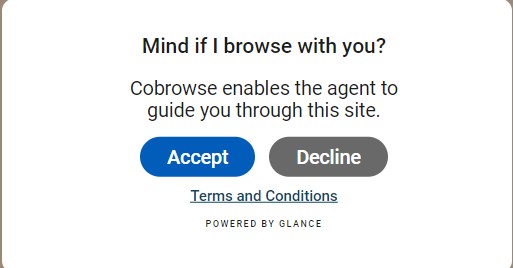
 Use the following code to add the `showTerms` command to your website:
```html
Use the following code to add the `showTerms` command to your website:
```html
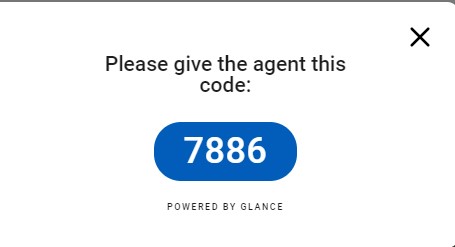 Use the following code to add the `startSession` command to your website:
```html
Use the following code to add the `startSession` command to your website:
```html
 *Example configuration:*
- **Domain:** `www.abc.com`
- **Helper Page URL:** `https://www.abc.com/glancehelper`
*Example configuration:*
- **Domain:** `www.abc.com`
- **Helper Page URL:** `https://www.abc.com/glancehelper`
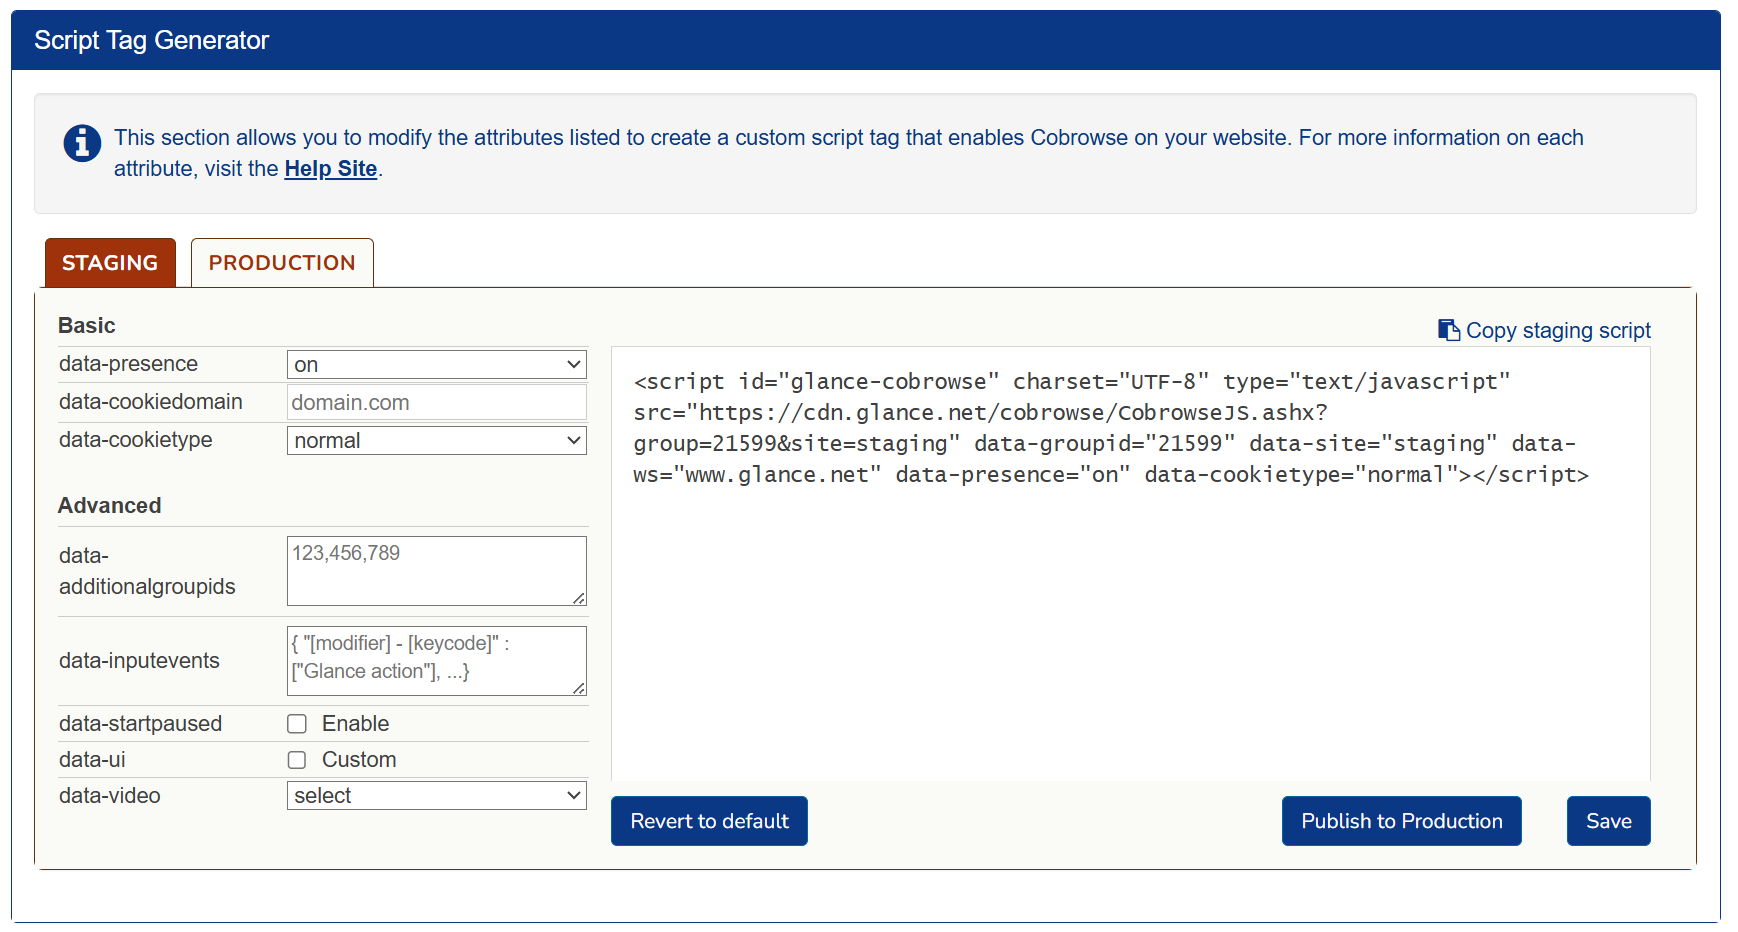
 4. In the bottom left corner of the **Settings** tab, click on **Manage your Cobrowse settings**. Scroll down to the **Script Tag Generator** section.
---
## 2. Customize the Script Tag
Modify your script tag by updating the attributes directly in the generator. Refer to the [Attributes Guide](../attributes) for a complete breakdown of each option.
4. In the bottom left corner of the **Settings** tab, click on **Manage your Cobrowse settings**. Scroll down to the **Script Tag Generator** section.
---
## 2. Customize the Script Tag
Modify your script tag by updating the attributes directly in the generator. Refer to the [Attributes Guide](../attributes) for a complete breakdown of each option.
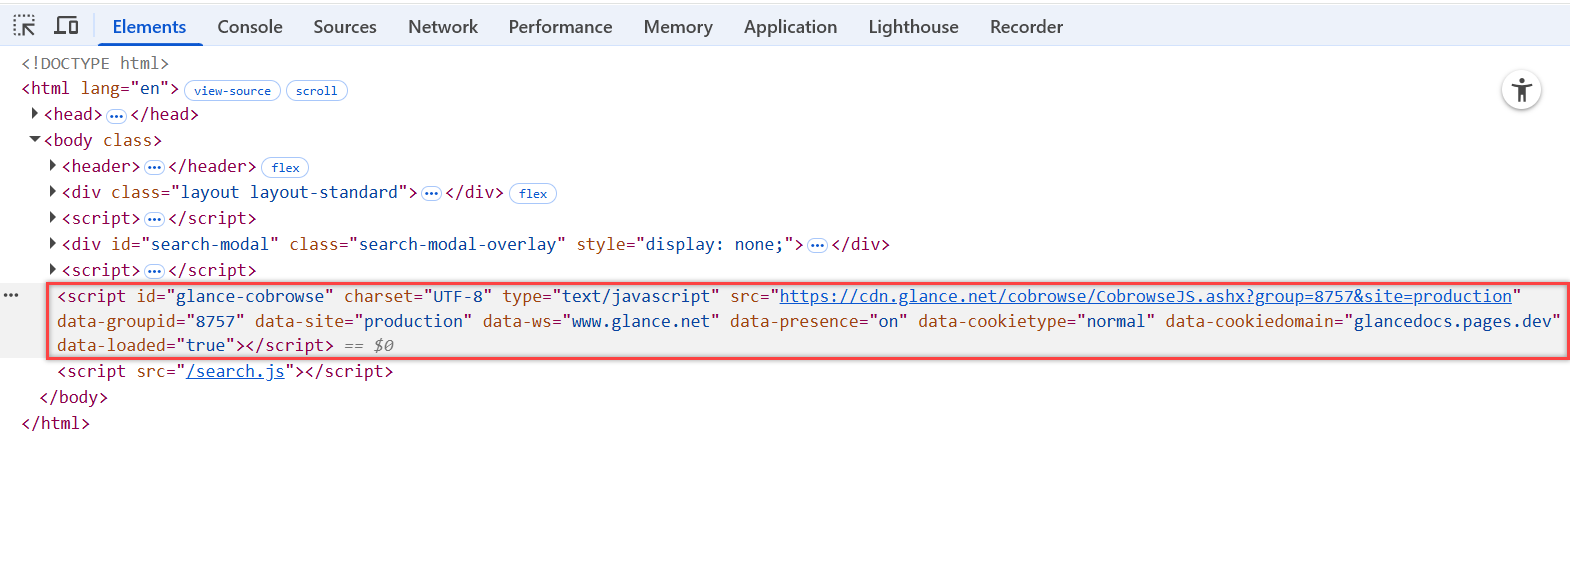
file:// urls and localhost:// won't work. You need to add an entry to your lmhosts file.
`input[id*=cardNumber]`
`input[id$=cardNumber]` --- ## Trouble Setting up Cross Domain Cobrowse? **Cross Domain Error: Untrusted Origin** If you are setting up cross domain Cobrowse, you must remember to enter the primary domain in the Glance backend in addition to the secondary domain that the visitor may be navigating to. If you don't, you will see an error that says `UNTRUSTED_ORIGIN`. --- ## Console Errors **404 error Getting the CustomSkin CSS file** Custom skin not yet created - this is harmless. **404 errors with CAM turned on** It is normal to get 404 errors on the visitor side when CAM (Cobrowse Asset Management) is turned on. The cobrowse script works by creating a copy of the browser DOM and sending it to the agent. To support CAM, resource URLs in the DOM copy are converted to relative urls. On the agent side, these relative urls combine with a `
This is a paragraph element in red
This is a paragraph element in red
``` To determine if invalid HTML is causing the issue, try running `GLANCE.checkHTML()` and `GLANCE.runTroubleshooter()` from the visitor-side browser console. These tools scan for common types of invalid HTML but may not catch every issue. If no problems are reported, try comparing the visitor's DOM to the agent's, focusing on the point where the structures begin to diverge. ================================================================= FILE: /developer =================================================================Developers
Tools, libraries, and guides to help you integrate Glance's Cobrowse and video capabilities directly into your web, mobile, and desktop applications.
Presence
Track visitor presence, capture custom browser data, and send real-time signals to launch Cobrowse sessions.
https://docs.glance.net/llms.txt
View File →
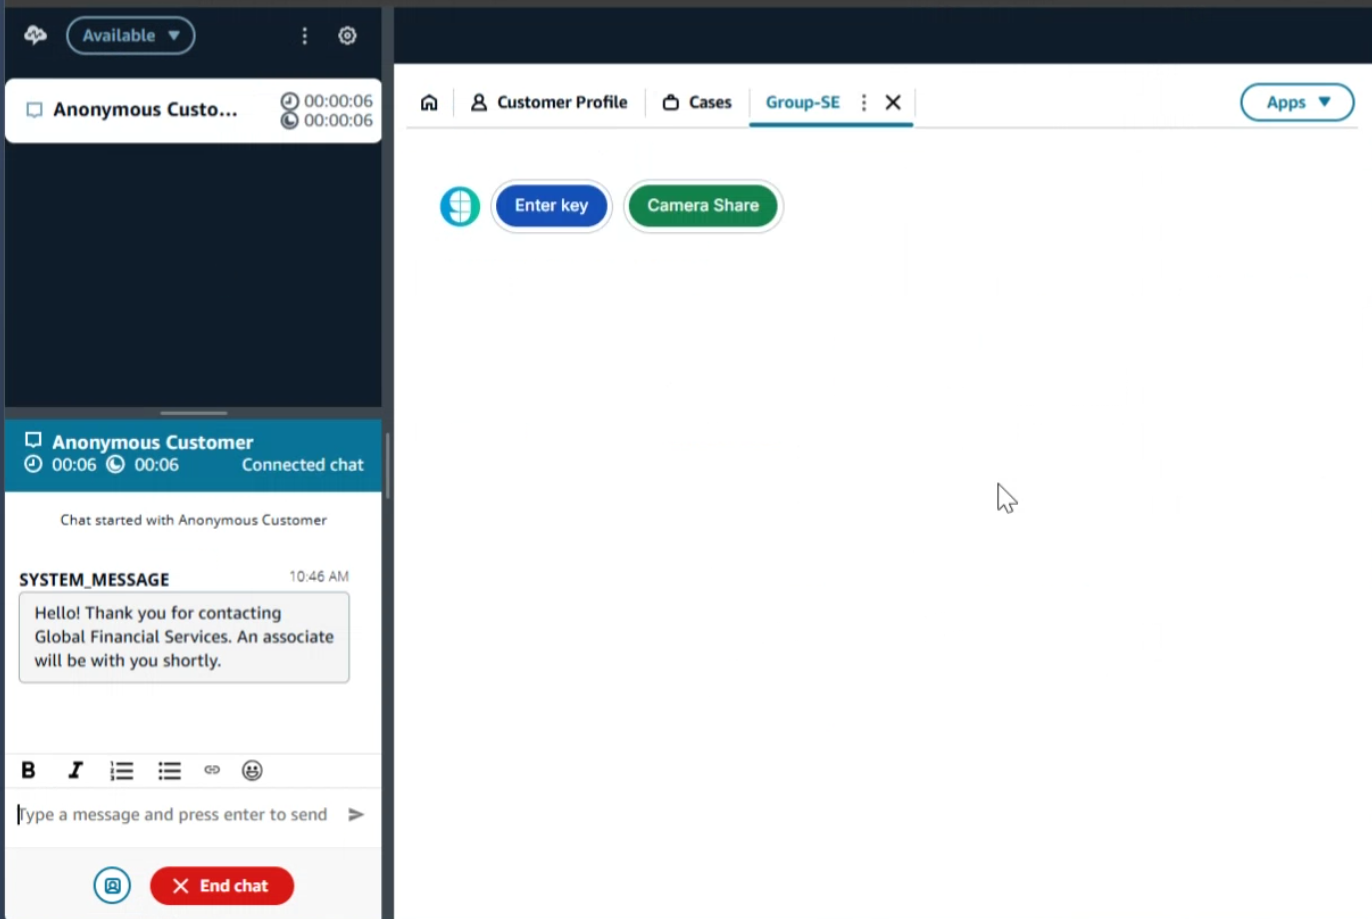 ## Prerequisites
* All high-level prerequisites as listed in the [Getting Started](/developer/integrations/agent_workspace/#getting-started) section.
* Access to an [Amazon Connect Instance](https://docs.aws.amazon.com/connect/latest/adminguide/tutorial1-set-up-your-instance.html).
## Add the Glance Application
To incorporate the Glance Application in Amazon Connect:
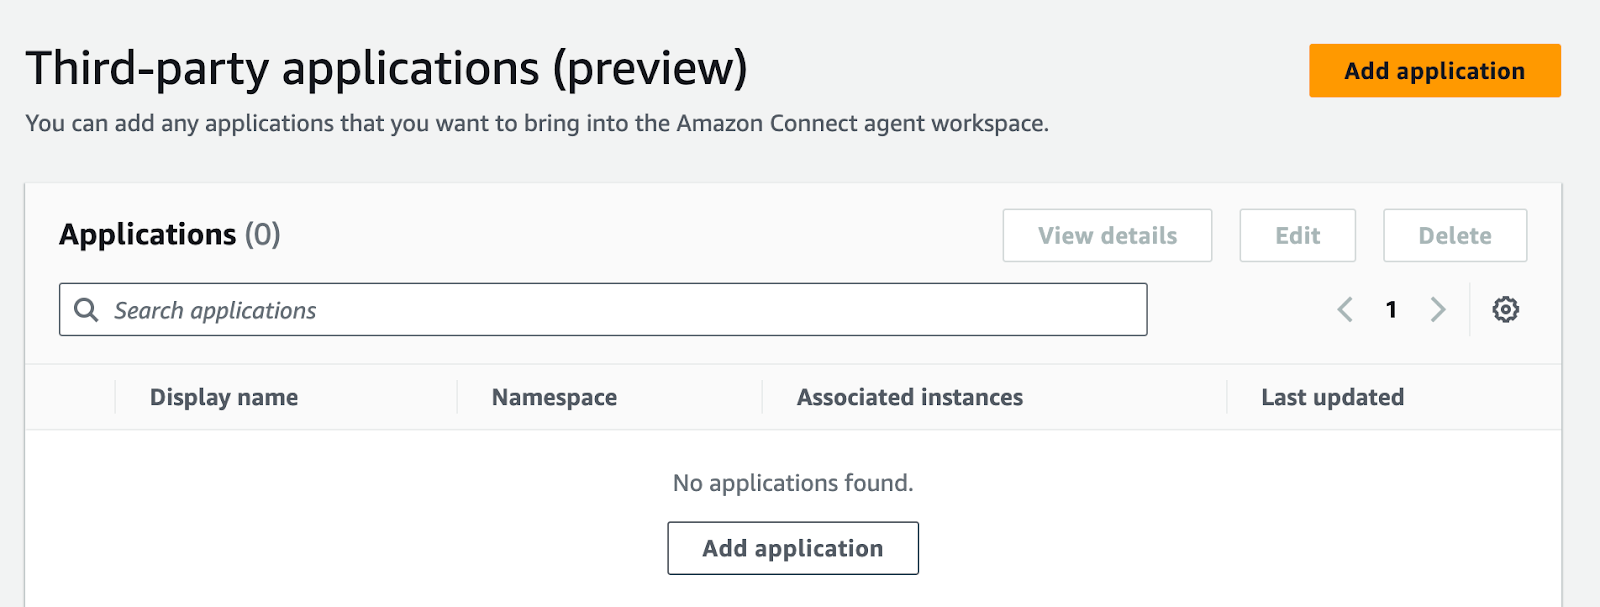
1. Navigate to the Third-Party Applications section in Amazon Connect, and click **Add Application**.
## Prerequisites
* All high-level prerequisites as listed in the [Getting Started](/developer/integrations/agent_workspace/#getting-started) section.
* Access to an [Amazon Connect Instance](https://docs.aws.amazon.com/connect/latest/adminguide/tutorial1-set-up-your-instance.html).
## Add the Glance Application
To incorporate the Glance Application in Amazon Connect:
1. Navigate to the Third-Party Applications section in Amazon Connect, and click **Add Application**.
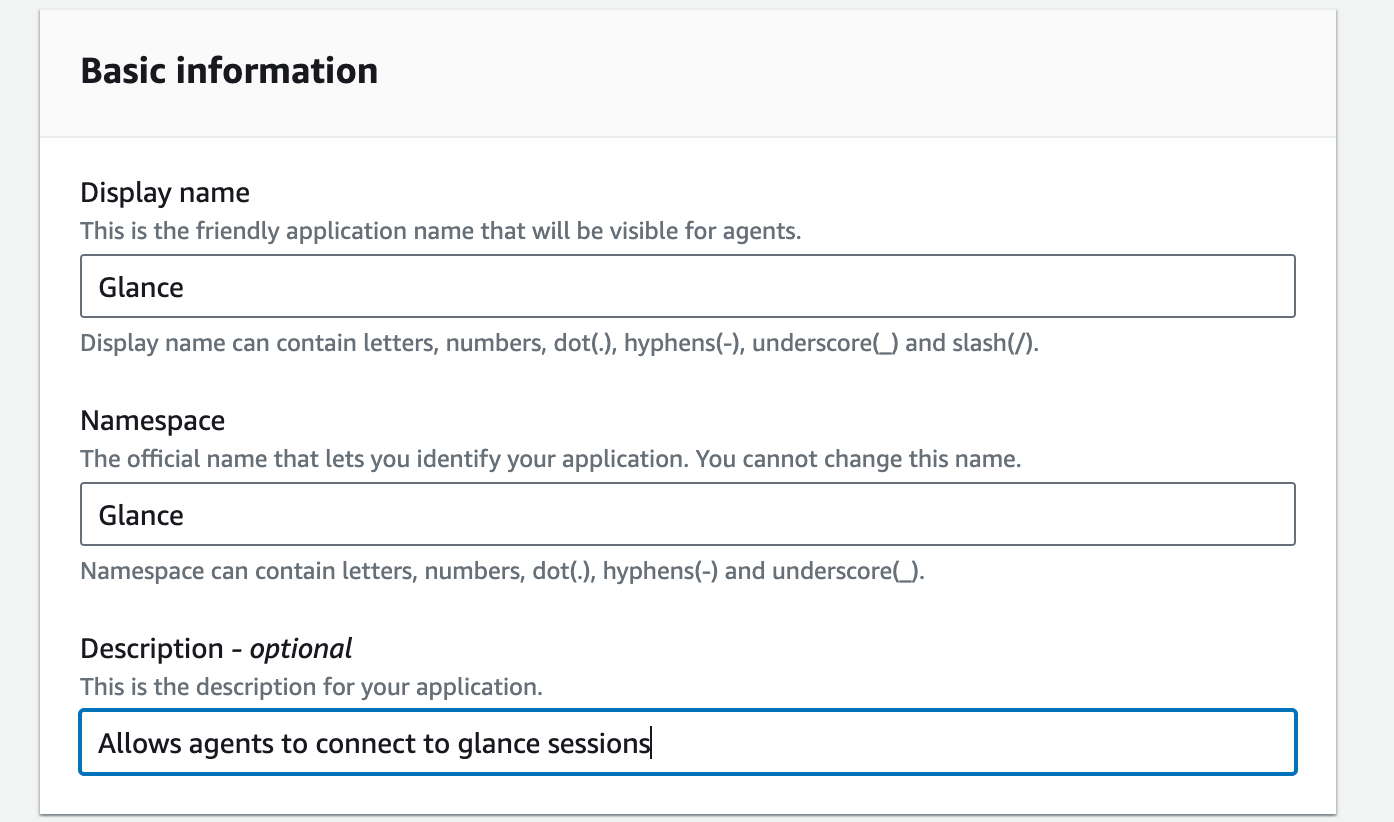
 2. Under **Basic Information**, input the following:
* For **Display name**, enter "Glance".
* For **Namespace**, enter "Glance".
* Enter an optional description for the Glance application.
2. Under **Basic Information**, input the following:
* For **Display name**, enter "Glance".
* For **Namespace**, enter "Glance".
* Enter an optional description for the Glance application.
 3. Under the **Access** section, enter the following:
* For **Access URL**, enter the URL provided by Glance.
* For **Approved Origins**, enter `https://www.glance.net`, and the URL for your IDP environment, e.g. `https://
3. Under the **Access** section, enter the following:
* For **Access URL**, enter the URL provided by Glance.
* For **Approved Origins**, enter `https://www.glance.net`, and the URL for your IDP environment, e.g. `https://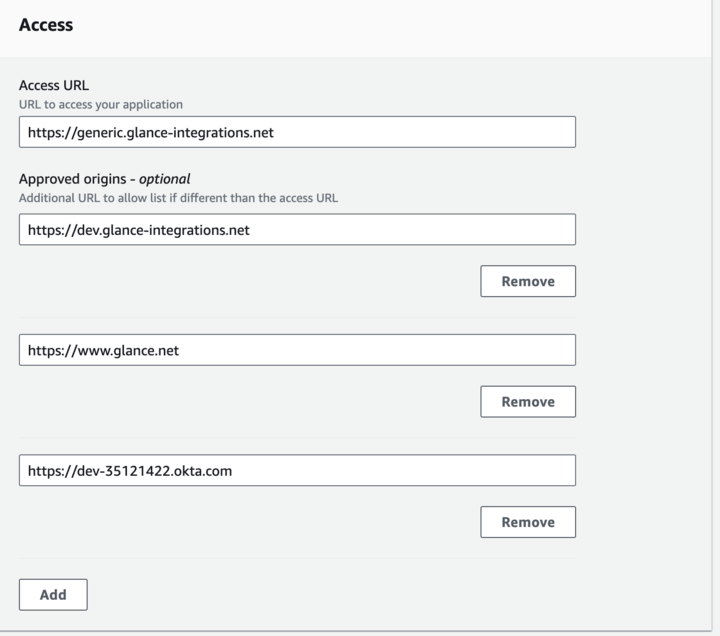 ## Joining Sessions from Amazon Connect
1. Navigate to the Agent Workspace application.
2. From the Agent Workspace, click the **Apps** menu and select the Glance application.
## Joining Sessions from Amazon Connect
1. Navigate to the Agent Workspace application.
2. From the Agent Workspace, click the **Apps** menu and select the Glance application.
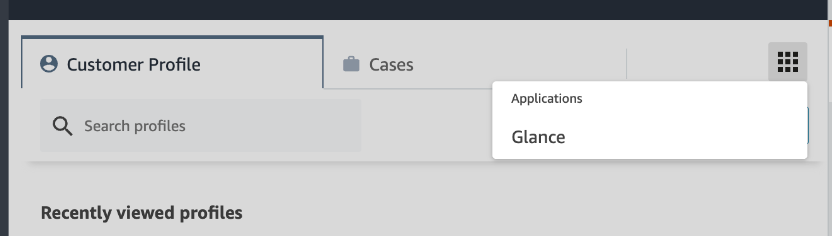 3. You will be prompted to sign in to your Identity Provider. Log in with your credentials.
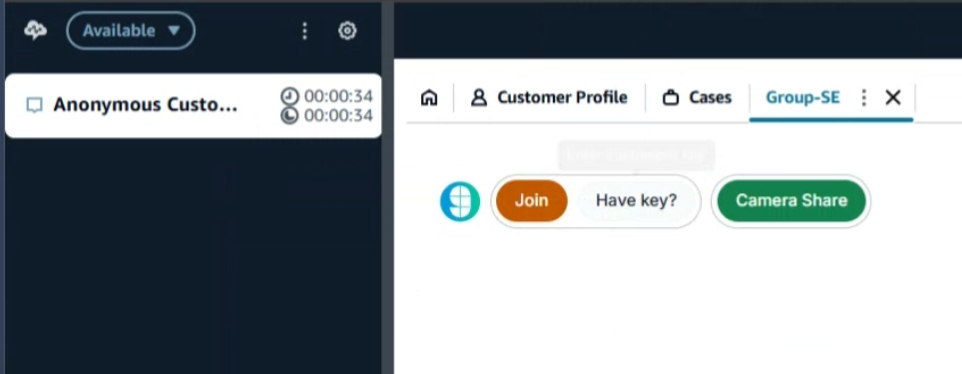
4. The Glance application is now available and you can join Glance Sessions.
3. You will be prompted to sign in to your Identity Provider. Log in with your credentials.
4. The Glance application is now available and you can join Glance Sessions.
 =================================================================
FILE: /developer/integrations/agent_workspace/dynamics
=================================================================
## Prerequisites
* All high-level prerequisites as listed in the [Getting Started](/developer/integrations/agent_workspace/#getting-started) section.
## Add the Glance Application
The following steps describe how to embed Glance controls within the Customer Service Hub workstream.
1. Click the **Pages** tab.
2. Select the view and form to add the Glance controls (i.e., **Customers** -> **Contacts view** -> **Contacts form**) then click the pencil icon.
=================================================================
FILE: /developer/integrations/agent_workspace/dynamics
=================================================================
## Prerequisites
* All high-level prerequisites as listed in the [Getting Started](/developer/integrations/agent_workspace/#getting-started) section.
## Add the Glance Application
The following steps describe how to embed Glance controls within the Customer Service Hub workstream.
1. Click the **Pages** tab.
2. Select the view and form to add the Glance controls (i.e., **Customers** -> **Contacts view** -> **Contacts form**) then click the pencil icon.
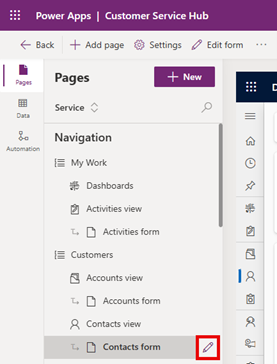 3. Select the **Components** tab from the left menu, scroll down to the **Layout** section and drag **1-column tab** to the form on the right.
4. Rename the section to "Glance Collaboration".
3. Select the **Components** tab from the left menu, scroll down to the **Layout** section and drag **1-column tab** to the form on the right.
4. Rename the section to "Glance Collaboration".
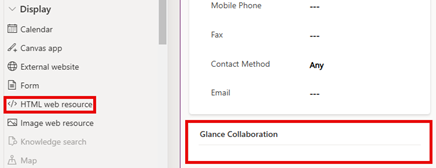
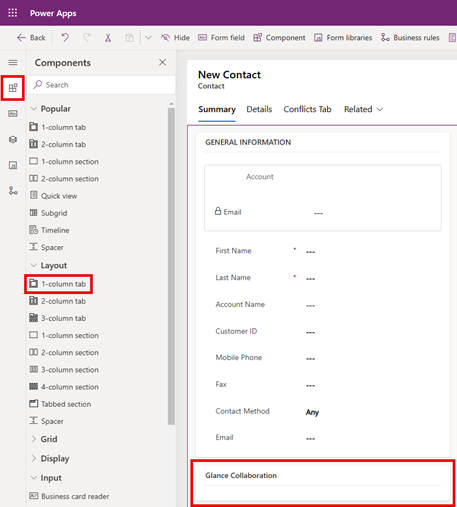 5. Scroll down to the **Display** section and drag **</> HTML web resource** into the **Glance Collaboration** section.
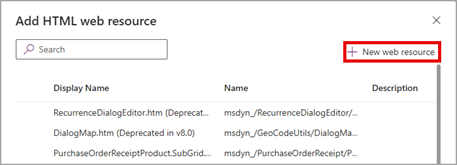
 6. Within **Add HTML web resource** click **+ New web resource**.
 7. Create an HTML file containing an iframe, replacing "GLANCE URL" with the organization-specific URL provided by Glance. For example:
```html
```
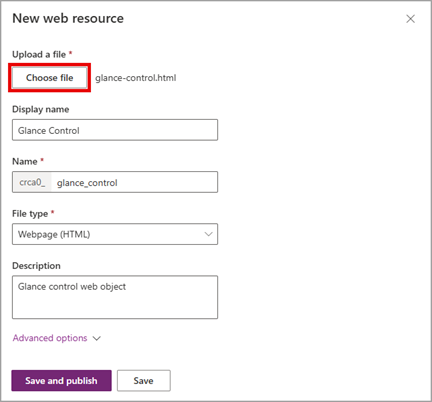
8. Click **Choose file** and upload the HTML file created in the previous step. Complete the rest of the form and click **Save**.
7. Create an HTML file containing an iframe, replacing "GLANCE URL" with the organization-specific URL provided by Glance. For example:
```html
```
8. Click **Choose file** and upload the HTML file created in the previous step. Complete the rest of the form and click **Save**.
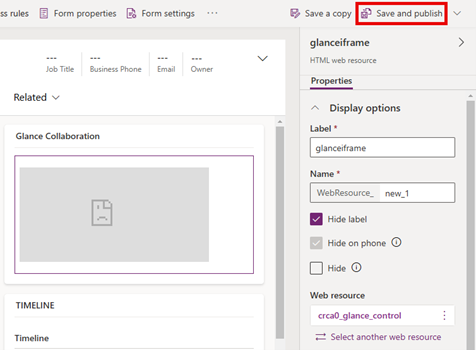
 9. Click **Save and publish** in the upper right corner. If changes to the iframe are required, utilize the **Properties** panel on the right.
 ## Joining a Session from Microsoft Dynamics
1. Navigate to the Dynamics Customer Service Hub.
2. Select either **Contacts** or **Cases** from the left navigation pane.
3. Click the **Summary** tab.
4. Log in with your credentials when prompted to sign in to your Identity Provider.
## Joining a Session from Microsoft Dynamics
1. Navigate to the Dynamics Customer Service Hub.
2. Select either **Contacts** or **Cases** from the left navigation pane.
3. Click the **Summary** tab.
4. Log in with your credentials when prompted to sign in to your Identity Provider.
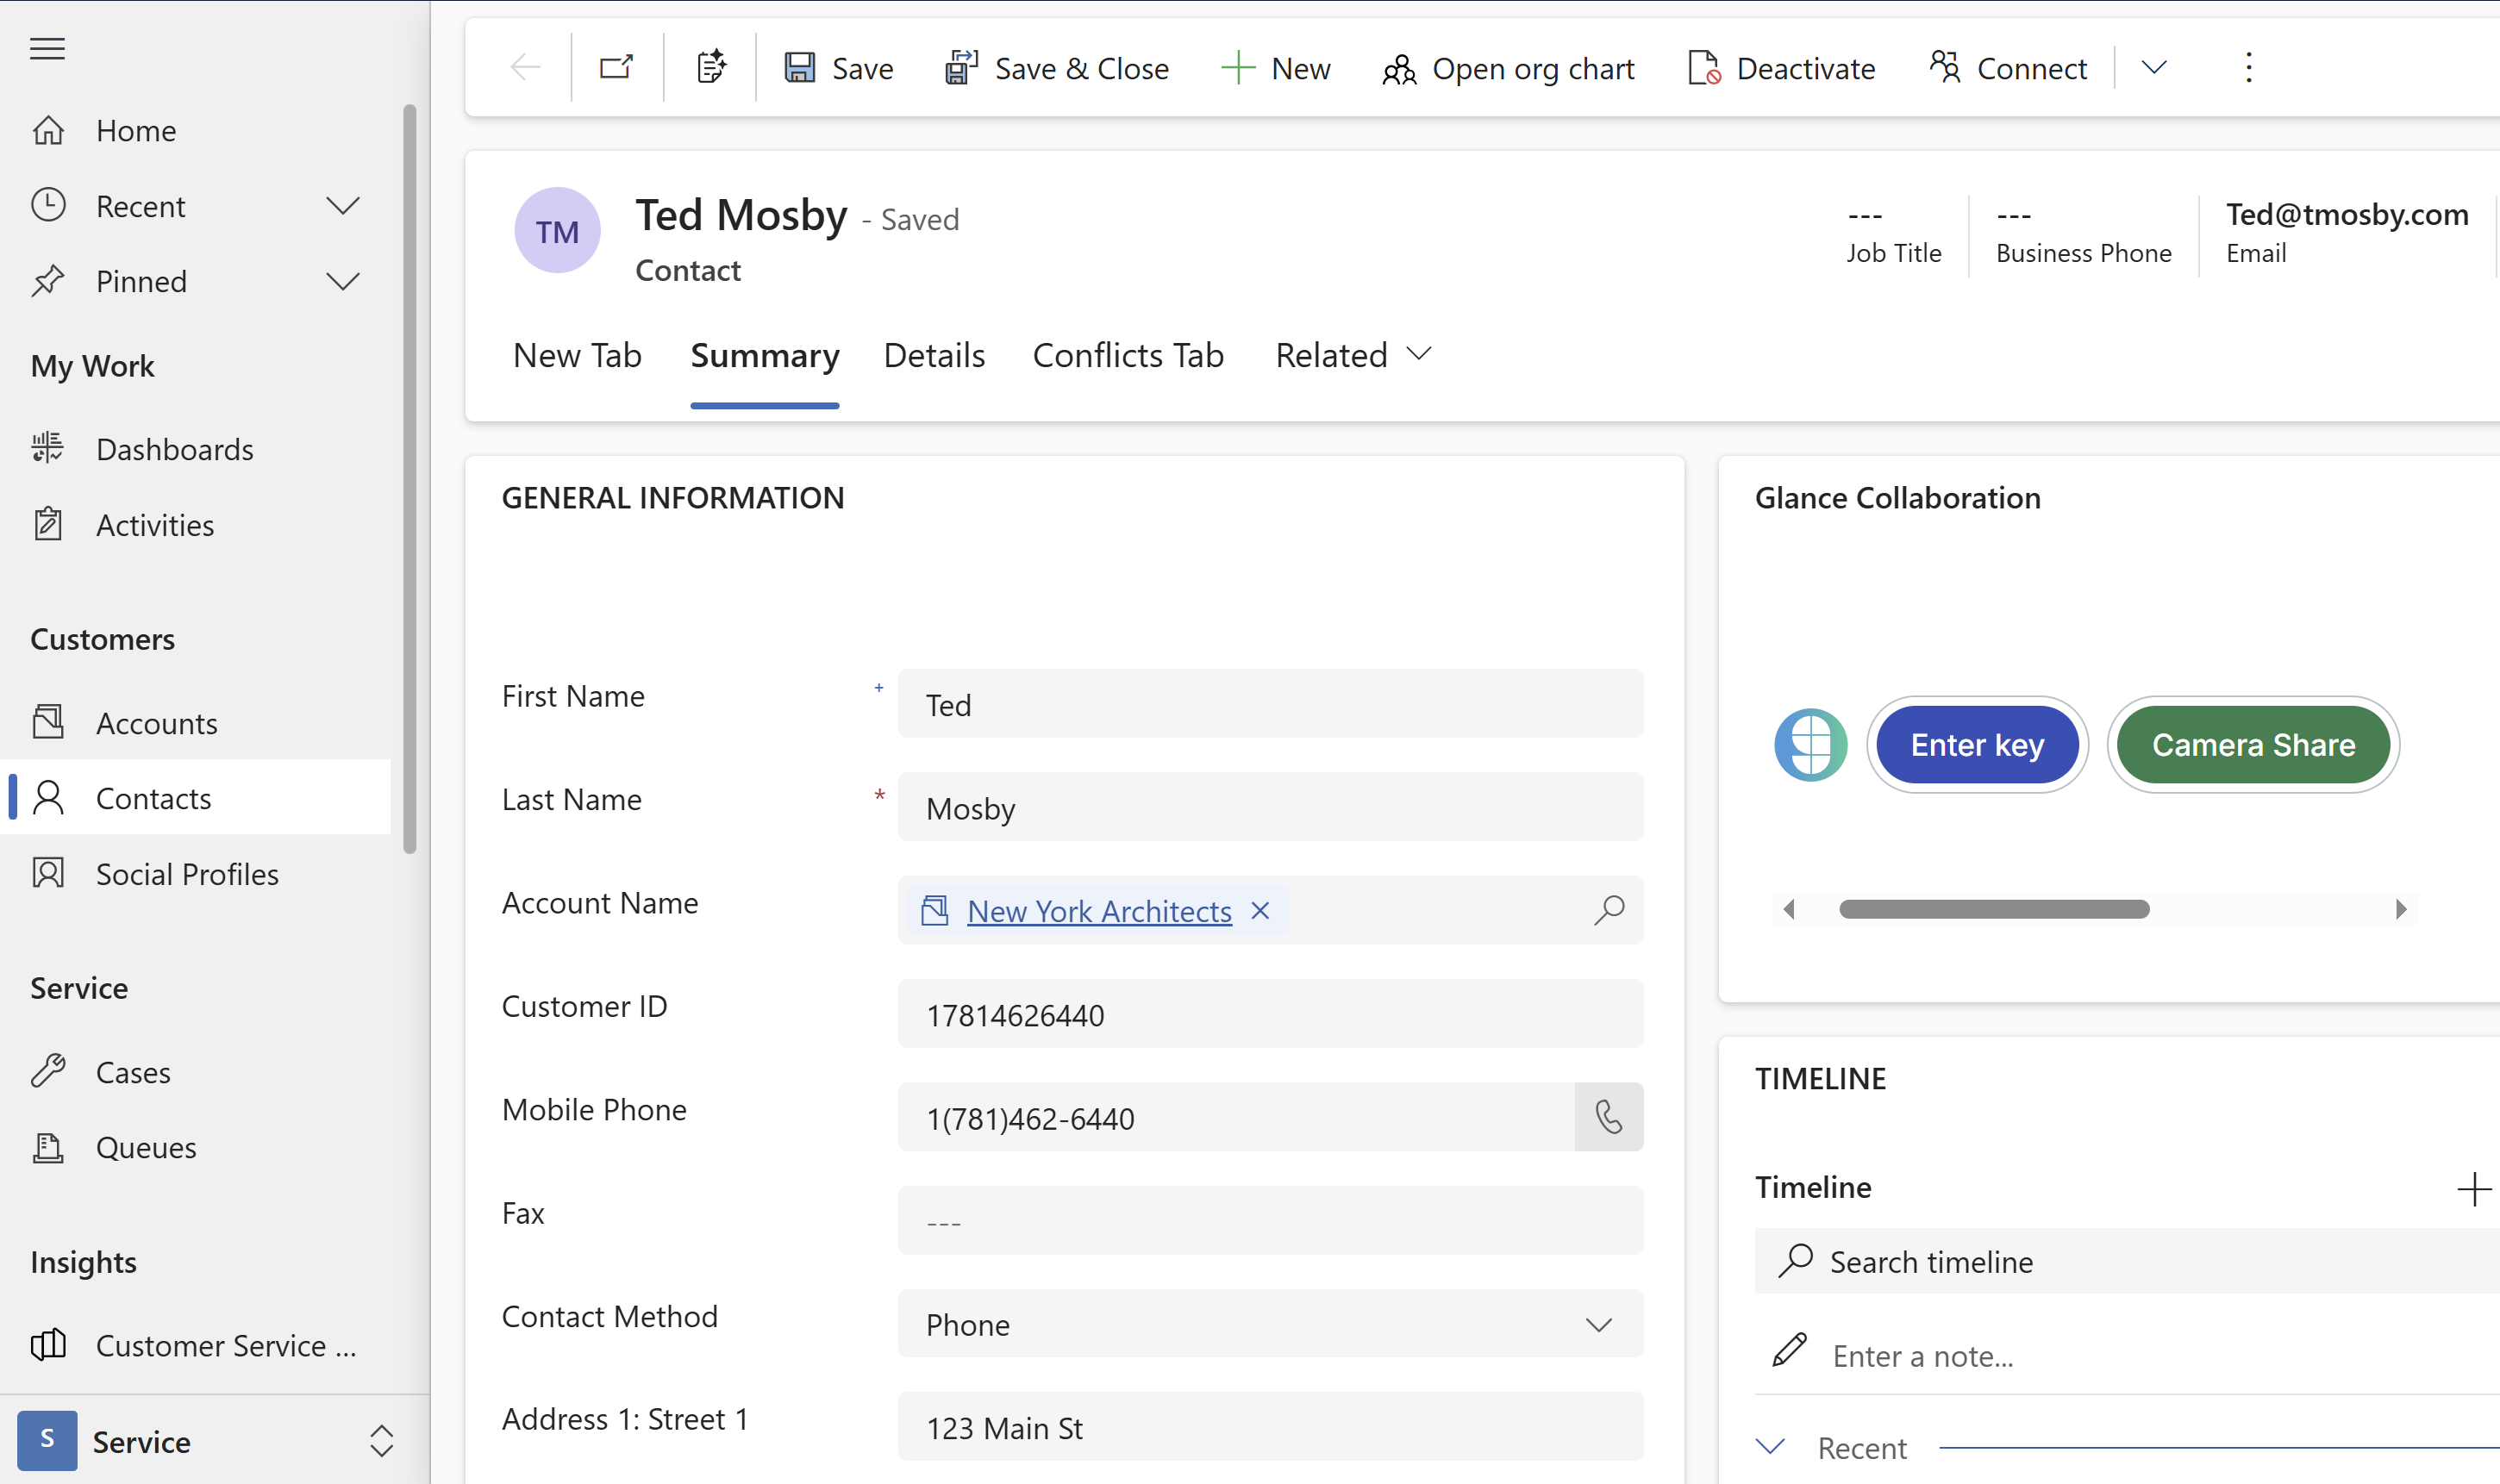 5. The Glance application is now available within the Glance Collaboration section.
=================================================================
FILE: /developer/integrations/agent_workspace/five9
=================================================================
5. The Glance application is now available within the Glance Collaboration section.
=================================================================
FILE: /developer/integrations/agent_workspace/five9
=================================================================
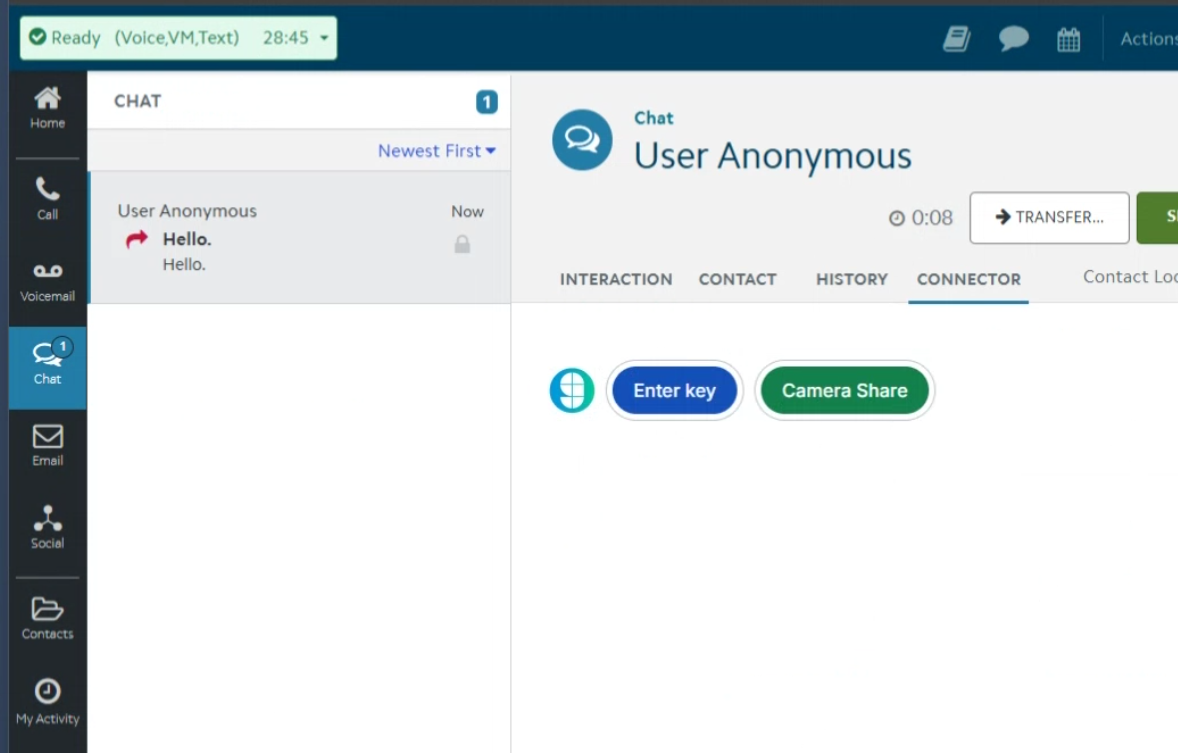 ## Prerequisites
* All high-level prerequisites as listed in the [Getting Started](/developer/integrations/agent_workspace/#getting-started) section.
* Access to a Five9 Instance, and access to the Virtual Contact Center (VCC) Admin Application.
* You have created a campaign and associated skill for agents you want to utilize Glance.
* You've added the following URLs to the Allowed Sites list:
* In the Virtual Contact Center (VCC) application, navigate to **Actions > Configuration > Web > Web Sites Allowed to Access REST API (CORS)** section and add the following URLs:
* Your IDP URL, e.g. `https://
## Prerequisites
* All high-level prerequisites as listed in the [Getting Started](/developer/integrations/agent_workspace/#getting-started) section.
* Access to a Five9 Instance, and access to the Virtual Contact Center (VCC) Admin Application.
* You have created a campaign and associated skill for agents you want to utilize Glance.
* You've added the following URLs to the Allowed Sites list:
* In the Virtual Contact Center (VCC) application, navigate to **Actions > Configuration > Web > Web Sites Allowed to Access REST API (CORS)** section and add the following URLs:
* Your IDP URL, e.g. `https://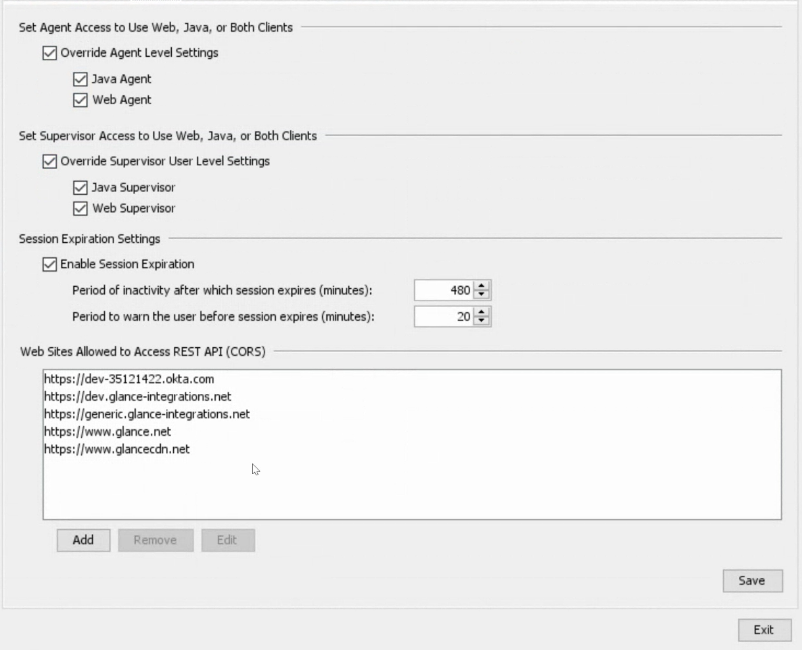 ## Add the Glance Connector to Five9
1. From the Virtual Contact Center (VCC) Admin Application, under the **Connectors** section, click the plus sign to create a new connector for Glance.
2. Enter a name and description.
3. For **URL**, enter the URL provided by Glance.
4. For **Method**, select **GET**.
5. For **Execution Mode**, choose **In Browser**.
6. For **CTI Web Services**, choose **Current browser window**.
7. Click **Save**.
## Add the Glance Connector to Five9
1. From the Virtual Contact Center (VCC) Admin Application, under the **Connectors** section, click the plus sign to create a new connector for Glance.
2. Enter a name and description.
3. For **URL**, enter the URL provided by Glance.
4. For **Method**, select **GET**.
5. For **Execution Mode**, choose **In Browser**.
6. For **CTI Web Services**, choose **Current browser window**.
7. Click **Save**.
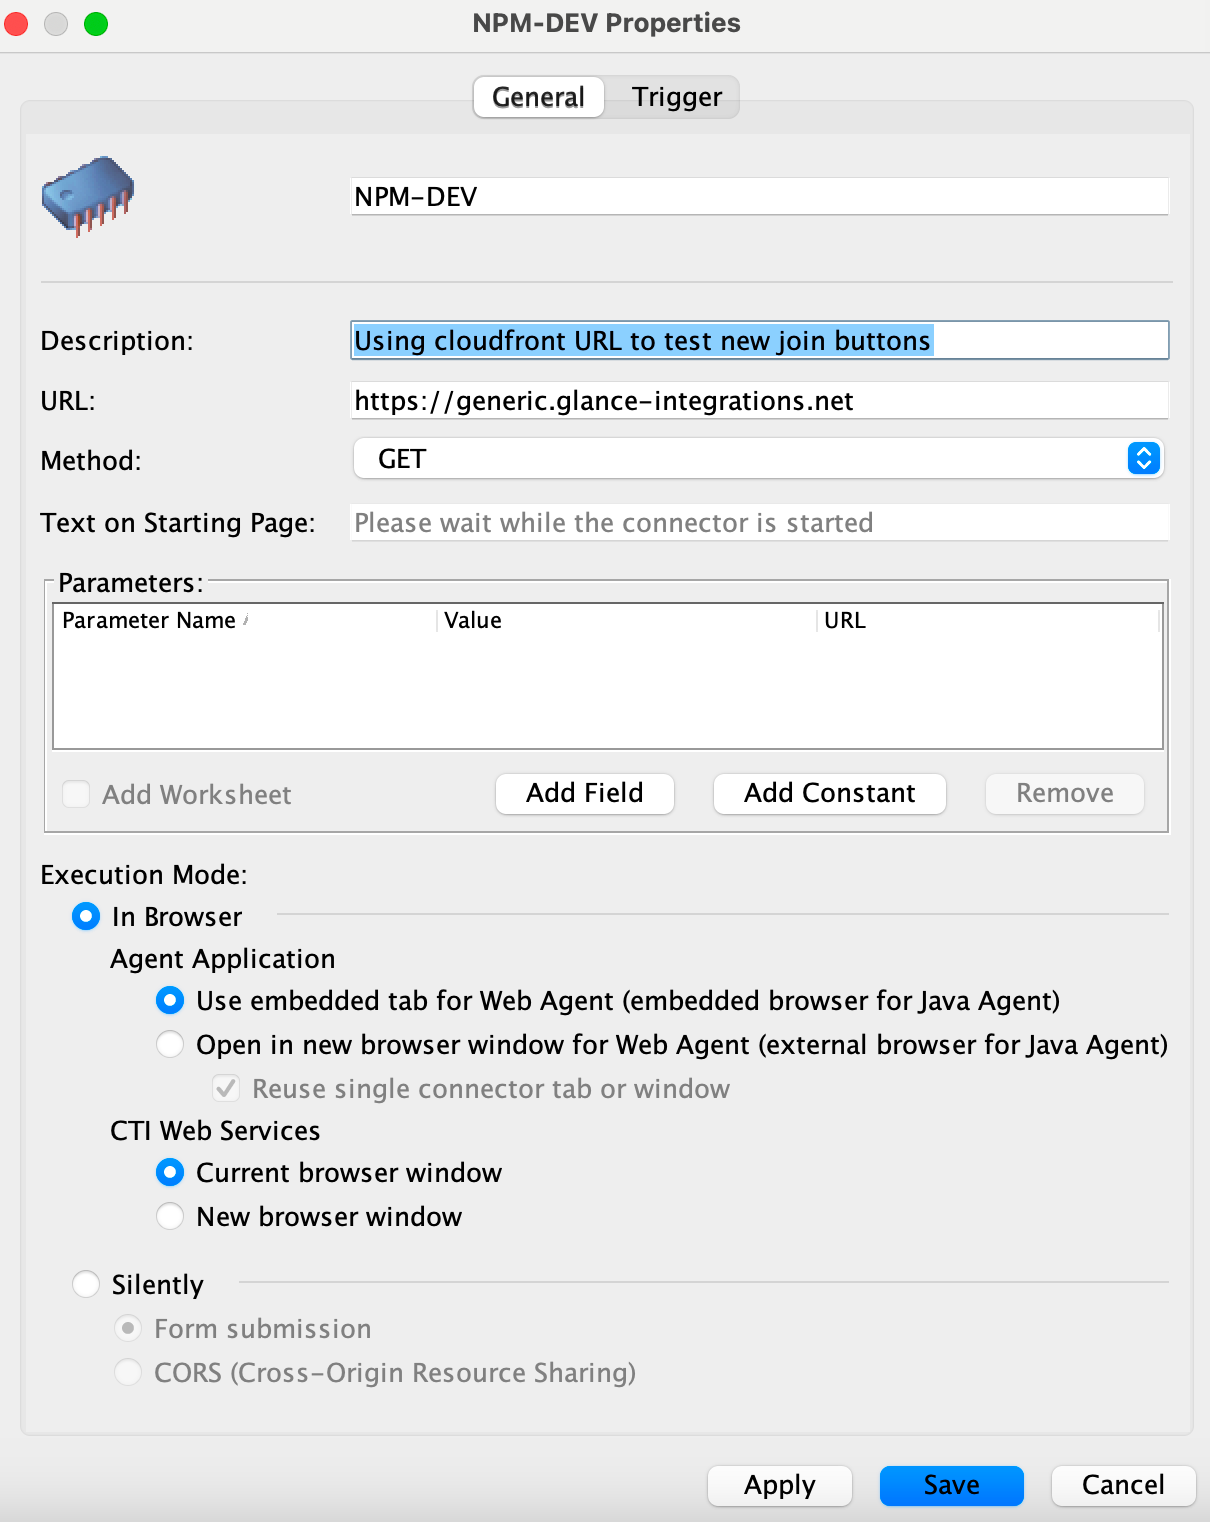 ## Joining Glance Sessions from Five9
1. Navigate to the Agent Desktop Application.
2. When logging in, select the skill you associated with Glance.
3. From the Agent Dashboard, select the Campaign where Glance is enabled.
4. When the interaction is started, you will be prompted to sign in to your Identity Provider to access the Glance application. Log in with your credentials.
5. The Glance application is now available and you can join Glance Sessions.
## Joining Glance Sessions from Five9
1. Navigate to the Agent Desktop Application.
2. When logging in, select the skill you associated with Glance.
3. From the Agent Dashboard, select the Campaign where Glance is enabled.
4. When the interaction is started, you will be prompted to sign in to your Identity Provider to access the Glance application. Log in with your credentials.
5. The Glance application is now available and you can join Glance Sessions.
 =================================================================
FILE: /developer/integrations/agent_workspace/genesys
=================================================================
# Genesys Cloud CX
This page will guide you through enabling and configuring Glance for [Genesys Cloud CX](https://www.genesys.com/genesys-cloud).
## Prerequisites
Before you begin, you must have completed the following:
* A [Genesys Cloud CX](https://www.genesys.com/genesys-cloud) account.
* A Glance Account (Group ID) and the following:
* [Provisioned agent user accounts](/users/account-management/manage_users) with abilities to join Glance sessions.
* A site that is configured with the [Glance Cobrowse script tag](/developer/glance-cobrowse/quickstart/).
* For [1-click connect](/users/glance-cobrowse/getting-started/cobrowse_requirements), ensure that you set the following script tag parameters:
* Set `data-presence` to `API`.
* Set `data-cookiedomain` to the URL for your website domain.
## Overview
At a high level, the installation process for enabling Glance in Genesys Cloud CX is as follows:
1. [Install the Glance application.](./manual_install)
2. [Add users to the Glance role in Cloud CX.](./roles_auth)
3. [Configure 1-Click Connect, and test joining Glance sessions.](./roles_auth/#authentication)
4. [View the attached data and create reports.](./reporting)
=================================================================
FILE: /developer/integrations/agent_workspace/genesys/joining_sessions
=================================================================
Glance offers a few different ways to join sessions:
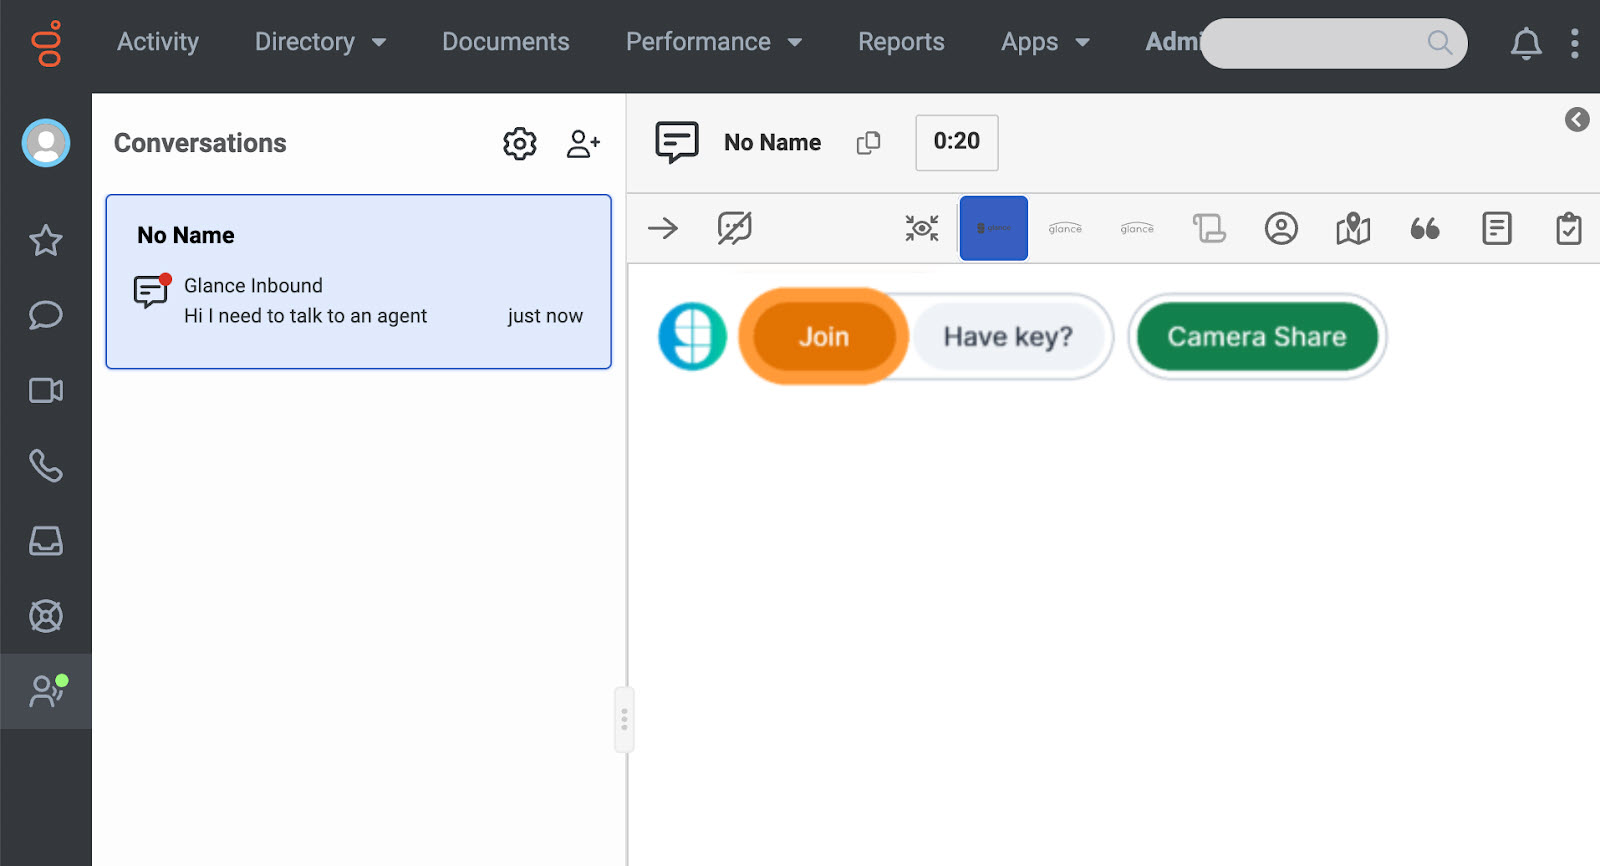
* **1-click connect:** Agent-initiated flow where the Join button will light up orange, and the agent can send a request to the visitor to share their browser, no key exchange required.
* **Key-based sessions:** Visitor clicks a button or link on the website to generate a key, which is relayed to the agent.
* **Mobile camera share sessions:** Enter the customer's phone number to send a text to share their video stream. Glance provides a default configuration to map [Glance Visitor IDs](/users/glance-cobrowse/getting-started/cobrowse_requirements) to interactions.
## Joining from 1-Click Connect
1. As an agent, accept the inbound interaction.
2. Click on the Glance interaction widget tab.
3. The **Join** button will light up orange if the customer is present and available to receive a Cobrowse request.
4. Click **Join** to send the request to the visitor.
=================================================================
FILE: /developer/integrations/agent_workspace/genesys
=================================================================
# Genesys Cloud CX
This page will guide you through enabling and configuring Glance for [Genesys Cloud CX](https://www.genesys.com/genesys-cloud).
## Prerequisites
Before you begin, you must have completed the following:
* A [Genesys Cloud CX](https://www.genesys.com/genesys-cloud) account.
* A Glance Account (Group ID) and the following:
* [Provisioned agent user accounts](/users/account-management/manage_users) with abilities to join Glance sessions.
* A site that is configured with the [Glance Cobrowse script tag](/developer/glance-cobrowse/quickstart/).
* For [1-click connect](/users/glance-cobrowse/getting-started/cobrowse_requirements), ensure that you set the following script tag parameters:
* Set `data-presence` to `API`.
* Set `data-cookiedomain` to the URL for your website domain.
## Overview
At a high level, the installation process for enabling Glance in Genesys Cloud CX is as follows:
1. [Install the Glance application.](./manual_install)
2. [Add users to the Glance role in Cloud CX.](./roles_auth)
3. [Configure 1-Click Connect, and test joining Glance sessions.](./roles_auth/#authentication)
4. [View the attached data and create reports.](./reporting)
=================================================================
FILE: /developer/integrations/agent_workspace/genesys/joining_sessions
=================================================================
Glance offers a few different ways to join sessions:
* **1-click connect:** Agent-initiated flow where the Join button will light up orange, and the agent can send a request to the visitor to share their browser, no key exchange required.
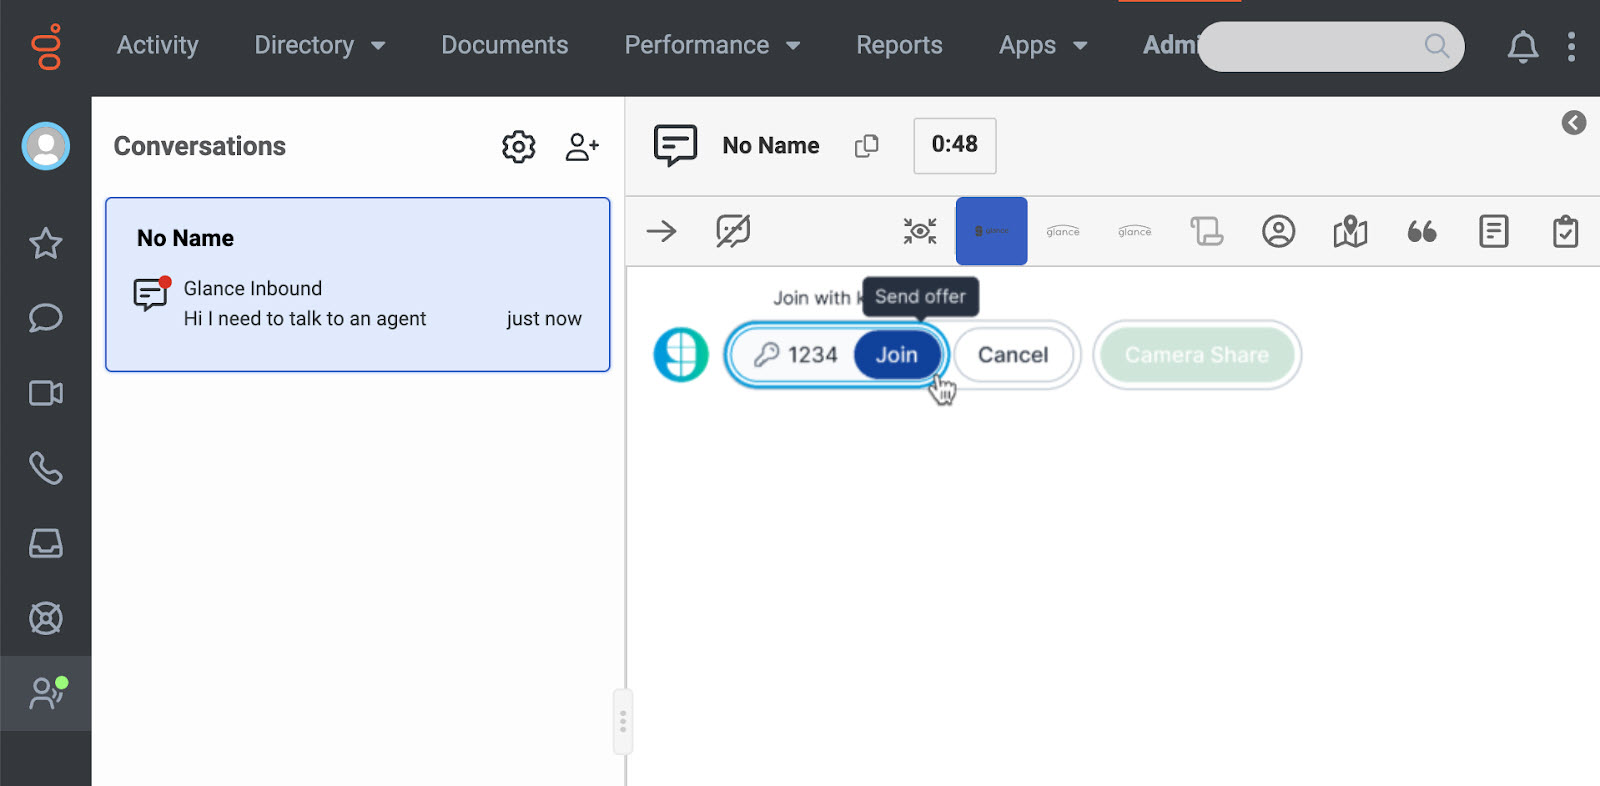
* **Key-based sessions:** Visitor clicks a button or link on the website to generate a key, which is relayed to the agent.
* **Mobile camera share sessions:** Enter the customer's phone number to send a text to share their video stream. Glance provides a default configuration to map [Glance Visitor IDs](/users/glance-cobrowse/getting-started/cobrowse_requirements) to interactions.
## Joining from 1-Click Connect
1. As an agent, accept the inbound interaction.
2. Click on the Glance interaction widget tab.
3. The **Join** button will light up orange if the customer is present and available to receive a Cobrowse request.
4. Click **Join** to send the request to the visitor.
 5. The visitor accepts the request.
6. The visitor and agent are connected.
## Joining from Key-Entry
1. As an agent, accept the inbound interaction.
2. Click on the Glance interaction widget tab.
3. Ask the visitor to click a link or a button on the website to generate a key.
4. Enter the key and click **Join**.
5. The visitor accepts the request.
6. The visitor and agent are connected.
## Joining from Key-Entry
1. As an agent, accept the inbound interaction.
2. Click on the Glance interaction widget tab.
3. Ask the visitor to click a link or a button on the website to generate a key.
4. Enter the key and click **Join**.
 5. The visitor and agent are connected.
## Joining Mobile Camera Share Sessions
1. As an agent, accept the inbound interaction.
2. Click on the Glance interaction widget tab.
3. Send a request to the visitor to share their mobile video through a text message.
5. The visitor and agent are connected.
## Joining Mobile Camera Share Sessions
1. As an agent, accept the inbound interaction.
2. Click on the Glance interaction widget tab.
3. Send a request to the visitor to share their mobile video through a text message.
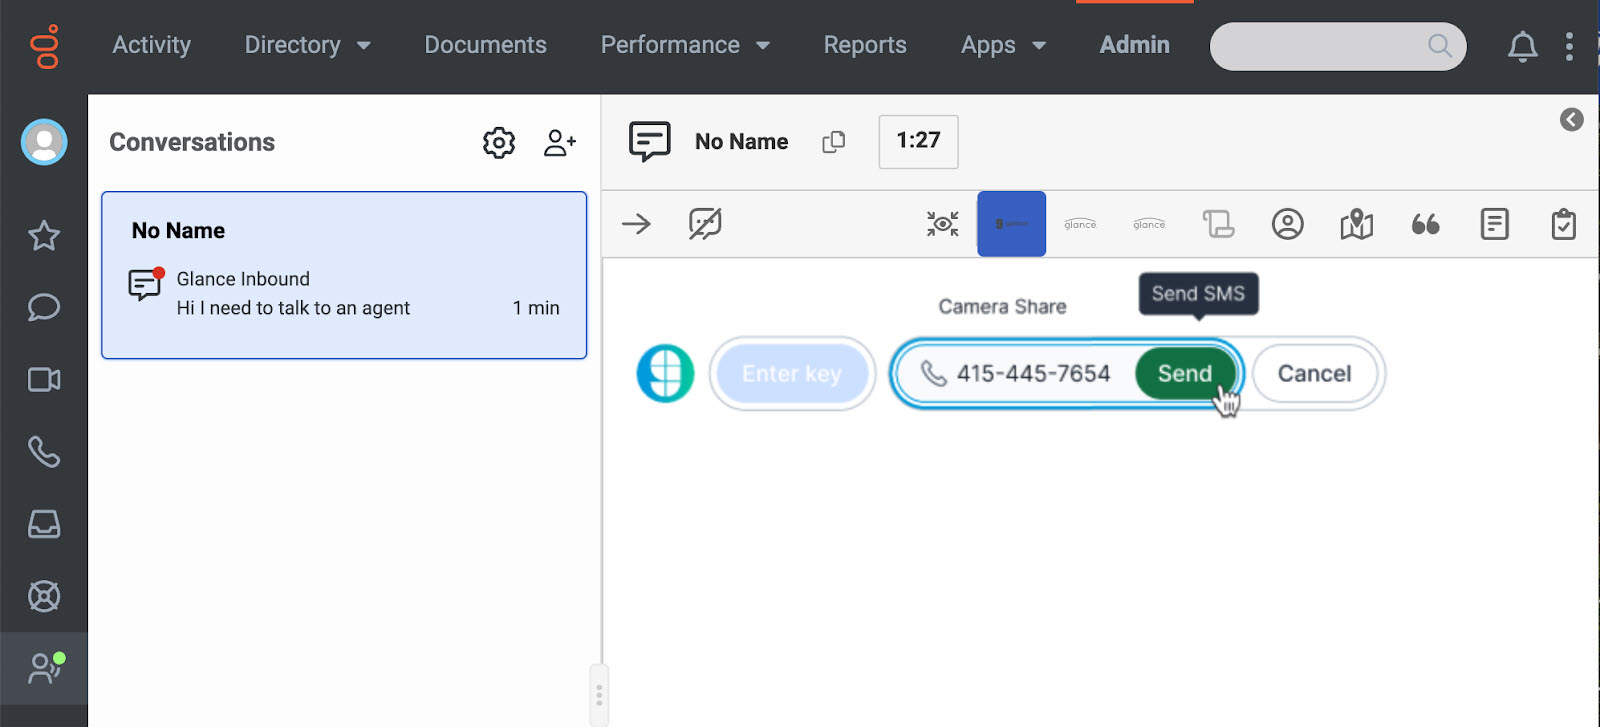 4. The visitor clicks the link in the text on their mobile device.
5. The visitor and agent are connected.
=================================================================
FILE: /developer/integrations/agent_workspace/genesys/manual_install
=================================================================
If you are an existing customer or starting a trial of Glance for Genesys Cloud, complete the following steps:
1. Log in to your Genesys environment as an administrator and go to **IT & Integrations** > **Integrations**, and choose **Add integration**.
4. The visitor clicks the link in the text on their mobile device.
5. The visitor and agent are connected.
=================================================================
FILE: /developer/integrations/agent_workspace/genesys/manual_install
=================================================================
If you are an existing customer or starting a trial of Glance for Genesys Cloud, complete the following steps:
1. Log in to your Genesys environment as an administrator and go to **IT & Integrations** > **Integrations**, and choose **Add integration**.
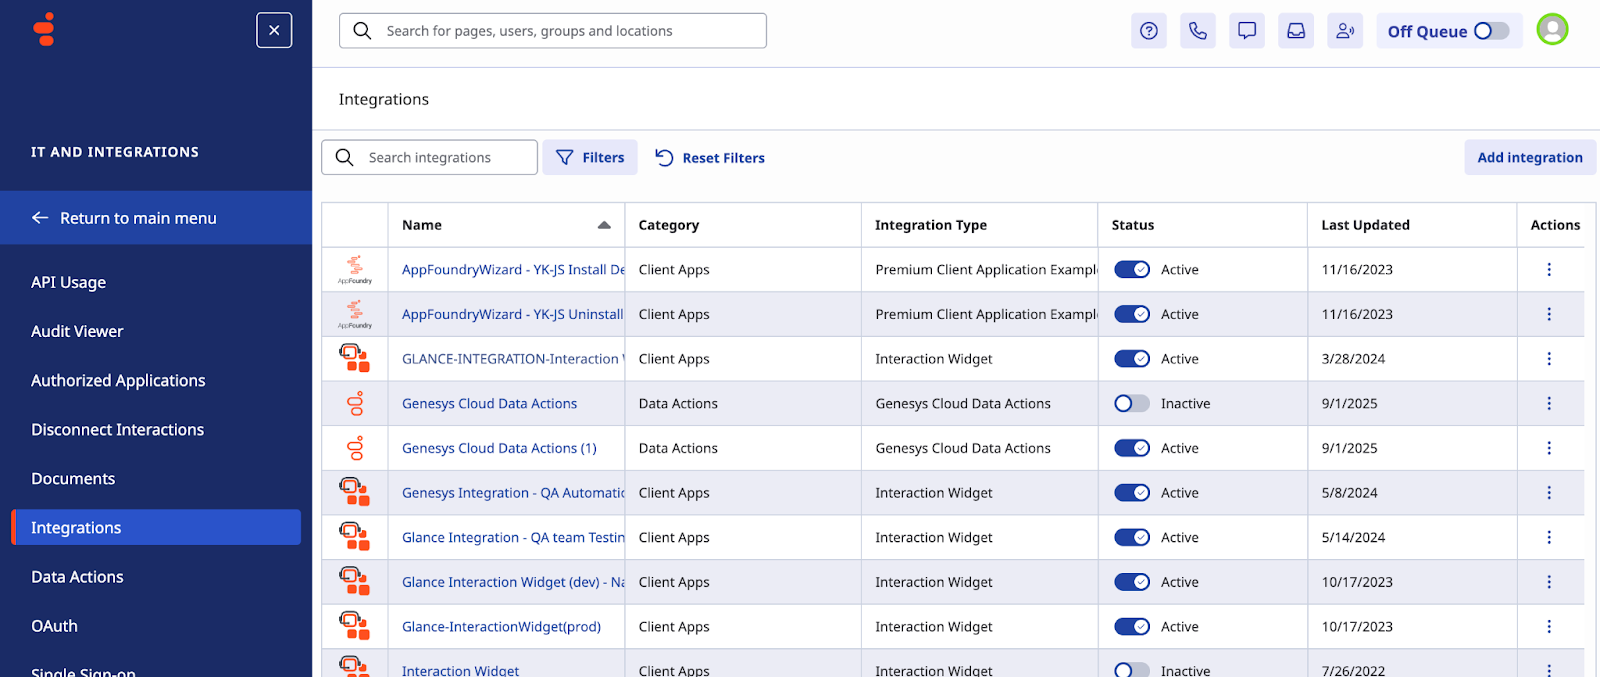 2. From the list of available apps, choose **Interaction Widget** > **Install**.
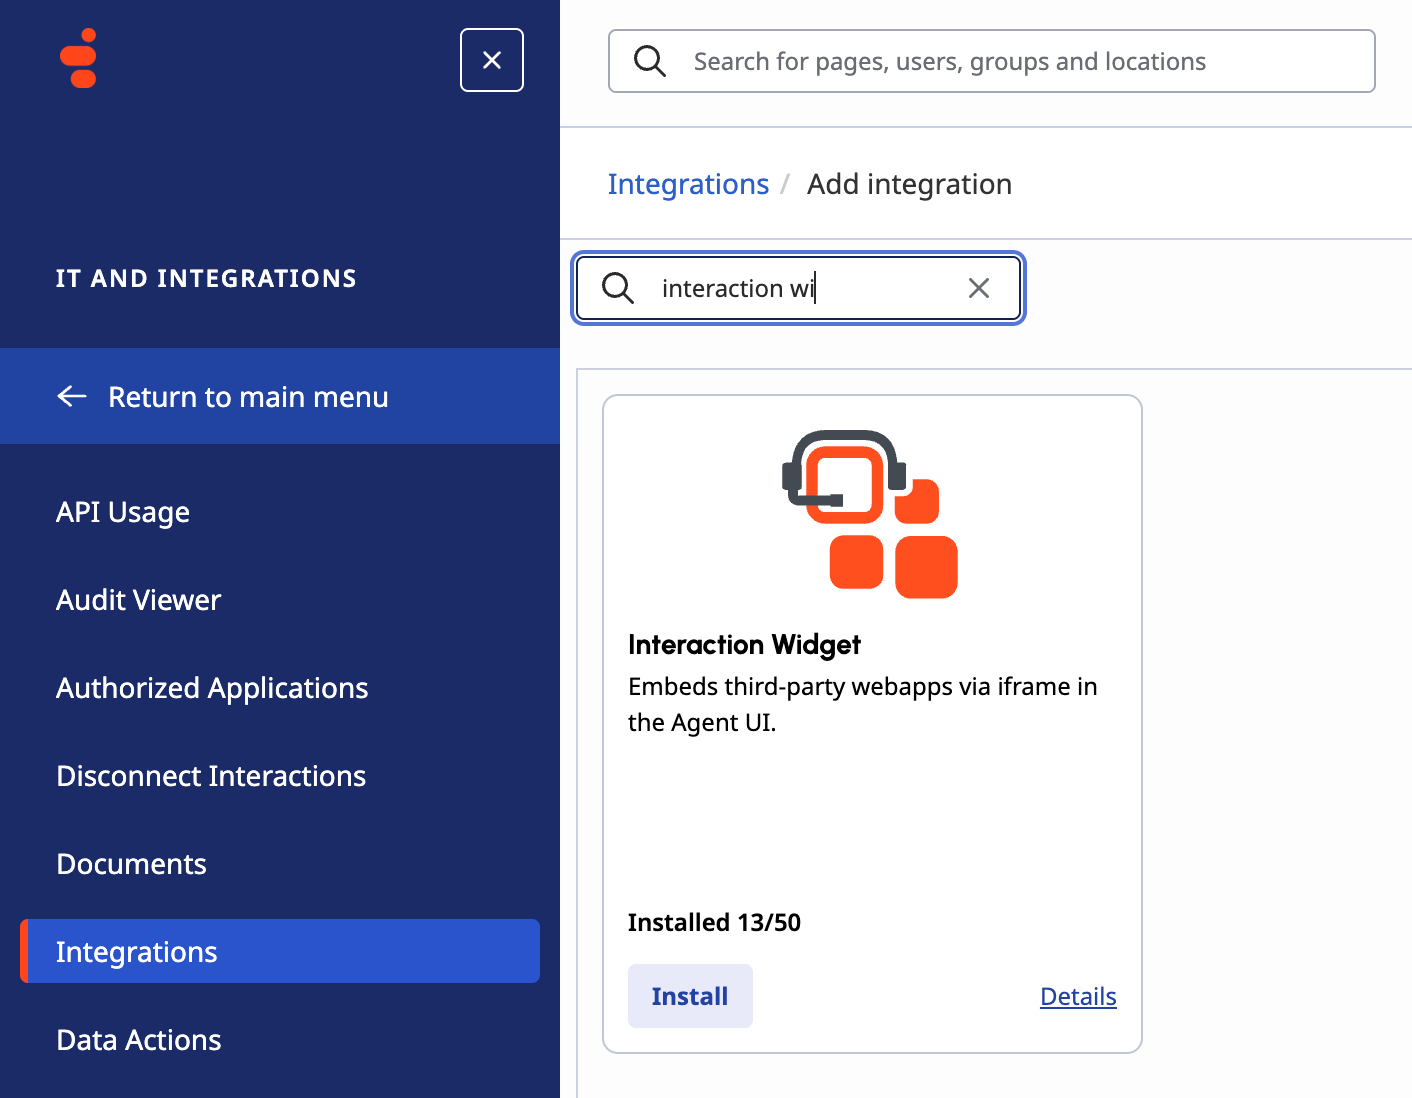 3. For **Integration Name**, enter **Glance**, then click **Save**.
4. On the **Configuration** tab, enter the following:
a. **Application URL:** *Provided by Glance*
b. **Iframe sandbox options:** `allow-forms,allow-modals,allow-popups,allow-presentation,allow-same-origin,allow-scripts,allow-downloads`
c. **Iframe Feature/Permissions Policy:** `camera,clipboard-write,display-capture,fullscreen,geolocation,microphone`
d. **Group Filtering:** choose which groups have access to the application.
e. **Queue Filtering:** choose which queues have access to the application.
f. **Communication:** `chat,call,callback,email,sms,line,facebook,instagram,twitter,open,webmessaging,whatsapp`
5. Click **Save & Activate**. Now you can verify the app displays during interactions.
6. Optional Advanced Configuration to add a Glance Logo:
```json
{
"lifecycle": {
"ephemeral": true,
"hooks": {
"focus": true,
"blur": true,
"bootstrap": true,
"stop": true
}
},
"icon": {
"vector": "[https://logo.glance-integrations.net/](https://logo.glance-integrations.net/)"
},
"i10n": {
"en": {
"name": "Glance Integration for Genesys Cloud"
},
"en-us": {
"name": "Glance Integration for Genesys Cloud"
}
}
}
```
=================================================================
FILE: /developer/integrations/agent_workspace/genesys/reporting
=================================================================
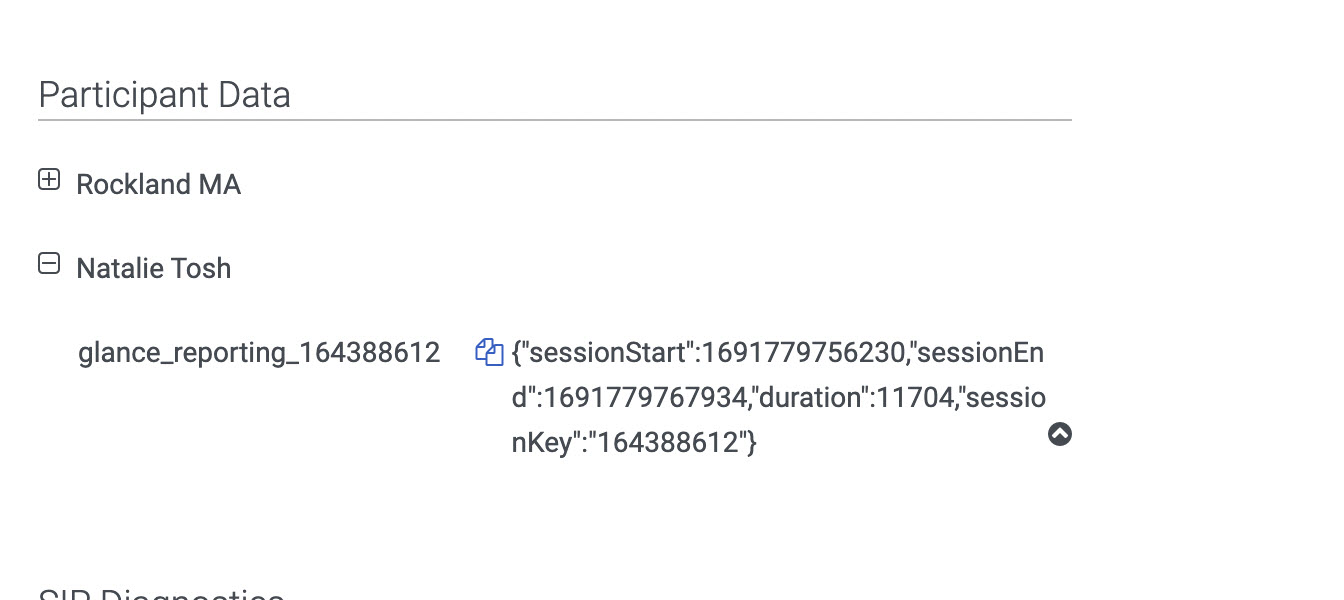
Once sessions are complete, Glance offers the ability to report on session metadata, including:
* Session Key
* Session Start Time
* Session End Time
* Duration
To view this data, navigate to **Performance** > **Workspace** > Select an Interaction, and scroll to the **Details** section to see the attached data. Per [Genesys' policy](https://help.mypurecloud.com/articles/view-participant-data-attributes/), Time to live (TTL) is 60 days for participant data. After 60 days, the data can only be accessed when it is exported.
An example of the attached data:
3. For **Integration Name**, enter **Glance**, then click **Save**.
4. On the **Configuration** tab, enter the following:
a. **Application URL:** *Provided by Glance*
b. **Iframe sandbox options:** `allow-forms,allow-modals,allow-popups,allow-presentation,allow-same-origin,allow-scripts,allow-downloads`
c. **Iframe Feature/Permissions Policy:** `camera,clipboard-write,display-capture,fullscreen,geolocation,microphone`
d. **Group Filtering:** choose which groups have access to the application.
e. **Queue Filtering:** choose which queues have access to the application.
f. **Communication:** `chat,call,callback,email,sms,line,facebook,instagram,twitter,open,webmessaging,whatsapp`
5. Click **Save & Activate**. Now you can verify the app displays during interactions.
6. Optional Advanced Configuration to add a Glance Logo:
```json
{
"lifecycle": {
"ephemeral": true,
"hooks": {
"focus": true,
"blur": true,
"bootstrap": true,
"stop": true
}
},
"icon": {
"vector": "[https://logo.glance-integrations.net/](https://logo.glance-integrations.net/)"
},
"i10n": {
"en": {
"name": "Glance Integration for Genesys Cloud"
},
"en-us": {
"name": "Glance Integration for Genesys Cloud"
}
}
}
```
=================================================================
FILE: /developer/integrations/agent_workspace/genesys/reporting
=================================================================
Once sessions are complete, Glance offers the ability to report on session metadata, including:
* Session Key
* Session Start Time
* Session End Time
* Duration
To view this data, navigate to **Performance** > **Workspace** > Select an Interaction, and scroll to the **Details** section to see the attached data. Per [Genesys' policy](https://help.mypurecloud.com/articles/view-participant-data-attributes/), Time to live (TTL) is 60 days for participant data. After 60 days, the data can only be accessed when it is exported.
An example of the attached data:
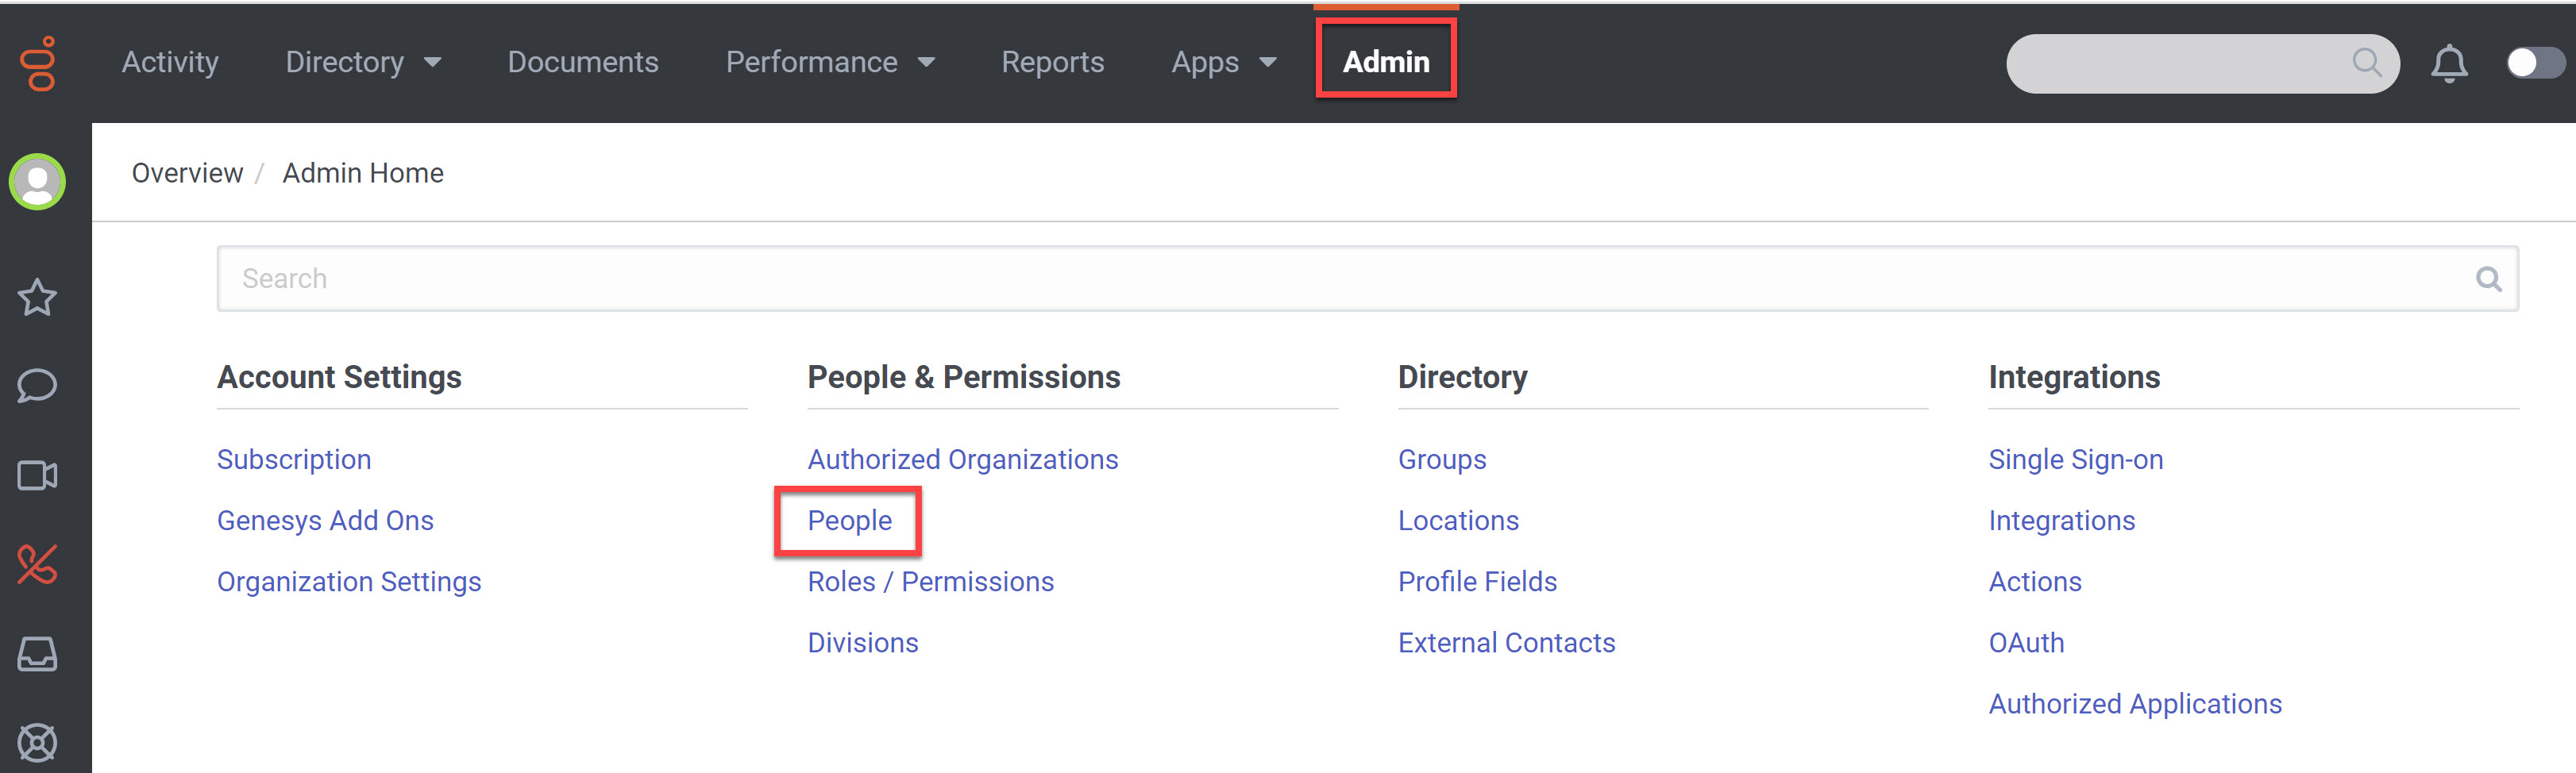 2. Click on the user's name.
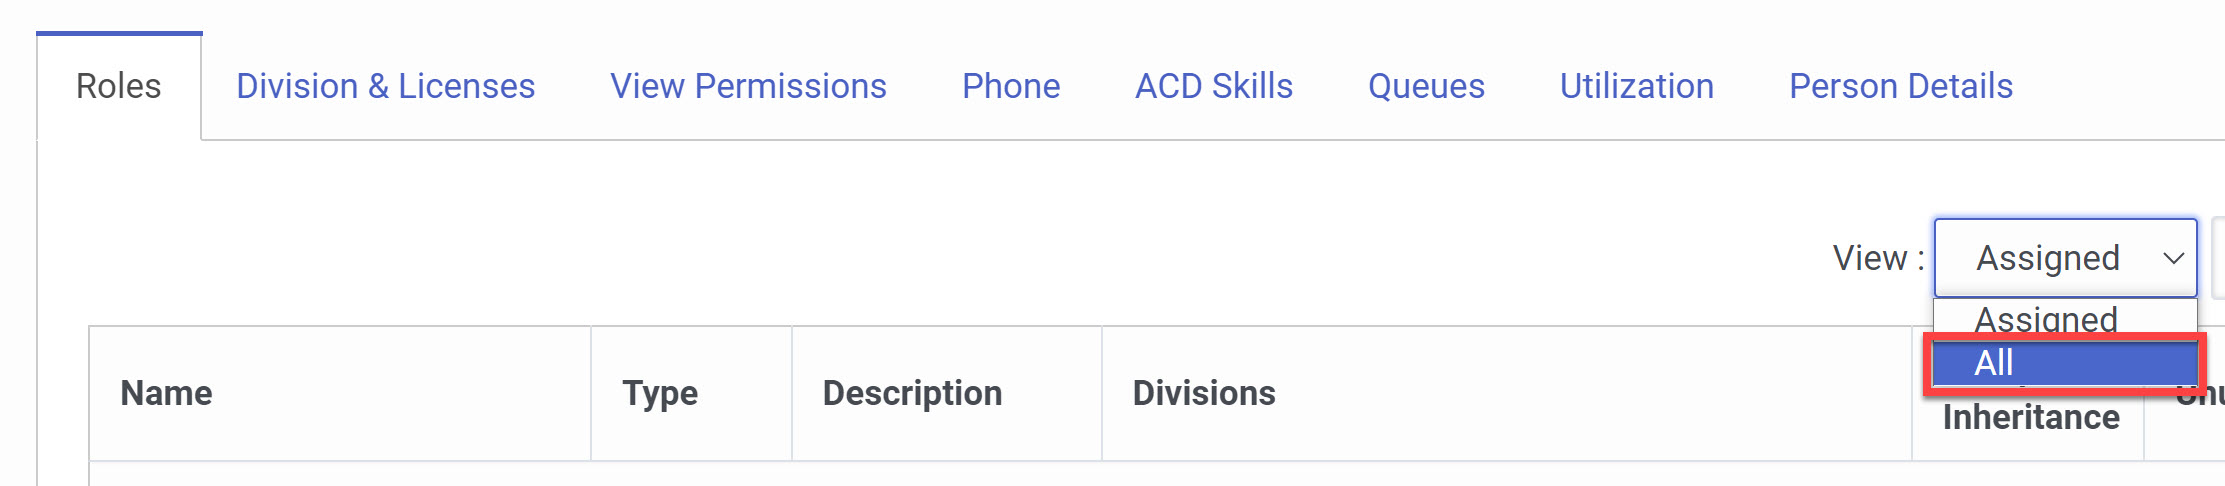
3. Click the drop-down arrow next to the **View** menu and choose **All**.
2. Click on the user's name.
3. Click the drop-down arrow next to the **View** menu and choose **All**.
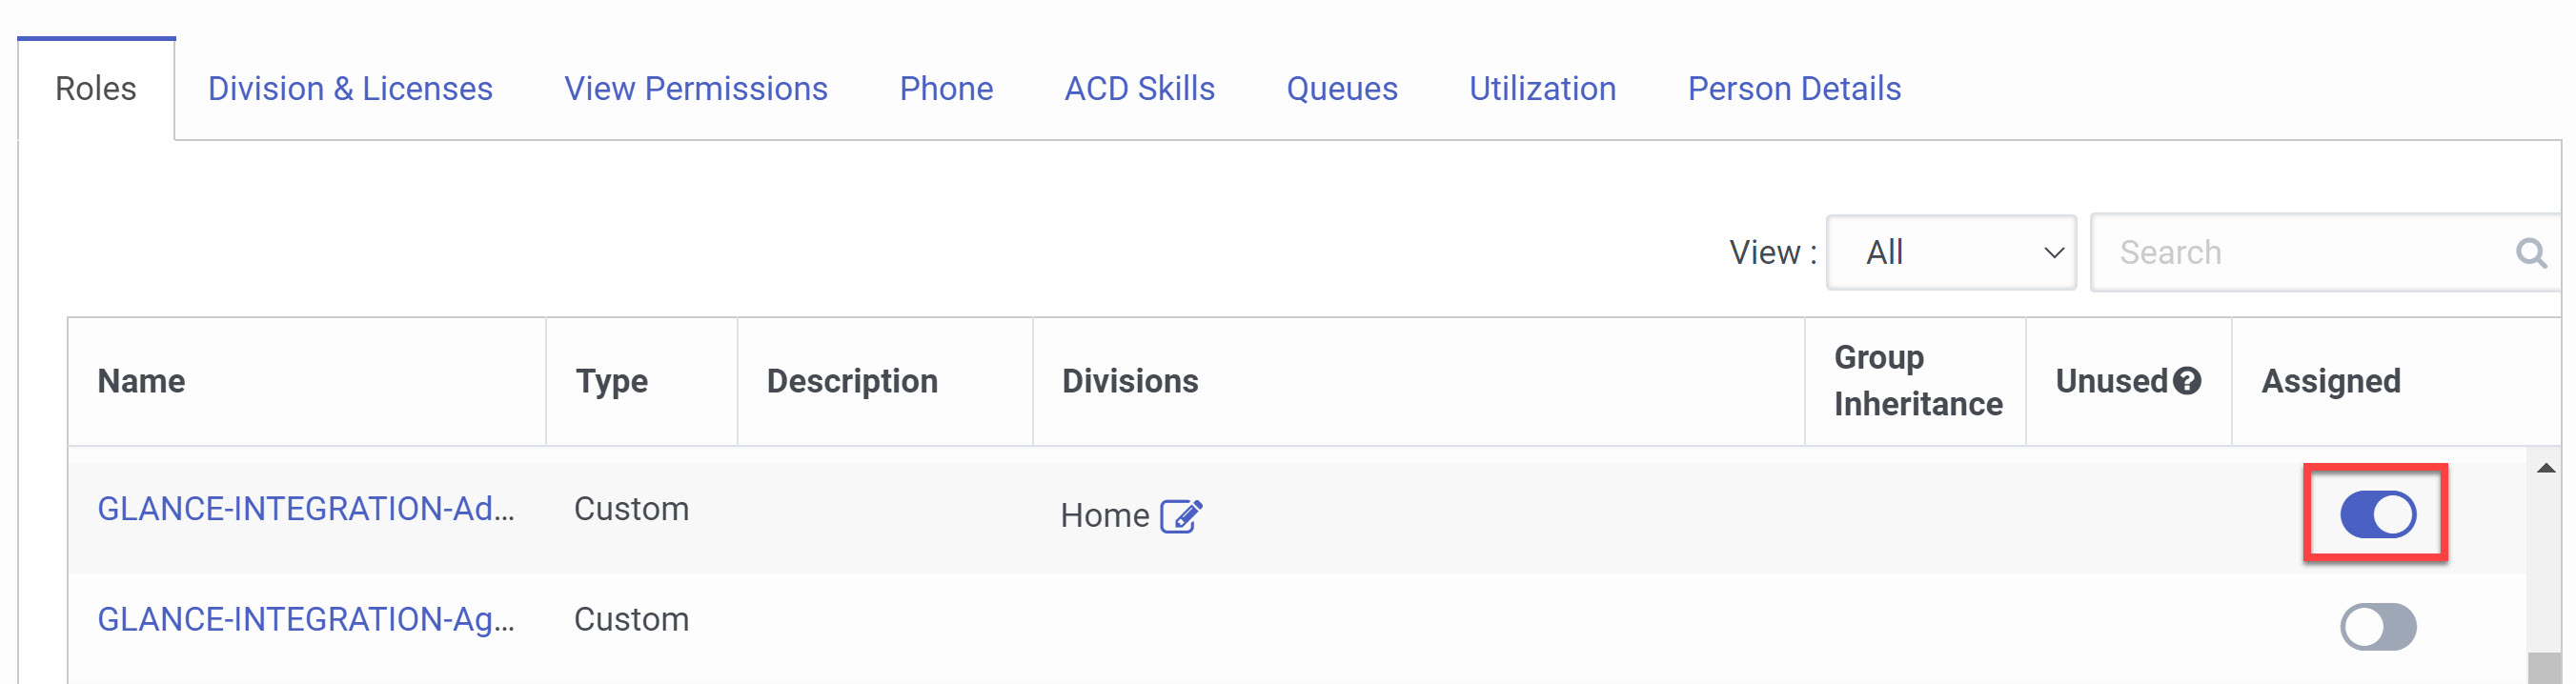
 4. Click the **Assigned** toggle to **On** for all roles that apply to the user.
 ## Authentication
The Glance application utilizes a dedicated [OAuth Client](https://help.mypurecloud.com/articles/create-an-oauth-client/) to authenticate against Genesys Cloud CX to sync entities between Genesys Cloud and Glance. Once agents log in to Genesys Cloud, they are automatically logged in to the Glance application.
### Enabling 1-Click Connect
By default, Glance provides a default configuration to map [Glance Visitor IDs](/users/glance-cobrowse/getting-started/cobrowse_requirements) to interactions.
=================================================================
FILE: /developer/integrations/agent_workspace
=================================================================
This section provides samples for integrating Glance into your agent workspace. The sample package provides an agent-side interface that enables agents to join [Glance Cobrowse](/users/glance-cobrowse/) and [Mobile Cobrowse](/developer/sdk/mobile_sdk/) sessions, as well as use [Mobile Camera Share](/users/mobile-camera/) functionality.
## Getting Started
Before using the Glance agent-side experience, ensure the following prerequisites have been completed:
* The organization has been provisioned a [Glance Group](/users/account-management/manage_users/).
* Users have been provisioned with valid Partner User IDs.
* The website is tagged with the [Glance Cobrowse script](/developer/glance-cobrowse/quickstart/), and includes a [button or link](/developer/glance-cobrowse/add_button/) to start a Cobrowse session.
* [SAML authentication](/developer/integrations/saml/saml_setup/) with Glance is enabled through an Identity Provider.
* Onboarding with Glance Customer Success has been completed. As part of this process, Glance provides an organization-specific URL and configures an allow-list for the agent desktop. If you need assistance, [Contact Glance](/users/account-management/contact/).
## Agent Interface
## Authentication
The Glance application utilizes a dedicated [OAuth Client](https://help.mypurecloud.com/articles/create-an-oauth-client/) to authenticate against Genesys Cloud CX to sync entities between Genesys Cloud and Glance. Once agents log in to Genesys Cloud, they are automatically logged in to the Glance application.
### Enabling 1-Click Connect
By default, Glance provides a default configuration to map [Glance Visitor IDs](/users/glance-cobrowse/getting-started/cobrowse_requirements) to interactions.
=================================================================
FILE: /developer/integrations/agent_workspace
=================================================================
This section provides samples for integrating Glance into your agent workspace. The sample package provides an agent-side interface that enables agents to join [Glance Cobrowse](/users/glance-cobrowse/) and [Mobile Cobrowse](/developer/sdk/mobile_sdk/) sessions, as well as use [Mobile Camera Share](/users/mobile-camera/) functionality.
## Getting Started
Before using the Glance agent-side experience, ensure the following prerequisites have been completed:
* The organization has been provisioned a [Glance Group](/users/account-management/manage_users/).
* Users have been provisioned with valid Partner User IDs.
* The website is tagged with the [Glance Cobrowse script](/developer/glance-cobrowse/quickstart/), and includes a [button or link](/developer/glance-cobrowse/add_button/) to start a Cobrowse session.
* [SAML authentication](/developer/integrations/saml/saml_setup/) with Glance is enabled through an Identity Provider.
* Onboarding with Glance Customer Success has been completed. As part of this process, Glance provides an organization-specific URL and configures an allow-list for the agent desktop. If you need assistance, [Contact Glance](/users/account-management/contact/).
## Agent Interface
 The initial interface offers agents two options for connecting with a visitor: they can click the **Enter Key** button to start a Cobrowse session using a session key provided by the visitor, or click the **Camera Share** button to send an SMS link that allows the visitor to share their mobile phone camera.
### Join with Key
The initial interface offers agents two options for connecting with a visitor: they can click the **Enter Key** button to start a Cobrowse session using a session key provided by the visitor, or click the **Camera Share** button to send an SMS link that allows the visitor to share their mobile phone camera.
### Join with Key
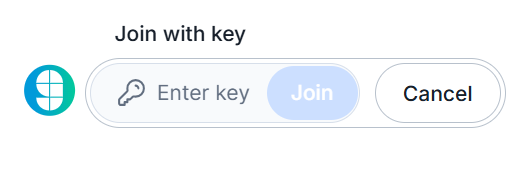 Input the code received from the visitor and click the **Join** button.
### Camera Share
Input the code received from the visitor and click the **Join** button.
### Camera Share
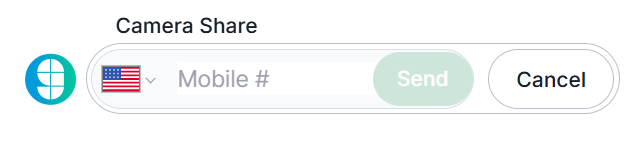 Input the visitor's mobile phone number and click the **Send** button. To change the country code, click the flag icon and select the appropriate region from the list.
### Presence
Input the visitor's mobile phone number and click the **Send** button. To change the country code, click the flag icon and select the appropriate region from the list.
### Presence
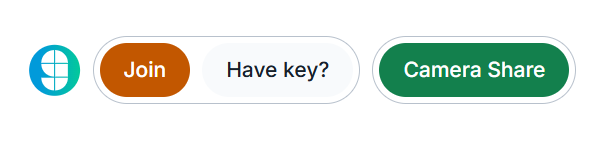 When Presence is enabled, you can instantly join the visitor's session by clicking the orange **Join** button.
=================================================================
FILE: /developer/integrations/agent_workspace/twilio_flex
=================================================================
When Presence is enabled, you can instantly join the visitor's session by clicking the orange **Join** button.
=================================================================
FILE: /developer/integrations/agent_workspace/twilio_flex
=================================================================
 ## Prerequisites
* All high-level prerequisites as listed in the [Getting Started](/developer/integrations/agent_workspace/#getting-started) section.
* Access to a [Twilio Flex Instance](https://www.twilio.com/docs/flex), and have followed the steps to create a [Flex Plugin](https://www.twilio.com/docs/flex/quickstart/getting-started-plugin) through the tutorial.
## Adding Glance to a Flex Plugin
1. After following the tutorial for the Flex Plugin listed above, replace the code in the Bing example with the following code:
```javascript
import React from "react"
import { FlexPlugin } from "@twilio/flex-plugin"
import CustomTaskList from "./components/CustomTaskList/CustomTaskList"
const PLUGIN_NAME = "SamplePlugin"
export default class SamplePlugin extends FlexPlugin {
constructor() {
super(PLUGIN_NAME)
}
/**
* This code is run when your plugin is being started
* Use this to modify any UI components or attach to the actions framework
*
* @param flex { typeof import('@twilio/flex-ui') }
*/
async init(flex, manager) {
flex.CRMContainer.defaultProps.uriCallback = (task) => {
return task
? `URL FROM GLANCE`
: "URL FROM GLANCE"
}
}
}
```
2. [Deploy and release](https://www.twilio.com/docs/flex/quickstart/getting-started-plugin#deploy-your-flex-plugin) the plugin to your environment.
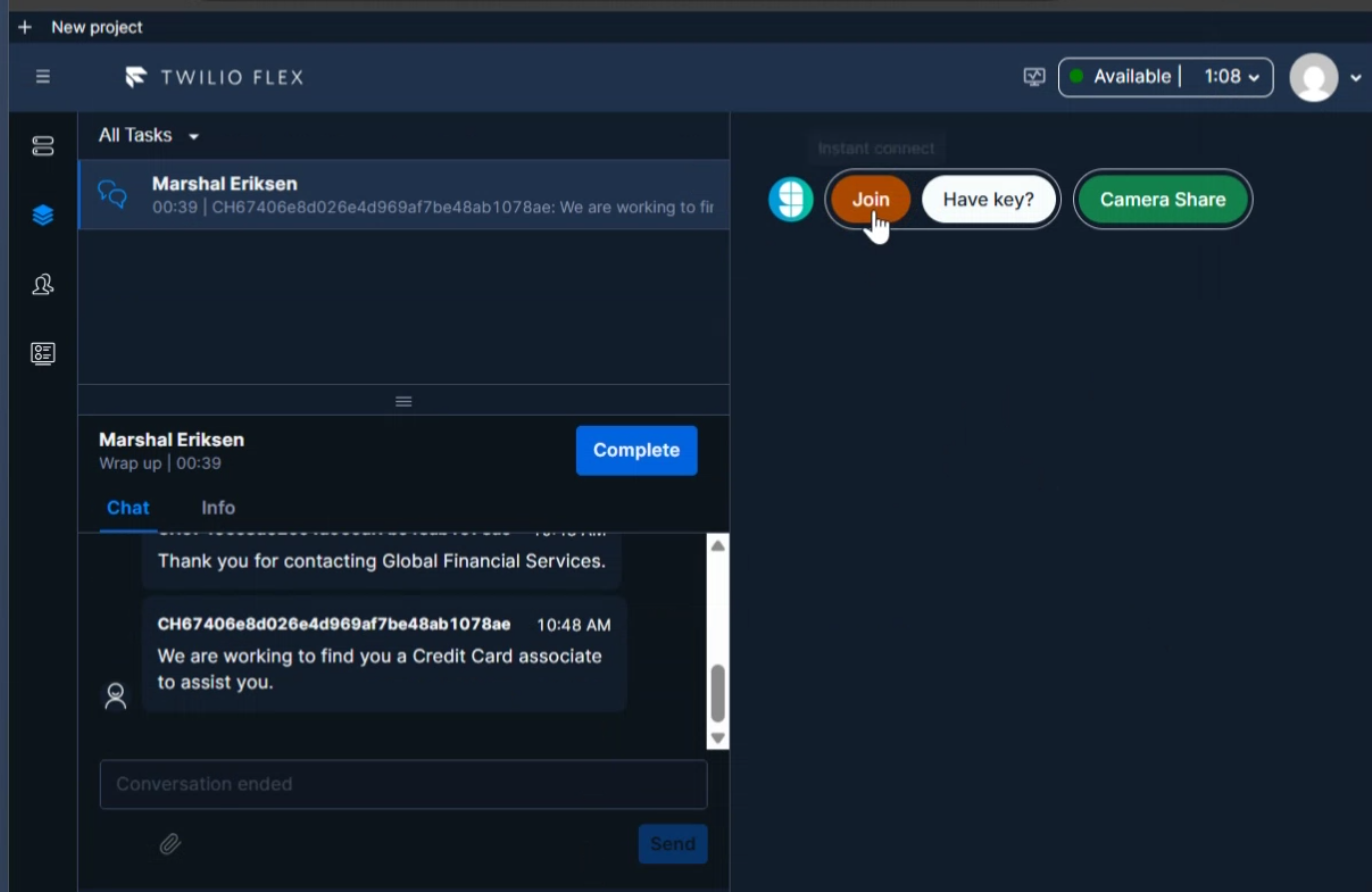
## Joining Glance Sessions from Twilio Flex
1. Navigate to the Twilio Flex Agent desktop.
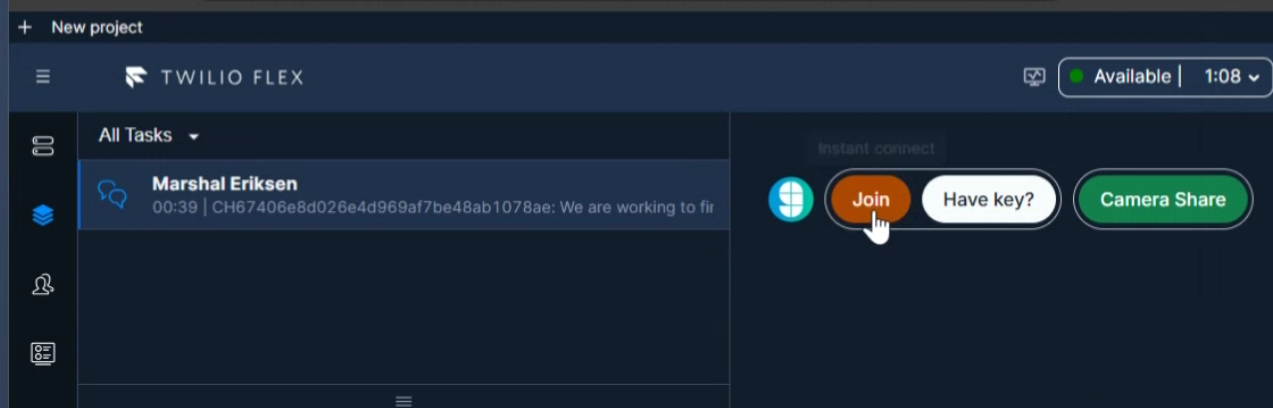
2. The Glance application is available in the CRM container window.
3. You will be prompted to sign in to your Identity Provider to access the Glance application. Log in with your credentials.
4. The Glance application is now available and you can join Glance Sessions.
## Prerequisites
* All high-level prerequisites as listed in the [Getting Started](/developer/integrations/agent_workspace/#getting-started) section.
* Access to a [Twilio Flex Instance](https://www.twilio.com/docs/flex), and have followed the steps to create a [Flex Plugin](https://www.twilio.com/docs/flex/quickstart/getting-started-plugin) through the tutorial.
## Adding Glance to a Flex Plugin
1. After following the tutorial for the Flex Plugin listed above, replace the code in the Bing example with the following code:
```javascript
import React from "react"
import { FlexPlugin } from "@twilio/flex-plugin"
import CustomTaskList from "./components/CustomTaskList/CustomTaskList"
const PLUGIN_NAME = "SamplePlugin"
export default class SamplePlugin extends FlexPlugin {
constructor() {
super(PLUGIN_NAME)
}
/**
* This code is run when your plugin is being started
* Use this to modify any UI components or attach to the actions framework
*
* @param flex { typeof import('@twilio/flex-ui') }
*/
async init(flex, manager) {
flex.CRMContainer.defaultProps.uriCallback = (task) => {
return task
? `URL FROM GLANCE`
: "URL FROM GLANCE"
}
}
}
```
2. [Deploy and release](https://www.twilio.com/docs/flex/quickstart/getting-started-plugin#deploy-your-flex-plugin) the plugin to your environment.
## Joining Glance Sessions from Twilio Flex
1. Navigate to the Twilio Flex Agent desktop.
2. The Glance application is available in the CRM container window.
3. You will be prompted to sign in to your Identity Provider to access the Glance application. Log in with your credentials.
4. The Glance application is now available and you can join Glance Sessions.
 =================================================================
FILE: /developer/integrations
=================================================================
Glance is designed to integrate seamlessly into your existing tech stack, whether you are using a major CRM, a CCaaS platform, or a custom workplace solution. Integrating Glance directly into your system of record centralizes your support workflows and reduces agent friction.
By leveraging presence detection, agents can instantly join a logged-in customer's session without relying on manual session codes. Administrators can also configure proactive Cobrowse sessions triggered by business intelligence data, routing rules, AI signals, or specific customer preferences.
Integrations can be configured to automatically synchronize session data. Each Glance interaction is logged as an activity directly within your integrated system, providing immediate visibility into key performance indicators (KPIs) and organizational usage metrics.
## User-facing integrations
You have several choices for integrating Glance seamlessly with your user-facing systems. You can:
* Configure Glance to integrate with:
* [Salesforce](./salesforce)
* [Genesys](./genesys)
* [Amazon Connect](./agent_workspace/amazon/)
* [Five9](./agent_workspace/five9/)
* [Twilio Flex](./agent_workspace/twilio_flex/)
* [Microsoft Dynamics](./agent_workspace/dynamics/)
* Configure our products for seamless integration with your organization's IT infrastructure. To achieve this, you may utilize the following options:
* [Service Target URLs (STUs)](./service-target-urls) - hyperlinks to give your users quick access to Glance.
* [Login Keys](./login-key) - a way to use an API key to authorize your users.
## Single Sign-On
You can set up single sign-on to Glance for your users. Glance works as a [SAML Service Provider](./saml) (also known as a [Federation Services Relying Party](./saml/saml_adfs) when integrating with Microsoft Windows Active Directory).
Glance offers two embed options for Identity Provider login: you can either embed the login page directly, or open it in a pop-up window to handle the initial login. [Glance Customer Success](/users/account-management/contact) will work with you to configure the option that works best for you.
## User Account Provisioning
To manage your Glance user accounts you can integrate Glance's APIs into your back-end systems.
You can provision (i.e., create and delete Glance accounts) for your users.
To do this:
* Use our [user provisioning API](/developer/legacy_api/partner-user).
* Use the [autoprovisioning capability](./saml/) (also known as just-in-time provisioning) of Glance's SAML Service Provider implementation.
## Data and Analytics
The Customer Records Retriever (CRR) is a public-facing HTTP interface for Glance customers to retrieve data related to their product activity. Refer to [this page](/developer/legacy_api/crr/) for detailed information.
Glance partners with your integrations team to deliver a seamless transition into your website, CCaaS, or CRM. Many of our customers get started with the Browser Agent SDK and are supported every step of the way by our dedicated Developer Experience (DevEx) team to ensure success.
Glance has a proven track record of integrating with industry-leading platforms, including:
- Salesforce
- Amazon Connect
- Microsoft Dynamics
- Five9
- Twilio Flex
- Genesys
=================================================================
FILE: /developer/integrations/login-key
=================================================================
The Glance Login Key is a secure, stateless, time-limited token used to authenticate users to various Glance services without requiring a traditional username and password. This section provides everything you need to implement Login Key authentication from start to finish. You will find detailed documentation on its HMAC-SHA256 cryptographic structure, architectural security best practices, and server-side code samples in multiple languages. Once your keys are being generated securely, you can explore the usage guides for passing tokens via web URLs and custom protocols, and even use our interactive browser utility to test your integration.
## In this section:
* **[Login Key](./integration_loginkey):** Technical reference for the token's formatting, components, and HMAC-SHA256 signature generation.
* **[Login Key Samples](./integration_samples):** Server-side code snippets in JavaScript, C#, Java, and Python for generating secure keys.
* **[Login Key Security](./integration_security):** Architectural guidelines, best practices, and stateless design considerations.
* **[Login Key Usage](./integration_usage):** Instructions for passing the Login Key to web pages, agent join links, and the `glance://` custom protocol handler.
* **[Login Key Check](./login_check):** An interactive, browser-based utility to generate tokens and verify your Start Session and Agent Join URLs.
=================================================================
FILE: /developer/integrations/login-key/integration_loginkey
=================================================================
The Glance Login Key is a time-limited token issued by a partner or customer, used to authenticate a user to various Glance services.
The Login Key is passed on `https:` or `glance:` URLs in one of the following ways:
Appended to the username�for example, `fred.glance.net` (a Glance Address) after a tilde:
`[username]~[loginkey]`
Passed along with Partner ID and Partner User ID parameters, typically:
`partnerid=[partnerid]&partneruserid=[partneruserid]~[loginkey]`
A Glance user is uniquely identified by either a username or a Partner ID/Partner User ID pair.
## Features of the Login Key
- Uses current best practice SHA-2 family of hashes.
- Expiration period selectable by the customer.
- Includes algorithm versioning to allow future changes with backward compatibility.
## Login Key Format
The Login Key format is identified by a leading dollar sign. (This distinguishes it from the previous format login key.)
**Format:**
`$[ver]$[expirationtime]$[signature]`
**Example:**
`$1$1392680360$YsT2Kj8rOp6FaJOG69o3QOj-GUacRiOo7Gw6l1EPVB8`
### Login Key Components
* **`[ver]`**: Must be `1` for this version of the key algorithm.
* **`[expirationtime]`**: The Unix (POSIX) epoch time. The number of seconds decimal since 00:00:00 UTC Jan 1 1970. Also, the value returned by the JavaScript `Date.valueOf()` method integer divided by 1000. The key is valid until this time (current time must be less than `[expirationtime]`).
* *Note: There is also a maximum time in the future for a valid expiration time (currently set to one day) to protect against possible accidentally generated keys with extended expiration times.*
* **`[signature]`**: `HMAC_SHA256([apikey], [partnerid][partneruserid][version][expirationtime])`
`HMAC_SHA256` takes `(secret key, message)` arguments and generates a hash-based message authentication code.
=================================================================
FILE: /developer/integrations
=================================================================
Glance is designed to integrate seamlessly into your existing tech stack, whether you are using a major CRM, a CCaaS platform, or a custom workplace solution. Integrating Glance directly into your system of record centralizes your support workflows and reduces agent friction.
By leveraging presence detection, agents can instantly join a logged-in customer's session without relying on manual session codes. Administrators can also configure proactive Cobrowse sessions triggered by business intelligence data, routing rules, AI signals, or specific customer preferences.
Integrations can be configured to automatically synchronize session data. Each Glance interaction is logged as an activity directly within your integrated system, providing immediate visibility into key performance indicators (KPIs) and organizational usage metrics.
## User-facing integrations
You have several choices for integrating Glance seamlessly with your user-facing systems. You can:
* Configure Glance to integrate with:
* [Salesforce](./salesforce)
* [Genesys](./genesys)
* [Amazon Connect](./agent_workspace/amazon/)
* [Five9](./agent_workspace/five9/)
* [Twilio Flex](./agent_workspace/twilio_flex/)
* [Microsoft Dynamics](./agent_workspace/dynamics/)
* Configure our products for seamless integration with your organization's IT infrastructure. To achieve this, you may utilize the following options:
* [Service Target URLs (STUs)](./service-target-urls) - hyperlinks to give your users quick access to Glance.
* [Login Keys](./login-key) - a way to use an API key to authorize your users.
## Single Sign-On
You can set up single sign-on to Glance for your users. Glance works as a [SAML Service Provider](./saml) (also known as a [Federation Services Relying Party](./saml/saml_adfs) when integrating with Microsoft Windows Active Directory).
Glance offers two embed options for Identity Provider login: you can either embed the login page directly, or open it in a pop-up window to handle the initial login. [Glance Customer Success](/users/account-management/contact) will work with you to configure the option that works best for you.
## User Account Provisioning
To manage your Glance user accounts you can integrate Glance's APIs into your back-end systems.
You can provision (i.e., create and delete Glance accounts) for your users.
To do this:
* Use our [user provisioning API](/developer/legacy_api/partner-user).
* Use the [autoprovisioning capability](./saml/) (also known as just-in-time provisioning) of Glance's SAML Service Provider implementation.
## Data and Analytics
The Customer Records Retriever (CRR) is a public-facing HTTP interface for Glance customers to retrieve data related to their product activity. Refer to [this page](/developer/legacy_api/crr/) for detailed information.
Glance partners with your integrations team to deliver a seamless transition into your website, CCaaS, or CRM. Many of our customers get started with the Browser Agent SDK and are supported every step of the way by our dedicated Developer Experience (DevEx) team to ensure success.
Glance has a proven track record of integrating with industry-leading platforms, including:
- Salesforce
- Amazon Connect
- Microsoft Dynamics
- Five9
- Twilio Flex
- Genesys
=================================================================
FILE: /developer/integrations/login-key
=================================================================
The Glance Login Key is a secure, stateless, time-limited token used to authenticate users to various Glance services without requiring a traditional username and password. This section provides everything you need to implement Login Key authentication from start to finish. You will find detailed documentation on its HMAC-SHA256 cryptographic structure, architectural security best practices, and server-side code samples in multiple languages. Once your keys are being generated securely, you can explore the usage guides for passing tokens via web URLs and custom protocols, and even use our interactive browser utility to test your integration.
## In this section:
* **[Login Key](./integration_loginkey):** Technical reference for the token's formatting, components, and HMAC-SHA256 signature generation.
* **[Login Key Samples](./integration_samples):** Server-side code snippets in JavaScript, C#, Java, and Python for generating secure keys.
* **[Login Key Security](./integration_security):** Architectural guidelines, best practices, and stateless design considerations.
* **[Login Key Usage](./integration_usage):** Instructions for passing the Login Key to web pages, agent join links, and the `glance://` custom protocol handler.
* **[Login Key Check](./login_check):** An interactive, browser-based utility to generate tokens and verify your Start Session and Agent Join URLs.
=================================================================
FILE: /developer/integrations/login-key/integration_loginkey
=================================================================
The Glance Login Key is a time-limited token issued by a partner or customer, used to authenticate a user to various Glance services.
The Login Key is passed on `https:` or `glance:` URLs in one of the following ways:
Appended to the username�for example, `fred.glance.net` (a Glance Address) after a tilde:
`[username]~[loginkey]`
Passed along with Partner ID and Partner User ID parameters, typically:
`partnerid=[partnerid]&partneruserid=[partneruserid]~[loginkey]`
A Glance user is uniquely identified by either a username or a Partner ID/Partner User ID pair.
## Features of the Login Key
- Uses current best practice SHA-2 family of hashes.
- Expiration period selectable by the customer.
- Includes algorithm versioning to allow future changes with backward compatibility.
## Login Key Format
The Login Key format is identified by a leading dollar sign. (This distinguishes it from the previous format login key.)
**Format:**
`$[ver]$[expirationtime]$[signature]`
**Example:**
`$1$1392680360$YsT2Kj8rOp6FaJOG69o3QOj-GUacRiOo7Gw6l1EPVB8`
### Login Key Components
* **`[ver]`**: Must be `1` for this version of the key algorithm.
* **`[expirationtime]`**: The Unix (POSIX) epoch time. The number of seconds decimal since 00:00:00 UTC Jan 1 1970. Also, the value returned by the JavaScript `Date.valueOf()` method integer divided by 1000. The key is valid until this time (current time must be less than `[expirationtime]`).
* *Note: There is also a maximum time in the future for a valid expiration time (currently set to one day) to protect against possible accidentally generated keys with extended expiration times.*
* **`[signature]`**: `HMAC_SHA256([apikey], [partnerid][partneruserid][version][expirationtime])`
`HMAC_SHA256` takes `(secret key, message)` arguments and generates a hash-based message authentication code.
| PartnerID: | |
| APIKey (PrivateKey): | |
| PartnerUserID: | |
| Timeout: |
(seconds from now) |
| Username: |
(for direct client start, cb view) |
| SessionKey: |
(for links, not part of loginkey) |
| Server: |
(for links, not part of loginkey) |
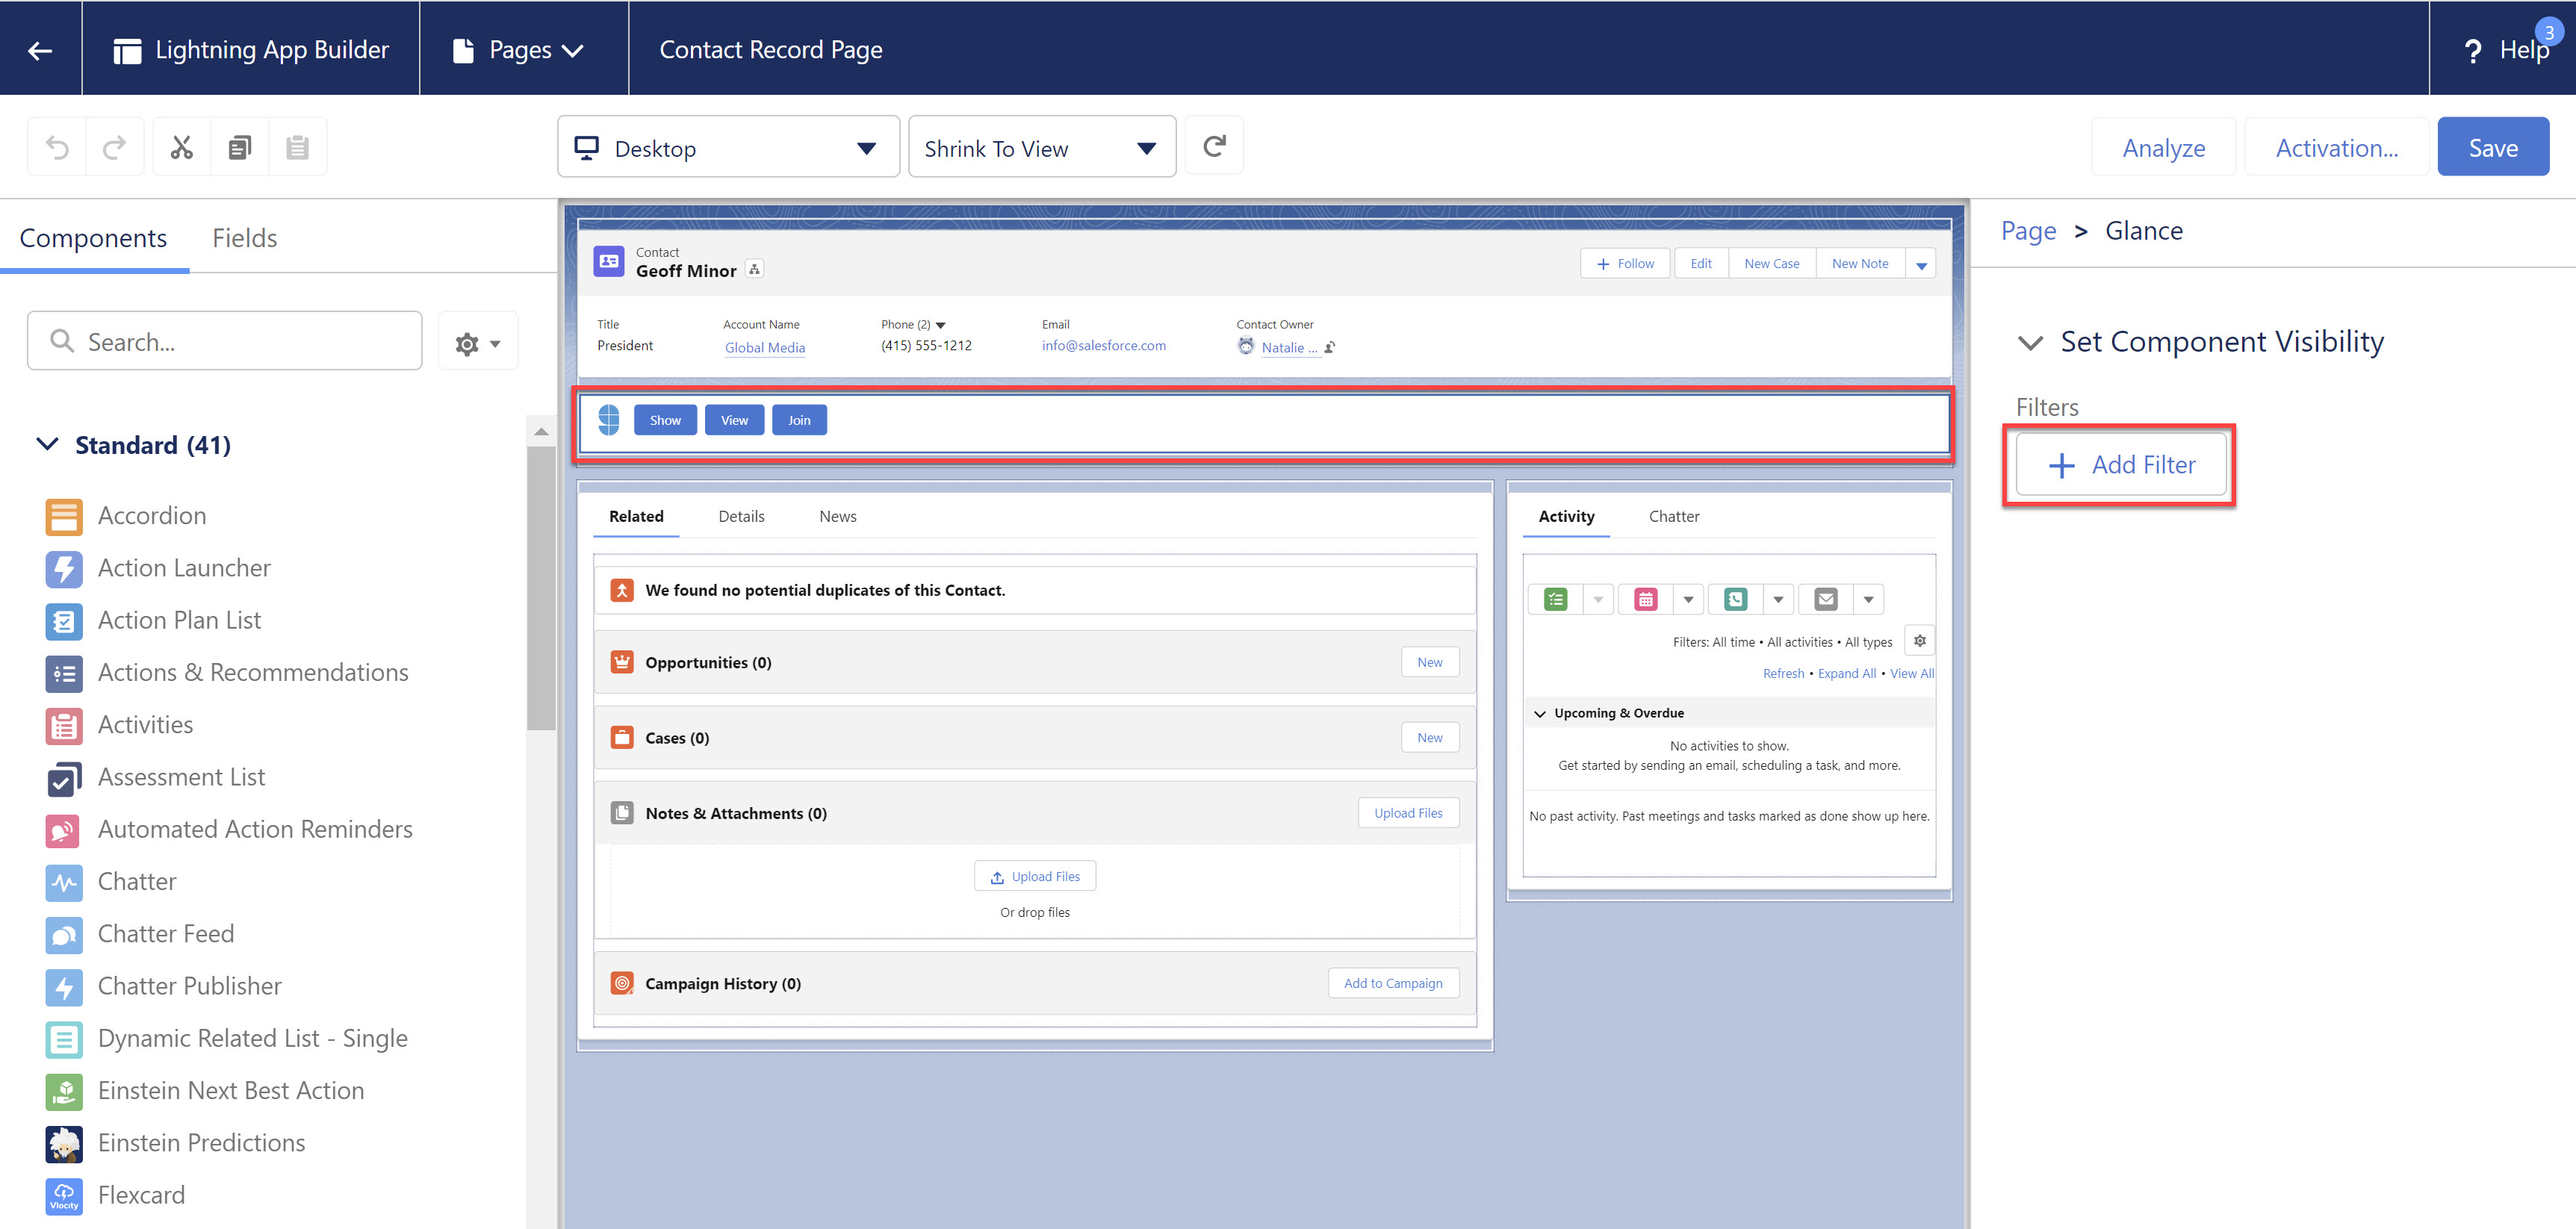 4. Under **Advanced**, click **Select**.
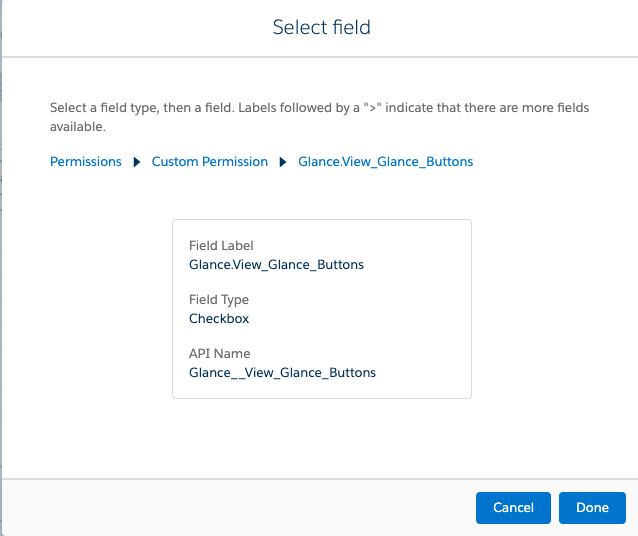
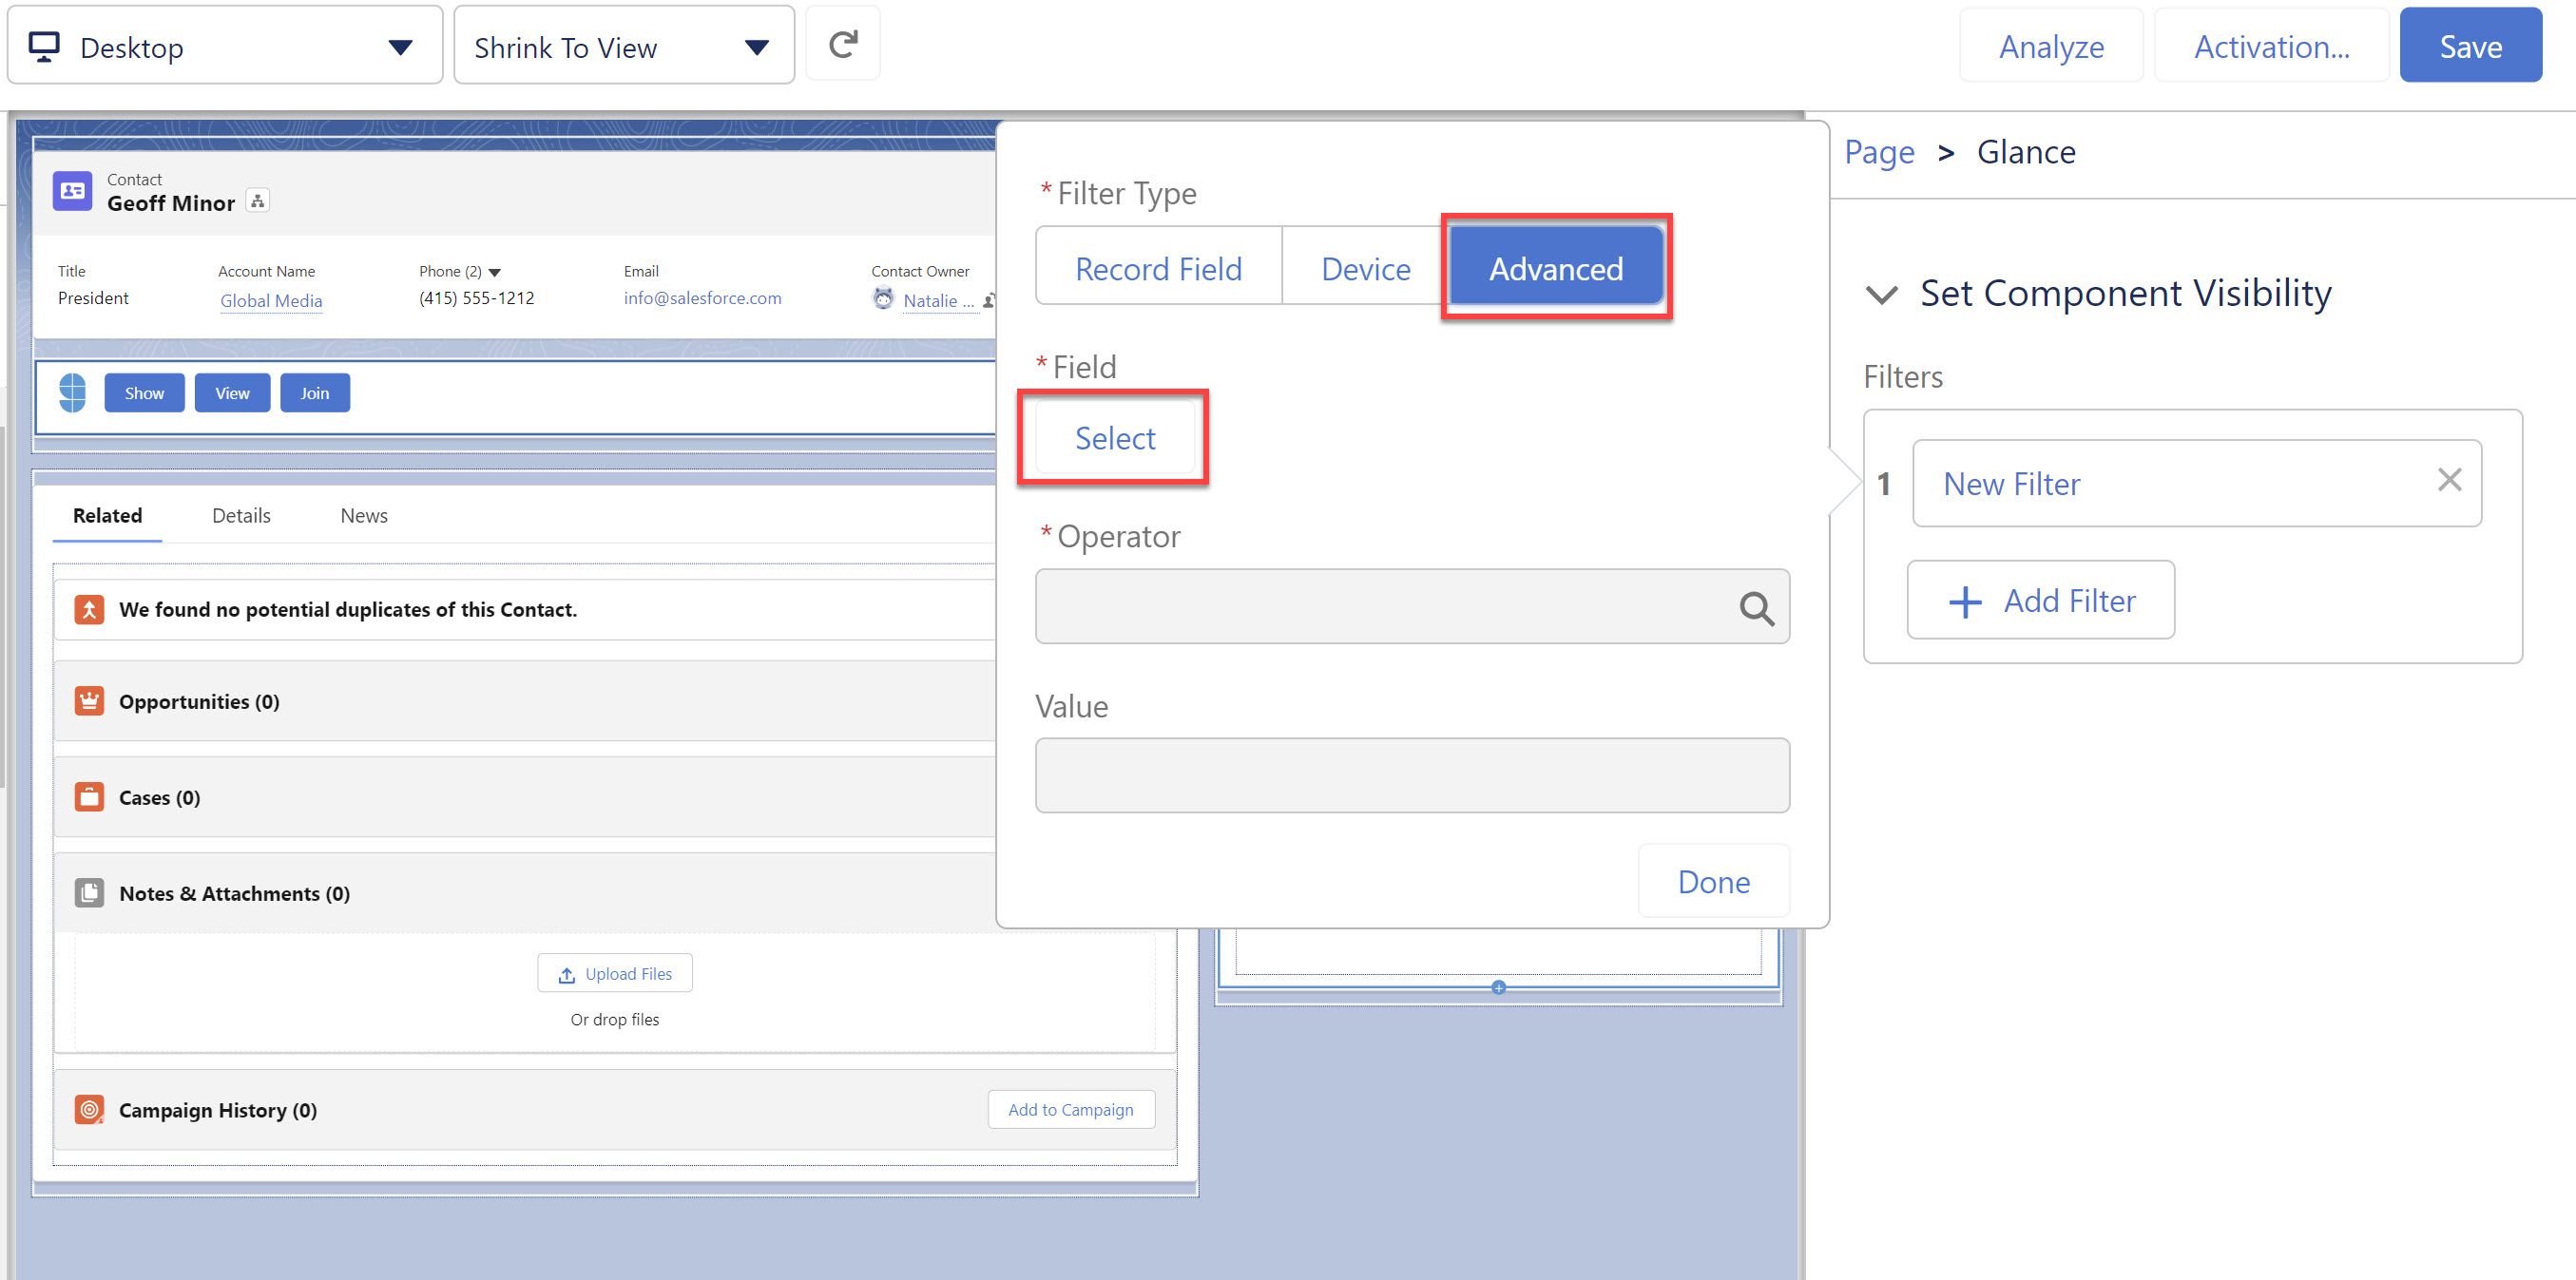 5. Choose **Permissions > Custom Permissions > Glance.View_Glance_Buttons** and then click **Done**.
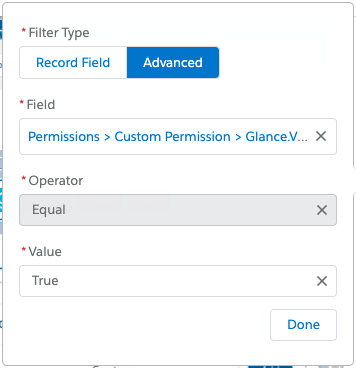
 6. Set **Operator** to **Equal** and **Value** to **True**, and then click **Done**.
 7. Click **Save** and **Activate** the page.
8. Users without the Glance permission set will no longer see the Glance icon and warning message on the page.
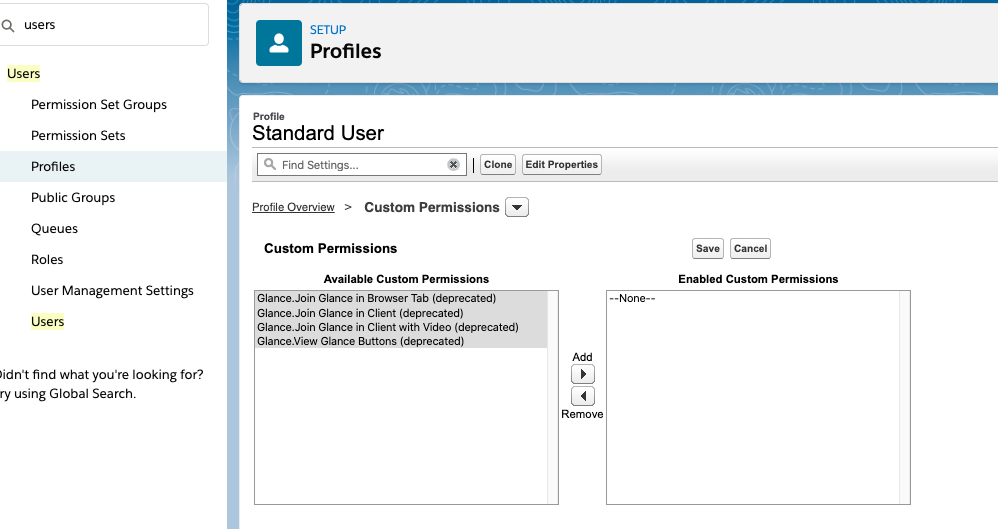
9. If a user sees an error that Glance is not enabled, then navigate to the user's Profile, edit the Custom Permissions, and disable the custom permissions related to Glance at the profile level. Ask the user to refresh the page.
7. Click **Save** and **Activate** the page.
8. Users without the Glance permission set will no longer see the Glance icon and warning message on the page.
9. If a user sees an error that Glance is not enabled, then navigate to the user's Profile, edit the Custom Permissions, and disable the custom permissions related to Glance at the profile level. Ask the user to refresh the page.
 =================================================================
FILE: /developer/integrations/salesforce
=================================================================
# Salesforce
## Overview
Glance for Salesforce improves the efficiency and customer experience of every call or chat session via integrated cobrowsing (mobile, web), screen sharing, and agent video. The Glance package allows your Salesforce users to join or start Glance sessions directly from a Salesforce record, and sync metadata about that session back to that record automatically.
### Prerequisites
Before you begin utilizing the Glance for Salesforce package, complete the following prerequisites:
* You have been provisioned a [Glance Group](/users/account-management/manage_users) and there is a Glance Administrator account provisioned for the group.
* You have tagged your website with the [Glance Cobrowse script](/developer/glance-cobrowse/script_tag/), and have added a [button or link](/developer/glance-cobrowse/add_button/) to start Cobrowse on the site.
* *Optional:* You have enabled [SAML authentication](/developer/integrations/saml/saml_setup) with Glance in the Identity Provider of your choice.
* *Optional:* If using 1-Click Connect, you have instrumented your website with this feature per the [requirements](/users/glance-cobrowse/getting-started/cobrowse_requirements).
### Supported Versions
Supported Salesforce versions can be found on the [Glance Software Current and Supported Versions](/release-notes/#crm-integrations) page.
### Streamlined Installation
The following is a streamlined version of the Salesforce installation process, if you want to install the package quickly. Click the links to go to respective sections of the help site.
1. Download the Glance for Salesforce package [here](./install_sf).
2. Log in to [Glance inside Salesforce](./sf_login).
3. [Select Glance Buttons](./sf_settings/#glance-buttons) for Salesforce objects.
4. Modify [Profile Settings](./sf_settings/#modify-profile-settings).
5. Add [permission sets](./sf_settings/#add-permission-sets).
6. Add [buttons to a Salesforce object](./sf_buttons), like case.
## Using Glance for Salesforce
* [Install Glance for Salesforce Package](./install_sf)
* [Log in to Glance in Salesforce](./sf_login)
* [Glance Company Settings](./sf_settings)
* [Adding Glance Buttons to Salesforce Records](./sf_buttons)
* [Joining Sessions](./joining_sessions)
* [Glance Data Sync for Reporting](./sf_sync)
* [Uninstalling Glance for Salesforce](./sf_uninstall)
## Additional Setup
* [Using Glance with Messaging](./miaw_sf)
* [Glance Cobrowse for Lightning Digital Experiences (Communities)](./sf_community)
* [Add a Glance Session Related List](./sf_relatedlist)
* [Using Glance with Custom Objects](./sf_custom)
* [Hide the Glance Component for Users Without Glance Access](./hide_component)
* [How SSO Works in Salesforce](./sf_sso)
## Salesforce Package Features
The following tables outline which Glance packages offer support for various Salesforce technologies and consoles. Click the links in the table for additional information on configuring specific features.
### Glance (Latest Package)
| Feature | Lightning Console | Classic Console |
| :--- | :--- | :--- |
| Salesforce Messaging In App Web| [Yes](./miaw_sf) | No |
| Support for custom objects | [Yes](./sf_custom) | No |
| Choose which buttons appear in the Glance Component | [Yes](./sf_settings/#glance-buttons) | [Yes](./sf_settings/#glance-buttons) |
| Configure Glance buttons by object | [Yes](./sf_settings/#glance-buttons) | [Yes](./sf_settings/#glance-buttons) |
| Configure Glance buttons by profile | [Yes](./sf_settings/#profile-access-settings) | [Yes](./sf_settings/#profile-access-settings) |
| Self-serve setup SSO | [Yes](./sf_settings/#single-sign-on-sso) | [Yes](./sf_settings/#single-sign-on-sso) |
### Glance for Salesforce (Legacy Package)
| Feature | Lightning Console | Classic Console |
| :--- | :--- | :--- |
| Salesforce Classic Chat (formerly Live Agent) | Yes, with
=================================================================
FILE: /developer/integrations/salesforce
=================================================================
# Salesforce
## Overview
Glance for Salesforce improves the efficiency and customer experience of every call or chat session via integrated cobrowsing (mobile, web), screen sharing, and agent video. The Glance package allows your Salesforce users to join or start Glance sessions directly from a Salesforce record, and sync metadata about that session back to that record automatically.
### Prerequisites
Before you begin utilizing the Glance for Salesforce package, complete the following prerequisites:
* You have been provisioned a [Glance Group](/users/account-management/manage_users) and there is a Glance Administrator account provisioned for the group.
* You have tagged your website with the [Glance Cobrowse script](/developer/glance-cobrowse/script_tag/), and have added a [button or link](/developer/glance-cobrowse/add_button/) to start Cobrowse on the site.
* *Optional:* You have enabled [SAML authentication](/developer/integrations/saml/saml_setup) with Glance in the Identity Provider of your choice.
* *Optional:* If using 1-Click Connect, you have instrumented your website with this feature per the [requirements](/users/glance-cobrowse/getting-started/cobrowse_requirements).
### Supported Versions
Supported Salesforce versions can be found on the [Glance Software Current and Supported Versions](/release-notes/#crm-integrations) page.
### Streamlined Installation
The following is a streamlined version of the Salesforce installation process, if you want to install the package quickly. Click the links to go to respective sections of the help site.
1. Download the Glance for Salesforce package [here](./install_sf).
2. Log in to [Glance inside Salesforce](./sf_login).
3. [Select Glance Buttons](./sf_settings/#glance-buttons) for Salesforce objects.
4. Modify [Profile Settings](./sf_settings/#modify-profile-settings).
5. Add [permission sets](./sf_settings/#add-permission-sets).
6. Add [buttons to a Salesforce object](./sf_buttons), like case.
## Using Glance for Salesforce
* [Install Glance for Salesforce Package](./install_sf)
* [Log in to Glance in Salesforce](./sf_login)
* [Glance Company Settings](./sf_settings)
* [Adding Glance Buttons to Salesforce Records](./sf_buttons)
* [Joining Sessions](./joining_sessions)
* [Glance Data Sync for Reporting](./sf_sync)
* [Uninstalling Glance for Salesforce](./sf_uninstall)
## Additional Setup
* [Using Glance with Messaging](./miaw_sf)
* [Glance Cobrowse for Lightning Digital Experiences (Communities)](./sf_community)
* [Add a Glance Session Related List](./sf_relatedlist)
* [Using Glance with Custom Objects](./sf_custom)
* [Hide the Glance Component for Users Without Glance Access](./hide_component)
* [How SSO Works in Salesforce](./sf_sso)
## Salesforce Package Features
The following tables outline which Glance packages offer support for various Salesforce technologies and consoles. Click the links in the table for additional information on configuring specific features.
### Glance (Latest Package)
| Feature | Lightning Console | Classic Console |
| :--- | :--- | :--- |
| Salesforce Messaging In App Web| [Yes](./miaw_sf) | No |
| Support for custom objects | [Yes](./sf_custom) | No |
| Choose which buttons appear in the Glance Component | [Yes](./sf_settings/#glance-buttons) | [Yes](./sf_settings/#glance-buttons) |
| Configure Glance buttons by object | [Yes](./sf_settings/#glance-buttons) | [Yes](./sf_settings/#glance-buttons) |
| Configure Glance buttons by profile | [Yes](./sf_settings/#profile-access-settings) | [Yes](./sf_settings/#profile-access-settings) |
| Self-serve setup SSO | [Yes](./sf_settings/#single-sign-on-sso) | [Yes](./sf_settings/#single-sign-on-sso) |
### Glance for Salesforce (Legacy Package)
| Feature | Lightning Console | Classic Console |
| :--- | :--- | :--- |
| Salesforce Classic Chat (formerly Live Agent) | Yes, withextension | Yes, with
extension | | Salesforce Embedded Services Chat (formerly Snap-in) | Yes, with
extension | Yes | | Log sessions from Chat sessions | No | No | | Support for custom objects | No | No | | Choose which buttons appear in the Glance Component | Yes | Yes | | Configure Glance buttons by object | Partially
Supported* | Partially
Supported* | | Configure Glance buttons by profile | No | No | | Self-serve setup SSO | No | No | *\* You can only configure buttons for Cases, Contacts, or Leads.* ================================================================= FILE: /developer/integrations/salesforce/install_sf ================================================================= This section will help you install and configure Glance for Salesforce (Lightning and Classic). Glance has two packages available in Salesforce. Our legacy package is under the namespace _G4S_, and our latest package is under the namespace _Glance_. This guide covers the new Glance build. If you wish to upgrade to the latest version, your session data from the legacy version will stay as Events, while session data from the new version will be stored as Glance Sessions. Complete the steps in the [Install the Glance for Salesforce Package](#install-the-glance-for-salesforce-package) section below.
Uninstalling the legacy package does not delete events from the previous version.
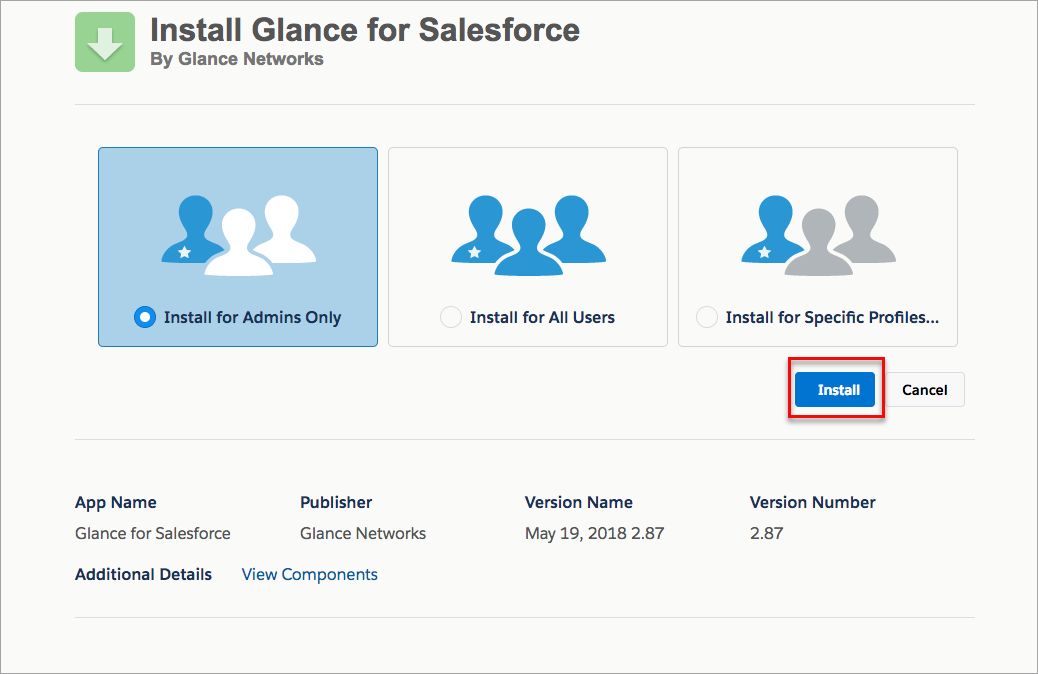
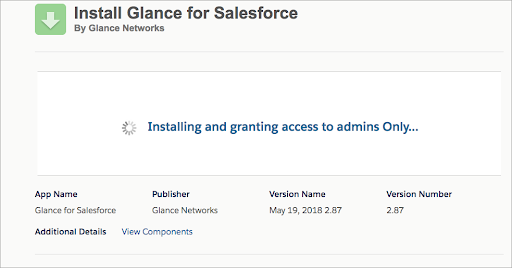
_**Note:** If you are upgrading, this will be a blue **Upgrade** button._ 3. A pop-up window will appear asking you to approve third-party access. Click **Continue**. 4. You will see the following message while the install is processing:
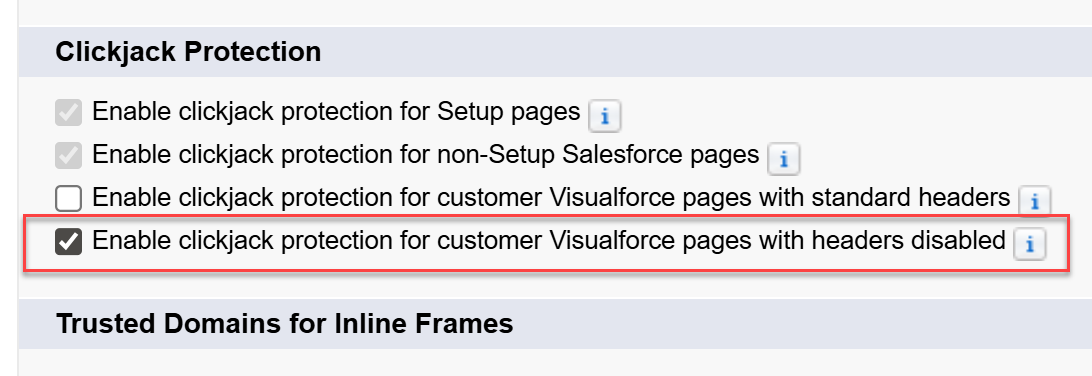 6. Scroll down to the **Trusted Domains for Inline Frames** section and click **Add Domain**.
7. Add the URL for the Salesforce org.
8. Click **Save**.
6. Scroll down to the **Trusted Domains for Inline Frames** section and click **Add Domain**.
7. Add the URL for the Salesforce org.
8. Click **Save**.
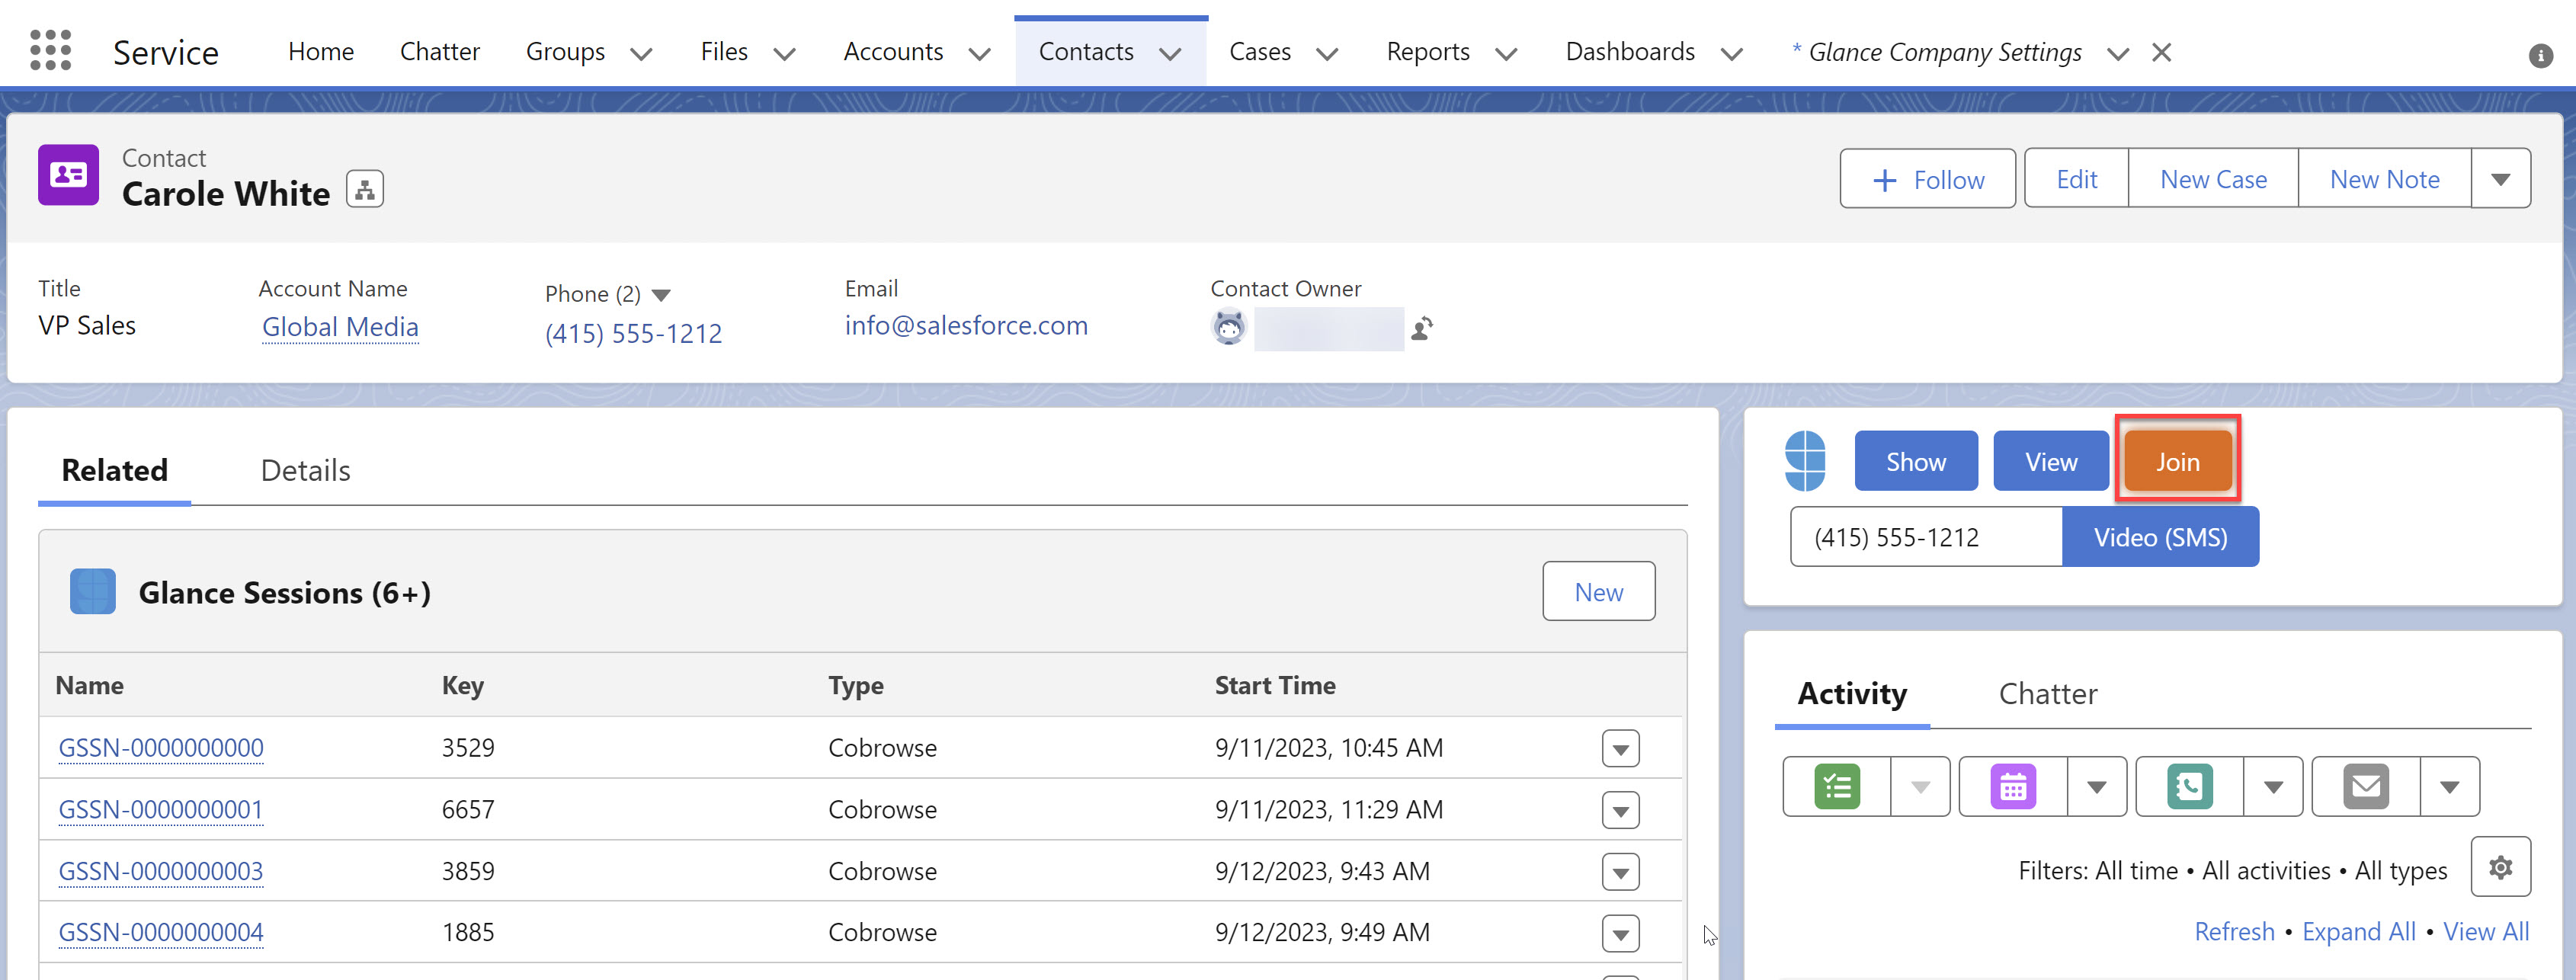 4. The visitor accepts the request.
5. The visitor and agent are connected.
## Joining from Key-Entry
1. Navigate to the object where you would like to start a session, for example a contact or case.
2. Ask the visitor to click a link or a button on the website to generate a key.
3. Click the **Join** button.
4. Click the **Have Key** button.
5. Enter the key and click **Connect**.
4. The visitor accepts the request.
5. The visitor and agent are connected.
## Joining from Key-Entry
1. Navigate to the object where you would like to start a session, for example a contact or case.
2. Ask the visitor to click a link or a button on the website to generate a key.
3. Click the **Join** button.
4. Click the **Have Key** button.
5. Enter the key and click **Connect**.
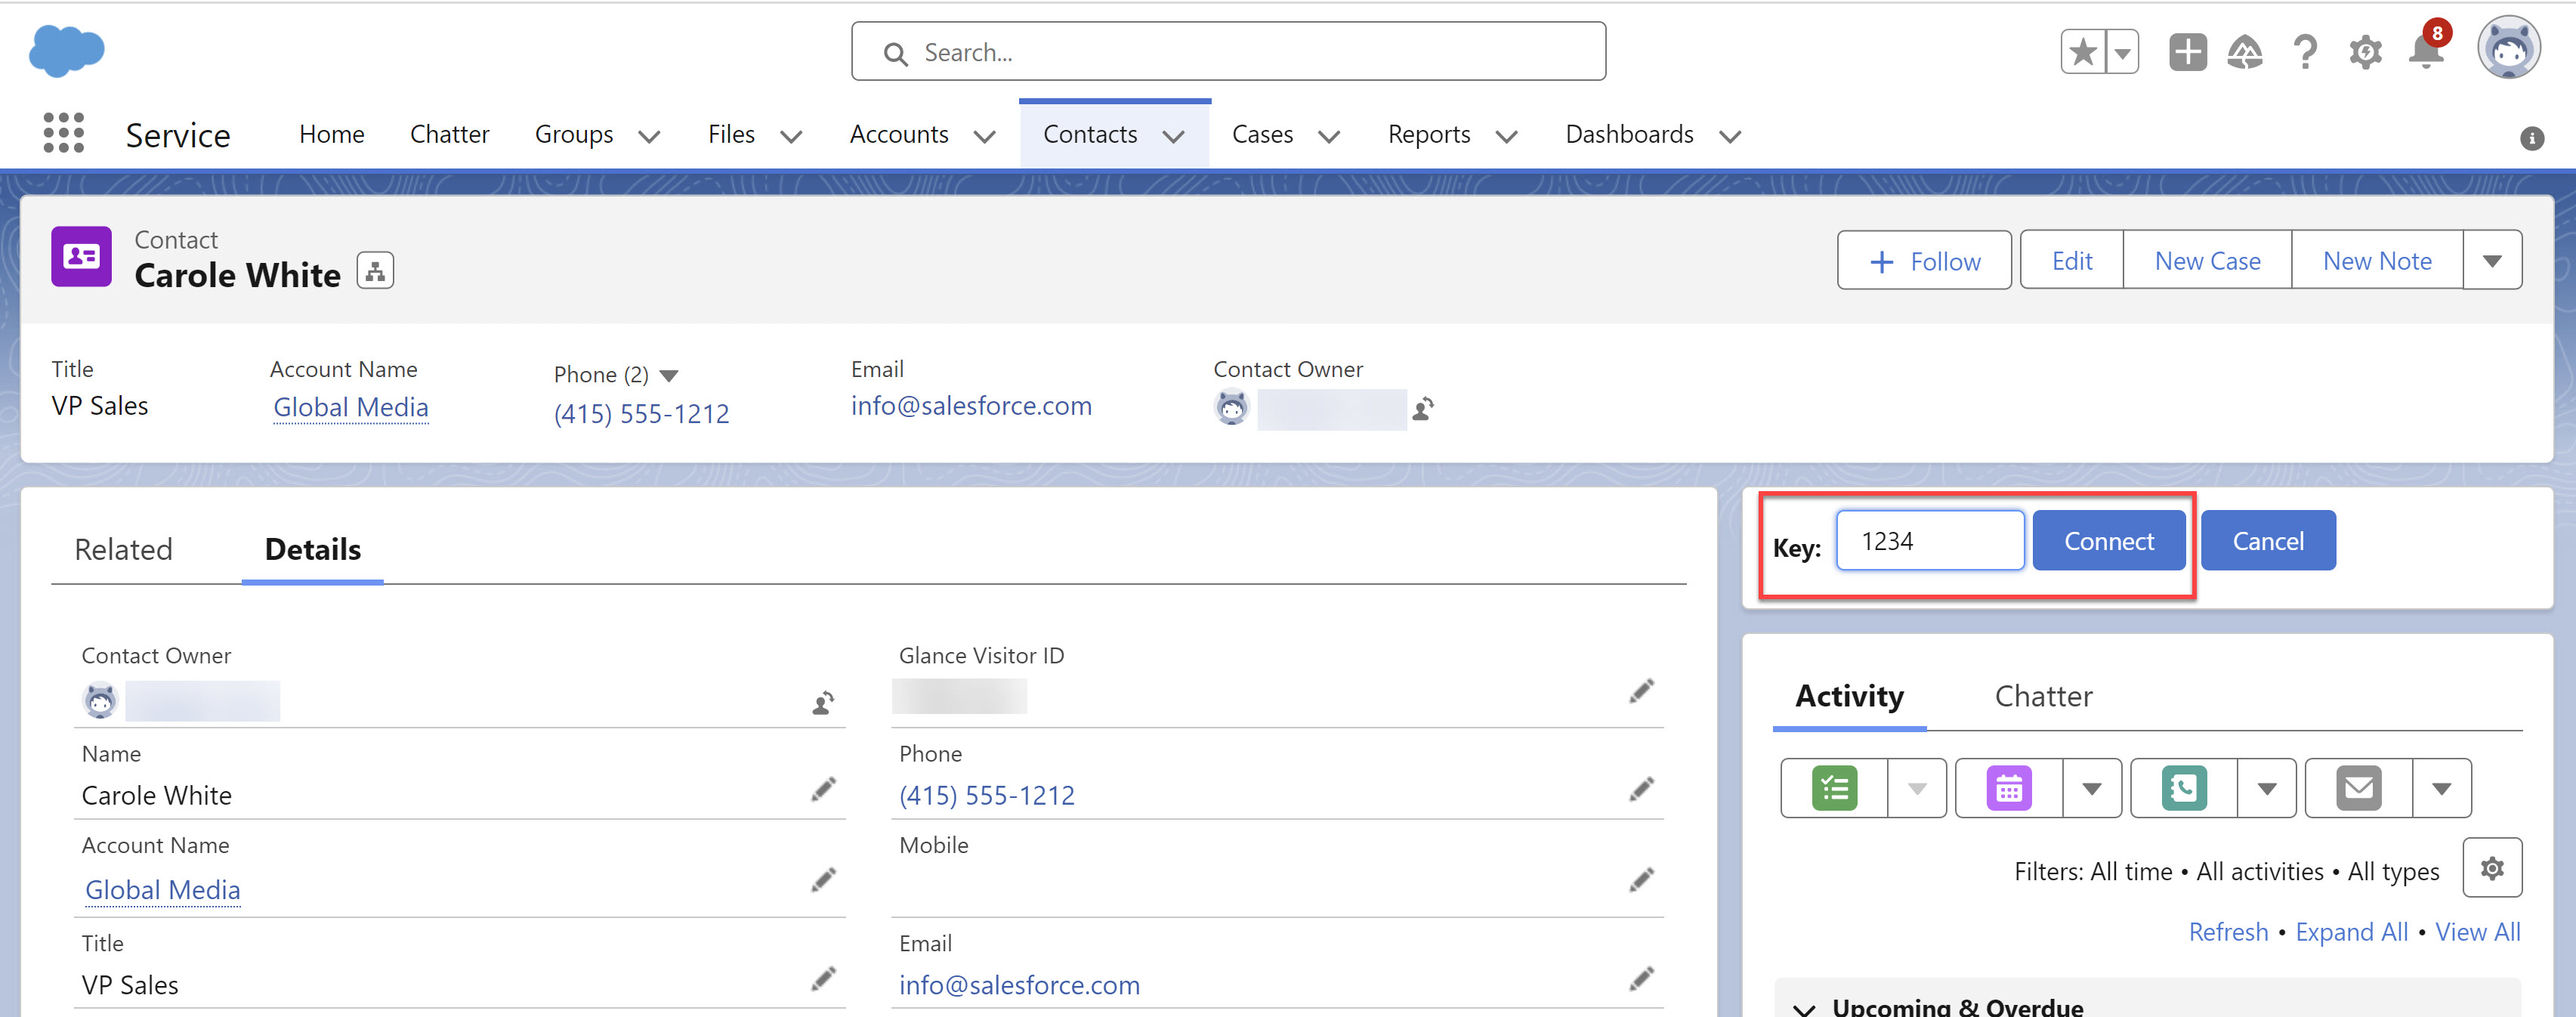 6. The visitor and agent are connected.
## Joining Mobile Camera Share Sessions
1. Navigate to the object where you would like to start a session, for example a contact or case.
2. Send a request to the visitor to share their mobile video through a text message.
6. The visitor and agent are connected.
## Joining Mobile Camera Share Sessions
1. Navigate to the object where you would like to start a session, for example a contact or case.
2. Send a request to the visitor to share their mobile video through a text message.
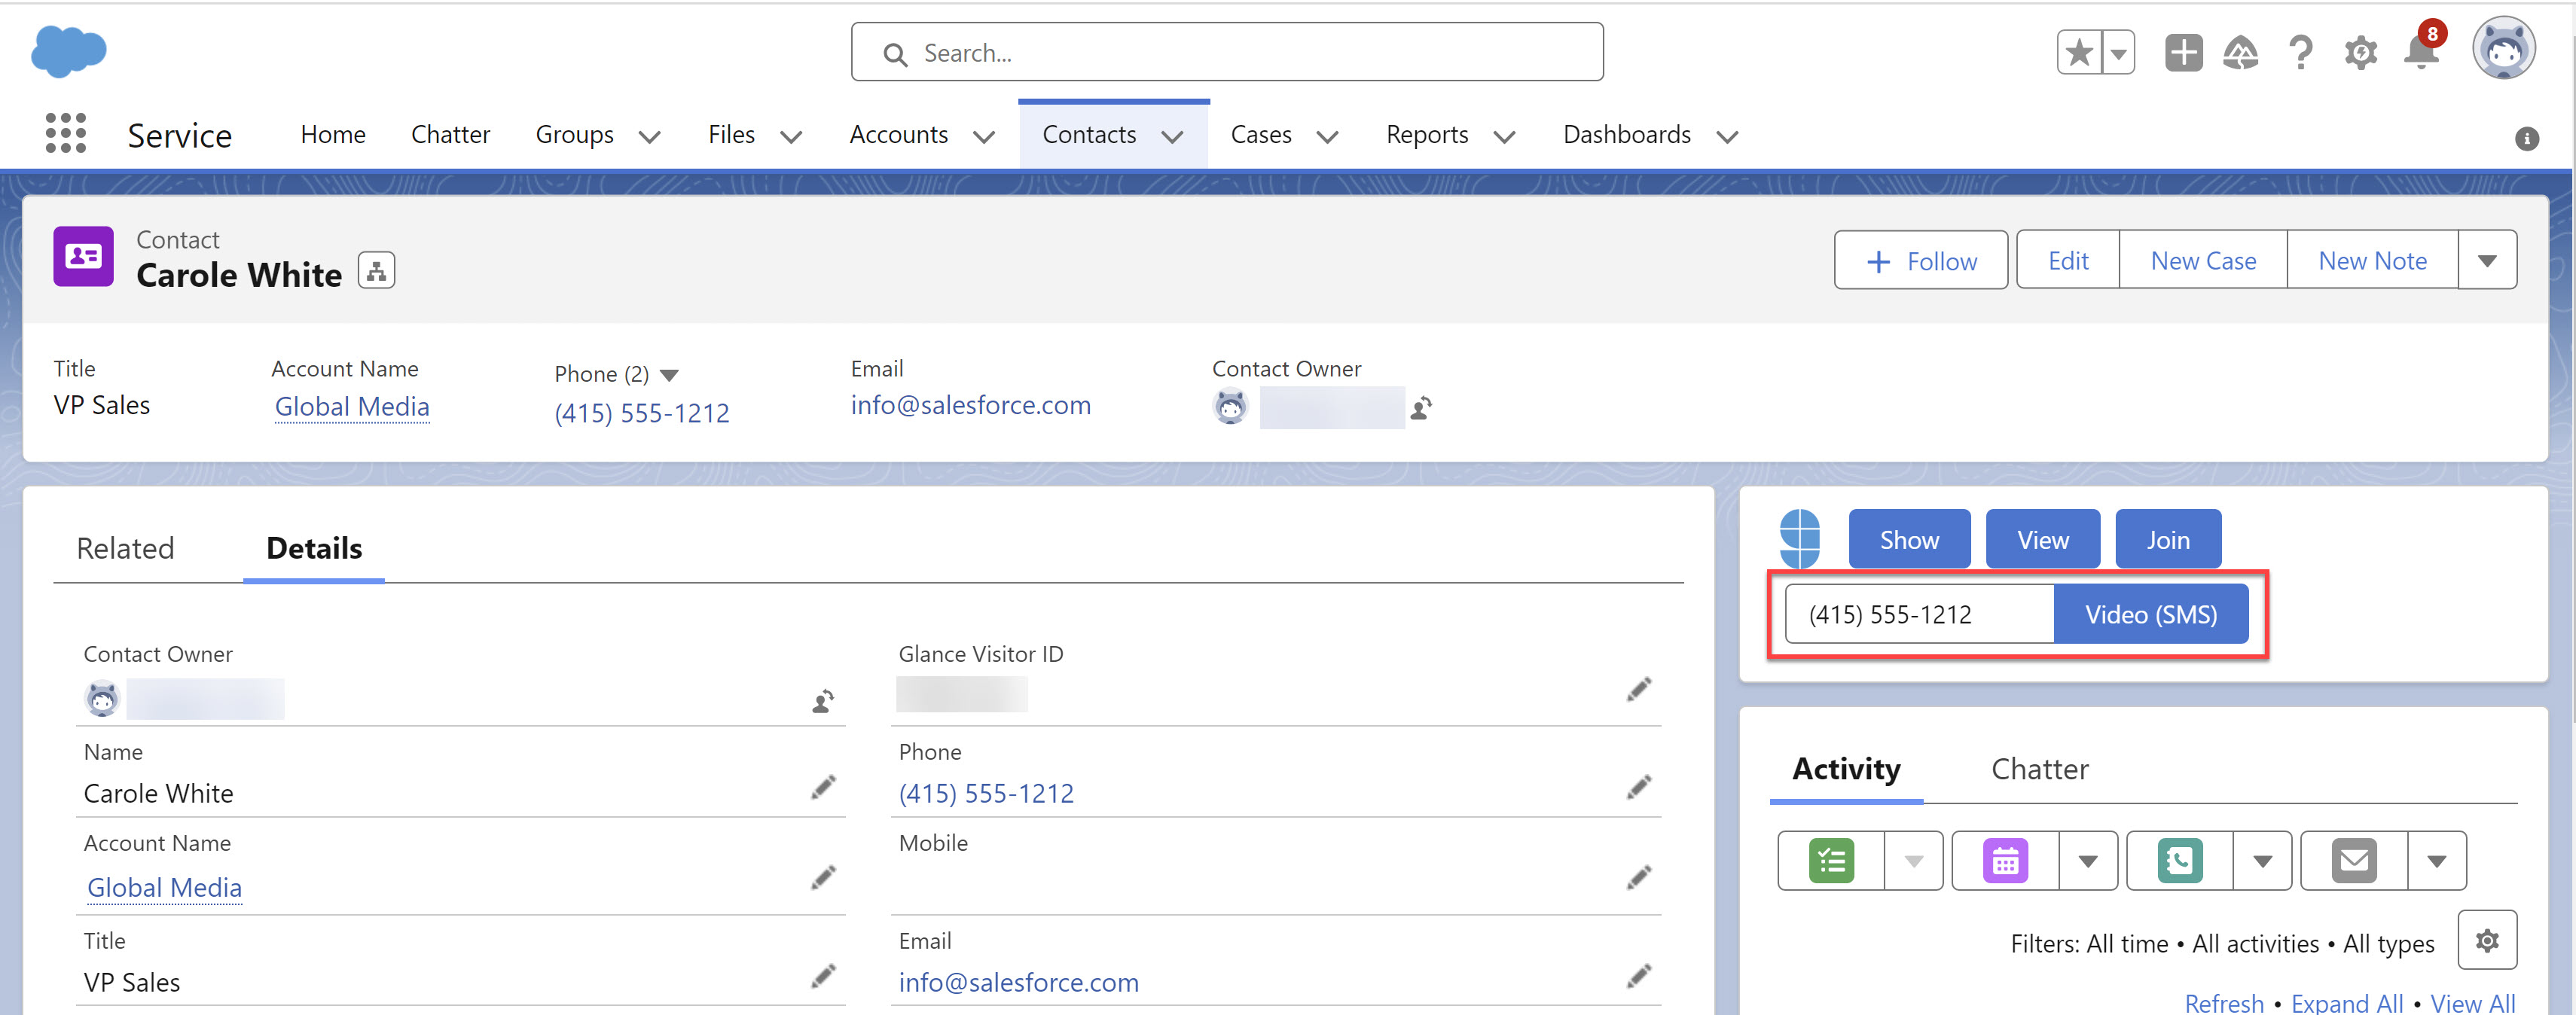 3. The visitor clicks the link in the text on their mobile device.
4. The visitor and agent are connected.
## Show My Screen
1. Navigate to the object where you would like to start a session, for example a contact or case.
2. Click the **Show** button.
3. The visitor clicks the link in the text on their mobile device.
4. The visitor and agent are connected.
## Show My Screen
1. Navigate to the object where you would like to start a session, for example a contact or case.
2. Click the **Show** button.
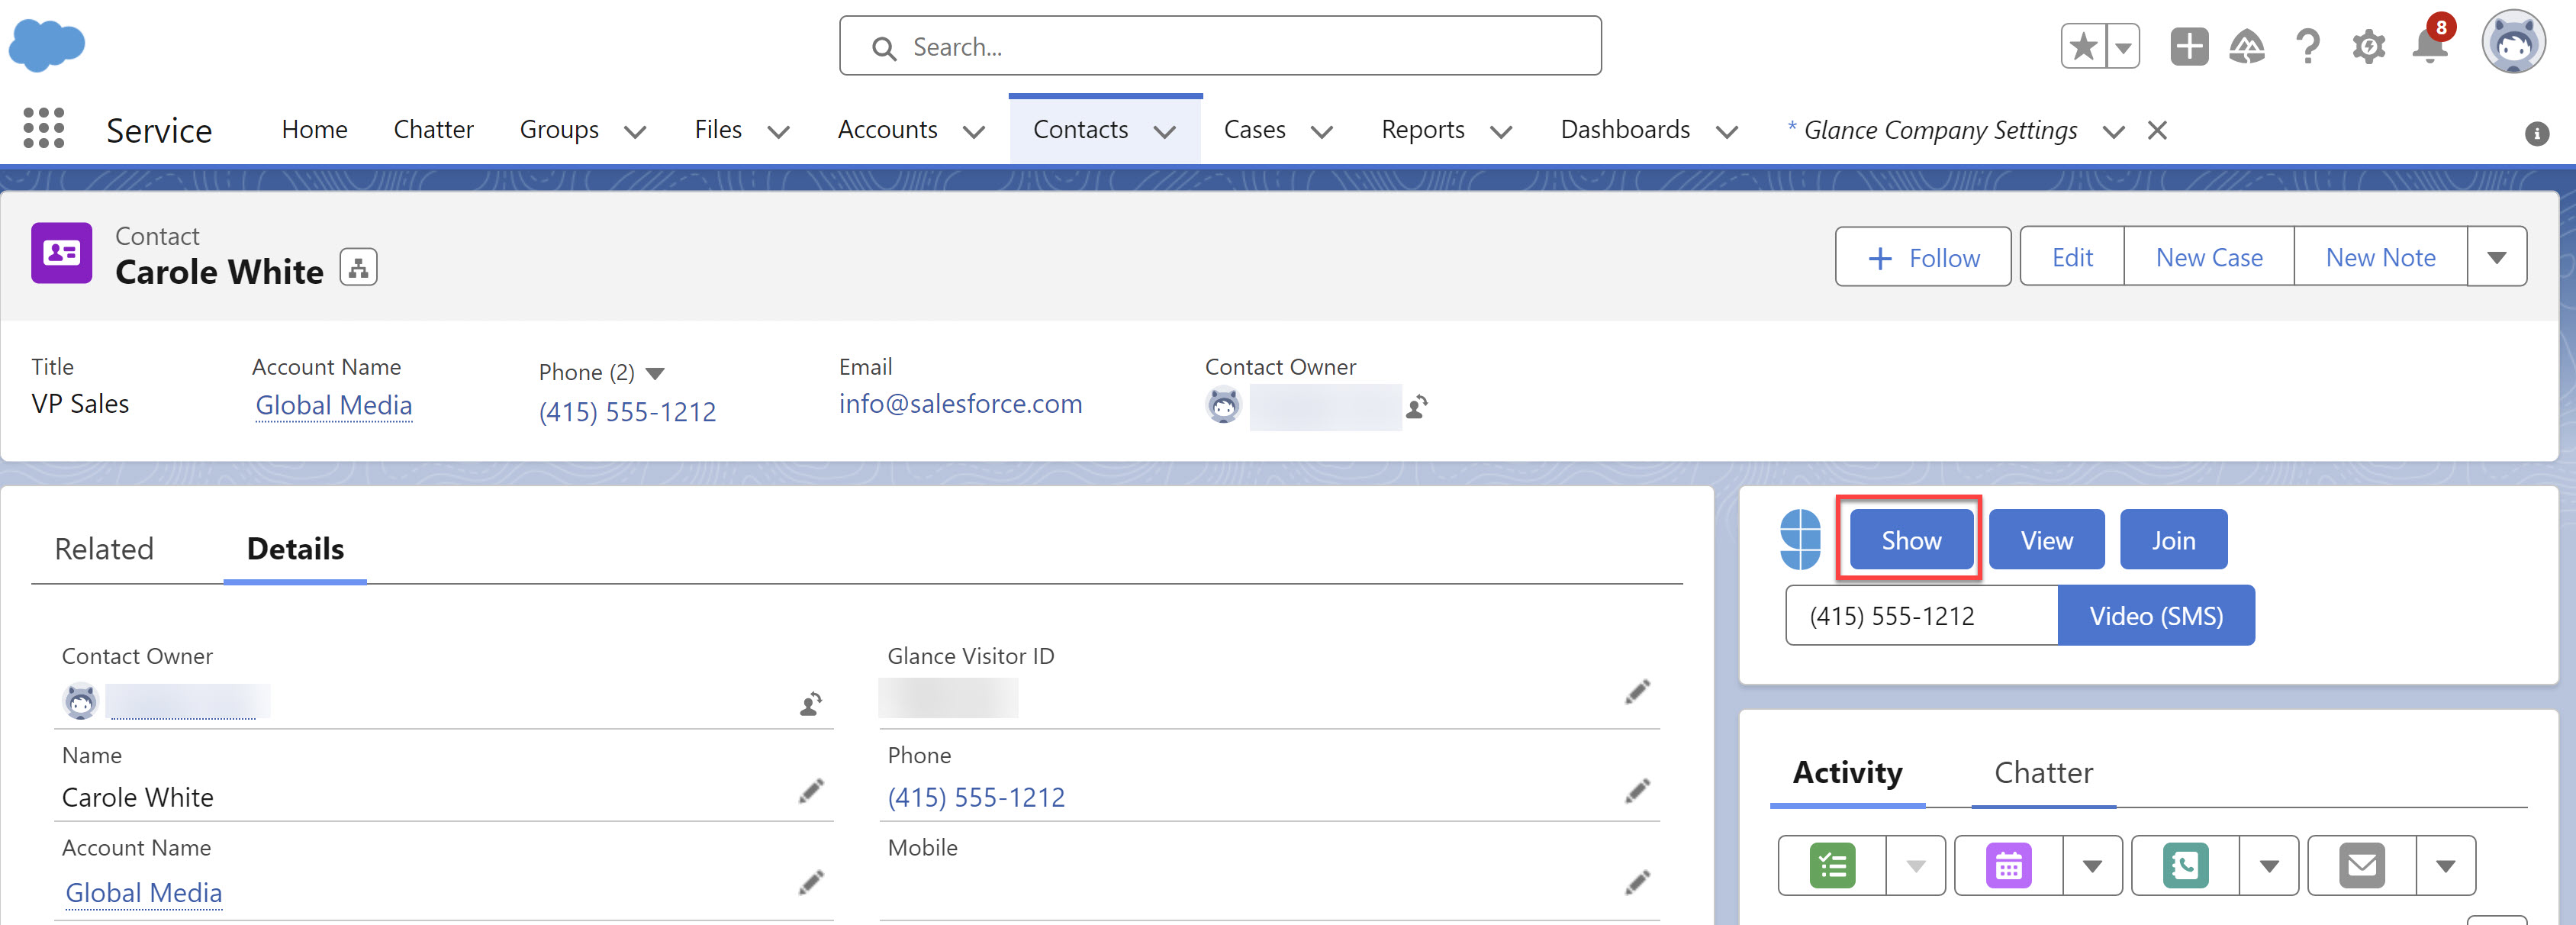
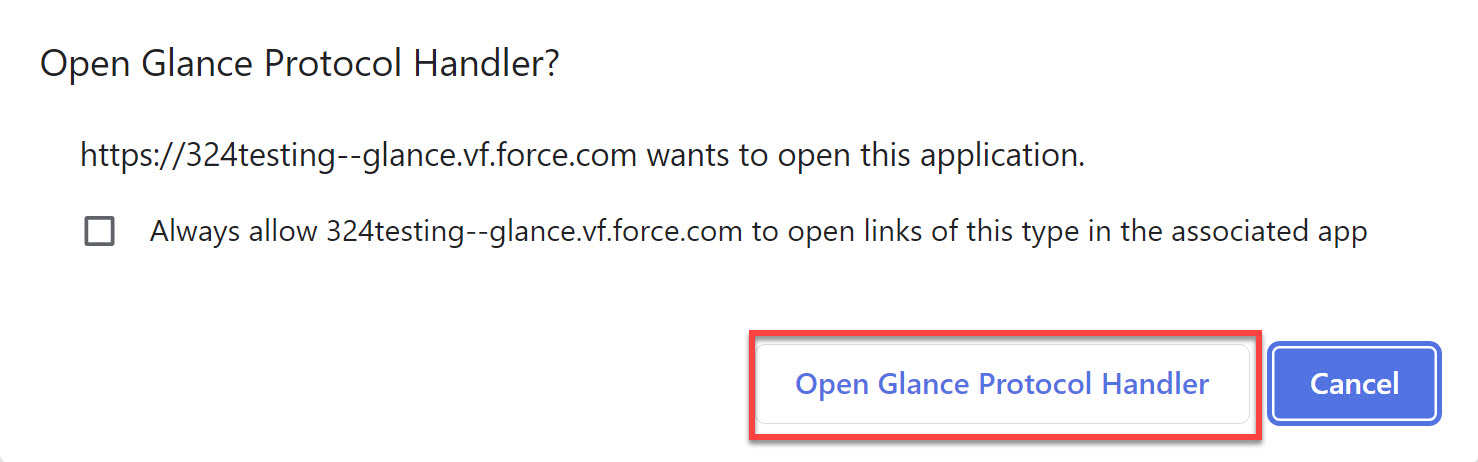 4. If you are not logged in to the Glance client, you will be prompted to do so.
5. Click **Yes** to the **Start Session** pop-up.
4. If you are not logged in to the Glance client, you will be prompted to do so.
5. Click **Yes** to the **Start Session** pop-up.
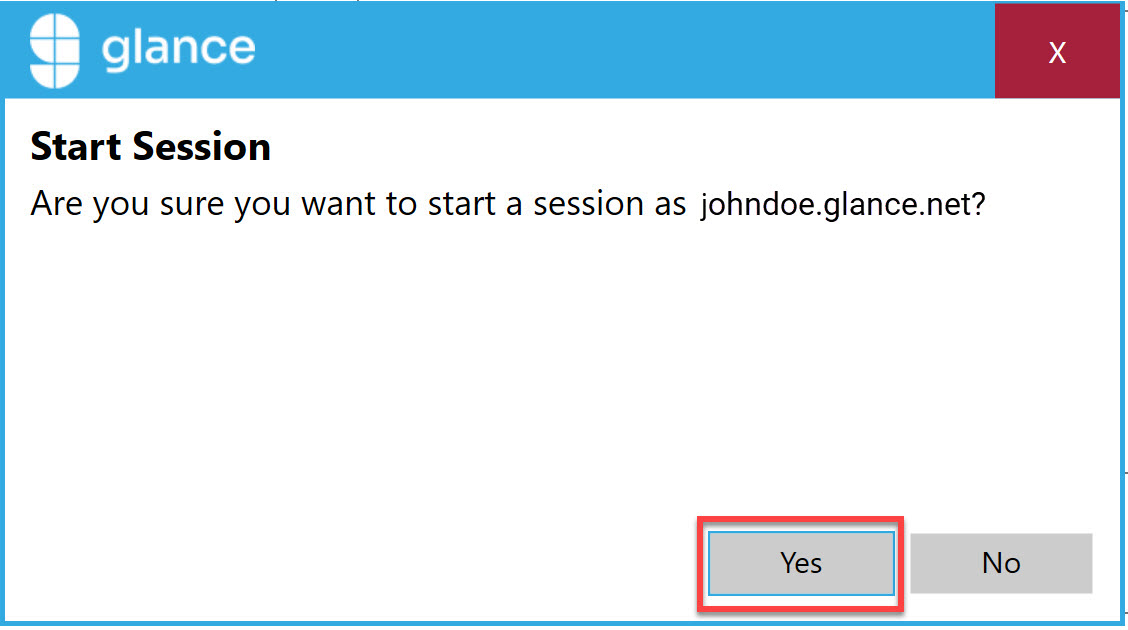 6. Provide the **Browse to** URL address from the Glance Client to the visitor.
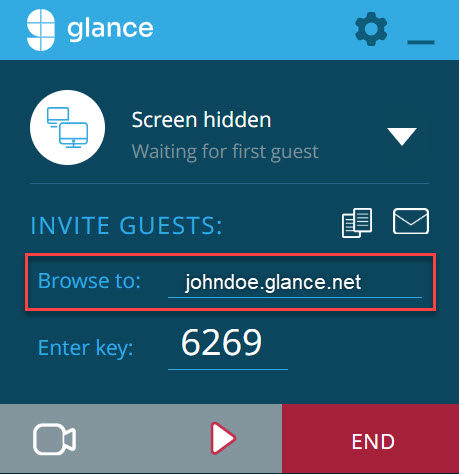 7. The visitor navigates to the URL provided and inputs the session key if required.
8. The visitor clicks **Join**.
9. The agent is now sharing their screen with the visitor.
## View Their Screen
1. Navigate to the object where you would like to start a session, for example a contact or case.
2. Click the **View** button.
7. The visitor navigates to the URL provided and inputs the session key if required.
8. The visitor clicks **Join**.
9. The agent is now sharing their screen with the visitor.
## View Their Screen
1. Navigate to the object where you would like to start a session, for example a contact or case.
2. Click the **View** button.
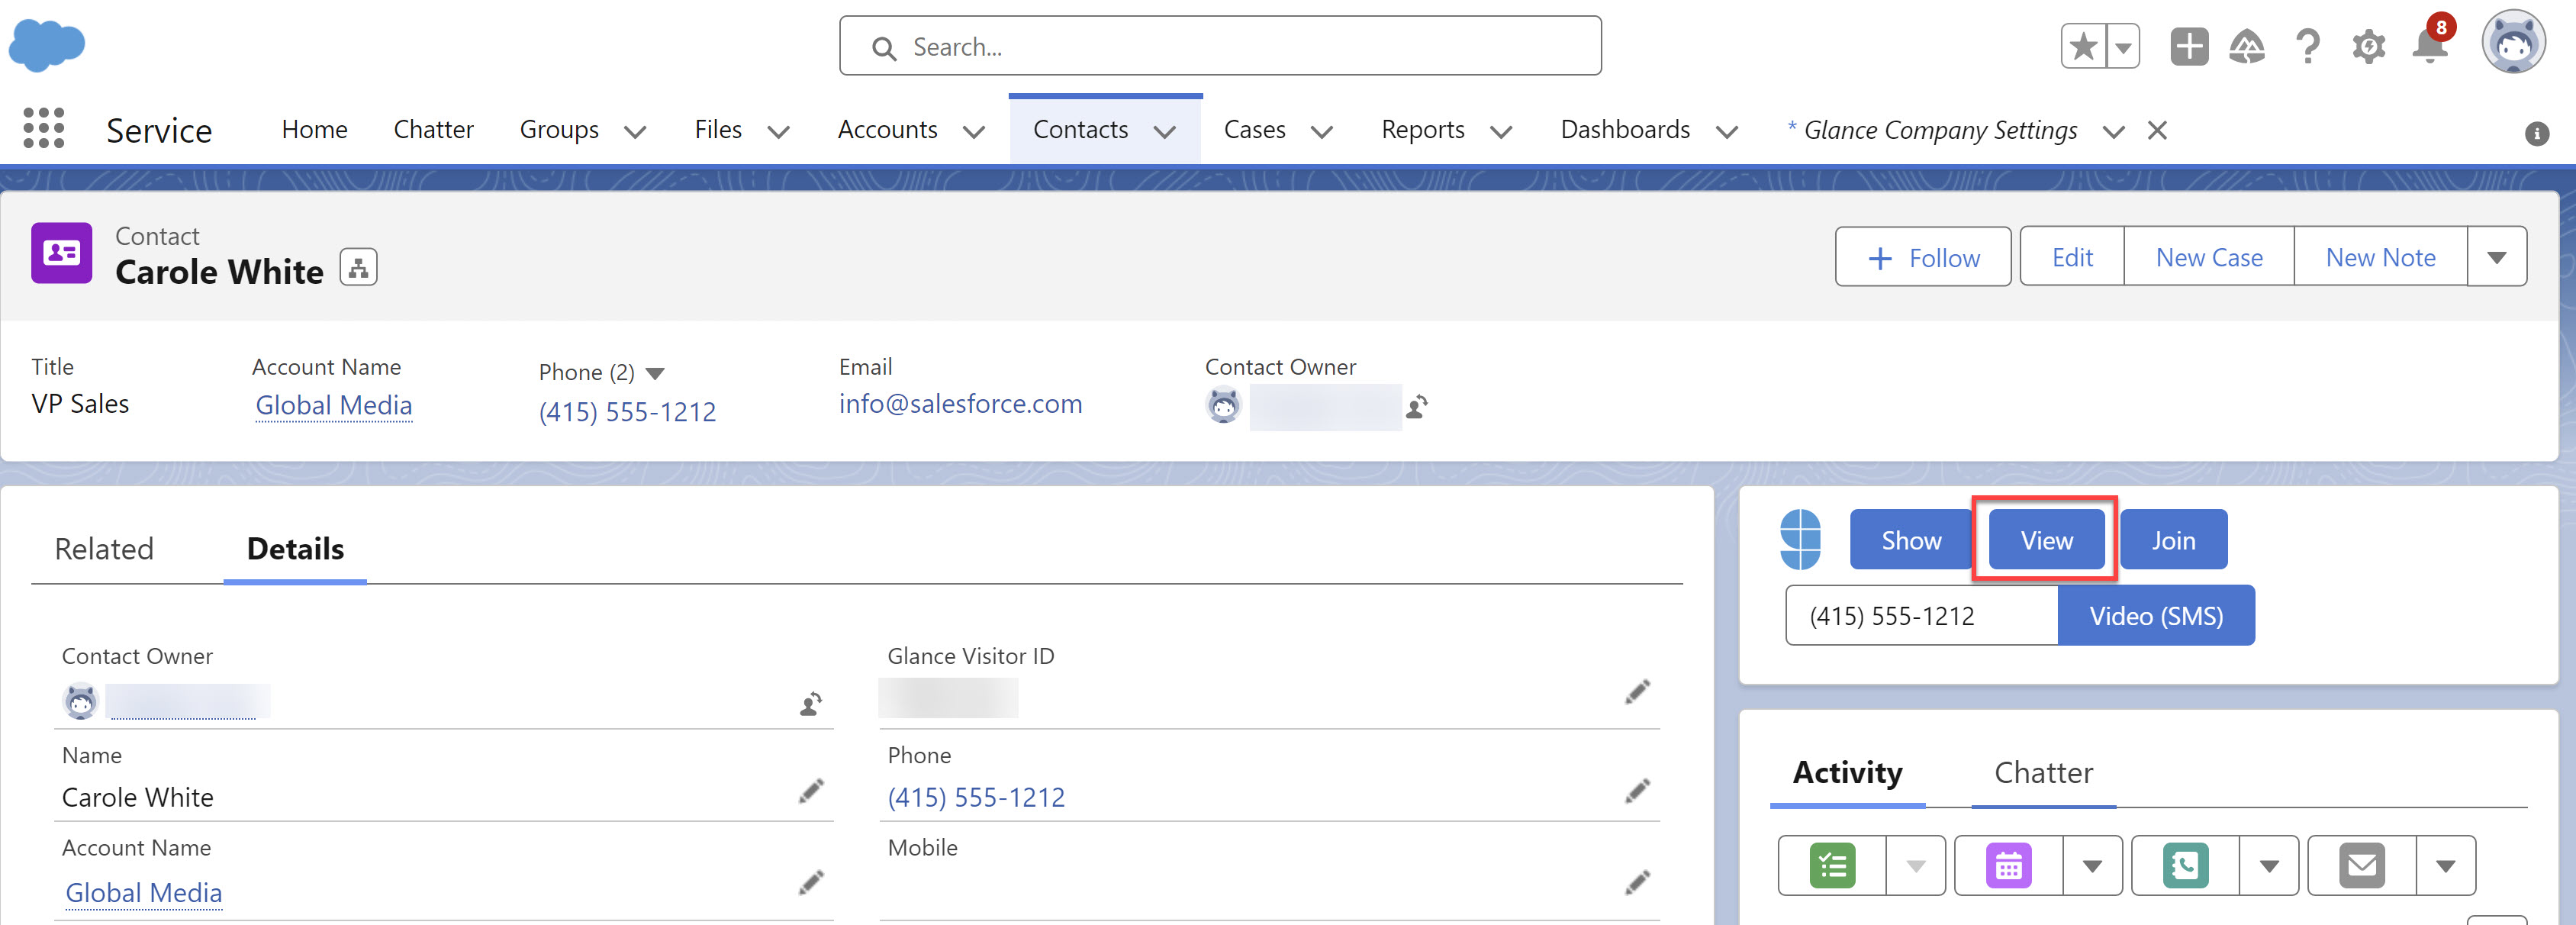
_**Note:** If this is your first time using View Screen from Salesforce you will need to click the allow pop-ups notification and install the Glance extension._ 3. Click the **Open Glance Protocol Handler** button on the pop-up.
4. If you are not logged in to the Glance client, you will be prompted to do so.
5. Click **Yes** to the **Start Session** pop-up.
6. Provide the **Browse to** URL address from the Glance Client to the visitor.
7. The visitor navigates to the URL provided and inputs the session key if required.
8. The visitor clicks **Join**.
9. The visitor receives a notification that the agent will be viewing their screen. Click **Allow**.
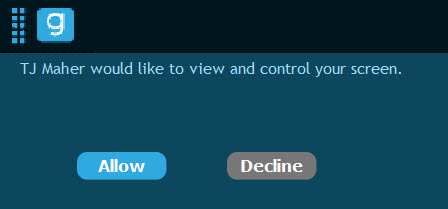 10. The agent is now viewing the visitor's screen.
=================================================================
FILE: /developer/integrations/salesforce/miaw_sf
=================================================================
Glance leverages Presence to enable 1-Click Connect during chat sessions using the Chat ID as the Glance Visitor ID. The following steps are to set this up.
10. The agent is now viewing the visitor's screen.
=================================================================
FILE: /developer/integrations/salesforce/miaw_sf
=================================================================
Glance leverages Presence to enable 1-Click Connect during chat sessions using the Chat ID as the Glance Visitor ID. The following steps are to set this up.
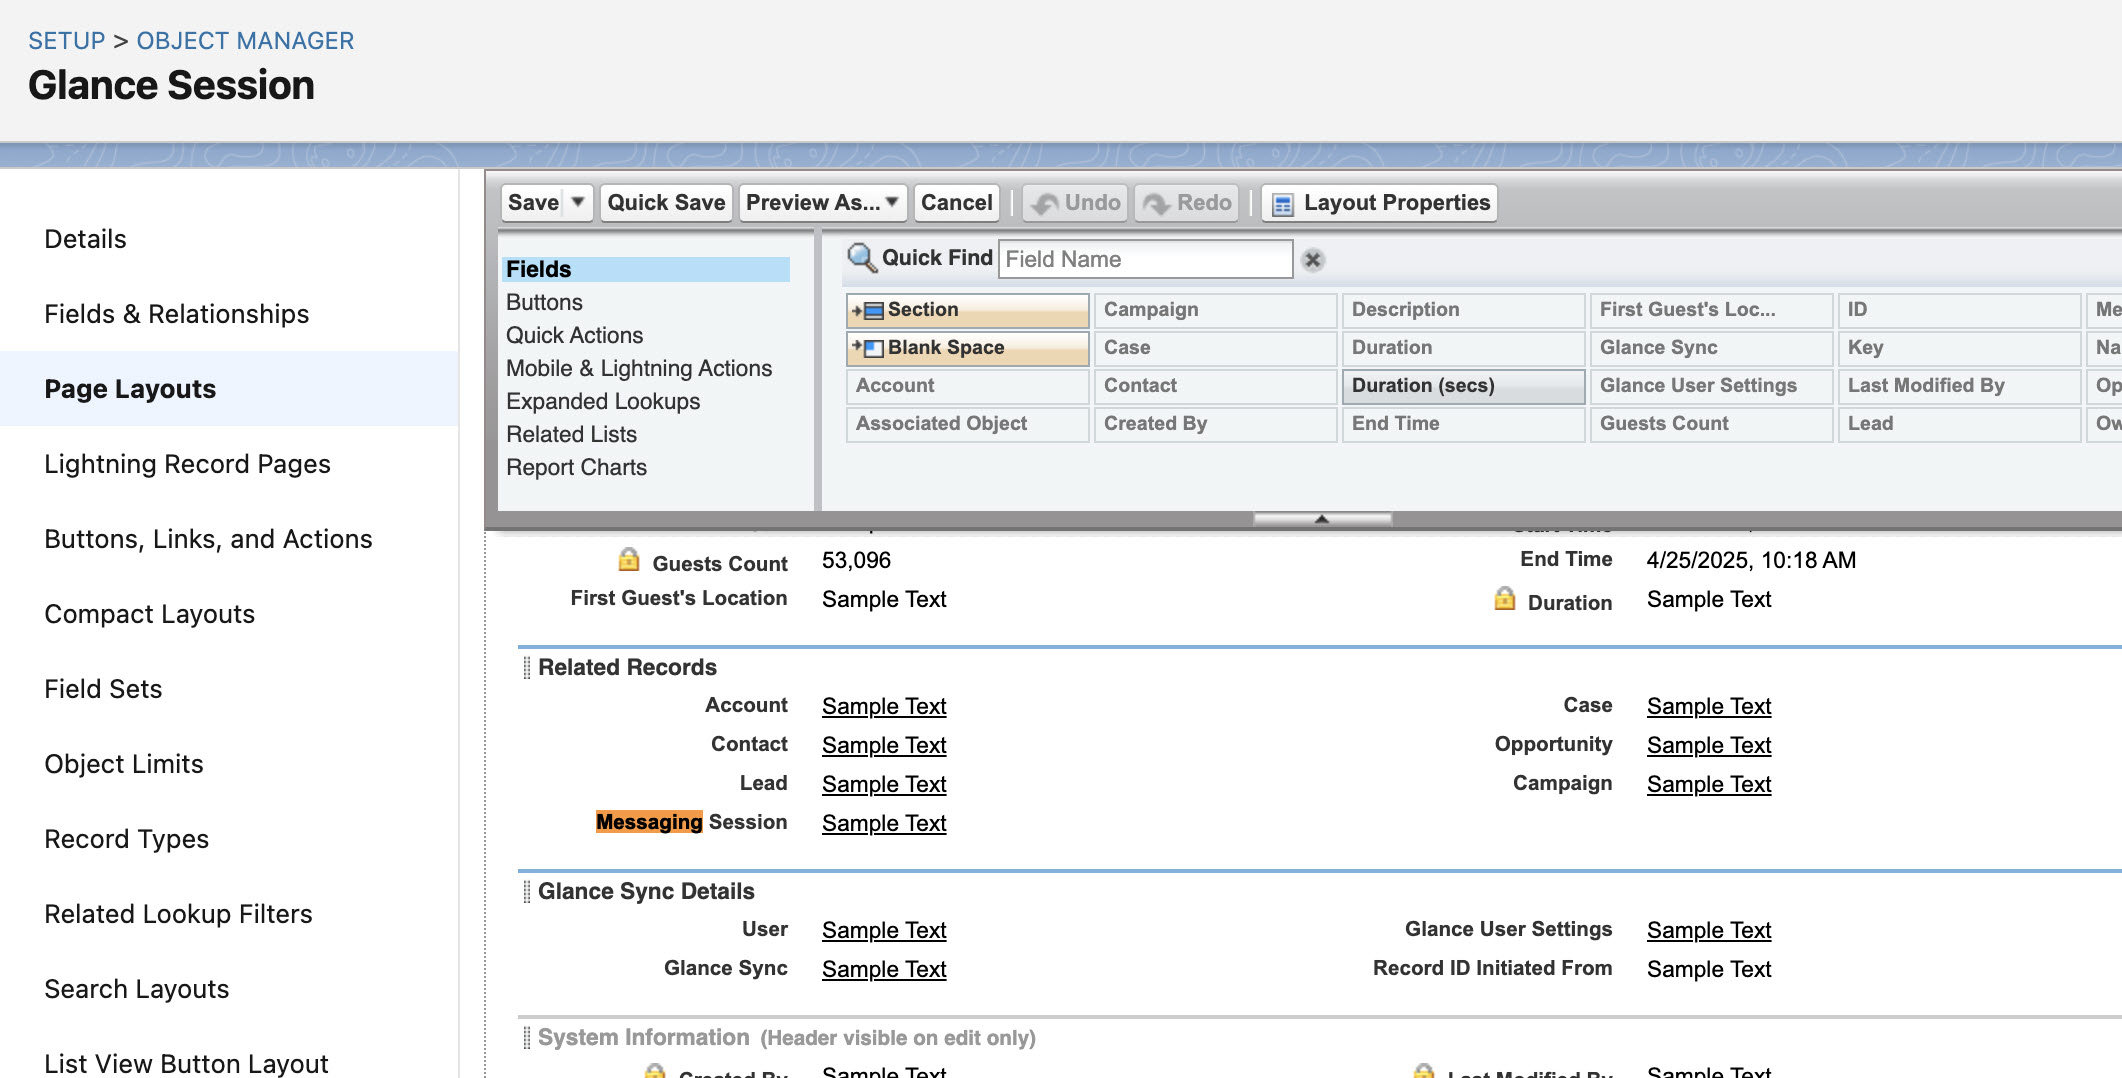 ### Configure the Glance Buttons for Glance Messaging Session
With the Lookup relationship in place, you can now configure the Glance Buttons.
1. Return to **Glance Company Settings** from the **App Launcher** or from the Glance app.
2. At the top, click **Edit**.
3. In the Glance Buttons section, click **Add**.
4. In the new row where it says **-None-**, click the dropdown and select **Messaging Session**.
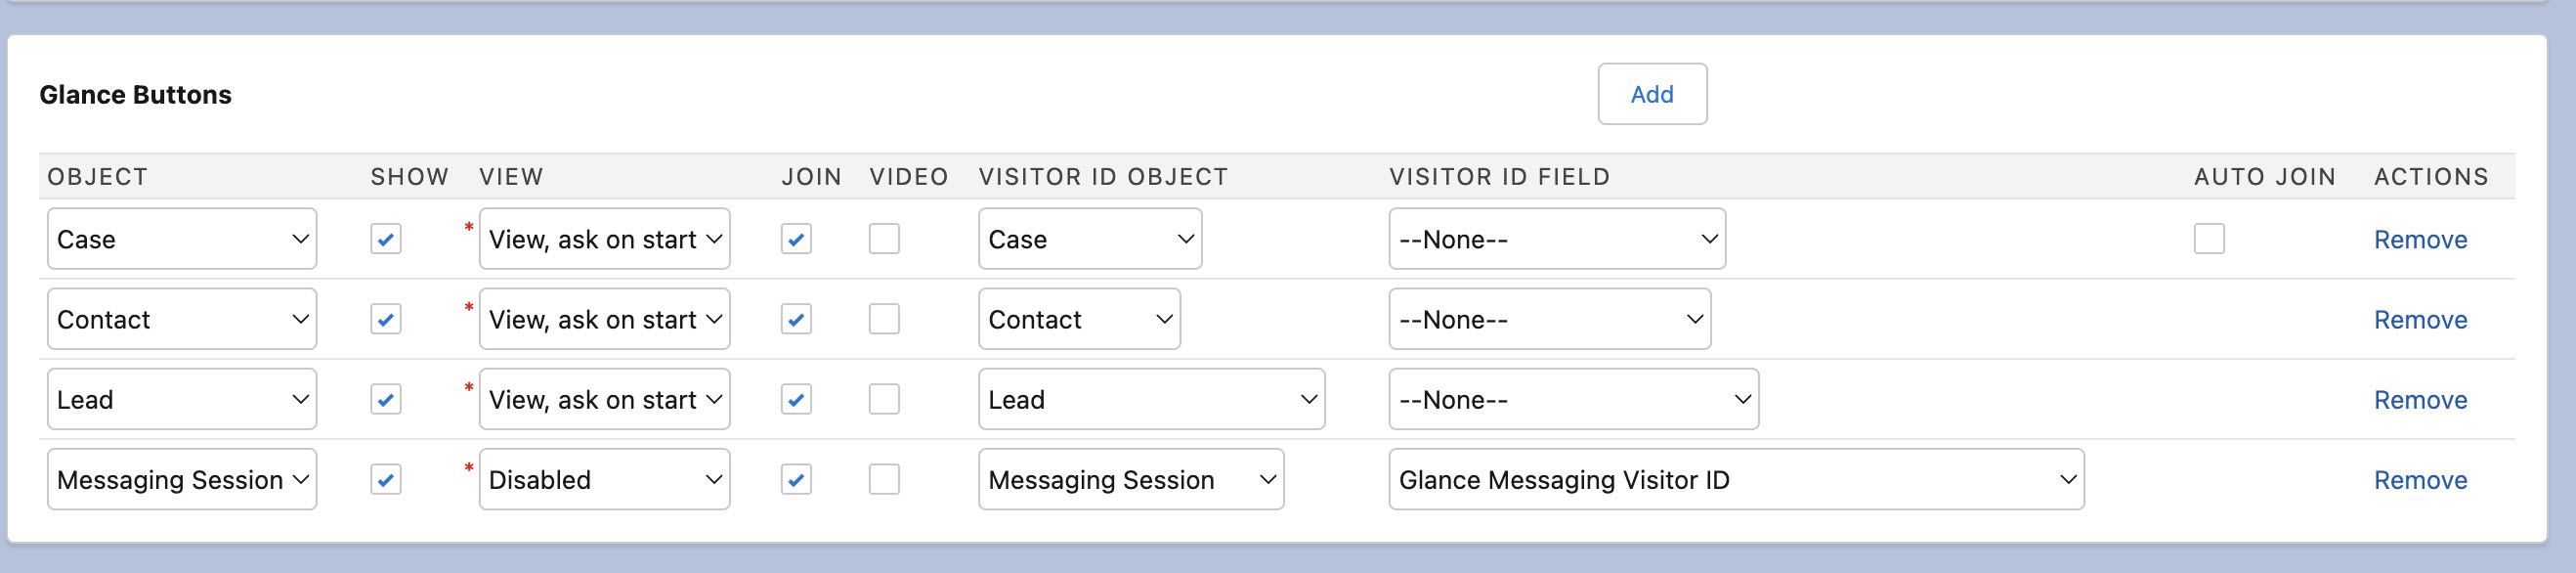
5. In the row, disable **Show** and **View**, but make sure that **Join** is enabled.
6. Under **Visitor ID Object**, select **Messaging Session**.
7. Under **Visitor ID Field**, select **Glance Messaging Visitor ID**.
8. Scroll back to the top and click **Save**.
9. It should look like this:
### Configure the Glance Buttons for Glance Messaging Session
With the Lookup relationship in place, you can now configure the Glance Buttons.
1. Return to **Glance Company Settings** from the **App Launcher** or from the Glance app.
2. At the top, click **Edit**.
3. In the Glance Buttons section, click **Add**.
4. In the new row where it says **-None-**, click the dropdown and select **Messaging Session**.
5. In the row, disable **Show** and **View**, but make sure that **Join** is enabled.
6. Under **Visitor ID Object**, select **Messaging Session**.
7. Under **Visitor ID Field**, select **Glance Messaging Visitor ID**.
8. Scroll back to the top and click **Save**.
9. It should look like this:
 ### Add the Glance Buttons to Messaging Session Lightning Record Page
After the relationship is defined and the buttons are configured, the last step is to actually add the buttons to the Lightning Record Page for your users to access.
1. From **Setup**, go to the **Object Manager**.
2. In **Quick Find**, input _Messaging Session_, then click **Messaging Session**.
3. On the left, click **Lightning Record Pages** and choose the page your agents use during Chat Sessions.
4. Click **Edit**.
5. When the builder loads up, on the left sidebar, under **Custom - Managed**, click and drag Glance over onto the console wherever you want Glance to be placed. We recommend placing it somewhere easy to see without scrolling.
6. Click **Save**.
7. If prompted, click **Activate**.
8. You might be prompted to assign the record page.
9. After you assign the record page, click **Save**.
10. In the top right corner, click **Back** to return to **Setup**.
## Configure your website for Glance with Chat
You also need to configure your website to use the Chat ID as the Glance Visitor ID.
### Verify the Glance Cobrowse Script Position
Make sure the Glance Cobrowse script tag comes before this script tag on your web pages. In general, we encourage you to place the Glance Cobrowse script in the header of your web pages.
In the Embedded Services Chat generated code, add the following script after your Glance Cobrowse script.
Here is an example of the Cobrowse script tag and the glance chat listener script.
### Add the Glance Buttons to Messaging Session Lightning Record Page
After the relationship is defined and the buttons are configured, the last step is to actually add the buttons to the Lightning Record Page for your users to access.
1. From **Setup**, go to the **Object Manager**.
2. In **Quick Find**, input _Messaging Session_, then click **Messaging Session**.
3. On the left, click **Lightning Record Pages** and choose the page your agents use during Chat Sessions.
4. Click **Edit**.
5. When the builder loads up, on the left sidebar, under **Custom - Managed**, click and drag Glance over onto the console wherever you want Glance to be placed. We recommend placing it somewhere easy to see without scrolling.
6. Click **Save**.
7. If prompted, click **Activate**.
8. You might be prompted to assign the record page.
9. After you assign the record page, click **Save**.
10. In the top right corner, click **Back** to return to **Setup**.
## Configure your website for Glance with Chat
You also need to configure your website to use the Chat ID as the Glance Visitor ID.
### Verify the Glance Cobrowse Script Position
Make sure the Glance Cobrowse script tag comes before this script tag on your web pages. In general, we encourage you to place the Glance Cobrowse script in the header of your web pages.
In the Embedded Services Chat generated code, add the following script after your Glance Cobrowse script.
Here is an example of the Cobrowse script tag and the glance chat listener script.
YOUR_GROUP_ID_HERE.
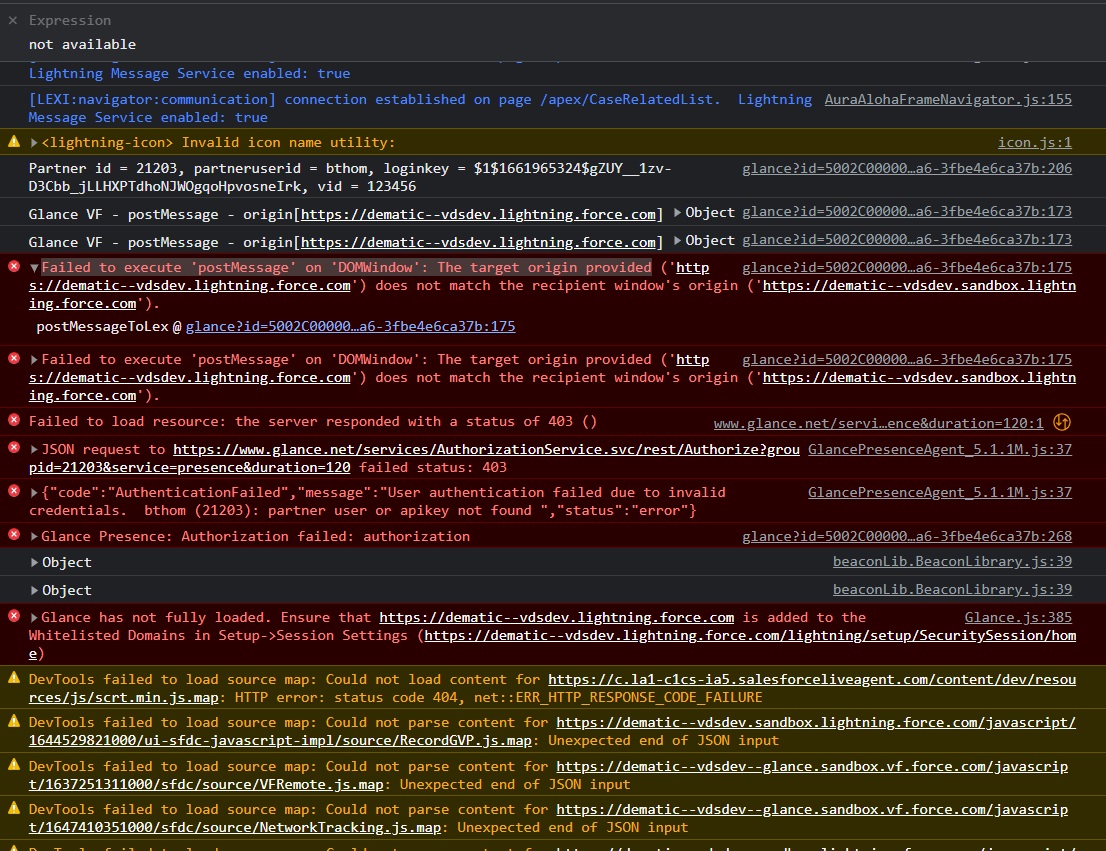 **Remediation**
If this is a sandbox of a production org, verify that the URL for the lightning base URL in glance company settings matched the URL for the object in the record page. Sometimes the domain for enhanced domains can take up to 24 hours to deploy. [Help And Training Community](https://help.salesforce.com/s/articleView?language=en_US&type=5&id=sf.domain_name_enhanced_enable.htm)
Additionally, verify you have not copy/pasted the domain into a text editor, there is a `- -` dash that can get converted into an em dash `- ` accidentally.
**Problem Description**
When I click the join button I get the whitelisting error and I have already tried adding the Visual Force URL and Lightning URL to Glance Company Settings.
**Remediation**
Add the Lightning URL to **Setup** > **Session Settings** > **Trusted Domains for Inline Frames** exactly as it appears in the error message.
## Error: My users don't see the Glance buttons
**Console:** Classic
**Problem Description**
When enabling a visualforce page with Glance buttons in Salesforce Classic, you added Glance buttons to your visualforce page and saved it following these instructions. When you went to look at case details, you had no Glance buttons.
**Remediation**
Edit your case assignment rules to use the new page layout with Glance buttons.
To edit case assignment rules:
1. Enter the object you want to add Glance buttons to in the quick find bar. This example uses cases.
2. Under **Cases**, select **Case Page Layout**.
3. At the top of your **Case Page Layouts**, select the **Page Layout Assignment** button.
4. Click **Edit Assignment**.
5. Select the profiles for which you want to enable the Glance buttons.
6. From the **Page Layout to Use** menu, select the page layout that you added glance buttons to.
7. Click **Save**.
Go back to **Case Details** to verify your case has buttons now.
## Error: Glance configuration problem. Cannot find Glance User. Contact your Glance Administrator.
**Problem Description**
This error appears after the user clicks Join, or after clicking Join, entering the key and clicking Connect.
**Remediation**
This issue occurs if:
* A user has no federation ID.
* A user has a federation ID that does not match any in the group.
* The Glance Company settings use a custom field for the PUID that is hidden from the user. To fix this, the custom field (with the PUID in it) must be marked as 'Visible' for the user (or the user's role).
## Error: Glance configuration problem. Glance API key error. Contact your Glance Administrator.
**Problem Description**
This can occur if the loginkey hash is invalid (partnerid, partneruserid or APIKey may not match hash).
**Remediation**
Check the API key in Glance Company Settings.
## Sandbox origin mismatch error (Console error: Glance VF - message skipped - origin mismatch)
**Problem Description**
Presence won't work after initial setup. You might receive `Console error: Glance VF - message skipped - origin mismatch` or `vid=null` in the console.
**Remediation**
This may occur if the agent doesn't have access to the field in which presence is configured. To resolve, pick a field that is displayed on the page and confirm the value.
## Glance component just keeps spinning when a user attempts to load the Glance component inside a Salesforce object.
**Problem Description**
This occurs when the user does not have the Glance user permission set.
**Remediation**
Add the Glance user permission set to that user.
## Error: I click Join and nothing happens
**Problem Description**
After entering a session key, I click Join and nothing happens.
**Remediation**
The pop-up blocker may be preventing an agent from joining a session.
1. Click the pop-up icon in the address bar.
2. Click **Always allow popups from Glance** and then click the link above it (this is only required to do once).
## Error: Trusted domain issue, please enable your domain
**Problem Description**
I get an error that says "trusted domain issue, please enable your domain"
**Remediation**
If you use Safari, go to Privacy settings and verify that "prevent cross-site tracking" is not selected.
## Error: Glance Has Not Fully Loaded
**Problem Description**
Users receive this message when opening Salesforce objects with Glance buttons.
**Remediation**
If this is a sandbox of a production org, verify that the URL for the lightning base URL in glance company settings matched the URL for the object in the record page. Sometimes the domain for enhanced domains can take up to 24 hours to deploy. [Help And Training Community](https://help.salesforce.com/s/articleView?language=en_US&type=5&id=sf.domain_name_enhanced_enable.htm)
Additionally, verify you have not copy/pasted the domain into a text editor, there is a `- -` dash that can get converted into an em dash `- ` accidentally.
**Problem Description**
When I click the join button I get the whitelisting error and I have already tried adding the Visual Force URL and Lightning URL to Glance Company Settings.
**Remediation**
Add the Lightning URL to **Setup** > **Session Settings** > **Trusted Domains for Inline Frames** exactly as it appears in the error message.
## Error: My users don't see the Glance buttons
**Console:** Classic
**Problem Description**
When enabling a visualforce page with Glance buttons in Salesforce Classic, you added Glance buttons to your visualforce page and saved it following these instructions. When you went to look at case details, you had no Glance buttons.
**Remediation**
Edit your case assignment rules to use the new page layout with Glance buttons.
To edit case assignment rules:
1. Enter the object you want to add Glance buttons to in the quick find bar. This example uses cases.
2. Under **Cases**, select **Case Page Layout**.
3. At the top of your **Case Page Layouts**, select the **Page Layout Assignment** button.
4. Click **Edit Assignment**.
5. Select the profiles for which you want to enable the Glance buttons.
6. From the **Page Layout to Use** menu, select the page layout that you added glance buttons to.
7. Click **Save**.
Go back to **Case Details** to verify your case has buttons now.
## Error: Glance configuration problem. Cannot find Glance User. Contact your Glance Administrator.
**Problem Description**
This error appears after the user clicks Join, or after clicking Join, entering the key and clicking Connect.
**Remediation**
This issue occurs if:
* A user has no federation ID.
* A user has a federation ID that does not match any in the group.
* The Glance Company settings use a custom field for the PUID that is hidden from the user. To fix this, the custom field (with the PUID in it) must be marked as 'Visible' for the user (or the user's role).
## Error: Glance configuration problem. Glance API key error. Contact your Glance Administrator.
**Problem Description**
This can occur if the loginkey hash is invalid (partnerid, partneruserid or APIKey may not match hash).
**Remediation**
Check the API key in Glance Company Settings.
## Sandbox origin mismatch error (Console error: Glance VF - message skipped - origin mismatch)
**Problem Description**
Presence won't work after initial setup. You might receive `Console error: Glance VF - message skipped - origin mismatch` or `vid=null` in the console.
**Remediation**
This may occur if the agent doesn't have access to the field in which presence is configured. To resolve, pick a field that is displayed on the page and confirm the value.
## Glance component just keeps spinning when a user attempts to load the Glance component inside a Salesforce object.
**Problem Description**
This occurs when the user does not have the Glance user permission set.
**Remediation**
Add the Glance user permission set to that user.
## Error: I click Join and nothing happens
**Problem Description**
After entering a session key, I click Join and nothing happens.
**Remediation**
The pop-up blocker may be preventing an agent from joining a session.
1. Click the pop-up icon in the address bar.
2. Click **Always allow popups from Glance** and then click the link above it (this is only required to do once).
## Error: Trusted domain issue, please enable your domain
**Problem Description**
I get an error that says "trusted domain issue, please enable your domain"
**Remediation**
If you use Safari, go to Privacy settings and verify that "prevent cross-site tracking" is not selected.
## Error: Glance Has Not Fully Loaded
**Problem Description**
Users receive this message when opening Salesforce objects with Glance buttons.
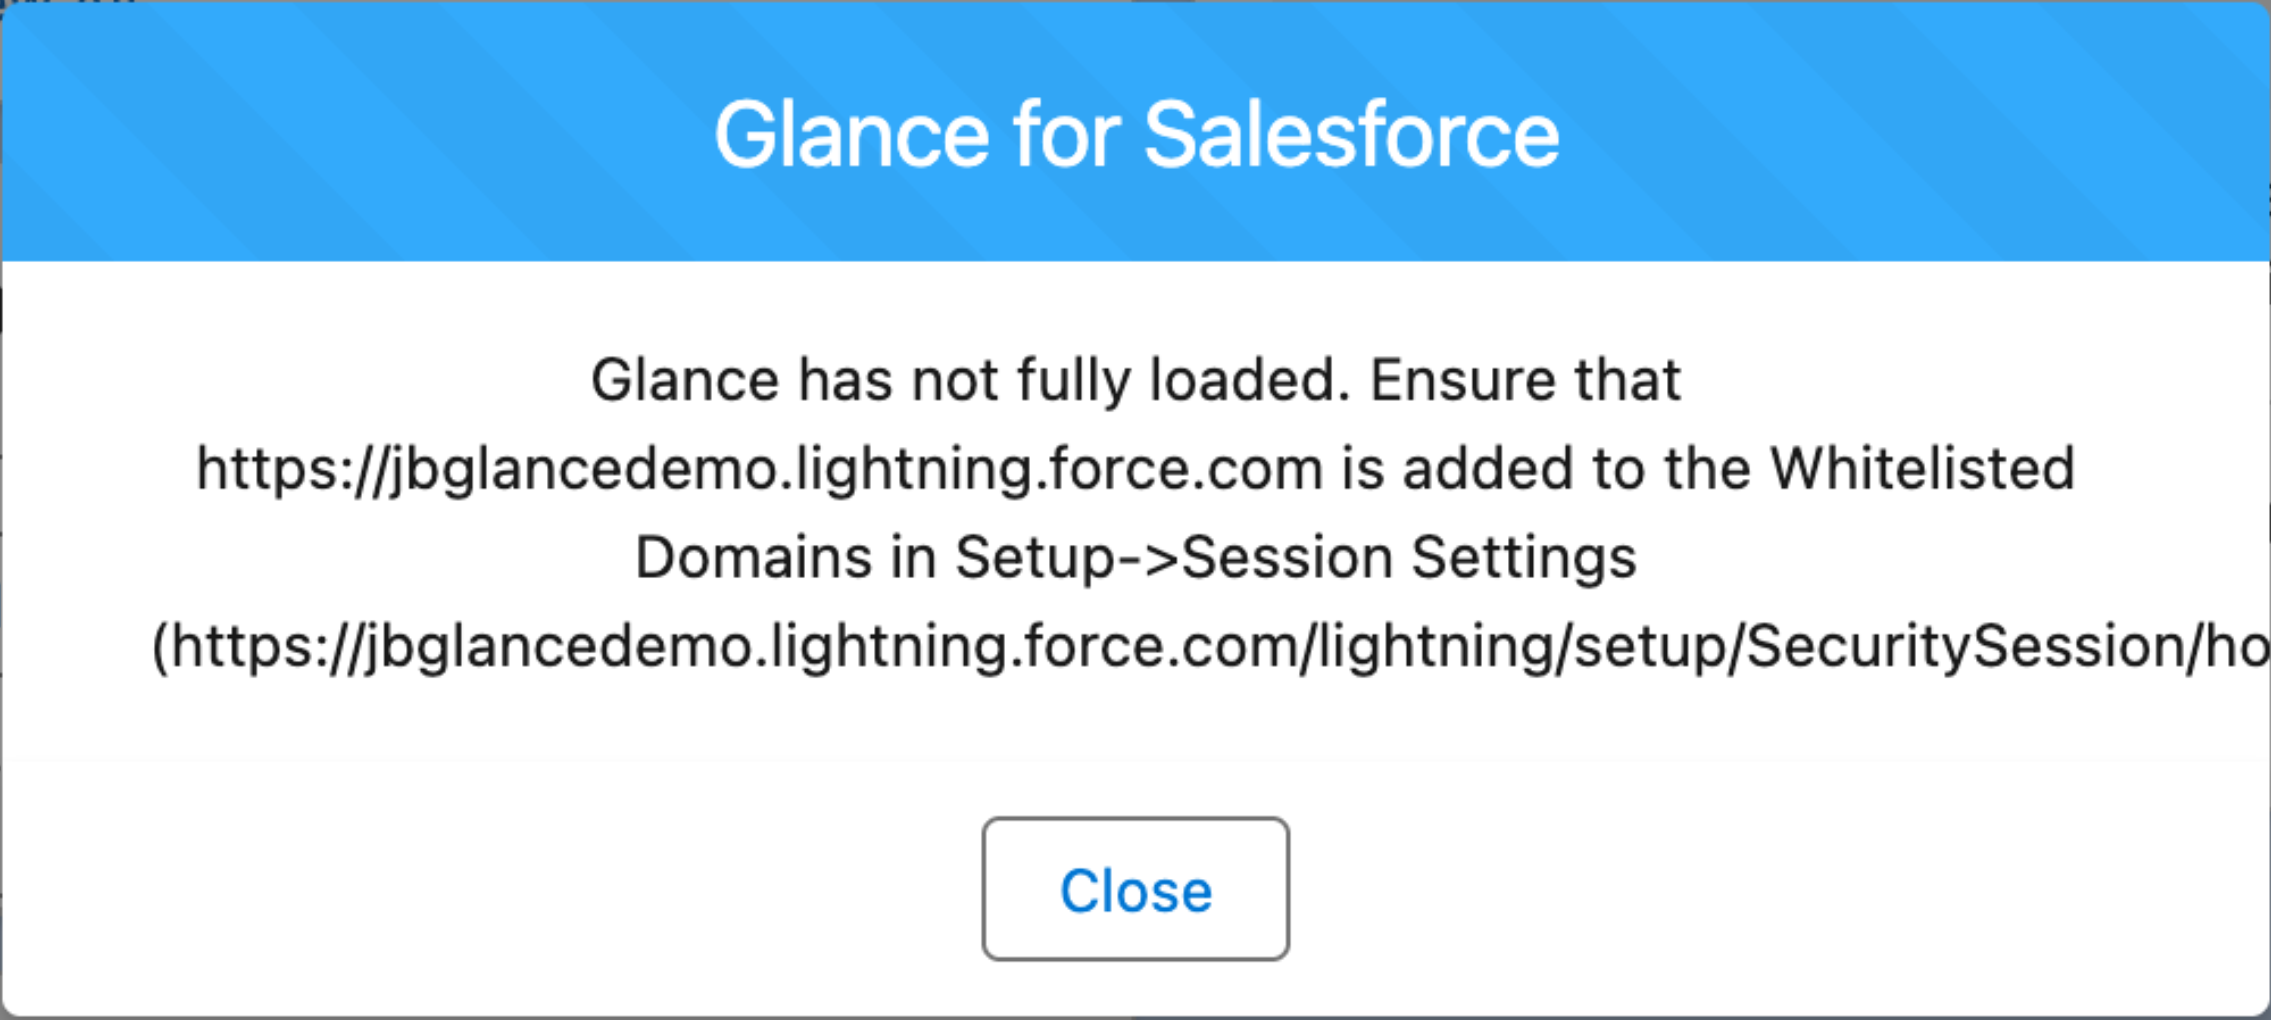 **Remediation**
* Ensure the API key is accurate for the group.
* Ensure the PUID is set appropriately in the Glance Backend Admin and the User in Salesforce.
* Make sure cookies are allowed in your browser.
* If your org uses Enhanced Domains, install the Glance Package [Glance Package](../../install_sf/#download-the-glance-for-salesforce-application) (3.12 or later), and follow the [instructions](../../sf_settings/#settings) to set the VisualForce URL.
* If you have enabled some clickjack settings, you need to whitelist your Salesforce org domain to start Glance sessions:
1. Go to Setup (gear icon).
2. In the search bar, enter "Session Settings".
3. Scroll to the **Clickjack Protection** section.
4. If **Enable clickjack protection for customer Visualforce pages with headers disabled** is selected, the salesforce org must be added to the Trusted Domains section.
5. Scroll down to the **Trusted Domains for Inline Frames** section and click **Add Domain**.
6. Add the domain listed in the error message.
7. Click **Save**.
## Error: A component error occured!
**Problem Description**
Users without access to Glance see this error when they open a Salesforce object configured with Glance buttons.
**Remediation**
Follow [these steps](../../hide_component/) to hide the Glance buttons for users without access.
=================================================================
FILE: /developer/integrations/salesforce/salesforcetrouble
=================================================================
While Glance for Salesforce is designed for seamless integration, occasional configuration mismatches, environmental restrictions, or synchronization errors can occur. This section provides targeted troubleshooting guides and remediation steps to help administrators quickly diagnose and resolve common issues to keep agents connected with customers.
Choose a troubleshooting category below to find specific error messages and their solutions:
* **[General Troubleshooting](./general/)**
Solutions for common configuration errors, missing Glance buttons, SSO/Login Key authentication failures, and clickjack protection blocks.
* **[Sync Troubleshooting](./sync/)**
Remediation steps for data synchronization failures, duplicate Glance Session records, "User Not Found" errors, and API Server Error 666.
=================================================================
FILE: /developer/integrations/salesforce/salesforcetrouble/sync
=================================================================
The following are answers to some common sync errors you may come across.
## Error: Glance session data fails to sync / "Glance API Server Error: 666 - Invalid admin credentials"
**Console: Lightning**
**Problem Description**
If your Glance session data is failing to sync with your Salesforce org, check the "Glance sync history" tab and look for this error:
**Remediation**
* Ensure the API key is accurate for the group.
* Ensure the PUID is set appropriately in the Glance Backend Admin and the User in Salesforce.
* Make sure cookies are allowed in your browser.
* If your org uses Enhanced Domains, install the Glance Package [Glance Package](../../install_sf/#download-the-glance-for-salesforce-application) (3.12 or later), and follow the [instructions](../../sf_settings/#settings) to set the VisualForce URL.
* If you have enabled some clickjack settings, you need to whitelist your Salesforce org domain to start Glance sessions:
1. Go to Setup (gear icon).
2. In the search bar, enter "Session Settings".
3. Scroll to the **Clickjack Protection** section.
4. If **Enable clickjack protection for customer Visualforce pages with headers disabled** is selected, the salesforce org must be added to the Trusted Domains section.
5. Scroll down to the **Trusted Domains for Inline Frames** section and click **Add Domain**.
6. Add the domain listed in the error message.
7. Click **Save**.
## Error: A component error occured!
**Problem Description**
Users without access to Glance see this error when they open a Salesforce object configured with Glance buttons.
**Remediation**
Follow [these steps](../../hide_component/) to hide the Glance buttons for users without access.
=================================================================
FILE: /developer/integrations/salesforce/salesforcetrouble
=================================================================
While Glance for Salesforce is designed for seamless integration, occasional configuration mismatches, environmental restrictions, or synchronization errors can occur. This section provides targeted troubleshooting guides and remediation steps to help administrators quickly diagnose and resolve common issues to keep agents connected with customers.
Choose a troubleshooting category below to find specific error messages and their solutions:
* **[General Troubleshooting](./general/)**
Solutions for common configuration errors, missing Glance buttons, SSO/Login Key authentication failures, and clickjack protection blocks.
* **[Sync Troubleshooting](./sync/)**
Remediation steps for data synchronization failures, duplicate Glance Session records, "User Not Found" errors, and API Server Error 666.
=================================================================
FILE: /developer/integrations/salesforce/salesforcetrouble/sync
=================================================================
The following are answers to some common sync errors you may come across.
## Error: Glance session data fails to sync / "Glance API Server Error: 666 - Invalid admin credentials"
**Console: Lightning**
**Problem Description**
If your Glance session data is failing to sync with your Salesforce org, check the "Glance sync history" tab and look for this error:
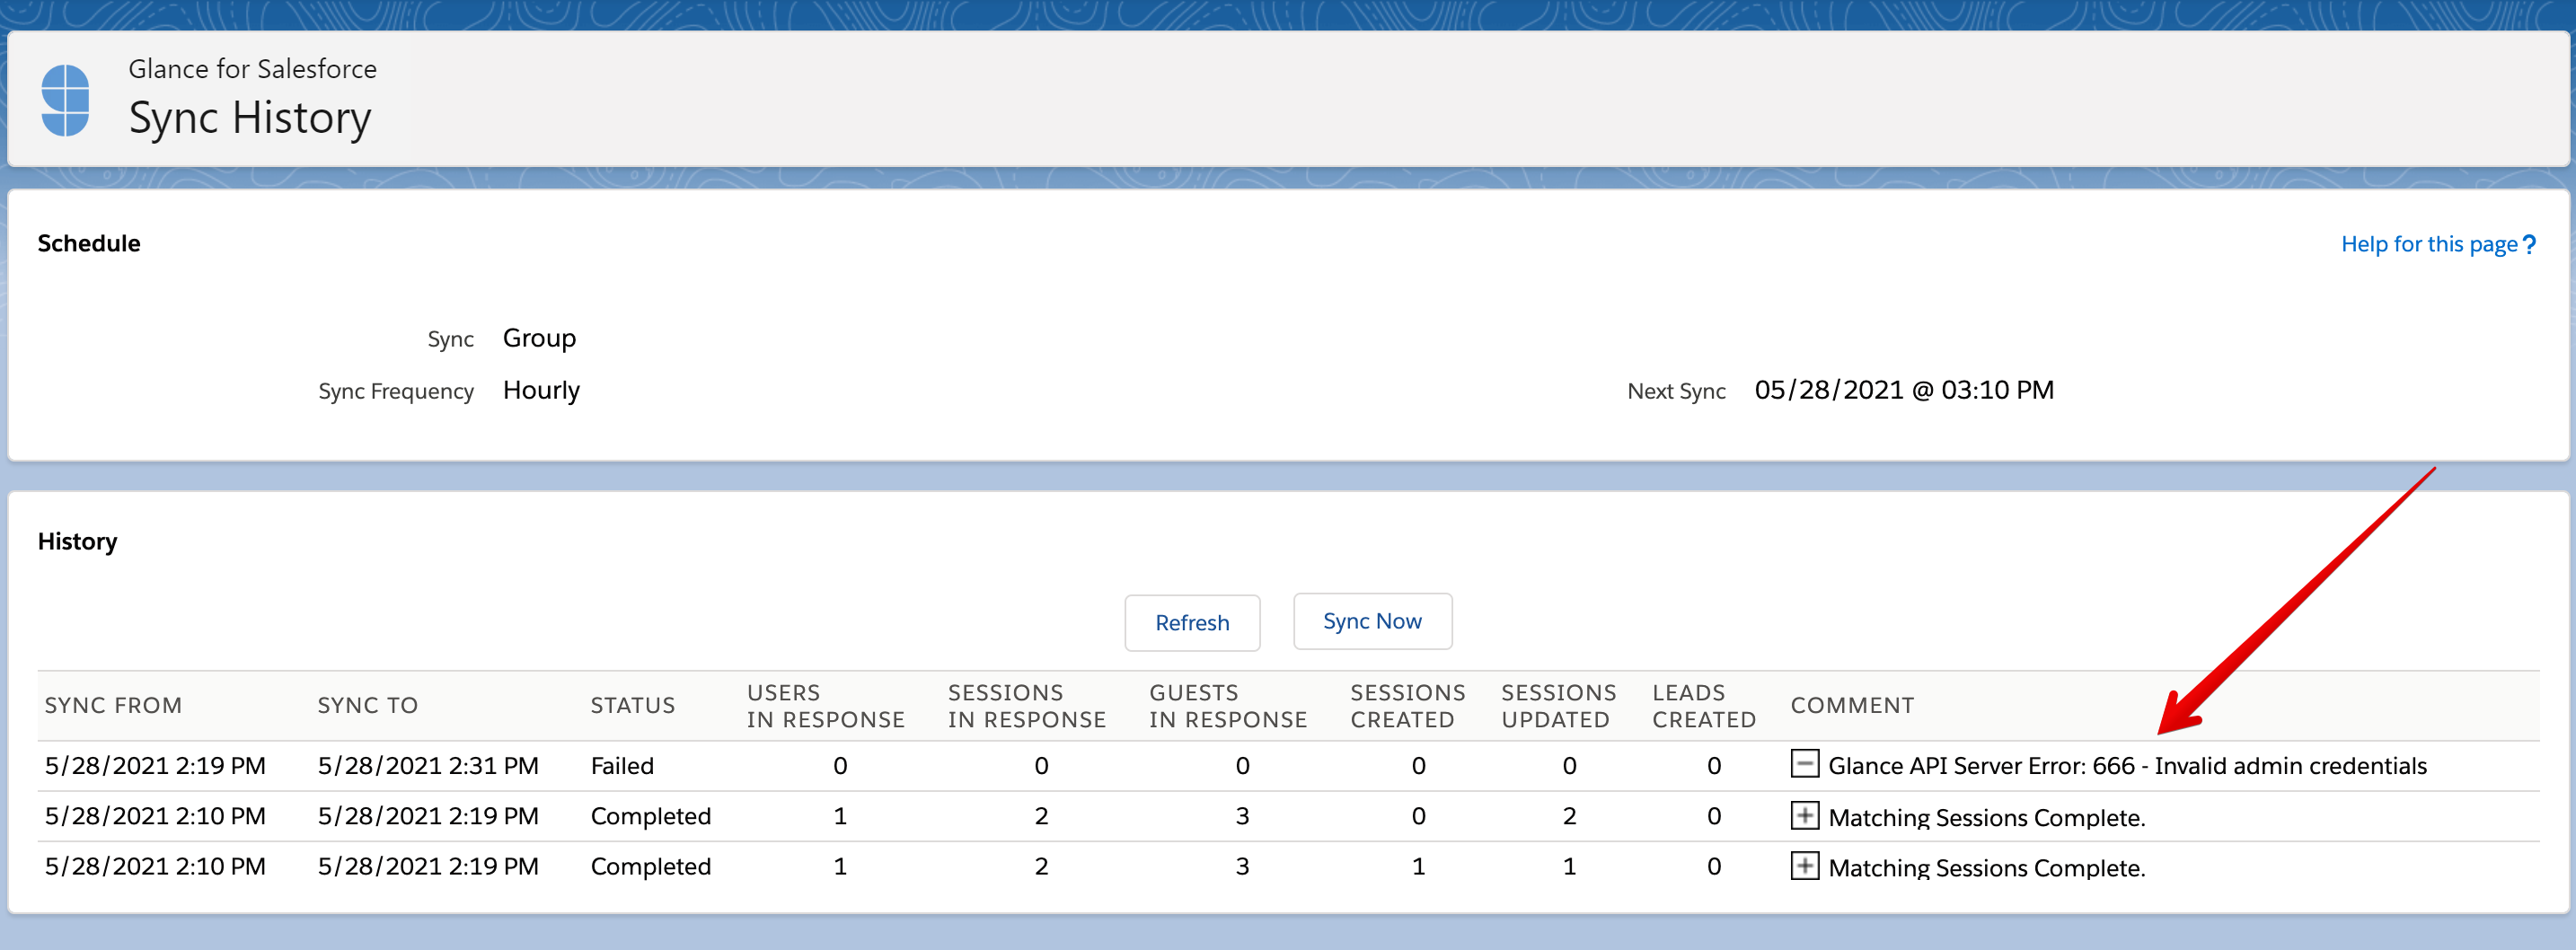 **Remediation**
1. Navigate to the Glance Company Settings tab. Scroll down to the Glance for Salesforce Users section and delete the admin user account.
2. Then navigate to the Glance User Settings tab and re-enter the admin's Glance username and password.
**Remediation**
1. Navigate to the Glance Company Settings tab. Scroll down to the Glance for Salesforce Users section and delete the admin user account.
2. Then navigate to the Glance User Settings tab and re-enter the admin's Glance username and password.
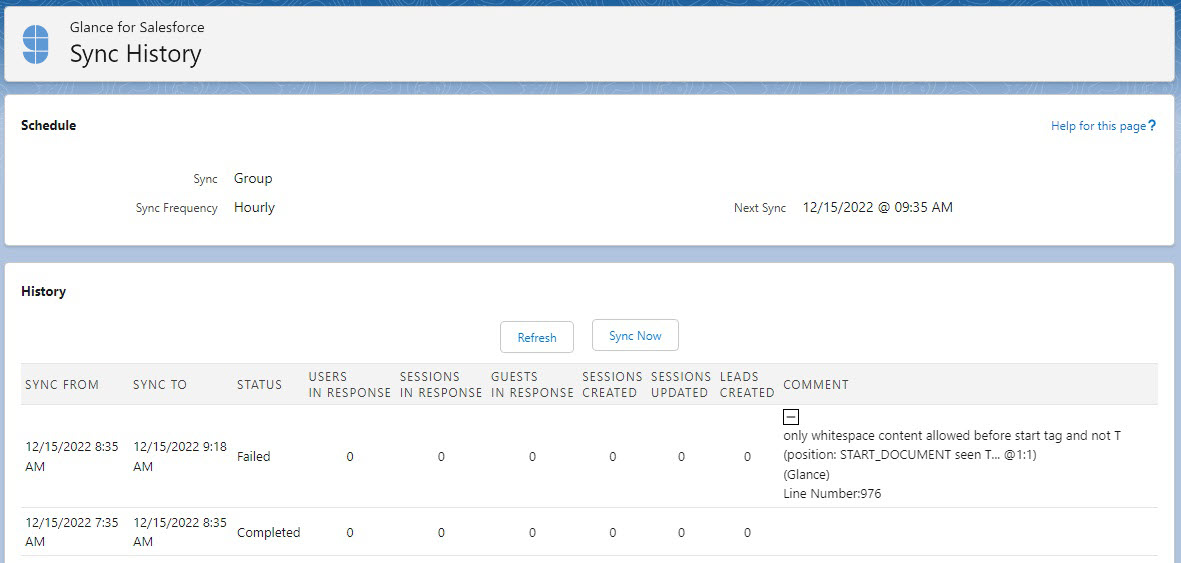 **Remediation**
1. Navigate to the Glance Company Settings tab. Scroll down to the Glance for Salesforce Users section and delete the admin user account.
2. Then navigate to the Glance User Settings tab and re-enter the admin's Glance username and password.
**Remediation**
1. Navigate to the Glance Company Settings tab. Scroll down to the Glance for Salesforce Users section and delete the admin user account.
2. Then navigate to the Glance User Settings tab and re-enter the admin's Glance username and password.
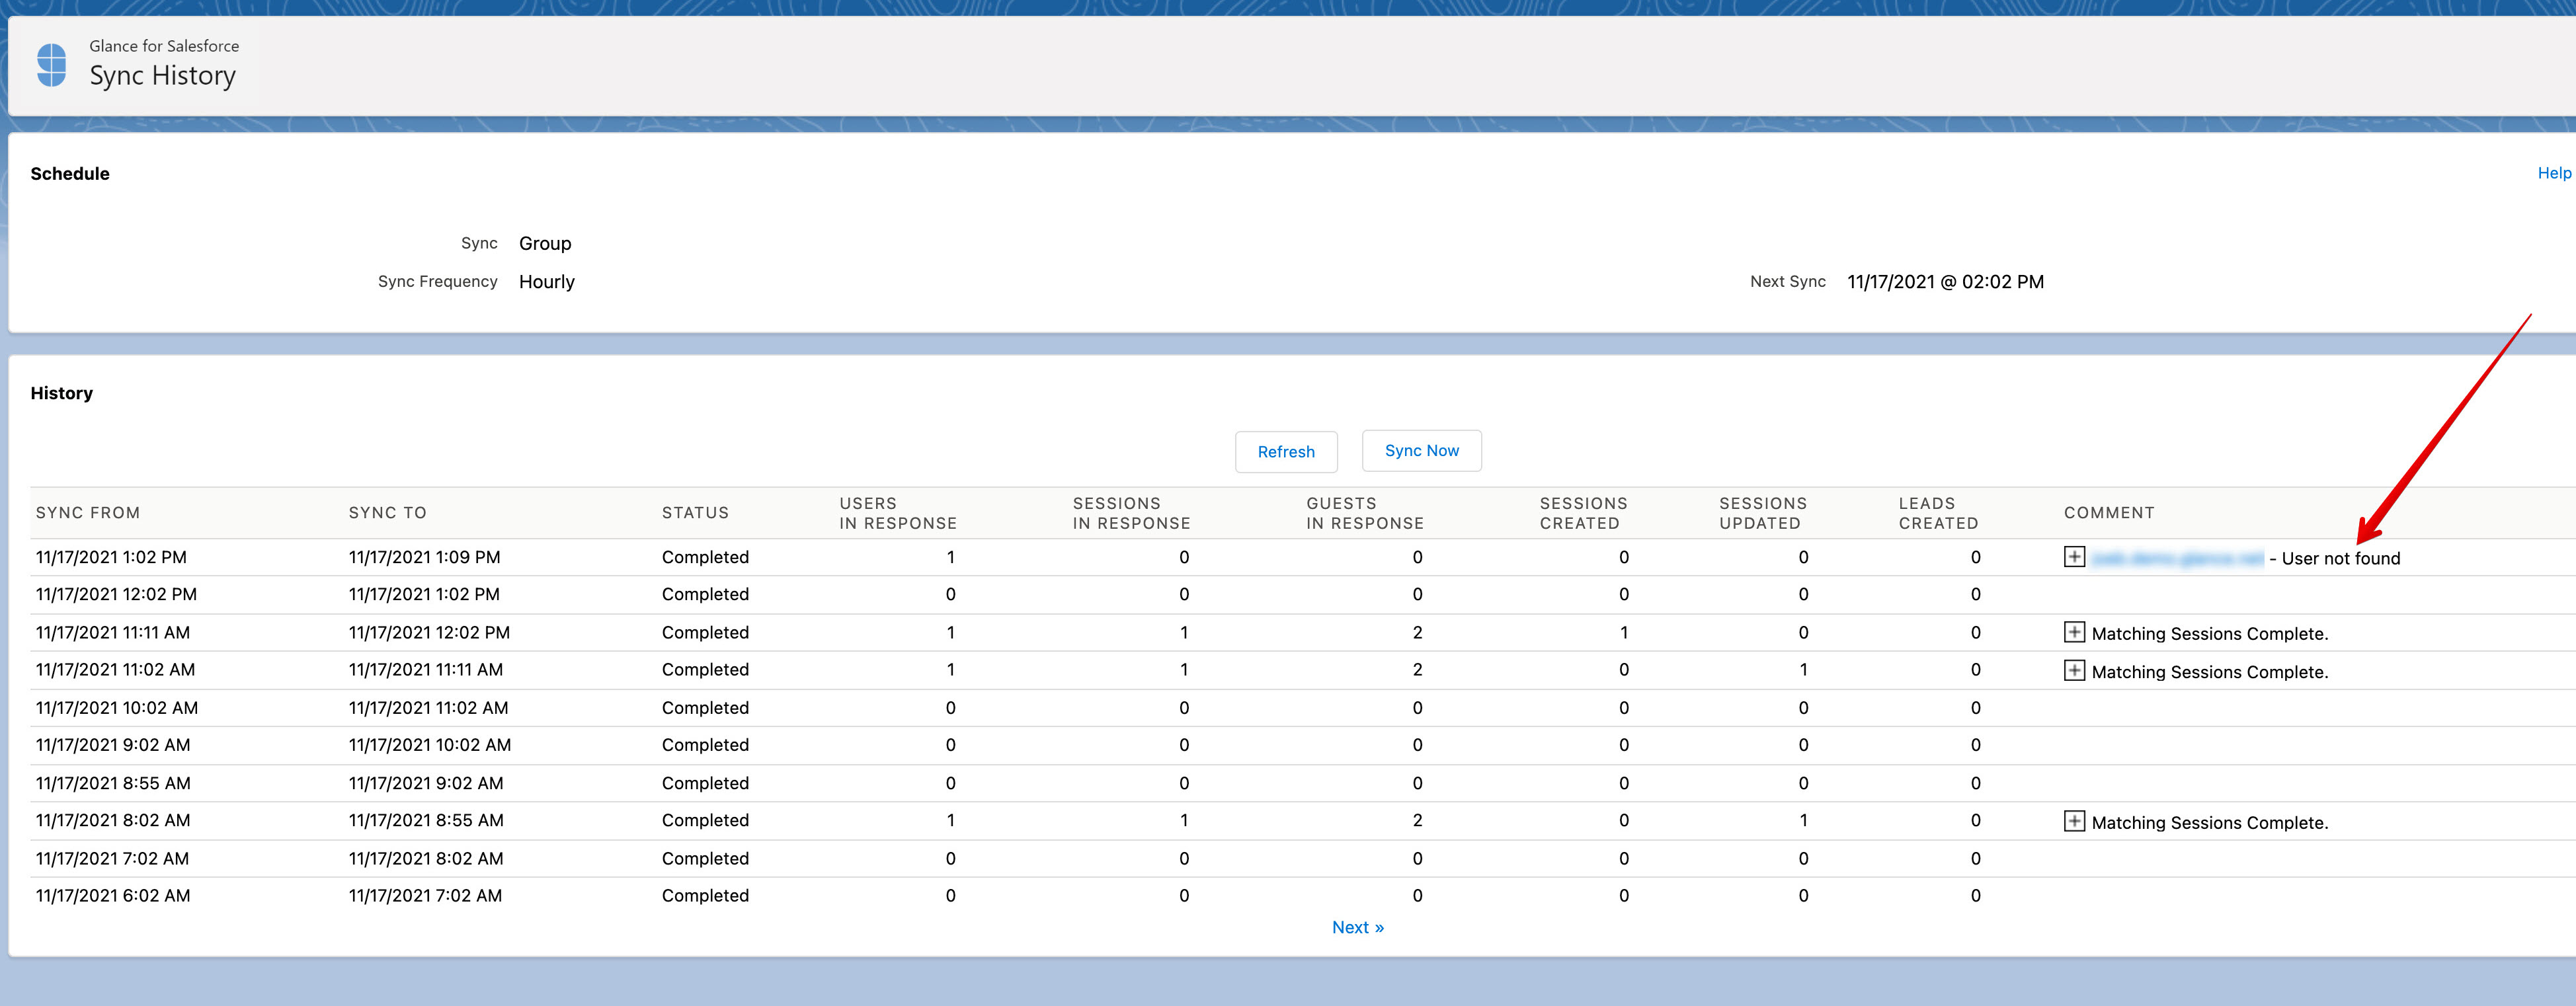 **Solution**
* Confirm the user has an active Salesforce account.
* Confirm the user has a PUID when using the Login Key authentication method or SAML 2.0. A PUID is required for all users using Glance for Salesforce.
* Confirm the PUID matches between Salesforce and the Glance back end. Note that the sync matching is case-sensitive for PUID, while SSO is not. This means that a Salesforce user with a case-mismatch in their PUID could successfully conduct Glance sessions but have the sync fail.
## Duplicate Glance Session Objects Created
**Problem Description**
Multiple Glance session objects are being created for the same Glance session, and only one has information on the end time, etc. suggesting it was synced correctly.
### Possible Cause #1
Instead of syncing data back to the Glance Session record that was created at session launch, the sync process creates a new Glance session with the same start time, session key, etc. and syncs the end time and duration to that new object.
In the screen shot below you can see the pairs of Glance Session records: each pair has the same start time, but only one has the end time/duration/Glance sync.
**Solution**
* Confirm the user has an active Salesforce account.
* Confirm the user has a PUID when using the Login Key authentication method or SAML 2.0. A PUID is required for all users using Glance for Salesforce.
* Confirm the PUID matches between Salesforce and the Glance back end. Note that the sync matching is case-sensitive for PUID, while SSO is not. This means that a Salesforce user with a case-mismatch in their PUID could successfully conduct Glance sessions but have the sync fail.
## Duplicate Glance Session Objects Created
**Problem Description**
Multiple Glance session objects are being created for the same Glance session, and only one has information on the end time, etc. suggesting it was synced correctly.
### Possible Cause #1
Instead of syncing data back to the Glance Session record that was created at session launch, the sync process creates a new Glance session with the same start time, session key, etc. and syncs the end time and duration to that new object.
In the screen shot below you can see the pairs of Glance Session records: each pair has the same start time, but only one has the end time/duration/Glance sync.
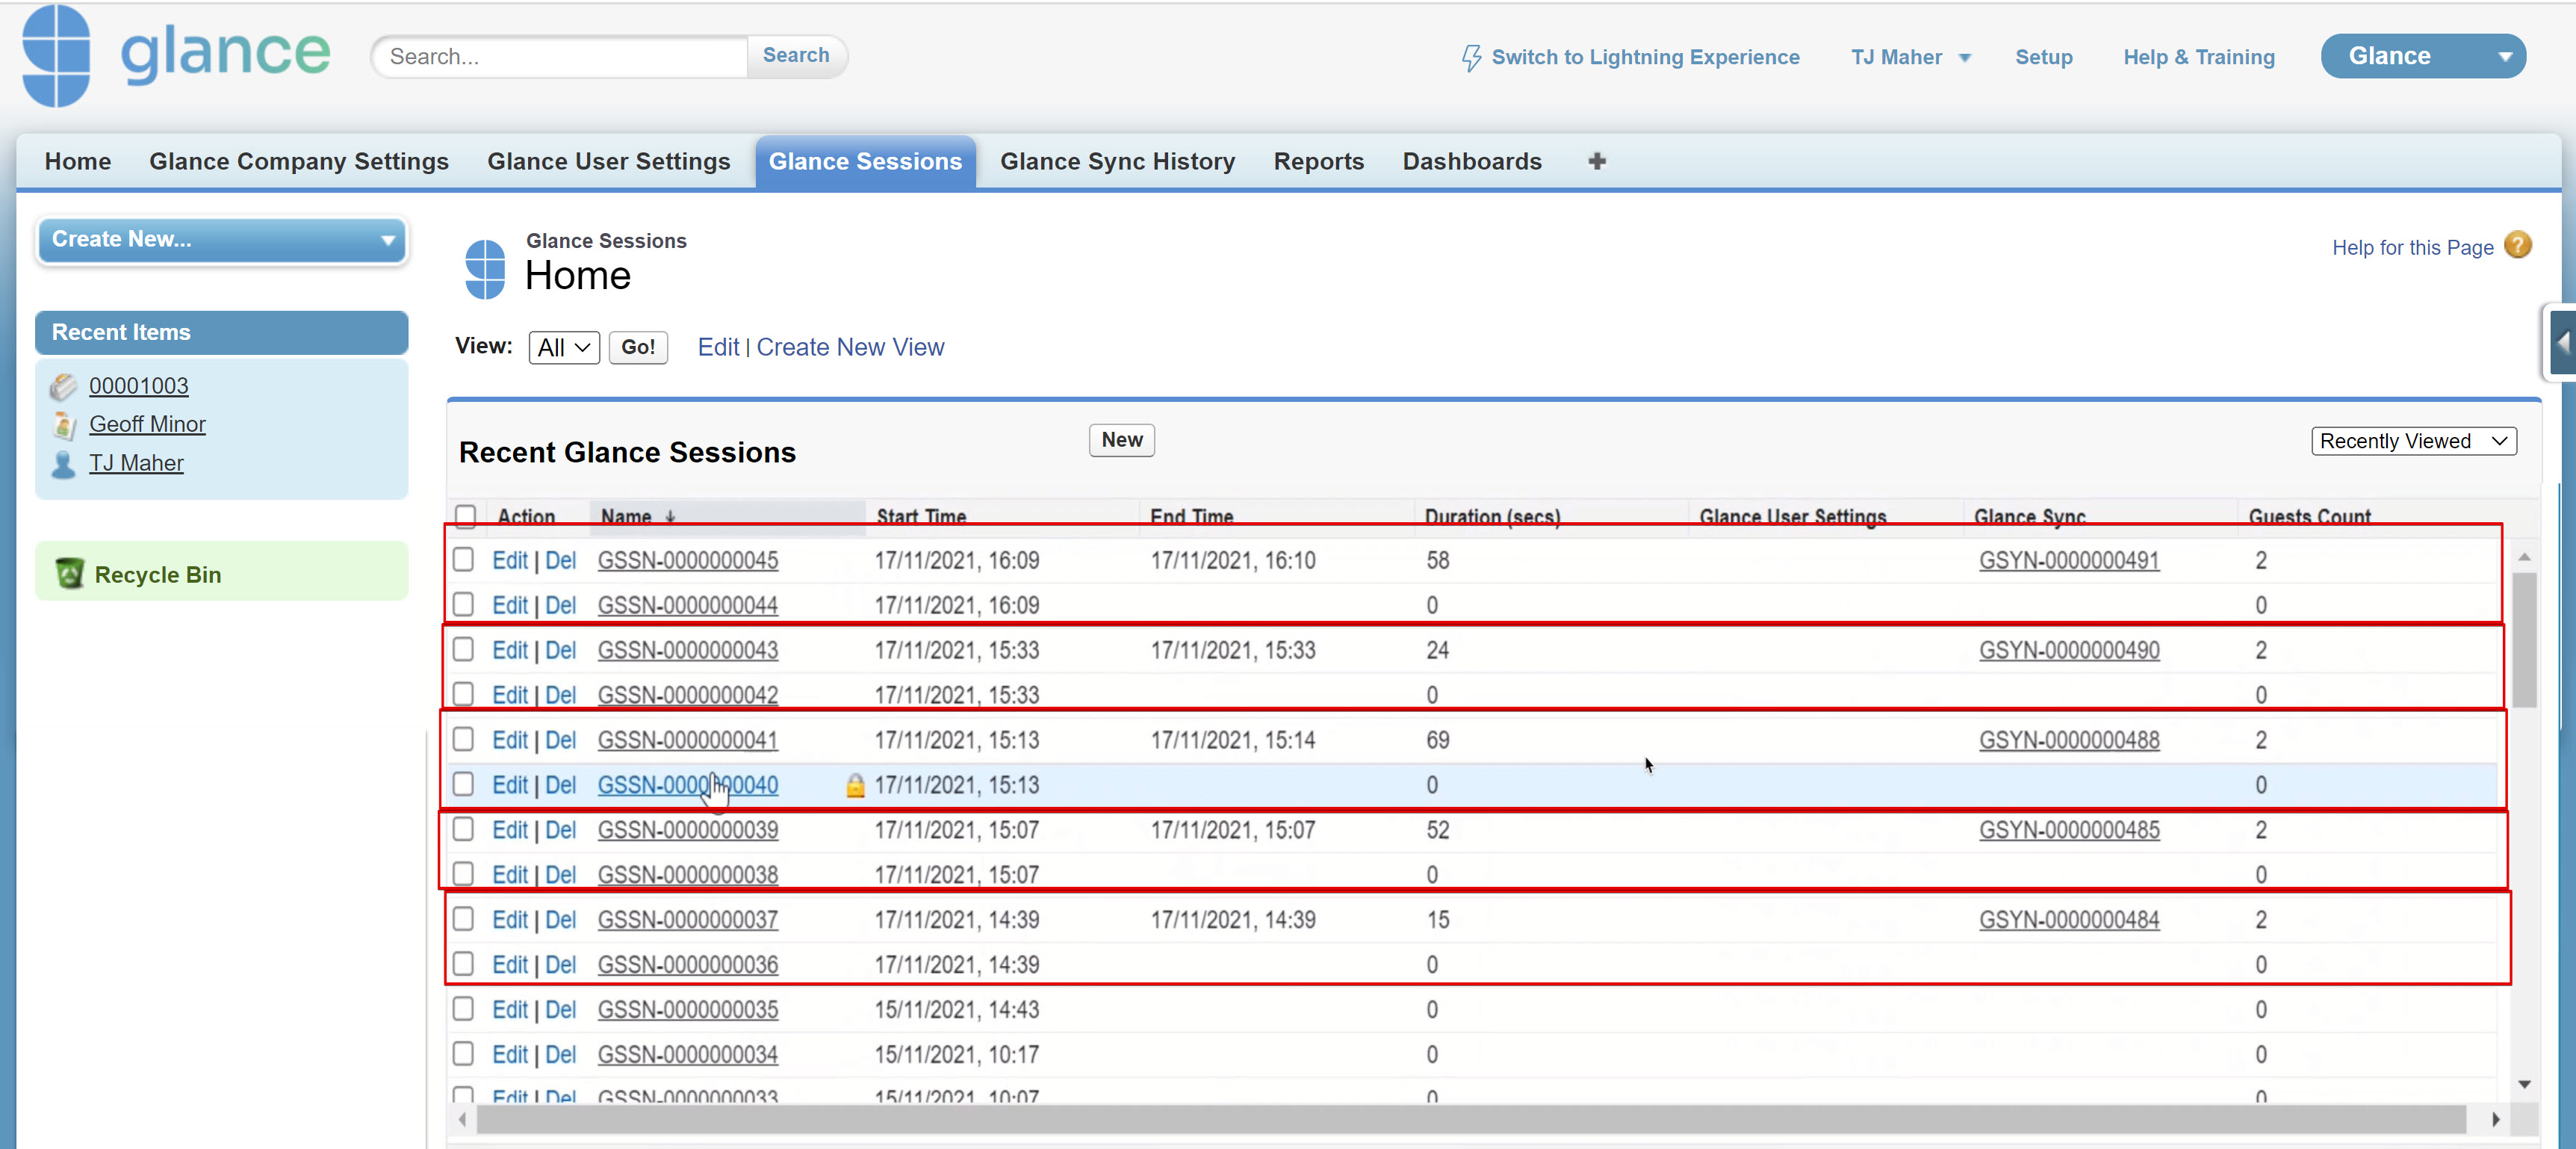 ### Solution for Cause #1
This is caused by there being multiple Salesforce accounts with the same email address which was being used as the PUID by Glance. PUID needs to be a unique value across all users.
### Possible Cause #2
The agent has pop-up blocking enabled in their browser. When they attempt to join a session, the agent viewer window is blocked from opening by the browser. It's not always obvious to the agent what is happening, so they may try to join a second or third time, with each pop-up being blocked.
### Solution for Cause #1
This is caused by there being multiple Salesforce accounts with the same email address which was being used as the PUID by Glance. PUID needs to be a unique value across all users.
### Possible Cause #2
The agent has pop-up blocking enabled in their browser. When they attempt to join a session, the agent viewer window is blocked from opening by the browser. It's not always obvious to the agent what is happening, so they may try to join a second or third time, with each pop-up being blocked.
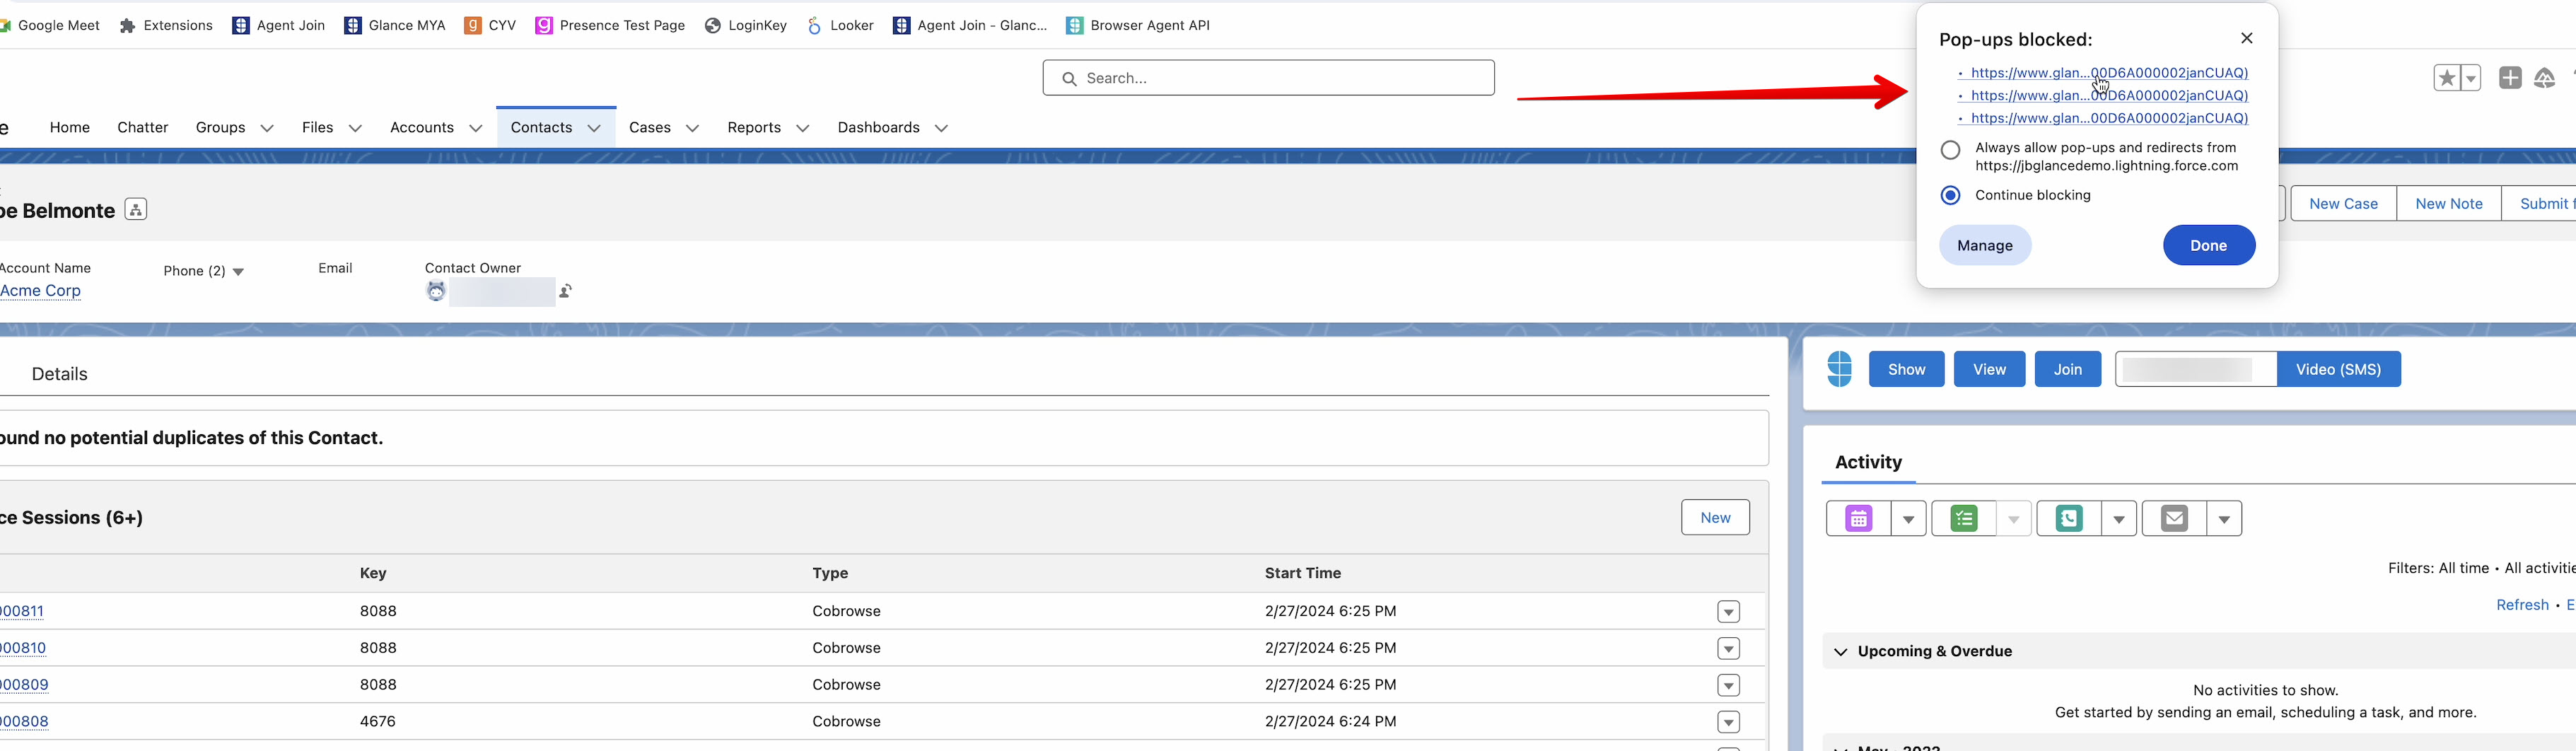 When the sync happens, it will only sync data for one of the records.
### Solution for Cause #2
Have the agents click the radio button to always allow pop-ups from their Salesforce org.
### Possible Cause #3
The org is configured to use SAML authentication but there is a misconfiguration in the **Partner User ID Field** field:
When the sync happens, it will only sync data for one of the records.
### Solution for Cause #2
Have the agents click the radio button to always allow pop-ups from their Salesforce org.
### Possible Cause #3
The org is configured to use SAML authentication but there is a misconfiguration in the **Partner User ID Field** field:
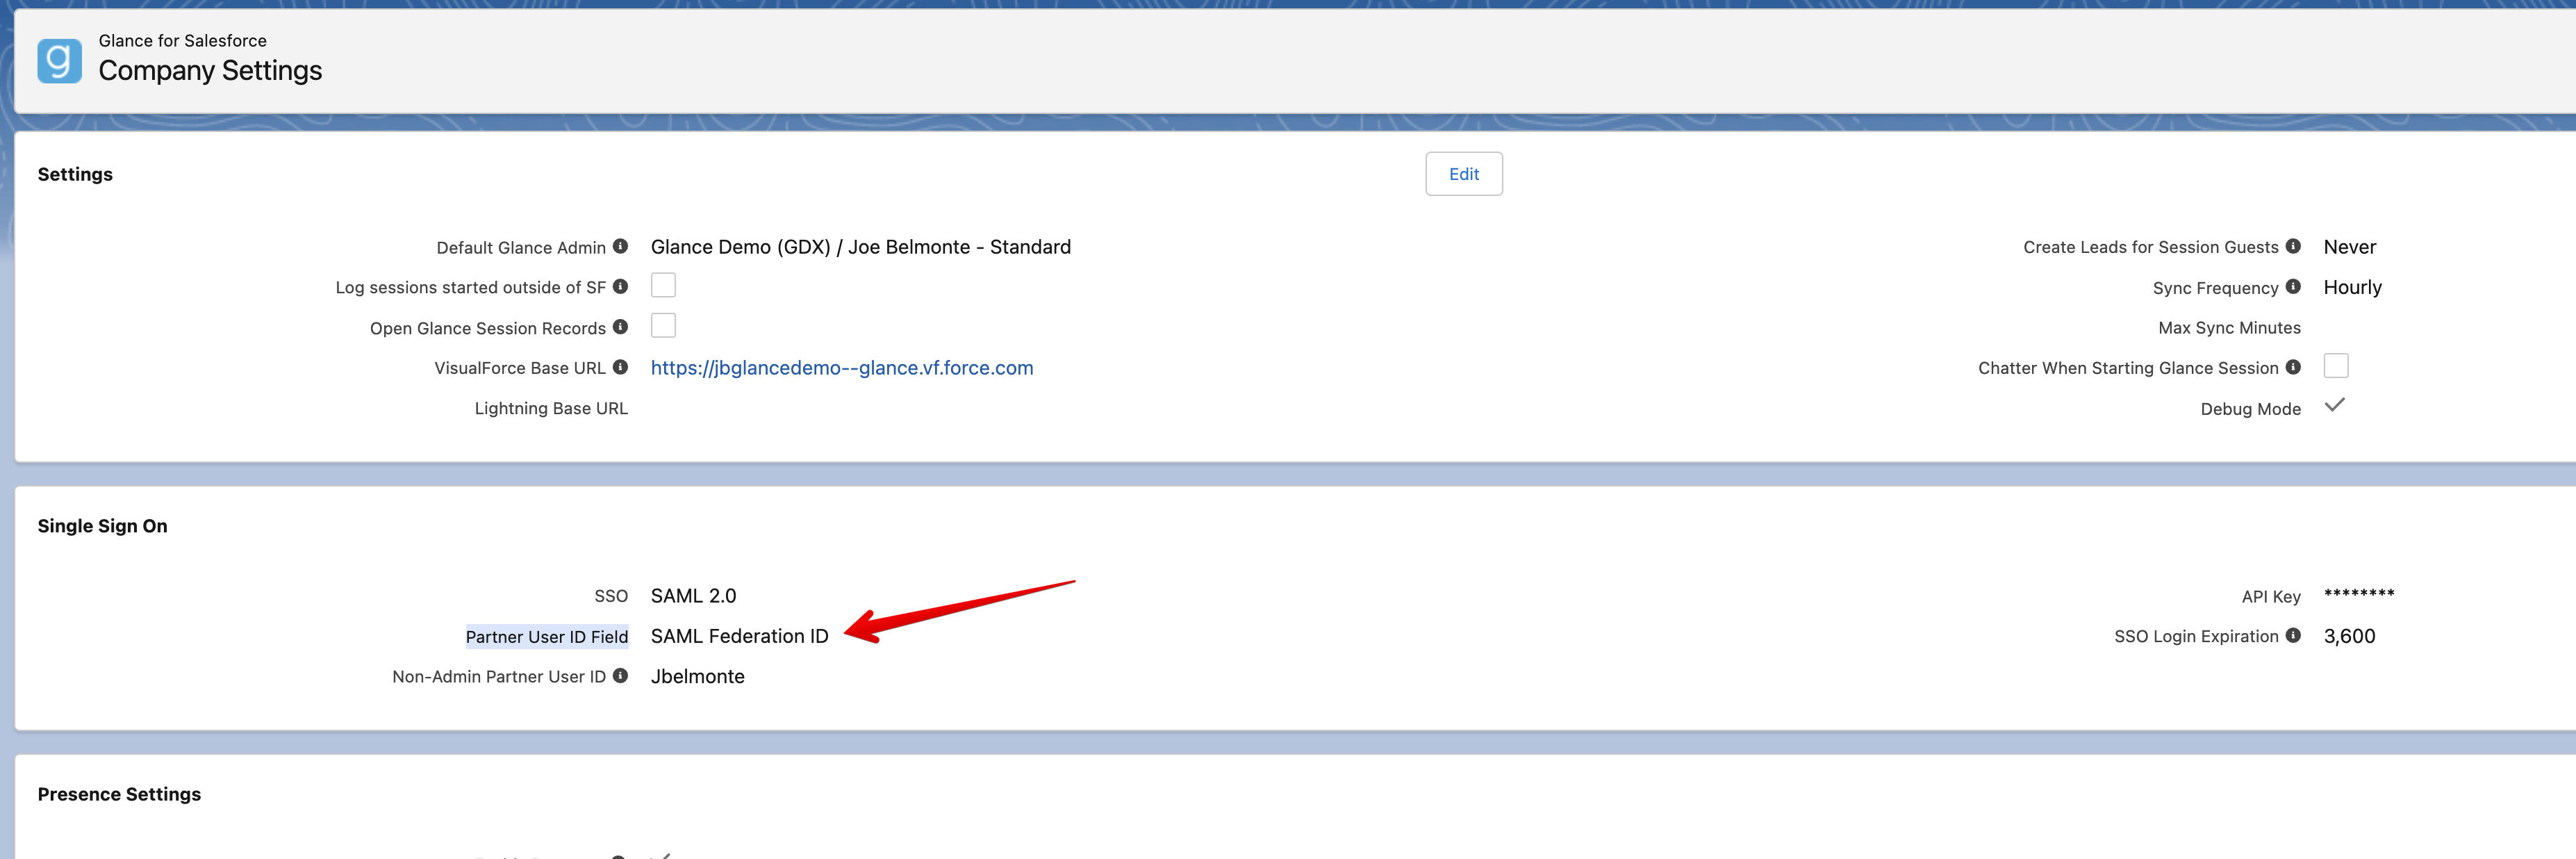 When an org uses SAML for authentication, having a misconfigured PUID field will not cause any problem with authentication�because the PUID is not being used to generate a login key�so the agents will be able to conduct sessions even with a misconfiguration here. However, the user's PUID is involved in matching the records during the sync, so a misconfiguration here would result in the sync not being able to match the sessions correctly.
### Solution for Cause #3
Make sure the **Partner User ID Field** field is configured correctly and that the value for each user in Salesforce matches what's configured for their account in glance.net.
=================================================================
FILE: /developer/integrations/salesforce/sf_buttons
=================================================================
The Glance buttons can be used from any record in Salesforce. These buttons are added by putting a Lightning Component on a Lightning Record Page or a small Visualforce page on a Page Layout.
When an org uses SAML for authentication, having a misconfigured PUID field will not cause any problem with authentication�because the PUID is not being used to generate a login key�so the agents will be able to conduct sessions even with a misconfiguration here. However, the user's PUID is involved in matching the records during the sync, so a misconfiguration here would result in the sync not being able to match the sessions correctly.
### Solution for Cause #3
Make sure the **Partner User ID Field** field is configured correctly and that the value for each user in Salesforce matches what's configured for their account in glance.net.
=================================================================
FILE: /developer/integrations/salesforce/sf_buttons
=================================================================
The Glance buttons can be used from any record in Salesforce. These buttons are added by putting a Lightning Component on a Lightning Record Page or a small Visualforce page on a Page Layout.
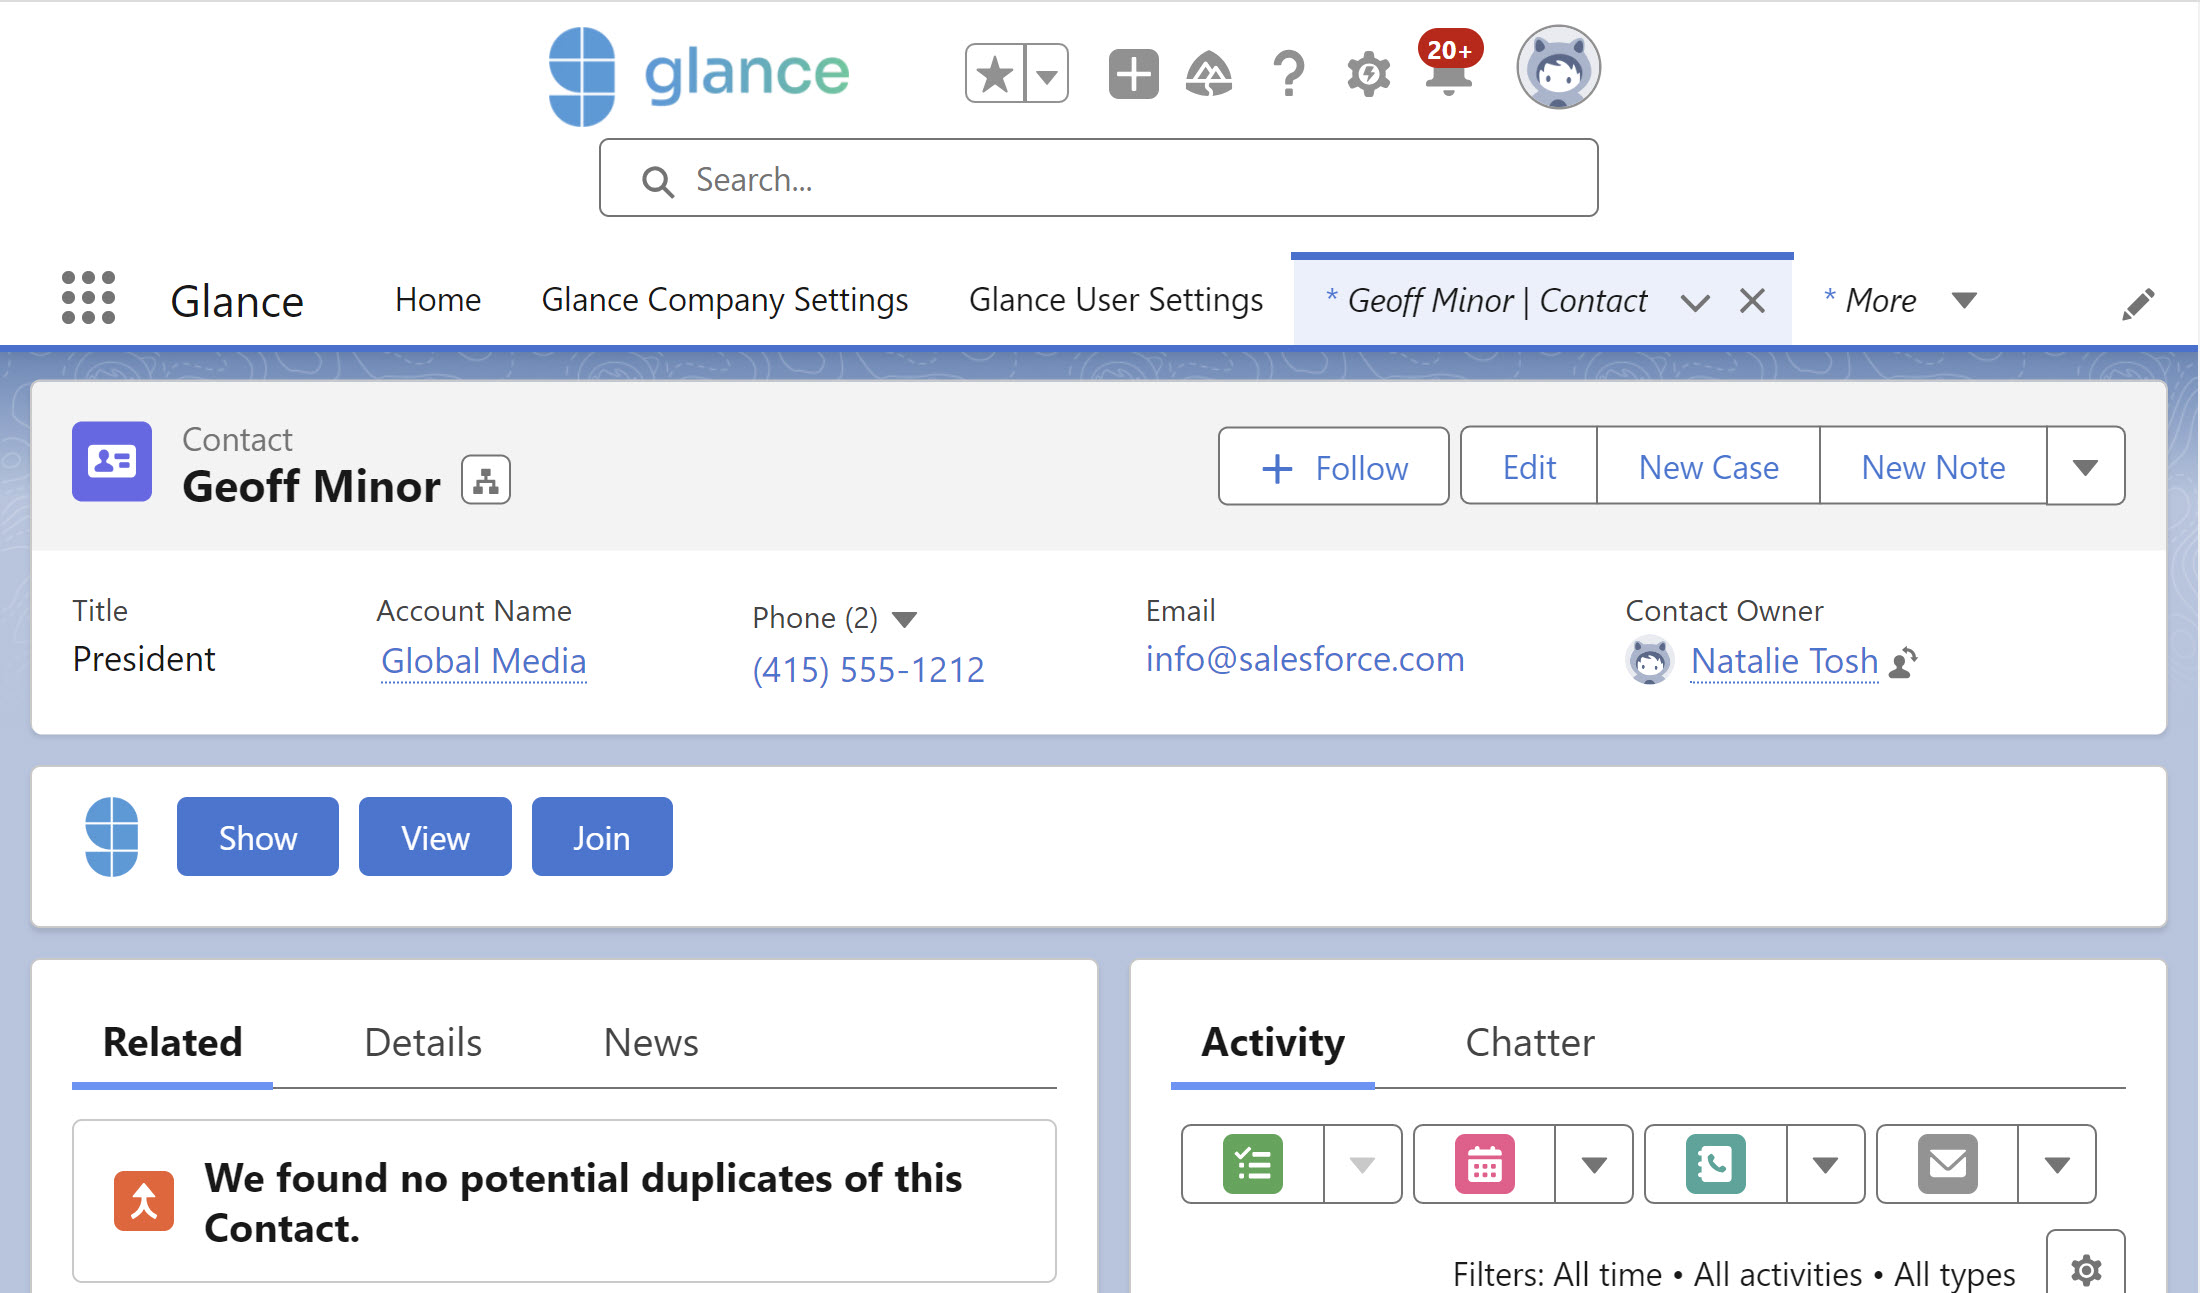 ## Add Glance Buttons to Page Layouts in Classic
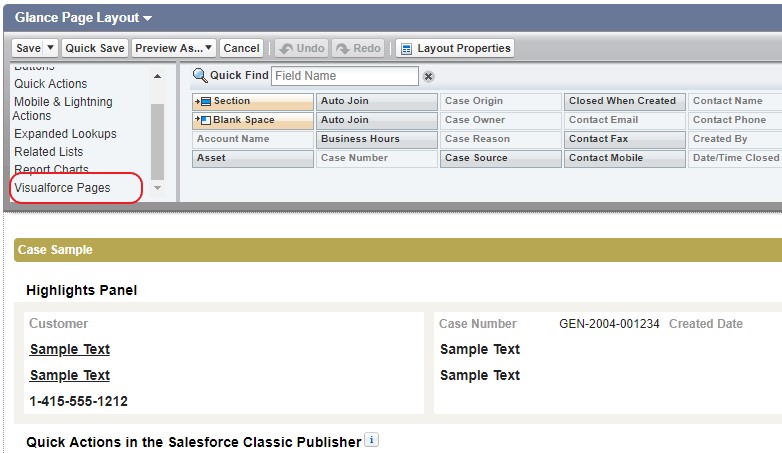 8. From the right-hand panel of Case Layout, select **GlanceFromCase**.
9. Drag the **GlanceFromCase** to the **Case Detail** section.
8. From the right-hand panel of Case Layout, select **GlanceFromCase**.
9. Drag the **GlanceFromCase** to the **Case Detail** section.
_**Note:** We recommend placing GlanceFromCase at the top of the right-hand column of the Case Detail section._ 10. The page is too big by default. Hover over **GlanceFromCase** and click on the wrench icon. 11. In the Visual Page Properties pop-up window, change the Height from **200** to **24** pixels. 12. Click **OK**. 13. Scroll back up the page and find the Case Layout section. 14. Click **Save**. 15. After creating your page layouts, click the **Page Layout Assignment** button to control which page layout users see by default. Below is an example of the Show, View, and Join buttons added to a Case object:
 =================================================================
FILE: /developer/integrations/salesforce/sf_community
=================================================================
This page outlines the process to implement Glance Cobrowse features on Salesforce Lightning Digital Experiences.
=================================================================
FILE: /developer/integrations/salesforce/sf_community
=================================================================
This page outlines the process to implement Glance Cobrowse features on Salesforce Lightning Digital Experiences.
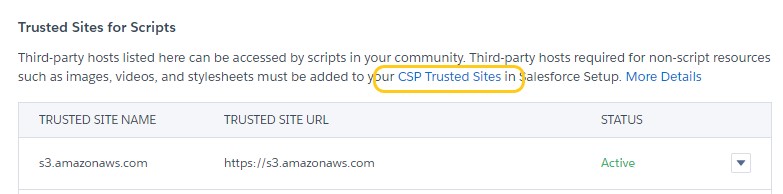 4. Click **New Trusted Site** to add the following sites:
* `https://*cdn.glance.net`
* `https://*.glance.net`
* If you are using 1-Click Connect from Chat or a button, `wss://*.glance.net`
4. Click **New Trusted Site** to add the following sites:
* `https://*cdn.glance.net`
* `https://*.glance.net`
* If you are using 1-Click Connect from Chat or a button, `wss://*.glance.net`
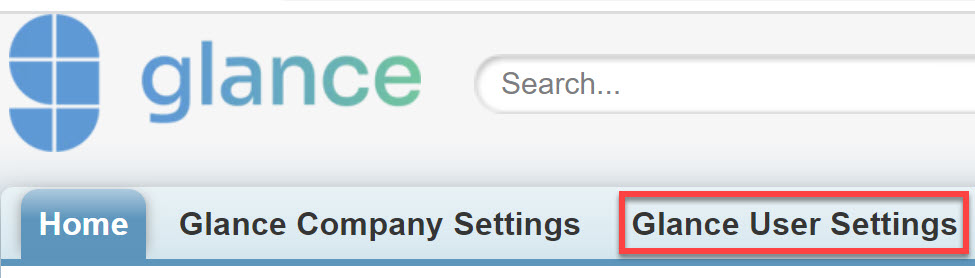 4. Review the License Agreement Terms and click the **I Accept** button.
5. Under Already use Glance, enter your **Glance Address** and **Password**.
6. Click **Save**.
When finished, go back to Glance Company Settings by clicking on the tab at the top.
4. Review the License Agreement Terms and click the **I Accept** button.
5. Under Already use Glance, enter your **Glance Address** and **Password**.
6. Click **Save**.
When finished, go back to Glance Company Settings by clicking on the tab at the top.
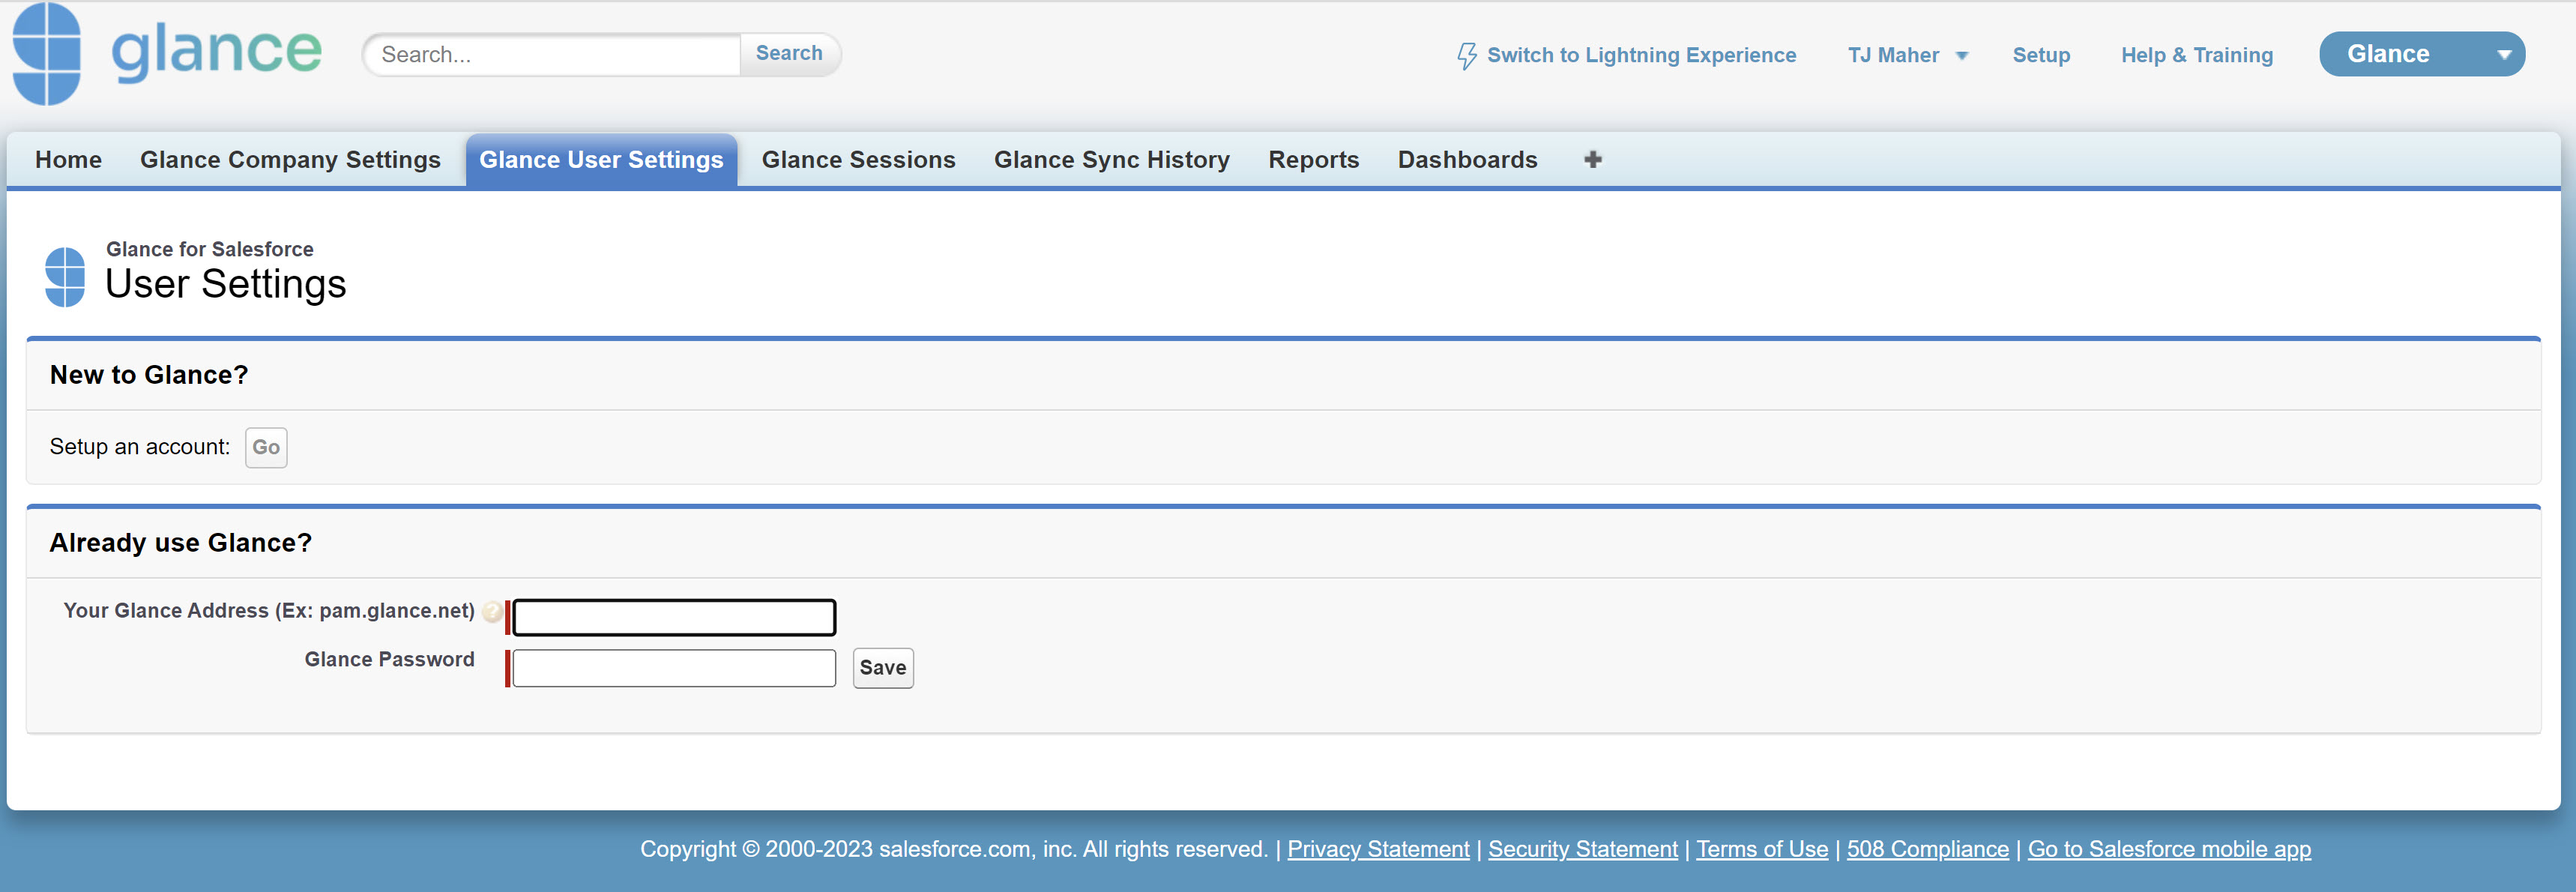 =================================================================
FILE: /developer/integrations/salesforce/sf_relatedlist
=================================================================
If you would like to show past Glance Sessions related to your records, you can add a Related List to the Page Layout with the following steps:
1. From Setup, choose an object's **Page Layout** from **Object Manager** in Lightning or from **Quick Find** in Classic.
2. From the Page Layout Editor, scroll down to Related Lists.
3. From the palette at the top, click **Related Lists** on the left.
4. Click and drag **Glance Sessions** onto the page.
5. Adjust the columns displayed if you like.
6. At the top, click **Save**.
Repeat these steps for any other record pages that you want to display **Glance Session history**.
=================================================================
FILE: /developer/integrations/salesforce/sf_settings
=================================================================
At the top of Glance Company Settings are the main settings for the package. It also includes some options to configure single sign-on, and which Glance buttons you want available to your agents.
There are five sections on the Glance Company Settings tab:
* [**Settings**](#settings): Choose your default admin and set session preferences.
* [**Single Sign On**](#single-sign-on-sso-): Manage how your users authenticate with Glance.
* [**Presence Settings**](#presence): Enable a button that lights up when a customer is present on your website.
* [**Glance Buttons**](#glance-buttons): Choose which buttons display on which objects in Salesforce.
* [**Glance for Salesforce Users**](#glance-for-salesforce-users): Manage which users are enabled with Glance.
## Prerequisites
Before modifying Settings, verify that:
* You are the administrator for your Glance account.
* You have entered your Glance username and password on the Glance User Settings tab in Salesforce.
## Settings
Choose your default admin and set session preferences.
=================================================================
FILE: /developer/integrations/salesforce/sf_relatedlist
=================================================================
If you would like to show past Glance Sessions related to your records, you can add a Related List to the Page Layout with the following steps:
1. From Setup, choose an object's **Page Layout** from **Object Manager** in Lightning or from **Quick Find** in Classic.
2. From the Page Layout Editor, scroll down to Related Lists.
3. From the palette at the top, click **Related Lists** on the left.
4. Click and drag **Glance Sessions** onto the page.
5. Adjust the columns displayed if you like.
6. At the top, click **Save**.
Repeat these steps for any other record pages that you want to display **Glance Session history**.
=================================================================
FILE: /developer/integrations/salesforce/sf_settings
=================================================================
At the top of Glance Company Settings are the main settings for the package. It also includes some options to configure single sign-on, and which Glance buttons you want available to your agents.
There are five sections on the Glance Company Settings tab:
* [**Settings**](#settings): Choose your default admin and set session preferences.
* [**Single Sign On**](#single-sign-on-sso-): Manage how your users authenticate with Glance.
* [**Presence Settings**](#presence): Enable a button that lights up when a customer is present on your website.
* [**Glance Buttons**](#glance-buttons): Choose which buttons display on which objects in Salesforce.
* [**Glance for Salesforce Users**](#glance-for-salesforce-users): Manage which users are enabled with Glance.
## Prerequisites
Before modifying Settings, verify that:
* You are the administrator for your Glance account.
* You have entered your Glance username and password on the Glance User Settings tab in Salesforce.
## Settings
Choose your default admin and set session preferences.
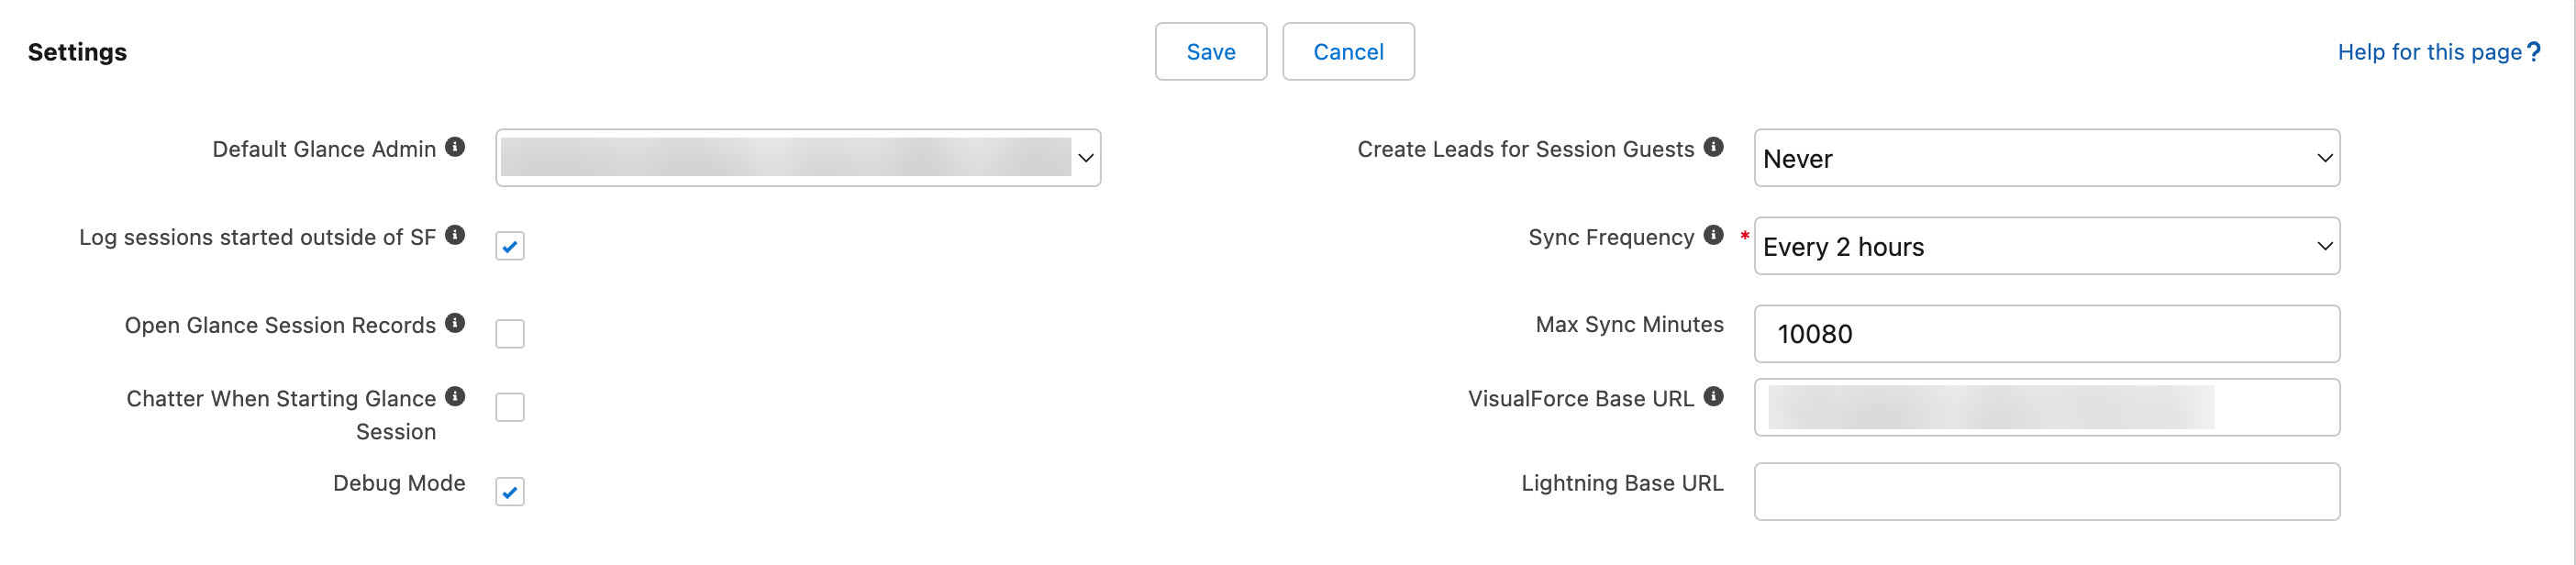 To configure your Glance settings:
1. From the Salesforce app, click the Glance Company Settings tab at the top.
2. Click **Edit**.
3. Under the Settings section, complete the following steps:
4. For **Default Glance Admin**, choose which Salesforce user is an admin for your company's Glance account.
5. For **Log Sessions Started Outside of Salesforce**, Select this option if your team is using the Glance client to join / start a session.
6. For **Open Glance Session Records**, select this option if you want the user to immediately capture notes in Salesforce during their session or relate the session to other records.
7. For **Chatter When Starting Glance Session**, select this option if you want started or joined Glance sessions posted into the Chatter feed of anyone following that record. The automatic notification includes a link to the session that Chatter users can click to join from any desktop, tablet, or mobile device.
8. For **Debug Mode**, select this checkbox if you need to debug the Glance Package. After you enable this setting, you can see logs for Glance sessions from the **App Launcher** > **Logs**. When you have finished debugging, de-select this checkbox.
9. For **Create Leads for Session Guests**, choose how you want leads created. These options only apply to screen share sessions:
* **Never**: This option does not create any new Leads for session guests.
* **Who Provide a New Email**: This option creates a new Lead for any guest who provides an email address when joining. A new Lead will only be created if there is no existing Lead with that same email address.
* **Who Provide a New Email and Name**: This option creates a new Lead for any guest who provides both an email address and name.
10. For **Sync Frequency**, choose how often updates occur: Hourly, Every 2 hours, Daily, or Never. Synchronization happens relative to the time you first installed the Glance for Salesforce package.
* For example, If you install the package at 1:14 p.m. and you synchronize every hour, synchronizations will occur at 2:14 p.m., 3:14 p.m. and so on.
* You may run synchronization jobs manually from the **Glance Sync History** page, which is located on the **Glance for Salesforce** navigation bar.
* Select the tab, click the **Sync Now** button, and click **Refresh**. Next Sync displays the date and time of the next scheduled sync.
11. For **Max Sync Minutes**, only modify this value if you receive sync issues related to date range issues, such as `date range cannot be more than 31 days`. Defaults to 10080 minutes (7 days).
12. For **VisualForce Base URL**, enter the Visual Force Domain. You can find this value through the following instructions:
1. Go to **Setup (gear icon)** > **VisualForce Pages**.
2. Search for "Glance".
To configure your Glance settings:
1. From the Salesforce app, click the Glance Company Settings tab at the top.
2. Click **Edit**.
3. Under the Settings section, complete the following steps:
4. For **Default Glance Admin**, choose which Salesforce user is an admin for your company's Glance account.
5. For **Log Sessions Started Outside of Salesforce**, Select this option if your team is using the Glance client to join / start a session.
6. For **Open Glance Session Records**, select this option if you want the user to immediately capture notes in Salesforce during their session or relate the session to other records.
7. For **Chatter When Starting Glance Session**, select this option if you want started or joined Glance sessions posted into the Chatter feed of anyone following that record. The automatic notification includes a link to the session that Chatter users can click to join from any desktop, tablet, or mobile device.
8. For **Debug Mode**, select this checkbox if you need to debug the Glance Package. After you enable this setting, you can see logs for Glance sessions from the **App Launcher** > **Logs**. When you have finished debugging, de-select this checkbox.
9. For **Create Leads for Session Guests**, choose how you want leads created. These options only apply to screen share sessions:
* **Never**: This option does not create any new Leads for session guests.
* **Who Provide a New Email**: This option creates a new Lead for any guest who provides an email address when joining. A new Lead will only be created if there is no existing Lead with that same email address.
* **Who Provide a New Email and Name**: This option creates a new Lead for any guest who provides both an email address and name.
10. For **Sync Frequency**, choose how often updates occur: Hourly, Every 2 hours, Daily, or Never. Synchronization happens relative to the time you first installed the Glance for Salesforce package.
* For example, If you install the package at 1:14 p.m. and you synchronize every hour, synchronizations will occur at 2:14 p.m., 3:14 p.m. and so on.
* You may run synchronization jobs manually from the **Glance Sync History** page, which is located on the **Glance for Salesforce** navigation bar.
* Select the tab, click the **Sync Now** button, and click **Refresh**. Next Sync displays the date and time of the next scheduled sync.
11. For **Max Sync Minutes**, only modify this value if you receive sync issues related to date range issues, such as `date range cannot be more than 31 days`. Defaults to 10080 minutes (7 days).
12. For **VisualForce Base URL**, enter the Visual Force Domain. You can find this value through the following instructions:
1. Go to **Setup (gear icon)** > **VisualForce Pages**.
2. Search for "Glance".
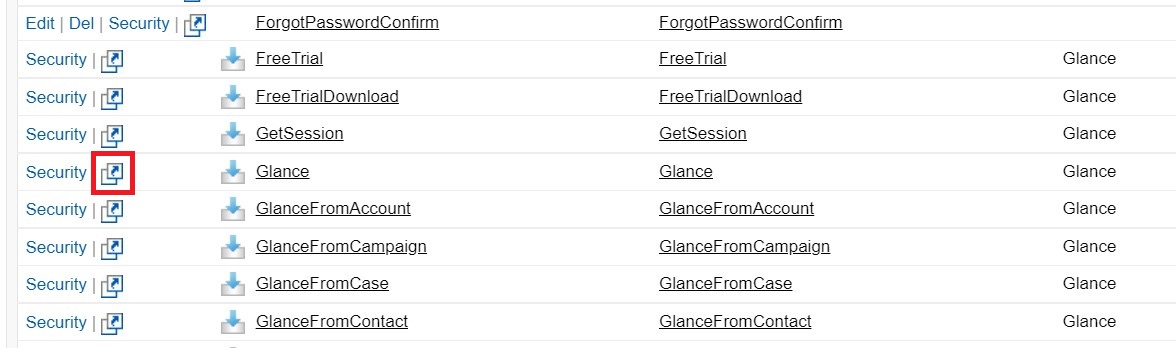 4. Copy only the `.force.com` part of the URL, no trailing slash.
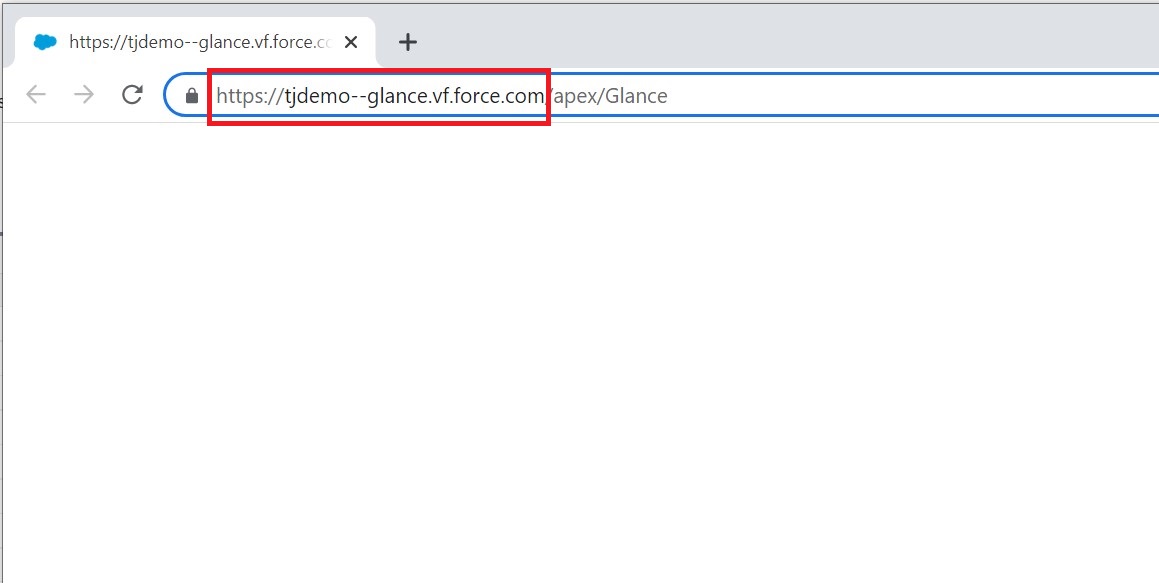 5. Navigate back to the **Glance Company Settings** page and paste the value into the **VisualForce URL** Field. For example, `https://test--glance.vf.force.com`.

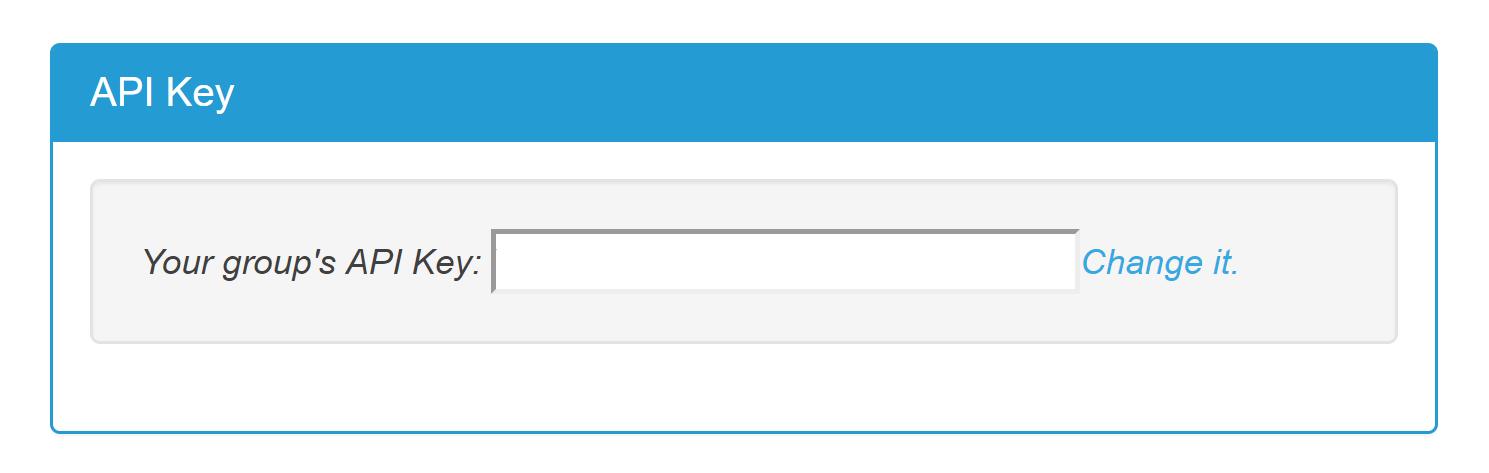 5. From the Salesforce app, click the **Glance Company Settings** tab at the top.
6. Click **Edit**.
7. Scroll to the **Single Sign On** section.
8. For **SSO**, select **SAML 2.0** or **Login Key** from the drop-down menu.
9. For **Partner User ID Field**, choose a value from the drop-down. The PUID must be available on the User object in Salesforce, must be unique to each user, and must match the value in the PUID field for the user's account within the Glance system (see the **PartnerUID** field [here](/account-management/manage_users)). It is also common to use a value in the user's **FederationID** field.
10. If you selected **SAML 2.0** for your SSO mechanism, enter the **Non-Admin Partner User ID** mentioned above in the text field.
11. For **API Key**, enter your API Key you obtained earlier from your Glance account.
5. From the Salesforce app, click the **Glance Company Settings** tab at the top.
6. Click **Edit**.
7. Scroll to the **Single Sign On** section.
8. For **SSO**, select **SAML 2.0** or **Login Key** from the drop-down menu.
9. For **Partner User ID Field**, choose a value from the drop-down. The PUID must be available on the User object in Salesforce, must be unique to each user, and must match the value in the PUID field for the user's account within the Glance system (see the **PartnerUID** field [here](/account-management/manage_users)). It is also common to use a value in the user's **FederationID** field.
10. If you selected **SAML 2.0** for your SSO mechanism, enter the **Non-Admin Partner User ID** mentioned above in the text field.
11. For **API Key**, enter your API Key you obtained earlier from your Glance account.
 12. For **SSO Login Expiration**, choose how frequently you want the login key to expire. The default is 3,600 seconds, which is one hour.
13. Scroll to the top and click **Save**.
If you are unable to use SAML or Login Key for SSO, every user must sign in with their Glance address and password from the Glance User Settings page. This can be found at the top of the Glance for Salesforce application next to Glance Company Settings. If you are using Cobrowse without any client software, your agents will also need to keep a browser tab open and stay signed into their Glance account. We have a page for this that can be found at [www.glance.net/account/accountkeepalive.aspx](https://www.glance.net/account/accountkeepalive.aspx).
## Presence
From the Presence Settings section, you can enable Presence within Salesforce so that the Join button lights up when your customer is present on your website. When the button lights up, the agent can connect with the customer with one click. For more information, see [1-Click Connect Requirements](/users/glance-cobrowse/getting-started/cobrowse_requirements).
12. For **SSO Login Expiration**, choose how frequently you want the login key to expire. The default is 3,600 seconds, which is one hour.
13. Scroll to the top and click **Save**.
If you are unable to use SAML or Login Key for SSO, every user must sign in with their Glance address and password from the Glance User Settings page. This can be found at the top of the Glance for Salesforce application next to Glance Company Settings. If you are using Cobrowse without any client software, your agents will also need to keep a browser tab open and stay signed into their Glance account. We have a page for this that can be found at [www.glance.net/account/accountkeepalive.aspx](https://www.glance.net/account/accountkeepalive.aspx).
## Presence
From the Presence Settings section, you can enable Presence within Salesforce so that the Join button lights up when your customer is present on your website. When the button lights up, the agent can connect with the customer with one click. For more information, see [1-Click Connect Requirements](/users/glance-cobrowse/getting-started/cobrowse_requirements).
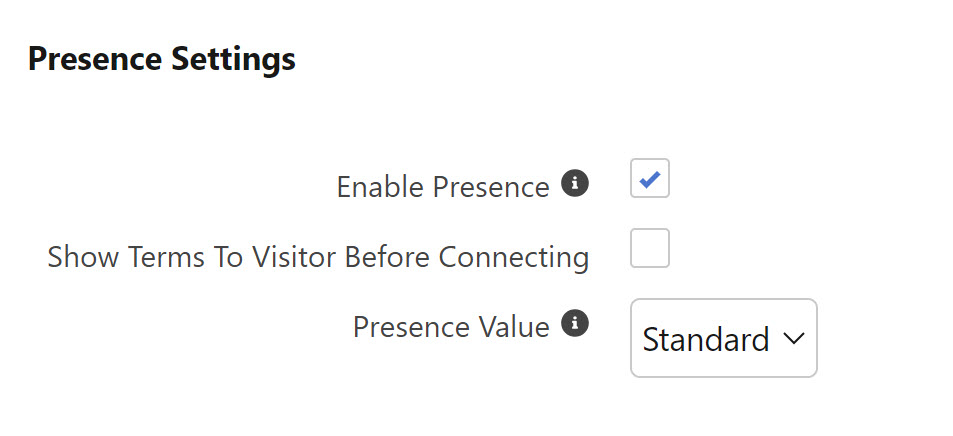 To enable presence:
1. From the Salesforce app, click the Glance Company Settings tab at the top.
2. Click **Edit**.
3. Scroll to the **Presence** section.
4. Select **Enable Presence**.
5. Select **Show Visitor Information** if you want to display visitor information prior to sessions. Refer to the [Viewing Visitor Information](../sf_visitor) page for more details.
6. If you want the visitor to receive a prompt in their browser window to accept before the Cobrowse session starts, select **Show Terms To Visitor Before Connecting**.
7. Click **Save**.
## Glance Buttons
This section controls which buttons appear in the Glance Lightning Component when it is on a record. These settings also apply in Classic when the Lightning Component is wrapped in a VisualForce page. By default, most buttons are enabled for Cases, Contacts, Leads and Opportunities.
To enable presence:
1. From the Salesforce app, click the Glance Company Settings tab at the top.
2. Click **Edit**.
3. Scroll to the **Presence** section.
4. Select **Enable Presence**.
5. Select **Show Visitor Information** if you want to display visitor information prior to sessions. Refer to the [Viewing Visitor Information](../sf_visitor) page for more details.
6. If you want the visitor to receive a prompt in their browser window to accept before the Cobrowse session starts, select **Show Terms To Visitor Before Connecting**.
7. Click **Save**.
## Glance Buttons
This section controls which buttons appear in the Glance Lightning Component when it is on a record. These settings also apply in Classic when the Lightning Component is wrapped in a VisualForce page. By default, most buttons are enabled for Cases, Contacts, Leads and Opportunities.
 To modify Glance button settings:
1. From the Salesforce app, click the **Glance Company Settings** tab at the top.
2. Click **Edit**.
3. Scroll to the Glance Buttons section.
4. If you want to modify an existing button configuration:
1. For **Object**, choose which object you want to configure the Glance buttons for. The options in this list are determined by which Lookup fields are on the Glance Session object.
2. For **Show**, select this option if you want the Show button to appear or not. Show enables your Glance user to show their screen and can invite anyone to join.
3. For **View**, choose if you want to be able to view the visitor's screen.
4. For **Join**, select this option if you want the Join button to appear or not. Join allows your Glance user to join Cobrowse and Screen Share sessions started by customers on your website, on their desktop, or in your mobile app.
5. For **Video** select this option if you want to start a video session. More information on configuring this feature is available [here](/glance-cobrowse/video).
6. For **Visitor ID Object**, choose which object the visitor ID is located from. You can choose the object you are configuring Glance on or any parent object. You should only modify this menu if you are configuring join sessions with 1-Click Connect through Glance's Presence service.
7. For **Visitor ID Field**, choose the field to use for the visitor ID from the Object you defined in the Visitor ID Object setting. If no Visitor ID is selected, the Join button will default to asking your user for a session key.
8. For **Auto Join**, select this option if you want users to automatically connect to any in-progress Glance session when they load the record in Salesforce. This is used in cases where Glance is fully integrated into the call center experience. This option is currently only supported for Cases. For more information, contact Glance.
5. If you want to configure Glance for another object, at the top of the section click **Add**.
6. Click **Save**.
For instructions on setting up Cobrowse on your website to join a session through CRM integration, please review the Cobrowse [User Guide](/users/glance-cobrowse/getting-started/) and the [Cobrowse Customizing](/users/glance-cobrowse/getting-started/widget-customization/) section.
## Profile Settings
This section describes how to configure and enable Profiles to use Glance.
If you are provisioning users for the first time, go to the [Granting User Access](#granting-user-access) section. If you are provisioning additional users or modifying existing user settings, go to the [Add Permission Sets](#add-permission-sets) section.
### Granting User Access
To enable Glance for your users, you need to:
1. Modify Profile Settings to grant profiles access to Glance buttons.
2. Add permission sets to users that you want to grant access.
### Modify Profile Settings
1. From the Salesforce app, click the **Glance Company Settings** tab at the top.
2. Click **Edit**.
3. Scroll to the **Profile Settings** section.
4. If you want to modify an existing Profile configuration:
1. For **Profile**, choose which Profile you want to configure the Glance buttons for.
2. Under **Show**, **View** or **Join**, check which buttons you want to be available for Users with that Profile.
3. Under **Join In**, choose whether Users with that Profile will join sessions in a Browser Tab or in the Glance Client. Joining sessions in the Glance Client requires Users to have the client installed. If the User is working from Chrome or Firefox, they will also need the Glance browser extension. See [Glance Buttons](#glance-buttons) above for details on button functions.
4. Under **Add Video** choose the type of video experience you would like agents to have.
* **No Video:** Agents have no video experience
* **Agent Video:** Agents show 1-way Video
* **Multi-Participant Video: Small**: Multi-way video that starts in small video mode. Note this configuration is only supported for 1-Click Connect.
* **Multi-Participant Video: Large**: Multi-way video that starts in large video mode. Note this configuration is only supported for 1-Click Connect.
5. If you want to modify video profile configurations, choose either **Video (SMS)** or **Video (APP)**.
To modify Glance button settings:
1. From the Salesforce app, click the **Glance Company Settings** tab at the top.
2. Click **Edit**.
3. Scroll to the Glance Buttons section.
4. If you want to modify an existing button configuration:
1. For **Object**, choose which object you want to configure the Glance buttons for. The options in this list are determined by which Lookup fields are on the Glance Session object.
2. For **Show**, select this option if you want the Show button to appear or not. Show enables your Glance user to show their screen and can invite anyone to join.
3. For **View**, choose if you want to be able to view the visitor's screen.
4. For **Join**, select this option if you want the Join button to appear or not. Join allows your Glance user to join Cobrowse and Screen Share sessions started by customers on your website, on their desktop, or in your mobile app.
5. For **Video** select this option if you want to start a video session. More information on configuring this feature is available [here](/glance-cobrowse/video).
6. For **Visitor ID Object**, choose which object the visitor ID is located from. You can choose the object you are configuring Glance on or any parent object. You should only modify this menu if you are configuring join sessions with 1-Click Connect through Glance's Presence service.
7. For **Visitor ID Field**, choose the field to use for the visitor ID from the Object you defined in the Visitor ID Object setting. If no Visitor ID is selected, the Join button will default to asking your user for a session key.
8. For **Auto Join**, select this option if you want users to automatically connect to any in-progress Glance session when they load the record in Salesforce. This is used in cases where Glance is fully integrated into the call center experience. This option is currently only supported for Cases. For more information, contact Glance.
5. If you want to configure Glance for another object, at the top of the section click **Add**.
6. Click **Save**.
For instructions on setting up Cobrowse on your website to join a session through CRM integration, please review the Cobrowse [User Guide](/users/glance-cobrowse/getting-started/) and the [Cobrowse Customizing](/users/glance-cobrowse/getting-started/widget-customization/) section.
## Profile Settings
This section describes how to configure and enable Profiles to use Glance.
If you are provisioning users for the first time, go to the [Granting User Access](#granting-user-access) section. If you are provisioning additional users or modifying existing user settings, go to the [Add Permission Sets](#add-permission-sets) section.
### Granting User Access
To enable Glance for your users, you need to:
1. Modify Profile Settings to grant profiles access to Glance buttons.
2. Add permission sets to users that you want to grant access.
### Modify Profile Settings
1. From the Salesforce app, click the **Glance Company Settings** tab at the top.
2. Click **Edit**.
3. Scroll to the **Profile Settings** section.
4. If you want to modify an existing Profile configuration:
1. For **Profile**, choose which Profile you want to configure the Glance buttons for.
2. Under **Show**, **View** or **Join**, check which buttons you want to be available for Users with that Profile.
3. Under **Join In**, choose whether Users with that Profile will join sessions in a Browser Tab or in the Glance Client. Joining sessions in the Glance Client requires Users to have the client installed. If the User is working from Chrome or Firefox, they will also need the Glance browser extension. See [Glance Buttons](#glance-buttons) above for details on button functions.
4. Under **Add Video** choose the type of video experience you would like agents to have.
* **No Video:** Agents have no video experience
* **Agent Video:** Agents show 1-way Video
* **Multi-Participant Video: Small**: Multi-way video that starts in small video mode. Note this configuration is only supported for 1-Click Connect.
* **Multi-Participant Video: Large**: Multi-way video that starts in large video mode. Note this configuration is only supported for 1-Click Connect.
5. If you want to modify video profile configurations, choose either **Video (SMS)** or **Video (APP)**.[Video SMS](/users/mobile-camera) allows you to send SMS text invitations to view the visitor's camera. Video (APP) allows you to start two-way video sessions. Note: your group must be provisioned with access to start mobile video sessions, and you cannot choose both video options. If you want access to these features, [Contact Glance](/users/account-management/contact/). * Under **Video (SMS)**, choose this option if you want to enable users to send visitors an SMS invitation to show the agent their camera. Then under **Mobile Video** choose a default camera for the visitor. * Under **Video (APP)**: choose this option if you want to enable users to start two-way video sessions. Then under **Mobile Video** choose a default camera for the visitor. 5. If you want to configure Glance for another Profile, at the top of the section click **Add**. 6. At the top of the page, click **Save**. ### Add Permission Sets Now modify your permission sets to enable Glance for your users. 1. Click **Setup** (gear icon). 2. In Quick Find, search for _Permission Sets_. 3. Select **Glance User**. 4. Click **Manage Assignments**. 5. Select the users you want to add, and click **Add Assignments**. If a User views the Glance Component and does not have Profile Settings configured for their Profile, or if buttons are not enabled for the Object, they will see an error message.
 You can [hide buttons](../hide_component) for users without access to Glance, so they do not see this error.
## Glance for Salesforce Users
This section shows a list of all the current users including their account and subscription details. If users authenticate with SSO, they will not appear in the list, unless they manually entered their Glance Address / Password.
To remove the association between a Salesforce account and the Glance account:
1. From the Salesforce app, click the Glance Company Settings tab at the top.
2. Click **Edit**.
3. Scroll to the Glance for Salesforce Users section.
4. Locate the user you want to modify.
5. In the Action column, click **Del**.
6. Click **OK**.
You can [hide buttons](../hide_component) for users without access to Glance, so they do not see this error.
## Glance for Salesforce Users
This section shows a list of all the current users including their account and subscription details. If users authenticate with SSO, they will not appear in the list, unless they manually entered their Glance Address / Password.
To remove the association between a Salesforce account and the Glance account:
1. From the Salesforce app, click the Glance Company Settings tab at the top.
2. Click **Edit**.
3. Scroll to the Glance for Salesforce Users section.
4. Locate the user you want to modify.
5. In the Action column, click **Del**.
6. Click **OK**.
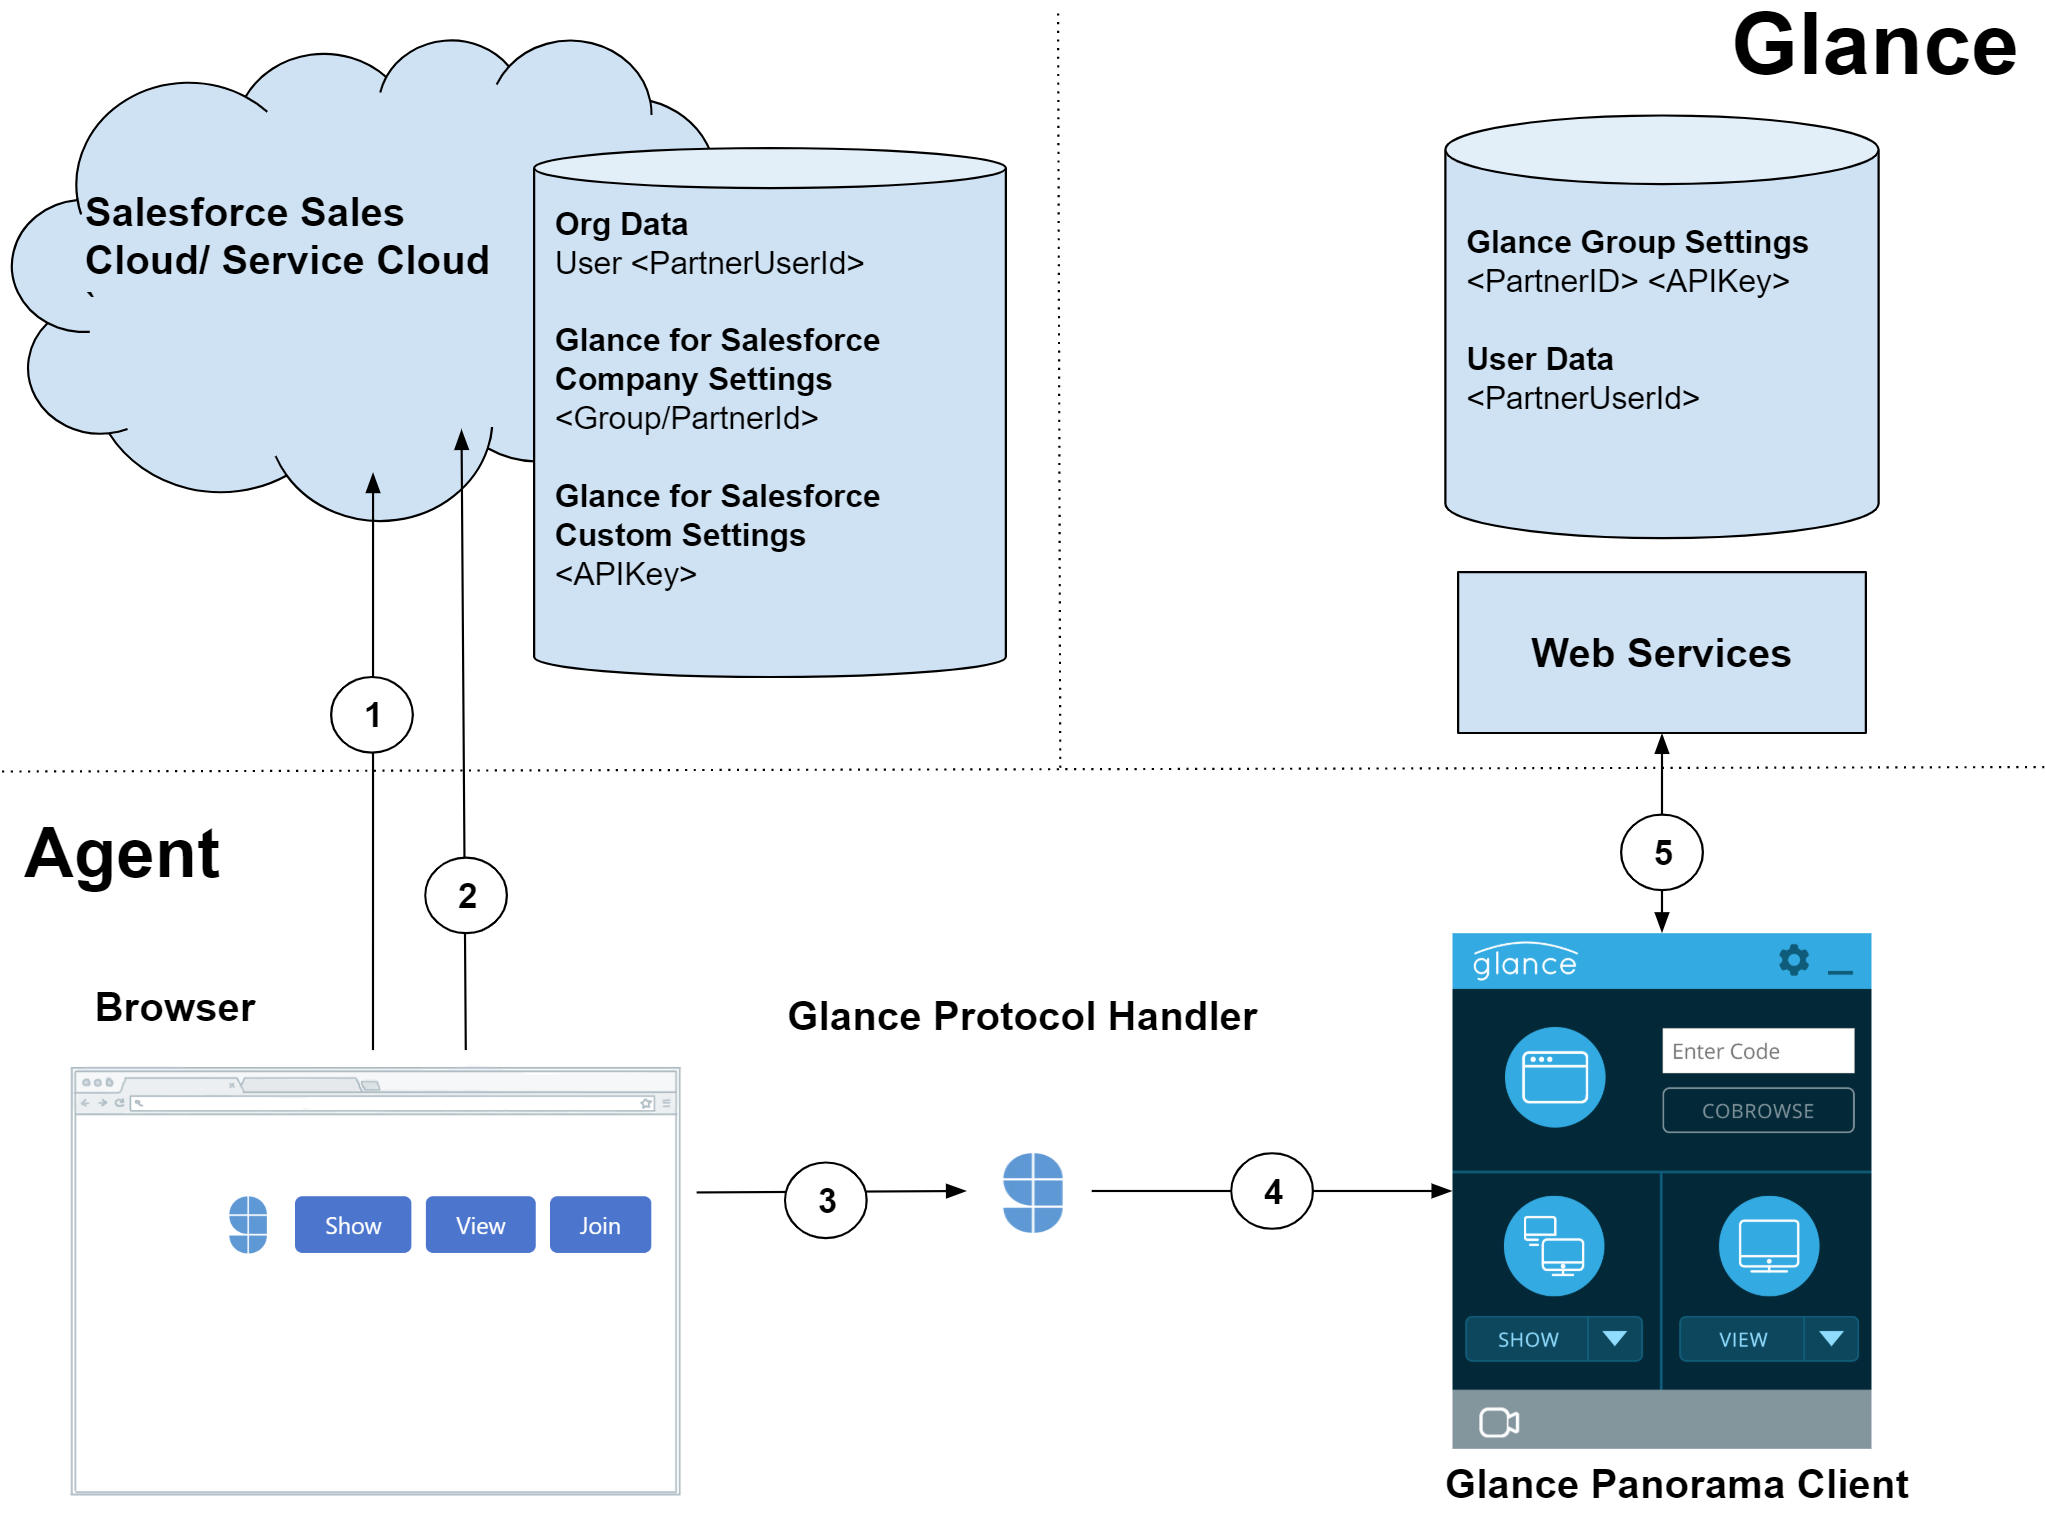 ## Detailed Flow
1. The agent browser requests an object (Lead, Contact, Case) from Salesforce. The Salesforce server serves a page layout with an embedded Glance for Salesforce Visualforce page.
2. The browser requests the Glance for Salesforce Visualforce page.
* The Glance for Salesforce Apex code retrieves the PartnerId (GroupId) from Company Settings, PartnerUserId from the specified User field, and shared secret APIKey from Custom Settings.
* Generates the LoginKey and `glancepanorama://` protocol URL.
* Responds with a page containing buttons, JavaScript, and URL.
3. The agent clicks the Glance button.
* The JavaScript invokes a protocol URL.
* The registered protocol handler (`GlanceLauncher.exe`) opens with a URL containing the command and parameters: PartnerId, PartnerUserId, LoginKey.
4. The protocol handler `.exe` file launches the Glance Client (if not running), then transmits the protocol URL (via ServiceModel/named pipes).
5. The client calls Glance Web Services to authenticate, passing the PartnerId, PartnerUserId, and LoginKey.
6. Web Services uses PartnerId to retrieve the secret APIKey, and validates the LoginKey. It then maps the PartnerUserId to a Glance user, and validates access and privileges. The web service returns validation, privileges, and settings, and for actions that start a session, returns a server and server key.
=================================================================
FILE: /developer/integrations/salesforce/sf_sync
=================================================================
Glance automatically creates Glance session records when users launch a Glance session from Salesforce. The Glance session records are automatically associated with the Salesforce object from which the session was initiated. You can access Glance Session data from the app launcher (9-dot menu) and search for Glance Sessions.
The record is created immediately upon using Glance with some initial data:
* Name
* Key
* Type
* Video Use
* Start Time
* Duration
* Associated Object
* ID
## Detailed Flow
1. The agent browser requests an object (Lead, Contact, Case) from Salesforce. The Salesforce server serves a page layout with an embedded Glance for Salesforce Visualforce page.
2. The browser requests the Glance for Salesforce Visualforce page.
* The Glance for Salesforce Apex code retrieves the PartnerId (GroupId) from Company Settings, PartnerUserId from the specified User field, and shared secret APIKey from Custom Settings.
* Generates the LoginKey and `glancepanorama://` protocol URL.
* Responds with a page containing buttons, JavaScript, and URL.
3. The agent clicks the Glance button.
* The JavaScript invokes a protocol URL.
* The registered protocol handler (`GlanceLauncher.exe`) opens with a URL containing the command and parameters: PartnerId, PartnerUserId, LoginKey.
4. The protocol handler `.exe` file launches the Glance Client (if not running), then transmits the protocol URL (via ServiceModel/named pipes).
5. The client calls Glance Web Services to authenticate, passing the PartnerId, PartnerUserId, and LoginKey.
6. Web Services uses PartnerId to retrieve the secret APIKey, and validates the LoginKey. It then maps the PartnerUserId to a Glance user, and validates access and privileges. The web service returns validation, privileges, and settings, and for actions that start a session, returns a server and server key.
=================================================================
FILE: /developer/integrations/salesforce/sf_sync
=================================================================
Glance automatically creates Glance session records when users launch a Glance session from Salesforce. The Glance session records are automatically associated with the Salesforce object from which the session was initiated. You can access Glance Session data from the app launcher (9-dot menu) and search for Glance Sessions.
The record is created immediately upon using Glance with some initial data:
* Name
* Key
* Type
* Video Use
* Start Time
* Duration
* Associated Object
* ID
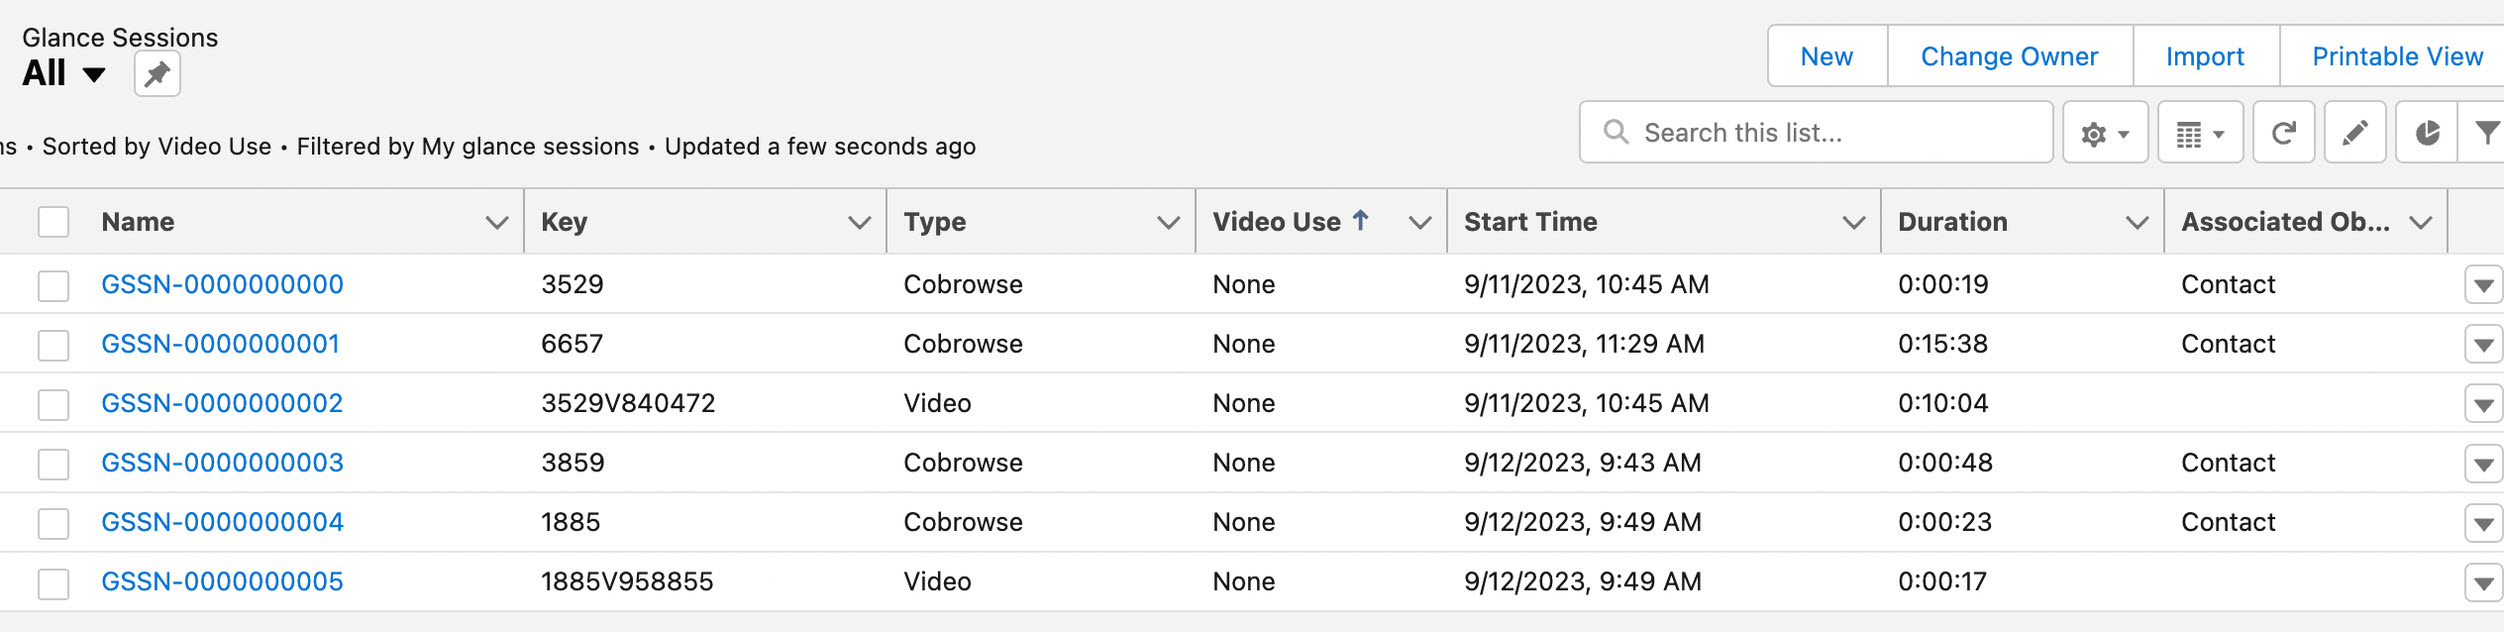 The remaining session details are added after the next scheduled synchronization.
Synchronization requires setting a Default Glance Admin in [Glance Company Settings](../sf_settings/#settings). The user selected must be an Admin in your company's Glance Account and must have the Glance Admin Permission set assigned.
You can see the history of syncs or trigger a sync manually by going to Glance Sync History tab from the App Launcher or the Glance app. You'll see a list of all recent sync jobs and any failures that may have occurred.
The remaining session details are added after the next scheduled synchronization.
Synchronization requires setting a Default Glance Admin in [Glance Company Settings](../sf_settings/#settings). The user selected must be an Admin in your company's Glance Account and must have the Glance Admin Permission set assigned.
You can see the history of syncs or trigger a sync manually by going to Glance Sync History tab from the App Launcher or the Glance app. You'll see a list of all recent sync jobs and any failures that may have occurred.
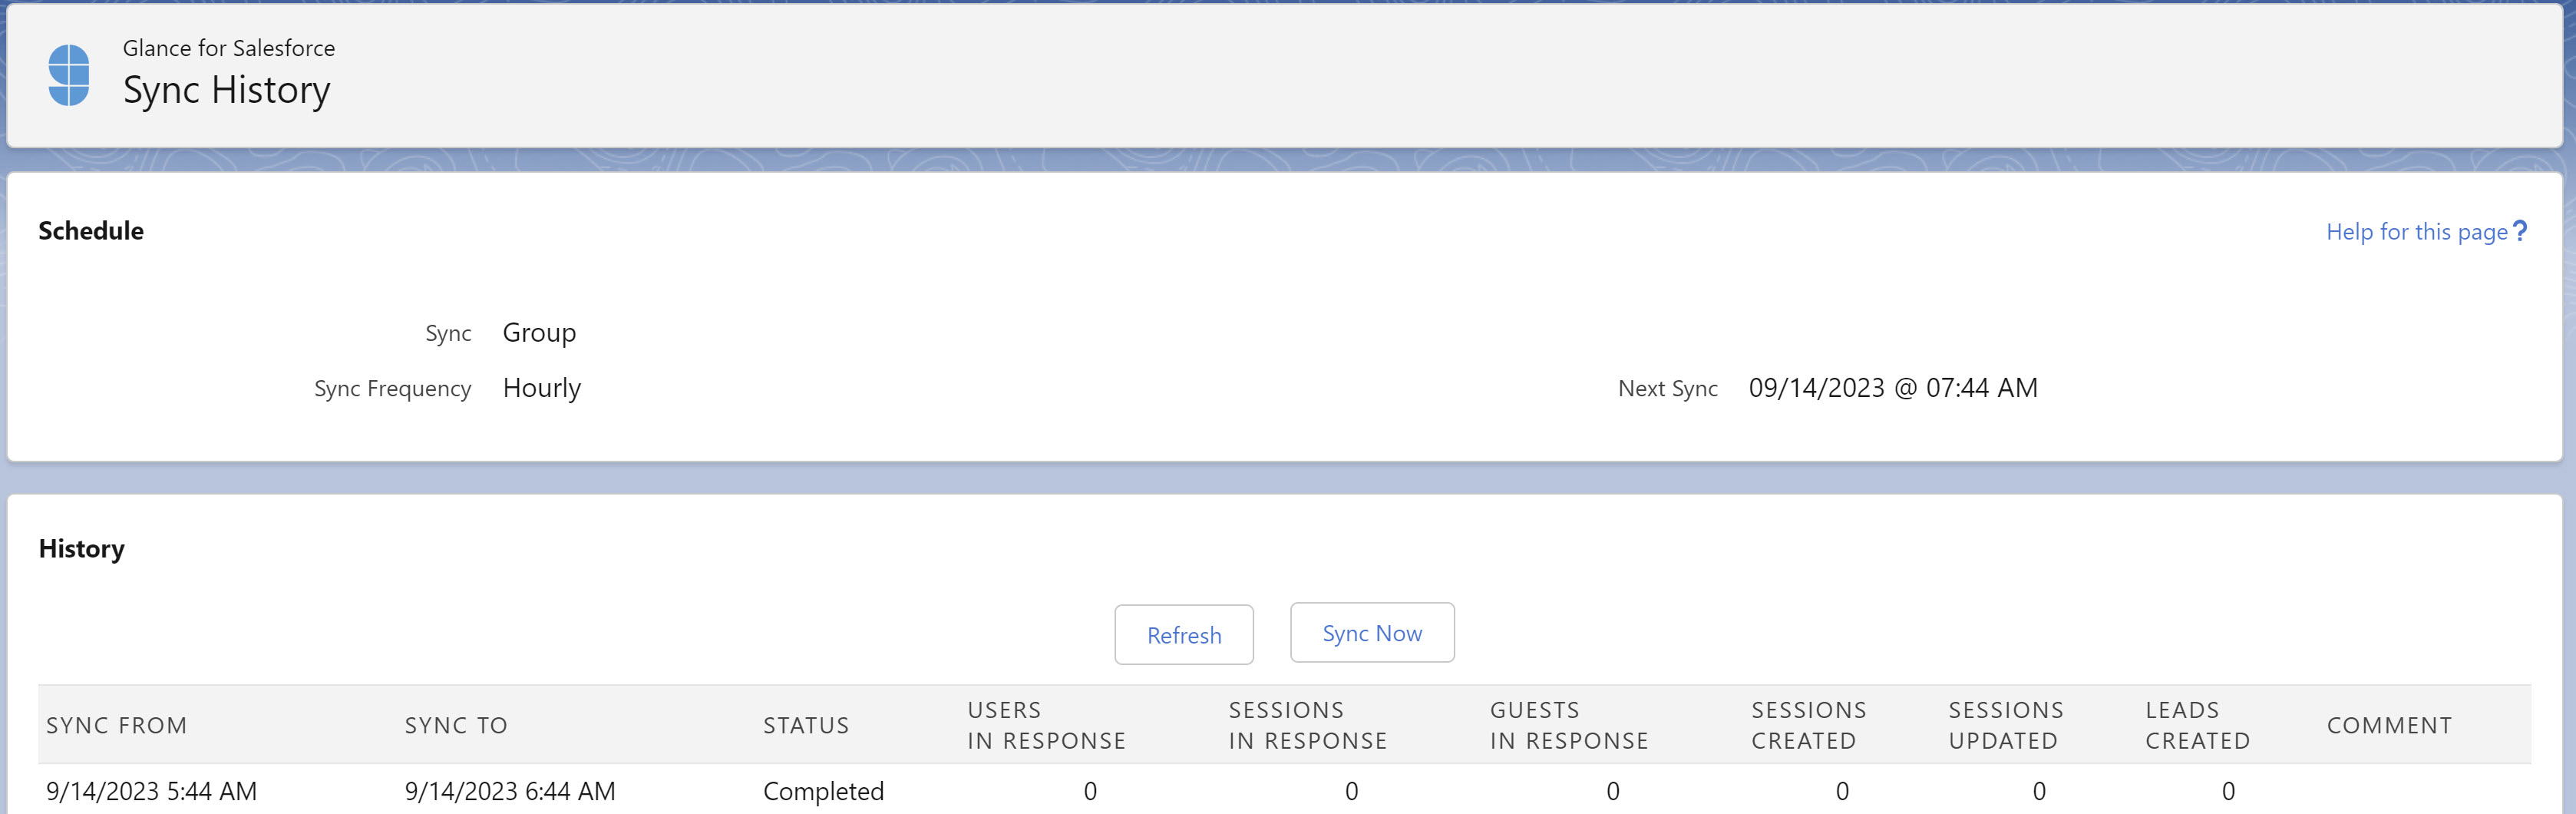 ### Session Type Reference Table
The following table describes the possible session types that can be listed in the **Type** column.
| **Session Type** | **Description** |
| :--- | :--- |
| **Cobrowse** | A Cobrowse session, meaning the customer shares their web browser with the agent via a session key or presence. |
| **Show** | A 'show' screen share session, meaning the agent shows their screen to the guest. |
| **View** | A 'view' screen share session, meaning the agent views the guest's screen. |
| **Video** | A one-way, multi-way, or mobile camera share video session. Use the **Video Use** column to filter by video type. |
| **App** | A mobile Cobrowse session, meaning the visitor shares their mobile app screen with the agent. |
### Session Type Reference Table
The following table describes the possible session types that can be listed in the **Type** column.
| **Session Type** | **Description** |
| :--- | :--- |
| **Cobrowse** | A Cobrowse session, meaning the customer shares their web browser with the agent via a session key or presence. |
| **Show** | A 'show' screen share session, meaning the agent shows their screen to the guest. |
| **View** | A 'view' screen share session, meaning the agent views the guest's screen. |
| **Video** | A one-way, multi-way, or mobile camera share video session. Use the **Video Use** column to filter by video type. |
| **App** | A mobile Cobrowse session, meaning the visitor shares their mobile app screen with the agent. |
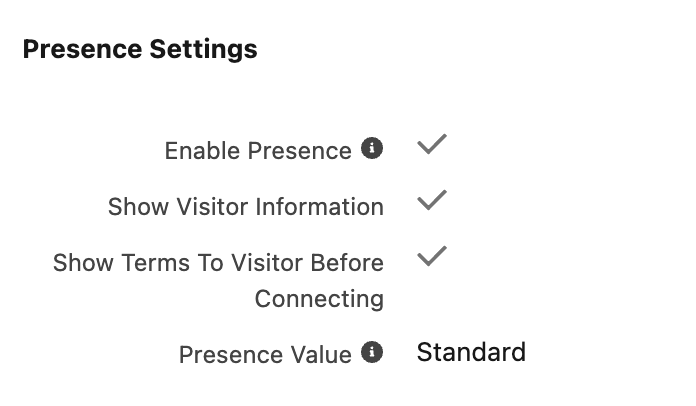 4. When a visitor is detected on the current Salesforce Object, the **Glance Component** displays the following information:
* **Type:** Desktop Web, Mobile Web, or Mobile App (SDK).
* **URL:** The URL of the page the visitor is browsing; you can hover over the URL to view the entire path.
* **Browser:** The browser the visitor is using and its version.
* **OS:** The Operating System for the visitor.
4. When a visitor is detected on the current Salesforce Object, the **Glance Component** displays the following information:
* **Type:** Desktop Web, Mobile Web, or Mobile App (SDK).
* **URL:** The URL of the page the visitor is browsing; you can hover over the URL to view the entire path.
* **Browser:** The browser the visitor is using and its version.
* **OS:** The Operating System for the visitor.
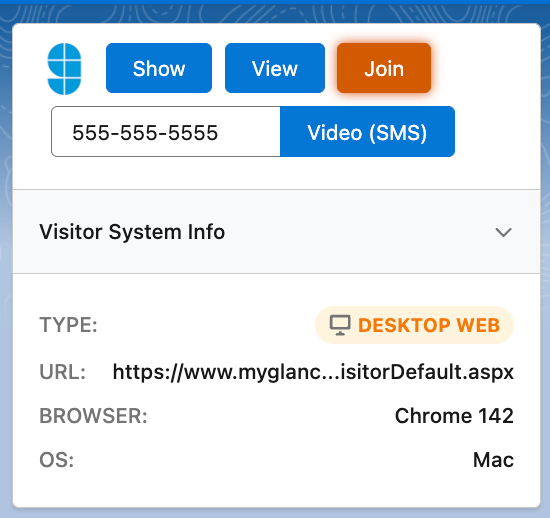 =================================================================
FILE: /developer/integrations/saml/cryptographic_security
=================================================================
Glance requires all SAML transactions to take place over TLS-secured (HTTPS) connections.
All identity providers cryptographically sign their transactions. The Metadata Discovery Endpoint you provide to Glance specifies the public key necessary for Glance to verify those signatures. Glance supports signatures using the SHA-512, SHA-384, SHA-256, or SHA-1 algorithms. By configuring your identity provider you may choose the algorithm you prefer from among those choices. Your identity provider may cryptographically sign the document at either the Reply or Assertion level; Glance accepts either.
Some identity providers also encrypt their transactions. If your identity provider requires encrypted transactions, Glance must provide a public key to you for that purpose.
=================================================================
FILE: /developer/integrations/saml
=================================================================
*Secure Transparent Sign-On* (*single sign-on* or SSO) is available for the Glance Client, Glance Screen Share, Glance Device Casting, and Glance Cobrowse. It is also available to sign in to Glance's *Manage Your Account* page.
You may configure your account (group) to use SSO. Once configured, it is available to all the users in your account.
The Glance service and website is a SAML Service Provider (also known as a Relying Party). Glance uses customer-furnished Identity Providers for secure transparent sign-on. Glance services work correctly when sign-on is initiated either by the Service Provider or the Identity Provider.
## Service Target URLs
When accessing Glance via SSO, you use *Service Target URLs* (STUs). More information about STUs is [here](../service-target-urls#stus-with-single-sign-on).
## Identity Providers
SAML 2.0-compliant Identity Provider services include (among others):
* Microsoft Active Directory Federation Services (ADFS)
* Microsoft Entra
* Ping
* OneLogin
* Salesforce.com
* CA Single Sign-On (formerly CA SiteMinder)
* Okta
* Shibboleth
Glance's SAML SSO implementation offers optional automatic provisioning (just-in-time provisioning) for new users. If you wish to use automatic provisioning, please contact Glance Customer Success.
=================================================================
FILE: /developer/integrations/saml/public-key-update
=================================================================
SAML single sign-on uses cryptographically signed tokens known as Assertions. They are signed by your Identity Provider system (Ping Federate or Active Directory Federation Services, for example). Glance checks the signature to make sure the token is valid before accepting it. Your Identity Provider uses the secret key from an internal encryption certificate to sign Assertions. When you provision SAML at Glance, you give our system the public key from that certificate.
From time to time, your identity provider's encryption certificate may change. This might be due to routine cryptographic key rotation, or less likely, if your identity provider's secret key was compromised.
When your identity provider's certificate changes, you must also change the public key you give our system.
You can give us up to five public keys. If you give us multiple public keys, we accept Assertion tokens signed with any of them.
## Changing your public key with a Metadata Discovery Endpoint
1. You may have a URL known as a Federation Metadata Discovery Endpoint from your identity provider. It is the URL of an XML document and looks something like this example:
```text
https://identity.example.com/FederationMetadata/2007-06/FederationMetadata.xml
```
2. Log in to Glance [by following these instructions](/users/account-management/log_in).
3. Go to the **SETTINGS** tab, scroll to the bottom, and click the [Manage your single sign-on settings](https://www.glance.net/account/AccountProvisionSSO.aspx#ctl00_ctl00_MainContent_AccountMainContent_Metadata) link.
4. Scroll to the **Metadata Discovery Endpoint** line, click the **Choose File** button, enter your URL, and press **Open**.
5. Scroll to the bottom of the page and click **OK**.
That updates your public key.
## Changing your public key with text
1. Make sure you have the text of your new public key. It is a block of text looking something like this but with more lines. Be sure it includes the first `BEGIN CERTIFICATE` and last `END CERTIFICATE` lines. You will need to copy your block of text and paste it into Glance. *(Don't copy this one, it's just an example.)*
```text
-----BEGIN CERTIFICATE-----
MIIC3jCCu1gMGvKZTEqhAXZ2TPRz0pREDACTEDzBMA0GCSqGSIb3DQEBCwUAA4IB
FAA5AZNwsjP6JkNo8CREDACTED6dXaLhRlUor58QouJca0nfNQebpRlLHZ5mA7Zi
2dVqREDACTED8mABSESbC76J2gKPNnZEFlJyIxXtzMMA18YlrVwdOuU3YZ1noStU
oLMVYQqyjPj7MSQTwKwTMY2e
-----END CERTIFICATE-----
```
2. Log in to Glance [by following these instructions](/users/account-management/log_in).
3. Navigate to the **SETTINGS** tab, scroll to the bottom, and click the [Manage your single sign-on settings](https://www.glance.net/account/AccountProvisionSSO.aspx#ctl00_ctl00_MainContent_AccountMainContent_VX09Cert) link.
4. Scroll to the first **X.509 Public Key** line.
5. You may *replace* your existing public key with the new one. In that case delete all the text from the textbox, and paste in your new key. If you do this, Glance rejects future Assertion tokens signed with the old key.
6. You may *add* a new public key to the existing one by pasting it into an empty **X.509 Public Key** text box. If you do this, Glance accepts future Assertion tokens signed with either key. Using multiple public keys allows a graceful key rotation operation.
7. Scroll to the bottom of the page and click **OK**.
## Changing your API Key
Refer to [Glance Account Values](/users/account-management/account_values).
=================================================================
FILE: /developer/integrations/saml/saml_adfs
=================================================================
Glance offers Secure Transparent Sign-On to our services. Follow these instructions to add a Relying Party Trust to your AD/FS instance for Glance services.
The Glance Cobrowse service and website is a SAML 2.0 _Relying Party_. Glance customers with on-premises Active Directory / Federation Services may use it to authenticate their subscribers to Glance services.
Glance does not support SAML Logout.
## Prerequisites
Before you begin:
* Your enterprise must use Active Directory / Federation Services, and you are the Windows Domain administrator. Make a note of the URL for your AD/FS Metadata Discovery Endpoint. It looks something like this: `https://adfs.example.com/FederationMetadata/2007-06/FederationMetadata.xml`.
* You need an enterprise account on Glance, and you should ask Glance Customer Success to furnish your idpid value, also known as a group id value. It is a number like **999999**.
* Your Glance enterprise account must have some subscribers in it. They need to be identified by email address or the field Glance calls Partner User Id. These identifiers come from the LDAP server in your Active Directory installation. Your AD/FS server sends them to Glance, and Glance uses them to identify your users.
=================================================================
FILE: /developer/integrations/saml/cryptographic_security
=================================================================
Glance requires all SAML transactions to take place over TLS-secured (HTTPS) connections.
All identity providers cryptographically sign their transactions. The Metadata Discovery Endpoint you provide to Glance specifies the public key necessary for Glance to verify those signatures. Glance supports signatures using the SHA-512, SHA-384, SHA-256, or SHA-1 algorithms. By configuring your identity provider you may choose the algorithm you prefer from among those choices. Your identity provider may cryptographically sign the document at either the Reply or Assertion level; Glance accepts either.
Some identity providers also encrypt their transactions. If your identity provider requires encrypted transactions, Glance must provide a public key to you for that purpose.
=================================================================
FILE: /developer/integrations/saml
=================================================================
*Secure Transparent Sign-On* (*single sign-on* or SSO) is available for the Glance Client, Glance Screen Share, Glance Device Casting, and Glance Cobrowse. It is also available to sign in to Glance's *Manage Your Account* page.
You may configure your account (group) to use SSO. Once configured, it is available to all the users in your account.
The Glance service and website is a SAML Service Provider (also known as a Relying Party). Glance uses customer-furnished Identity Providers for secure transparent sign-on. Glance services work correctly when sign-on is initiated either by the Service Provider or the Identity Provider.
## Service Target URLs
When accessing Glance via SSO, you use *Service Target URLs* (STUs). More information about STUs is [here](../service-target-urls#stus-with-single-sign-on).
## Identity Providers
SAML 2.0-compliant Identity Provider services include (among others):
* Microsoft Active Directory Federation Services (ADFS)
* Microsoft Entra
* Ping
* OneLogin
* Salesforce.com
* CA Single Sign-On (formerly CA SiteMinder)
* Okta
* Shibboleth
Glance's SAML SSO implementation offers optional automatic provisioning (just-in-time provisioning) for new users. If you wish to use automatic provisioning, please contact Glance Customer Success.
=================================================================
FILE: /developer/integrations/saml/public-key-update
=================================================================
SAML single sign-on uses cryptographically signed tokens known as Assertions. They are signed by your Identity Provider system (Ping Federate or Active Directory Federation Services, for example). Glance checks the signature to make sure the token is valid before accepting it. Your Identity Provider uses the secret key from an internal encryption certificate to sign Assertions. When you provision SAML at Glance, you give our system the public key from that certificate.
From time to time, your identity provider's encryption certificate may change. This might be due to routine cryptographic key rotation, or less likely, if your identity provider's secret key was compromised.
When your identity provider's certificate changes, you must also change the public key you give our system.
You can give us up to five public keys. If you give us multiple public keys, we accept Assertion tokens signed with any of them.
## Changing your public key with a Metadata Discovery Endpoint
1. You may have a URL known as a Federation Metadata Discovery Endpoint from your identity provider. It is the URL of an XML document and looks something like this example:
```text
https://identity.example.com/FederationMetadata/2007-06/FederationMetadata.xml
```
2. Log in to Glance [by following these instructions](/users/account-management/log_in).
3. Go to the **SETTINGS** tab, scroll to the bottom, and click the [Manage your single sign-on settings](https://www.glance.net/account/AccountProvisionSSO.aspx#ctl00_ctl00_MainContent_AccountMainContent_Metadata) link.
4. Scroll to the **Metadata Discovery Endpoint** line, click the **Choose File** button, enter your URL, and press **Open**.
5. Scroll to the bottom of the page and click **OK**.
That updates your public key.
## Changing your public key with text
1. Make sure you have the text of your new public key. It is a block of text looking something like this but with more lines. Be sure it includes the first `BEGIN CERTIFICATE` and last `END CERTIFICATE` lines. You will need to copy your block of text and paste it into Glance. *(Don't copy this one, it's just an example.)*
```text
-----BEGIN CERTIFICATE-----
MIIC3jCCu1gMGvKZTEqhAXZ2TPRz0pREDACTEDzBMA0GCSqGSIb3DQEBCwUAA4IB
FAA5AZNwsjP6JkNo8CREDACTED6dXaLhRlUor58QouJca0nfNQebpRlLHZ5mA7Zi
2dVqREDACTED8mABSESbC76J2gKPNnZEFlJyIxXtzMMA18YlrVwdOuU3YZ1noStU
oLMVYQqyjPj7MSQTwKwTMY2e
-----END CERTIFICATE-----
```
2. Log in to Glance [by following these instructions](/users/account-management/log_in).
3. Navigate to the **SETTINGS** tab, scroll to the bottom, and click the [Manage your single sign-on settings](https://www.glance.net/account/AccountProvisionSSO.aspx#ctl00_ctl00_MainContent_AccountMainContent_VX09Cert) link.
4. Scroll to the first **X.509 Public Key** line.
5. You may *replace* your existing public key with the new one. In that case delete all the text from the textbox, and paste in your new key. If you do this, Glance rejects future Assertion tokens signed with the old key.
6. You may *add* a new public key to the existing one by pasting it into an empty **X.509 Public Key** text box. If you do this, Glance accepts future Assertion tokens signed with either key. Using multiple public keys allows a graceful key rotation operation.
7. Scroll to the bottom of the page and click **OK**.
## Changing your API Key
Refer to [Glance Account Values](/users/account-management/account_values).
=================================================================
FILE: /developer/integrations/saml/saml_adfs
=================================================================
Glance offers Secure Transparent Sign-On to our services. Follow these instructions to add a Relying Party Trust to your AD/FS instance for Glance services.
The Glance Cobrowse service and website is a SAML 2.0 _Relying Party_. Glance customers with on-premises Active Directory / Federation Services may use it to authenticate their subscribers to Glance services.
Glance does not support SAML Logout.
## Prerequisites
Before you begin:
* Your enterprise must use Active Directory / Federation Services, and you are the Windows Domain administrator. Make a note of the URL for your AD/FS Metadata Discovery Endpoint. It looks something like this: `https://adfs.example.com/FederationMetadata/2007-06/FederationMetadata.xml`.
* You need an enterprise account on Glance, and you should ask Glance Customer Success to furnish your idpid value, also known as a group id value. It is a number like **999999**.
* Your Glance enterprise account must have some subscribers in it. They need to be identified by email address or the field Glance calls Partner User Id. These identifiers come from the LDAP server in your Active Directory installation. Your AD/FS server sends them to Glance, and Glance uses them to identify your users.
_Note: Many customers have Active Directory User Principal Names (UPNs) that are the same as user email addresses. These are often a good choice for the shared identifier._ * You may find it helpful to install two web extensions in your Google Chrome browser. The SAML Message Decoder shows the contents of SAML AuthnRequest and Assertion messages. Edit this Cookie shows the contents of browser session cookies and allows their easy deletion. ## Choose a Method to Identify Users The way you identify your users is up to you. You have these choices for a unique identifier for each user: * **By email address:** Some domains employ User Principal Names (UPNs) for E-Mail addresses, and others have a separate attribute. Either one is satisfactory. * **By an arbitrary identifier:** Such as an employee badge number that you furnish. We call this a Partner User Id. This can, at your choice, be the same as E-Mail address or Glance Address, or some different value. * **By Glance Address:** Values like `emp1234.example.glance.net`. You add your users to Glance by preparing a comma-separated values (CSV) file looking something like this: ```csv FirstName,LastName,Email,GlanceAddress,PartnerUID Stephanie,Grant,stephanie.grant@example.com,sgrant.example.glance.net,e0001 Bella,Greene,bella.greene@example.com,bgreene.example.glance.net,e0023 Dorothy,Bond,dorothy.bond@example.com,dbond.example.glance.net,e0245 Hannah,Greene,hannah.greene@example.com,hgreene.example.glance.net,e0018 Gavin,Nolan,gavin.nolan@example.com,ngavin.example.glance.net,e0008 ``` To upload the CSV file: 1. As an Administrator, go to **Portal** > **Add Users**. 2. Under **Upload a list of new users**, select the CSV file. 3. Click **Upload**. [Contact Glance](/users/account-management/contact) if you need assistance. Notice the user attributes for the first example user, Stephanie Grant: * **E-Mail Address:** stephanie.grant@example.com * **Glance Address:** sgrant.example.glance.net * **PartnerUID:** e0001 (this may be a badge number or similar value defined by you). Before you configure claim rules on your AD/FS server, you must pick one of these attributes as a unique identifier for each user. Your claim rules retrieve your chosen identifier from your LDAP server and sends it to Glance in the authorization token. Specifically, the identifier appears as an Attribute in the SAML `
This mismatch prevents Glance from correctly identifying your users. Consider using the Calc program from openoffice.org if you must manipulate this kind of value in your CSV files; it does not strip the leading zeros.
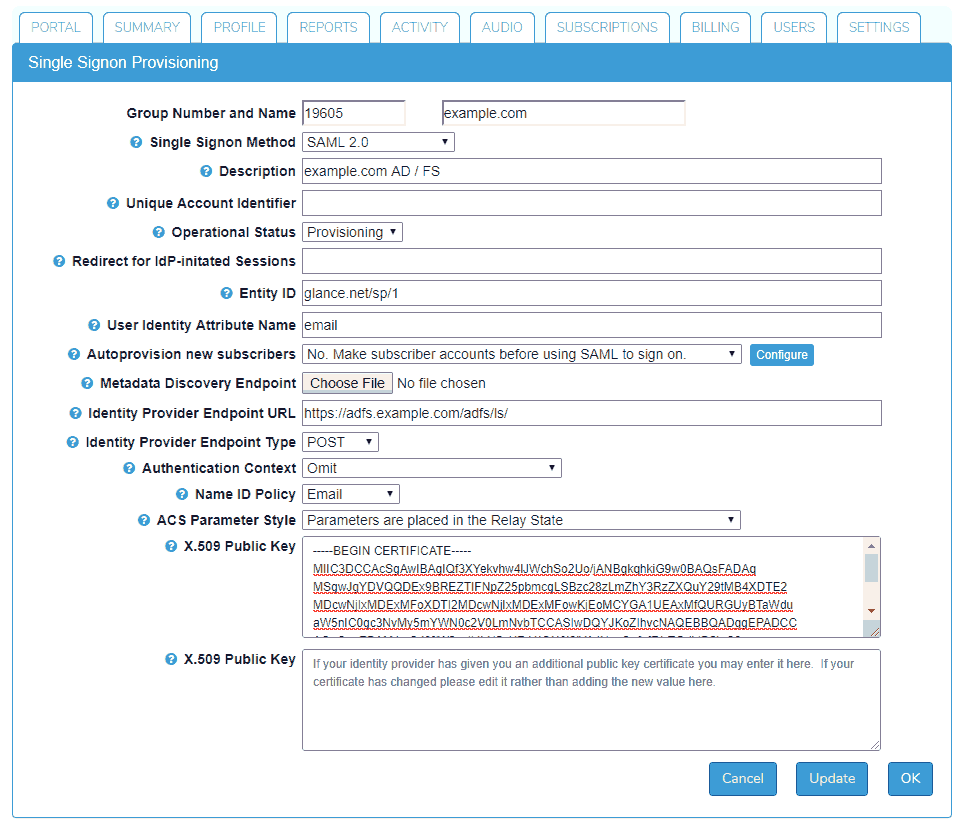 2. Choose a Single Sign-On Method of **SAML 2.0**.
3. Provide a Description for the configuration.
4. Click **Choose File** for the Metadata Discovery Endpoint. Paste the URL for your Metadata Discovery Endpoint into the File Name box and click the **Open** button. Then click the **Update** button. This fills in several provisioning items.
5. Next, you need to set several more items:
* **User Identity Attribute Name:** Should usually be "email".
* **Authentication Context:** Should be "Omit".
* **Name ID Policy:** Should be "Email".
* **ACS Parameter Style:** Should be "Parameters are placed in the Relay State".
6. Click **Update** once again.
## Create a Relying Party Trust
Follow [Microsoft's instructions](https://docs.microsoft.com/en-us/windows-server/identity/ad-fs/operations/create-a-relying-party-trust) on creating a relying party trust.
Select the **Relying Party Trusts** folder in the **AD FS Management** console, and use the Actions sidebar to add a new **Standard Relying Party Trust**. This starts the **Add Relying Party Trust Wizard**.
1. On the **Select Data Source** screen, select the last option, **Enter data about the party manually**.
2. On the **Specify Display Name** screen, enter an appropriate value such as "Glance Networks."
3. On the **Choose Profile** screen, choose **AD FS profile**.
4. Skip over the **Configure Certificate** screen.
5. On the **Configure URL** screen, choose **Enable support for the SAML 2.0 Web SSO protocol**. Using your idpid value in place of 999999, enter `https://www.glance.net/account/GetLoginKey.aspx?idpid=999999` in the **Relying party SAML 2.0 SSO service URL** box.
6. On the **Configure Identifiers** screen, enter `glance.net/sp/1` into the **Relying party trust identifier** box and click the **Add** button.
7. On the **Configure Multi-factor Authentication Now?** screen, choose an appropriate value for your organization.
8. On the **Choose Issuance Authorization Rules** screen, choose **Permit all users to access this relying party**.
9. On the **Ready to Add Trust** screen, check the box marked **Edit Claim Rules** and click **Close**.
## Create Claim Rules
Now that your Relying Party Trust is set up, your next step is to create appropriate claim rules. You must create a pair of rules, one from each of these templates:
* **Send LDAP Attributes as Claims**
* **Transform an Incoming Claim**
Use the following steps in the **Edit Claim Rules** screen.
1. Click **Add Rule...**.
2. On the **Select Rule Template** screen, choose **Send LDAP Attributes as Claims** from the **Claim rule template** dropdown menu.
3. On the **Edit Rule** screen:
* Put an appropriate name into the **Claim rule name** field (e.g., "Email" or "UPN").
* Choose **Active Directory** from the **Attribute store** pulldown menu.
* From the **LDAP Attribute** dropdown menu, choose an appropriate LDAP field. E-Mail-Addresses or User Principal Names might be good choices if your chosen unique identifier is E-Mail.
* From the **Outgoing Claim Type** dropdown menu, choose **E-Mail Address**. (If you have chosen some other unique identifier, pick the appropriate type for that).
* Click **Finish**.
4. Back on the **Edit Claim Rules** screen, click **Add Rule...** again.
5. On the **Select Rule Template** screen, choose **Transform an Incoming Claim** from the **Claim rule template** dropdown menu.
6. On the **Edit Rule** screen:
* Put an appropriate name into the **Claim rule name** field (e.g., "Email Transform").
* From the **Incoming claim type** pulldown menu, choose **E-Mail Address** (or the same value you put into the Outgoing Claim Type for your first claim rule).
* From the **Outgoing claim type** pulldown menu, choose **Name ID** (or Unspecified if using another unique identifier).
* From the **Outgoing name ID format** pulldown, choose **Email**. This choice must match the Name ID Policy setting in Glance's provisioning screen.
* Choose **Pass through all claim values**, and click **OK**.
7. Back on the **Edit Claim Rules** screen, click **OK** again.
## Identity Provider-Initiated (IdP-initiated) SAML SSO via AD/FS
You may want your users to initiate their Glance sessions directly from AD/FS, rather than using a Glance STU. To support both IdP-initiated and service provider initiated Glance sessions, you must make a small change to the Relying Party Trust configuration.
You must add a second SAML Assertion Consumer Service endpoint to the one you added in the Relying Party Trust Wizard.
1. To do this in the AD/FS Management Console, first find Glance's Relying Party Trust, and open its **Properties** box.
2. Choose a Single Sign-On Method of **SAML 2.0**.
3. Provide a Description for the configuration.
4. Click **Choose File** for the Metadata Discovery Endpoint. Paste the URL for your Metadata Discovery Endpoint into the File Name box and click the **Open** button. Then click the **Update** button. This fills in several provisioning items.
5. Next, you need to set several more items:
* **User Identity Attribute Name:** Should usually be "email".
* **Authentication Context:** Should be "Omit".
* **Name ID Policy:** Should be "Email".
* **ACS Parameter Style:** Should be "Parameters are placed in the Relay State".
6. Click **Update** once again.
## Create a Relying Party Trust
Follow [Microsoft's instructions](https://docs.microsoft.com/en-us/windows-server/identity/ad-fs/operations/create-a-relying-party-trust) on creating a relying party trust.
Select the **Relying Party Trusts** folder in the **AD FS Management** console, and use the Actions sidebar to add a new **Standard Relying Party Trust**. This starts the **Add Relying Party Trust Wizard**.
1. On the **Select Data Source** screen, select the last option, **Enter data about the party manually**.
2. On the **Specify Display Name** screen, enter an appropriate value such as "Glance Networks."
3. On the **Choose Profile** screen, choose **AD FS profile**.
4. Skip over the **Configure Certificate** screen.
5. On the **Configure URL** screen, choose **Enable support for the SAML 2.0 Web SSO protocol**. Using your idpid value in place of 999999, enter `https://www.glance.net/account/GetLoginKey.aspx?idpid=999999` in the **Relying party SAML 2.0 SSO service URL** box.
6. On the **Configure Identifiers** screen, enter `glance.net/sp/1` into the **Relying party trust identifier** box and click the **Add** button.
7. On the **Configure Multi-factor Authentication Now?** screen, choose an appropriate value for your organization.
8. On the **Choose Issuance Authorization Rules** screen, choose **Permit all users to access this relying party**.
9. On the **Ready to Add Trust** screen, check the box marked **Edit Claim Rules** and click **Close**.
## Create Claim Rules
Now that your Relying Party Trust is set up, your next step is to create appropriate claim rules. You must create a pair of rules, one from each of these templates:
* **Send LDAP Attributes as Claims**
* **Transform an Incoming Claim**
Use the following steps in the **Edit Claim Rules** screen.
1. Click **Add Rule...**.
2. On the **Select Rule Template** screen, choose **Send LDAP Attributes as Claims** from the **Claim rule template** dropdown menu.
3. On the **Edit Rule** screen:
* Put an appropriate name into the **Claim rule name** field (e.g., "Email" or "UPN").
* Choose **Active Directory** from the **Attribute store** pulldown menu.
* From the **LDAP Attribute** dropdown menu, choose an appropriate LDAP field. E-Mail-Addresses or User Principal Names might be good choices if your chosen unique identifier is E-Mail.
* From the **Outgoing Claim Type** dropdown menu, choose **E-Mail Address**. (If you have chosen some other unique identifier, pick the appropriate type for that).
* Click **Finish**.
4. Back on the **Edit Claim Rules** screen, click **Add Rule...** again.
5. On the **Select Rule Template** screen, choose **Transform an Incoming Claim** from the **Claim rule template** dropdown menu.
6. On the **Edit Rule** screen:
* Put an appropriate name into the **Claim rule name** field (e.g., "Email Transform").
* From the **Incoming claim type** pulldown menu, choose **E-Mail Address** (or the same value you put into the Outgoing Claim Type for your first claim rule).
* From the **Outgoing claim type** pulldown menu, choose **Name ID** (or Unspecified if using another unique identifier).
* From the **Outgoing name ID format** pulldown, choose **Email**. This choice must match the Name ID Policy setting in Glance's provisioning screen.
* Choose **Pass through all claim values**, and click **OK**.
7. Back on the **Edit Claim Rules** screen, click **OK** again.
## Identity Provider-Initiated (IdP-initiated) SAML SSO via AD/FS
You may want your users to initiate their Glance sessions directly from AD/FS, rather than using a Glance STU. To support both IdP-initiated and service provider initiated Glance sessions, you must make a small change to the Relying Party Trust configuration.
You must add a second SAML Assertion Consumer Service endpoint to the one you added in the Relying Party Trust Wizard.
1. To do this in the AD/FS Management Console, first find Glance's Relying Party Trust, and open its **Properties** box.
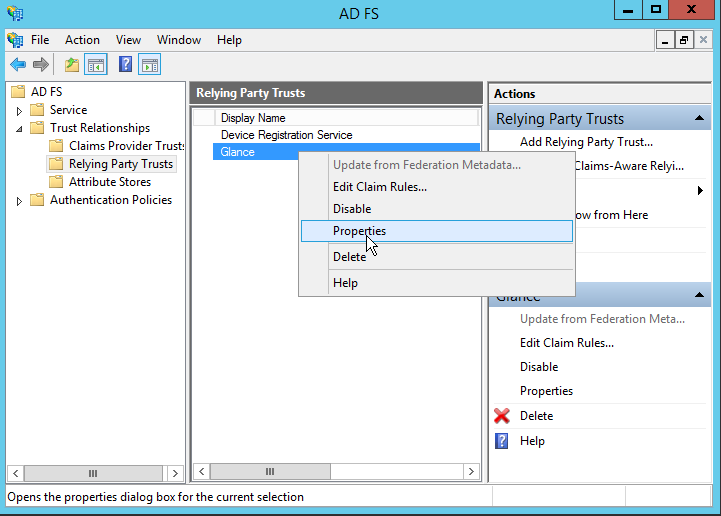 2. Choose the **Endpoints** tab, and click the **Add SAML...** button.
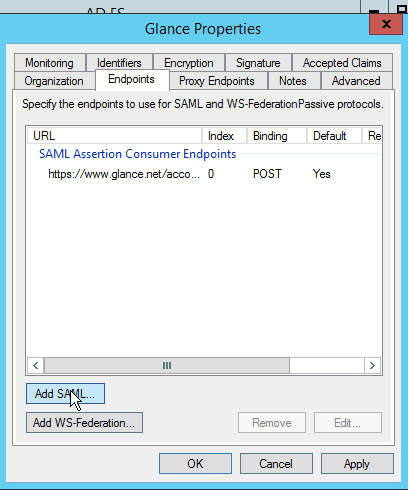 3. Add another endpoint URL. It is the same as the URL above with `&sso=1` appended to it. In our example, it would be `https://www.glance.net/account/GetLoginKey.aspx?idpid=999999&sso=1`. Make sure to set the **Binding** to POST and the **Index** to 1. Check **Set the trusted URL as default**.
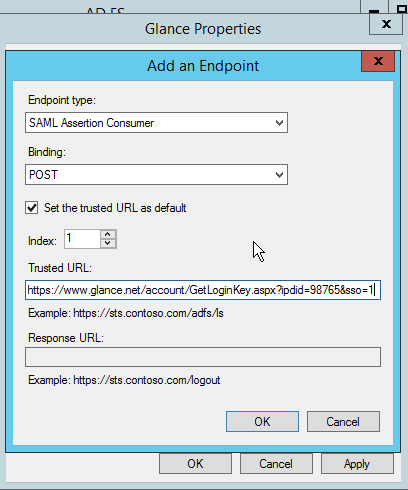 4. Click **OK**. You should now see two items in the **Endpoints** tab. Click **OK** again.
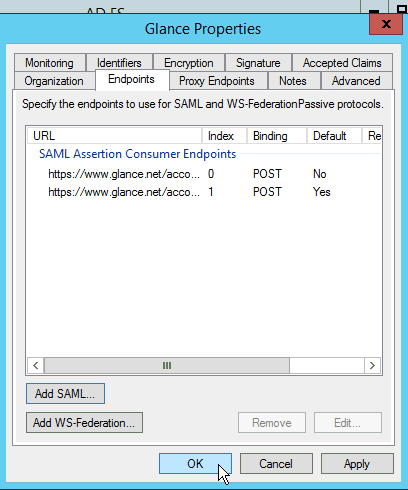 ## Test your Integration
* Make sure you have the correct idpid value for your Glance account. It is a number like 999999. We also call these values Group Ids. If you don't have this value, ask Glance Customer Care to provide it.
* Issue this web request from your browser, using your own idpid in place of `999999`:
`https://www.glance.net/account/GetLoginKey.aspx?idpid=999999&sso=1&test=11`
* Your AD/FS will prompt you to log in.
* You will see a diagnostic page.
At the top of the page, you can see the claim values (the SAML attribute values) presented to Glance by your AD/FS.
One field on the page shows the SAML Assertion token your AD/FS server sent to Glance's server. Other fields show such things as the Glance user associated with your AD/FS domain login (if one is found).
If you use identity provider initiated sign-on, test it. Enter the URL for your domain's AD/FS, log in, and choose Glance. The URL is below. Substitute your own AD/FS hostname for the one in this example:
`https://adfs.contoso.com/adfs/ls/idpinitiatedsignon.aspx`
## Troubleshooting
If you need help troubleshooting your AD/FS integration please see [SAML Troubleshooting](../saml_troubleshooting/) or [contact Glance](/users/account-management/contact).
## References
* Microsoft's documentation: [Create a Relying Party Trust](https://docs.microsoft.com/en-us/windows-server/identity/ad-fs/operations/create-a-relying-party-trust).
* [SAML Message Decoder](https://chrome.google.com/webstore/detail/saml-message-decoder/mpabchoaimgbdbbjjieoaeiibojelbhm?hl=en) web extension.
* [Edit this Cookie](https://chrome.google.com/webstore/detail/editthiscookie/fngmhnnpilhplaeedifhccceomclgfbg?hl=en) web extension.
* [Glance Browser Extensions](https://glance.net/install/install.aspx)
=================================================================
FILE: /developer/integrations/saml/saml_autoprovisioning
=================================================================
Customers who subscribe to Glance products offering autoprovisioning can skip the step of pre-provisioning each of their users who must use Glance. Instead, a Glance subscriber account is created on the fly the first time each user accesses the Glance product via SAML single sign-on.
## Requirements
You must contact your Glance representative in order to activate autoprovisioning on your account.
Autoprovisioning only works for SAML-integrated customer accounts. Set up SAML access to Glance, and verify it is working correctly for Glance subscribers. When valid SAML Assertion documents are being presented to the Glance service, the autoprovisioning user interface uses them to help choose the appropriate attributes to use for new Glance subscribers.
Autoprovisioning requires certain identifying attributes to be provided by the customer's SAML single-signon identity provider. To autoprovision an account, Glance needs:
* An agreed-upon unique identifier for each new subscriber.
* A way to create a Glance Address from the user's profile information.
* Name, email, and telephone number attributes are helpful but not required.
## Setting up Autoprovisioning
1. Navigate to **My Account**, then to the **SETTINGS** tab, then scroll down to the **Identity Provider Settings** panel.
2. Click on the link to **Manage your single signon settings**. The **Single Signon Provisioning** tab will be displayed.
## Test your Integration
* Make sure you have the correct idpid value for your Glance account. It is a number like 999999. We also call these values Group Ids. If you don't have this value, ask Glance Customer Care to provide it.
* Issue this web request from your browser, using your own idpid in place of `999999`:
`https://www.glance.net/account/GetLoginKey.aspx?idpid=999999&sso=1&test=11`
* Your AD/FS will prompt you to log in.
* You will see a diagnostic page.
At the top of the page, you can see the claim values (the SAML attribute values) presented to Glance by your AD/FS.
One field on the page shows the SAML Assertion token your AD/FS server sent to Glance's server. Other fields show such things as the Glance user associated with your AD/FS domain login (if one is found).
If you use identity provider initiated sign-on, test it. Enter the URL for your domain's AD/FS, log in, and choose Glance. The URL is below. Substitute your own AD/FS hostname for the one in this example:
`https://adfs.contoso.com/adfs/ls/idpinitiatedsignon.aspx`
## Troubleshooting
If you need help troubleshooting your AD/FS integration please see [SAML Troubleshooting](../saml_troubleshooting/) or [contact Glance](/users/account-management/contact).
## References
* Microsoft's documentation: [Create a Relying Party Trust](https://docs.microsoft.com/en-us/windows-server/identity/ad-fs/operations/create-a-relying-party-trust).
* [SAML Message Decoder](https://chrome.google.com/webstore/detail/saml-message-decoder/mpabchoaimgbdbbjjieoaeiibojelbhm?hl=en) web extension.
* [Edit this Cookie](https://chrome.google.com/webstore/detail/editthiscookie/fngmhnnpilhplaeedifhccceomclgfbg?hl=en) web extension.
* [Glance Browser Extensions](https://glance.net/install/install.aspx)
=================================================================
FILE: /developer/integrations/saml/saml_autoprovisioning
=================================================================
Customers who subscribe to Glance products offering autoprovisioning can skip the step of pre-provisioning each of their users who must use Glance. Instead, a Glance subscriber account is created on the fly the first time each user accesses the Glance product via SAML single sign-on.
## Requirements
You must contact your Glance representative in order to activate autoprovisioning on your account.
Autoprovisioning only works for SAML-integrated customer accounts. Set up SAML access to Glance, and verify it is working correctly for Glance subscribers. When valid SAML Assertion documents are being presented to the Glance service, the autoprovisioning user interface uses them to help choose the appropriate attributes to use for new Glance subscribers.
Autoprovisioning requires certain identifying attributes to be provided by the customer's SAML single-signon identity provider. To autoprovision an account, Glance needs:
* An agreed-upon unique identifier for each new subscriber.
* A way to create a Glance Address from the user's profile information.
* Name, email, and telephone number attributes are helpful but not required.
## Setting up Autoprovisioning
1. Navigate to **My Account**, then to the **SETTINGS** tab, then scroll down to the **Identity Provider Settings** panel.
2. Click on the link to **Manage your single signon settings**. The **Single Signon Provisioning** tab will be displayed.
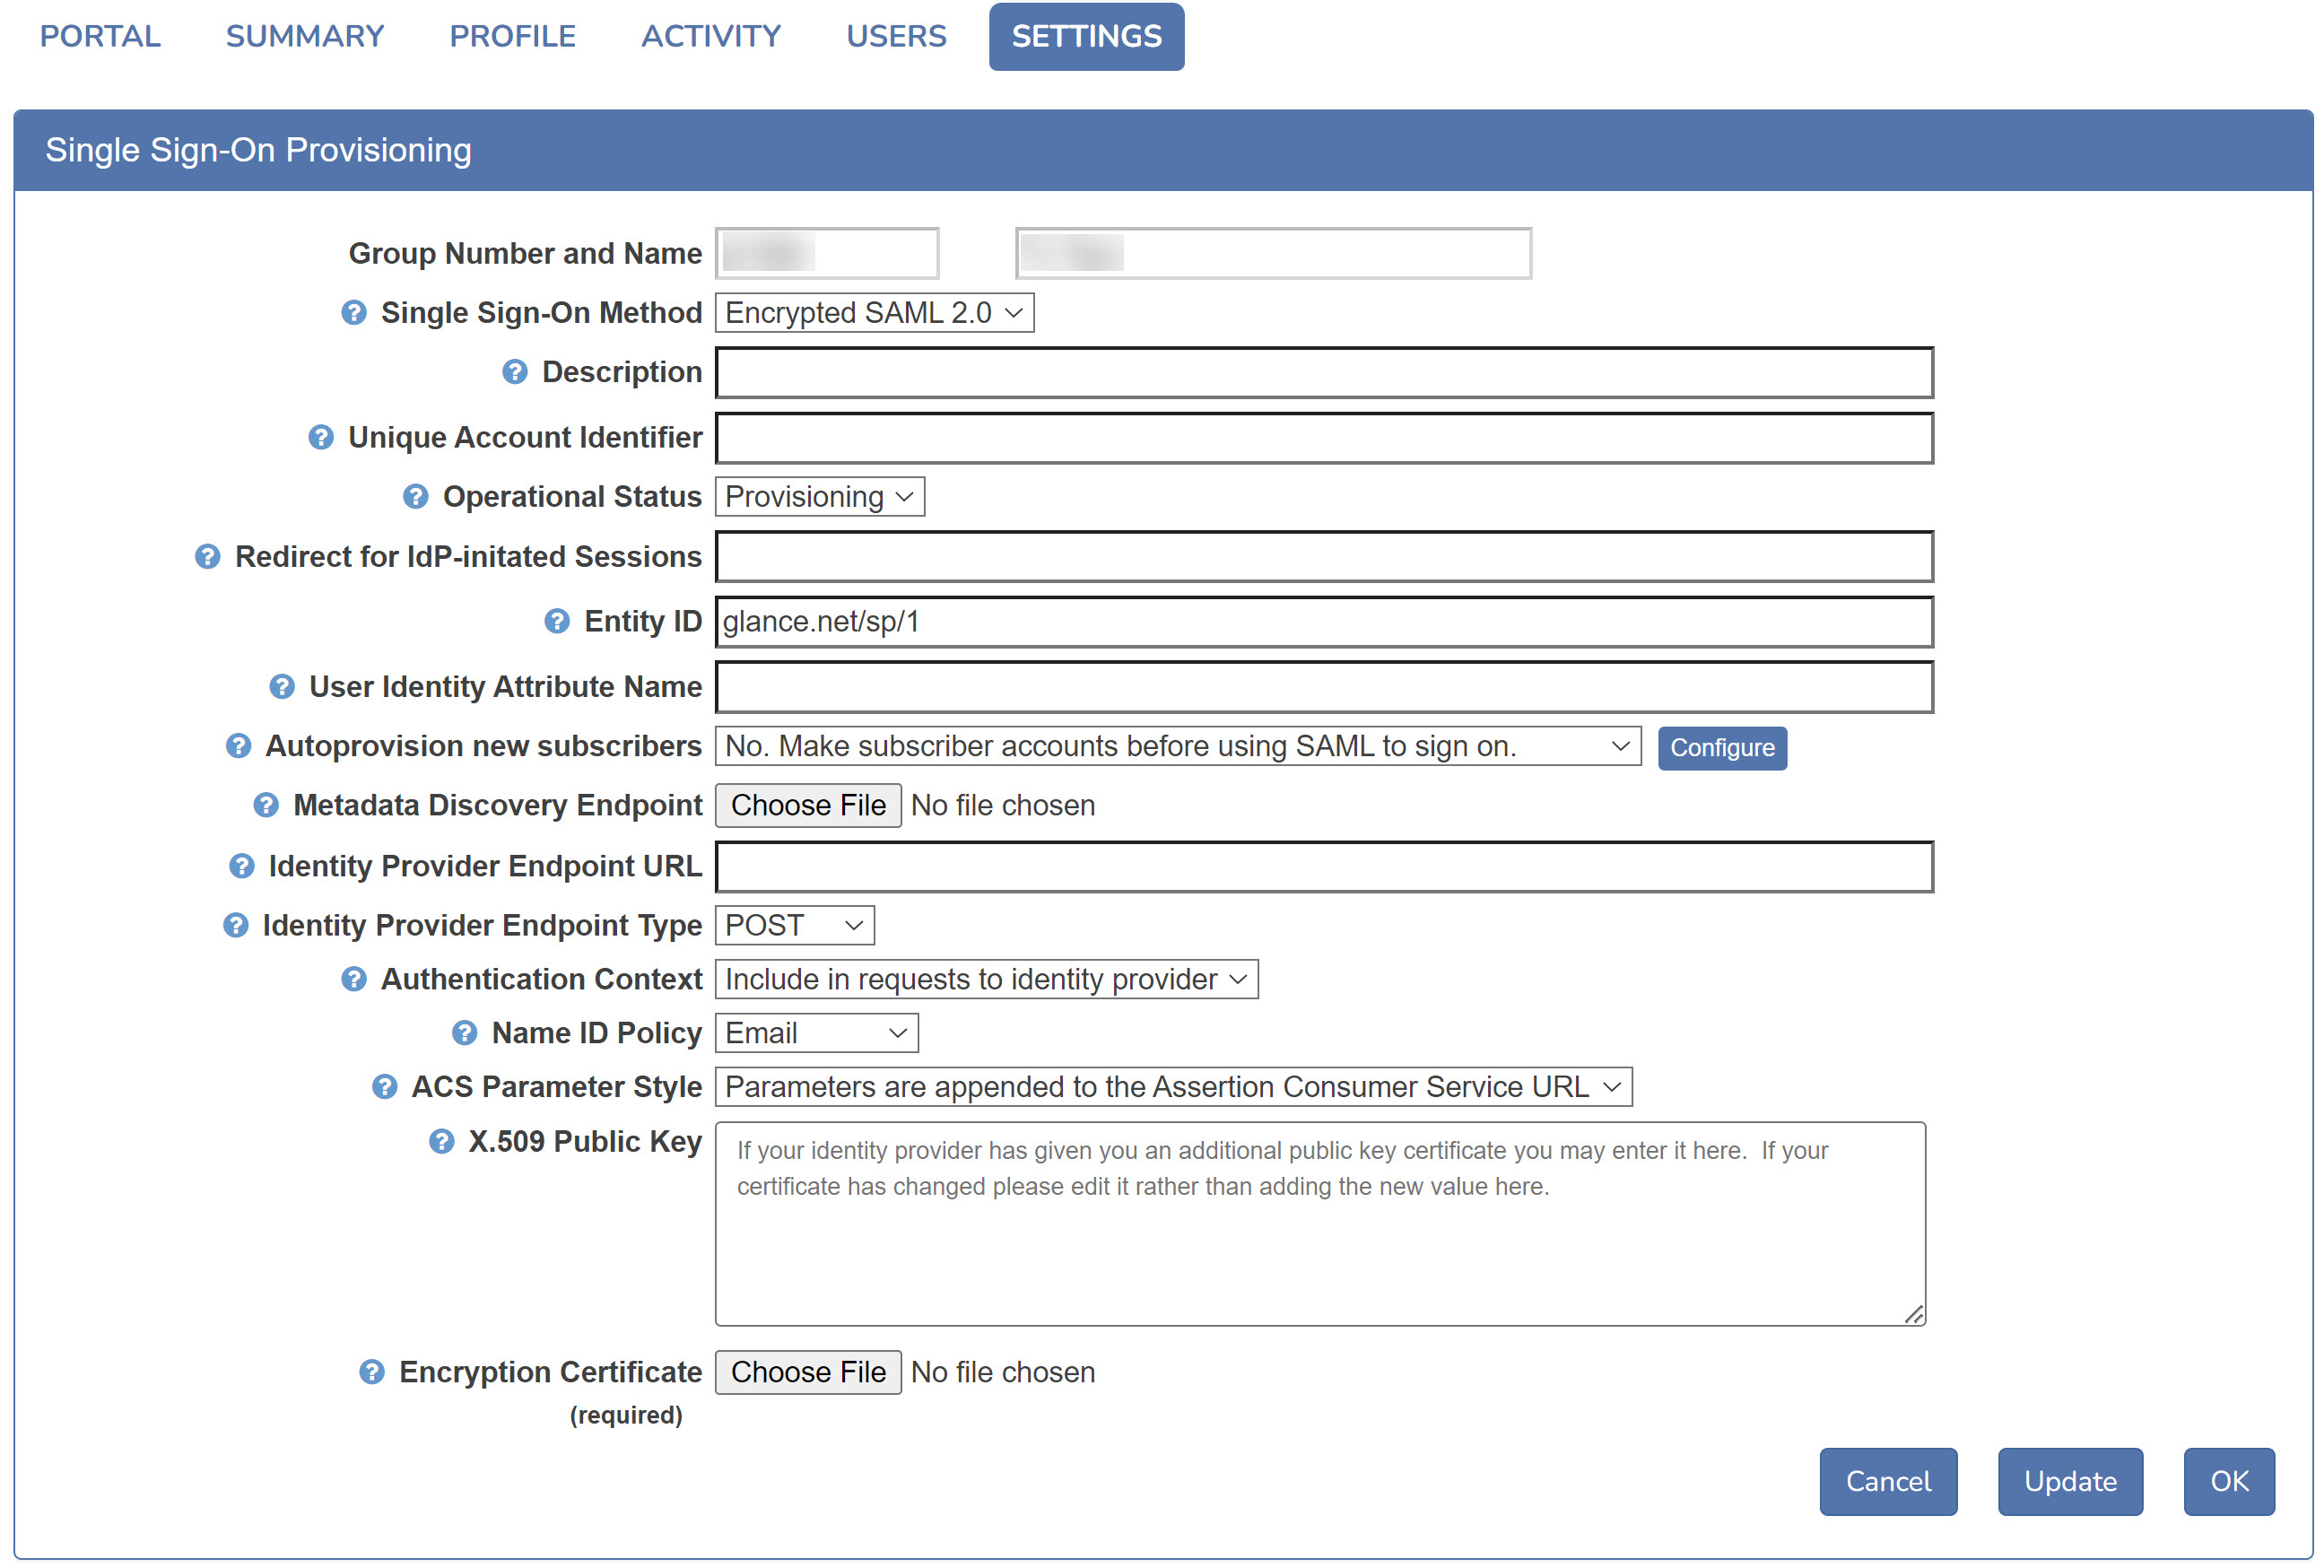 3. Verify the **Operational Status** choice is set to **Provisioning**, not **Production**. When the operational status is set to provisioning, Glance captures all the attributes in recent SAML assertions.
 ## Configuring Autoprovisioning
When Glance is integrated with your SAML enterprise single-signon solution, you can automatically create/provision a new Glance account for each new subscriber from your organization. This panel provides the information required to provision these accounts correctly.
Glance identifies your subscribers with these attributes (items of data):
* GlanceAddress (required)
* PartnerUID
* FirstName
* LastName
* Email
* Phone
* Role
Most subscribers need a valid and unique PartnerUID. This can be an employee number or any other unique alphanumeric code assigned by your organization. It can be the same value as the GlanceAddress if you wish.
The other information (name, email, and phone number) is not required. It helps support and keep track of subscribers.
Your SAML enterprise single-signon solution is configured to present particular attributes of each user to Glance. This panel allows Glance to interpret those attributes correctly so we can provision new accounts for your subscribers.
1. Click the **Configure** button by **Autoprovision new subscribers** to get to the configuration panel.
## Configuring Autoprovisioning
When Glance is integrated with your SAML enterprise single-signon solution, you can automatically create/provision a new Glance account for each new subscriber from your organization. This panel provides the information required to provision these accounts correctly.
Glance identifies your subscribers with these attributes (items of data):
* GlanceAddress (required)
* PartnerUID
* FirstName
* LastName
* Email
* Phone
* Role
Most subscribers need a valid and unique PartnerUID. This can be an employee number or any other unique alphanumeric code assigned by your organization. It can be the same value as the GlanceAddress if you wish.
The other information (name, email, and phone number) is not required. It helps support and keep track of subscribers.
Your SAML enterprise single-signon solution is configured to present particular attributes of each user to Glance. This panel allows Glance to interpret those attributes correctly so we can provision new accounts for your subscribers.
1. Click the **Configure** button by **Autoprovision new subscribers** to get to the configuration panel.
 2. Choose which SAML attributes to use for new Glance subscribers.
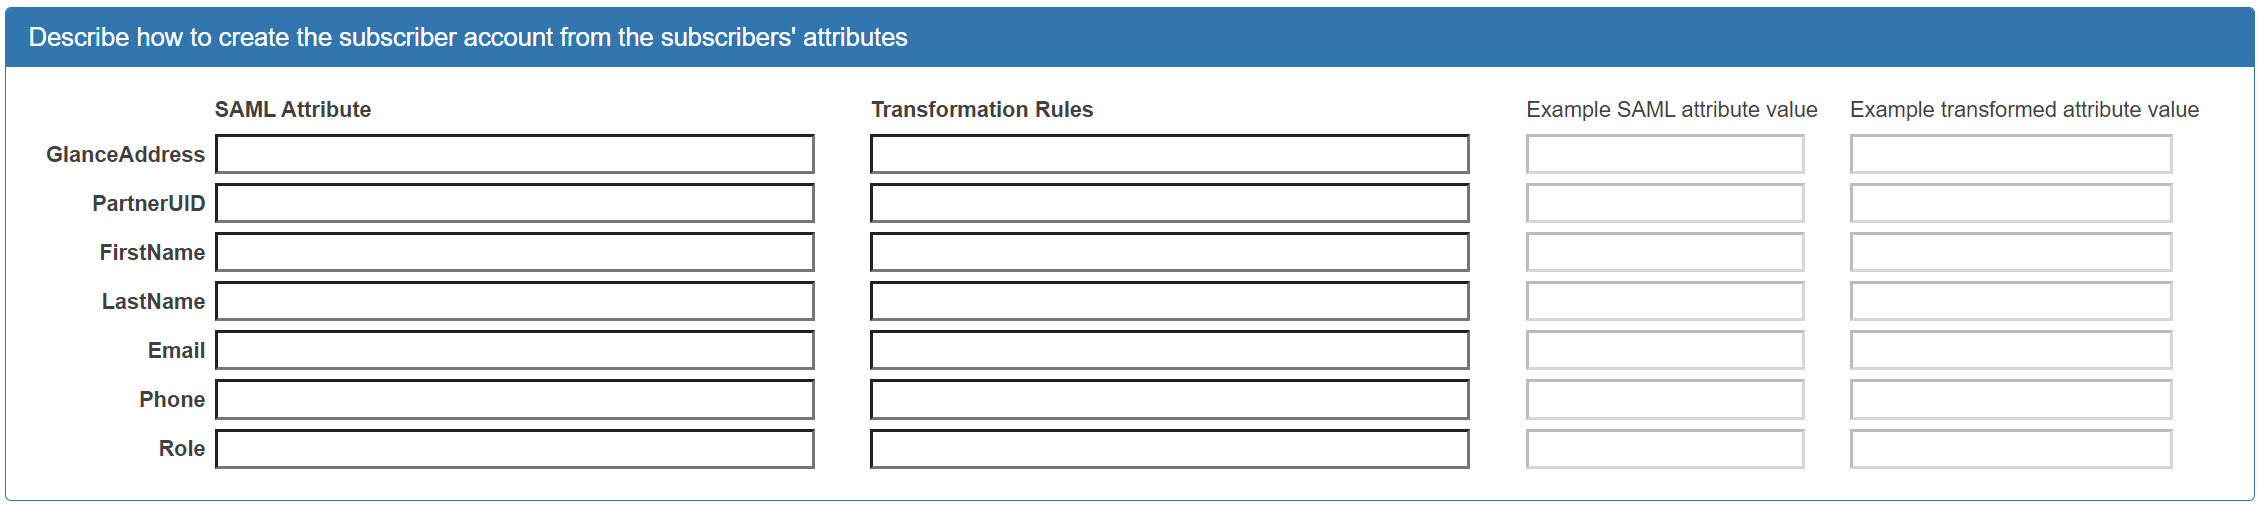 3. Click in the text box next to **GlanceAddress**, then press the down-arrow key. You'll see an autocompletion menu populated from a recent SAML assertion.
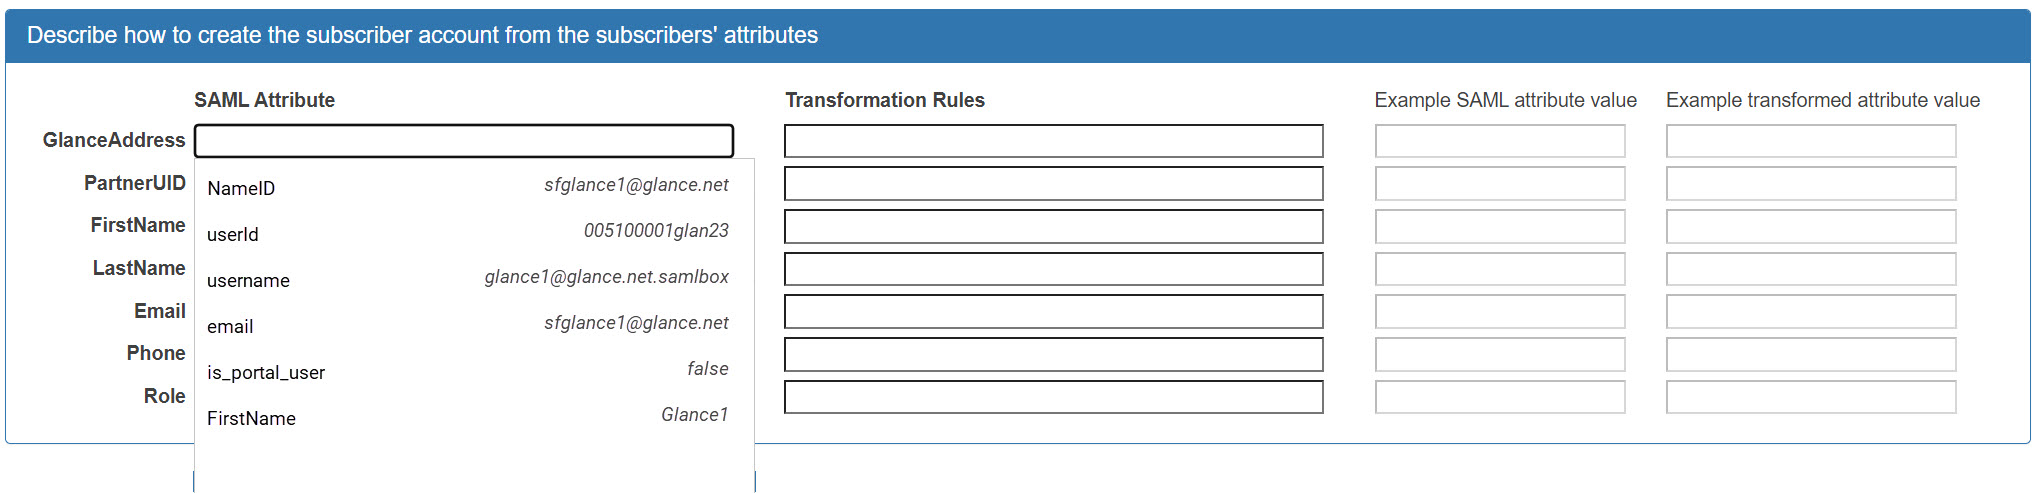 4. Choose the name of an Attribute to use to create the Glance Address. The example values shown next to each attribute name should help you make the choice. In this case, the **username** attribute looks like it might uniquely identify the user.
5. Click in the **Transformation Rules** box, then press the down-arrow key. You'll see an autocompletion menu populated with available transformation rules.
4. Choose the name of an Attribute to use to create the Glance Address. The example values shown next to each attribute name should help you make the choice. In this case, the **username** attribute looks like it might uniquely identify the user.
5. Click in the **Transformation Rules** box, then press the down-arrow key. You'll see an autocompletion menu populated with available transformation rules.
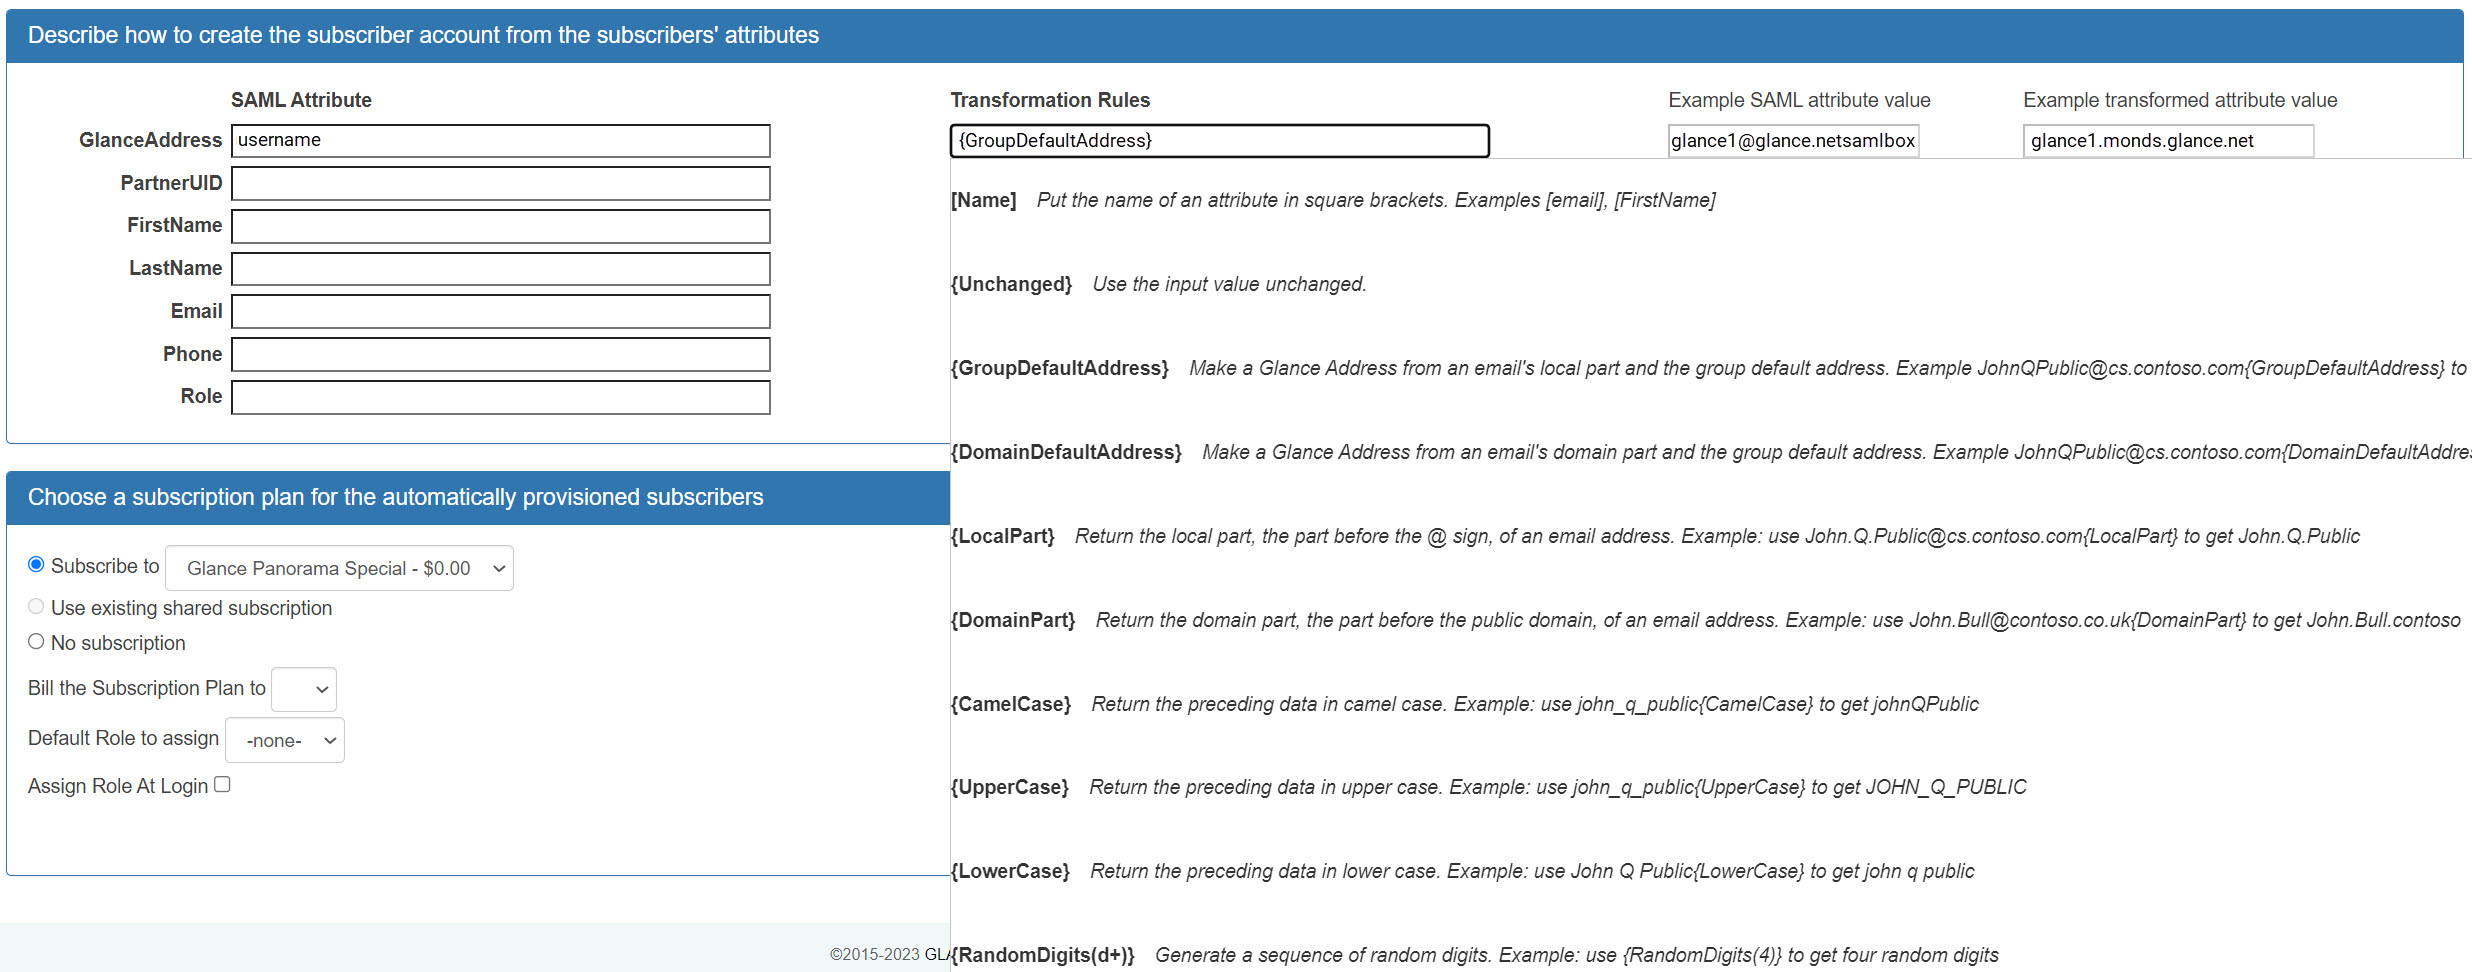 The following transformation rules are available:
| Rule | Explanation | Example |
| :--- | :--- | :--- |
| `{GroupDefaultAddress}` | Make a Glance Address from an email and the group default address. | `JohnQPublic@example.com` becomes `JohnQPublic.example.glance.net` |
| `{DomainDefaultAddress}` | Make a Glance Address from an email's domain part and the group default address. | `JohnQPublic@cs.contoso.com` becomes `JohnQPublic.cs.contoso.example.glance.net` |
| `{LocalPart}` | Return the local part, the part before the @ sign, of an email address. | `John.Q.Public@example.com` becomes `John.Q.Public` |
| `{DomainPart}` | Return the domain part, the part before the top-level domain, of an email address. | `John.Bull@uk.example.org` becomes `John.Bull.uk.example` |
| `{UpperCase}` | Return the preceding data in upper case. | `john_q_public` becomes `JOHN_Q_PUBLIC` |
| `{LowerCase}` | Return the preceding data in lower case. | `John Q Public` becomes `john q public` |
| `{CamelCase}` | Return the preceding data in camel case, eliminating hyphens and underscores. | `john_q_public` becomes `johnQPublic` |
| `{RandomUppercase(n)}` | Generate a sequence of random uppercase characters. | Use `{RandomUppercase(12)}` to get twelve characters. |
| `{RandomDigits(n)}` | Generate a sequence of random digits. | Use `{RandomDigits(4)}` to get four random digits. The generated number may contain leading zeros. |
| `{Unchanged}` | Use the input value unchanged. | |
The following transformation rules are available:
| Rule | Explanation | Example |
| :--- | :--- | :--- |
| `{GroupDefaultAddress}` | Make a Glance Address from an email and the group default address. | `JohnQPublic@example.com` becomes `JohnQPublic.example.glance.net` |
| `{DomainDefaultAddress}` | Make a Glance Address from an email's domain part and the group default address. | `JohnQPublic@cs.contoso.com` becomes `JohnQPublic.cs.contoso.example.glance.net` |
| `{LocalPart}` | Return the local part, the part before the @ sign, of an email address. | `John.Q.Public@example.com` becomes `John.Q.Public` |
| `{DomainPart}` | Return the domain part, the part before the top-level domain, of an email address. | `John.Bull@uk.example.org` becomes `John.Bull.uk.example` |
| `{UpperCase}` | Return the preceding data in upper case. | `john_q_public` becomes `JOHN_Q_PUBLIC` |
| `{LowerCase}` | Return the preceding data in lower case. | `John Q Public` becomes `john q public` |
| `{CamelCase}` | Return the preceding data in camel case, eliminating hyphens and underscores. | `john_q_public` becomes `johnQPublic` |
| `{RandomUppercase(n)}` | Generate a sequence of random uppercase characters. | Use `{RandomUppercase(12)}` to get twelve characters. |
| `{RandomDigits(n)}` | Generate a sequence of random digits. | Use `{RandomDigits(4)}` to get four random digits. The generated number may contain leading zeros. |
| `{Unchanged}` | Use the input value unchanged. | |
{LocalPart}.support.monds.glance.net. This would result in the example value glance1.support.monds.glance.net.
 7. Navigate back to the main **Single Sign-On Provisioning** tab, set the **User Identity Attribute Name** to that same attribute.
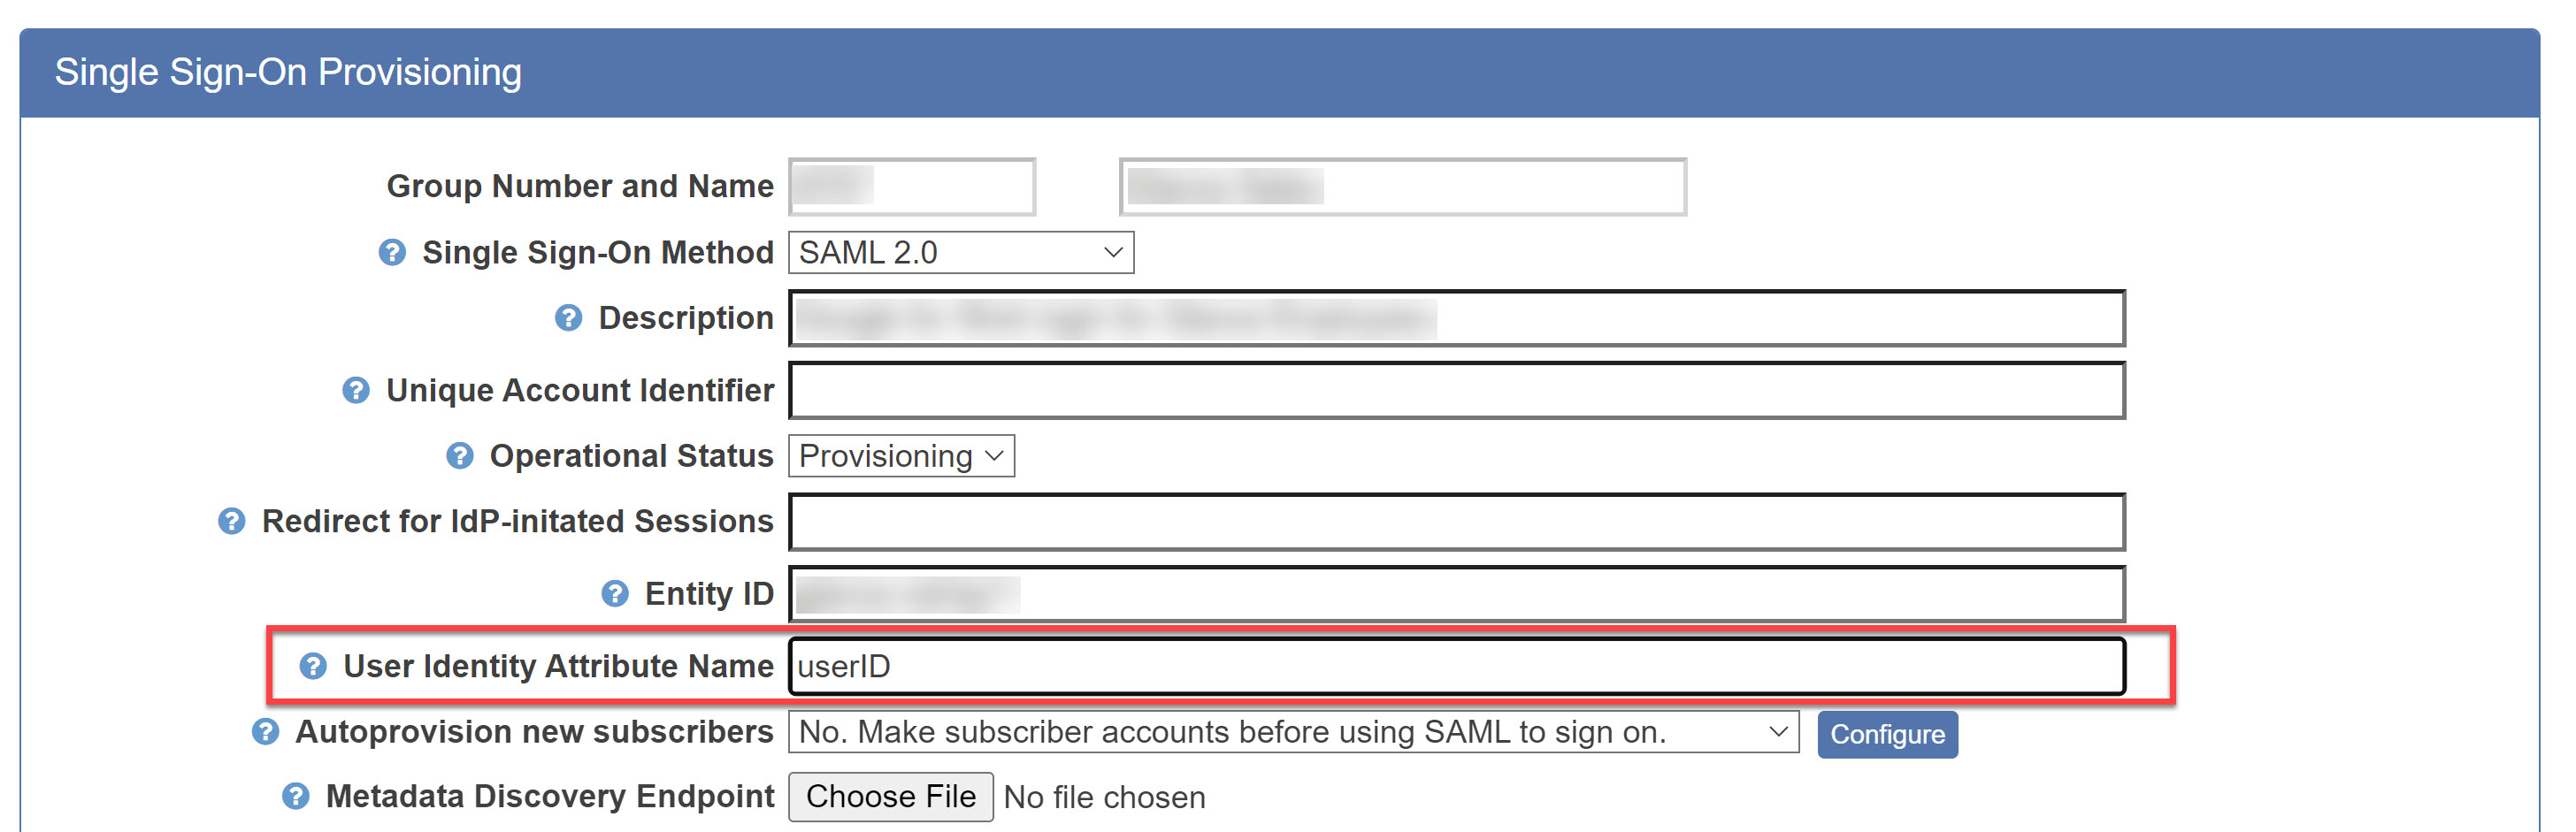 8. Navigate back to the Configuration page and scroll down to the **Choose a subscription plan for the automatically provisioned subscribers** section.
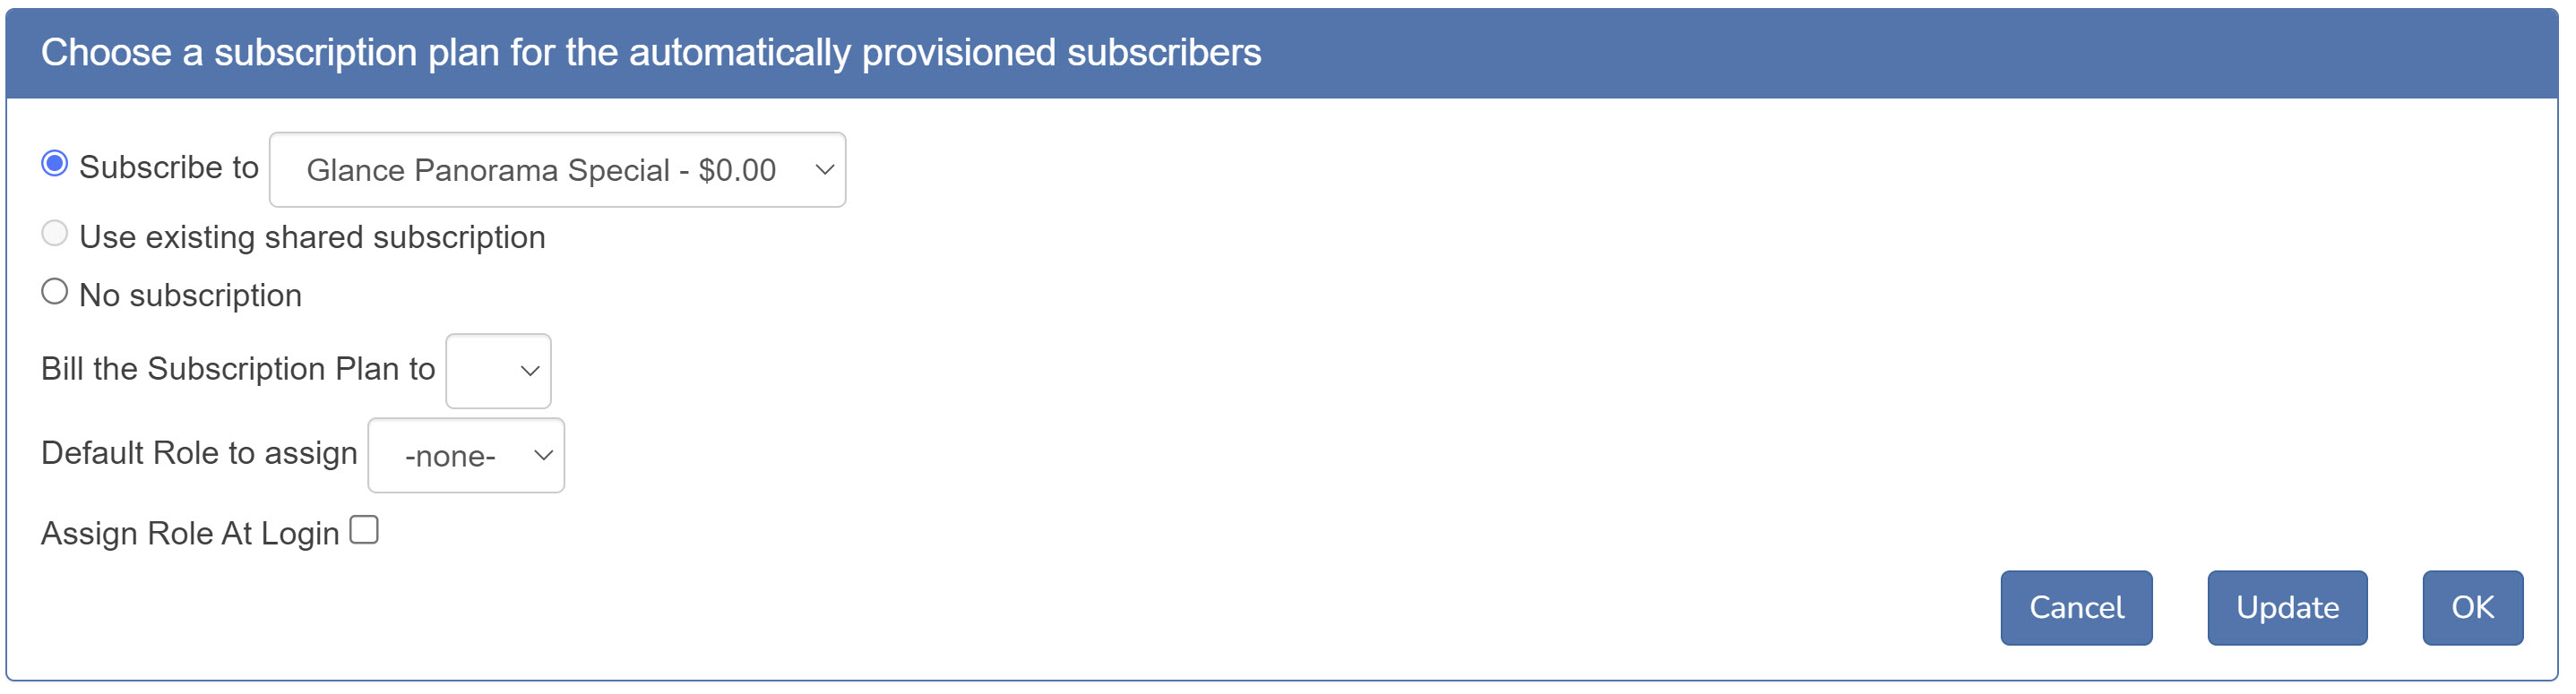 9. Select the subscription and billing person to be assigned to automatically provisioned accounts.
10. Select the **Default Role to assign**. When an account is created, the role will be assigned based on the rules for the **Role** attribute configured in step 5. The Default Role is used during the following scenarios:
* You have not configured a rule for the **Role** in step 5.
* You have configured a rule for **Role** in step 5 and the assertion contains the attribute specified in the table, but the value included in the assertion does not match an existing Role for the group.
11. **Assign Role At Login** - If checked, a user's role will be updated to the value specified in their SAML assertion upon each successful authentication, prior to joining the session.
* Note that the value in the SAML assertion must match an existing role for the group. Otherwise, the user's role will be updated to the Default value specified in step 10.
* **Role** is the only user attribute that can be automatically updated based on SAML assertion attributes during subsequent logins.
That completes the configuring autoprovisioning for your account.
## Finishing Provisioning
Once the SAML provisioning is complete for the account, you should give it a few days to stabilize. Visit the **Access Log** to observe activity including SAML logins and new subscriber autoprovisioning events. You can see the **Access Log** via a link on the **ACTIVITY** tab on **My Account**.
1. When production is known to be stable, navigate back to the **Single Sign-On Provisioning** tab.
2. Set the **Operational Status** to **Production**.
9. Select the subscription and billing person to be assigned to automatically provisioned accounts.
10. Select the **Default Role to assign**. When an account is created, the role will be assigned based on the rules for the **Role** attribute configured in step 5. The Default Role is used during the following scenarios:
* You have not configured a rule for the **Role** in step 5.
* You have configured a rule for **Role** in step 5 and the assertion contains the attribute specified in the table, but the value included in the assertion does not match an existing Role for the group.
11. **Assign Role At Login** - If checked, a user's role will be updated to the value specified in their SAML assertion upon each successful authentication, prior to joining the session.
* Note that the value in the SAML assertion must match an existing role for the group. Otherwise, the user's role will be updated to the Default value specified in step 10.
* **Role** is the only user attribute that can be automatically updated based on SAML assertion attributes during subsequent logins.
That completes the configuring autoprovisioning for your account.
## Finishing Provisioning
Once the SAML provisioning is complete for the account, you should give it a few days to stabilize. Visit the **Access Log** to observe activity including SAML logins and new subscriber autoprovisioning events. You can see the **Access Log** via a link on the **ACTIVITY** tab on **My Account**.
1. When production is known to be stable, navigate back to the **Single Sign-On Provisioning** tab.
2. Set the **Operational Status** to **Production**.
 3. Click the **OK** button when changes are complete.
=================================================================
FILE: /developer/integrations/saml/saml_faq
=================================================================
### Does Glance act as a SAML Identity Provider?
No. Glance acts as a Service Provider, also known as a Relying Party.
### Can I configure single sign-on for only a few users in my account (my group)?
No. SAML configuration at Glance is done on a per-group basis.
It may be possible to configure your Identity Provider (or Active Directory / Federation Services) to only allow Glance access to certain groups of people in your enterprise.
### How do I require my users to use single sign-on, and prevent them from logging in to Glance directly?
1. Visit the **Settings** tab of the **Account Management** page.
2. Go to the **Password Requirements** panel.
3. Choose the **Subscribers with no passwords** `may not create their own passwords` option.
4. Press **Save Changes**.
### Is single sign-on secure?
Yes. Glance, like all SAML 2.0 service providers, uses industry-standard cryptographic security. [Read more here](../cryptographic_security). Glance requires cryptographically signed (authenticated) SAML, and can use encrypted SAML.
### What happens if single sign-on fails for some reason? Can I still get into my Glance account?
Yes. To do this, configure a password for an account with administrative privileges. Then [log in to Glance](/users/account-management) with your username and password.
Please don't hesitate to contact Glance Customer Success if you need help.
### How do I change my X.509 public key?
If your SAML Identity Provider's private key changes, you need to change the public key you provisioned in Glance. [Read this](../public-key-update) for instructions.
=================================================================
FILE: /developer/integrations/saml/saml_provisioning
=================================================================
Glance's single sign-on provisioning screen is shown here. The best way to obtain values for most fields in this screen is to upload a Metadata Discovery Endpoint XML file. Most identity provider operators can provide it.
3. Click the **OK** button when changes are complete.
=================================================================
FILE: /developer/integrations/saml/saml_faq
=================================================================
### Does Glance act as a SAML Identity Provider?
No. Glance acts as a Service Provider, also known as a Relying Party.
### Can I configure single sign-on for only a few users in my account (my group)?
No. SAML configuration at Glance is done on a per-group basis.
It may be possible to configure your Identity Provider (or Active Directory / Federation Services) to only allow Glance access to certain groups of people in your enterprise.
### How do I require my users to use single sign-on, and prevent them from logging in to Glance directly?
1. Visit the **Settings** tab of the **Account Management** page.
2. Go to the **Password Requirements** panel.
3. Choose the **Subscribers with no passwords** `may not create their own passwords` option.
4. Press **Save Changes**.
### Is single sign-on secure?
Yes. Glance, like all SAML 2.0 service providers, uses industry-standard cryptographic security. [Read more here](../cryptographic_security). Glance requires cryptographically signed (authenticated) SAML, and can use encrypted SAML.
### What happens if single sign-on fails for some reason? Can I still get into my Glance account?
Yes. To do this, configure a password for an account with administrative privileges. Then [log in to Glance](/users/account-management) with your username and password.
Please don't hesitate to contact Glance Customer Success if you need help.
### How do I change my X.509 public key?
If your SAML Identity Provider's private key changes, you need to change the public key you provisioned in Glance. [Read this](../public-key-update) for instructions.
=================================================================
FILE: /developer/integrations/saml/saml_provisioning
=================================================================
Glance's single sign-on provisioning screen is shown here. The best way to obtain values for most fields in this screen is to upload a Metadata Discovery Endpoint XML file. Most identity provider operators can provide it.
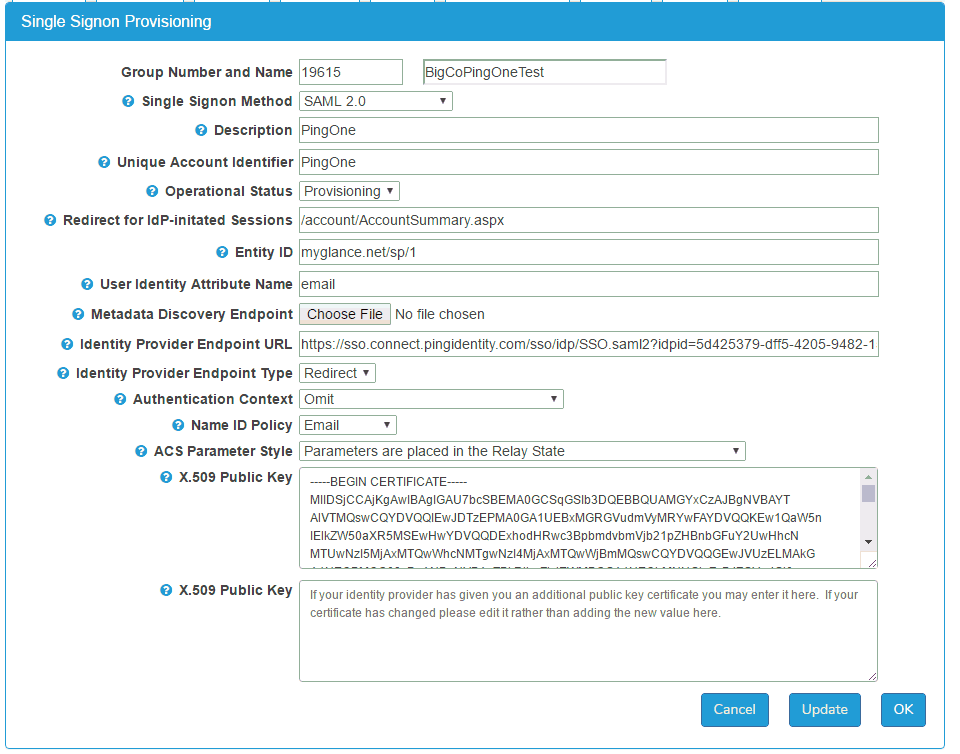 ## SAML Provisioning Fields
* **Group Number and Name:** Identification of the customer group.
* **Single Sign-On Method:** You may choose Off, SAML 2.0, or Encrypted SAML 2.0. Most SAML customers use SAML 2.0 (without encryption).
* **Description:** A text field describing the SAML setup.
* **Unique Account Identifier:** For some identity providers, this must have a specific value. For example, for Salesforce.com accounts, it should contain the Organization ID. For Entra accounts, it should contain the Tenant Unique Name. If you set it, you can use its value in the `idptoken` parameter in Service Target URLs (described later in this document). If it is not required by your identity provider, you may leave it blank.
* **Operational Status:** When you first provision a new account, set this to Provisioning. This setting causes SAML authentication attempts to put entries in the Access Log. When the provisioning is stable, change this to Production.
* **Redirect for IdP-initiated sessions:** Some identity providers allow users to initiate single sign-on directly from the identity provider's user interface. This value allows you to redirect those users to an appropriate page on the Glance service. For example, `/agentjoin/agentjoin.aspx` presents the Cobrowse join page to users coming in via the identity provider. This field must contain a relative URL to a page within the Glance backend. It may not contain an absolute URL (any URL starting with `https://`).
* **Entity ID:** This is the federation entity ID (also sometimes known as the relying party trust identifier) for the Glance service provider. In most cases, it should be set to `glance.net/sp/1`. Some cloud identity providers will provide the correct value.
* **User Identity Attribute Name:** Assertions, the tokens sent to Glance from identity providers, contain one or more attributes describing the authenticated user. Put the name of the attribute uniquely identifying the user. The attribute value must uniquely match the Glance user's Glance Address, Partner User ID, or Email Address.
* **Metadata Discovery Endpoint:** A metadata discovery endpoint is an XML document furnished by the identity provider. You upload it to Glance here. Metadata Discovery Endpoints are very helpful because they set most of the required fields on this provisioning page.
* **Identity Provider Endpoint URL:** This is the URL, furnished by the identity provider, to which Glance presents authentication requests. A Metadata Discovery Endpoint document contains it.
* **Identity Provider Endpoint Type:** Glance presents authentication requests to your identity provider using either HTTPS redirect or an HTTPS POST operation. Your identity provider furnishes this value. A Metadata Discovery Endpoint document contains it.
* **Authentication Context:** Most identity providers require elements called authentication contexts when Glance sends single sign-on requests. Others do not allow them. Your identity provider gives you this setting.
* **Name ID Policy:** Most identity providers require an element called a NameID Policy when Glance sends a single sign-on request. In most cases, the NameID Policy should specify an Email, but some identity providers require the policy to be Unspecified. Your identity provider gives you this setting.
* **ACS Parameter Style:** Your identity provider responds to single sign-on requests using a Glance URL called an Assertion Consumer Service (ACS). In most cases, parameters describing what to do after single sign-on can be appended to the ACS. In some cases, your identity provider passes those parameters in a separate Relay State element. Your identity provider gives you this setting.
* **X.509 Public Key:** Your identity provider furnishes one or more public keys for Glance to use when validating Assertions, the tokens sent to Glance from identity providers. The identity provider cryptographically signs Assertions with a private key matching one of these public keys. Cryptographic signing prevents Assertions from being forged. A Metadata Discovery Endpoint contains the public key or keys. See Changing Public Keys below for more information about these fields.
* **Encryption Certificate:** When you choose Encrypted SAML 2.0 in the Single Sign-on Method, this field appears. When you use Encrypted SAML 2.0, your identity provider responds to single sign-on requests by sending encrypted Assertions (XML tokens) to Glance. This is the key certificate by which Glance decrypts those documents. The key certificate is secret. A Glance staff member generates it and never sends it to the identity provider.
A Glance staff member will upload the key certificate file and then press the **Update** button. The provisioning page will show the corresponding public key. Provide the public key to the person who operates your identity provider.
Notice that Encrypted SAML is only used to conceal the contents of Assertions. Assertions are already transmitted via HTTPS Transport Layer Security. Encrypted SAML provides an extra measure of security beyond HTTPS. Most SAML users do not use encryption, but rather rely on HTTPS alone.
## Changing Public Keys
Glance supports multiple public keys. Each one is used in turn to attempt to validate each SAML Assertion.
From time to time, identity provider operators may replace (rotate) the cryptographic key they use to sign SAML assertions. When this happens, it is necessary for the identity provider operator to furnish the new public key to Glance. These steps allow for seamless key-pair changes, without the need to synchronize changes to your identity provider and Glance's provisioning screen.
1. The identity provider operator generates a new public / private key pair.
2. Glance puts the new public key into the provisioning screen as an "additional public key."
3. The identity provider operator starts using the new key pair.
## Vendor-Specific Provisioning Information
Certain vendors of identity provider servers require specific provisioning; this section makes it possible.
### Microsoft Active Directory Federation Services (AD/FS)
See [SAML SSO for AD/FS](../saml_adfs).
### Microsoft Entra
In Entra, the **Unique Account Identifier** should be set to the Entra Tenant Unique Name.
* **User Identity Attribute Name** should be `NameID`.
* **Name ID Policy** should be "Email."
### Computer Associates Single Sign-On
Some versions of CA's identity provider do not offer metadata discovery endpoint files. You must provide values for the Identity Provider Endpoint URL, the Identity Provider Endpoint Type, and the X.509 Signing Certificate.
It may be necessary to choose "Redirect" for the Identity Provider Endpoint Type.
### Ping Identity
For Ping Identity, the **Name ID Policy** ordinarily must be "Email."
Some Ping Identity providers require a slightly different Assertion Consumer Service:
```text
https://www.glance.net/account/GetLoginKey.aspx?idpid=EXAMPLE
```
### Salesforce.com
Metadata discovery endpoint files from Salesforce.com contain the necessary information to configure Glance to use Salesforce.com as an identity provider.
### Onelogin.com
Metadata discovery endpoint files from Onelogin.com contain the necessary information to configure Glance to use Onelogin.com as an identity provider.
=================================================================
FILE: /developer/integrations/saml/saml_sample
=================================================================
The key protocol element in a SAML authentication transaction is passed as an XML document containing an `
## SAML Provisioning Fields
* **Group Number and Name:** Identification of the customer group.
* **Single Sign-On Method:** You may choose Off, SAML 2.0, or Encrypted SAML 2.0. Most SAML customers use SAML 2.0 (without encryption).
* **Description:** A text field describing the SAML setup.
* **Unique Account Identifier:** For some identity providers, this must have a specific value. For example, for Salesforce.com accounts, it should contain the Organization ID. For Entra accounts, it should contain the Tenant Unique Name. If you set it, you can use its value in the `idptoken` parameter in Service Target URLs (described later in this document). If it is not required by your identity provider, you may leave it blank.
* **Operational Status:** When you first provision a new account, set this to Provisioning. This setting causes SAML authentication attempts to put entries in the Access Log. When the provisioning is stable, change this to Production.
* **Redirect for IdP-initiated sessions:** Some identity providers allow users to initiate single sign-on directly from the identity provider's user interface. This value allows you to redirect those users to an appropriate page on the Glance service. For example, `/agentjoin/agentjoin.aspx` presents the Cobrowse join page to users coming in via the identity provider. This field must contain a relative URL to a page within the Glance backend. It may not contain an absolute URL (any URL starting with `https://`).
* **Entity ID:** This is the federation entity ID (also sometimes known as the relying party trust identifier) for the Glance service provider. In most cases, it should be set to `glance.net/sp/1`. Some cloud identity providers will provide the correct value.
* **User Identity Attribute Name:** Assertions, the tokens sent to Glance from identity providers, contain one or more attributes describing the authenticated user. Put the name of the attribute uniquely identifying the user. The attribute value must uniquely match the Glance user's Glance Address, Partner User ID, or Email Address.
* **Metadata Discovery Endpoint:** A metadata discovery endpoint is an XML document furnished by the identity provider. You upload it to Glance here. Metadata Discovery Endpoints are very helpful because they set most of the required fields on this provisioning page.
* **Identity Provider Endpoint URL:** This is the URL, furnished by the identity provider, to which Glance presents authentication requests. A Metadata Discovery Endpoint document contains it.
* **Identity Provider Endpoint Type:** Glance presents authentication requests to your identity provider using either HTTPS redirect or an HTTPS POST operation. Your identity provider furnishes this value. A Metadata Discovery Endpoint document contains it.
* **Authentication Context:** Most identity providers require elements called authentication contexts when Glance sends single sign-on requests. Others do not allow them. Your identity provider gives you this setting.
* **Name ID Policy:** Most identity providers require an element called a NameID Policy when Glance sends a single sign-on request. In most cases, the NameID Policy should specify an Email, but some identity providers require the policy to be Unspecified. Your identity provider gives you this setting.
* **ACS Parameter Style:** Your identity provider responds to single sign-on requests using a Glance URL called an Assertion Consumer Service (ACS). In most cases, parameters describing what to do after single sign-on can be appended to the ACS. In some cases, your identity provider passes those parameters in a separate Relay State element. Your identity provider gives you this setting.
* **X.509 Public Key:** Your identity provider furnishes one or more public keys for Glance to use when validating Assertions, the tokens sent to Glance from identity providers. The identity provider cryptographically signs Assertions with a private key matching one of these public keys. Cryptographic signing prevents Assertions from being forged. A Metadata Discovery Endpoint contains the public key or keys. See Changing Public Keys below for more information about these fields.
* **Encryption Certificate:** When you choose Encrypted SAML 2.0 in the Single Sign-on Method, this field appears. When you use Encrypted SAML 2.0, your identity provider responds to single sign-on requests by sending encrypted Assertions (XML tokens) to Glance. This is the key certificate by which Glance decrypts those documents. The key certificate is secret. A Glance staff member generates it and never sends it to the identity provider.
A Glance staff member will upload the key certificate file and then press the **Update** button. The provisioning page will show the corresponding public key. Provide the public key to the person who operates your identity provider.
Notice that Encrypted SAML is only used to conceal the contents of Assertions. Assertions are already transmitted via HTTPS Transport Layer Security. Encrypted SAML provides an extra measure of security beyond HTTPS. Most SAML users do not use encryption, but rather rely on HTTPS alone.
## Changing Public Keys
Glance supports multiple public keys. Each one is used in turn to attempt to validate each SAML Assertion.
From time to time, identity provider operators may replace (rotate) the cryptographic key they use to sign SAML assertions. When this happens, it is necessary for the identity provider operator to furnish the new public key to Glance. These steps allow for seamless key-pair changes, without the need to synchronize changes to your identity provider and Glance's provisioning screen.
1. The identity provider operator generates a new public / private key pair.
2. Glance puts the new public key into the provisioning screen as an "additional public key."
3. The identity provider operator starts using the new key pair.
## Vendor-Specific Provisioning Information
Certain vendors of identity provider servers require specific provisioning; this section makes it possible.
### Microsoft Active Directory Federation Services (AD/FS)
See [SAML SSO for AD/FS](../saml_adfs).
### Microsoft Entra
In Entra, the **Unique Account Identifier** should be set to the Entra Tenant Unique Name.
* **User Identity Attribute Name** should be `NameID`.
* **Name ID Policy** should be "Email."
### Computer Associates Single Sign-On
Some versions of CA's identity provider do not offer metadata discovery endpoint files. You must provide values for the Identity Provider Endpoint URL, the Identity Provider Endpoint Type, and the X.509 Signing Certificate.
It may be necessary to choose "Redirect" for the Identity Provider Endpoint Type.
### Ping Identity
For Ping Identity, the **Name ID Policy** ordinarily must be "Email."
Some Ping Identity providers require a slightly different Assertion Consumer Service:
```text
https://www.glance.net/account/GetLoginKey.aspx?idpid=EXAMPLE
```
### Salesforce.com
Metadata discovery endpoint files from Salesforce.com contain the necessary information to configure Glance to use Salesforce.com as an identity provider.
### Onelogin.com
Metadata discovery endpoint files from Onelogin.com contain the necessary information to configure Glance to use Onelogin.com as an identity provider.
=================================================================
FILE: /developer/integrations/saml/saml_sample
=================================================================
The key protocol element in a SAML authentication transaction is passed as an XML document containing an ` ```text
https://www.glance.net/agentjoin/agentjoin.aspx
```
When you set up Glance for your users, you can embed STUs in the web portal or application they use.
For example, to produce a hyperlink like the [Join a Glance Session](https://www.glance.net/agentjoin/agentjoin.aspx) to give direct access to a session, add this HTML code:
```html
Join a Glance Session
```
## STUs without single sign-on
* `https://www.glance.net/agentjoin/AgentJoin.aspx` prompts for a session key.
* `https://www.glance.net/agentjoin/AgentView.aspx?SessionKey=1234` is useful when you already know the session key. It joins the session directly. When using this STU, the actual session key goes in place of `1234`.
### Parameters to the AgentJoin and AgentView STUs
You can add these parameters to either the AgentJoin or AgentView STUs to give the identity of the Glance user. Glance shows this identity, when it's available, to the visitor (the person using Glance to ask for help) as the session starts.
* `name=User+Name` displays the user's personal information, including name, email, and phone number, as a courtesy to individuals using Glance to request assistance.
* `email=user@example.com` displays the user's email.
* `phone=(111)222-3333` displays the user's telephone number.
### Parameters to the AgentJoin STU
The AgentJoin URL supports optional parameters that can be added to modify and control its behavior.
* `viewersamewindow=1` Initiates the session viewer within the same browser window that displays the session key prompt. If this parameter is omitted, Glance will launch the viewer in a new browser window by default.
These optional parameters control the prompt on the AgentJoin page. For more information, please contact Glance Customer Success:
* `mode=universaljoin`
* `mode=chatinvitation`
* `mode=smsinvitation`
## STUs with single sign-on
For accounts utilizing SAML 2.0 single sign-on, SSO-specific STUs must be used. These require an identity provider identifier, which corresponds to the account's numeric Group ID assigned by Glance.
These examples use a Group ID of `EXAMPLE`. Replace `EXAMPLE` with your Glance Group ID or Partner ID.
Accessing any STU starts a service-provider-initiated sign-on (login) operation if the user is not yet signed on. These STUs give direct access to sessions. When a Glance user visits one of these STUs, they immediately see the session page.
* `https://www.glance.net/agentjoin/AgentJoin.aspx?idpid=EXAMPLE` prompts for a session key.
* `https://www.glance.net/agentjoin/AgentView.aspx?idpid=EXAMPLE&SessionKey=1234` is useful when you already know the session key. It joins the session directly. When using this STU, the actual session key goes in place of `1234`.
You may use the [optional parameters](#parameters-to-the-agentjoin-and-agentview-stus) mentioned earlier in this page with these STUs.
To start an interactive session on Glance's **Account Management** page, use this STU:
```text
https://www.glance.net/account/GetLoginKey.aspx?sso=1&idpid=EXAMPLE&redirect=/account/AccountSummary.aspx
```
To obtain a Login Key for use by native client software, the STU is:
```text
https://www.glance.net/account/GetLoginKey.aspx?sso=1&idpid=EXAMPLE
```
To show a SAML single sign-on troubleshooting page, use this STU:
```text
https://www.glance.net/account/GetLoginKey.aspx?sso=1&test=11&idpid=EXAMPLE
```
More information on troubleshooting single sign-on can be found [here](../saml/saml_troubleshooting).
### Alternative identifiers for your single sign-on account
* In place of `idpid=EXAMPLE`, you may use `idpname=EXAMPLE`. When this is done, Glance's service uses a name rather than a number to look up the group. Replace `EXAMPLE` with your account's group name, provided by Glance Customer Support.
* In place of `idpid=EXAMPLE`, you may also use `idptoken=TOKENVALUE`. When this is done, Glance's service uses the value you place in the Unique Account Identifier field on the SAML provisioning screen. Replace `TOKENVALUE` with the name you put in that field. This is suitable for things like Salesforce Organization IDs and Azure tenant unique names.
* In place of `idpid=EXAMPLE`, it is also possible to provide `idpusername=USER.glance.net`. When this is done, Glance's service uses the username provided to look up the account (Glance group). This option is convenient in cases where the group name is not known but the username is. Replace `USER.glance.net` with the Glance username (also known as the Glance Address) of a user (any user) in the account. If you are not sure what value to use, contact Glance Customer Support.
=================================================================
FILE: /developer/integrations/twilio_webchat
=================================================================
Flex WebChat must be loaded from the CDN. Glance does not provide an NPM package, which is required for React deployments.
1. Install [Flex WebChat](https://www.twilio.com/docs/flex/developer/messaging/webchat/setup#option-1).
2. The following code example contains Flex WebChat and Glance Presence functionality. Update the code with your Account SID and Flex Flow SID:
```html
```
3. Set up a [Flow](https://www.twilio.com/console/studio/flows) for Flex WebChat:
1. From the Twilio Console > **Studio** > **Manage Flows**, select **Webchat Flow**.
2. In the **Widget Library** > **Flow Control**, select and drag **Set Variables** onto the canvas. Click the widget to edit.
3. Click the plus sign on the right side of **Variables**.
4. For **Key**, input `glance_visitor_id`.
5. For **Value**, input `{{trigger.message.ChannelSid}}`
6. **Save** the variable.
7. **Save** the widget.
8. Wire the widget to the **Incoming Message Trigger**.
9. In the **Widget Library** > **Connect Other Products**, select and drag **Send to Flex** onto the canvas. Click the widget to edit.
10. For **Workflow**, select **Assign to Anyone**.
11. For **Channel**, select **Programmable Chat**.
12. For **Attributes**, input `{"name": "{{trigger.message.ChannelAttributes.from}}", "channelType": "{{trigger.message.ChannelAttributes.channel_type}}", "channelSid": "{{trigger.message.ChannelSid}}", "glance_visitor_id": "{{flow.variables.glance_visitor_id}}"}`
13. **Save** the widget.
14. Wire the widget to the **Set Variable Widget** that you just created.
15. Select **Publish**.
```text
https://www.glance.net/agentjoin/agentjoin.aspx
```
When you set up Glance for your users, you can embed STUs in the web portal or application they use.
For example, to produce a hyperlink like the [Join a Glance Session](https://www.glance.net/agentjoin/agentjoin.aspx) to give direct access to a session, add this HTML code:
```html
Join a Glance Session
```
## STUs without single sign-on
* `https://www.glance.net/agentjoin/AgentJoin.aspx` prompts for a session key.
* `https://www.glance.net/agentjoin/AgentView.aspx?SessionKey=1234` is useful when you already know the session key. It joins the session directly. When using this STU, the actual session key goes in place of `1234`.
### Parameters to the AgentJoin and AgentView STUs
You can add these parameters to either the AgentJoin or AgentView STUs to give the identity of the Glance user. Glance shows this identity, when it's available, to the visitor (the person using Glance to ask for help) as the session starts.
* `name=User+Name` displays the user's personal information, including name, email, and phone number, as a courtesy to individuals using Glance to request assistance.
* `email=user@example.com` displays the user's email.
* `phone=(111)222-3333` displays the user's telephone number.
### Parameters to the AgentJoin STU
The AgentJoin URL supports optional parameters that can be added to modify and control its behavior.
* `viewersamewindow=1` Initiates the session viewer within the same browser window that displays the session key prompt. If this parameter is omitted, Glance will launch the viewer in a new browser window by default.
These optional parameters control the prompt on the AgentJoin page. For more information, please contact Glance Customer Success:
* `mode=universaljoin`
* `mode=chatinvitation`
* `mode=smsinvitation`
## STUs with single sign-on
For accounts utilizing SAML 2.0 single sign-on, SSO-specific STUs must be used. These require an identity provider identifier, which corresponds to the account's numeric Group ID assigned by Glance.
These examples use a Group ID of `EXAMPLE`. Replace `EXAMPLE` with your Glance Group ID or Partner ID.
Accessing any STU starts a service-provider-initiated sign-on (login) operation if the user is not yet signed on. These STUs give direct access to sessions. When a Glance user visits one of these STUs, they immediately see the session page.
* `https://www.glance.net/agentjoin/AgentJoin.aspx?idpid=EXAMPLE` prompts for a session key.
* `https://www.glance.net/agentjoin/AgentView.aspx?idpid=EXAMPLE&SessionKey=1234` is useful when you already know the session key. It joins the session directly. When using this STU, the actual session key goes in place of `1234`.
You may use the [optional parameters](#parameters-to-the-agentjoin-and-agentview-stus) mentioned earlier in this page with these STUs.
To start an interactive session on Glance's **Account Management** page, use this STU:
```text
https://www.glance.net/account/GetLoginKey.aspx?sso=1&idpid=EXAMPLE&redirect=/account/AccountSummary.aspx
```
To obtain a Login Key for use by native client software, the STU is:
```text
https://www.glance.net/account/GetLoginKey.aspx?sso=1&idpid=EXAMPLE
```
To show a SAML single sign-on troubleshooting page, use this STU:
```text
https://www.glance.net/account/GetLoginKey.aspx?sso=1&test=11&idpid=EXAMPLE
```
More information on troubleshooting single sign-on can be found [here](../saml/saml_troubleshooting).
### Alternative identifiers for your single sign-on account
* In place of `idpid=EXAMPLE`, you may use `idpname=EXAMPLE`. When this is done, Glance's service uses a name rather than a number to look up the group. Replace `EXAMPLE` with your account's group name, provided by Glance Customer Support.
* In place of `idpid=EXAMPLE`, you may also use `idptoken=TOKENVALUE`. When this is done, Glance's service uses the value you place in the Unique Account Identifier field on the SAML provisioning screen. Replace `TOKENVALUE` with the name you put in that field. This is suitable for things like Salesforce Organization IDs and Azure tenant unique names.
* In place of `idpid=EXAMPLE`, it is also possible to provide `idpusername=USER.glance.net`. When this is done, Glance's service uses the username provided to look up the account (Glance group). This option is convenient in cases where the group name is not known but the username is. Replace `USER.glance.net` with the Glance username (also known as the Glance Address) of a user (any user) in the account. If you are not sure what value to use, contact Glance Customer Support.
=================================================================
FILE: /developer/integrations/twilio_webchat
=================================================================
Flex WebChat must be loaded from the CDN. Glance does not provide an NPM package, which is required for React deployments.
1. Install [Flex WebChat](https://www.twilio.com/docs/flex/developer/messaging/webchat/setup#option-1).
2. The following code example contains Flex WebChat and Glance Presence functionality. Update the code with your Account SID and Flex Flow SID:
```html
```
3. Set up a [Flow](https://www.twilio.com/console/studio/flows) for Flex WebChat:
1. From the Twilio Console > **Studio** > **Manage Flows**, select **Webchat Flow**.
2. In the **Widget Library** > **Flow Control**, select and drag **Set Variables** onto the canvas. Click the widget to edit.
3. Click the plus sign on the right side of **Variables**.
4. For **Key**, input `glance_visitor_id`.
5. For **Value**, input `{{trigger.message.ChannelSid}}`
6. **Save** the variable.
7. **Save** the widget.
8. Wire the widget to the **Incoming Message Trigger**.
9. In the **Widget Library** > **Connect Other Products**, select and drag **Send to Flex** onto the canvas. Click the widget to edit.
10. For **Workflow**, select **Assign to Anyone**.
11. For **Channel**, select **Programmable Chat**.
12. For **Attributes**, input `{"name": "{{trigger.message.ChannelAttributes.from}}", "channelType": "{{trigger.message.ChannelAttributes.channel_type}}", "channelSid": "{{trigger.message.ChannelSid}}", "glance_visitor_id": "{{flow.variables.glance_visitor_id}}"}`
13. **Save** the widget.
14. Wire the widget to the **Set Variable Widget** that you just created.
15. Select **Publish**.
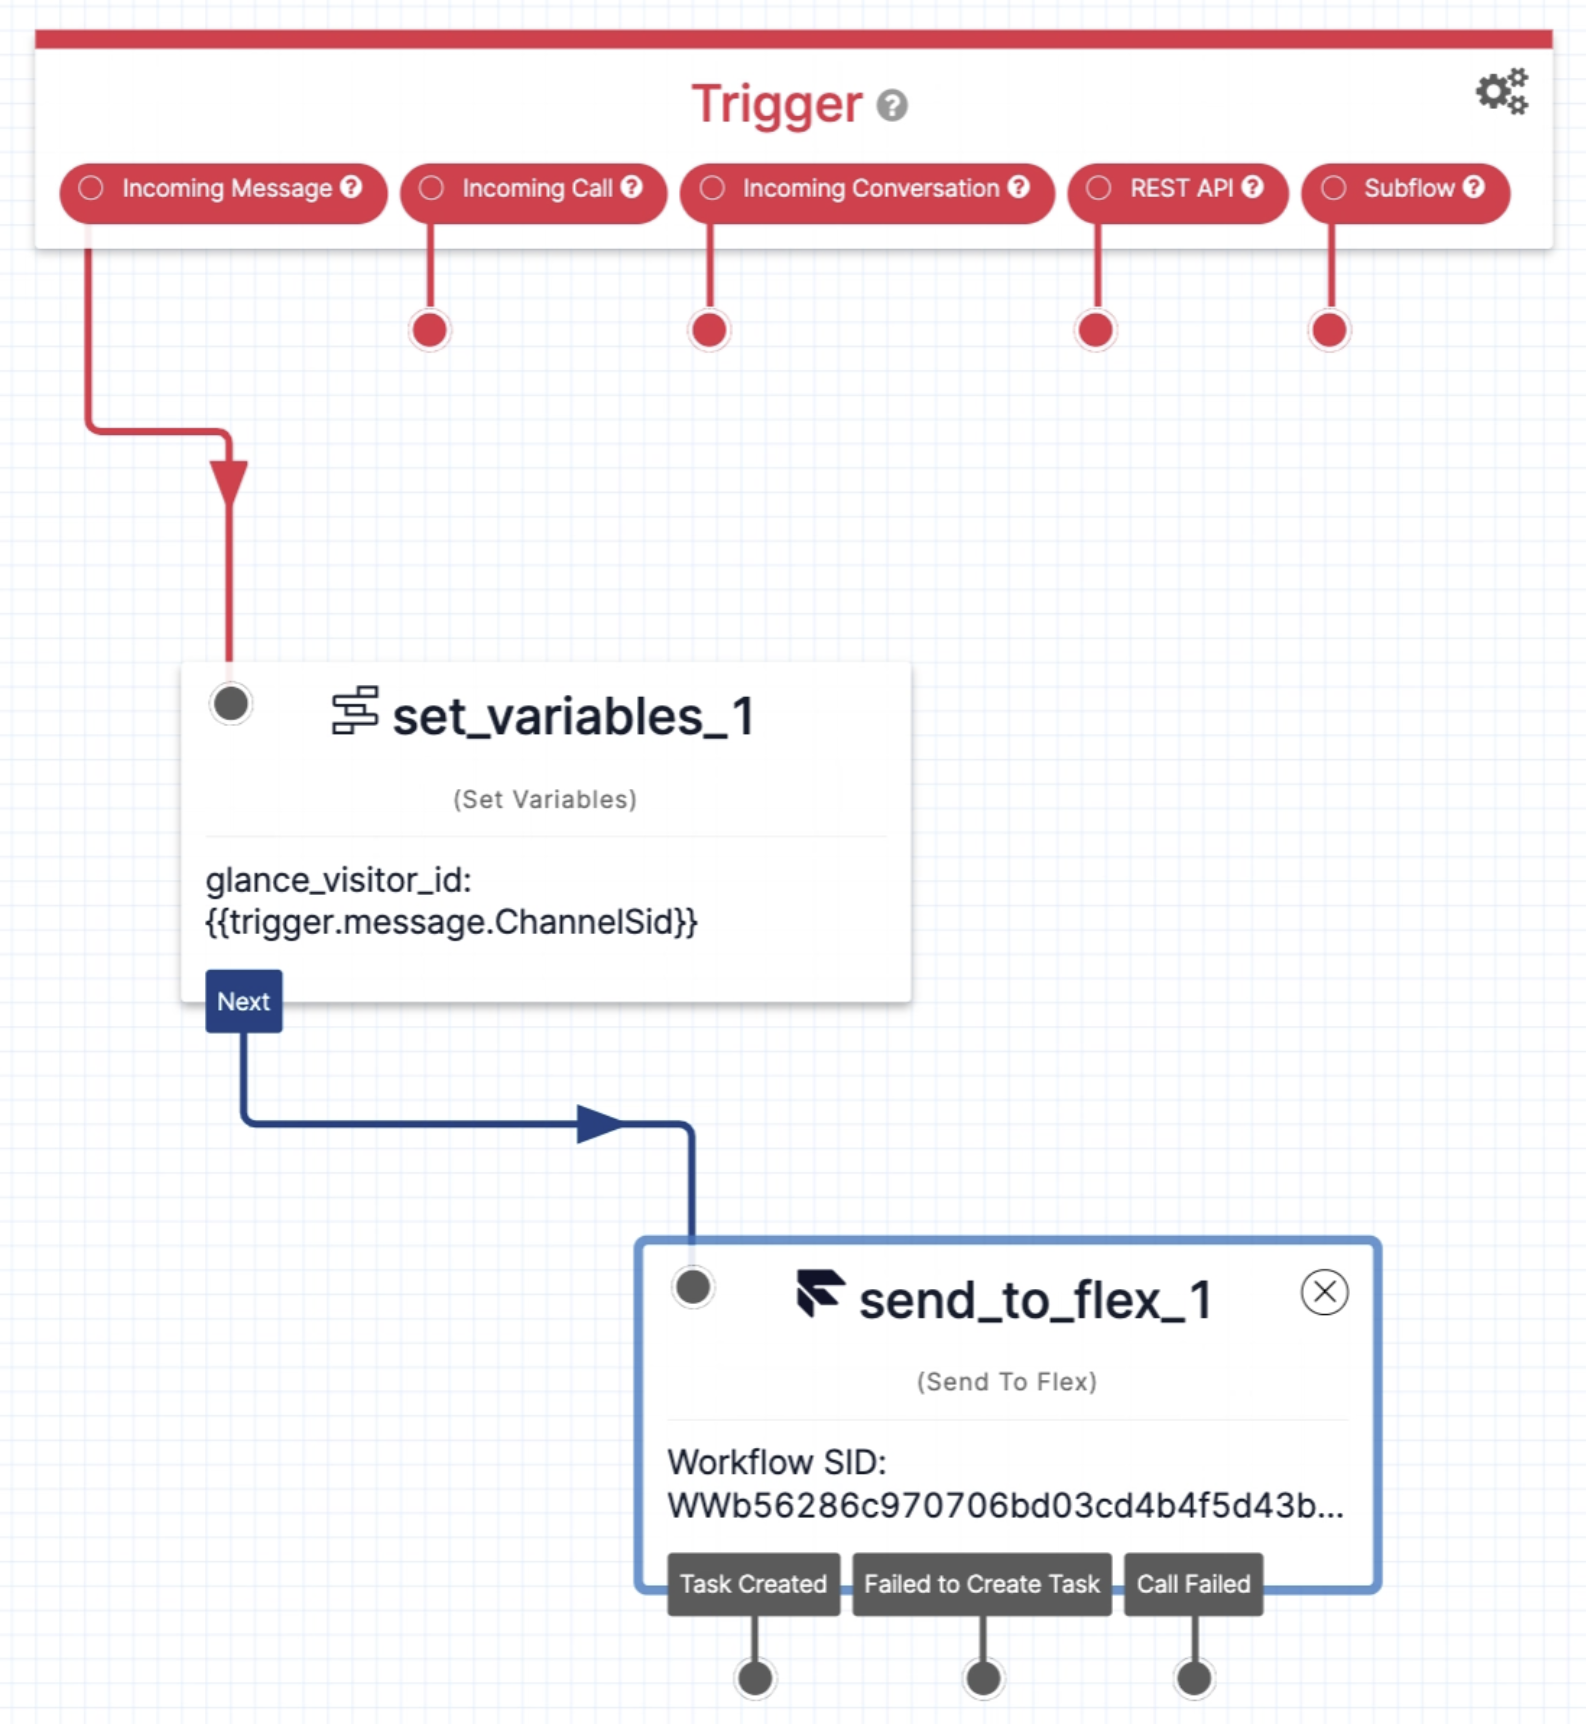 =================================================================
FILE: /developer/legacy_api/activity
=================================================================
The Activity Service API provides developers with programmatic access to historical session data, allowing you to seamlessly query session counts, detailed participant information, and overarching usage metrics. Implemented via Windows Communication Foundation (WCF), this versatile web service supports integration through SOAP/XML, JSON requests, and standard HTTPS POSTs, making it highly compatible with a wide range of backend reporting systems, custom dashboards, and CRM workflows.
In this section, you will find a comprehensive reference for interacting with the Activity Service. This includes a breakdown of all available **Methods** and **Endpoints** (such as retrieving active, completed, or user-specific sessions), the global **Conventions** required for authentication and date formatting, and a detailed mapping of **Session and Guest Statuses** to help you accurately track the lifecycle of every cobrowse, screen share, and video interaction.
=================================================================
FILE: /developer/legacy_api/activity/status
=================================================================
Glance service is provided via Sessions. Each successful session has two or more Session Guests.
=================================================================
FILE: /developer/legacy_api/activity
=================================================================
The Activity Service API provides developers with programmatic access to historical session data, allowing you to seamlessly query session counts, detailed participant information, and overarching usage metrics. Implemented via Windows Communication Foundation (WCF), this versatile web service supports integration through SOAP/XML, JSON requests, and standard HTTPS POSTs, making it highly compatible with a wide range of backend reporting systems, custom dashboards, and CRM workflows.
In this section, you will find a comprehensive reference for interacting with the Activity Service. This includes a breakdown of all available **Methods** and **Endpoints** (such as retrieving active, completed, or user-specific sessions), the global **Conventions** required for authentication and date formatting, and a detailed mapping of **Session and Guest Statuses** to help you accurately track the lifecycle of every cobrowse, screen share, and video interaction.
=================================================================
FILE: /developer/legacy_api/activity/status
=================================================================
Glance service is provided via Sessions. Each successful session has two or more Session Guests.
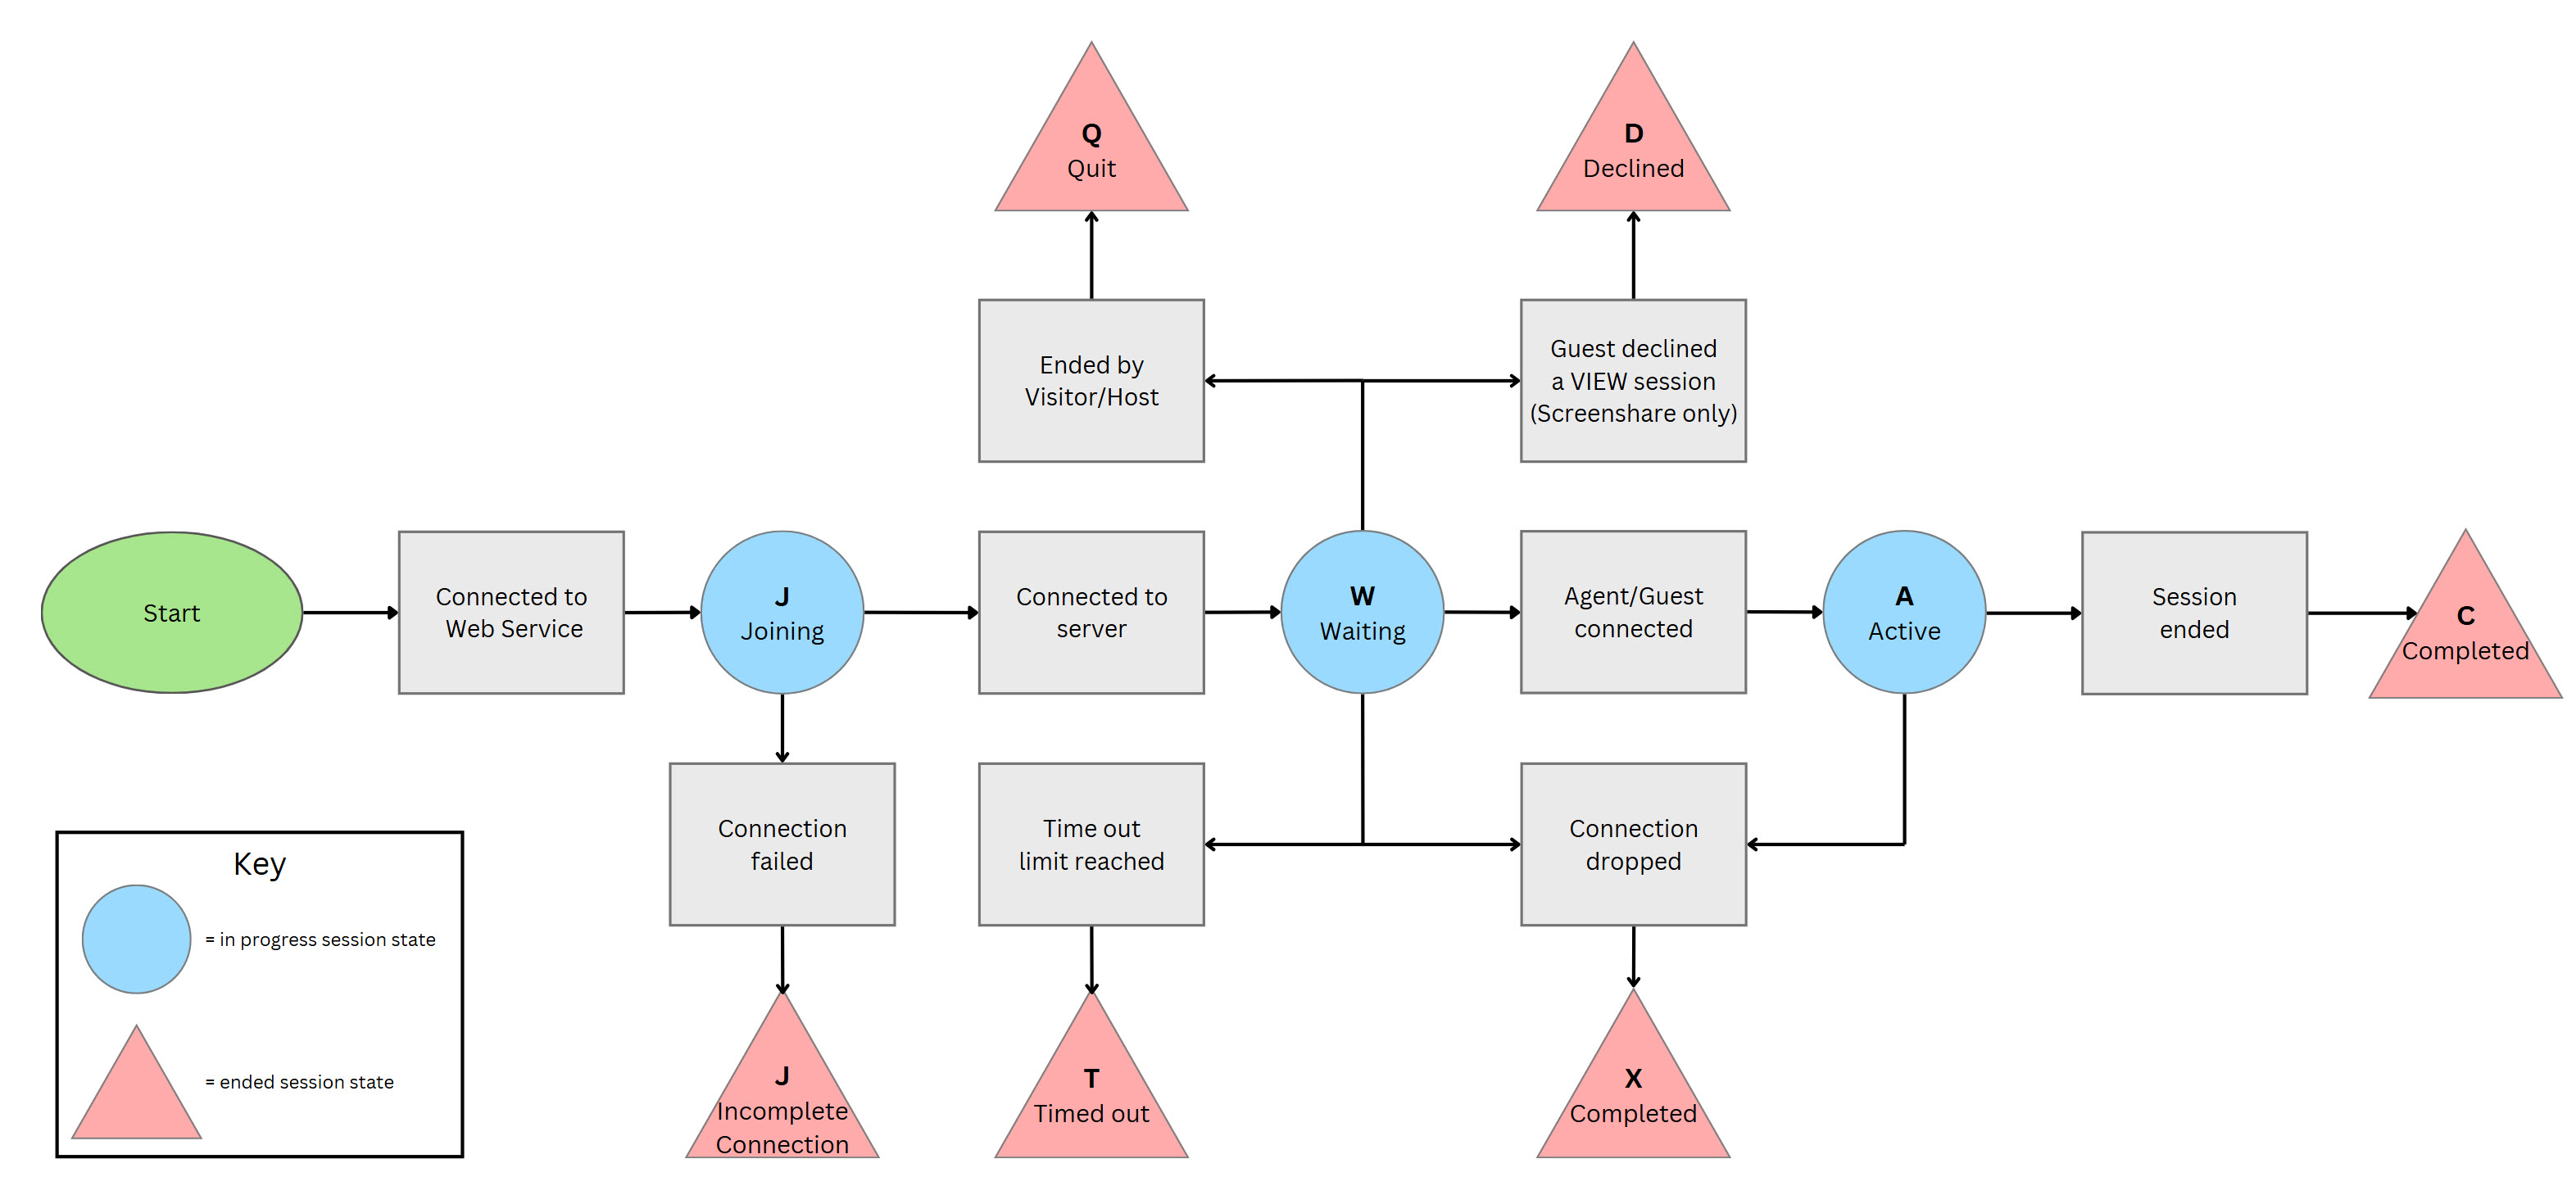 ## Session Guest Status
These are possible guest status values:
* **A** - Active (guest connected)
* **C** - Completed (guest has left)
* **D** - Guest declined the session
* **E** - Unexpected error occurred
* **J** - Joining (guest is in process of connecting but has not yet connected)
* **P** - Another viewer instance was opened by the same guest
* **R** - Temporary status that occurs when the server is waiting for a reconnect from the client
* **T** - Session timed out
* **W** - Temporary status that occurs when a different display side has connected but updates are not yet being sent
* **X** - Guest left session, by closing a browser window or dropping the session some other way
=================================================================
FILE: /developer/legacy_api/activity/webservices_activity
=================================================================
This is the API for querying for session counts and session and participant details.
**Endpoint:** `https://www.glance.net/services/activityservice.asmx`
The WSDL is located here: `https://www.glance.net/services/activityservice.asmx?WSDL`
## Session Guest Status
These are possible guest status values:
* **A** - Active (guest connected)
* **C** - Completed (guest has left)
* **D** - Guest declined the session
* **E** - Unexpected error occurred
* **J** - Joining (guest is in process of connecting but has not yet connected)
* **P** - Another viewer instance was opened by the same guest
* **R** - Temporary status that occurs when the server is waiting for a reconnect from the client
* **T** - Session timed out
* **W** - Temporary status that occurs when a different display side has connected but updates are not yet being sent
* **X** - Guest left session, by closing a browser window or dropping the session some other way
=================================================================
FILE: /developer/legacy_api/activity/webservices_activity
=================================================================
This is the API for querying for session counts and session and participant details.
**Endpoint:** `https://www.glance.net/services/activityservice.asmx`
The WSDL is located here: `https://www.glance.net/services/activityservice.asmx?WSDL`
Common session status values are:
- W: Waiting, other side has not joined yet
- A: Active, both sides have joined (host/guest or agent/visitor)
- C: Completed (session has ended)
- X: Session ended but without a clean close (may have dropped)
- T: Timed out. The session was waiting but the other side did not join within the timeout
- Q: Quit. The session was waiting but was ended by the host or visitor before the other side joined
Note: Some API methods filter out sessions with certain status values. Not every method returns sessions with all these status values. | | **Width and Height** | The initial width and height of the screen are returned for a screen-sharing session. This can change during a session if the display side changes its monitor or resolution. These values are 0 for co-browsing sessions.
For video sessions, the width and height represent the video resolution. The exact resolution depends on the originating person's webcam make, model, and settings. Video sessions always have a fixed ratio of 4:3 (NTSC), 11:9 (PAL), or less commonly 5:4 or 16:9 (HD) and usually have one of these sets of dimensions:
- 160x120
- 176x144
- 320x240
- 352x288
- 640x360
A larger video resolution�such as 640x480 or 704x576�usually means the webcam is misconfigured. | | **Session Duration** | Session duration is in seconds. It is 0 for active sessions. | | **Guest Type** | Guest type is one of:
- Agent: Agent (Glance user) in a Cobrowse session
- Visitor: Website visitor (customer) in a Cobrowse session
- Host: Glance user who has started a screen-sharing session
- Guest: Guest of a screen-sharing session
- J: Joining (the guest is in the process of connecting but has not yet connected)
- A: Active (guest connected)
- C: Completed (guest has left)
- X: Guest left the session, but without a clean close (may have dropped)
See [Session Status and Session Guest Status](../status) for more details. | | **Guest Duration** | Guest duration is in seconds. It is 0 for active guests. | | **Guest Information** | Guest information may include name, email, and phone if supplied. These values can be requested from the guest or passed through a URL used to join the session. Glance gathers this information on behalf of Glance customers and only at their request. If a customer account is not configured to gather this information, these values are empty.
Guest information may also include a location node with city, region (state/province), and country code. This is derived from the guest's IP address if available. | ### Sample Session Records (XML) ```xml
- 2012-12-01T16:08:00Z: UTC date and time
- 2012-12-01T16:08:00-5:00: Time with offset from UTC
- 2012-12-01T16:00:00: Unspecified timezone = US East Coast time (EST or EDT)
- 2012-12-01: Time 00:00, midnight at the beginning of Dec 1, 2012, East Coast time
Note: Date values are returned in [UTC](https://en.wikipedia.org/wiki/Coordinated_Universal_Time). | ================================================================= FILE: /developer/legacy_api/activity/webservices_operations ================================================================= ## PartnerSessionCounts `https://www.glance.net/services/activityservice.asmx?op=PartnerSessionCounts` This method returns counts of numbers of sessions started within the given date range, broken down by session type and status. **Input Parameters** | Parameter | Description | | :--- | :--- | | **partnerId** | Your Glance group id. This is assigned by Glance. | | **apiKey** | The unique identifier used to authenticate. Administrators can set, reset, and view API keys from the My Account area under Settings. | | **type** | Parameter must be supplied, but value is optional. **"C"** Cobrowse, **"G"** Screen Share, or **"V"** Video (blank returns all). | | **status** | **"A"** Active or **"C"** Completed sessions. | | **startRange**
**endRange** | Date range of session starting times.
For today's sessions, set startRange to today and endRange to tomorrow.
The maximum range is 31 days. | **Sample Results** ```xml
**endRange** | Date range of session starting times.
For today's sessions, set startRange to today and endRange to tomorrow.
The maximum range is 31 days. | **Sample Results** ```xml
**endRange** | Date range of session starting times.
For today's sessions, set startRange to today and endRange to tomorrow.
The maximum range is 31 days. | | **sessionKey** | Parameter must be supplied, but value is optional. If supplied, then only sessions with that key are returned. | | **nResults** | Number of sessions to return in this call, must be between 1 and 1000. | | **nextId** | Next starting id for pagination of results. For the first (or a single) call pass 0. On subsequent calls, pass the value returned by the previous call. | **Sample Results** ```xml
**endRange** | Date range of session starting times.
For today's sessions, set startRange to today and endRange to tomorrow.
The maximum range is 31 days. | | **sessionKey** | Parameter must be supplied, but value is optional. If supplied, then only sessions with that key are returned. | | **nResults** | Number of sessions to return in this call, must be between 1 and 1000. | | **nextId** | Next starting id for pagination of results. For the first (or a single) call pass 0. On subsequent calls, pass the value returned by the previous call. | **Sample Results** ```xml
**endRange** | Date range of session starting times.
For today's sessions, set startRange to today and endRange to tomorrow.
The maximum range is 31 days. | | **status** | Must be either "A" to return Active (in-progress) sessions or "C" for Completed sessions. | | **sessionKey** | Parameter must be supplied, but value is optional. If supplied, then only sessions with that key are returned. |
partnerUserId can be assigned by Glance, but will typically be supplied by you, if you provision users with the Glance Provisioning API. For more information on provisioning, contact Glance support.
**connfail** - Failed to establish or maintain the websocket connection. Reasons may include, but are not limited to, `extend`, `timedout`, `authtokenmissing`, and other errors passed from XMLHttpRequest. In the event of a connection failure, a "detail" property will include a detailed reason:
**authfail** - Authorization token missing, bad, or expired
**connection** - Network connection dropped
**error** - Server returned an error
**invalidprotocol** - Visitor IDs contain special nats characters: space, *, and >. | | `onterms` | `{ status : "displayed/accepted/declined" }` | The terms event fires when the terms and conditions dialog is displayed, accepted, or declined by the visitor. | | `onvisitorsessionstart`, `onvisitorsessionend`, `onvisitorerror` | *N/A* | These events fire when the corresponding events sessionstart, sessionend, and error fire on the visitor side. See the `GLANCE.Cobrowse.Visitor` API documentation for details. | | `onvisibility` | `{ visibility : "hidden/visible" }` | The visibility event fires when the visitor's browser tab visibility changes. | --- ### Error Handling The `onfail` parameters to `GLANCE.Presence.Agent` methods should be a function which takes a "reason" parameter. The "reason" codes will be one of the following: * **authorization** - Authorization token missing, bad, or expired * **connection** - Network connection could not be established. See the browser console for details. ## Sample Code See [Sample Code](../sample) for details. ================================================================= FILE: /developer/presence/presence_rest_api ================================================================= # Presence Agent REST API The Glance Presence Agent REST API offers the same functionality as the JavaScript `GLANCE.Presence.Agent` API, with the exception of `connect()` which relies on WebSockets. The REST API is useful for implementing server side agent console functionality. ### REST API URLs The Presence service consists of a load balancer at `presence.glance.net` as well as multiple named Presence Servers at `presence0001.glance.net`, `presence0002.glance.net`, etc. Presence data can be queried by invoking the JSON REST API on the Presence Service at `presence.glance.net`. Signaling specific visitors must be done by finding the instance that the visitor is currently connected to (via `/findvisitor`), then invoking the REST API on that specific server. ### Authorization All Presence Agent REST API entry points expect an authorization token to be sent in an HTTP `Authorization` header as follows: ```text Authorization: Bearer [authorization_token] ``` The Authorization Token can be obtained using the Glance [Authorization API](/developer/legacy_api/auth/webservices_authorization). *** ### REST API Endpoints The Presence service supports the following REST endpoints: #### /lookupvisitor Returns the Presence information for a particular visitor. ```text GET [https://presence.glance.net/lookupvisitor?groupid=](https://presence.glance.net/lookupvisitor?groupid=)[groupid]&visitorid=[visitorid] ``` **Response:** ```json { "direct": "pr0016.glance.net:443", "visitorpresent": "1583953702.0", "timestamp": "1583953702.0", "visitorid": "example", "groupid": "12345", "ds": "pr0016.glance.net/0", "directserver": "pr0016.glance.net", "tlsport": 5501, "httpsport": 443 } ``` #### /findvisitor Returns the specific named Presence server that the visitor is currently connected to. ```text GET [https://presence.glance.net/findvisitor?groupid=](https://presence.glance.net/findvisitor?groupid=)[groupid]&visitorid=[visitorid] ``` **Response (Visitor Found):** ```json { "ds": "pr0016.glance.net/0", "direct": "pr0016.glance.net:443", "directserver": "pr0016.glance.net", "tlsport": 5501, "httpsport": 443, "visitorfound": true } ``` **Response (Visitor Not Found):** ```json { "visitorfound": false } ``` #### /signalvisitor Signals the specified visitor, passing a JSON message. There must be a connected `GLANCE.Presence.Visitor` instance on the visitor side to receive the signal. ```text POST https://[directserver]/signalvisitor?groupid=[groupid]&visitorid=[visitorid] ``` The body of the request is the JSON message to send. The message should have the following format: ```json { "mtype": "message_type", "data": "message_payload" } ``` The message type can be `"invoke"`, to invoke a `GLANCE` JavaScript function on the visitor: ```json { "mtype": "invoke", "data": { "func": "GLANCE.Cobrowse.Visitor.startSession" } } ``` Alternatively, message type `"signal"` can be specified to send a custom message. When the visitor side receives the message, the event handler `onsignal()`, if defined, will be called on the Visitor instance. For example: ```json { "mtype": "signal", "data": { "command": "startchat", "chatid": "56789" } } ``` This will result in `onsignal({ "command": "startchat", "chatid": "56789" })` being called on the `GLANCE.Presence.Visitor` instance. ================================================================= FILE: /developer/presence/presence_security ================================================================= The Presence Service allows an authorized agent to invoke JavaScript functionality in a visitor browser. This document outlines the security considerations associated with the Presence Service. When an agent issues a request to the Glance Presence Service, the service verifies the identity of the agent, and ensures that particular agent is authorized to carry out the requested operation. This verification is accomplished by means of an Authorization Token. ## Authorization Token All agent side requests to the Presence Service carry an Authorization Token which can be obtained from the Glance Web Service. Glance uses the JSON Web Token (JWT) standard for creating, signing, and verifying authorization tokens. ## Obtaining the Token For an Agent to obtain an authorization token for Presence: 1. The Agent passes credentials to the Glance Authorization Service to prove their identity. 2. The Glance Authorization Service verifies the agent's credentials and determines whether the Agent is authorized to access the Presence service. The Glance Authorization Service is accessible via: * Soap 1.2 ([wsdl](https://www.glance.net/services/AuthorizationService.svc?wsdl)) * JSON REST ([REST help page](https://www.glance.net/services/AuthorizationService.svc/rest/help)) * XML REST ## Authentication The Glance Authorization service accepts as credentials any of the following: * Glance username and password * Partner ID, partner user ID, and login key * Glance username and login key * Glance website session id In addition to credentials, the agent must specify a Glance group id. An individual user may be a member of multiple groups, but at any given time the user authenticates in a particular group. If an agent needs to carry out operations in multiple groups, they must obtain multiple authorization tokens. ## Authorization Agents must have a current subscription which includes the Presence feature in order to be granted access to Presence services. ## Token Duration The agent specifies a duration for the token. Tokens may be issued for up to two hours duration. Obtaining a token is resource intensive. Therefore, the agent console should obtain a token and reuse it until it expires or the agent logs out, rather than obtaining a new token for every operation. ## Token Storage and Usage The authorization token may be obtained server side using the SOAP or REST API. It may be stored server side, for example in session state, and used in subsequent server side requests to the Presence service. Alternatively, a token obtained server side may be used client side by the Presence JavaScript API. The token may be embedded in the page in a `data-authtoken` attribute of the cobrowse script or meta tag, or it may be passed into the JavaScript API using `GLANCE.Authorization.setToken()`. Finally, a token may be obtained client side by passing credentials into `GLANCE.Authorization.authorize()`. When `setToken()` or `authorize()` is used, the authorization token is stored in local storage to allow reuse. All calls to the `GLANCE.Presence` API will automatically use the stored token, as long as those calls are made from secure pages on the same fully qualified domain. See the [Glance Authorization API](/webservices/auth/webservices_authorization) documentation for more information. --- ## Presence Service Request Validation ### Validating Authorization Token The Presence Service validates the authorization token presented: * In the `Authorization` header, for REST requests. * In the first message on a websocket connection. The Presence Service verifies the token signature, that it is not expired, and that the `groupid` in the token matches the `groupid` in the request. There are no restrictions on which visitors in the group the agent can interact with. ### Origin Check and CORS Requests to the Presence Service from secure browsers will include an `Origin` header. The Presence Service will reject requests with a non-whitelisted Origin domain. If and only if the request Origin is on the whitelist, the Presence Service will respond with the `Access-Control-Allow-Origin` header set to the Origin domain. ### Shared Secret JSON Web Tokens require a shared secret between the token issuer and the consumer. The Presence service generates a new shared secret every two hours and passes it to the Glance Authorization service via an https request to an internal endpoint in the Glance VPN. ### Visitor Authentication Website visitors are identified by a unique visitor id, which may be anything unique to the visitor such as a user id, phone number, or email address, which could either be relayed to a customer service agent over the phone, or is included in a customer record that can be retrieved using some information that is relayed over the phone. When the visitor id is not secret or is static, a customer service agent may want some way to guarantee that the visitor browser receiving any presence requests is truly operated by the individual on the phone. One way to do this would be for the agent console to trigger a confirmation message to appear on the visitor side. The visitor must select the correct button on the confirmation message (as directed by the agent over the phone) before subsequent presence requests can be sent. It is still the responsibility of the agent to verify the identity of the caller. ================================================================= FILE: /developer/presence/presence_visitor ================================================================= ## Adding Visitor Presence to Your Website There are two ways to include Visitor Presence functionality in your website. You can get default Presence behavior by adding some parameters to your Cobrowse script tag, or you can load and use the Presence API for more control. ### Visitor ID A unique `visitorid` is required when connecting to presence. The visitorid can be specified in the `GLANCE_COBROWSE` JavaScript variable, or in `data-` attributes, as described on the [Cobrowse Visitor API](/webservices/visitor_agent/visitor/#cobrowse-visitor-api) page. For example: ```html ``` --- #### GLANCE.Presence.Visitor(params) - Constructor Constructor for a Visitor Object. **Parameters** ```javascript { "groupid" : "group_id", // defaults to GLANCE_COBROWSE.groupid "visitorid" : "visitor_id" // defaults to GLANCE_COBROWSE.visitorid } ``` Do not specify a `visitorid` if the visitor will connect using `connectUnique()`. See this page for more information on [Glance Cobrowse](/developer/legacy_api/visitor_agent/visitor/#glance_cobrowse). --- #### GLANCE.Presence.Visitor.prototype.presence(params) Sends Presence information to the Presence service. **Parameters** ```javascript { "data": "custom data to be stored on the presence server" // optional } ```
origin and xid may be up to 255 Latin-1 (ISO/IEC 8859-1) characters. For character type and length limits on name, email, and phone see this page.
allow="camera *; microphone *"
insession() without parameters is possible but is not supported. Currently, this will return an array of sessions that the agent is participating in, but this functionality should not be relied on and will be separated into a different method in a future release.
[groupid] in the above URLs must be replaced with your Group ID.
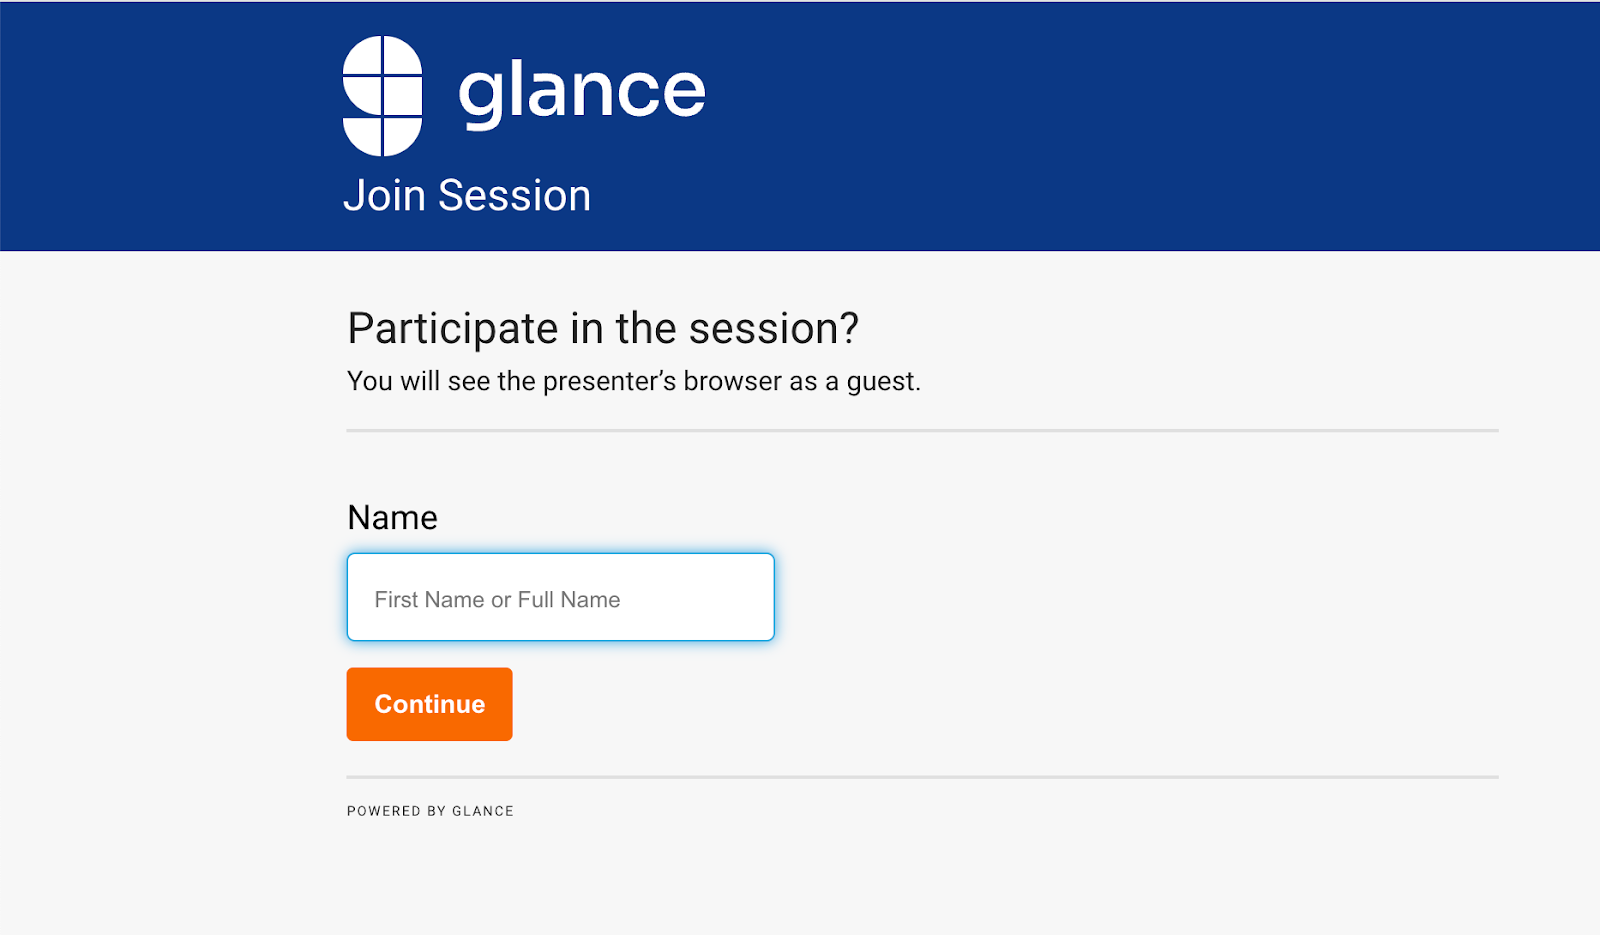 It contains one form field and one button. When the guest clicks **Continue**, your page will run code similar to the following, leveraging the Glance SDK in various places:
```javascript
async function getJoinCode() {
// define the guest's name, or use the generic "Guest" if the field is blank
var guestName = document.querySelector("#GuestName").value
? document.querySelector("#GuestName").value
: "Guest";
// Show or hide UI as appropriate, for example:
$("#headermessagetext").hide();
$("#guestname").hide();
$("#waitingtext").show();
$("#joincode").show();
let connector = new GLANCE.Guest.Connector({
groupid: groupid, // Make sure to replace with your unique group id
ws: "www.glance.net",
});
connector.addEventListener("timeout", () => {
// Perform functions/adjust UI in the event that the agent fails to admit the guest before the code times out
});
connector.addEventListener("error", () => {
// Perform functions/adjust UI in the event of an error
});
let guestcode = await connector.connect(guestName);
if (!guestcode.ok) {
// Perform functions/adjust UI in the event of an error
} else {
// guestcode.code contains the code to be displayed to the user. Adjust the UI and display it to the user.
// guestcode.timeout indicates the number of seconds until the code will timeout.
// You may optionally use this to extend the timeout, possibly in response to a user prompt if desired.
}
}
```
It contains one form field and one button. When the guest clicks **Continue**, your page will run code similar to the following, leveraging the Glance SDK in various places:
```javascript
async function getJoinCode() {
// define the guest's name, or use the generic "Guest" if the field is blank
var guestName = document.querySelector("#GuestName").value
? document.querySelector("#GuestName").value
: "Guest";
// Show or hide UI as appropriate, for example:
$("#headermessagetext").hide();
$("#guestname").hide();
$("#waitingtext").show();
$("#joincode").show();
let connector = new GLANCE.Guest.Connector({
groupid: groupid, // Make sure to replace with your unique group id
ws: "www.glance.net",
});
connector.addEventListener("timeout", () => {
// Perform functions/adjust UI in the event that the agent fails to admit the guest before the code times out
});
connector.addEventListener("error", () => {
// Perform functions/adjust UI in the event of an error
});
let guestcode = await connector.connect(guestName);
if (!guestcode.ok) {
// Perform functions/adjust UI in the event of an error
} else {
// guestcode.code contains the code to be displayed to the user. Adjust the UI and display it to the user.
// guestcode.timeout indicates the number of seconds until the code will timeout.
// You may optionally use this to extend the timeout, possibly in response to a user prompt if desired.
}
}
```
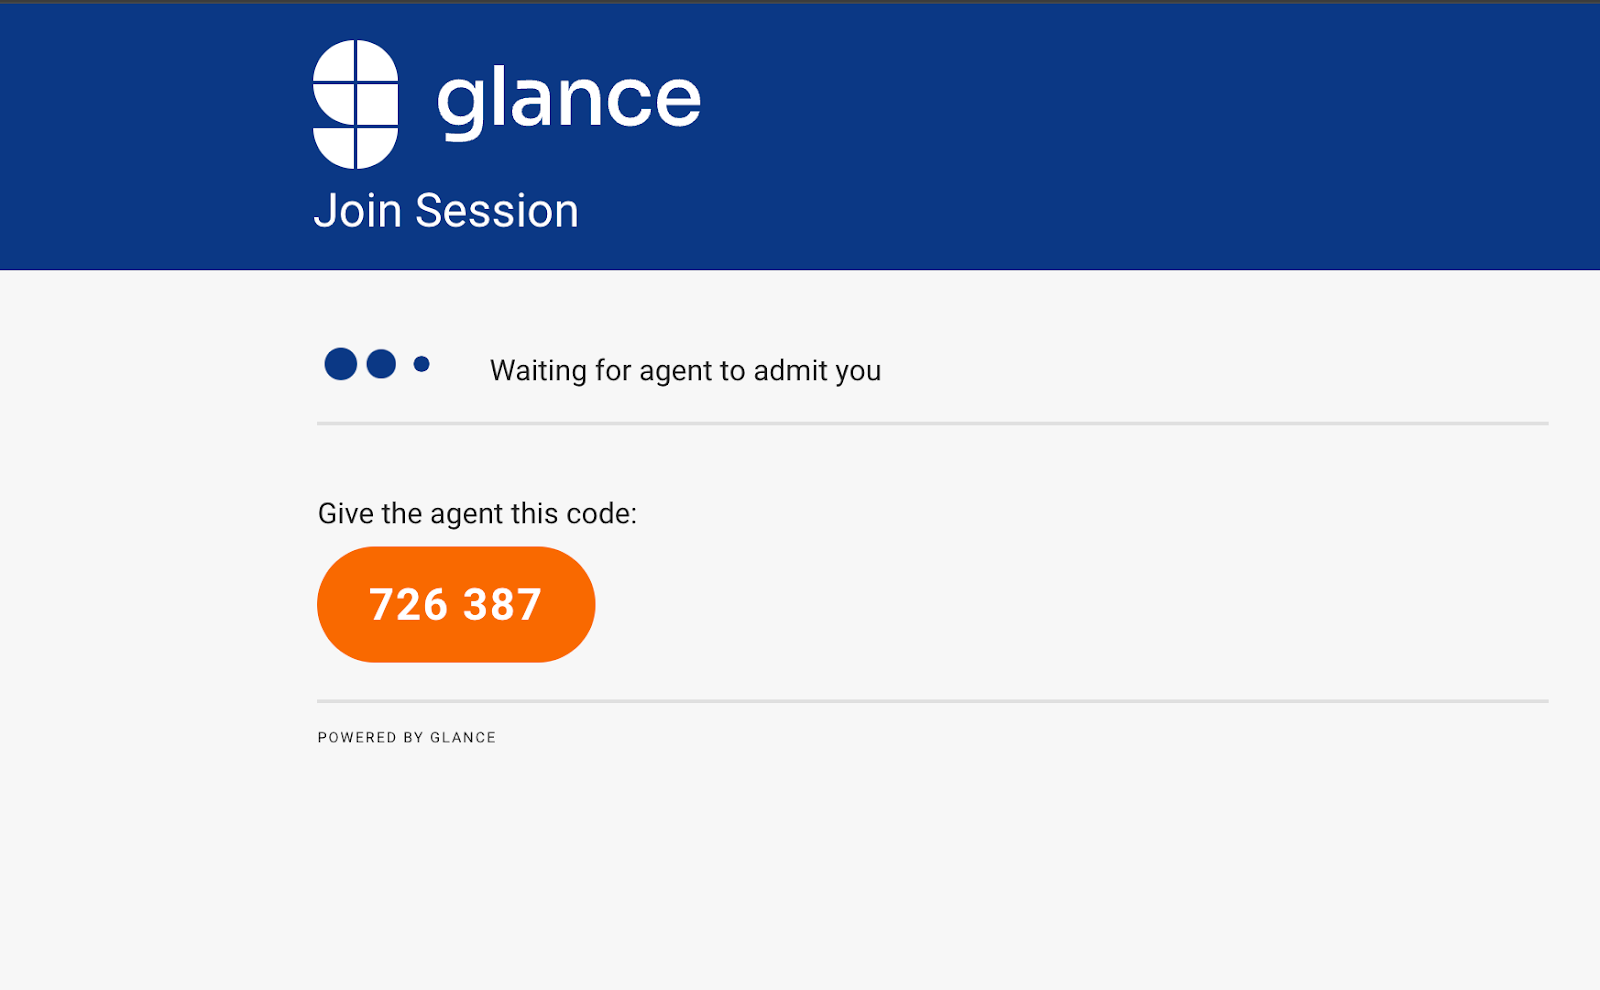 When the agent admits the guest successfully, the guest's browser will automatically be redirected to the **Guest Viewer** page (hosted on glance.net) so this event does not need to be handled explicitly.
After the session, the guest is redirected to a URL that can be specified in the **Account Management** area of glance.net.
Refer to the [Glance Guest API Reference Document](https://glance.gitlab.io/glance-client-src/GLANCE.Guest.html) for a breakdown of the events, parameters, and additional functionality available.
=================================================================
FILE: /developer/sdk
=================================================================
The Glance SDK suite provides developers with the tools needed to embed seamless, real-time collaboration directly into any platform. Whether you are building a custom agent desktop, integrating into a native mobile app, or creating a frictionless join experience for your customers, our SDKs offer flexible, out-of-the-box components and granular API controls.
Choose the SDK that fits your implementation:
{% launcher %}
{% card
title="Browser Agent SDK"
description="Embed the Glance Agent experience directly into your web-based CRM, CCaaS, or custom support portal."
href="/developer/sdk/browseragent/"
/%}
{% card
title="Mobile SDK"
description="Integrate cobrowse, screen sharing, and masking natively into your iOS and Android applications."
href="/developer/sdk/mobile_sdk/"
/%}
{% card
title="Guest Join SDK"
description="Create frictionless, one-click session join experiences for your customers directly in the browser."
href="/developer/sdk/guest_join_sdk/"
/%}
{% /launcher %}
## Choosing the Right SDK
* **Building for the Agent:** If you are a developer tasked with integrating the Glance agent viewer into tools like Salesforce, Zendesk, Genesys, or your own proprietary web dashboard, you will want the **Browser Agent SDK**.
* **Building for the App User:** If you need to allow customers to share their mobile app screen with your support team, use the **Mobile SDK** (available for iOS and Android).
* **Building for the Web User:** If you want to dynamically launch sessions for customers visiting your website without requiring them to download anything, the **Guest Join SDK** is your go-to.
=================================================================
FILE: /developer/sdk/mobile_sdk/flows
=================================================================
The following flowcharts illustrate Glance's operations when using the mobile SDK.
## Initialize Glance and Join a Session
When the agent admits the guest successfully, the guest's browser will automatically be redirected to the **Guest Viewer** page (hosted on glance.net) so this event does not need to be handled explicitly.
After the session, the guest is redirected to a URL that can be specified in the **Account Management** area of glance.net.
Refer to the [Glance Guest API Reference Document](https://glance.gitlab.io/glance-client-src/GLANCE.Guest.html) for a breakdown of the events, parameters, and additional functionality available.
=================================================================
FILE: /developer/sdk
=================================================================
The Glance SDK suite provides developers with the tools needed to embed seamless, real-time collaboration directly into any platform. Whether you are building a custom agent desktop, integrating into a native mobile app, or creating a frictionless join experience for your customers, our SDKs offer flexible, out-of-the-box components and granular API controls.
Choose the SDK that fits your implementation:
{% launcher %}
{% card
title="Browser Agent SDK"
description="Embed the Glance Agent experience directly into your web-based CRM, CCaaS, or custom support portal."
href="/developer/sdk/browseragent/"
/%}
{% card
title="Mobile SDK"
description="Integrate cobrowse, screen sharing, and masking natively into your iOS and Android applications."
href="/developer/sdk/mobile_sdk/"
/%}
{% card
title="Guest Join SDK"
description="Create frictionless, one-click session join experiences for your customers directly in the browser."
href="/developer/sdk/guest_join_sdk/"
/%}
{% /launcher %}
## Choosing the Right SDK
* **Building for the Agent:** If you are a developer tasked with integrating the Glance agent viewer into tools like Salesforce, Zendesk, Genesys, or your own proprietary web dashboard, you will want the **Browser Agent SDK**.
* **Building for the App User:** If you need to allow customers to share their mobile app screen with your support team, use the **Mobile SDK** (available for iOS and Android).
* **Building for the Web User:** If you want to dynamically launch sessions for customers visiting your website without requiring them to download anything, the **Guest Join SDK** is your go-to.
=================================================================
FILE: /developer/sdk/mobile_sdk/flows
=================================================================
The following flowcharts illustrate Glance's operations when using the mobile SDK.
## Initialize Glance and Join a Session
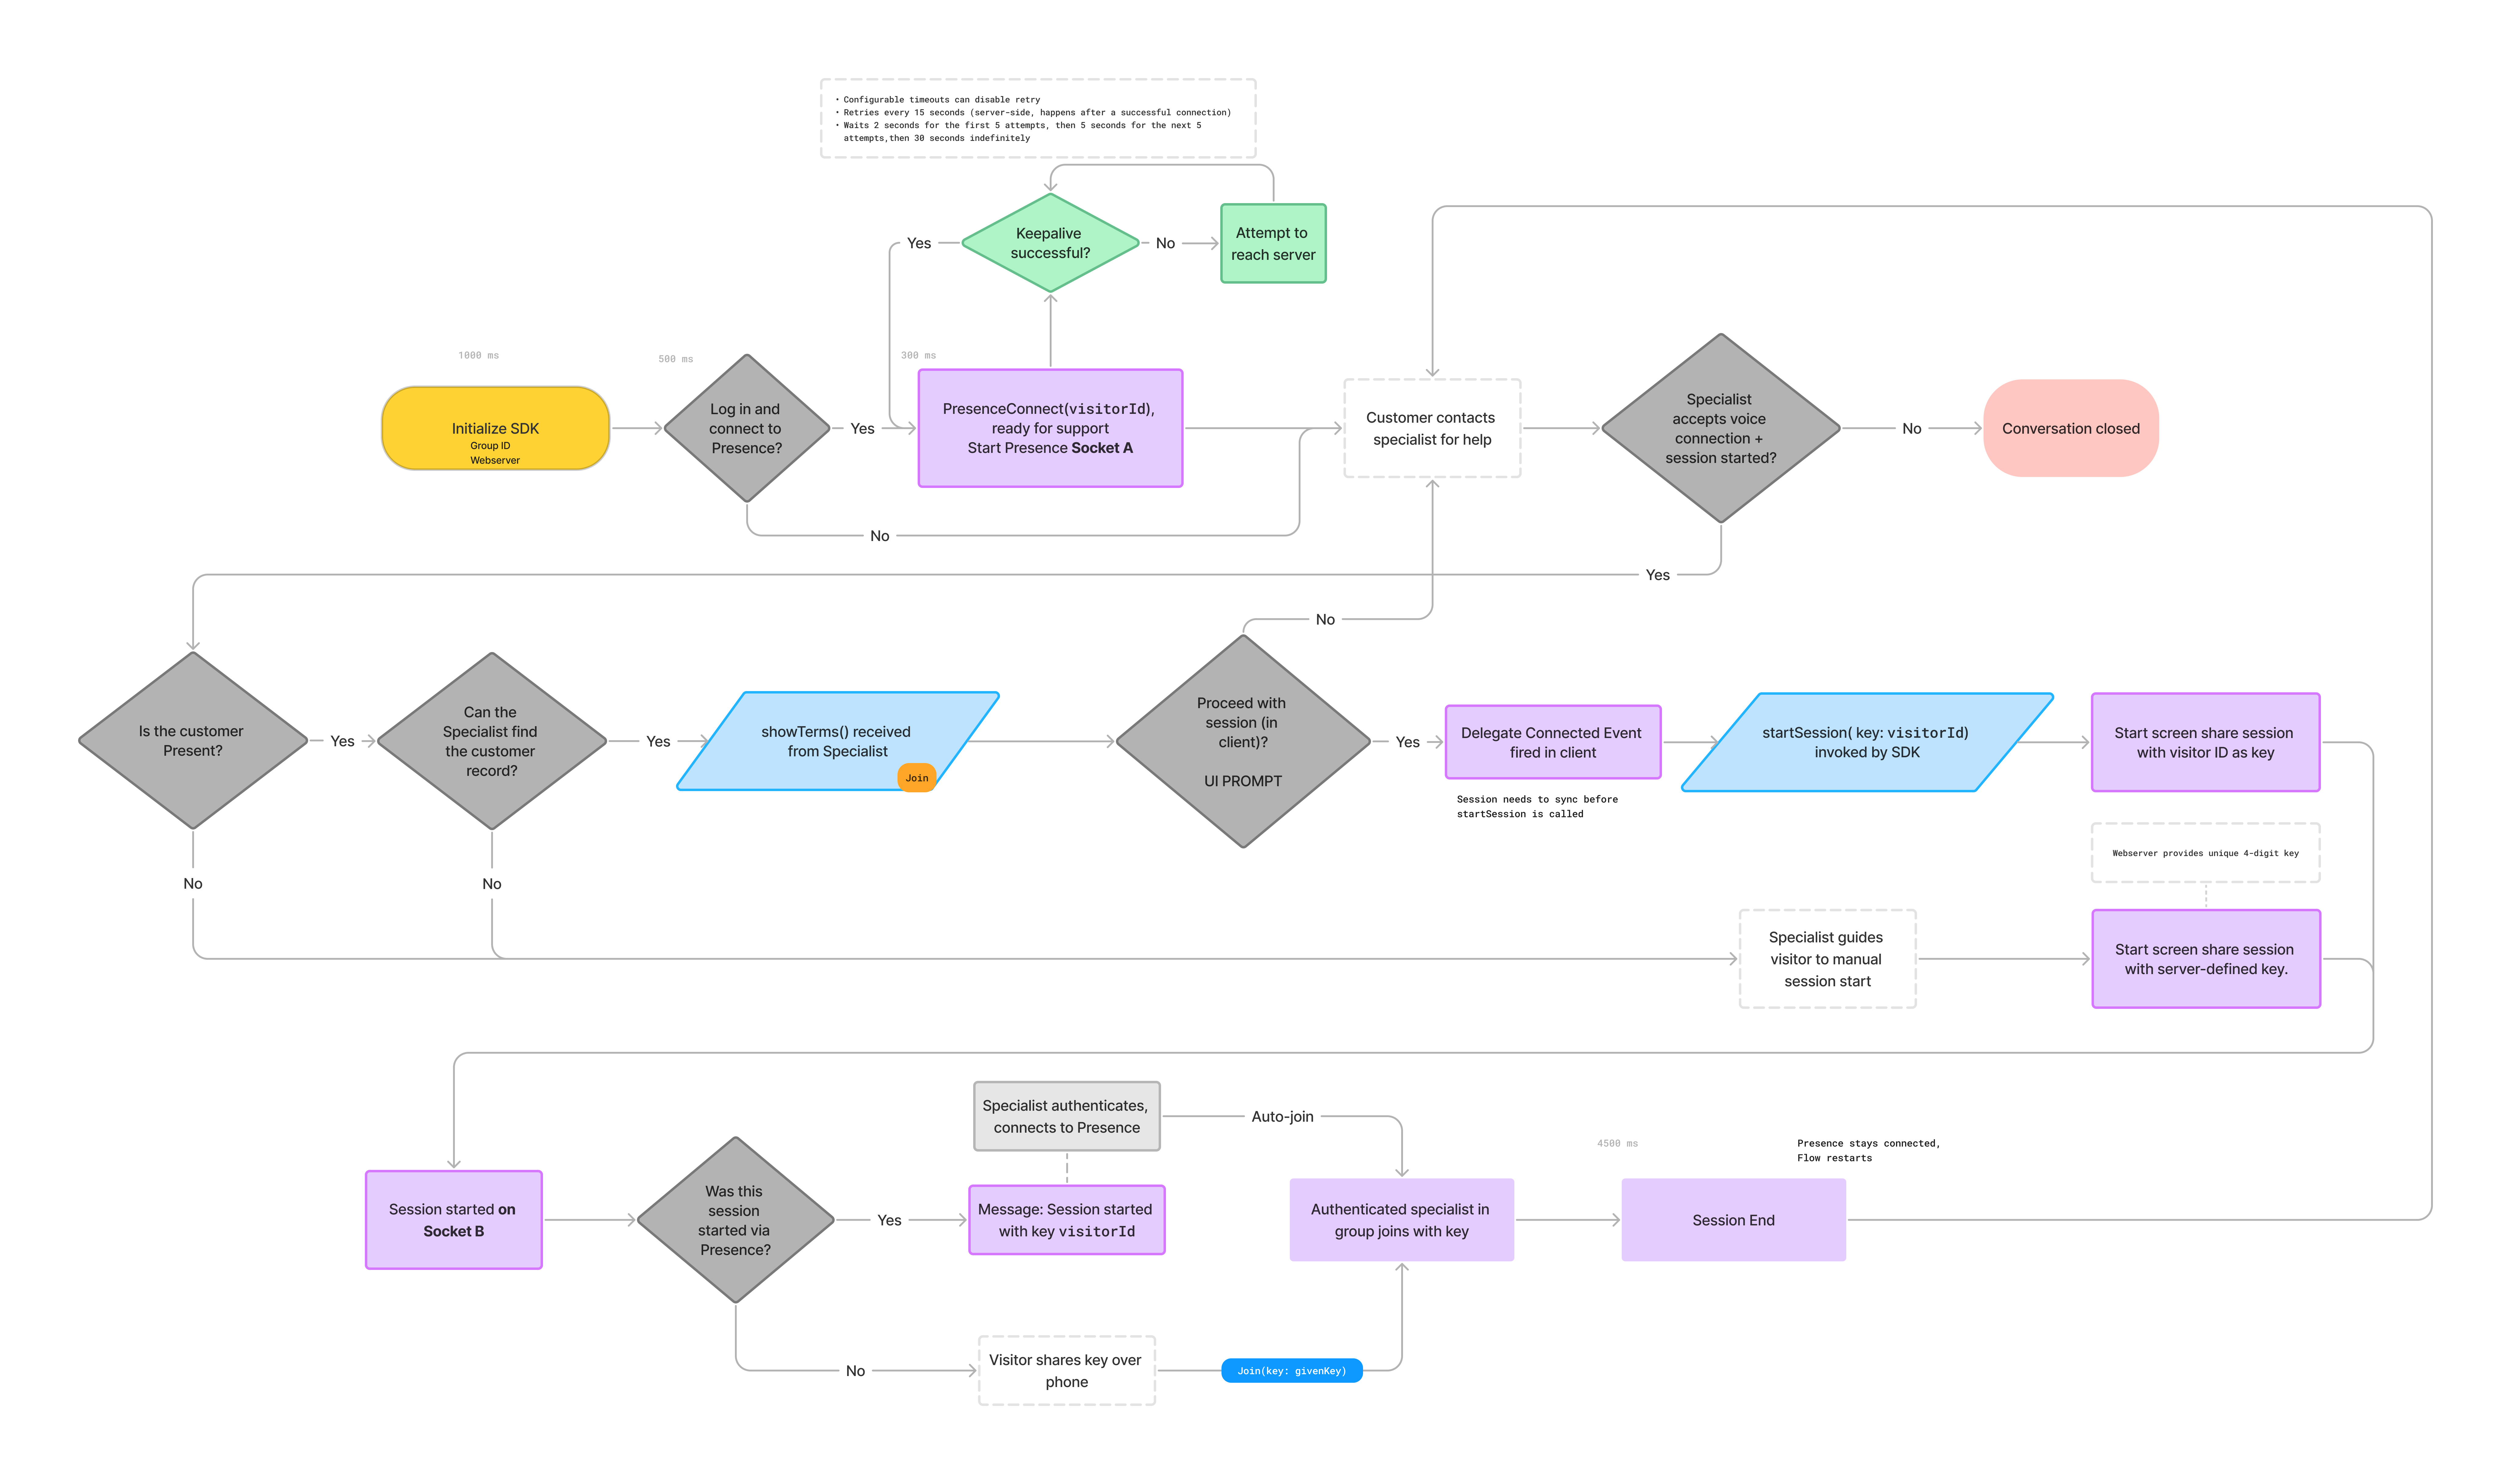 ## Presence Connect Flow from Mobile SDK Host App to Custom Tab in Web Browser
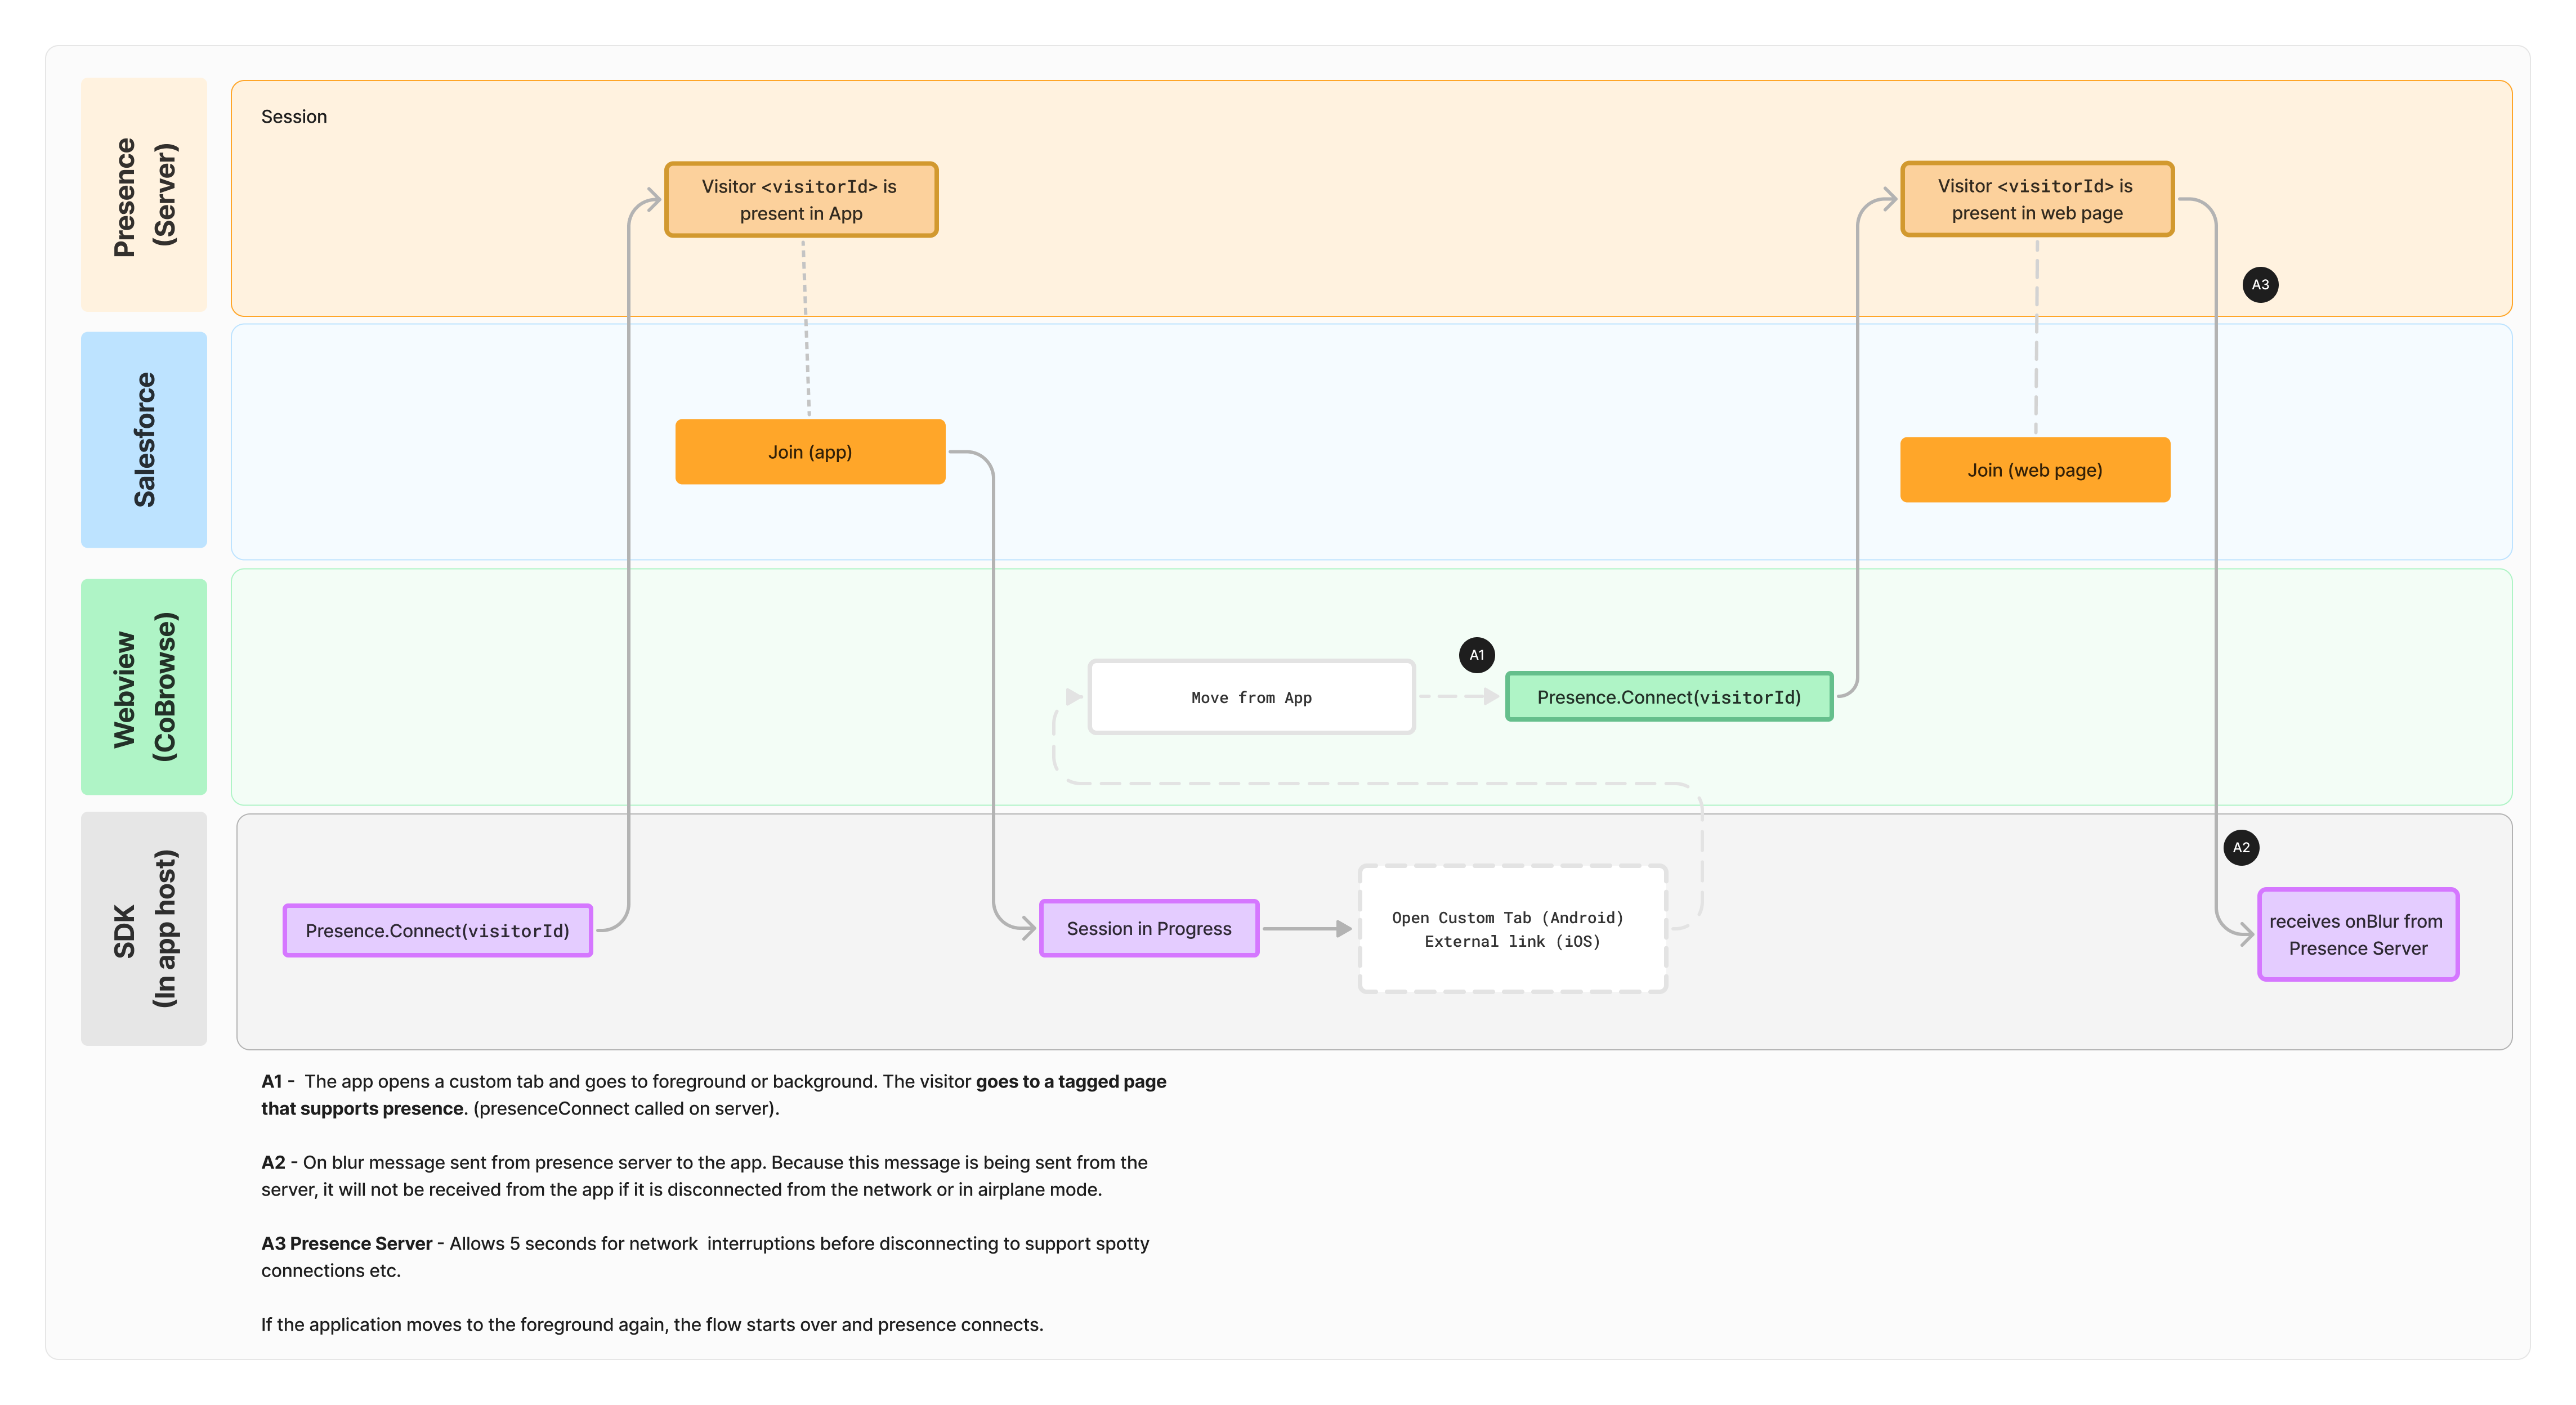 =================================================================
FILE: /developer/sdk/mobile_sdk
=================================================================
The mobile SDK is easy to integrate into your mobile apps and pairs with pre-built integrations to agent desktops of CRM, CCaaS, and custom systems to offer a complete, out-of-the-box solution.
## iOS
Get started integrating Glance into your iOS Apps with Swift or Objective-C.
* **[iOS SDK](https://gitlab.com/glance-sdk-public/glance-sdk-ios-releases):** Provides essential core features, enabling our customers to implement event handling without a UI.
* **[iOS Default UI SDK](https://gitlab.com/glance-sdk-public/glance-default-ui-ios-releases):** An out-of-the-box implementation of our iOS SDK with a default UI and sample app that can be copied and customized to fit a company's brand.
## Android
Get started integrating Glance into your Android Apps with Kotlin or Java.
* **[Android SDK](https://gitlab.com/glance-sdk-public/glance-sdk-android-releases):** Provides essential core features, enabling our customers to implement event handling without a UI.
* **[Android Default UI SDK](https://gitlab.com/glance-sdk-public/glance-default-ui-android-releases):** An out-of-the-box implementation of our Android SDK with a default UI and sample app that can be copied and customized to fit a company's brand.
=================================================================
FILE: /developer/sdk/mobile_sdk/masking_android
=================================================================
In **Glance Mobile Cobrowse**, masking is a critical feature used to protect sensitive or private information on the end user�s screen during a live session with an agent. By selectively hiding specific UI elements�such as passwords, credit card fields, or health data�from the representative's view, masking allows companies to safeguard sensitive information while still providing real-time support.
To enable masking during sessions, developers should use the Glance Mobile SDK to designate which portions of the screen should be hidden from agents. Masking integrates with the native rendering layer of the mobile app, allowing developers to selectively hide sensitive views. There are four main contexts in which masking can be applied:
* **View Masking (Traditional Android Views)**
* **Jetpack Compose Masking**
* **WebView Masking**
* **Keyboard Masking**
Below are best practices for each of these contexts, as well as general masking guidelines that apply in all situations.
---
## General Masking
In all contexts, once an element is designated to be masked by the SDK, it will remain obscured from the agent's view for the duration of all current and future sessions. Given this behavior, masking should be applied at the time views are created�during layout or initialization�rather than waiting until a session has begun. This ensures that masking is consistently applied, even if a session starts after the views are already rendered or if views are recreated during the app lifecycle.
Similarly, when a view is destroyed, masking should be removed. In most cases, masking is automatically removed when the view is destroyed, but best practice is to explicitly remove it in the view's destructor. Masking is always applied if the view is visible. If a view is destroyed and no longer present, masking will be removed and will not appear during sessions.
There are, however, situations in which a mask might be applied even though the view is not visible�primarily when the view is covered by another view, which the SDK may not detect. In such cases, if masking is not desired, it should be removed and reapplied when the view becomes visible again.
### Takeaways
* Masked elements remain hidden for the entire session once registered with the SDK.
* Apply masking during view initialization or layout, not after a session begins.
* Always remove masking when a view is destroyed or removed and no longer used.
---
## View Masking
For apps built using traditional Android Views, masking is performed by passing view IDs or view references to the SDK. Masking can be removed by making calls to remove masked views using references to the masked views. Below are the methods that should be used for masking Android views:
```java
// Adding Masked Views by ID
Glance.addMaskedViewId(R.id.sensitiveTextField, "Masked text field");
Glance.addMaskedViewId(R.id.sensitiveLabel, "Masked label");
Glance.addMaskedViewId(R.id.sensitiveButton, "Masked button");
// Adding Masked Views by reference
Glance.addMaskedView(textField, "Masked text field");
Glance.addMaskedView(label, "Masked label");
Glance.addMaskedView(button, "Masked button");
// Removing Masked Views
Glance.removeMaskedViewId(R.id.sensitiveTextField);
Glance.removeMaskedView(textField);
```
When using traditional Android Views, the SDK utilizes the view�s visibility to determine when masks should be displayed. In these cases, you typically do not need to manually add or remove masked views based on visibility. However, there are scenarios where masks might remain visible even when the corresponding views are obstructed�for example, when covered by a `Dialog` or a `Compose` view rendered in a way that prevents the SDK from detecting the obstruction.
In such cases, you may need to explicitly call `removeMaskedView` when the view is no longer visible and reapply it using `addMaskedView` once it becomes visible again.
=================================================================
FILE: /developer/sdk/mobile_sdk
=================================================================
The mobile SDK is easy to integrate into your mobile apps and pairs with pre-built integrations to agent desktops of CRM, CCaaS, and custom systems to offer a complete, out-of-the-box solution.
## iOS
Get started integrating Glance into your iOS Apps with Swift or Objective-C.
* **[iOS SDK](https://gitlab.com/glance-sdk-public/glance-sdk-ios-releases):** Provides essential core features, enabling our customers to implement event handling without a UI.
* **[iOS Default UI SDK](https://gitlab.com/glance-sdk-public/glance-default-ui-ios-releases):** An out-of-the-box implementation of our iOS SDK with a default UI and sample app that can be copied and customized to fit a company's brand.
## Android
Get started integrating Glance into your Android Apps with Kotlin or Java.
* **[Android SDK](https://gitlab.com/glance-sdk-public/glance-sdk-android-releases):** Provides essential core features, enabling our customers to implement event handling without a UI.
* **[Android Default UI SDK](https://gitlab.com/glance-sdk-public/glance-default-ui-android-releases):** An out-of-the-box implementation of our Android SDK with a default UI and sample app that can be copied and customized to fit a company's brand.
=================================================================
FILE: /developer/sdk/mobile_sdk/masking_android
=================================================================
In **Glance Mobile Cobrowse**, masking is a critical feature used to protect sensitive or private information on the end user�s screen during a live session with an agent. By selectively hiding specific UI elements�such as passwords, credit card fields, or health data�from the representative's view, masking allows companies to safeguard sensitive information while still providing real-time support.
To enable masking during sessions, developers should use the Glance Mobile SDK to designate which portions of the screen should be hidden from agents. Masking integrates with the native rendering layer of the mobile app, allowing developers to selectively hide sensitive views. There are four main contexts in which masking can be applied:
* **View Masking (Traditional Android Views)**
* **Jetpack Compose Masking**
* **WebView Masking**
* **Keyboard Masking**
Below are best practices for each of these contexts, as well as general masking guidelines that apply in all situations.
---
## General Masking
In all contexts, once an element is designated to be masked by the SDK, it will remain obscured from the agent's view for the duration of all current and future sessions. Given this behavior, masking should be applied at the time views are created�during layout or initialization�rather than waiting until a session has begun. This ensures that masking is consistently applied, even if a session starts after the views are already rendered or if views are recreated during the app lifecycle.
Similarly, when a view is destroyed, masking should be removed. In most cases, masking is automatically removed when the view is destroyed, but best practice is to explicitly remove it in the view's destructor. Masking is always applied if the view is visible. If a view is destroyed and no longer present, masking will be removed and will not appear during sessions.
There are, however, situations in which a mask might be applied even though the view is not visible�primarily when the view is covered by another view, which the SDK may not detect. In such cases, if masking is not desired, it should be removed and reapplied when the view becomes visible again.
### Takeaways
* Masked elements remain hidden for the entire session once registered with the SDK.
* Apply masking during view initialization or layout, not after a session begins.
* Always remove masking when a view is destroyed or removed and no longer used.
---
## View Masking
For apps built using traditional Android Views, masking is performed by passing view IDs or view references to the SDK. Masking can be removed by making calls to remove masked views using references to the masked views. Below are the methods that should be used for masking Android views:
```java
// Adding Masked Views by ID
Glance.addMaskedViewId(R.id.sensitiveTextField, "Masked text field");
Glance.addMaskedViewId(R.id.sensitiveLabel, "Masked label");
Glance.addMaskedViewId(R.id.sensitiveButton, "Masked button");
// Adding Masked Views by reference
Glance.addMaskedView(textField, "Masked text field");
Glance.addMaskedView(label, "Masked label");
Glance.addMaskedView(button, "Masked button");
// Removing Masked Views
Glance.removeMaskedViewId(R.id.sensitiveTextField);
Glance.removeMaskedView(textField);
```
When using traditional Android Views, the SDK utilizes the view�s visibility to determine when masks should be displayed. In these cases, you typically do not need to manually add or remove masked views based on visibility. However, there are scenarios where masks might remain visible even when the corresponding views are obstructed�for example, when covered by a `Dialog` or a `Compose` view rendered in a way that prevents the SDK from detecting the obstruction.
In such cases, you may need to explicitly call `removeMaskedView` when the view is no longer visible and reapply it using `addMaskedView` once it becomes visible again.
Glance Docs
Get the most out of Glance. Access comprehensive guides, API documentation, and configuration best practices to seamlessly integrate Glance into your customer engagement strategy.
Integration guides and SDKs for bringing Glance into your web, mobile, and desktop applications.
Admin configuration, security & compliance protocols, and user guides for managing your Glance account.
Direct access to our REST APIs for managing users, sessions, reporting data, and webhooks.
Stay up to date with the latest features, improvements, and fixes across the Glance platform.
**Version 6.33+:** Spanish (US)
**Version 6.41+:** Japanese | Yes | Utilize the [Cobrowse Widget Customization User Guide](/users/glance-cobrowse/getting-started/widget-customization/#languages) | | **Universal Connector** | English, French, French Canadian, German, Italian, Portuguese (Brazil), Spanish (MX) | No | [Contact Glance](../contact/) | | **Mobile SDK** | *None* | Yes | To update the language, you need to override values in the `Localizable.strings` file of your app. Glance does not offer default translations for the Mobile SDK, but you can translate our strings into local languages.
The list of strings for the Glance Mobile SDK default UI are available [for iOS and Android here](/developer/sdk/mobile_sdk/). | | **Glance Guest Client**
(version 4.17+) | English, Italian, Spanish (MX), Portuguese (Brazil), French, French Canadian, German | No | The Glance Guest client will use the default language of the Guest's Operating System. | | **Salesforce Integration**
(version 3.5+) | English, Italian, Spanish (MX), Portuguese (Brazil), French, French Canadian, German | No | [Contact Glance](../contact/) | *\* **Customizable / Additional Languages:** Glance supports the ability to customize the default languages. You can also provide your own custom translations for languages outside of the default.* ================================================================= FILE: /users/account-management/log_in ================================================================= To log in, follow these steps: 1. Go to [www.glance.cx](https://www.glance.cx).
 2. Click **Log In**. Or use the following link: [https://www.glance.net/login](https://www.glance.net/login)
3. Enter your administrative Glance login credentials (**Glance Address** and **Password**).
2. Click **Log In**. Or use the following link: [https://www.glance.net/login](https://www.glance.net/login)
3. Enter your administrative Glance login credentials (**Glance Address** and **Password**).
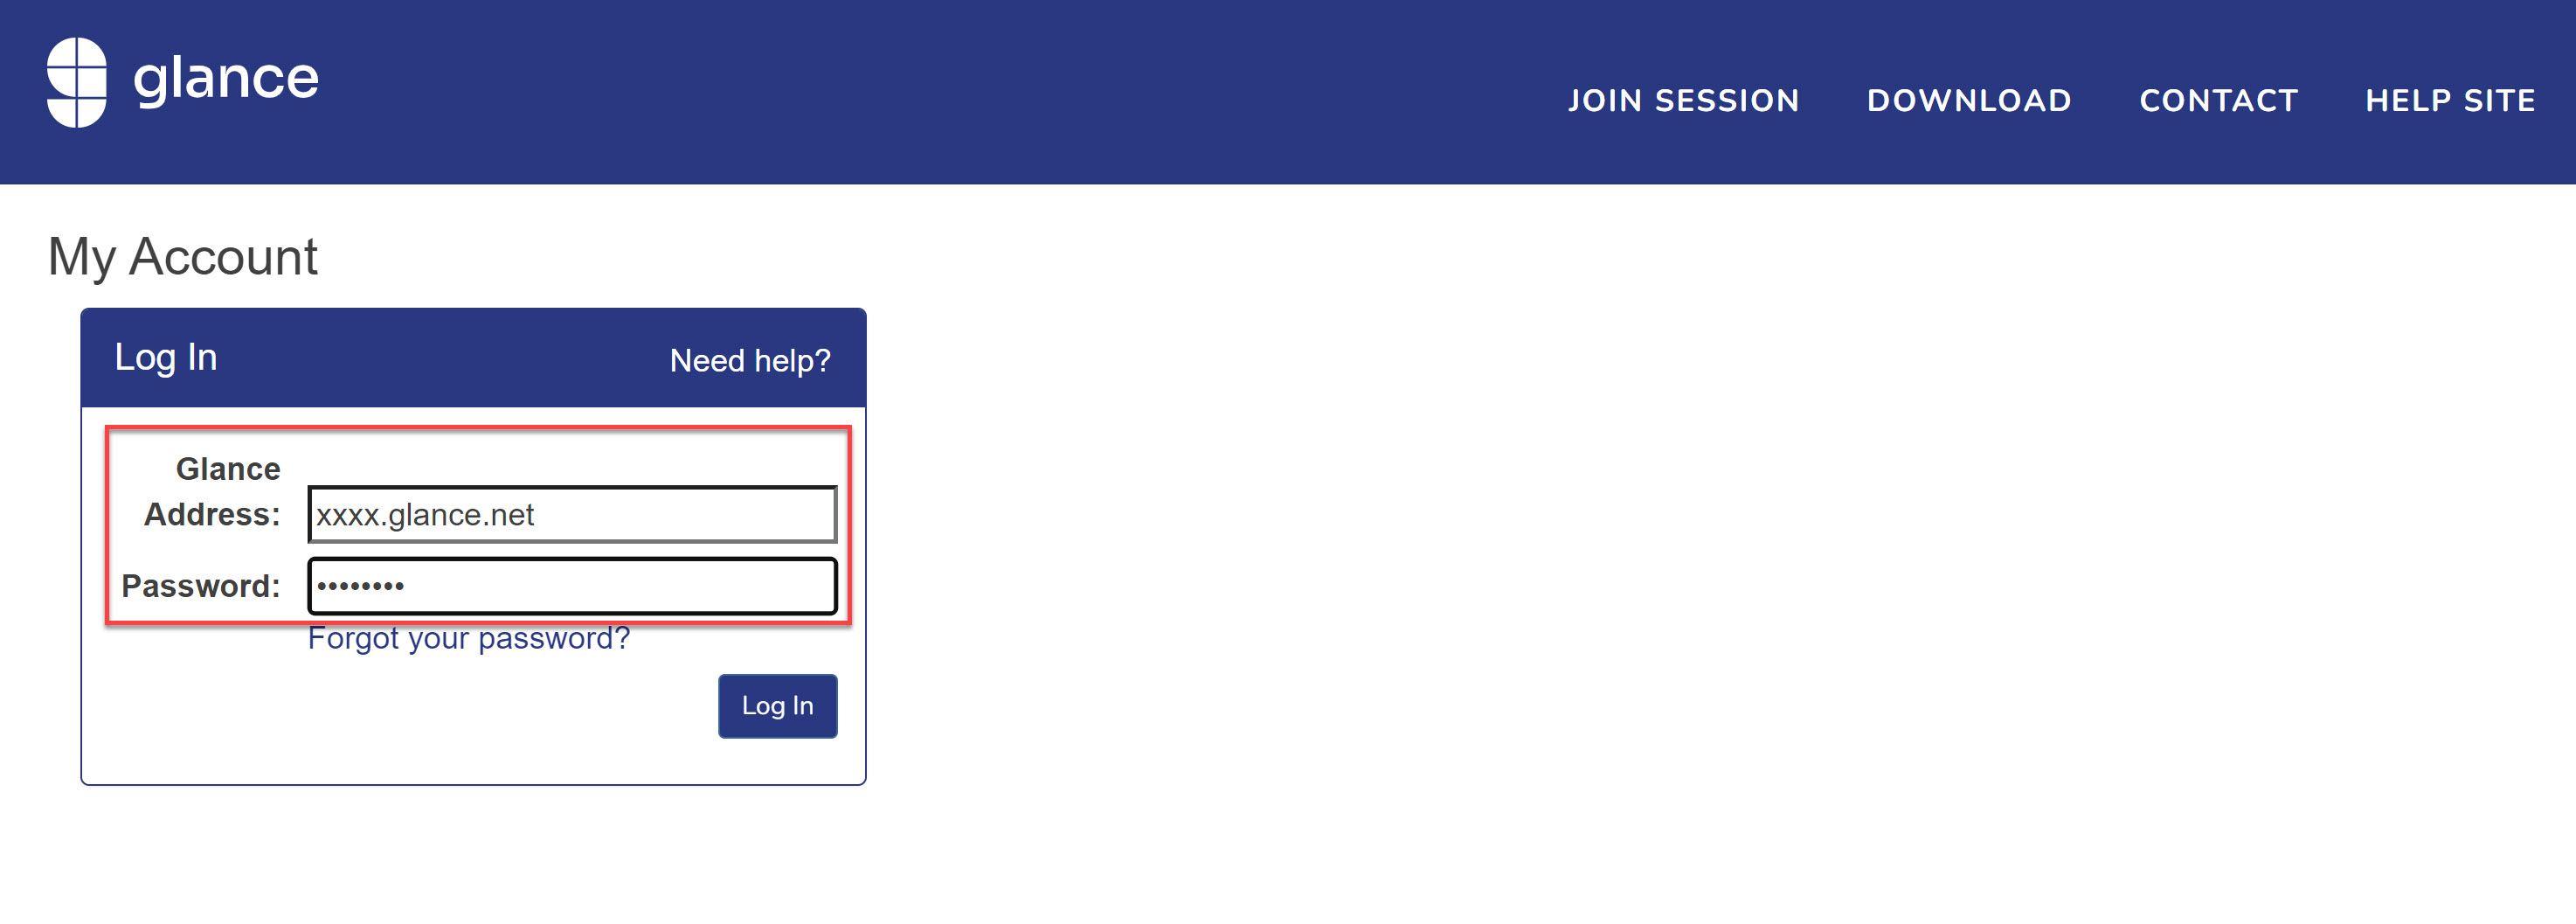
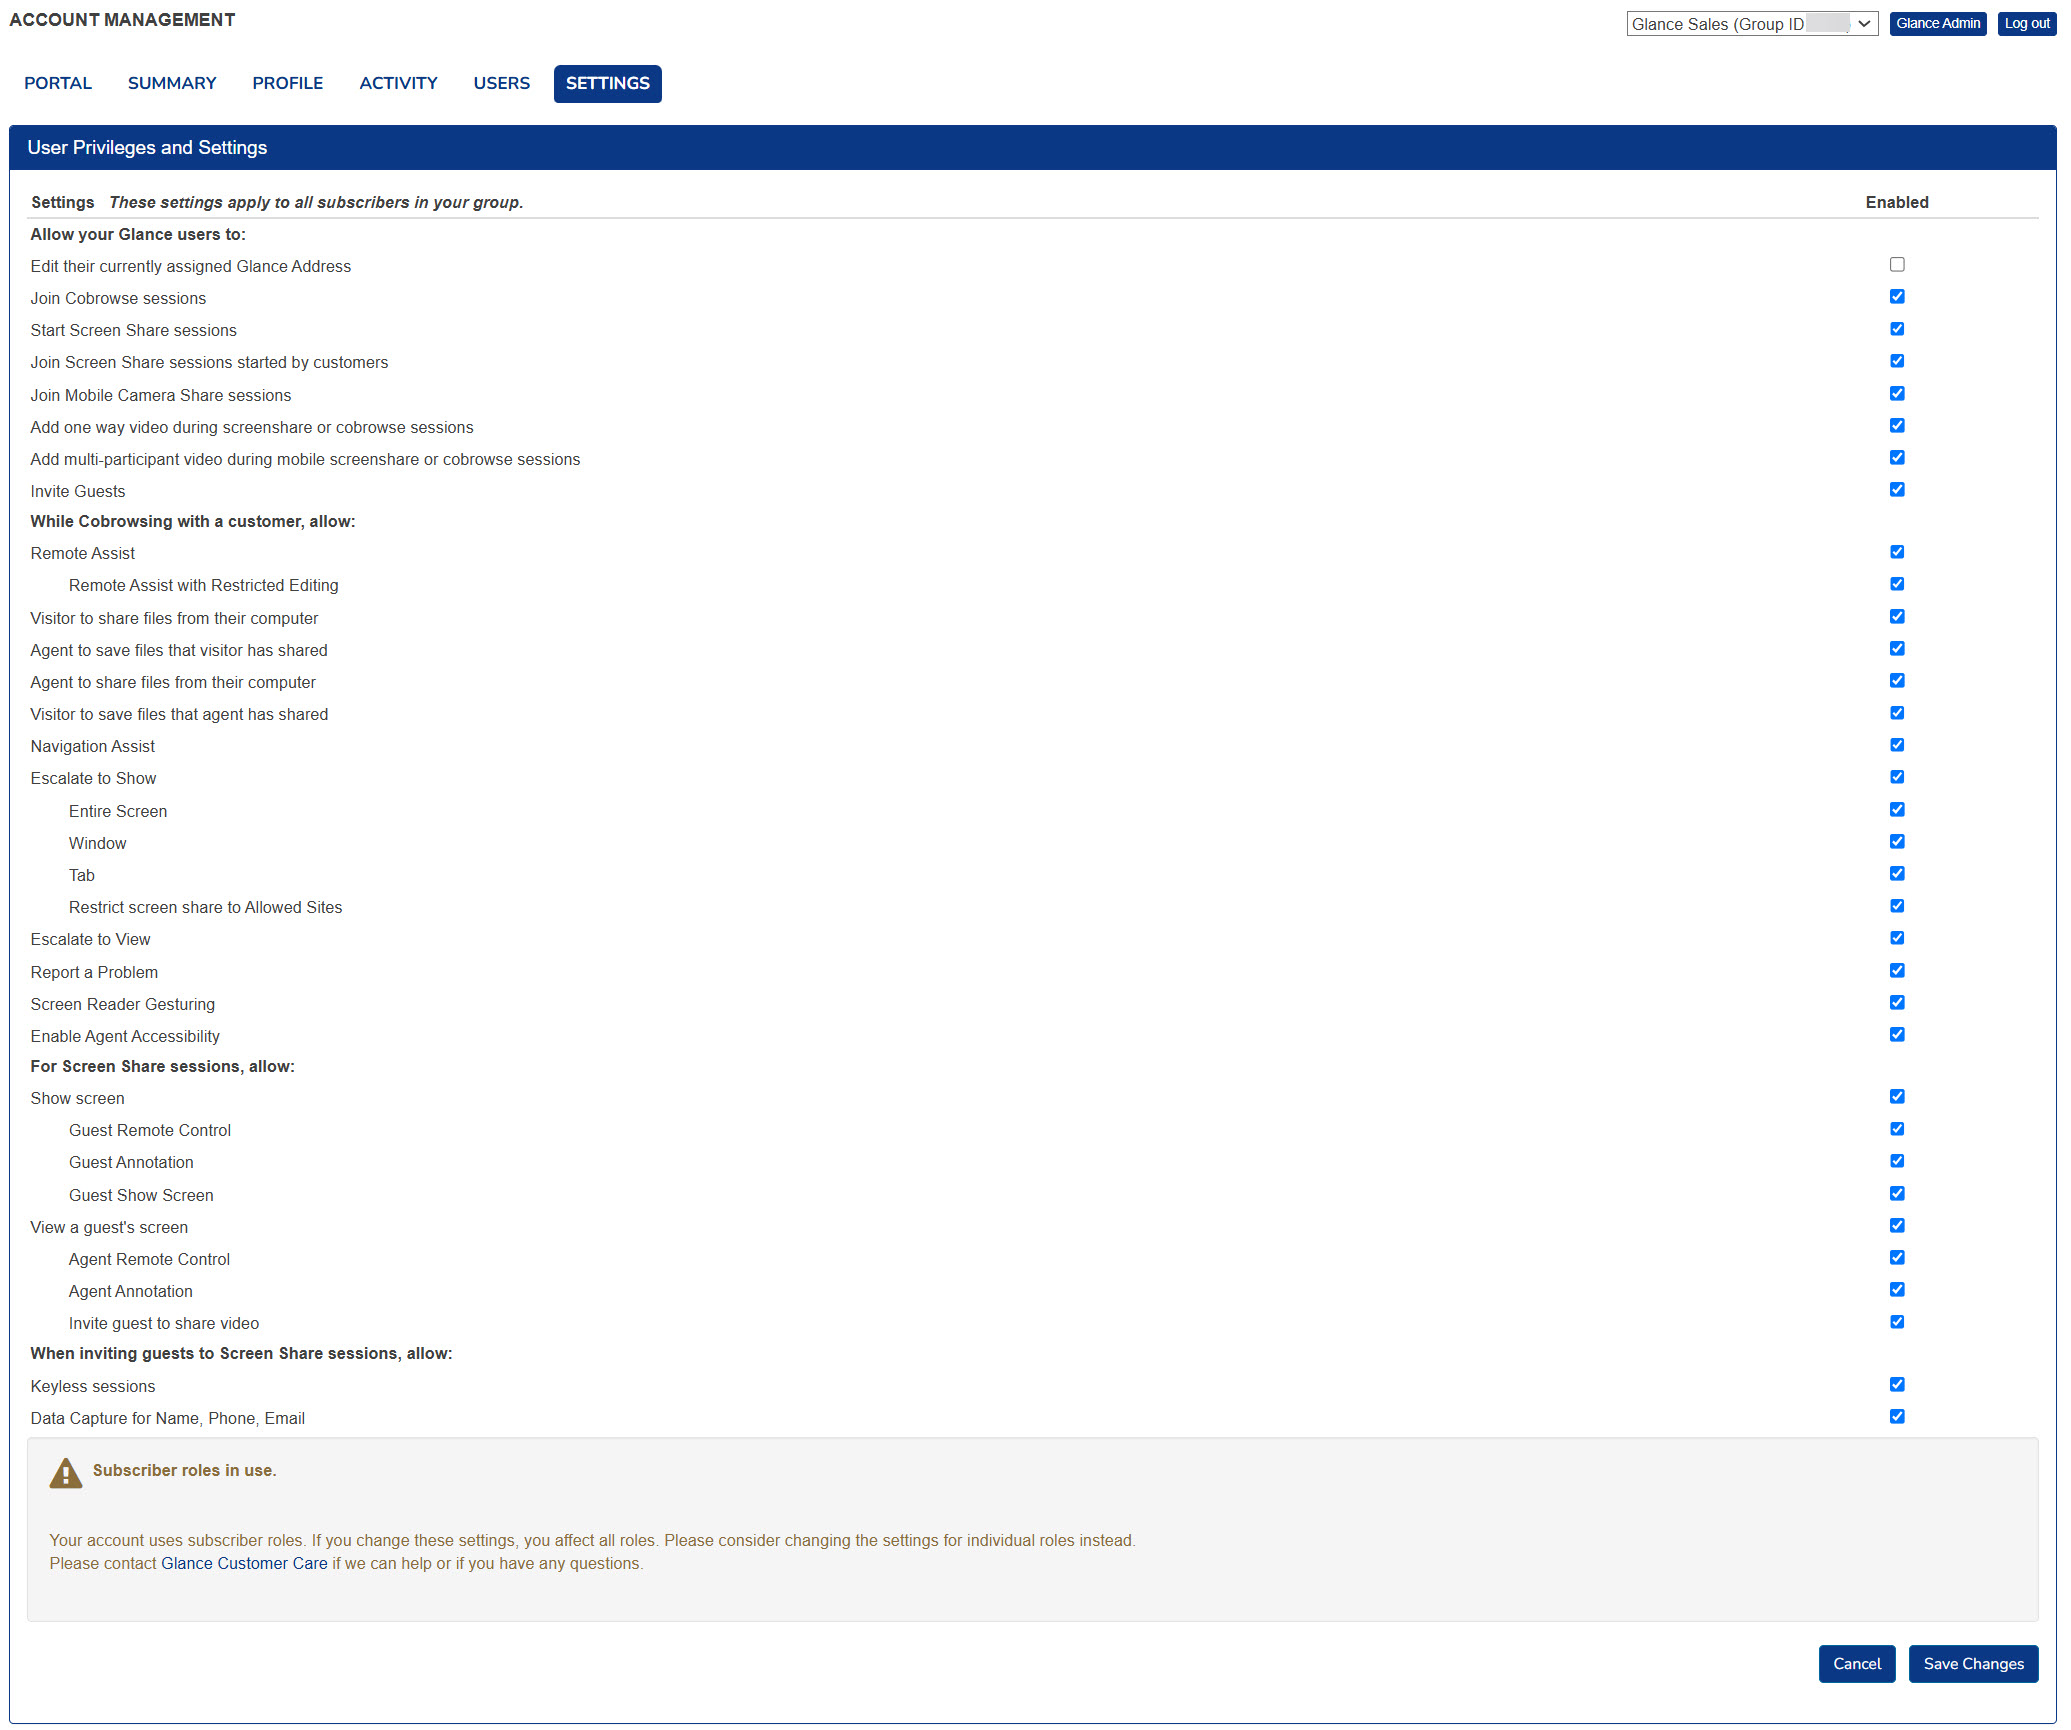 ## Managing Role Settings
You can also customize behavior for users at the role level from the **Portal** tab > **Role Settings**.
## Understanding Group & Role Settings
* To enable a permission at the Role level, it must first be enabled at the Group level. In other words, permissions enabled at the Role level are always a subset of the permissions enabled at the Group level.
* If a permission is changed from ON to OFF at the Group level, it will automatically be turned off for all roles, including roles where it had previously been ON.
* If this permission is then changed back to ON at a later date on the Group level, it will automatically restore the state of the permission at the Role level to what it was the last time it was ON at the group level.
* If a new setting is introduced that defaults to OFF at the Group level, the first time it is turned ON at the Group level it will remain OFF by default for each role. You must turn the feature ON for each role.
* Any users not assigned to a role will inherit the permissions enabled at the group level.
### Inherit Settings from a Parent Group
If you use child groups in your Glance account, the child group can inherit the group settings of the parent group, so you have a consistent experience across users. To enable inheritance in your account, [Contact Glance Support](../contact/).
* The Admin of the parent group can select the child group to inherit settings from the parent group.
* Only child groups of the parent group inherit settings from the parent group. Any sub-groups beyond the child group do not inherit any settings.
* When inheritance settings are enabled for a child group, the child group's settings cannot be modified at the child-level.
* If the inheritance capability is disabled for this child group, the child group's settings will be as they were prior to enabling inheritance.
* All settings are included in inheritance, except:
* API key and SSO
* Users and roles
To inherit settings from a parent group:
1. From **Account Management** > **Portal** tab, select **Inheritance**.
2. Select the groups you want to inherit the parent settings > **Save**.
3. Now, when a user is logged in to the **child** group, they will see this message on the **SETTINGS** tab, and are not able to modify their settings.
## Managing Role Settings
You can also customize behavior for users at the role level from the **Portal** tab > **Role Settings**.
## Understanding Group & Role Settings
* To enable a permission at the Role level, it must first be enabled at the Group level. In other words, permissions enabled at the Role level are always a subset of the permissions enabled at the Group level.
* If a permission is changed from ON to OFF at the Group level, it will automatically be turned off for all roles, including roles where it had previously been ON.
* If this permission is then changed back to ON at a later date on the Group level, it will automatically restore the state of the permission at the Role level to what it was the last time it was ON at the group level.
* If a new setting is introduced that defaults to OFF at the Group level, the first time it is turned ON at the Group level it will remain OFF by default for each role. You must turn the feature ON for each role.
* Any users not assigned to a role will inherit the permissions enabled at the group level.
### Inherit Settings from a Parent Group
If you use child groups in your Glance account, the child group can inherit the group settings of the parent group, so you have a consistent experience across users. To enable inheritance in your account, [Contact Glance Support](../contact/).
* The Admin of the parent group can select the child group to inherit settings from the parent group.
* Only child groups of the parent group inherit settings from the parent group. Any sub-groups beyond the child group do not inherit any settings.
* When inheritance settings are enabled for a child group, the child group's settings cannot be modified at the child-level.
* If the inheritance capability is disabled for this child group, the child group's settings will be as they were prior to enabling inheritance.
* All settings are included in inheritance, except:
* API key and SSO
* Users and roles
To inherit settings from a parent group:
1. From **Account Management** > **Portal** tab, select **Inheritance**.
2. Select the groups you want to inherit the parent settings > **Save**.
3. Now, when a user is logged in to the **child** group, they will see this message on the **SETTINGS** tab, and are not able to modify their settings.
 4. When a user is logged in to the **parent** group, they will see this message on the **SETTINGS** tab indicating that changing these settings impacts child groups.
 =================================================================
FILE: /users/account-management/manage_users
=================================================================
Through the Glance Portal tab, you can add and edit users, create roles, and export user lists.
For Cobrowse, you can also use Glance's APIs found under Customizing for partner user registration to subscribe roles, show, update, delete, and add users.
## Add Users to Your Account
To add users to your account:
1. Under **Account Management**, select the **Portal** tab.
=================================================================
FILE: /users/account-management/manage_users
=================================================================
Through the Glance Portal tab, you can add and edit users, create roles, and export user lists.
For Cobrowse, you can also use Glance's APIs found under Customizing for partner user registration to subscribe roles, show, update, delete, and add users.
## Add Users to Your Account
To add users to your account:
1. Under **Account Management**, select the **Portal** tab.
 2. Select **Add subscribers to this account**.
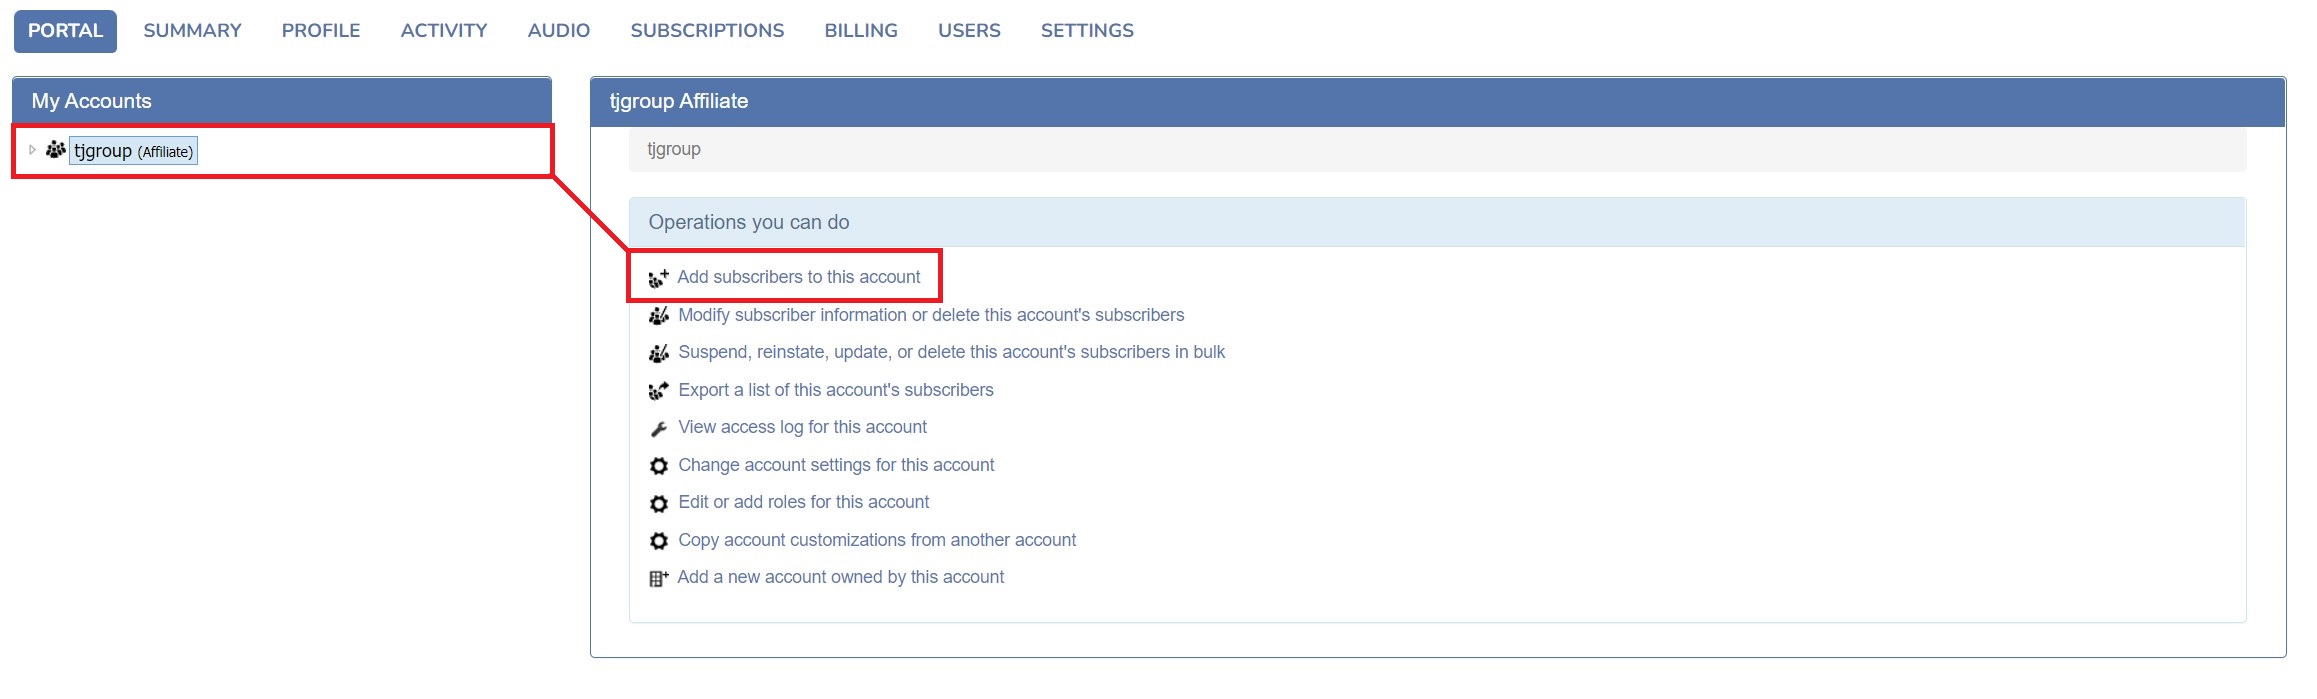 3. If using roles, select the role which is applicable.
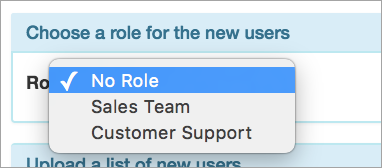 There are two ways you can add users:
* **Bulk Upload:** If you are adding more than five users, we recommend a bulk upload via a CSV file. You may only select one role per bulk upload.
* Create a new bulk upload excel file using the following template and upload it to Glance.
| FirstName | LastName | Email | Phone | GlanceAddress | Password | PartnerUID |
| :--- | :--- | :--- | :--- | :--- | :--- | :--- |
| | | | | | | |
There are two ways you can add users:
* **Bulk Upload:** If you are adding more than five users, we recommend a bulk upload via a CSV file. You may only select one role per bulk upload.
* Create a new bulk upload excel file using the following template and upload it to Glance.
| FirstName | LastName | Email | Phone | GlanceAddress | Password | PartnerUID |
| :--- | :--- | :--- | :--- | :--- | :--- | :--- |
| | | | | | | |
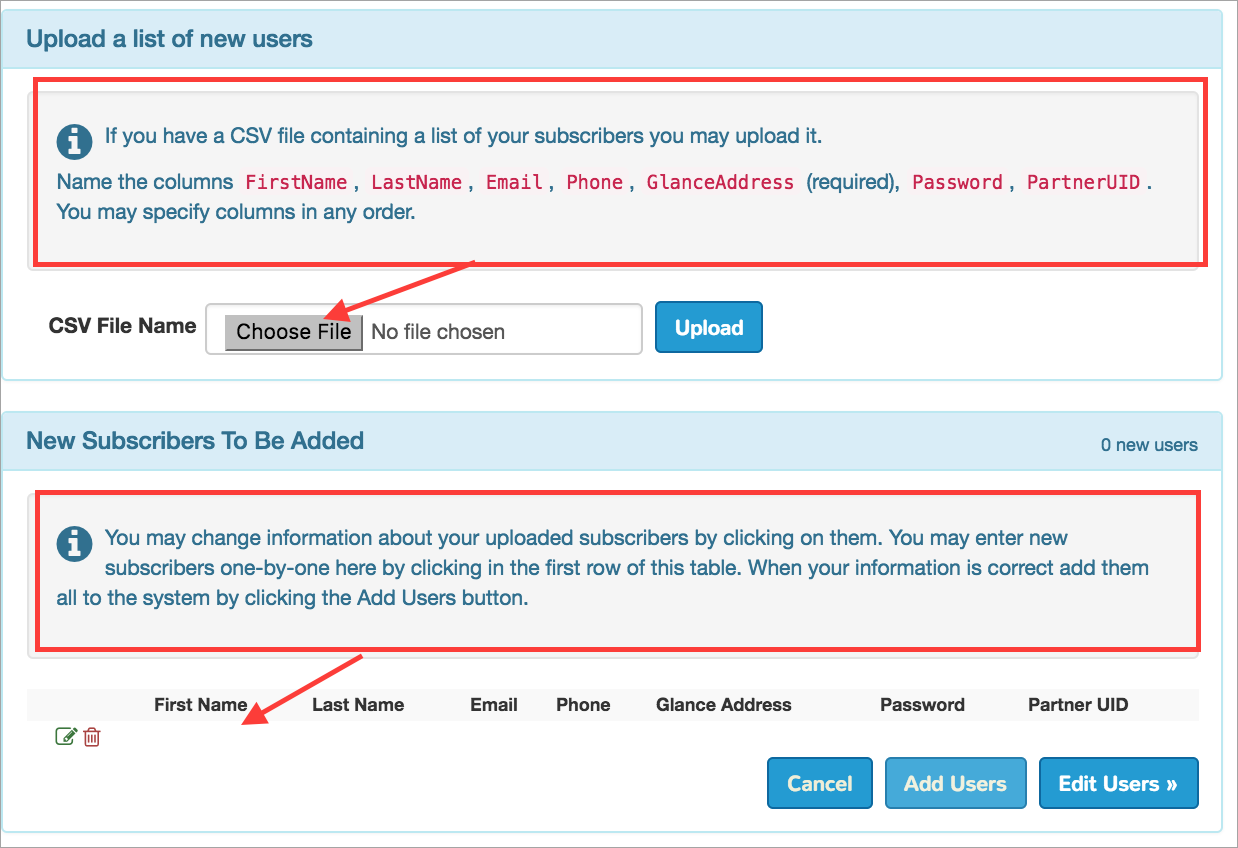 ### Glance Address Naming Conventions
Customers can choose any of the following standard Glance naming conventions, or create their own. For John Appleseed `
### Glance Address Naming Conventions
Customers can choose any of the following standard Glance naming conventions, or create their own. For John Appleseed `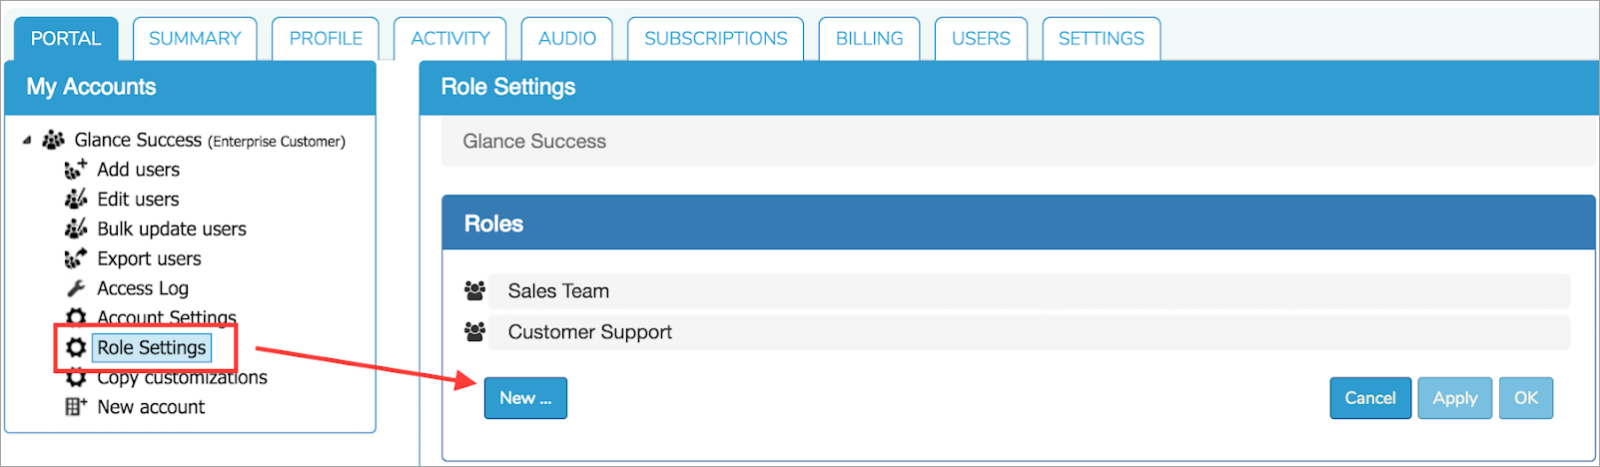 2. To create a new role, select **New**.
3. Fill out the following:
* **Role name**: Assign a name for the role.
* **Description**: Give a brief description which will be helpful for your team when reviewing the role.
* **Features / Settings**: Assign the capabilities and features for this role. The features/settings are pulled from the Settings tab found under the **User Privileges** and **Settings** section.
4. Save the role.
5. Click **OK**.
6. If you have no other roles to create, click **Apply**.
2. To create a new role, select **New**.
3. Fill out the following:
* **Role name**: Assign a name for the role.
* **Description**: Give a brief description which will be helpful for your team when reviewing the role.
* **Features / Settings**: Assign the capabilities and features for this role. The features/settings are pulled from the Settings tab found under the **User Privileges** and **Settings** section.
4. Save the role.
5. Click **OK**.
6. If you have no other roles to create, click **Apply**.
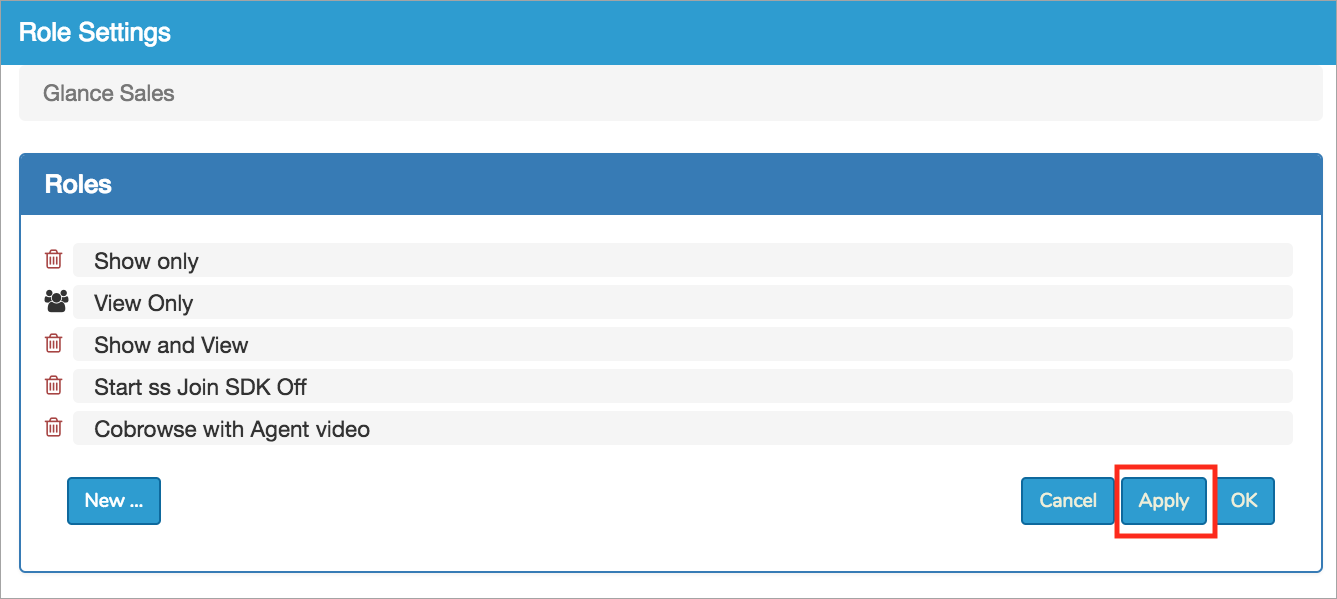
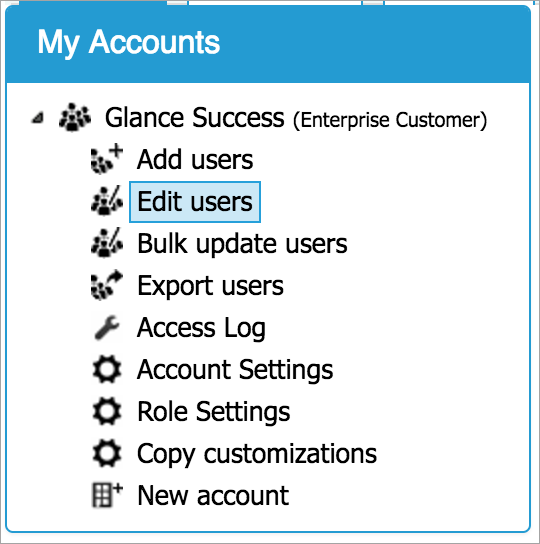 4. Find the user you wish to modify and click the green **Edit Users** icon.
 5. The **Edit a Subscriber** window opens, where you can make changes to the user's information.
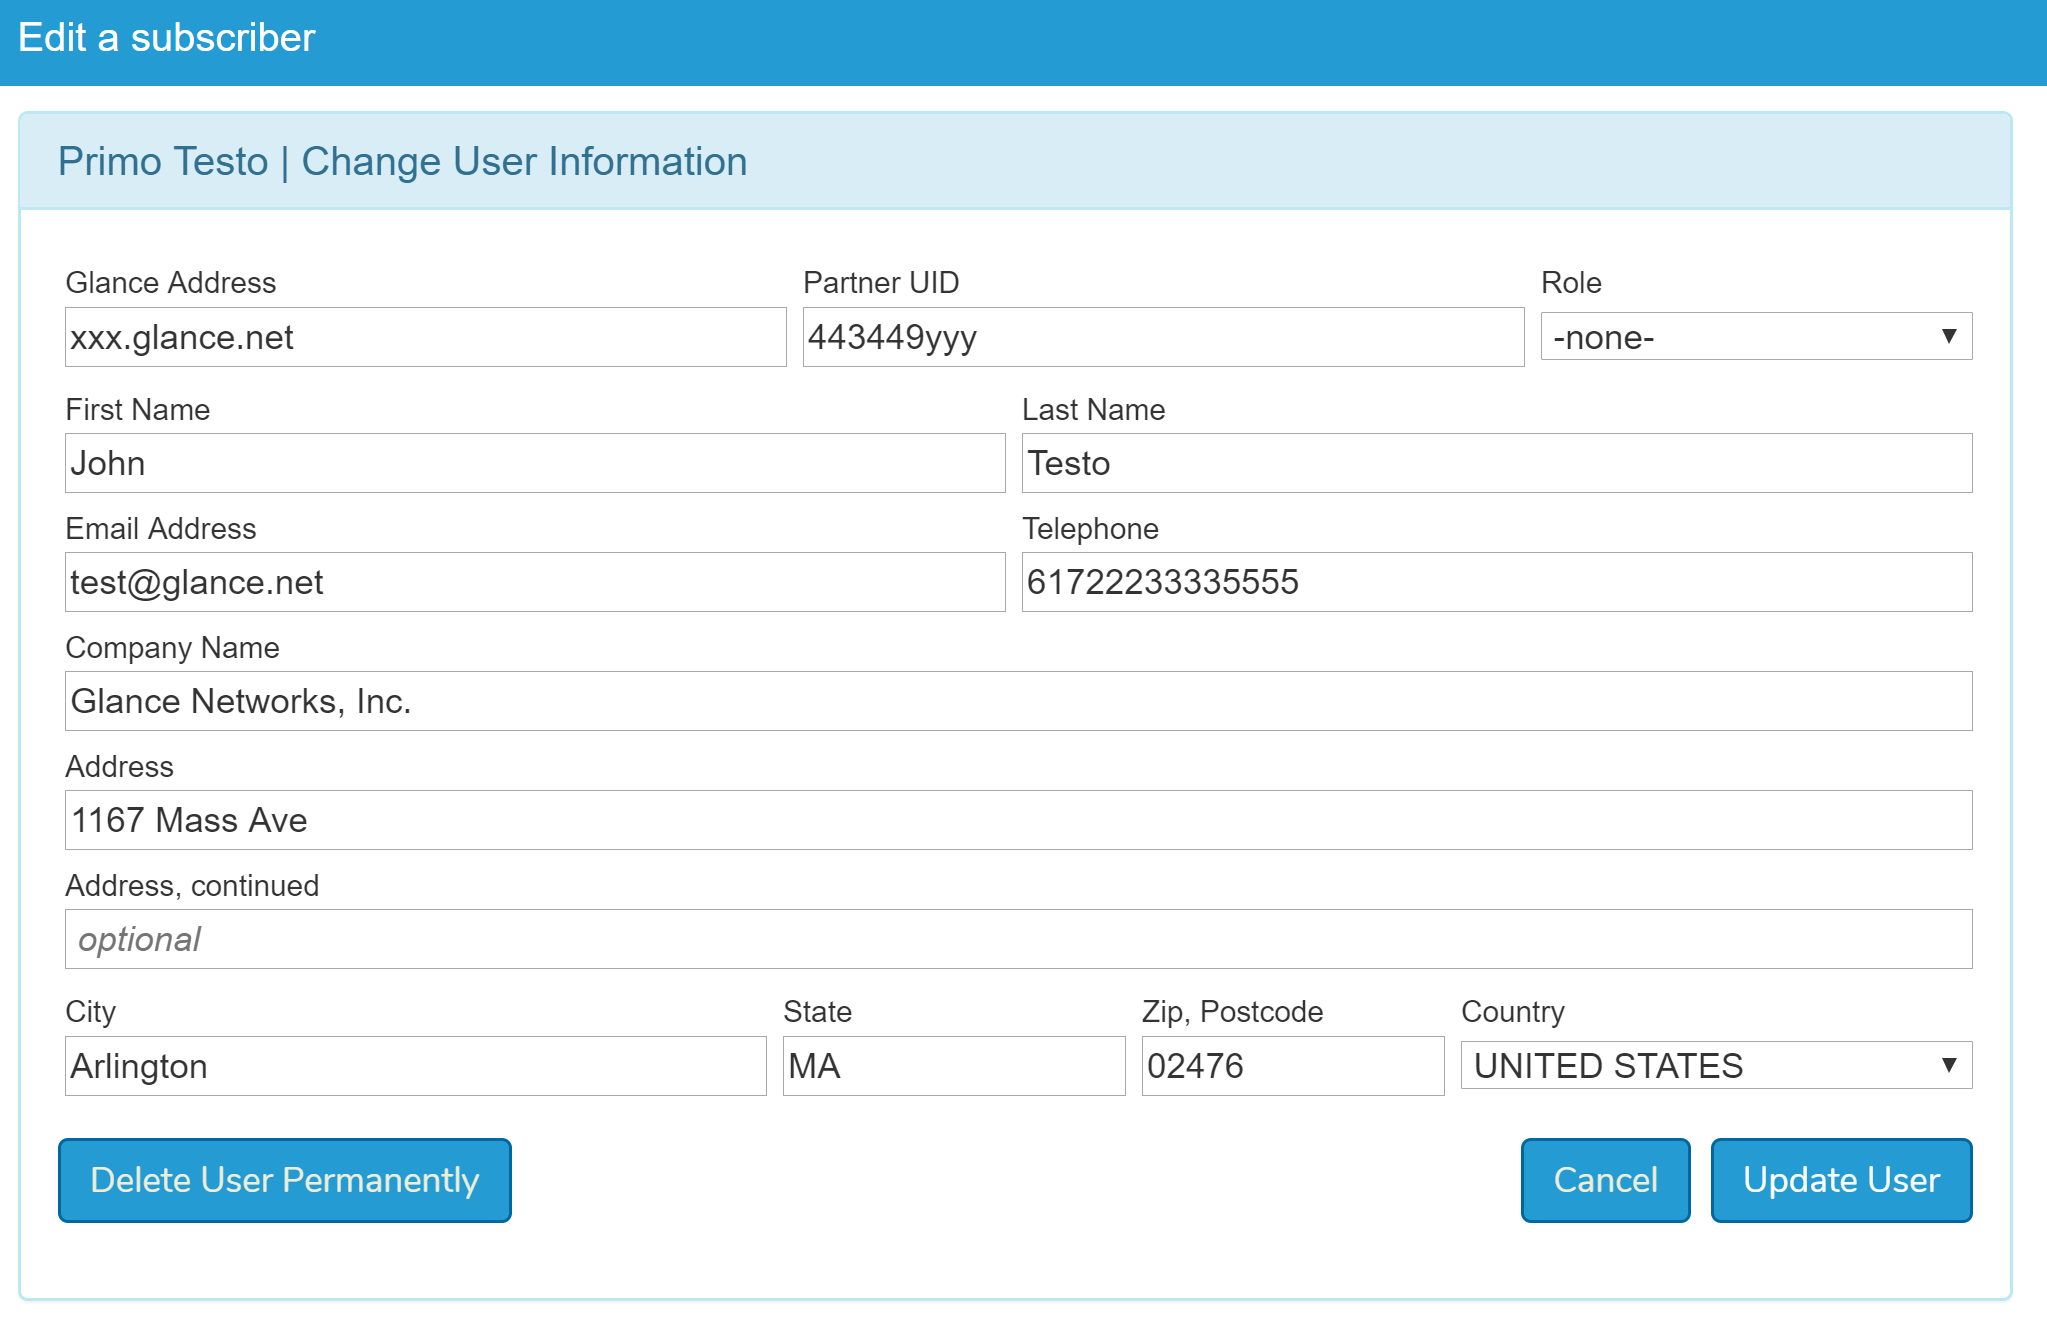 6. After you make a change, click **Update User** to save.
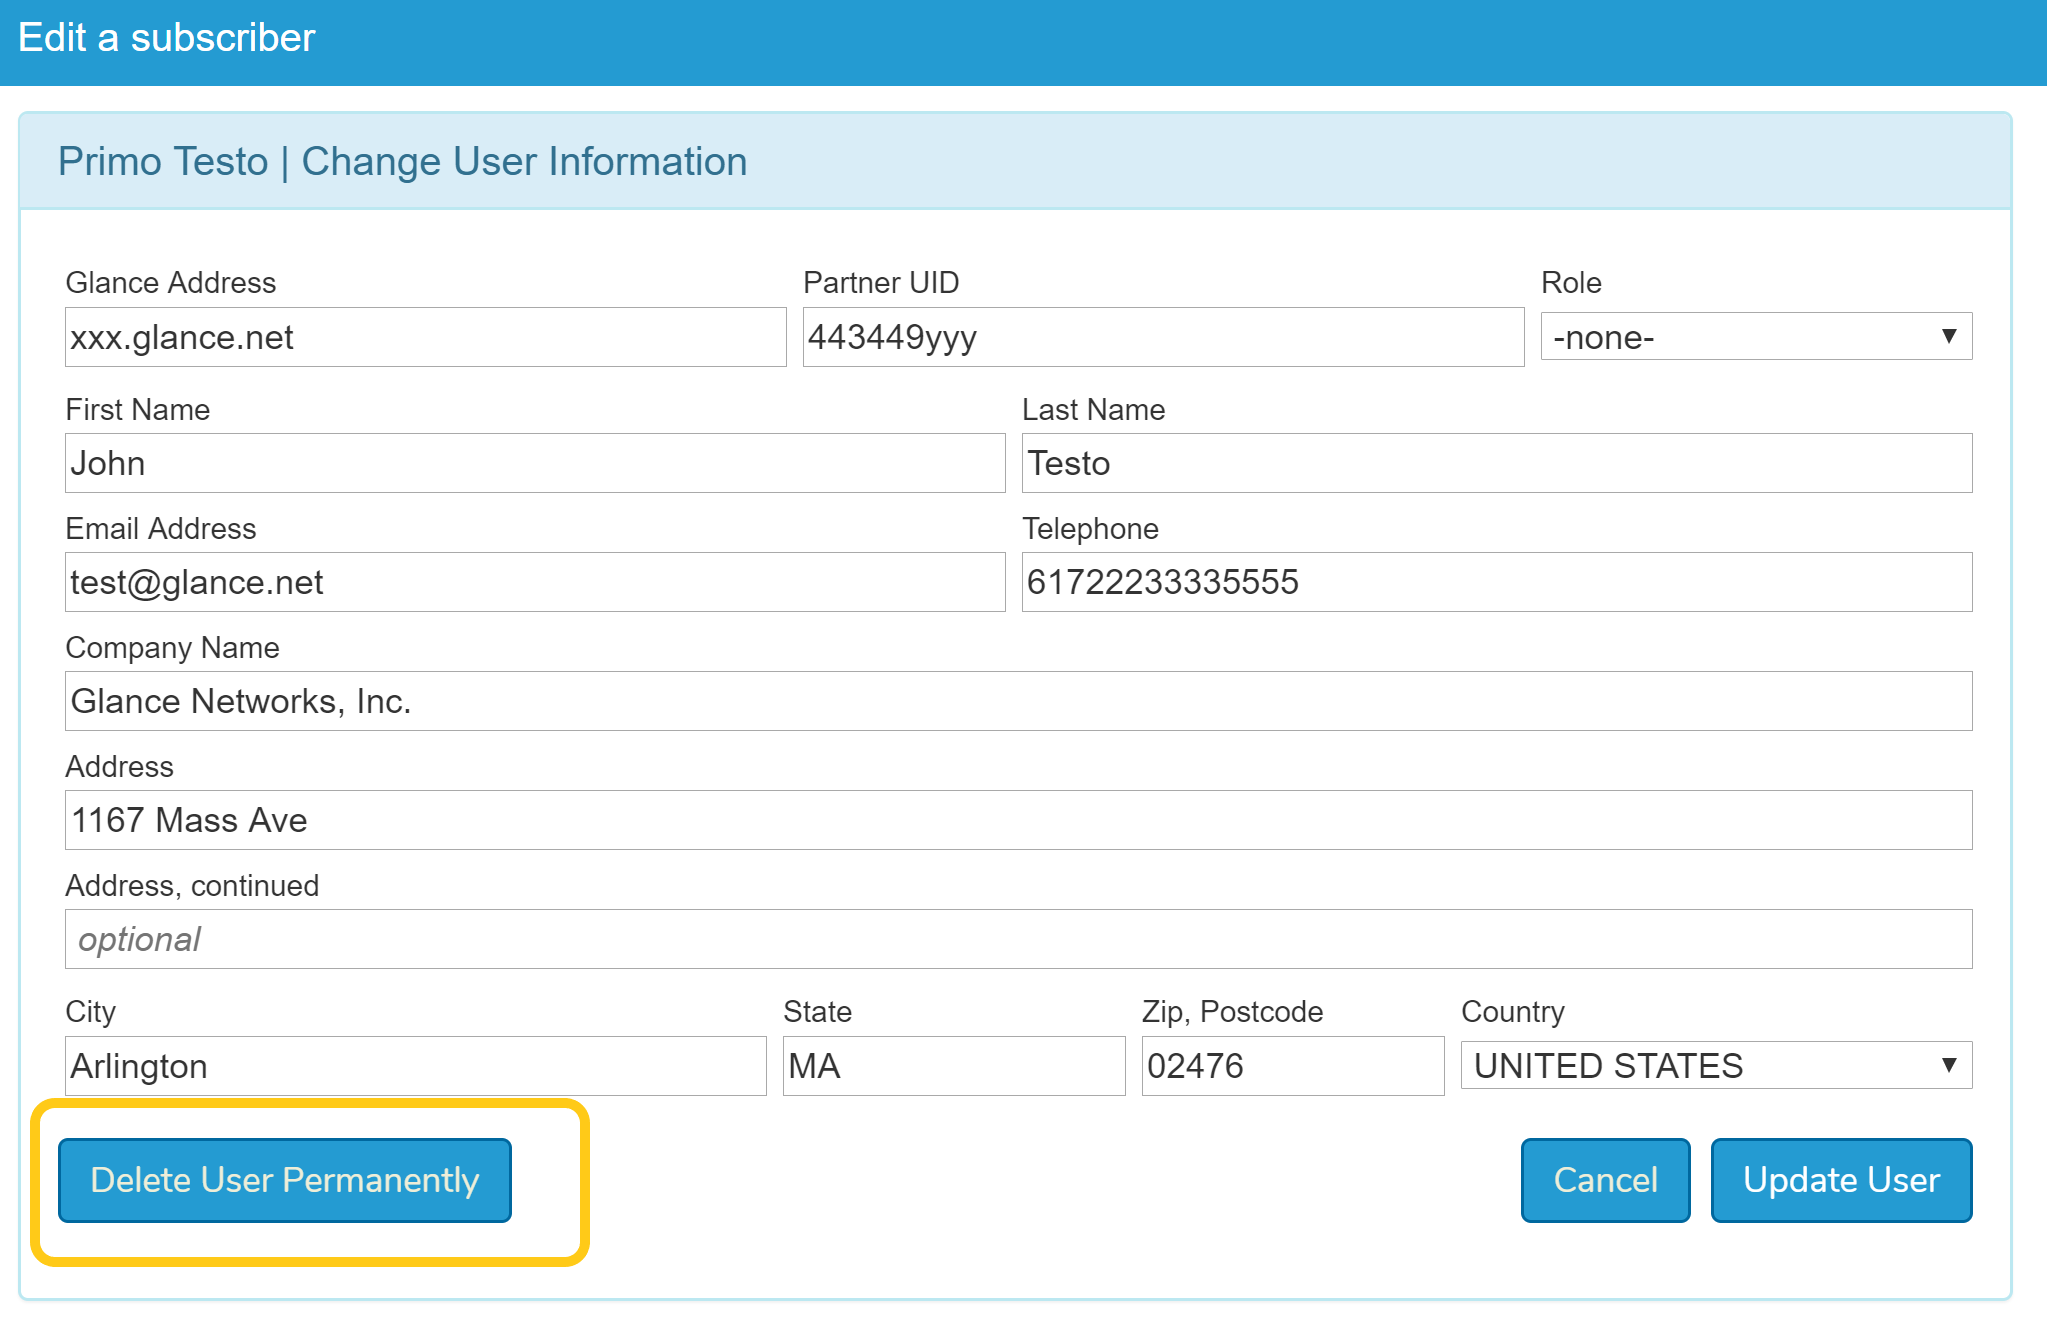 ## Edit a User Role Within Your Account
Follow these steps if you want to update a single user's assigned role:
1. Go to the **Portal** tab.
2. Select your company name.
3. Choose **Edit users**.
4. Locate the user you want to edit.
5. Click on the green **Edit Users** icon.
6. Select the new role and click **Update User**.
## Edit a User Role Within Your Account
Follow these steps if you want to update a single user's assigned role:
1. Go to the **Portal** tab.
2. Select your company name.
3. Choose **Edit users**.
4. Locate the user you want to edit.
5. Click on the green **Edit Users** icon.
6. Select the new role and click **Update User**.
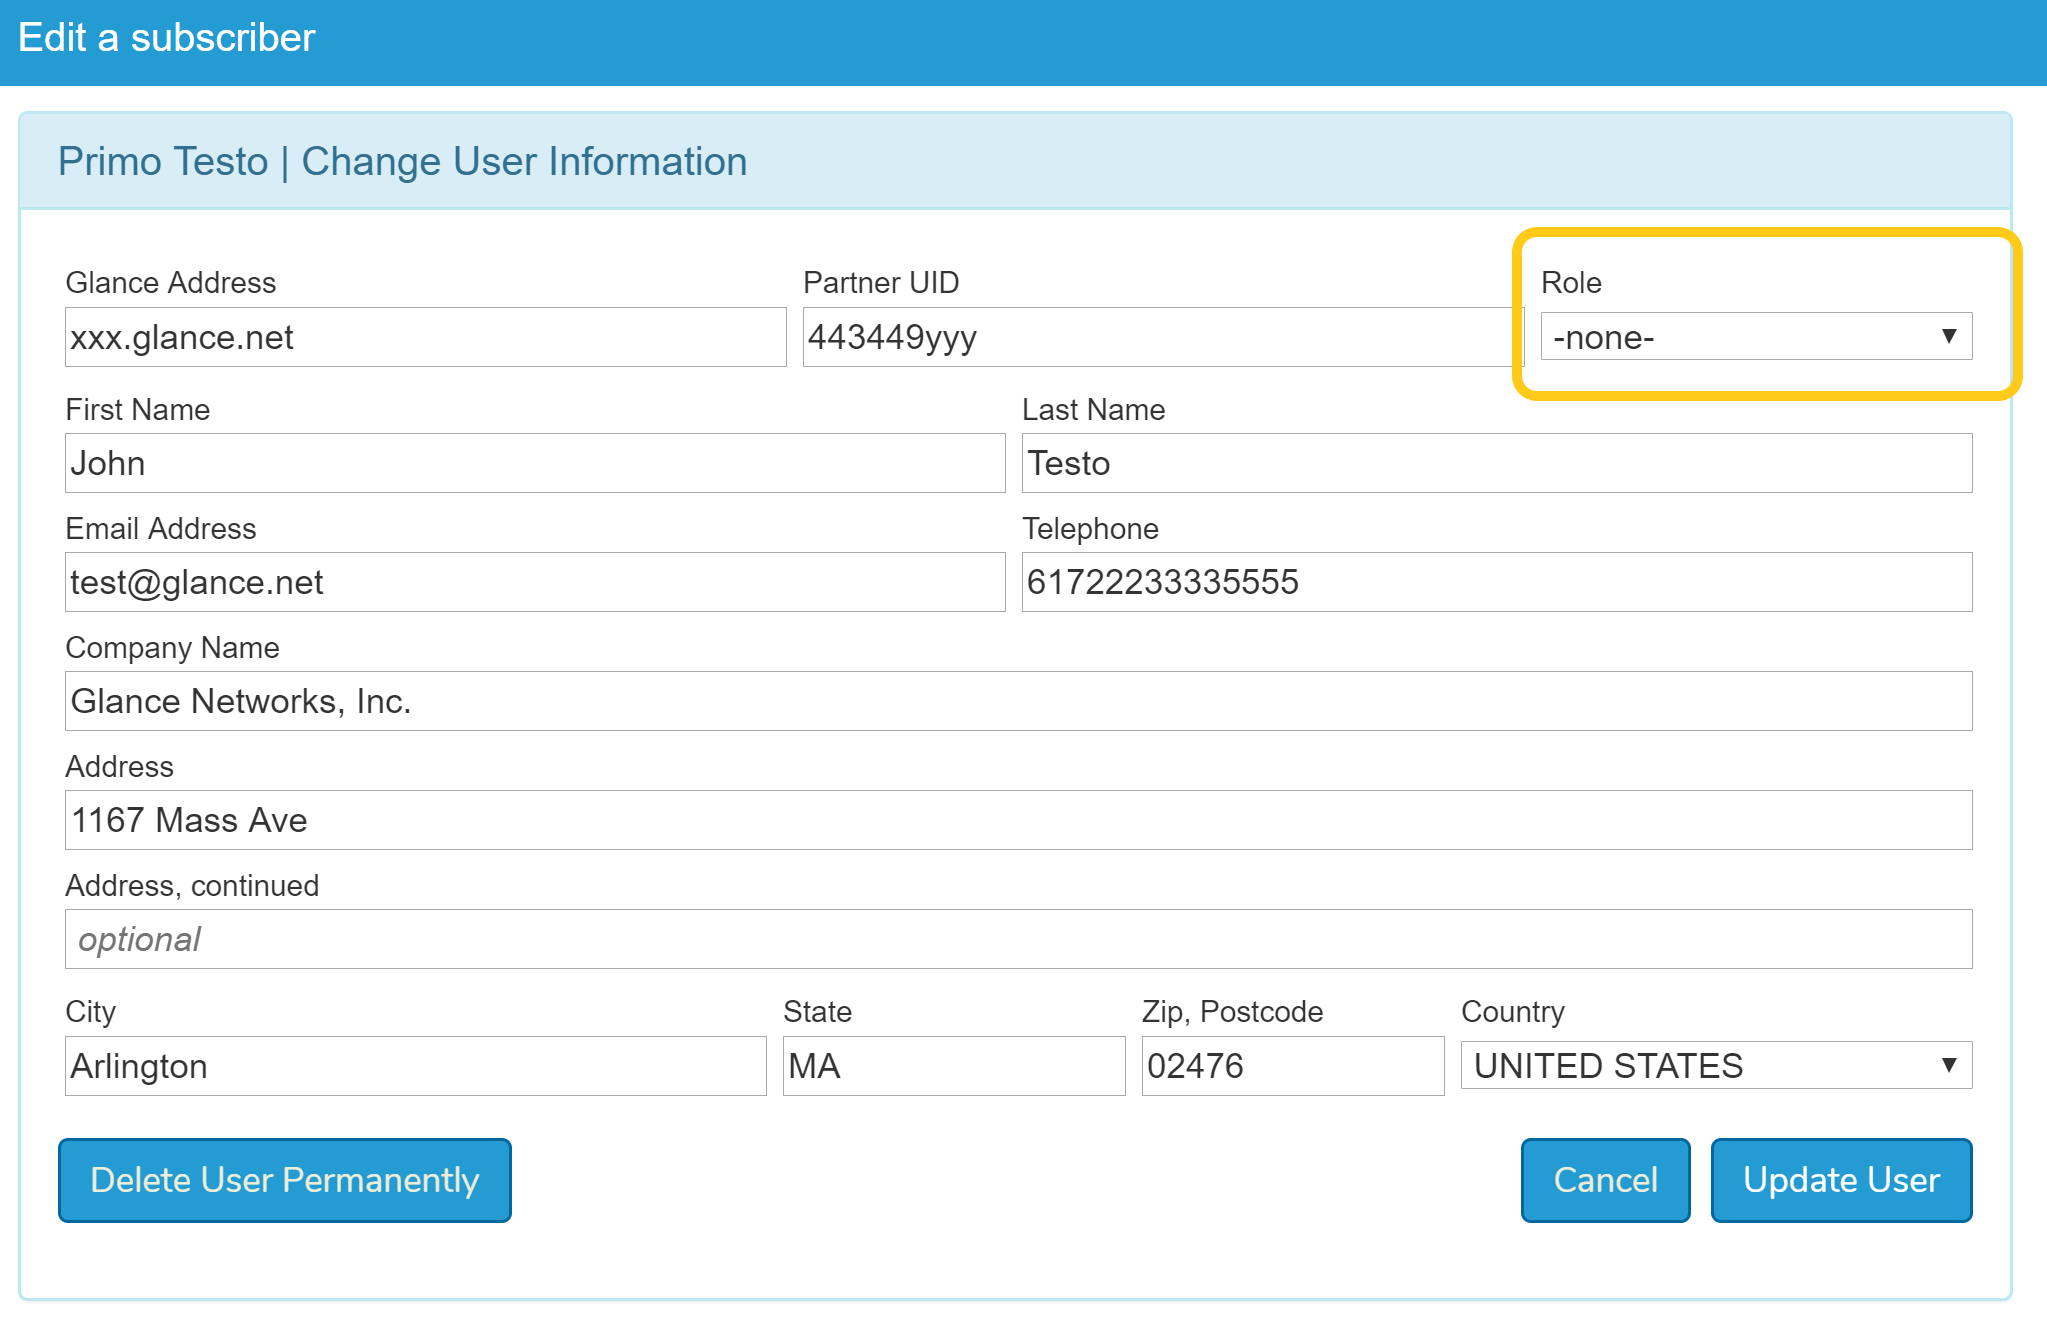 ## Managing Locked Out Users
Glance provides the ability for administrators to unlock users if they are locked out due to too many failed password attempts.
1. Go to the **Portal Tab** > **Edit Users**.
2. From the Users table, the Locked column will indicate if there are any locked out users. You can also sort this column by locked out users.
3. To unlock a user, click the **Unlock** link > **OK**.
## Managing Locked Out Users
Glance provides the ability for administrators to unlock users if they are locked out due to too many failed password attempts.
1. Go to the **Portal Tab** > **Edit Users**.
2. From the Users table, the Locked column will indicate if there are any locked out users. You can also sort this column by locked out users.
3. To unlock a user, click the **Unlock** link > **OK**.
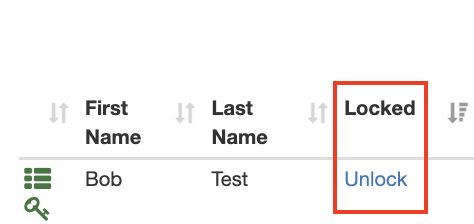 4. The user is able to log in again.
## Edit Users in Bulk Within Your Account (Customer View)
The following steps walk you through editing (Role, Passwords, Suspend, Delete, and Reinstate) for multiple users.
1. Go to the **Portal** tab.
2. Select **Bulk update users**.
4. The user is able to log in again.
## Edit Users in Bulk Within Your Account (Customer View)
The following steps walk you through editing (Role, Passwords, Suspend, Delete, and Reinstate) for multiple users.
1. Go to the **Portal** tab.
2. Select **Bulk update users**.
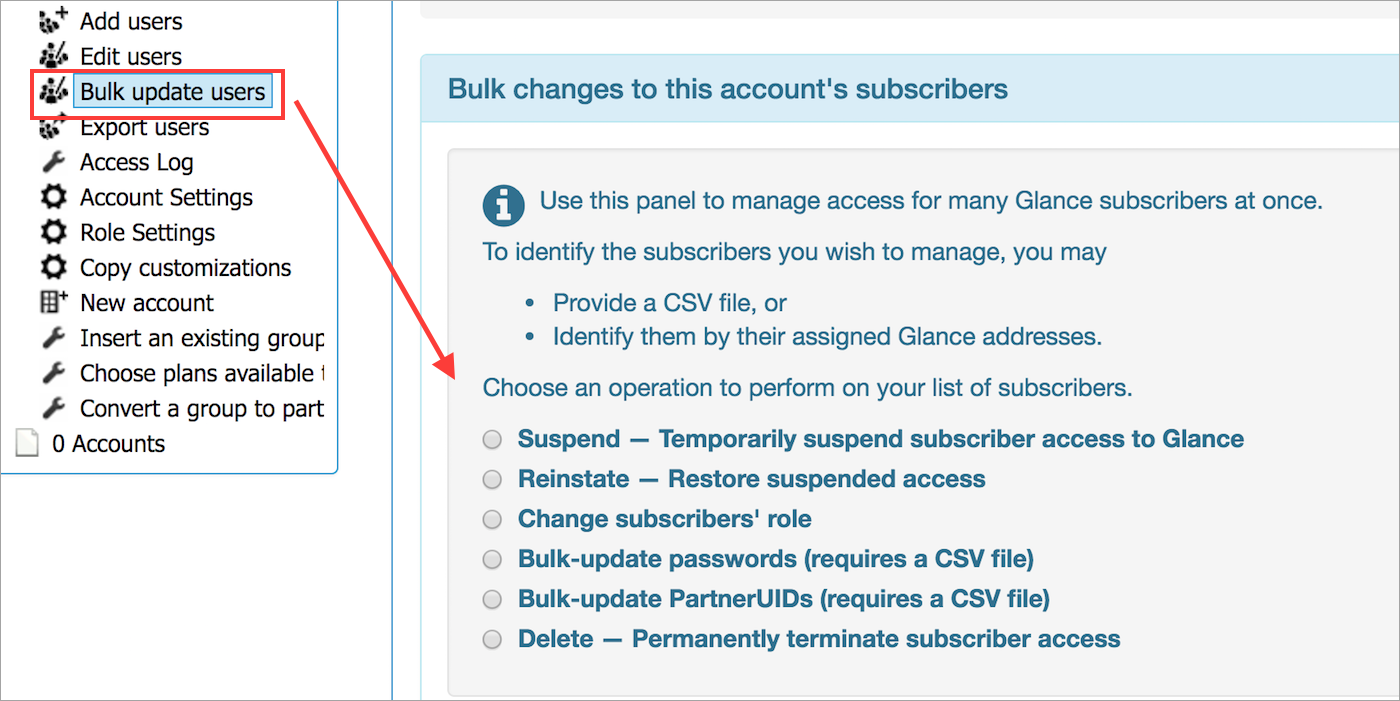 3. Select a method:
* Suspend
* Reinstate
* Change subscriber's role
* Password
* PUID
* Delete
## Export User Lists
To export user lists, follow these steps:
1. Select **Export users**.
3. Select a method:
* Suspend
* Reinstate
* Change subscriber's role
* Password
* PUID
* Delete
## Export User Lists
To export user lists, follow these steps:
1. Select **Export users**.
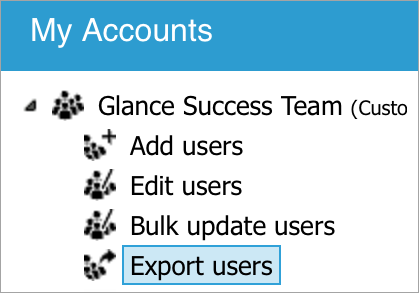 2. Select which user list you want to export:
* All subscribers
* Active subscribers
* Suspended subscribers
3. Click **Export**.
The list will be saved in your download folder.
=================================================================
FILE: /users/account-management/multiple_groups
=================================================================
Additional groups may be requested to manage differences between staging and production or to represent multiple business units. It is important to consider the implications of splitting into multiple groups before starting the implementation.
## When New Groups are Required
* You need to leverage customized branding for distinct business units.
* You need to have different administrators managing different groups of users and are not comfortable with a shared administrator pool.
* You need to manage staging and production differently from what the Glance Admin portal allows.
## Staging vs. Production Groups
Glance allows for each group (denoted by a unique Group ID - e.g., 12345) to have two independent sets of settings, which are called "staging" and "production". Customers typically have a test site tagged with `site="staging"` and a production site tagged with `site="production"`. This allows you to configure and test new versions of Cobrowse on a staging site before pushing the change to the production site. However, not all settings within a group have staging versus production differentiation.
Alternatively, you can use a separate group (with a separate Group ID) for staging versus production.
## Key Considerations
If you have any of the above needs or require an additional group or groups for another reason, review the following considerations.
| Category | Single Group | Multiple Groups |
| :--- | :--- | :--- |
| **User/Admin Accounts** |
2. Select which user list you want to export:
* All subscribers
* Active subscribers
* Suspended subscribers
3. Click **Export**.
The list will be saved in your download folder.
=================================================================
FILE: /users/account-management/multiple_groups
=================================================================
Additional groups may be requested to manage differences between staging and production or to represent multiple business units. It is important to consider the implications of splitting into multiple groups before starting the implementation.
## When New Groups are Required
* You need to leverage customized branding for distinct business units.
* You need to have different administrators managing different groups of users and are not comfortable with a shared administrator pool.
* You need to manage staging and production differently from what the Glance Admin portal allows.
## Staging vs. Production Groups
Glance allows for each group (denoted by a unique Group ID - e.g., 12345) to have two independent sets of settings, which are called "staging" and "production". Customers typically have a test site tagged with `site="staging"` and a production site tagged with `site="production"`. This allows you to configure and test new versions of Cobrowse on a staging site before pushing the change to the production site. However, not all settings within a group have staging versus production differentiation.
Alternatively, you can use a separate group (with a separate Group ID) for staging versus production.
## Key Considerations
If you have any of the above needs or require an additional group or groups for another reason, review the following considerations.
| Category | Single Group | Multiple Groups |
| :--- | :--- | :--- |
| **User/Admin Accounts** | - Only one account per person is needed.
- User permissions are not differentiated between staging and production.
- Each group needs a separate account. (Users must maintain two sets of Glance IDs and passwords.)
- Or, each person's account must be configured so that it is associated with both groups:
- Must be done by a Glance employee.
- Permissions can be different between groups.
- Can sometimes lead to confusion with permissions conflict.
- Some settings can be differentiated between staging and production, while others apply to the entire group.
- All settings are differentiated between groups with no overlap.
- Generally easier, using built-in functionality.
- Settings must be manually copied over from one group to the other.
- Salesforce production and sandbox organizations are paired with the same Glance group.
- Sessions in the Glance Admin activity tab will be synced with one or the other SF org, but it won't be obvious based on the activity tab export which org it is.
- Each Salesforce org receives the full list of data, regardless of what org the session was launched from. It is then matched to the sessions that were launched from within the respective org, but some reports may reflect sessions that weren't launched out of that particular org.
- Production and Sandbox organizations need to be paired with their respective Glance groups.
- There should be a 1:1 match between what's in the Activity tab for a given group and the session details that are synced with the given SF org.
- You cannot pair more than one Glance group with a single Salesforce org with SSO enabled.
- Shared configuration for authentication across users.
- SSO mechanism would need to accommodate multiple Group IDs/API keys and each authentication attempt would need to point to a unique group.
- Simpler
- Less flexibility
- Easier to push changes to production from staging
- More complicated
- More flexibility
- Less risk of changes in staging inadvertently impacting production
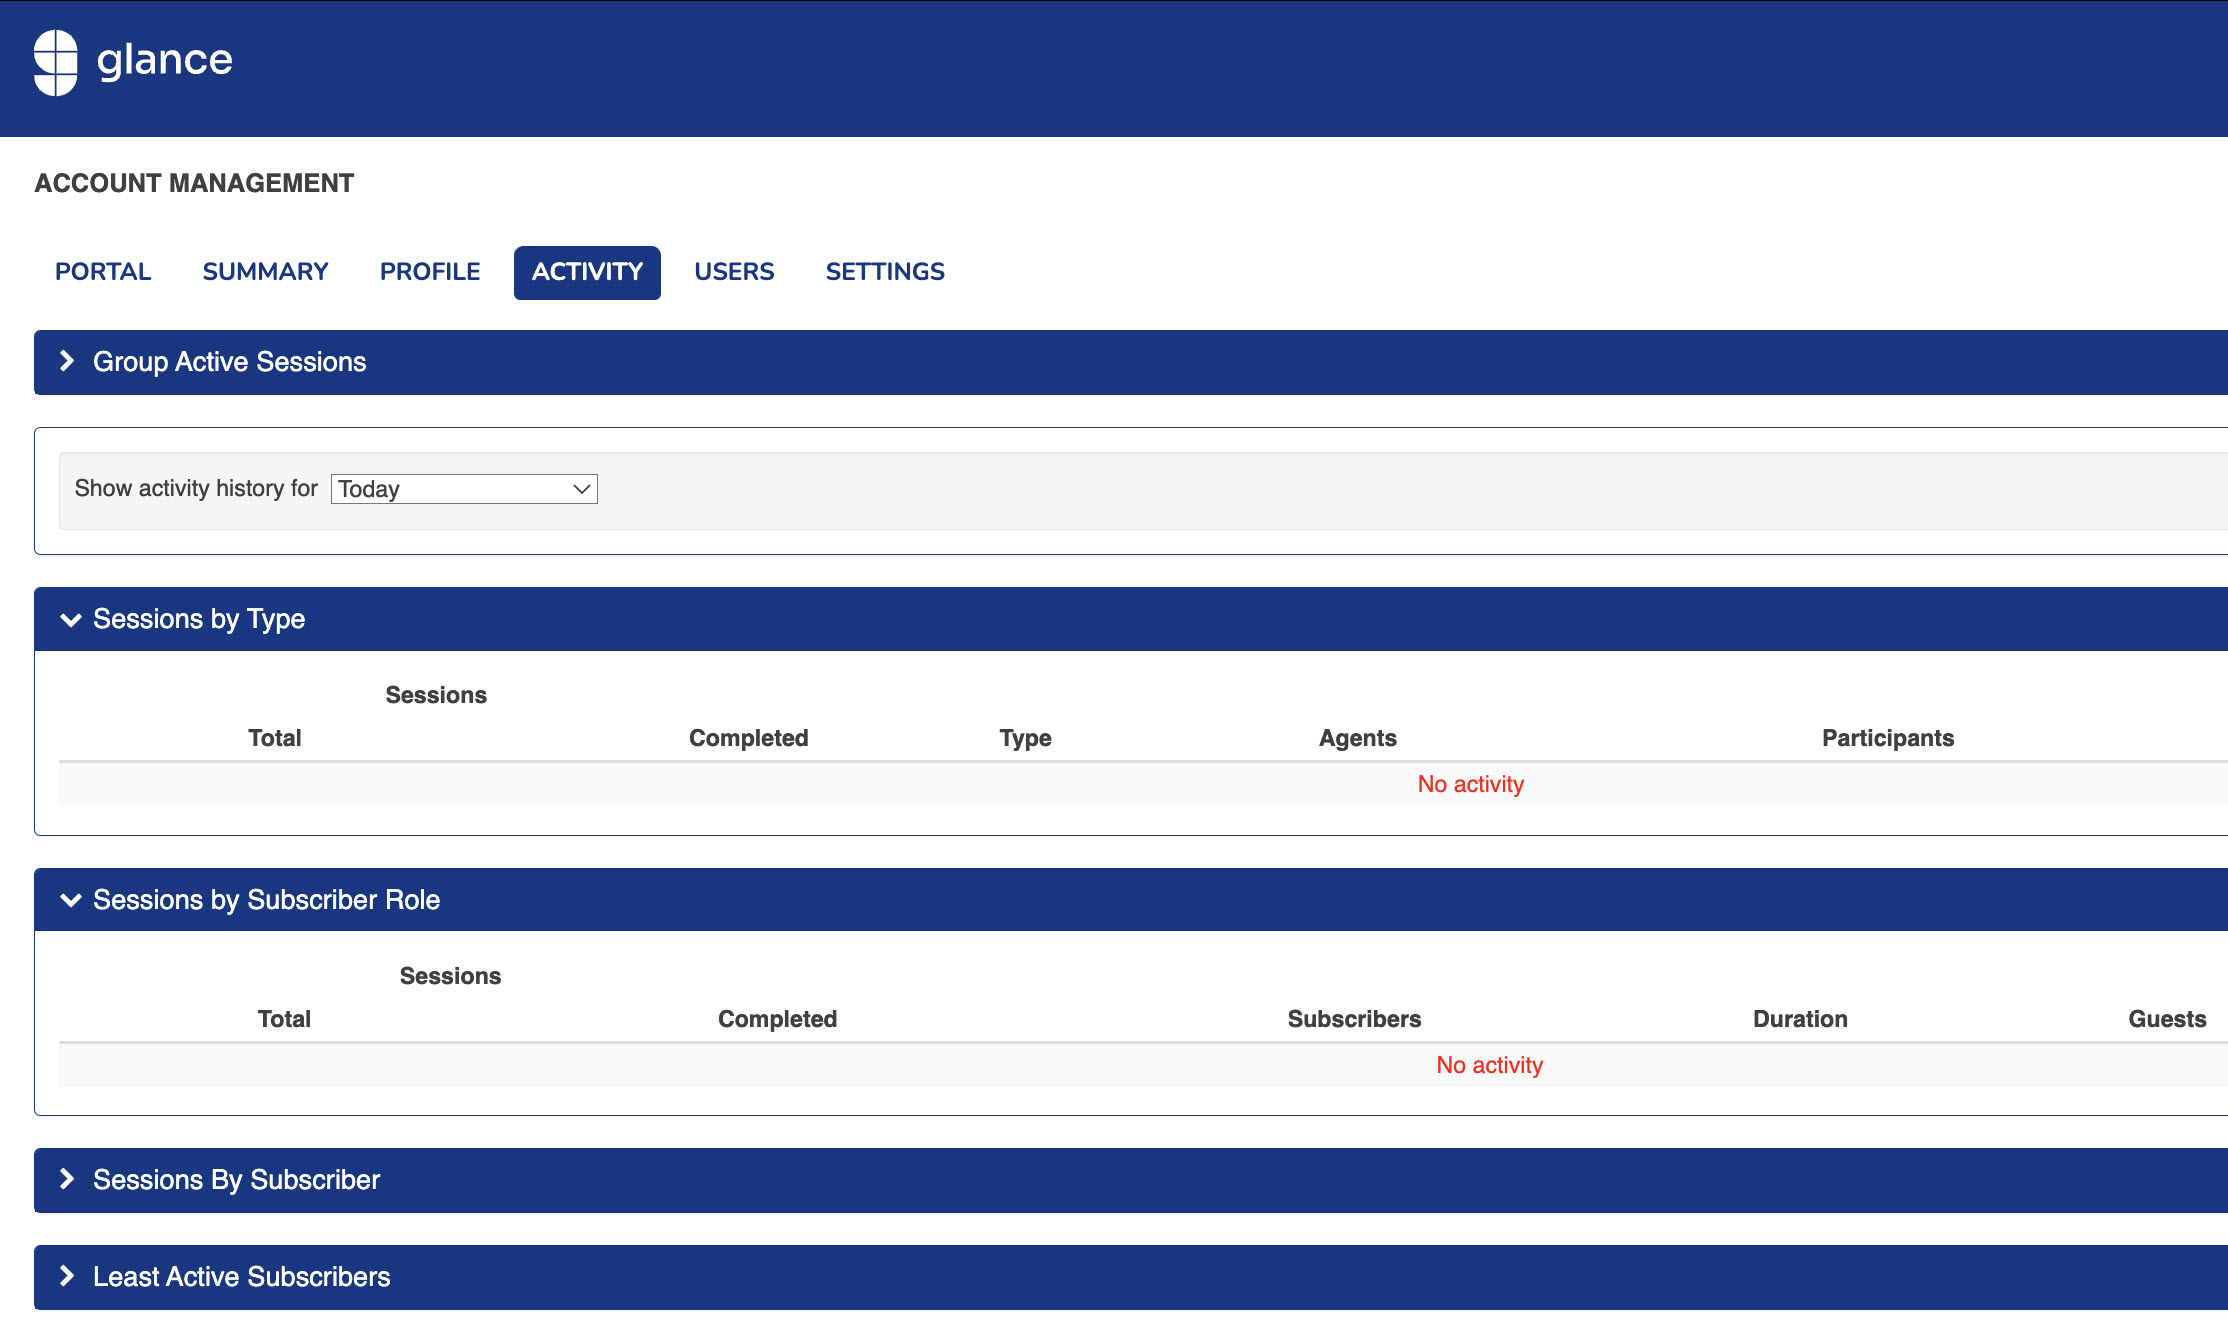 2. When you click on the **Activity** tab, it will automatically provide you a team session report for today.
 3. You can change the date range of the session report to:
* Today
* Yesterday
* Last 7 days
* Current month report
* Last month's report
* Two months ago
* Three months ago
* Four months ago
* Custom date range
3. You can change the date range of the session report to:
* Today
* Yesterday
* Last 7 days
* Current month report
* Last month's report
* Two months ago
* Three months ago
* Four months ago
* Custom date range
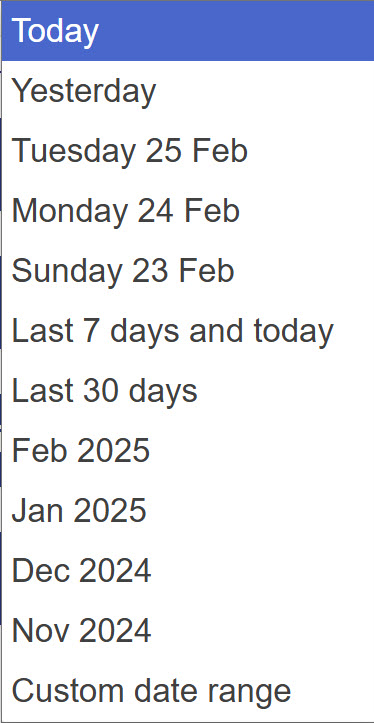 Here is an example of selecting a **Custom Date Range**:
 4. Select which report option you would like to View or Export:
* **Sessions by Type**: You can export the report via type or all. Click on the Total number to see a breakdown of each session. You can see the duration, how many participants, if video or screenshare was used, etc.
4. Select which report option you would like to View or Export:
* **Sessions by Type**: You can export the report via type or all. Click on the Total number to see a breakdown of each session. You can see the duration, how many participants, if video or screenshare was used, etc.
 * **Sessions by Subscriber Role**: You can export the report via role or summary of all roles.
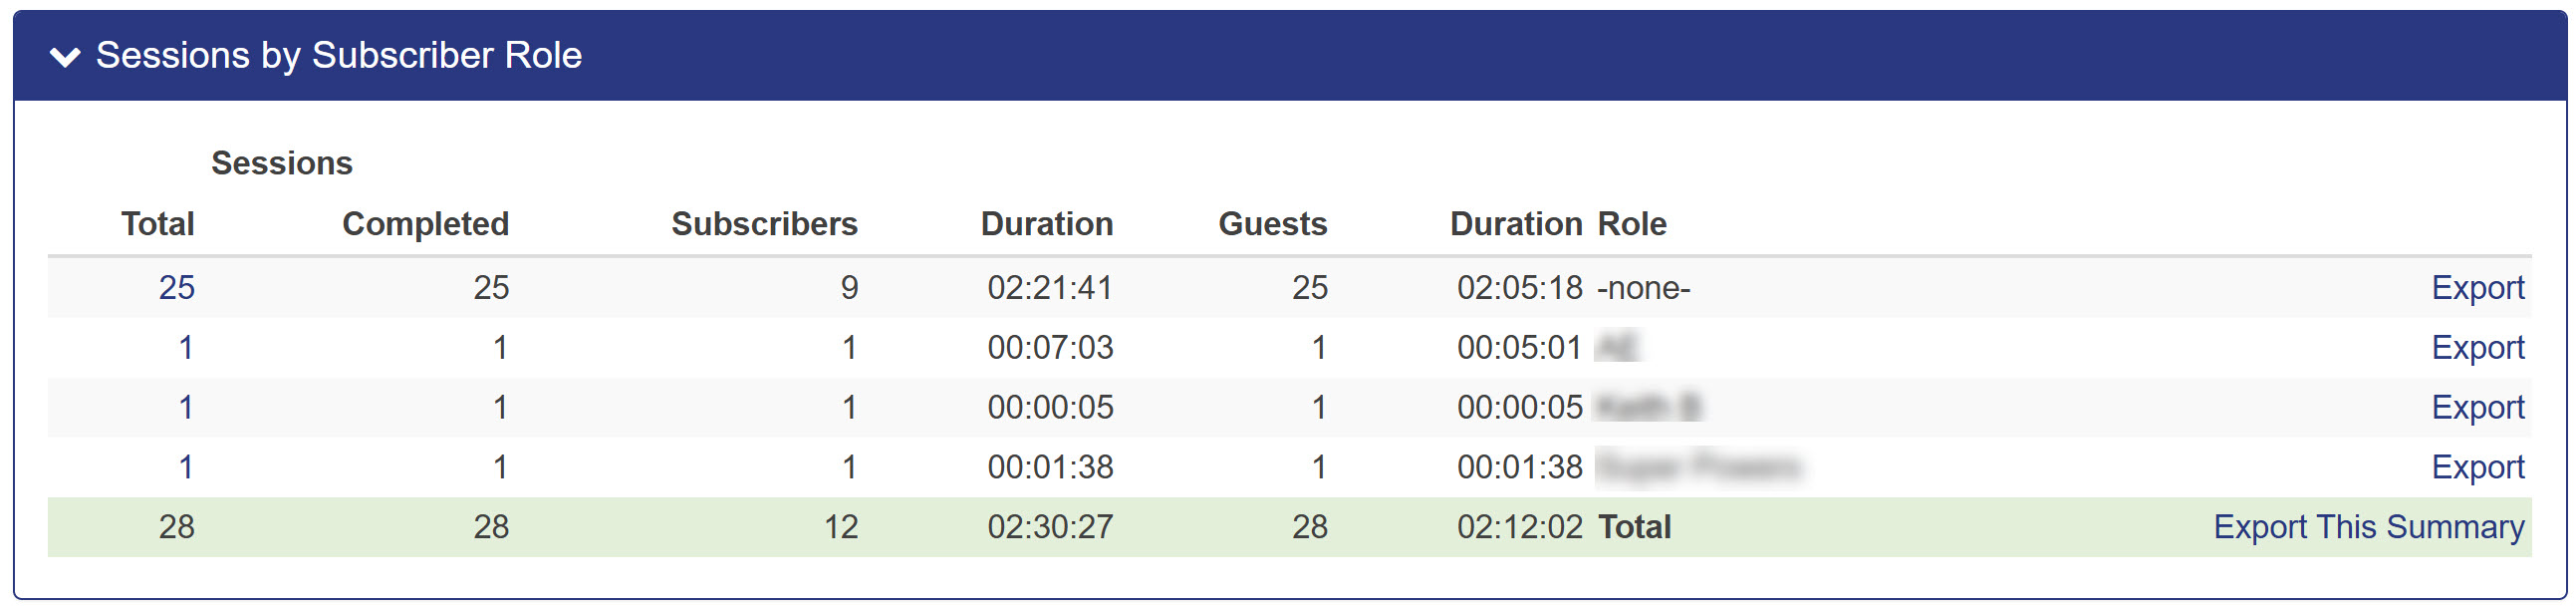 * **Sessions by Subscriber**: You can export the report by single subscriber, all, or summary.
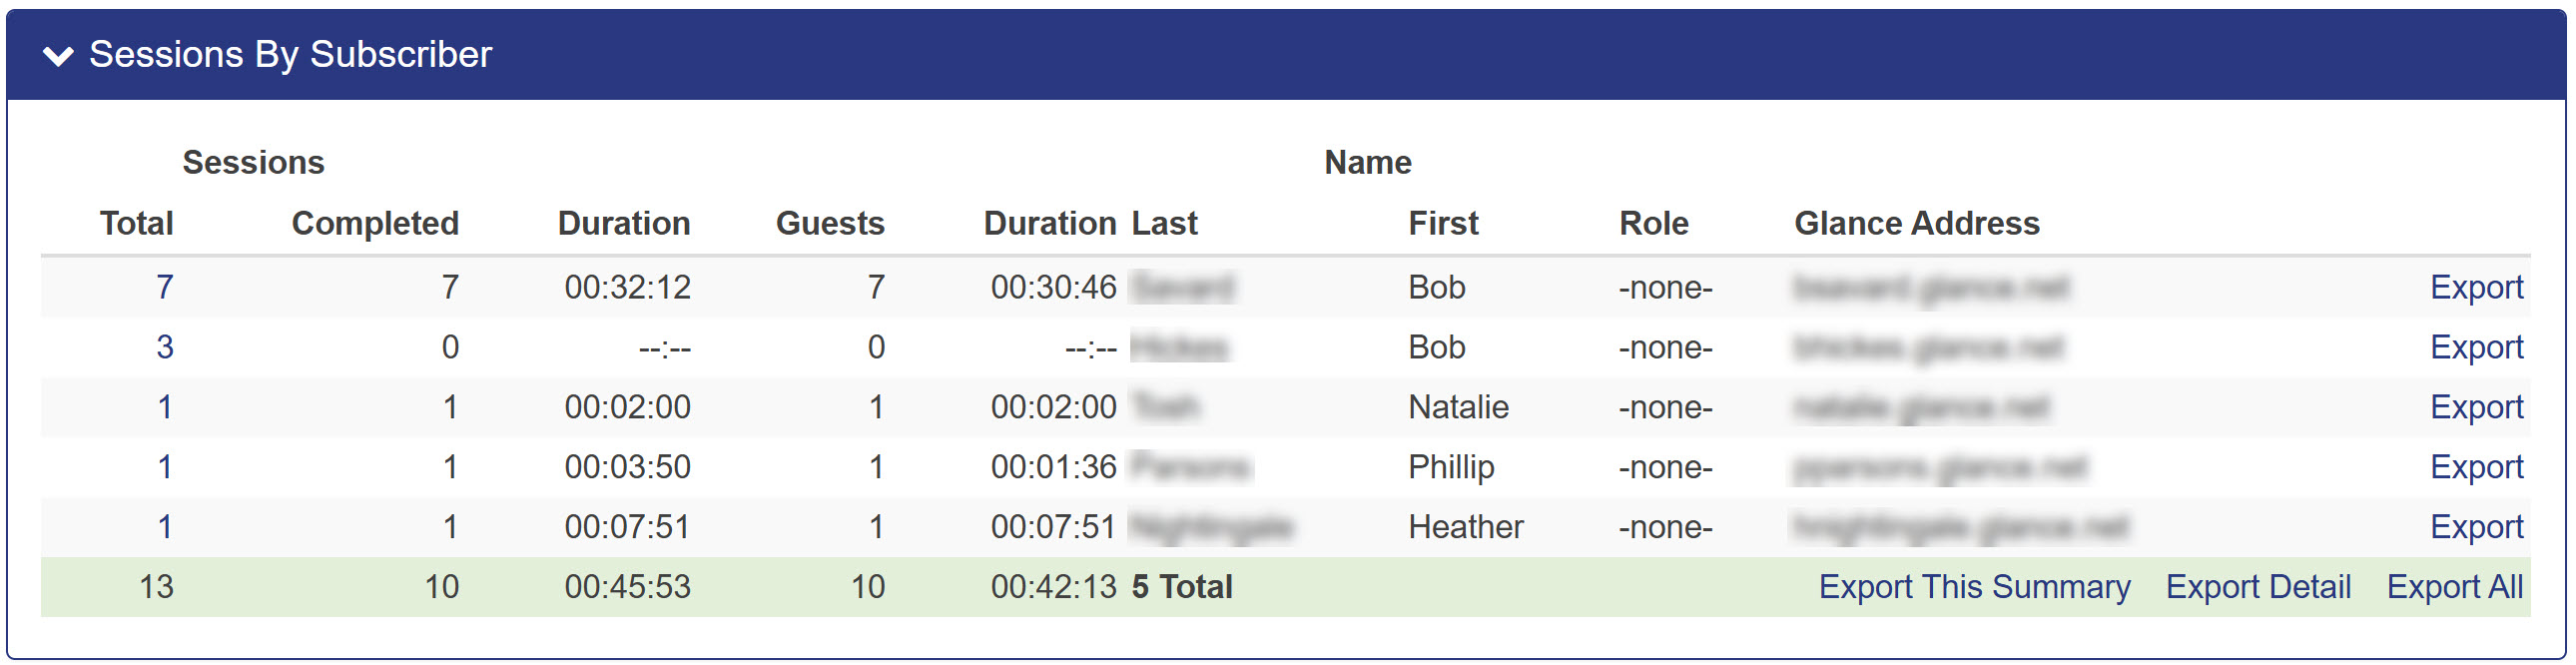 * **Least Active Subscribers** (No sessions or low 5%): You can export all or summary.
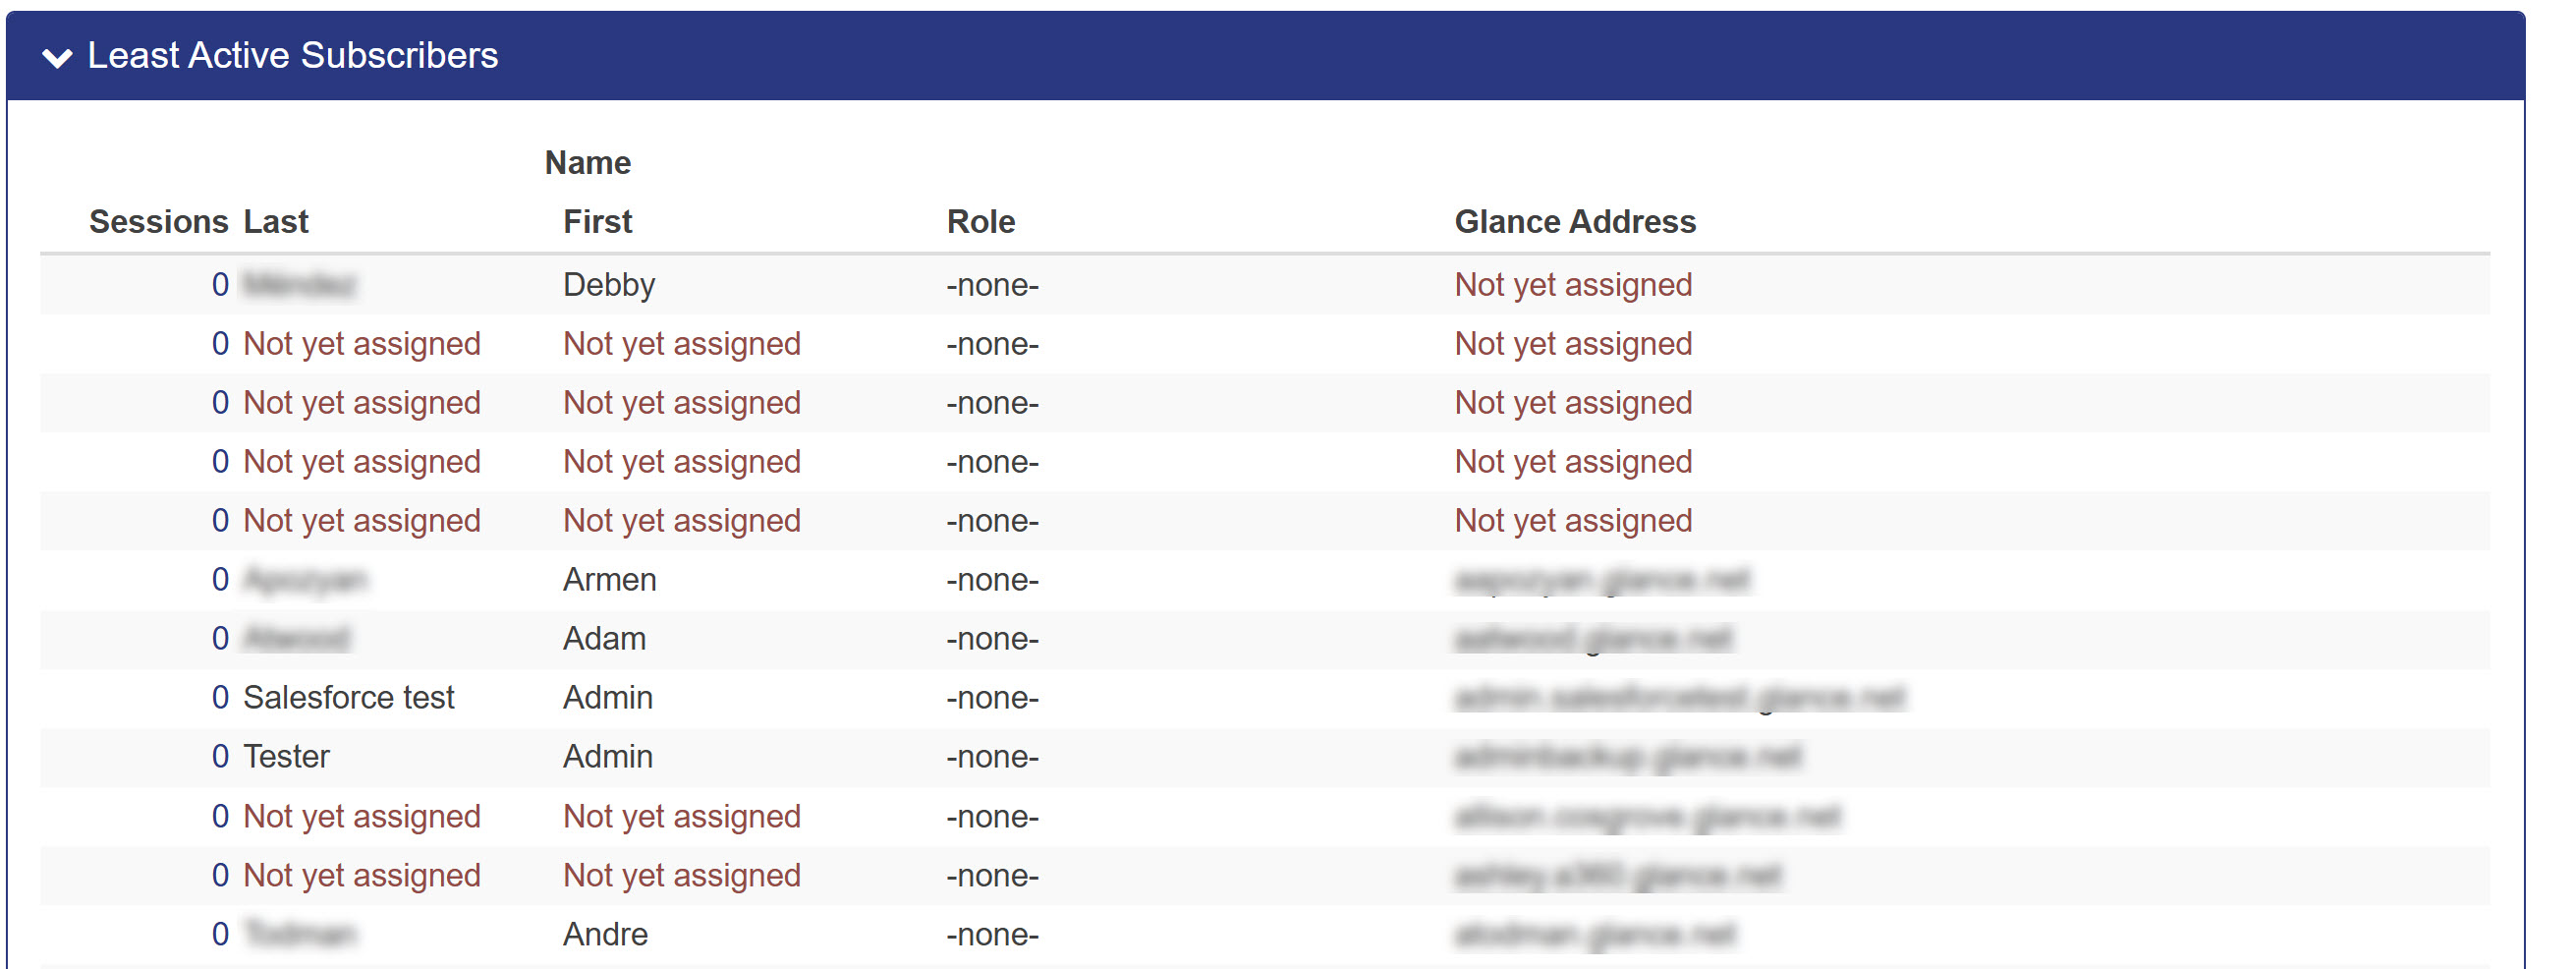 ## Report Session Problems (For Cobrowse Only)
This feature is enabled for Cobrowse only. Agents may report any oddities while cobrowsing. Some examples include: page loaded slowly, screen froze, and "I didn't see the images the customer was seeing." By reporting session problems, Glance can help troubleshoot with you to improve your agent/customer experience.
Events are also added through the AddCallReport API when an agent navigates to an unapproved website during a session.
To use Session Problem Reports:
1. Under the **Activity** tab, select **Session Problem Reports**.
## Report Session Problems (For Cobrowse Only)
This feature is enabled for Cobrowse only. Agents may report any oddities while cobrowsing. Some examples include: page loaded slowly, screen froze, and "I didn't see the images the customer was seeing." By reporting session problems, Glance can help troubleshoot with you to improve your agent/customer experience.
Events are also added through the AddCallReport API when an agent navigates to an unapproved website during a session.
To use Session Problem Reports:
1. Under the **Activity** tab, select **Session Problem Reports**.
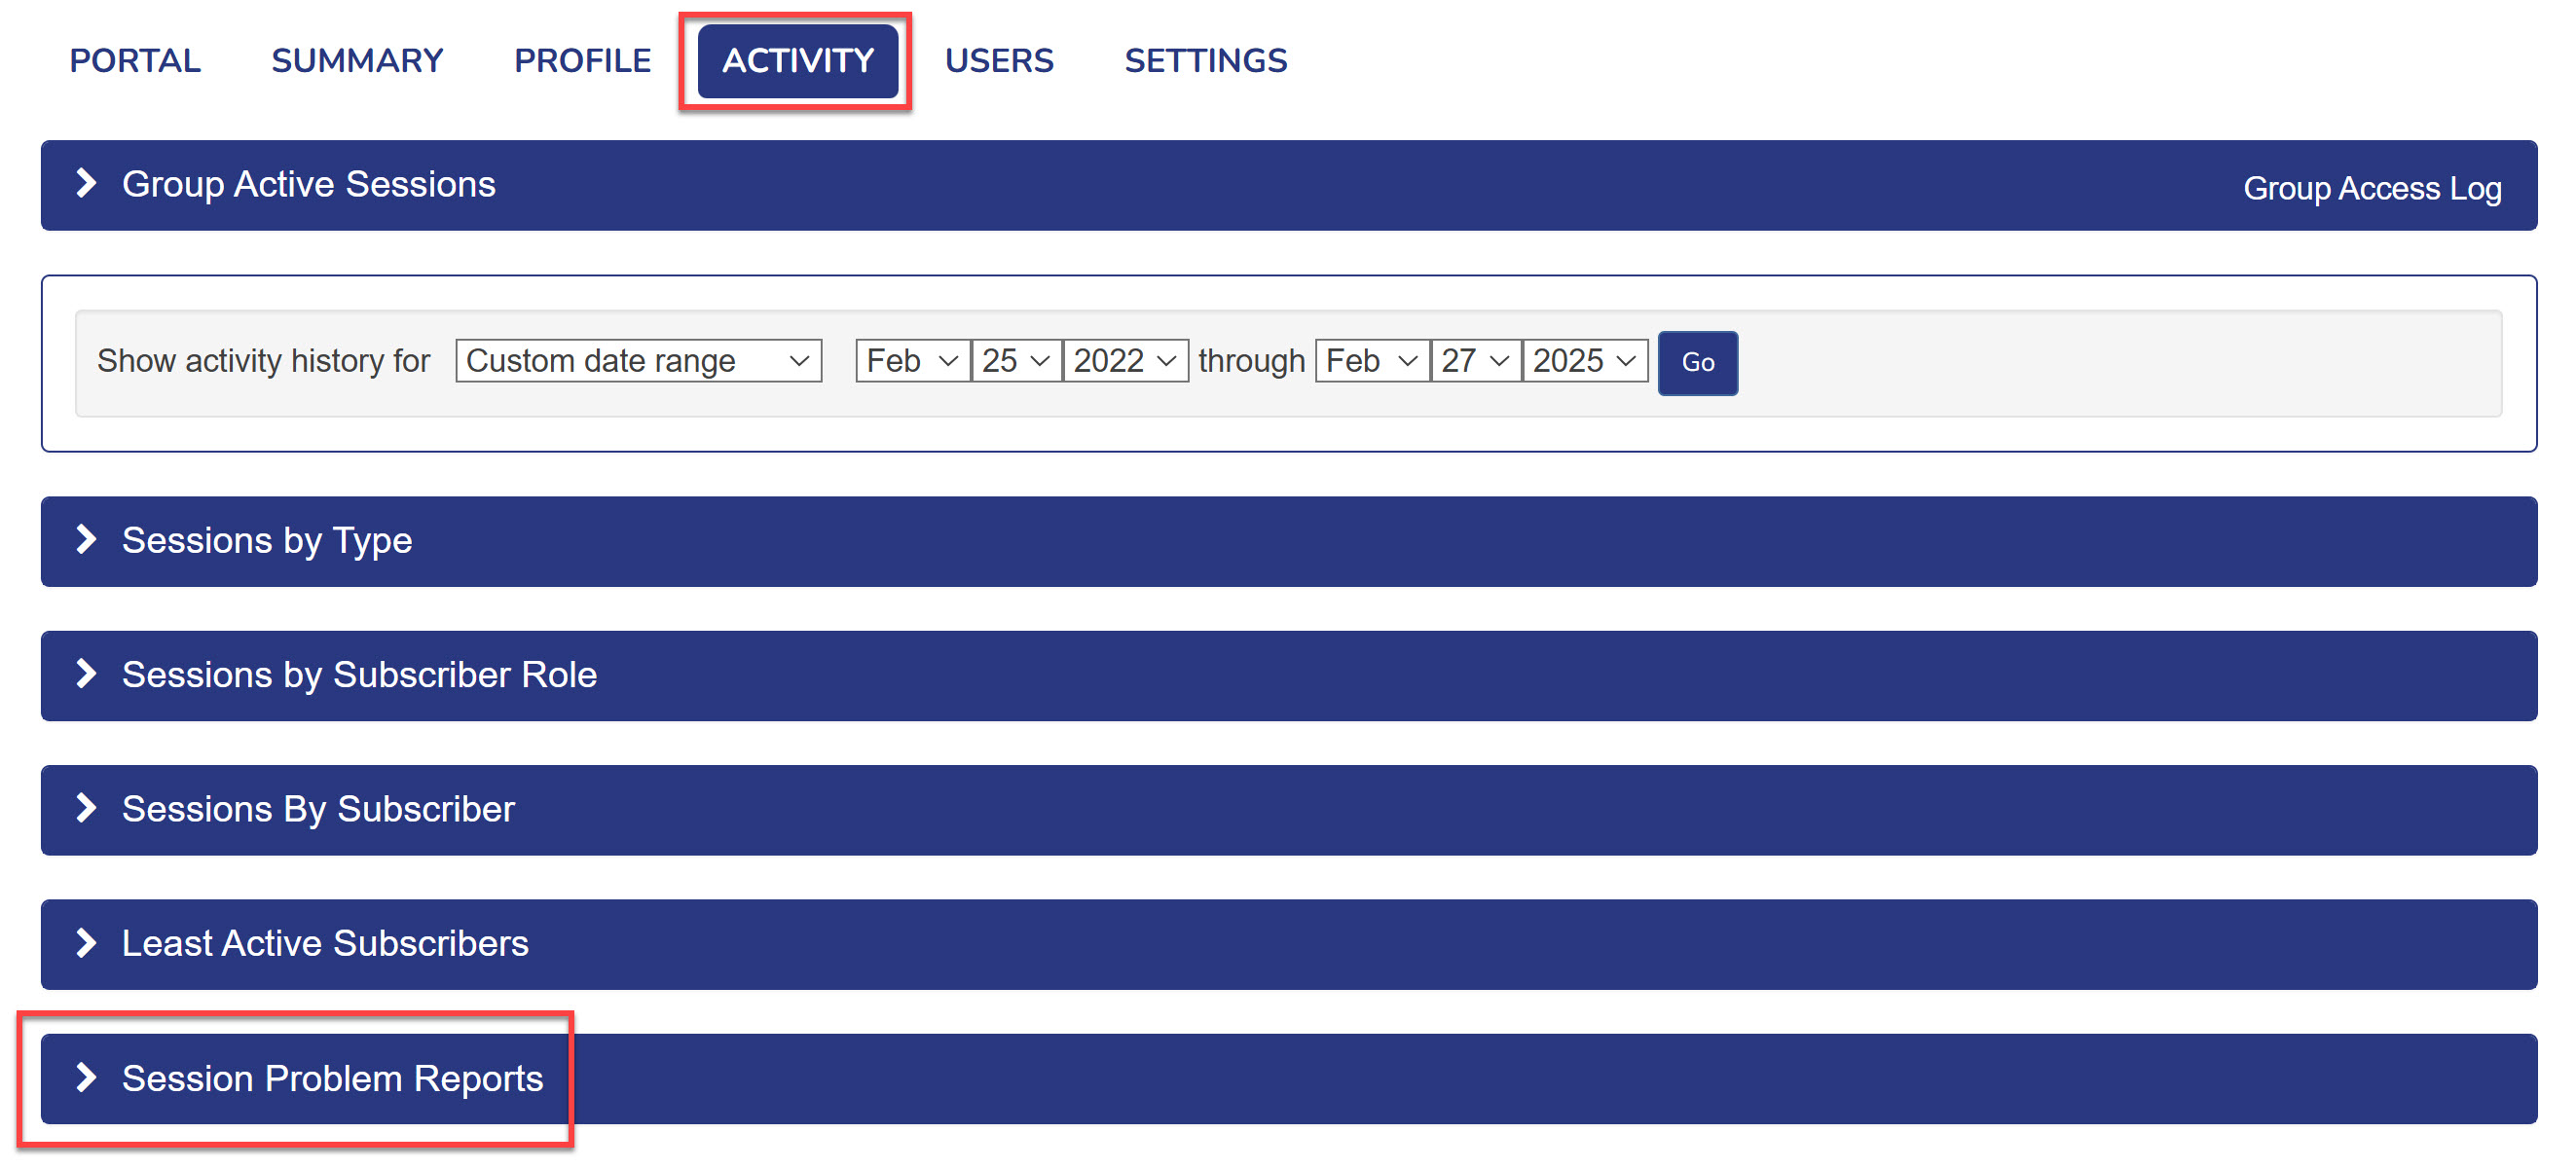
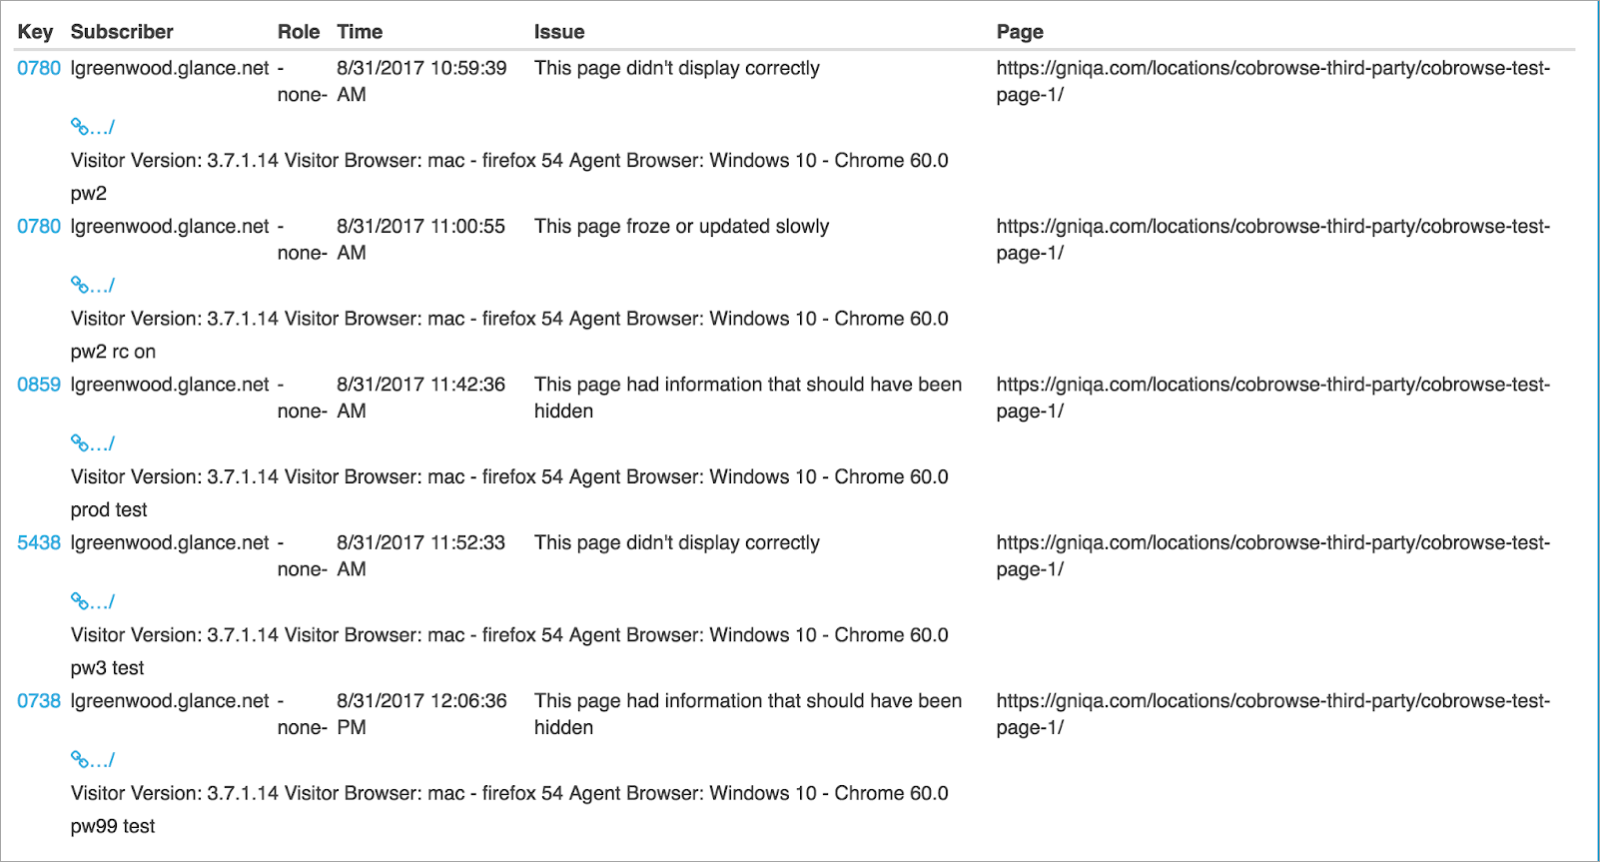 ## Export Reports
To get the most out of the data, Glance recommends exporting the details into a CSV (comma-separated values) file. You can view and analyze CSV files with Excel or another spreadsheet program.
After you have run the report, click **Export Detail** or **Export The Summary**.
## Export Reports
To get the most out of the data, Glance recommends exporting the details into a CSV (comma-separated values) file. You can view and analyze CSV files with Excel or another spreadsheet program.
After you have run the report, click **Export Detail** or **Export The Summary**.
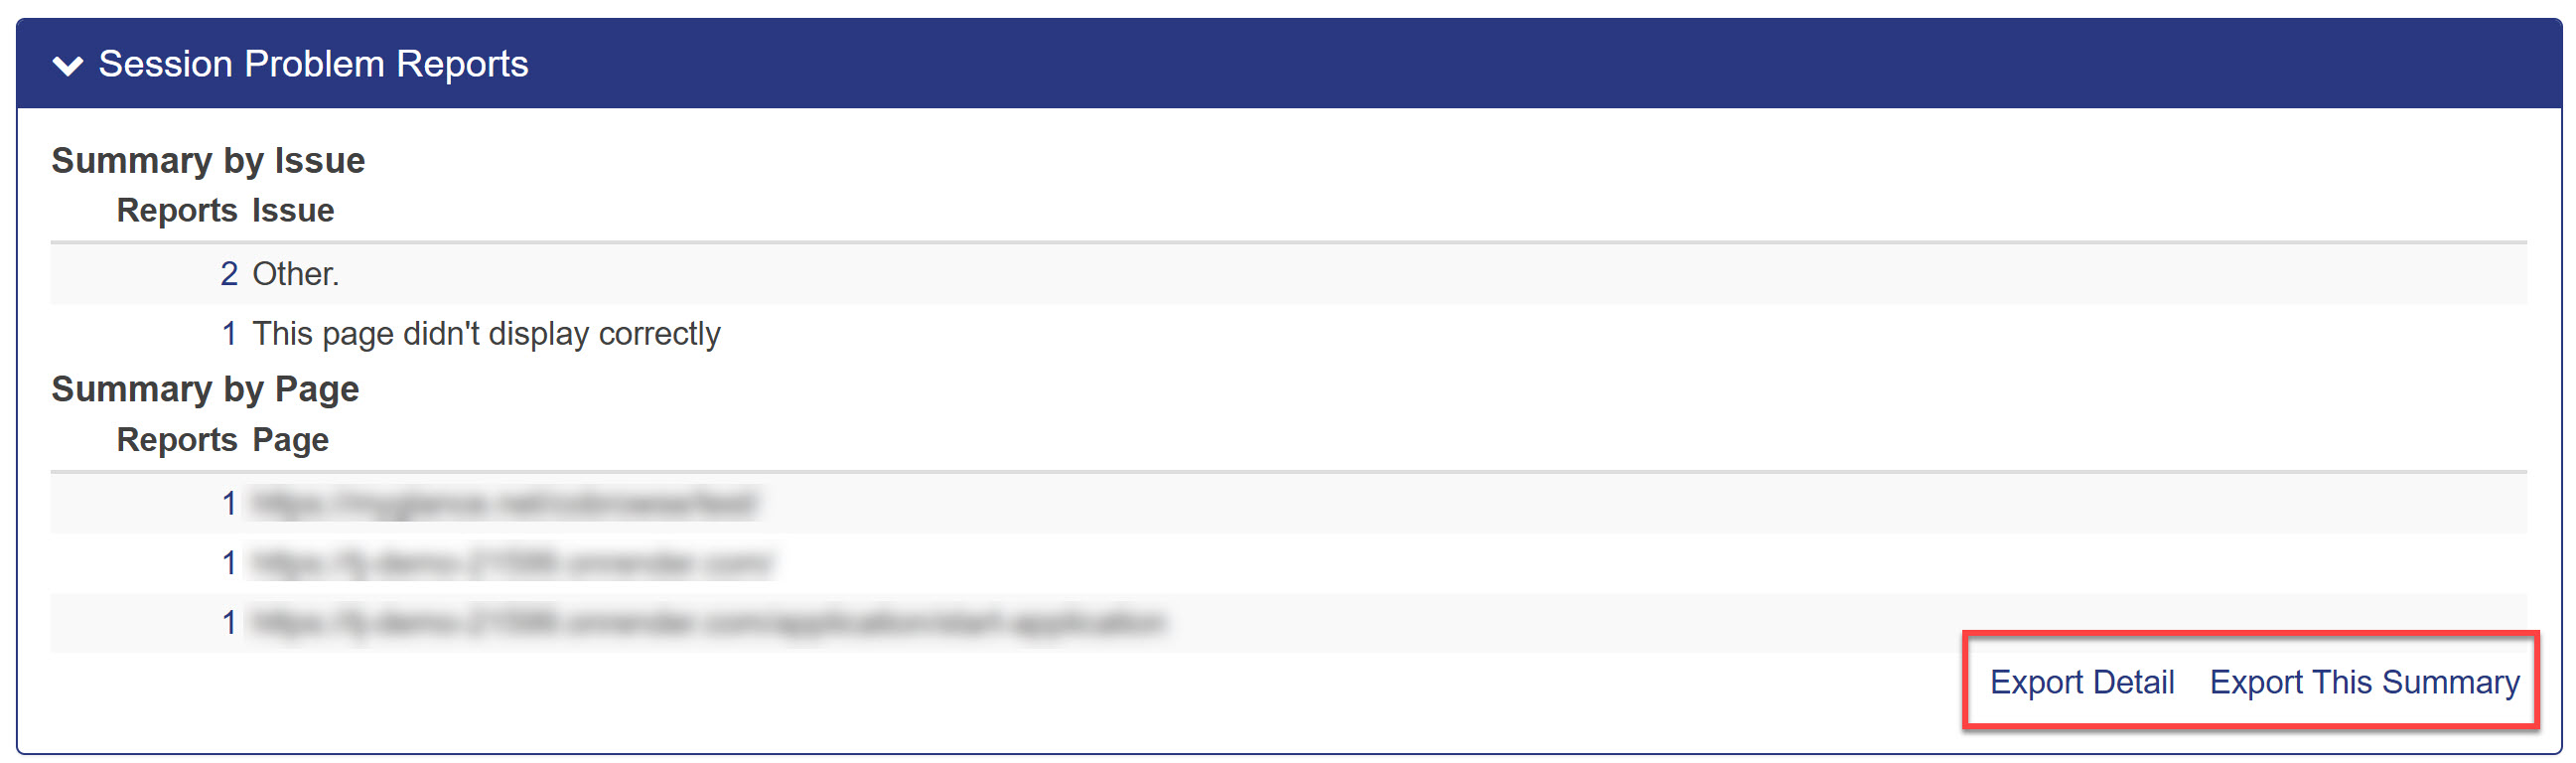 =================================================================
FILE: /users/account-management/screenshare
=================================================================
To log in, follow these steps:
1. Go to [www.glance.cx](https://www.glance.cx).
2. Click **Log In**. Or use the following link: [https://www.glance.net/Login](https://www.glance.net/Login)
3. Enter your admin Glance login credentials (**Glance Address** and **Password**).
## Account Dashboard Overview
Once you are logged in to your account, you can access the following tabs:
=================================================================
FILE: /users/account-management/screenshare
=================================================================
To log in, follow these steps:
1. Go to [www.glance.cx](https://www.glance.cx).
2. Click **Log In**. Or use the following link: [https://www.glance.net/Login](https://www.glance.net/Login)
3. Enter your admin Glance login credentials (**Glance Address** and **Password**).
## Account Dashboard Overview
Once you are logged in to your account, you can access the following tabs:
 * **Summary:** An overview of your profile, subscriptions and recent session activities for your Glance Address.
* **Profile:** View and edit your contact information and change your password.
* **Activity:** View your Glance session activities including:
* Group Activity Sessions
* Sessions by Subscriber Role
* Session by Subscriber
* Least Active Subscribers
* **Audio:** See your audio conferencing account information.
* **Subscriptions:** View your current subscriptions and shop for more capacity.
* **Billing:** View and update your billing information.
* **Users:** Add or delete users, view detailed reports of their usage, and view current subscriptions.
* **Settings:** Adjust privileges for users in your group.
=================================================================
FILE: /users/account-management/screenshare_qa
=================================================================
A list of commonly-asked questions about Glance Screen Share.
## How do I log in to the Glance Screen Share Client?
When you first installed the Screen Share Client, Glance prompted you to log in using your Glance Address and Password. If you didn't do this during the installation process, or if you need to make changes to your login details, follow these steps:
1. Click on the **G** icon located on the system tray next to your computer's clock. If you are using a Mac, it will display on the menu bar.
* **Windows:**
* **Summary:** An overview of your profile, subscriptions and recent session activities for your Glance Address.
* **Profile:** View and edit your contact information and change your password.
* **Activity:** View your Glance session activities including:
* Group Activity Sessions
* Sessions by Subscriber Role
* Session by Subscriber
* Least Active Subscribers
* **Audio:** See your audio conferencing account information.
* **Subscriptions:** View your current subscriptions and shop for more capacity.
* **Billing:** View and update your billing information.
* **Users:** Add or delete users, view detailed reports of their usage, and view current subscriptions.
* **Settings:** Adjust privileges for users in your group.
=================================================================
FILE: /users/account-management/screenshare_qa
=================================================================
A list of commonly-asked questions about Glance Screen Share.
## How do I log in to the Glance Screen Share Client?
When you first installed the Screen Share Client, Glance prompted you to log in using your Glance Address and Password. If you didn't do this during the installation process, or if you need to make changes to your login details, follow these steps:
1. Click on the **G** icon located on the system tray next to your computer's clock. If you are using a Mac, it will display on the menu bar.
* **Windows:**  * **Mac:**
  2. Enter your **Glance Address** and **Password**.
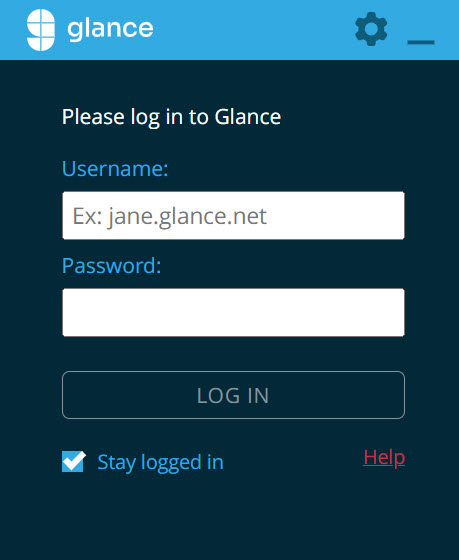 3. Click **Log In**.
If you completed these steps but still get a login-related error, make sure your Glance Address and Password are correct by logging in to your online account from the Glance website.
If you CAN log in online, but you are still having trouble logging onto the client with the correct credentials, try closing and relaunching Glance, or restart your computer.
**To relaunch Glance in Windows:**
1. Click the **G** icon located in your system tray next to your computer's clock.
2. Click the **Gear Icon** > **Advanced**.
3. Click the **Advanced** tab.
4. Click the **Exit Glance** button.
5. Find Glance in your programs from the Start menu or in your File Explorer and relaunch.
**To relaunch Glance on a Mac:**
1. Click the **G** icon located on your menu bar of your Mac (near your clock).
2. Click **Quit Glance**.
3. Find Glance from your Spotlight or Applications folder and open it.
## I am having trouble logging in to my account. What should I do?
Before you can use the Glance service, you need to have the proper Glance account credentials. Your account credentials include your Glance address and password:
* **Your Glance address** serves as your account username. You choose the address. It is often something like `yourname.glance.net`. Remember that when logging in to your account, you must enter your whole address including ".glance.net."
3. Click **Log In**.
If you completed these steps but still get a login-related error, make sure your Glance Address and Password are correct by logging in to your online account from the Glance website.
If you CAN log in online, but you are still having trouble logging onto the client with the correct credentials, try closing and relaunching Glance, or restart your computer.
**To relaunch Glance in Windows:**
1. Click the **G** icon located in your system tray next to your computer's clock.
2. Click the **Gear Icon** > **Advanced**.
3. Click the **Advanced** tab.
4. Click the **Exit Glance** button.
5. Find Glance in your programs from the Start menu or in your File Explorer and relaunch.
**To relaunch Glance on a Mac:**
1. Click the **G** icon located on your menu bar of your Mac (near your clock).
2. Click **Quit Glance**.
3. Find Glance from your Spotlight or Applications folder and open it.
## I am having trouble logging in to my account. What should I do?
Before you can use the Glance service, you need to have the proper Glance account credentials. Your account credentials include your Glance address and password:
* **Your Glance address** serves as your account username. You choose the address. It is often something like `yourname.glance.net`. Remember that when logging in to your account, you must enter your whole address including ".glance.net."
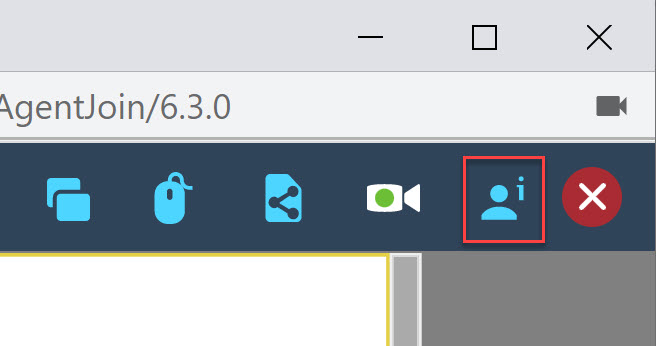 2. Click the **Report a Problem** button.
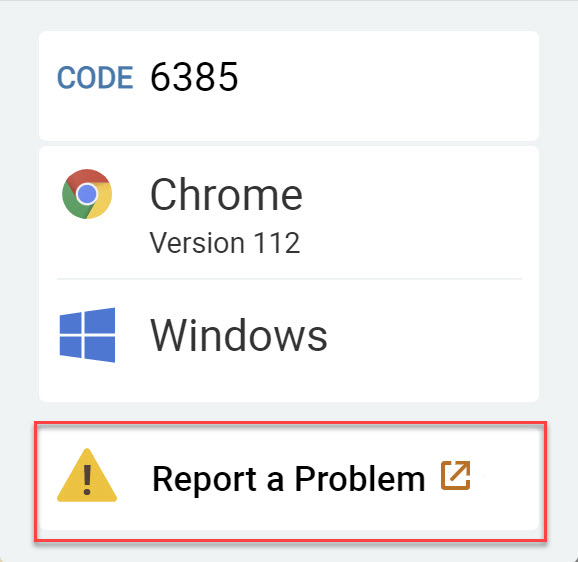 3. Click the radio button next to any applicable errors and fill out the additional details if needed.
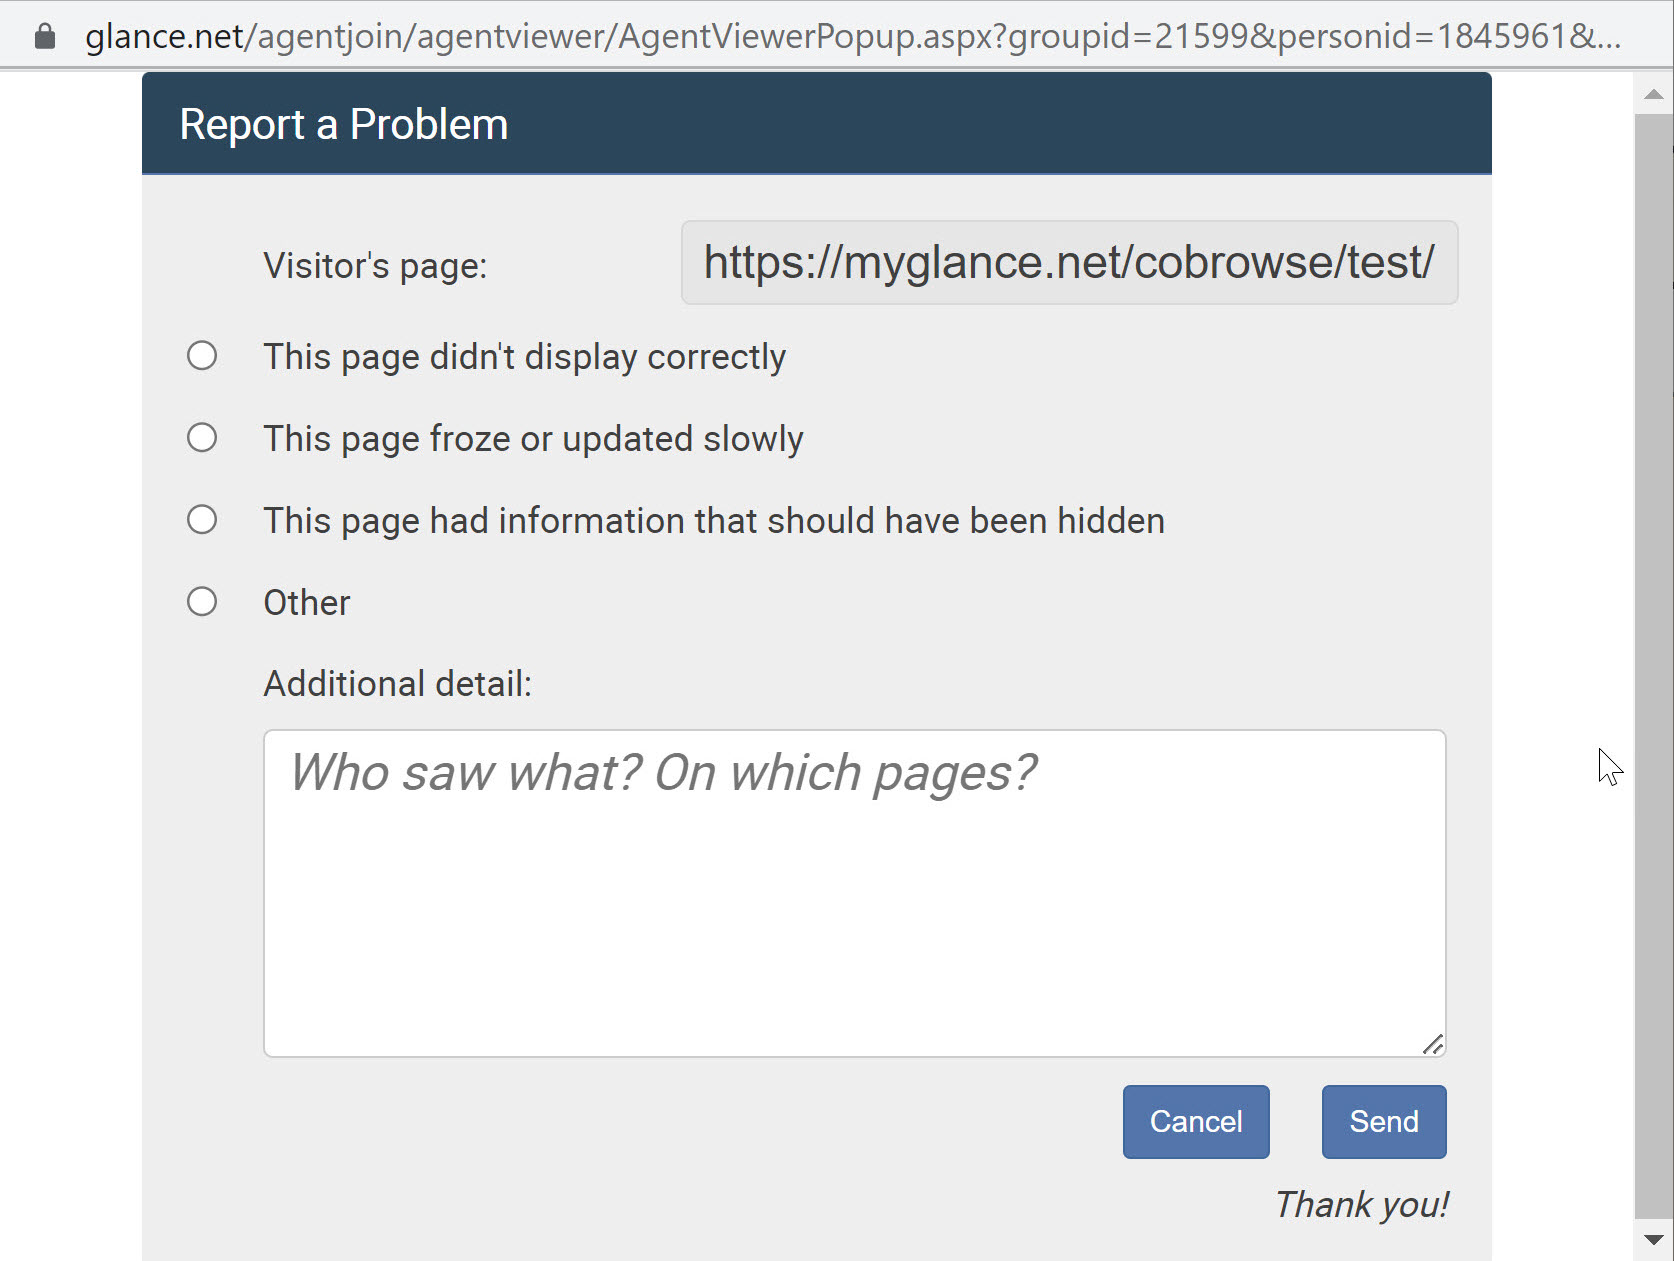 4. Click **Send**.
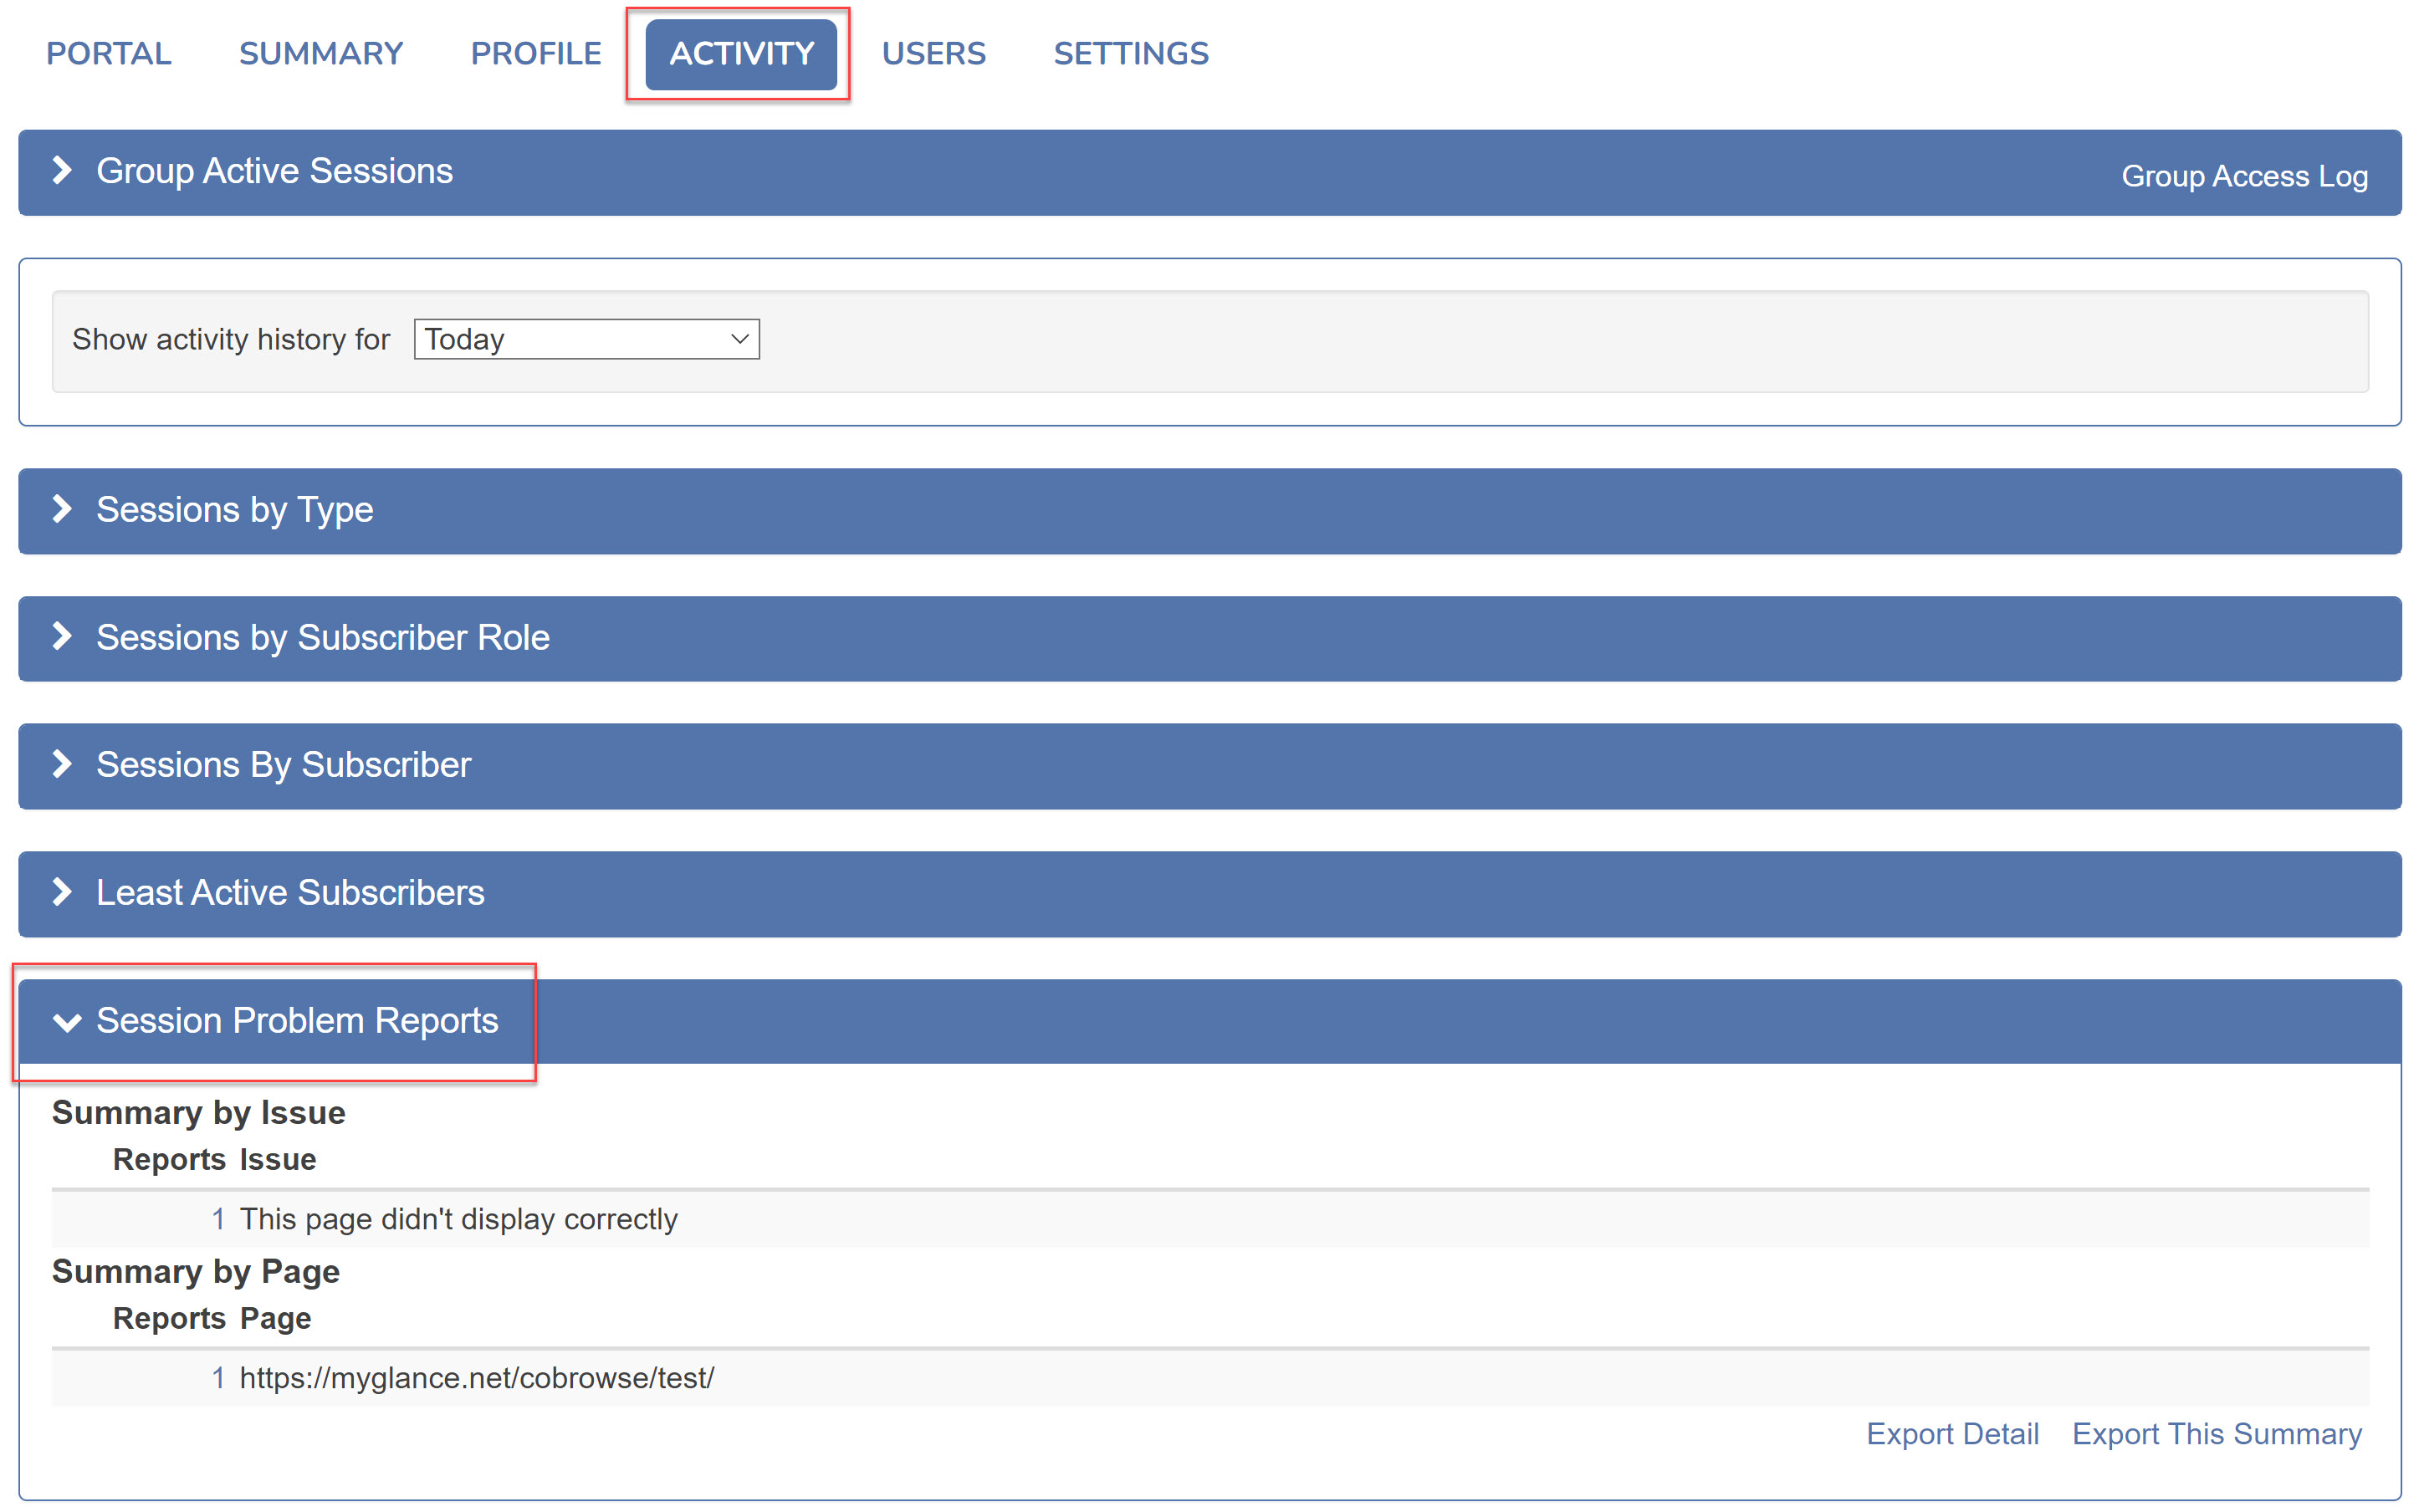 4. Click **Export Detail** or **Export this Summary** to download this report.
## Best Practices
Glance recommends reviewing problem reports daily at go-live, weekly until stable, and monthly while Cobrowse sessions are active.
Verify at the end of your implementation that the Report a Problem owners are set up with Glance to receive an email summarizing your reported problems for the desired period.
**If there are a couple of reported issues**
* Attempt to reproduce the issue using the details provided.
* Follow up with the agent who reported the problem if additional details are needed.
* Work with your IT team to investigate, reproduce, and resolve issues.
* Publish a broadcast to Glance users with updates/training notes.
**If there are several reported issues**
1. Select the option to **Export Detail** from the **Activity** tab to download a CSV file of the reported issues.
2. Save the downloaded CSV file and analyze patterns in the issues reported. (e.g., Sort by "URL" and then review whether there are patterns in visitor or agent browser/OS.)
3. Catalog the issues. (e.g., separate training notes from the issues that need to be reproduced/investigated.)
4. Work with your IT team to investigate, reproduce, and resolve issues.
5. Publish a broadcast to Glance users with updates/training notes.
=================================================================
FILE: /users/glance-cobrowse/faq
=================================================================
## What is involved in the Glance Cobrowse version upgrade process?
For complete information on upgrading, see the [Upgrading](/users/glance-cobrowse/upgrading/) section.
## What are the main features of Glance Cobrowse?
Glance Cobrowse features include the following:
* All features defined on the [Features](/users/glance-cobrowse/features/) page.
* Effortless engagement with no passcode or complex key required for customers.
* No proxy means there's nothing for your IT team to install, manage, or maintain.
* Guests connect from Windows, Mac, or any browser.
* Mobile support for every customer, no matter what device they are on.
* No download required.
## What is Glance Cobrowse?
Glance Cobrowse is a solution whereby customer service agents can simultaneously view web pages, live, as currently seen by visitors to the website they are supporting within the same browser view. With the visitor's permission, Glance Cobrowse also allows an agent to remotely assist a visitor's webpage, but can never view or control any other open browser or open applications on a customer's computer.
Since agents can see and share exactly what customers are trying to accomplish, they can provide a seamless and more satisfying customer experience. This type of online collaboration dramatically reduces frustration and can build lifetime customer loyalty.
To learn more about how Glance Cobrowse works, watch the [Glance Cobrowse video](/users/glance-cobrowse/) or visit the [Glance Cobrowse web page](https://www.glance.cx/guided-cx-platform/cobrowse).
## What is the difference between Cobrowse and Screen Share?
Cobrowse enables you to simultaneously view company webpages as currently seen by visitors within a shared browser view. There is no download on the agent or guest side.
Glance Screen Share is also a [visual engagement](https://www.glance.cx/guided-cx-platform/screen-share) solution that can be used alone or in conjunction with the Glance Visual Engagement Platform. The difference is that in a screen share session you can view a visitor's entire screen, not just specific company webpages.
Both Cobrowse and Screen Share instantly clarify online interactions, providing an exceptional customer experience.
## How long does the "Please give the agent this code:" modal display before it's automatically dismissed?
The code will stay on the page for a little over two minutes. If no agent has joined by that point, the session will time out and the code will disappear.
## How long does the Cobrowse session code last?
It lasts for the duration of the session. Any agent with the code can join the session while it's active, and only one session can exist at any one time with a given code. Once the session ends, the code is put back in the pool to potentially be used again. Session codes can and do get used repeatedly over time.
## If the support representative gets dropped from a session, can they reconnect to the Cobrowse session with the same code, or will they need to prompt the user to generate a new one?
If an agent closes their browser, then they have left the session. Once the last agent leaves a session, the session is over. The session code is no longer valid for that session and a new code would need to be generated by the visitor.
If there are two (or more) agents in the session, and one of them leaves, the session would persist and the agent who left could re-join it with the same session code. As long as one agent remains in the session, it will continue to be active and other agents can leave and re-join as many times as they want.
## If the user gets dropped from a Cobrowse session, is there any way for them to reconnect to their existing session, or do they need to generate a new one?
If the visitor leaves without clicking the end session button (e.g., closes the entire browser tab, shuts off computer abruptly, etc.), the session enters a suspended state and the agent sees a gray screen with a message indicating that the session is suspended. If the visitor comes back to a tagged page within 10 minutes and the agent has not left the session, then the session will resume automatically.
If all agents leave the session at any point (even during the suspended state), the session ends.
Suspended sessions time out and end after 10 minutes.
## How does Cobrowse integrate with my CRM?
For complete information on integrations, see our [Integrations](/developer/integrations/) section.
## Can additional guests join my Cobrowse session?
Yes, additional guests are able to participate in a Cobrowse session. Refer to the [Adding a Guest](/users/glance-cobrowse/features/adding_guest/) page.
=================================================================
FILE: /users/glance-cobrowse/features/adding_guest
=================================================================
Agents can invite additional participants to join an active Cobrowse session by following these steps:
1. Click the **Add Guest** button located in the top-right corner of the Agent Viewer.
4. Click **Export Detail** or **Export this Summary** to download this report.
## Best Practices
Glance recommends reviewing problem reports daily at go-live, weekly until stable, and monthly while Cobrowse sessions are active.
Verify at the end of your implementation that the Report a Problem owners are set up with Glance to receive an email summarizing your reported problems for the desired period.
**If there are a couple of reported issues**
* Attempt to reproduce the issue using the details provided.
* Follow up with the agent who reported the problem if additional details are needed.
* Work with your IT team to investigate, reproduce, and resolve issues.
* Publish a broadcast to Glance users with updates/training notes.
**If there are several reported issues**
1. Select the option to **Export Detail** from the **Activity** tab to download a CSV file of the reported issues.
2. Save the downloaded CSV file and analyze patterns in the issues reported. (e.g., Sort by "URL" and then review whether there are patterns in visitor or agent browser/OS.)
3. Catalog the issues. (e.g., separate training notes from the issues that need to be reproduced/investigated.)
4. Work with your IT team to investigate, reproduce, and resolve issues.
5. Publish a broadcast to Glance users with updates/training notes.
=================================================================
FILE: /users/glance-cobrowse/faq
=================================================================
## What is involved in the Glance Cobrowse version upgrade process?
For complete information on upgrading, see the [Upgrading](/users/glance-cobrowse/upgrading/) section.
## What are the main features of Glance Cobrowse?
Glance Cobrowse features include the following:
* All features defined on the [Features](/users/glance-cobrowse/features/) page.
* Effortless engagement with no passcode or complex key required for customers.
* No proxy means there's nothing for your IT team to install, manage, or maintain.
* Guests connect from Windows, Mac, or any browser.
* Mobile support for every customer, no matter what device they are on.
* No download required.
## What is Glance Cobrowse?
Glance Cobrowse is a solution whereby customer service agents can simultaneously view web pages, live, as currently seen by visitors to the website they are supporting within the same browser view. With the visitor's permission, Glance Cobrowse also allows an agent to remotely assist a visitor's webpage, but can never view or control any other open browser or open applications on a customer's computer.
Since agents can see and share exactly what customers are trying to accomplish, they can provide a seamless and more satisfying customer experience. This type of online collaboration dramatically reduces frustration and can build lifetime customer loyalty.
To learn more about how Glance Cobrowse works, watch the [Glance Cobrowse video](/users/glance-cobrowse/) or visit the [Glance Cobrowse web page](https://www.glance.cx/guided-cx-platform/cobrowse).
## What is the difference between Cobrowse and Screen Share?
Cobrowse enables you to simultaneously view company webpages as currently seen by visitors within a shared browser view. There is no download on the agent or guest side.
Glance Screen Share is also a [visual engagement](https://www.glance.cx/guided-cx-platform/screen-share) solution that can be used alone or in conjunction with the Glance Visual Engagement Platform. The difference is that in a screen share session you can view a visitor's entire screen, not just specific company webpages.
Both Cobrowse and Screen Share instantly clarify online interactions, providing an exceptional customer experience.
## How long does the "Please give the agent this code:" modal display before it's automatically dismissed?
The code will stay on the page for a little over two minutes. If no agent has joined by that point, the session will time out and the code will disappear.
## How long does the Cobrowse session code last?
It lasts for the duration of the session. Any agent with the code can join the session while it's active, and only one session can exist at any one time with a given code. Once the session ends, the code is put back in the pool to potentially be used again. Session codes can and do get used repeatedly over time.
## If the support representative gets dropped from a session, can they reconnect to the Cobrowse session with the same code, or will they need to prompt the user to generate a new one?
If an agent closes their browser, then they have left the session. Once the last agent leaves a session, the session is over. The session code is no longer valid for that session and a new code would need to be generated by the visitor.
If there are two (or more) agents in the session, and one of them leaves, the session would persist and the agent who left could re-join it with the same session code. As long as one agent remains in the session, it will continue to be active and other agents can leave and re-join as many times as they want.
## If the user gets dropped from a Cobrowse session, is there any way for them to reconnect to their existing session, or do they need to generate a new one?
If the visitor leaves without clicking the end session button (e.g., closes the entire browser tab, shuts off computer abruptly, etc.), the session enters a suspended state and the agent sees a gray screen with a message indicating that the session is suspended. If the visitor comes back to a tagged page within 10 minutes and the agent has not left the session, then the session will resume automatically.
If all agents leave the session at any point (even during the suspended state), the session ends.
Suspended sessions time out and end after 10 minutes.
## How does Cobrowse integrate with my CRM?
For complete information on integrations, see our [Integrations](/developer/integrations/) section.
## Can additional guests join my Cobrowse session?
Yes, additional guests are able to participate in a Cobrowse session. Refer to the [Adding a Guest](/users/glance-cobrowse/features/adding_guest/) page.
=================================================================
FILE: /users/glance-cobrowse/features/adding_guest
=================================================================
Agents can invite additional participants to join an active Cobrowse session by following these steps:
1. Click the **Add Guest** button located in the top-right corner of the Agent Viewer.
 2. The visitor will see a prompt asking them to **Allow the agent to add a guest?**. They must click **Yes** to proceed.
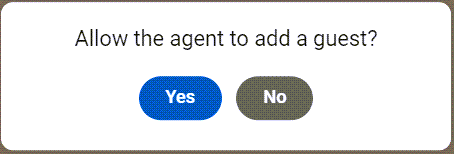 3. Copy the URL underneath **Share with guest:** and send it to the guest.
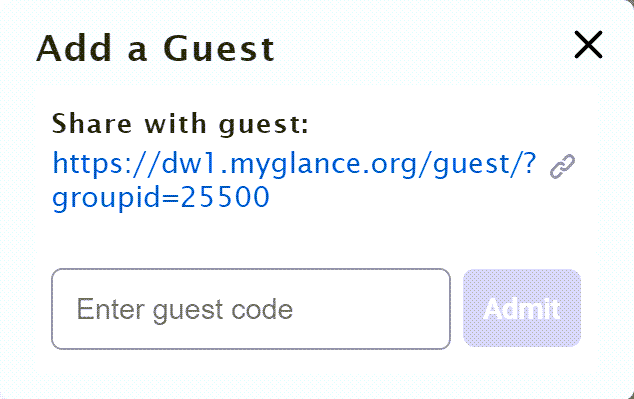 4. The guest will be prompted to enter their name and then click **Continue**.
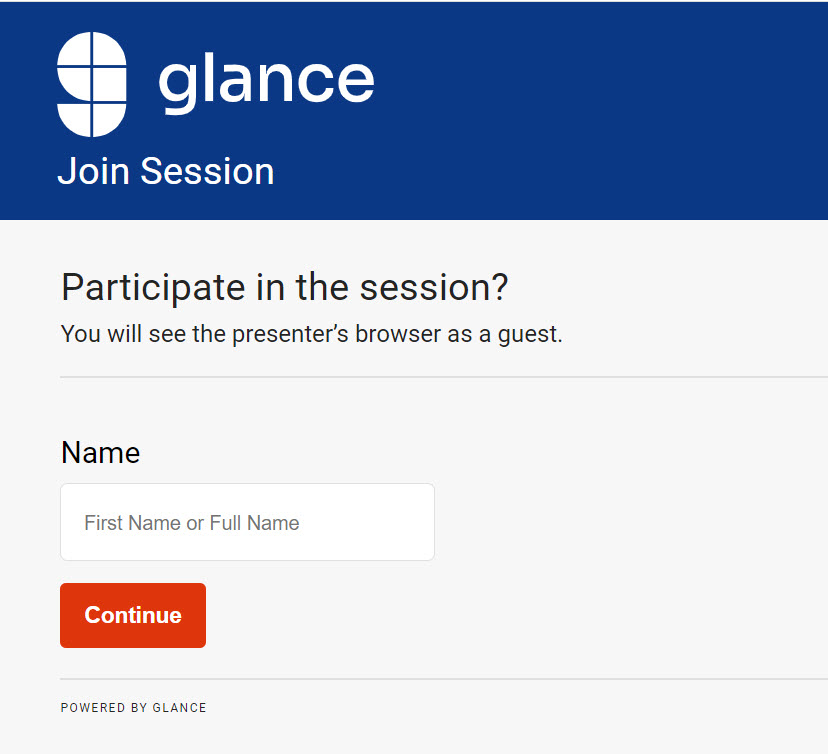 5. Once the guest enters their name, a code is displayed.
 6. The agent enters the code from the guest in the **Enter the code given to them:** field and clicks **Admit**.
7. The guest will be given the option to join the session with their video enabled or disabled by clicking **Continue** or **No thanks**. The guest can choose which camera they want to use from the gear icon.
8. Agents can disable guest or visitor video at any time by clicking the Video Off icon.
6. The agent enters the code from the guest in the **Enter the code given to them:** field and clicks **Admit**.
7. The guest will be given the option to join the session with their video enabled or disabled by clicking **Continue** or **No thanks**. The guest can choose which camera they want to use from the gear icon.
8. Agents can disable guest or visitor video at any time by clicking the Video Off icon.
 9. To remove a guest from the session, click the Eject button.
 ## Hosting Guest Join Page on Your Own Domain
Glance allows you to host the Guest Join Page on your own domain for a more branded experience.
1. Contact your Glance representative to request the necessary configuration changes.
2. Once the changes are confirmed, navigate to **Account Management** > **Settings** > **Manage your cobrowse settings** and scroll down to the **Links** section.
3. Update the **Guest Join short URL** with the URL of your hosted page.
## Hosting Guest Join Page on Your Own Domain
Glance allows you to host the Guest Join Page on your own domain for a more branded experience.
1. Contact your Glance representative to request the necessary configuration changes.
2. Once the changes are confirmed, navigate to **Account Management** > **Settings** > **Manage your cobrowse settings** and scroll down to the **Links** section.
3. Update the **Guest Join short URL** with the URL of your hosted page.
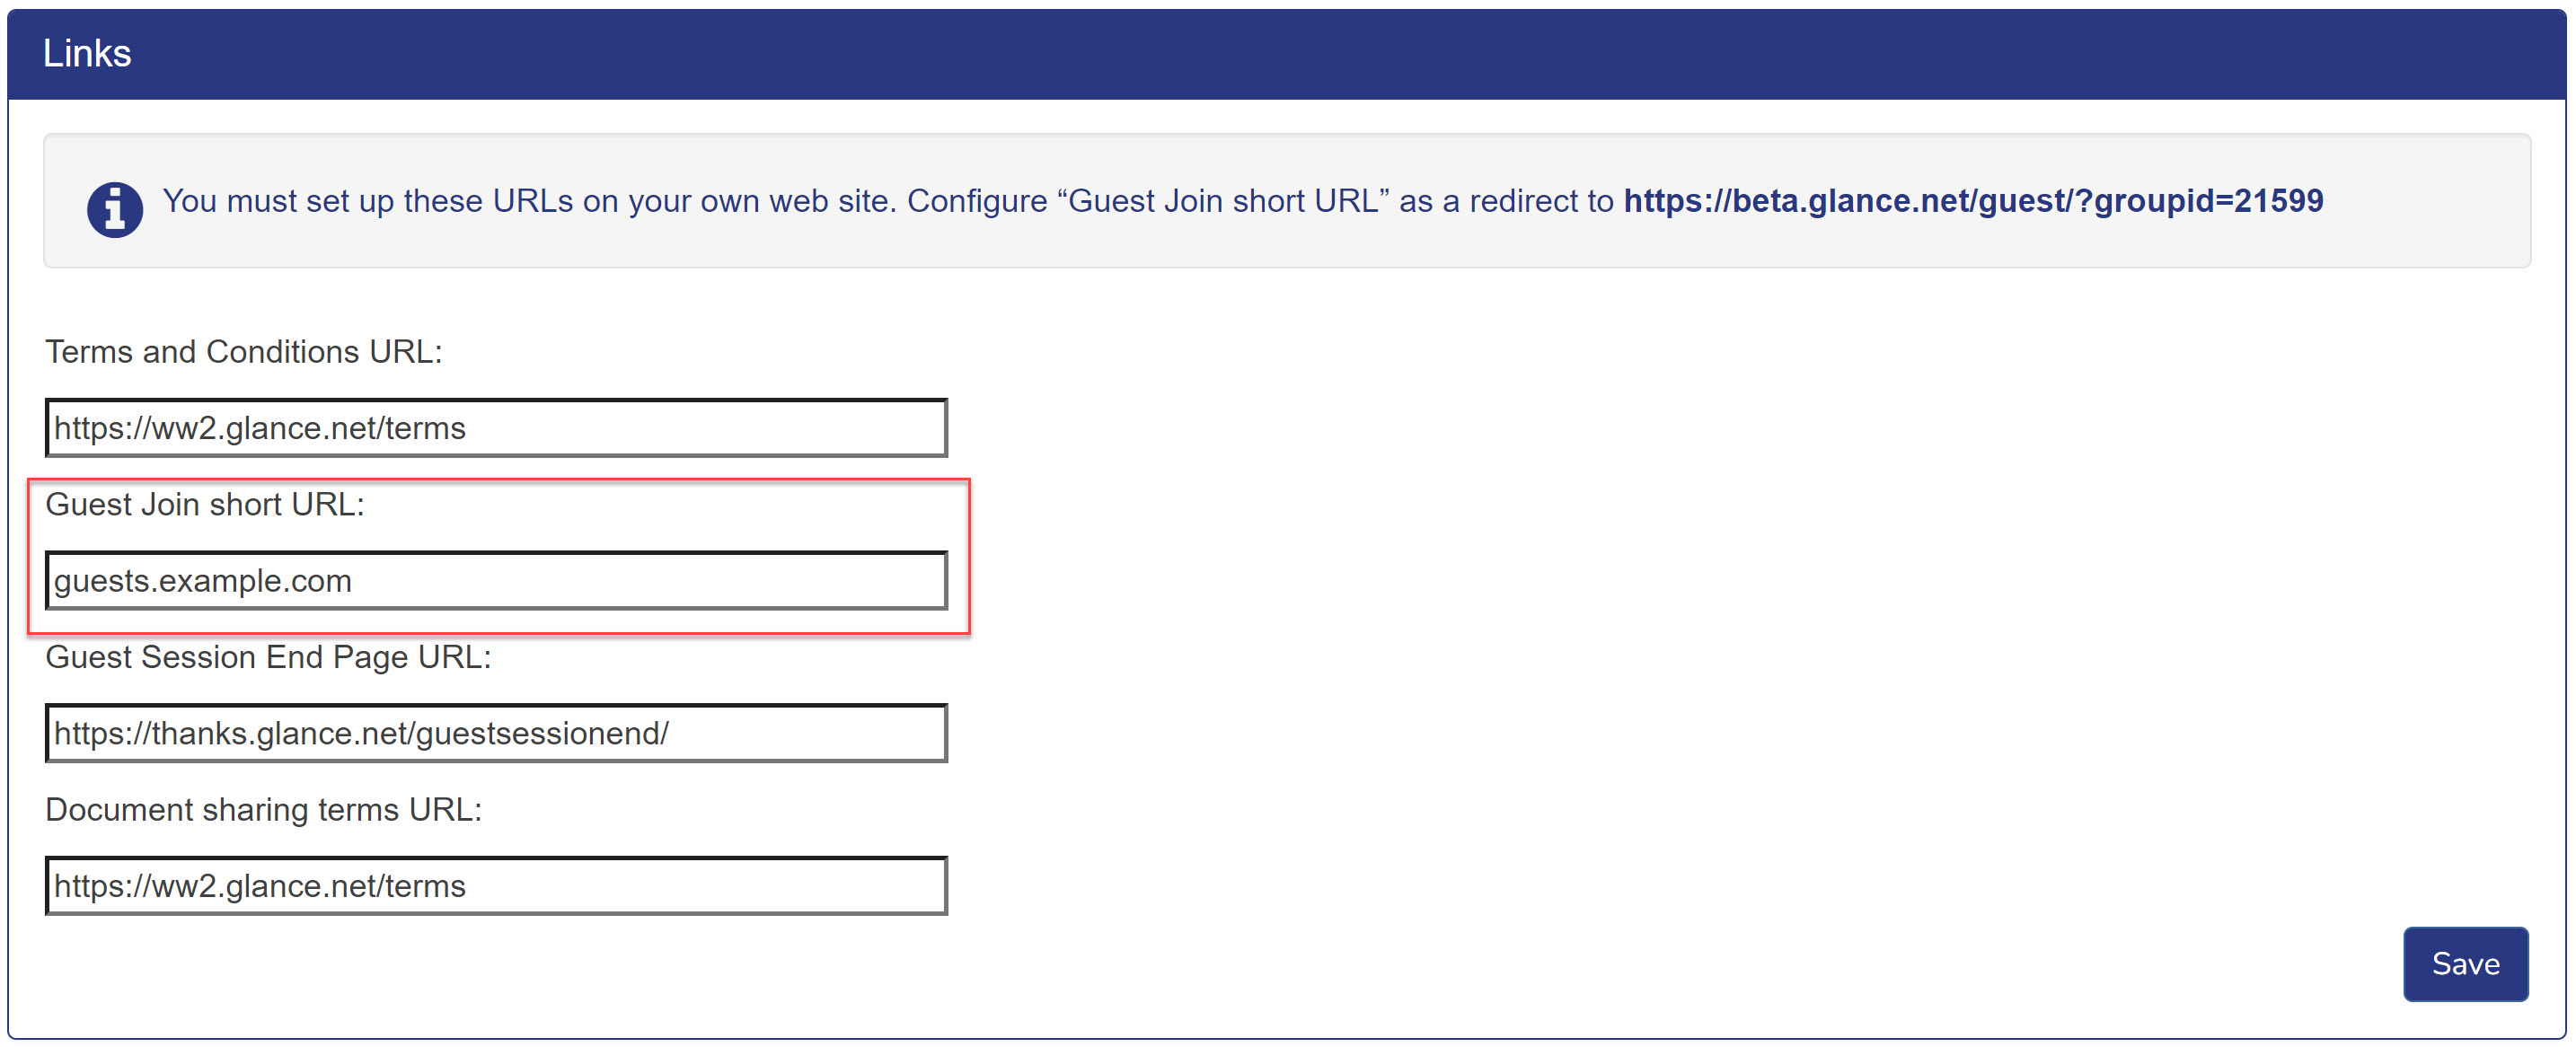 4. Add `allow="camera*"` to the iframe element. See the below example.
```html
=================================================================
FILE: /users/glance-cobrowse/features/agent_video
=================================================================
Glance offers a variety of video options within the Glance Visual Engagement Platform in which a customer can see an agent. Personalizing the conversation with video enables your agents to build trust, confidence, credibility, and rapport.
Glance offers:
* [Multi-Participant video for visitors, agents, and guests](#multi-participant-video-features)
* [1-Way Agent video](#1-way-agent-video)
## Multi-Participant Video Features
**Requires CB 5.1 or higher**
* A responsive UI that supports both desktop and mobile screen formats
* Multi-participant Video (up to 10 participants)
* Ability to add additional guest participants
* Accessible UI (conforms to the WCAG 2.1 AA standard)
* Standard cobrowse features such as PDF/XLS document viewing, masking, gesturing, and remote control
* Salesforce Integration: agents can instantly join video sessions using 1-Click Connect
* [Background Effects](#video-background-effects): blur, color fill, or image fill agent video backgrounds
4. Add `allow="camera*"` to the iframe element. See the below example.
```html
=================================================================
FILE: /users/glance-cobrowse/features/agent_video
=================================================================
Glance offers a variety of video options within the Glance Visual Engagement Platform in which a customer can see an agent. Personalizing the conversation with video enables your agents to build trust, confidence, credibility, and rapport.
Glance offers:
* [Multi-Participant video for visitors, agents, and guests](#multi-participant-video-features)
* [1-Way Agent video](#1-way-agent-video)
## Multi-Participant Video Features
**Requires CB 5.1 or higher**
* A responsive UI that supports both desktop and mobile screen formats
* Multi-participant Video (up to 10 participants)
* Ability to add additional guest participants
* Accessible UI (conforms to the WCAG 2.1 AA standard)
* Standard cobrowse features such as PDF/XLS document viewing, masking, gesturing, and remote control
* Salesforce Integration: agents can instantly join video sessions using 1-Click Connect
* [Background Effects](#video-background-effects): blur, color fill, or image fill agent video backgrounds
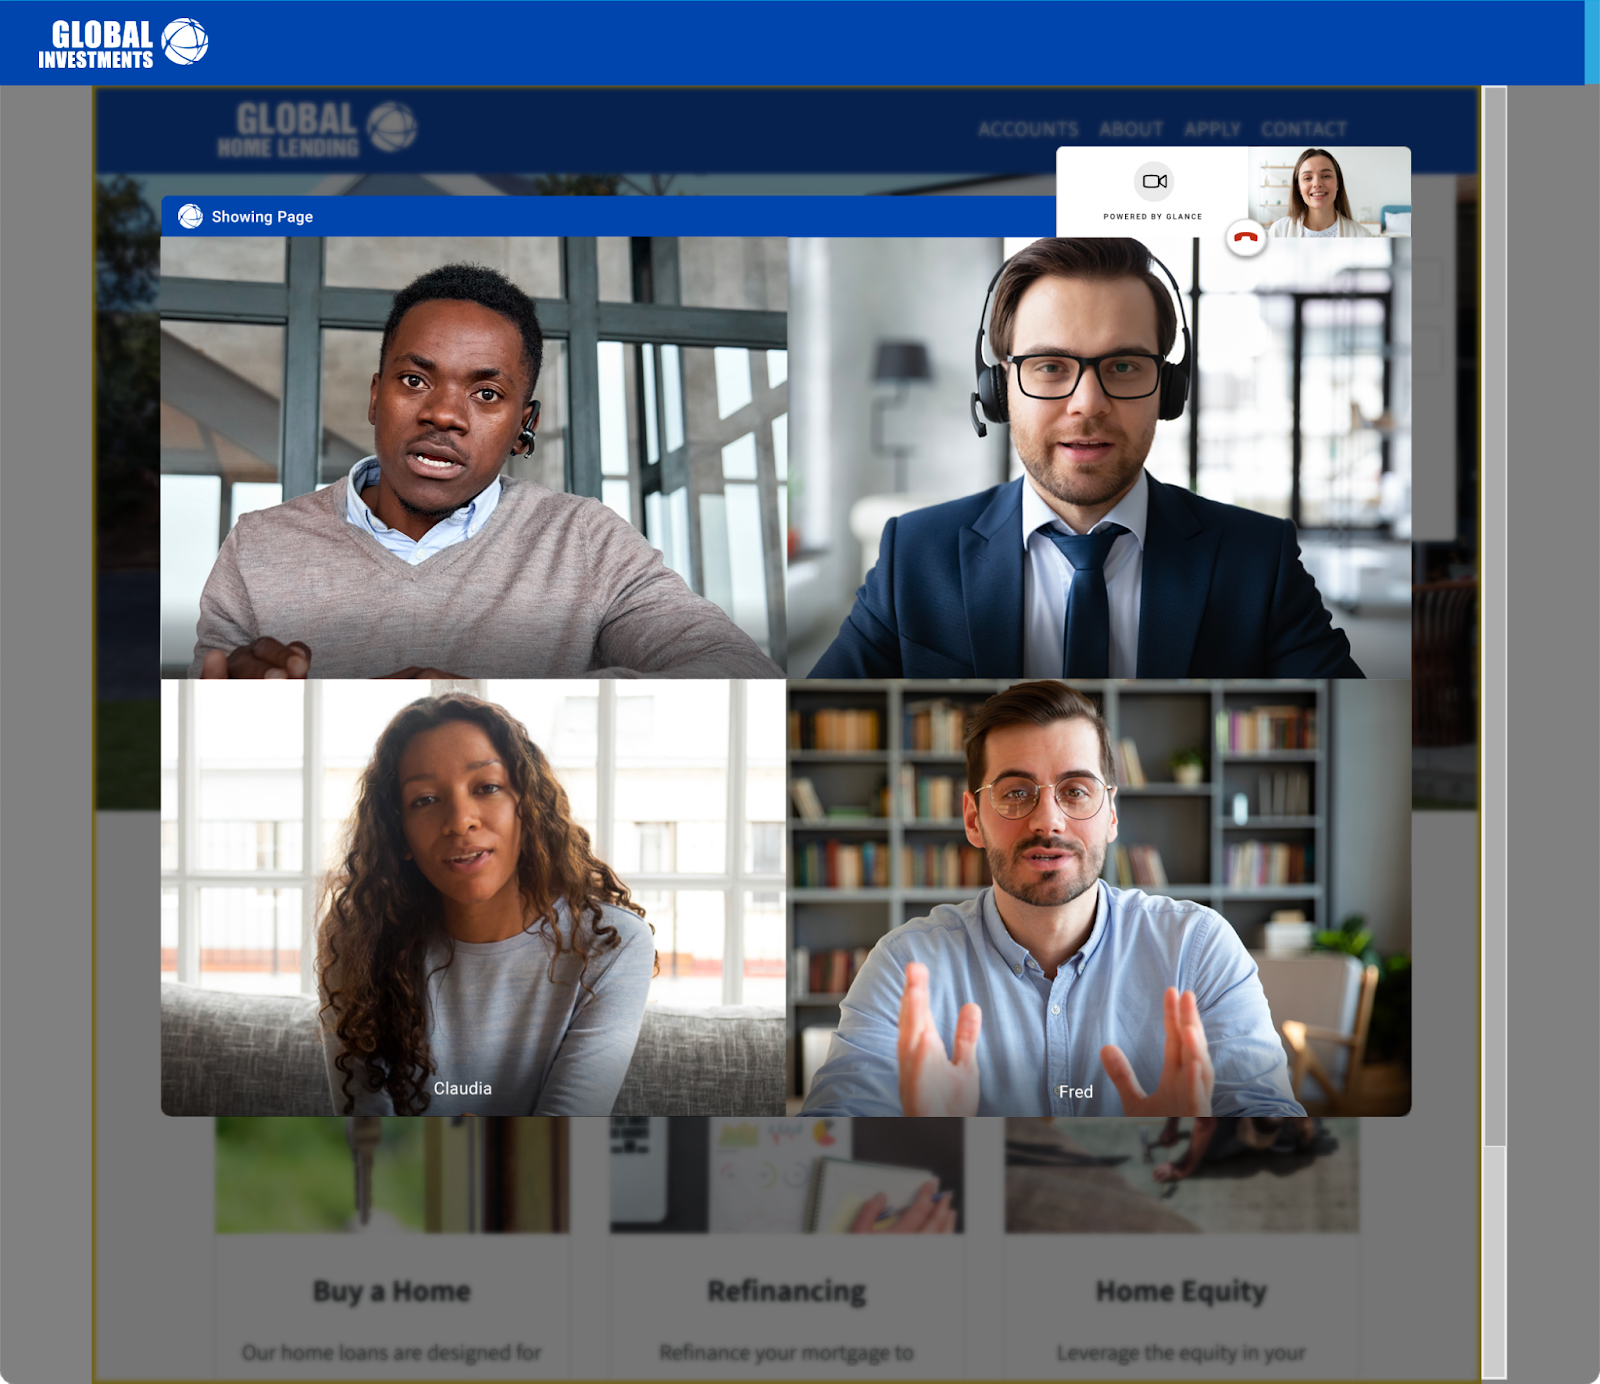 More information on multi-participant video is in this section [here](/users/glance-cobrowse/video/).
## 1-Way Agent Video
**Requires CB 4.5 or higher**
An agent who has connected to a cobrowse session may now start Agent Video. Formerly, Agent Video always required connecting with the Glance desktop client.
Glance 1-Way Agent Video includes specific [system requirements](/users/account-management/system_requirements/) for both an agent and visitor (customer, prospect) to employ the video service.
### Agent Video Features
Glance Agent Video features include the following:
* Leverages onboard or external cameras
* Cloud-based
* Scalable
* No proxies on onsite installs
* Can embed in any app
* [Background Effects](#video-background-effects): blur, color fill, or image fill agent video backgrounds
### Requirements
To use Agent Video, the following are required:
* The Glance Group account must be set to use Cobrowse version 4.5 or above, or if self-hosting scripts, then version 4.5 must be used.
* The agent must have a subscription plan that allows video.
* The setting **Add one way video during screenshare or cobrowse sessions** must be enabled in **Account Management** > **Settings**.
* If User Roles are in use, the Role must have **Use Agent Video during sessions** enabled.
* The agent must have a webcam.
## Video Background Effects
**Requires CB 5.1 or higher**
Administrators can choose background effects for agents during the session for Cobrowse and Mobile SDK sessions.
### Enabling Background Effects
To enable this feature, select the following settings depending on which experience you want agents to have.
See the [System Requirements](/users/account-management/system_requirements/) page for details on what is required to use background effects.
Navigate to **Account Management** > **Settings** > **Manage your video settings**.
1. Under **Background Effects**, choose the background effects you want to be enabled:
* **Enable Agents to use video background effects**: allows the agent to add background effects.
* **Enable visitors and guests to use video background effects**: allows visitors and guests to add background effects.
* **Enable button for agents to toggle background effect on/off**: displays a button for the agent to toggle background effect on/off.
* **Enable button for visitors to toggle background blur on/off**: displays a button for the visitor to toggle background blur on/off.
2. Under **Agent Background Effect,** choose the agent video background experience:
* **Role**: Indicates which role you are updating the background for.
| Effect | Description | Options |
| :--- | :--- | :--- |
| **Blur** | Blurs the agent's background. | None |
| **Image** | Choose an image to display behind the agent. | Select a background that has been uploaded to **Manage Background Images**. |
| **Fill** | Choose a color to display behind the agent. | Enter the hex value for the color you want to use. |
3. **Manage Background Images:** Upload a file to use for the background replacement. You can upload up to five files at a time.
* Glance recommends using an image that is 1280 x 720 pixels
* **Minimum Supported File Size:** 640 x 360
* **Maximum Supported File Size:** 1280 x 720
* **Supported File Types:** JPEG, PNG
* There is a total file size limit of 1 MB.
More information on multi-participant video is in this section [here](/users/glance-cobrowse/video/).
## 1-Way Agent Video
**Requires CB 4.5 or higher**
An agent who has connected to a cobrowse session may now start Agent Video. Formerly, Agent Video always required connecting with the Glance desktop client.
Glance 1-Way Agent Video includes specific [system requirements](/users/account-management/system_requirements/) for both an agent and visitor (customer, prospect) to employ the video service.
### Agent Video Features
Glance Agent Video features include the following:
* Leverages onboard or external cameras
* Cloud-based
* Scalable
* No proxies on onsite installs
* Can embed in any app
* [Background Effects](#video-background-effects): blur, color fill, or image fill agent video backgrounds
### Requirements
To use Agent Video, the following are required:
* The Glance Group account must be set to use Cobrowse version 4.5 or above, or if self-hosting scripts, then version 4.5 must be used.
* The agent must have a subscription plan that allows video.
* The setting **Add one way video during screenshare or cobrowse sessions** must be enabled in **Account Management** > **Settings**.
* If User Roles are in use, the Role must have **Use Agent Video during sessions** enabled.
* The agent must have a webcam.
## Video Background Effects
**Requires CB 5.1 or higher**
Administrators can choose background effects for agents during the session for Cobrowse and Mobile SDK sessions.
### Enabling Background Effects
To enable this feature, select the following settings depending on which experience you want agents to have.
See the [System Requirements](/users/account-management/system_requirements/) page for details on what is required to use background effects.
Navigate to **Account Management** > **Settings** > **Manage your video settings**.
1. Under **Background Effects**, choose the background effects you want to be enabled:
* **Enable Agents to use video background effects**: allows the agent to add background effects.
* **Enable visitors and guests to use video background effects**: allows visitors and guests to add background effects.
* **Enable button for agents to toggle background effect on/off**: displays a button for the agent to toggle background effect on/off.
* **Enable button for visitors to toggle background blur on/off**: displays a button for the visitor to toggle background blur on/off.
2. Under **Agent Background Effect,** choose the agent video background experience:
* **Role**: Indicates which role you are updating the background for.
| Effect | Description | Options |
| :--- | :--- | :--- |
| **Blur** | Blurs the agent's background. | None |
| **Image** | Choose an image to display behind the agent. | Select a background that has been uploaded to **Manage Background Images**. |
| **Fill** | Choose a color to display behind the agent. | Enter the hex value for the color you want to use. |
3. **Manage Background Images:** Upload a file to use for the background replacement. You can upload up to five files at a time.
* Glance recommends using an image that is 1280 x 720 pixels
* **Minimum Supported File Size:** 640 x 360
* **Maximum Supported File Size:** 1280 x 720
* **Supported File Types:** JPEG, PNG
* There is a total file size limit of 1 MB.
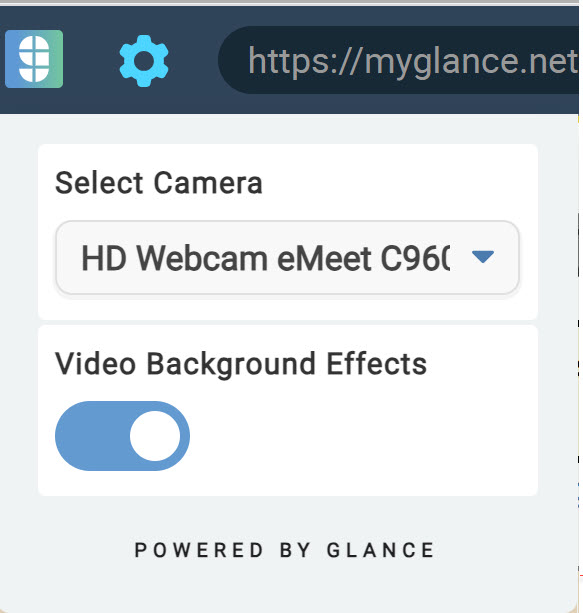 Visitors and guests can toggle their blur off from the blur icon while Cobrowsing on a mobile device or computer.
 ### Best Practices for Agent Background Selection
* In general, light replacement backgrounds work better because the algorithm attempts to 'feather' the edging which will always look more distinct if there is a big disparity between the colors.
* A detailed background (picture of an office/branch) may work better than a solid color.
* Make sure the agent has proper lighting and is centered in view as the background detection algorithm is trained for the human to be in the center.
* Whenever possible, minimize wide variations in color in the agent's physical background (e.g., columns that are white versus black).
### Usage
The **g** icon is available from the left side of the agent control bar. This menu has commands including requesting remote control. Not all accounts are configured to see this menu.
### Best Practices for Agent Background Selection
* In general, light replacement backgrounds work better because the algorithm attempts to 'feather' the edging which will always look more distinct if there is a big disparity between the colors.
* A detailed background (picture of an office/branch) may work better than a solid color.
* Make sure the agent has proper lighting and is centered in view as the background detection algorithm is trained for the human to be in the center.
* Whenever possible, minimize wide variations in color in the agent's physical background (e.g., columns that are white versus black).
### Usage
The **g** icon is available from the left side of the agent control bar. This menu has commands including requesting remote control. Not all accounts are configured to see this menu.
 If you meet the requirements listed above, the agent control bar contains the video button.
To use agent video:
1. Click the video button on the agent control bar.
2. The first time you use video, your browser presents a warning. Click **Allow**.
3. When agent video is active, the video button glows white.
### Integration
When connecting to Cobrowse from Salesforce using Glance for Salesforce, if the agent has the **Glance - AgentVideo** Custom Permission then video will automatically start.
Other agent software integrations can connect to Cobrowse with a URL like:
```text
[https://www.glance.net/agentjoin/AgentView.aspx?sessionkey=](https://www.glance.net/agentjoin/AgentView.aspx?sessionkey=)
If you meet the requirements listed above, the agent control bar contains the video button.
To use agent video:
1. Click the video button on the agent control bar.
2. The first time you use video, your browser presents a warning. Click **Allow**.
3. When agent video is active, the video button glows white.
### Integration
When connecting to Cobrowse from Salesforce using Glance for Salesforce, if the agent has the **Glance - AgentVideo** Custom Permission then video will automatically start.
Other agent software integrations can connect to Cobrowse with a URL like:
```text
[https://www.glance.net/agentjoin/AgentView.aspx?sessionkey=](https://www.glance.net/agentjoin/AgentView.aspx?sessionkey=)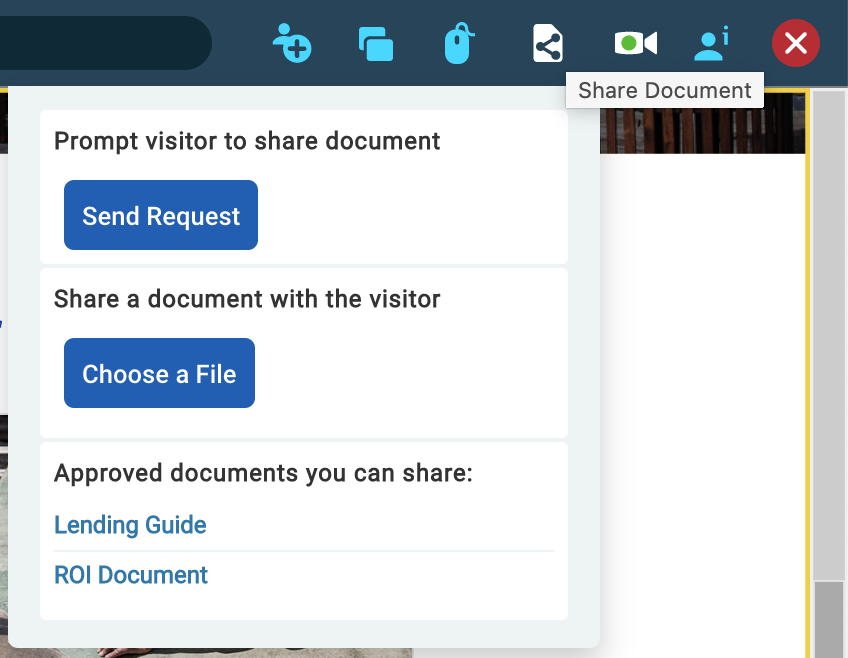 2. The agent is prompted to choose a file from their local computer > **Open**.
3. The agent gets the opportunity to preview the file, then clicks **Share**.
2. The agent is prompted to choose a file from their local computer > **Open**.
3. The agent gets the opportunity to preview the file, then clicks **Share**.
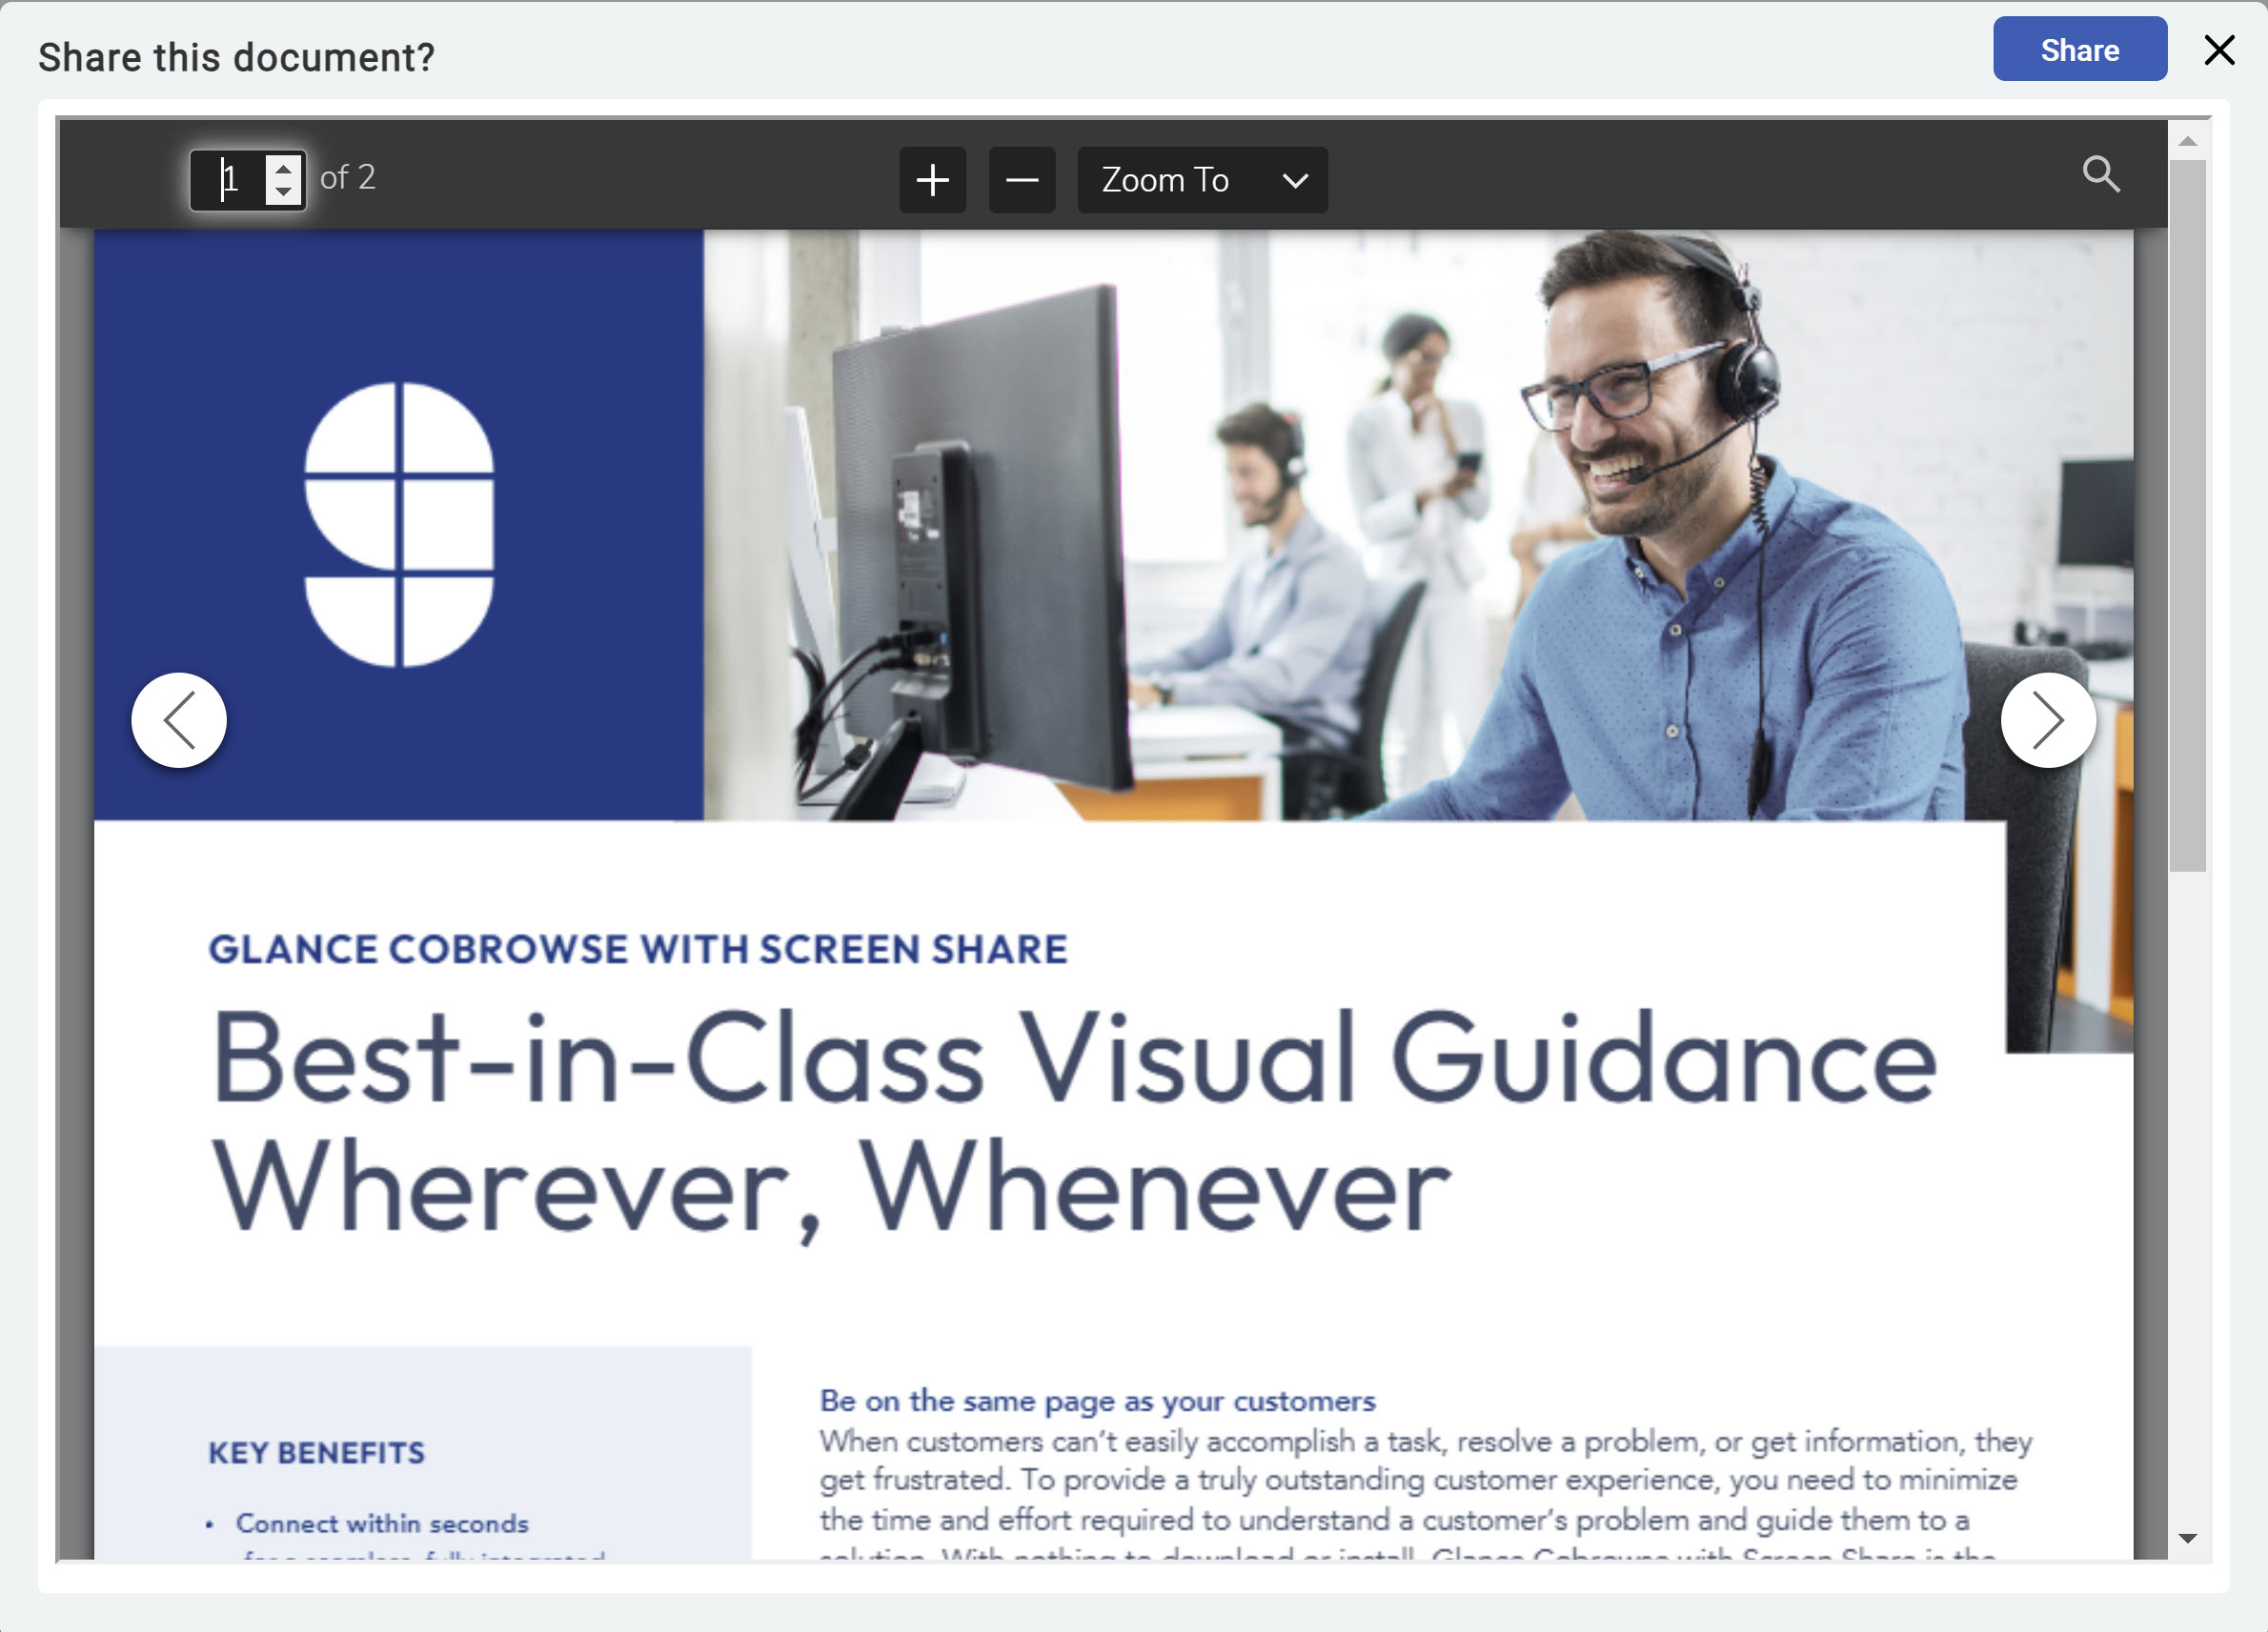 4. The agent is cobrowsing the document with the visitor.
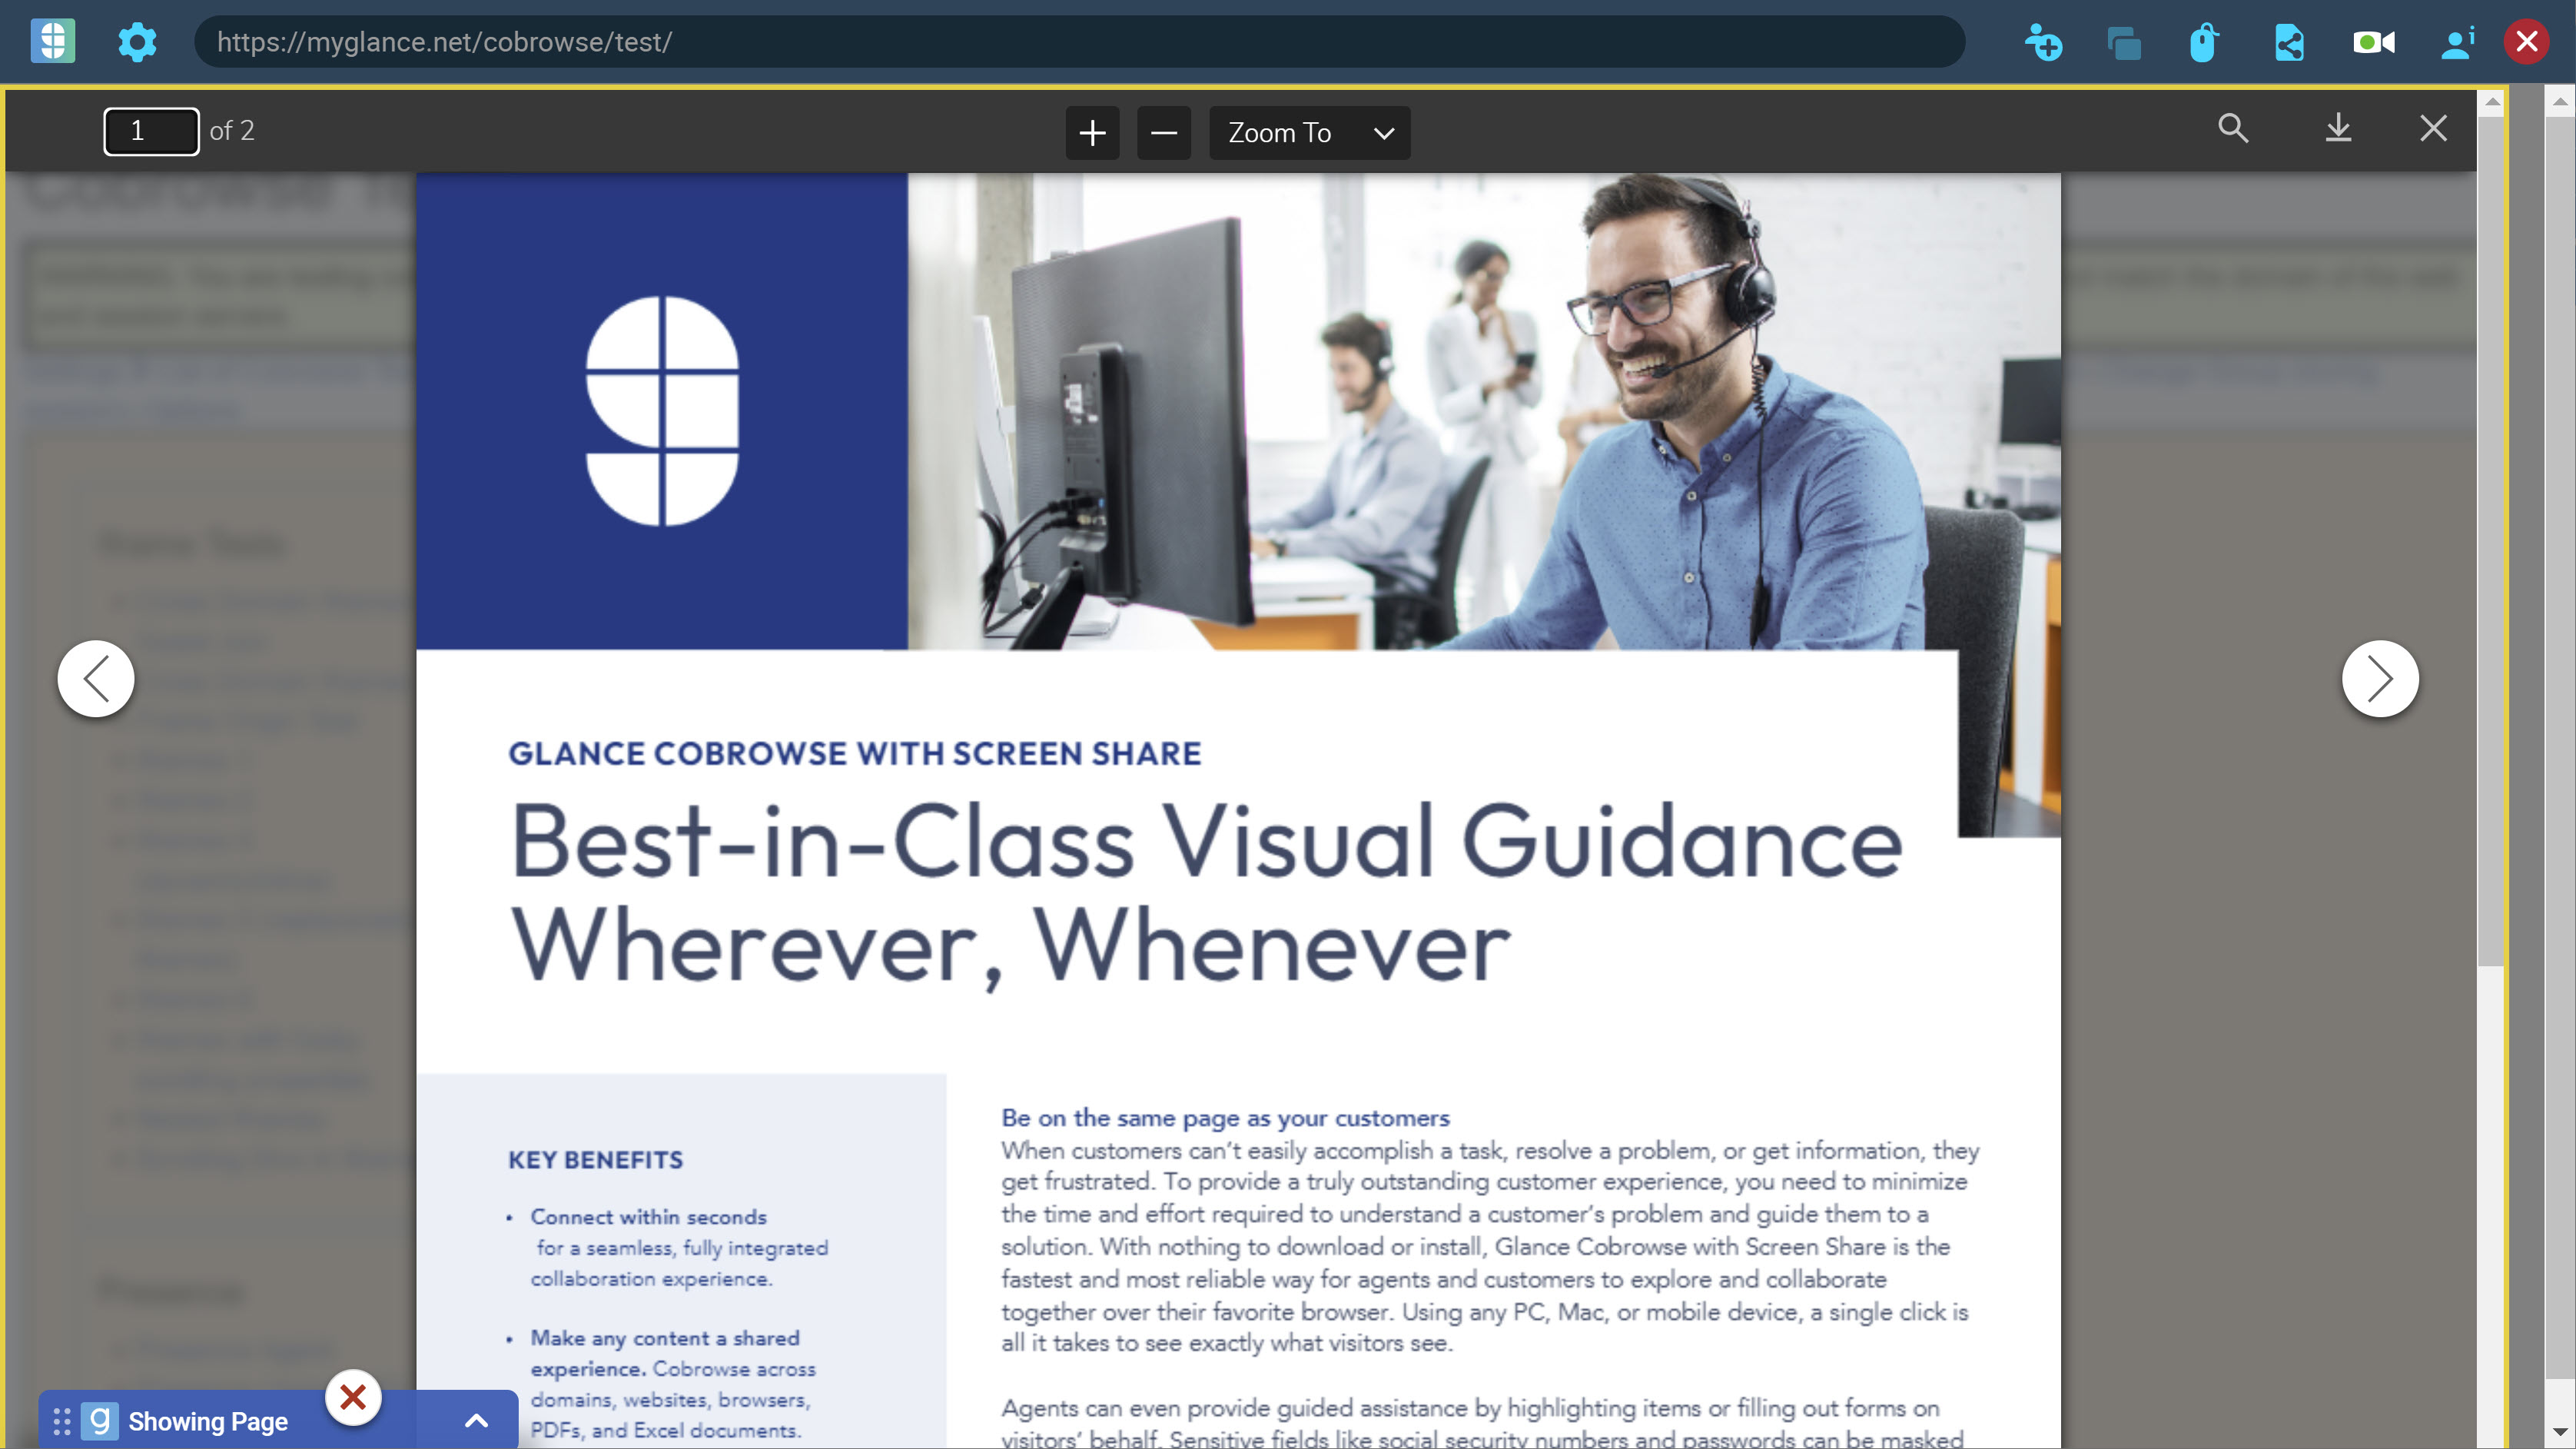 5. Click the magnifying glass to search for text within the document.
 6. The visitor can download the document to their local drive if this function is enabled.
7. Click the **X** in the top-right corner to close the document.
## Visitor-Initiated Sharing
If the visitor would like to share a document with the agent during a session:
1. The agent clicks the document share icon > **Send Request**.
2. The visitor accepts the request.
6. The visitor can download the document to their local drive if this function is enabled.
7. Click the **X** in the top-right corner to close the document.
## Visitor-Initiated Sharing
If the visitor would like to share a document with the agent during a session:
1. The agent clicks the document share icon > **Send Request**.
2. The visitor accepts the request.
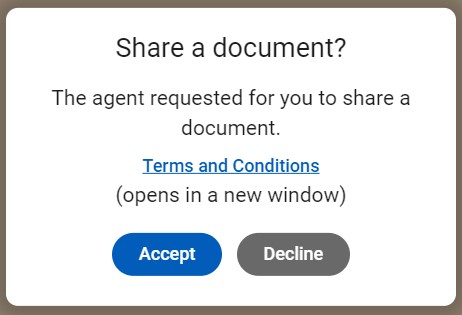 3. The visitor is prompted to drag or open a file from their local computer.
4. The visitor gets the opportunity to preview the file, then clicks **Share**.
5. The agent can cobrowse the document with the visitor.
6. Click the magnifying glass to search for text within the document.
7. The agent can download the document to their local drive if this function is enabled.
8. Click the **X** in the top-right corner to close the document.
## Document Sharing Links
Glance offers the ability to add links to approved PDF, CSV, and Excel documents that agents can share in a session. Once you add documents in the **Account Management** site, the document is shown in the **Document Sharing** modal in the Agent Viewer.
You can upload a total of 20 links that reference PDF/CSV/XLS files.
**Before You Begin**
Configure the CORS headers on your resources to allow requests from [https://www.glance.net](https://www.glance.net/) during the session.
To add document sharing links:
1. From **Account Management** > **Settings** > **Manage your cobrowse settings**, scroll to the **Document Sharing Links for Agents** section.
3. The visitor is prompted to drag or open a file from their local computer.
4. The visitor gets the opportunity to preview the file, then clicks **Share**.
5. The agent can cobrowse the document with the visitor.
6. Click the magnifying glass to search for text within the document.
7. The agent can download the document to their local drive if this function is enabled.
8. Click the **X** in the top-right corner to close the document.
## Document Sharing Links
Glance offers the ability to add links to approved PDF, CSV, and Excel documents that agents can share in a session. Once you add documents in the **Account Management** site, the document is shown in the **Document Sharing** modal in the Agent Viewer.
You can upload a total of 20 links that reference PDF/CSV/XLS files.
**Before You Begin**
Configure the CORS headers on your resources to allow requests from [https://www.glance.net](https://www.glance.net/) during the session.
To add document sharing links:
1. From **Account Management** > **Settings** > **Manage your cobrowse settings**, scroll to the **Document Sharing Links for Agents** section.
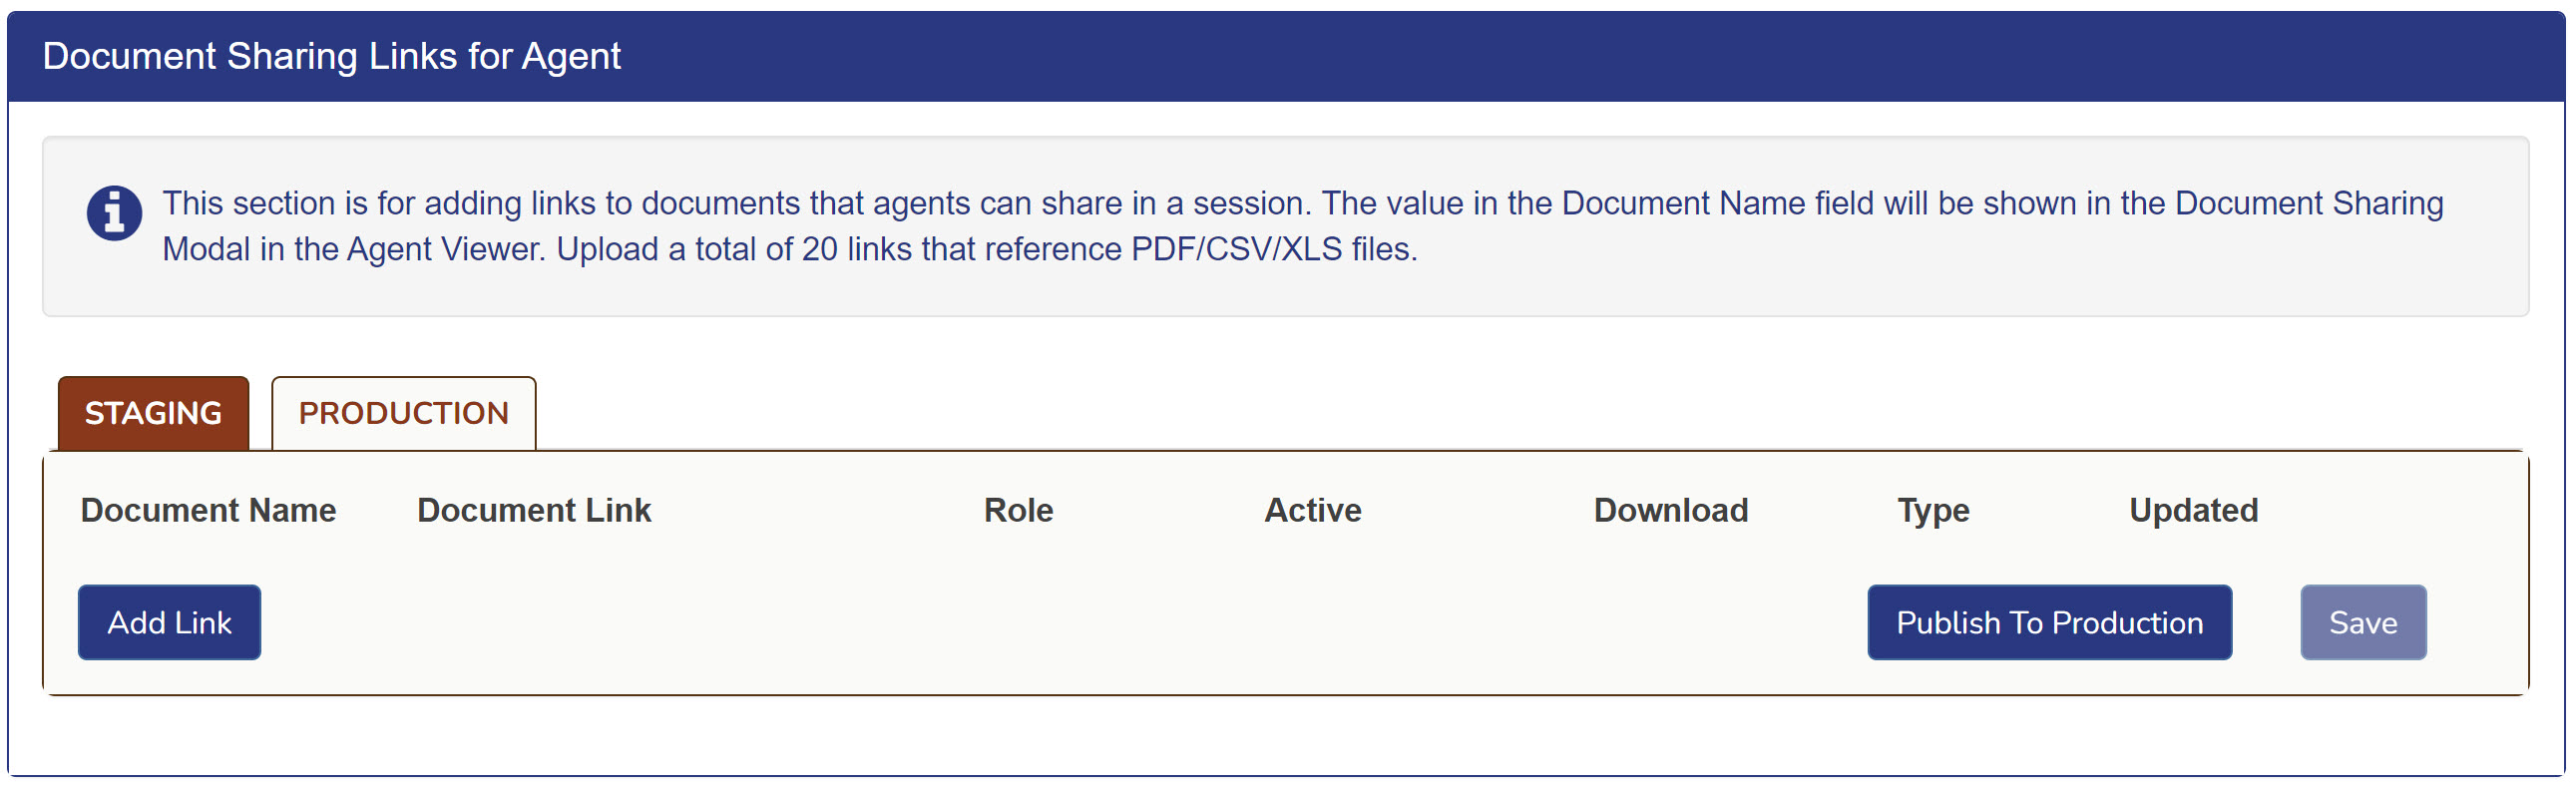 2. For **Document Name**, enter the name you want to display for the link in the agent viewer.
3. For **Link**, add a link to the location of the file.
4. For **Role**, select the role that needs to access the document.
5. Select the **Active** checkbox to make the file active for the agent.
6. Select the **Download** checkbox to make the document downloadable.
7. For **Type**, select the type of document: PDF, or Excel/XLS.
8. Click **Save** to add the link.
9. Once you are satisfied with your changes in Staging, click **Publish to Production**.
## Using Document Sharing Links
If document sharing has been configured to **Active** in **Account Management**:
1. From the document share icon > Select a file from the list of **Approved documents you can share**.
2. For **Document Name**, enter the name you want to display for the link in the agent viewer.
3. For **Link**, add a link to the location of the file.
4. For **Role**, select the role that needs to access the document.
5. Select the **Active** checkbox to make the file active for the agent.
6. Select the **Download** checkbox to make the document downloadable.
7. For **Type**, select the type of document: PDF, or Excel/XLS.
8. Click **Save** to add the link.
9. Once you are satisfied with your changes in Staging, click **Publish to Production**.
## Using Document Sharing Links
If document sharing has been configured to **Active** in **Account Management**:
1. From the document share icon > Select a file from the list of **Approved documents you can share**.
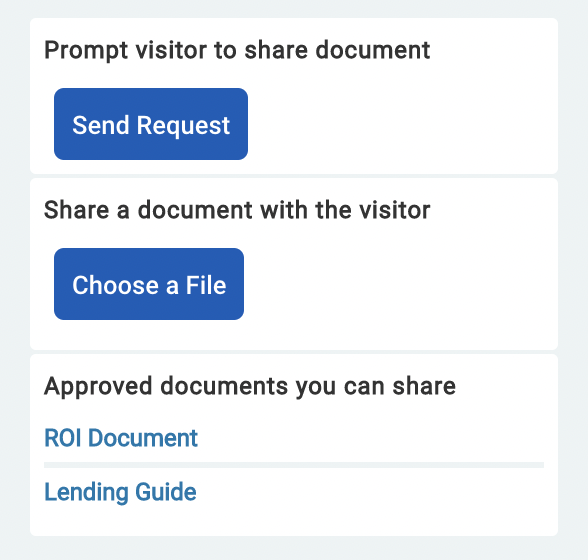 2. The agent gets the opportunity to preview the file, then clicks **Share**.
3. The agent and visitor can cobrowse the document together.
4. If this capability is enabled, the visitor can download the document to their local drive.
5. Click the **X** in the top-right corner to close the document.
## Events
For events related to document sharing, see [Cobrowse Visitor Events](/developer/legacy_api/visitor_agent/visitor_event/#document-sharing-events) and [Browser Agent API Events](/developer/sdk/browseragent/reference/#agent-events).
=================================================================
FILE: /users/glance-cobrowse/features/excel_cobrowse
=================================================================
## Overview
2. The agent gets the opportunity to preview the file, then clicks **Share**.
3. The agent and visitor can cobrowse the document together.
4. If this capability is enabled, the visitor can download the document to their local drive.
5. Click the **X** in the top-right corner to close the document.
## Events
For events related to document sharing, see [Cobrowse Visitor Events](/developer/legacy_api/visitor_agent/visitor_event/#document-sharing-events) and [Browser Agent API Events](/developer/sdk/browseragent/reference/#agent-events).
=================================================================
FILE: /users/glance-cobrowse/features/excel_cobrowse
=================================================================
## Overview
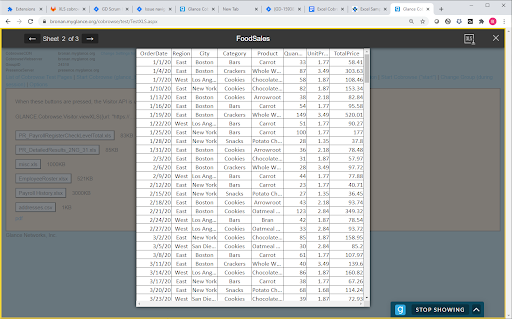
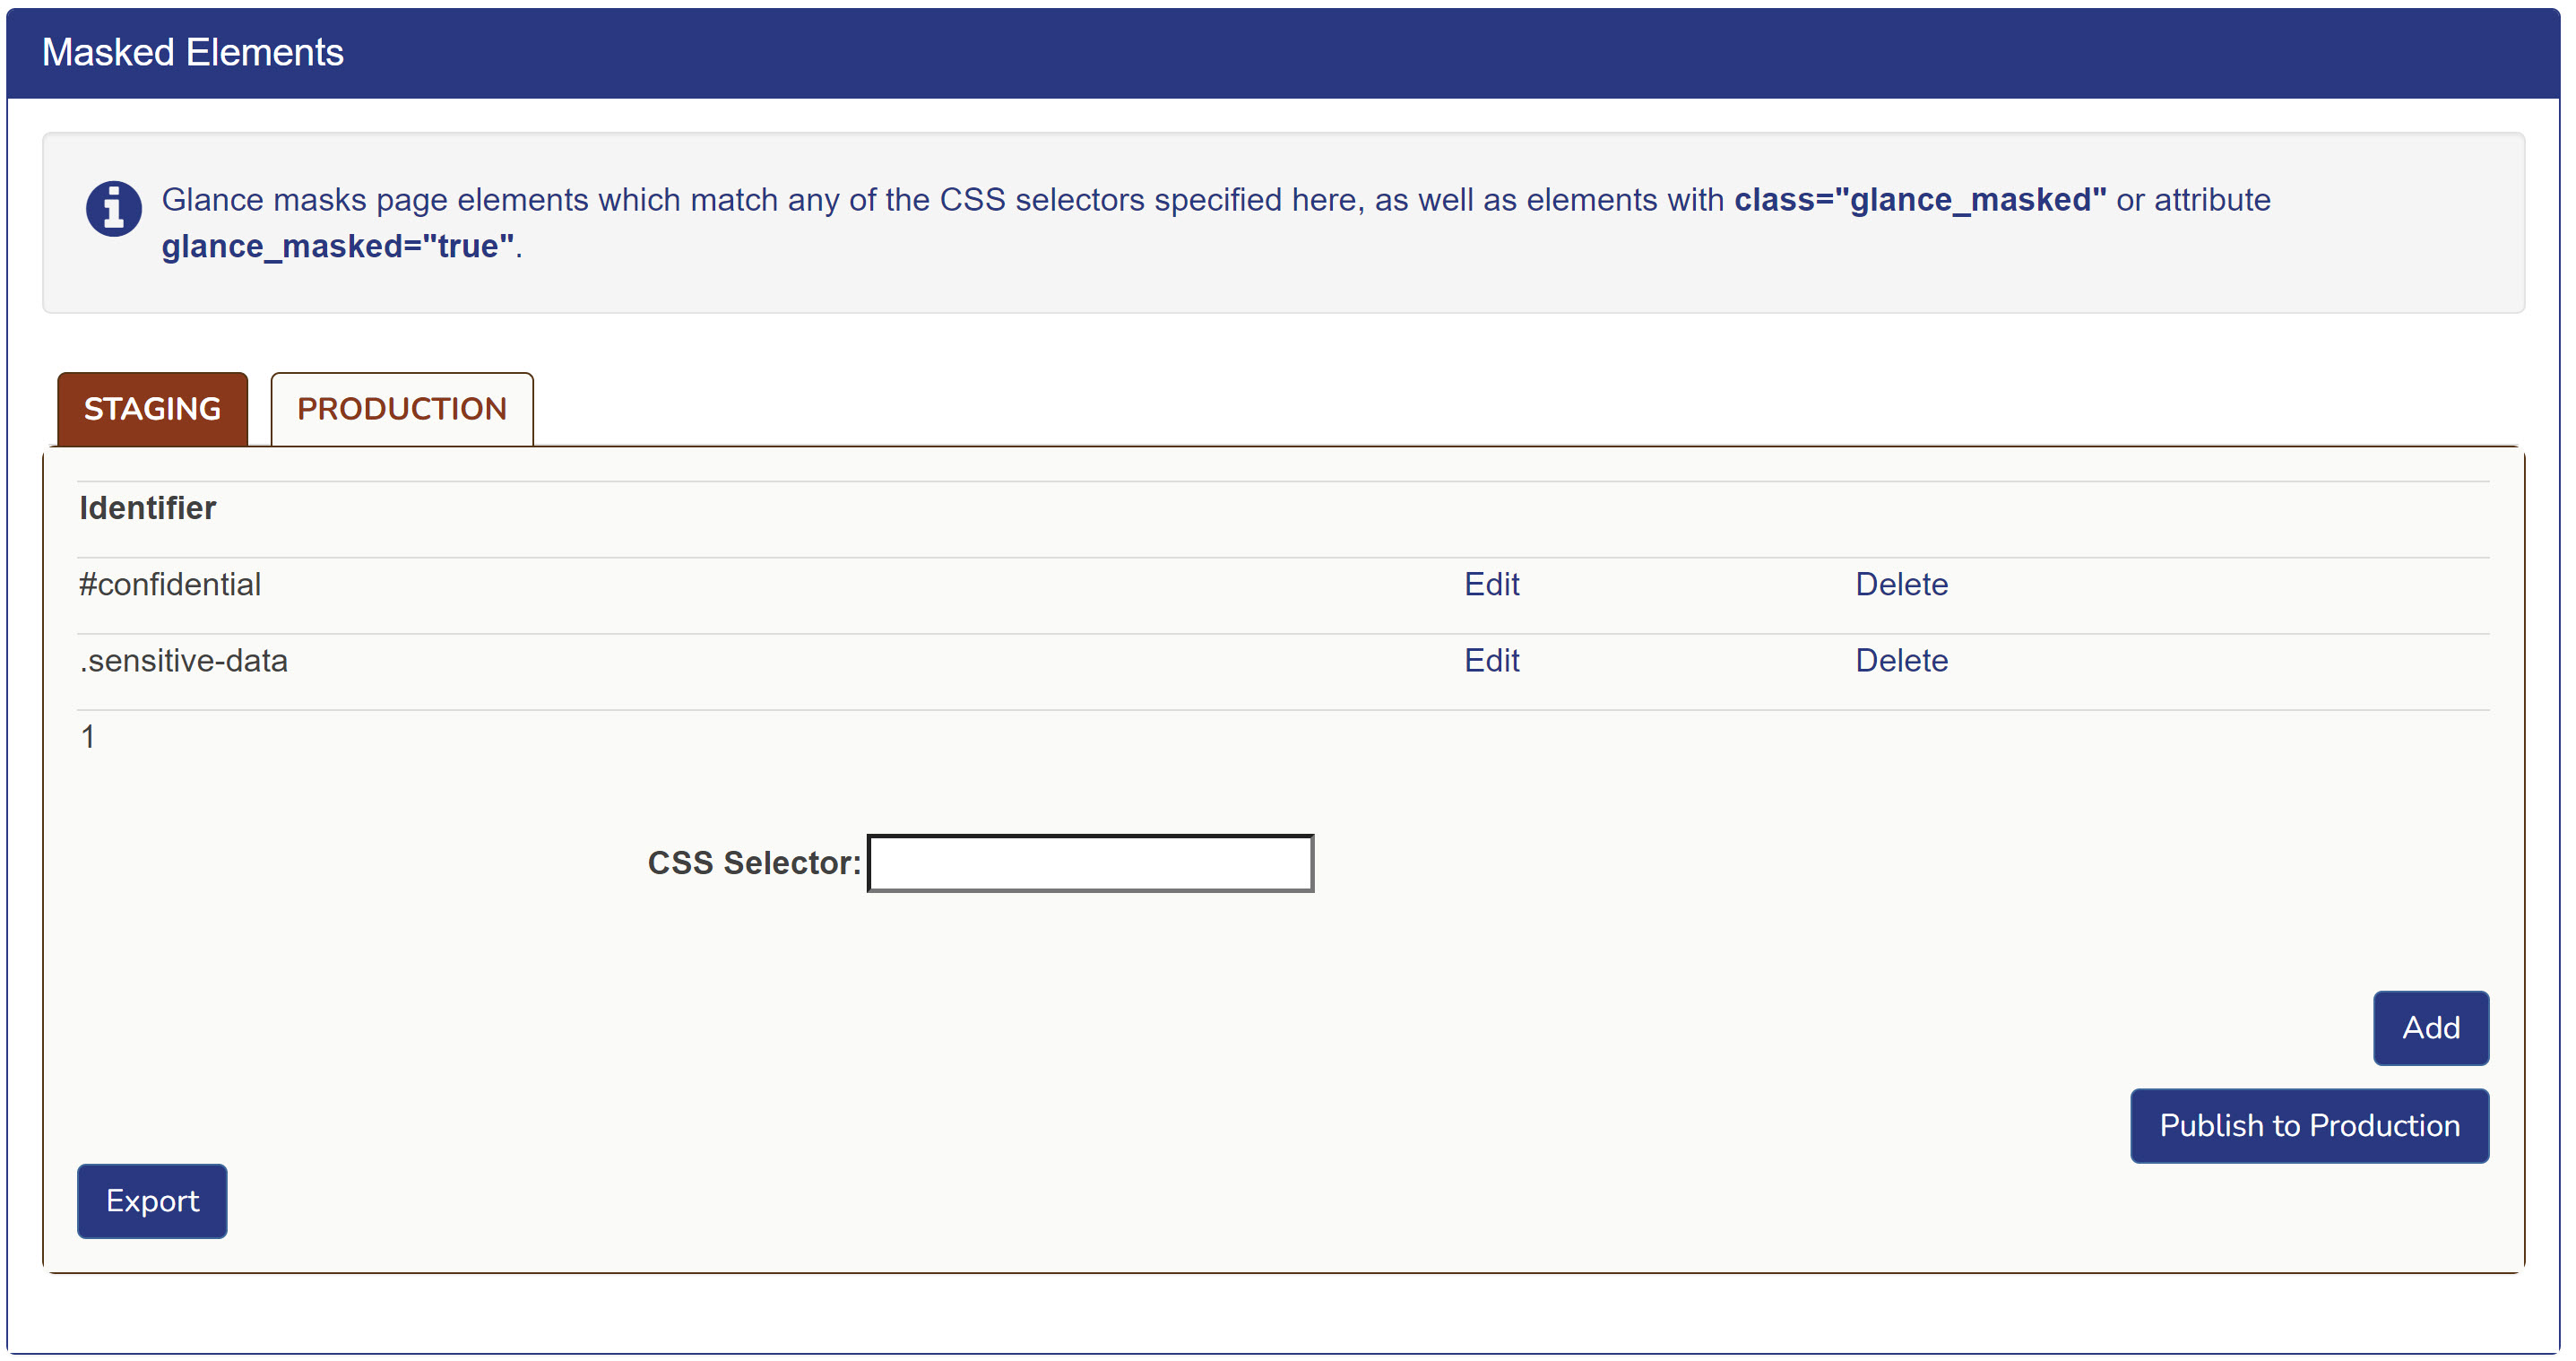
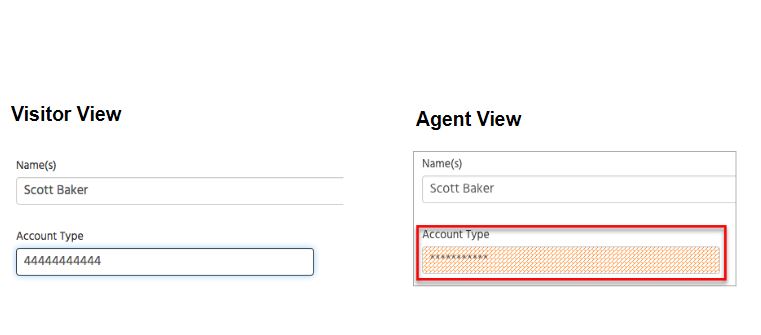
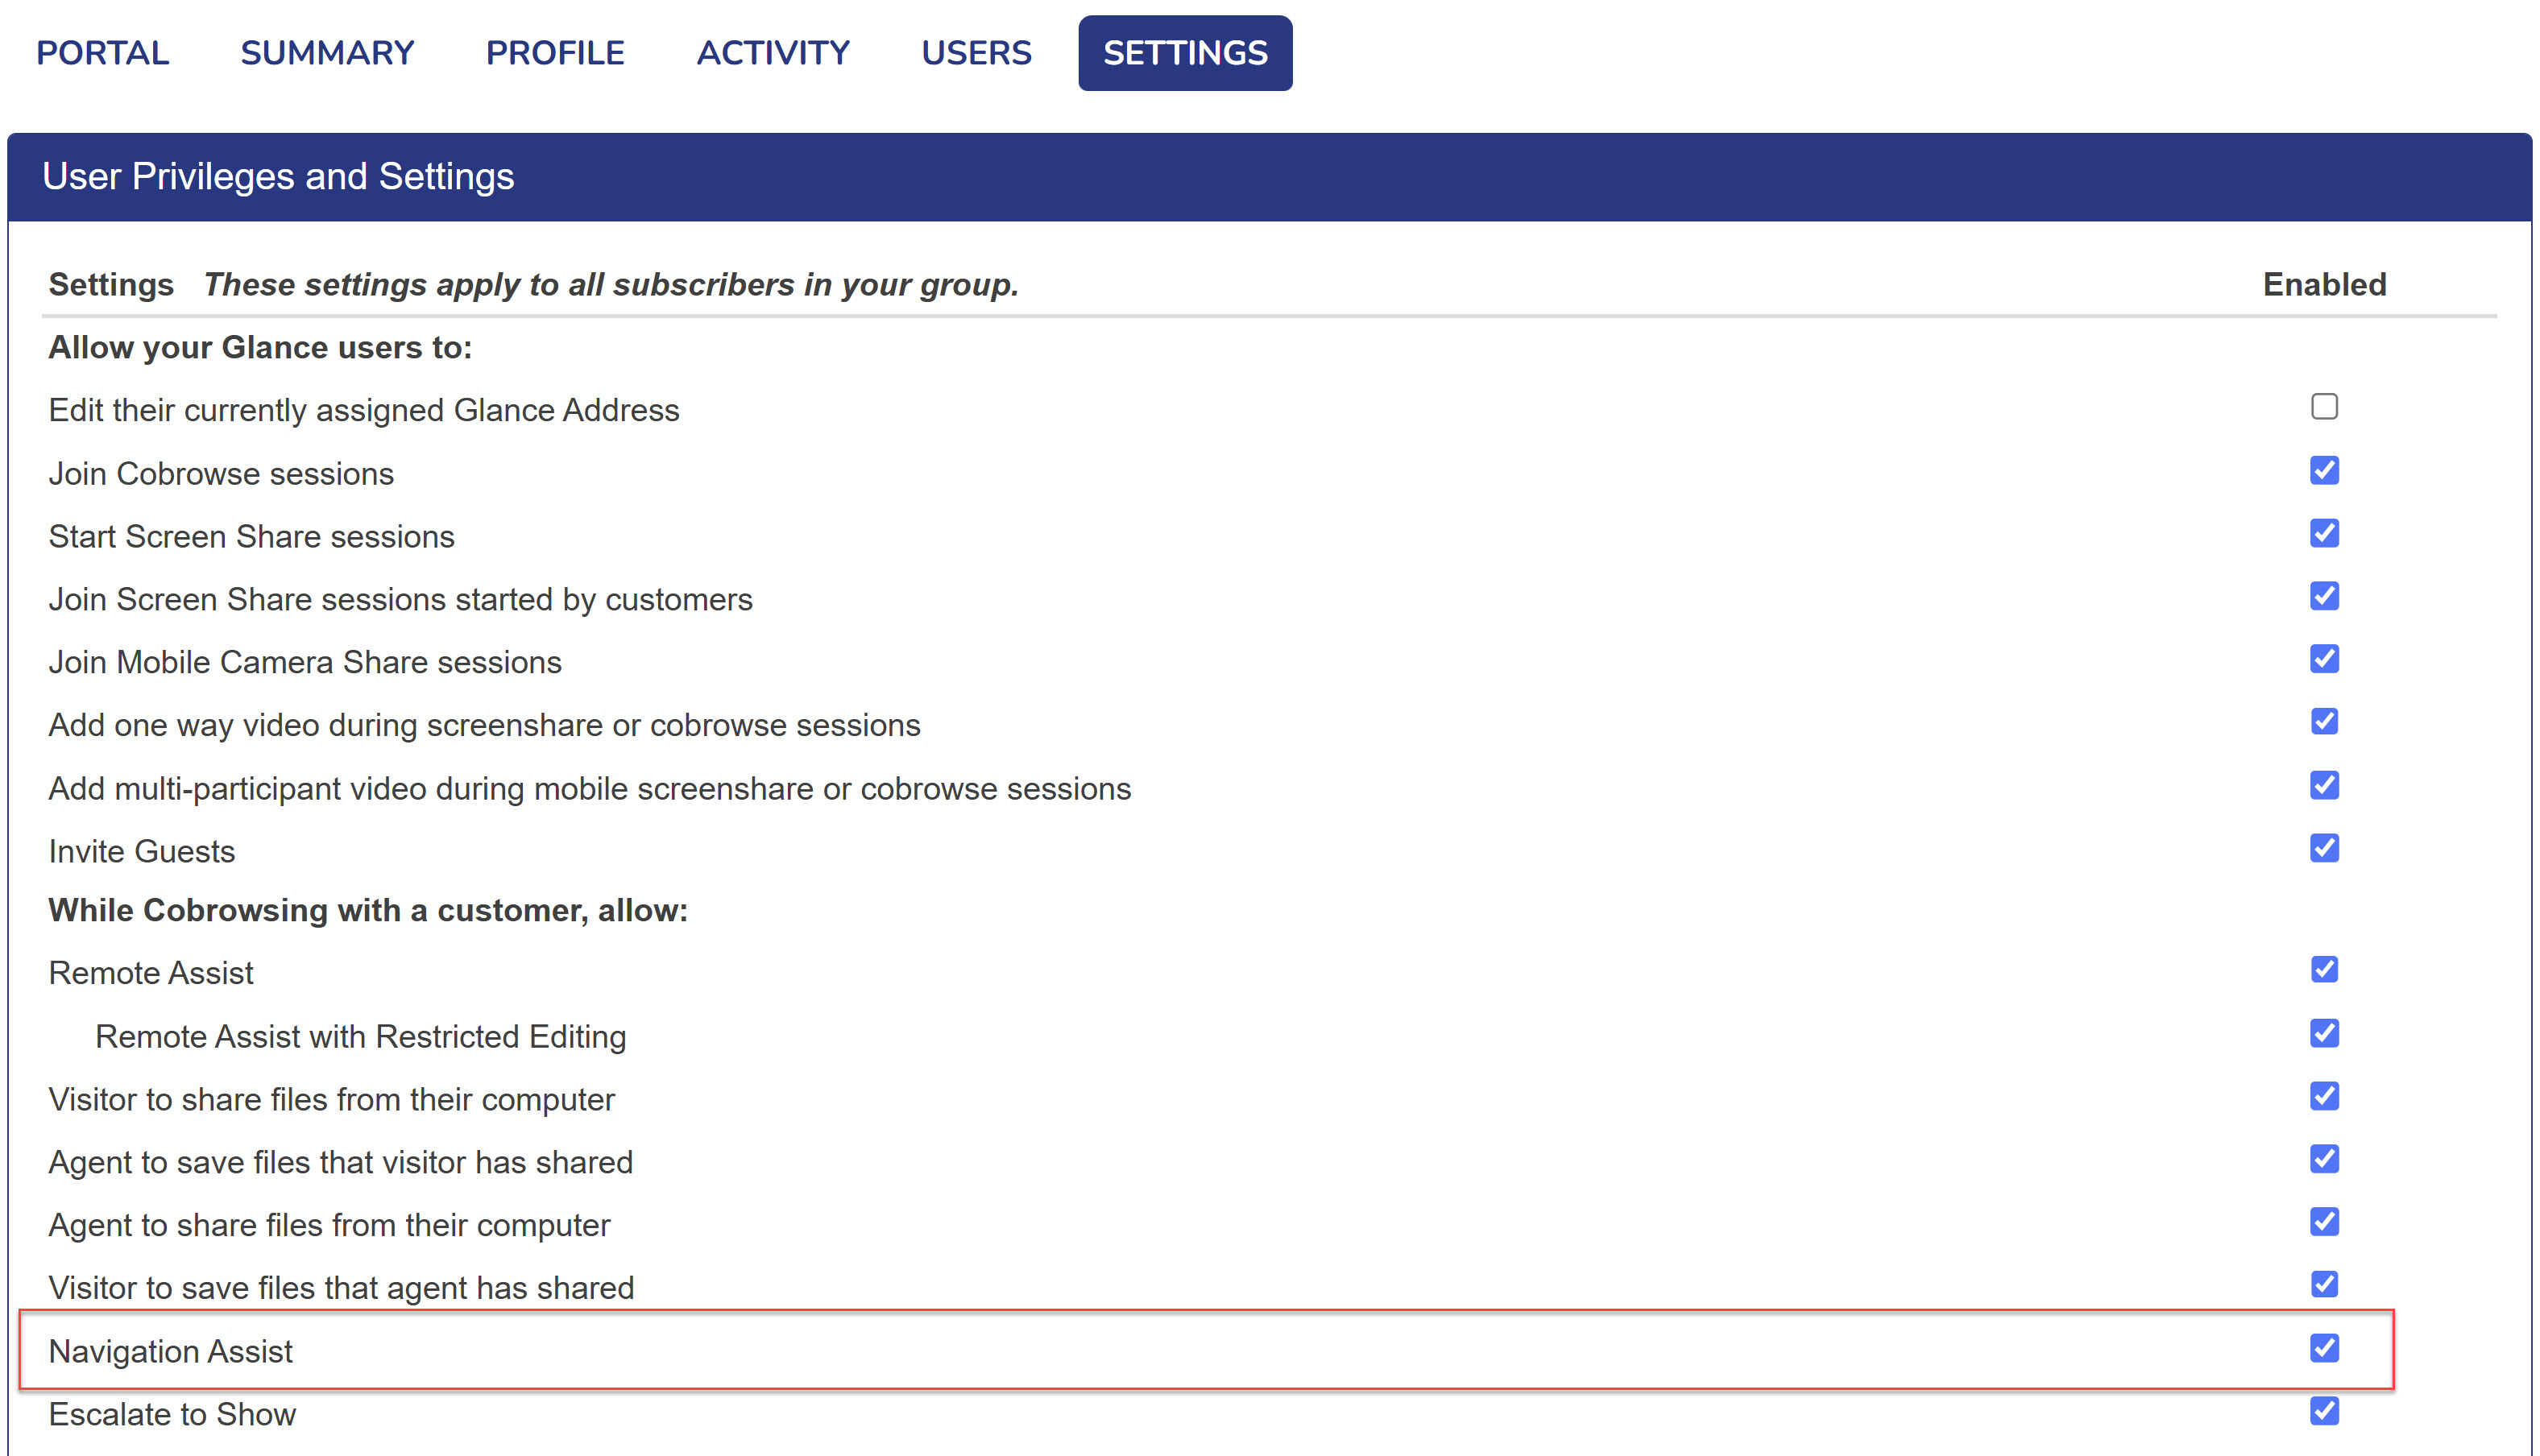
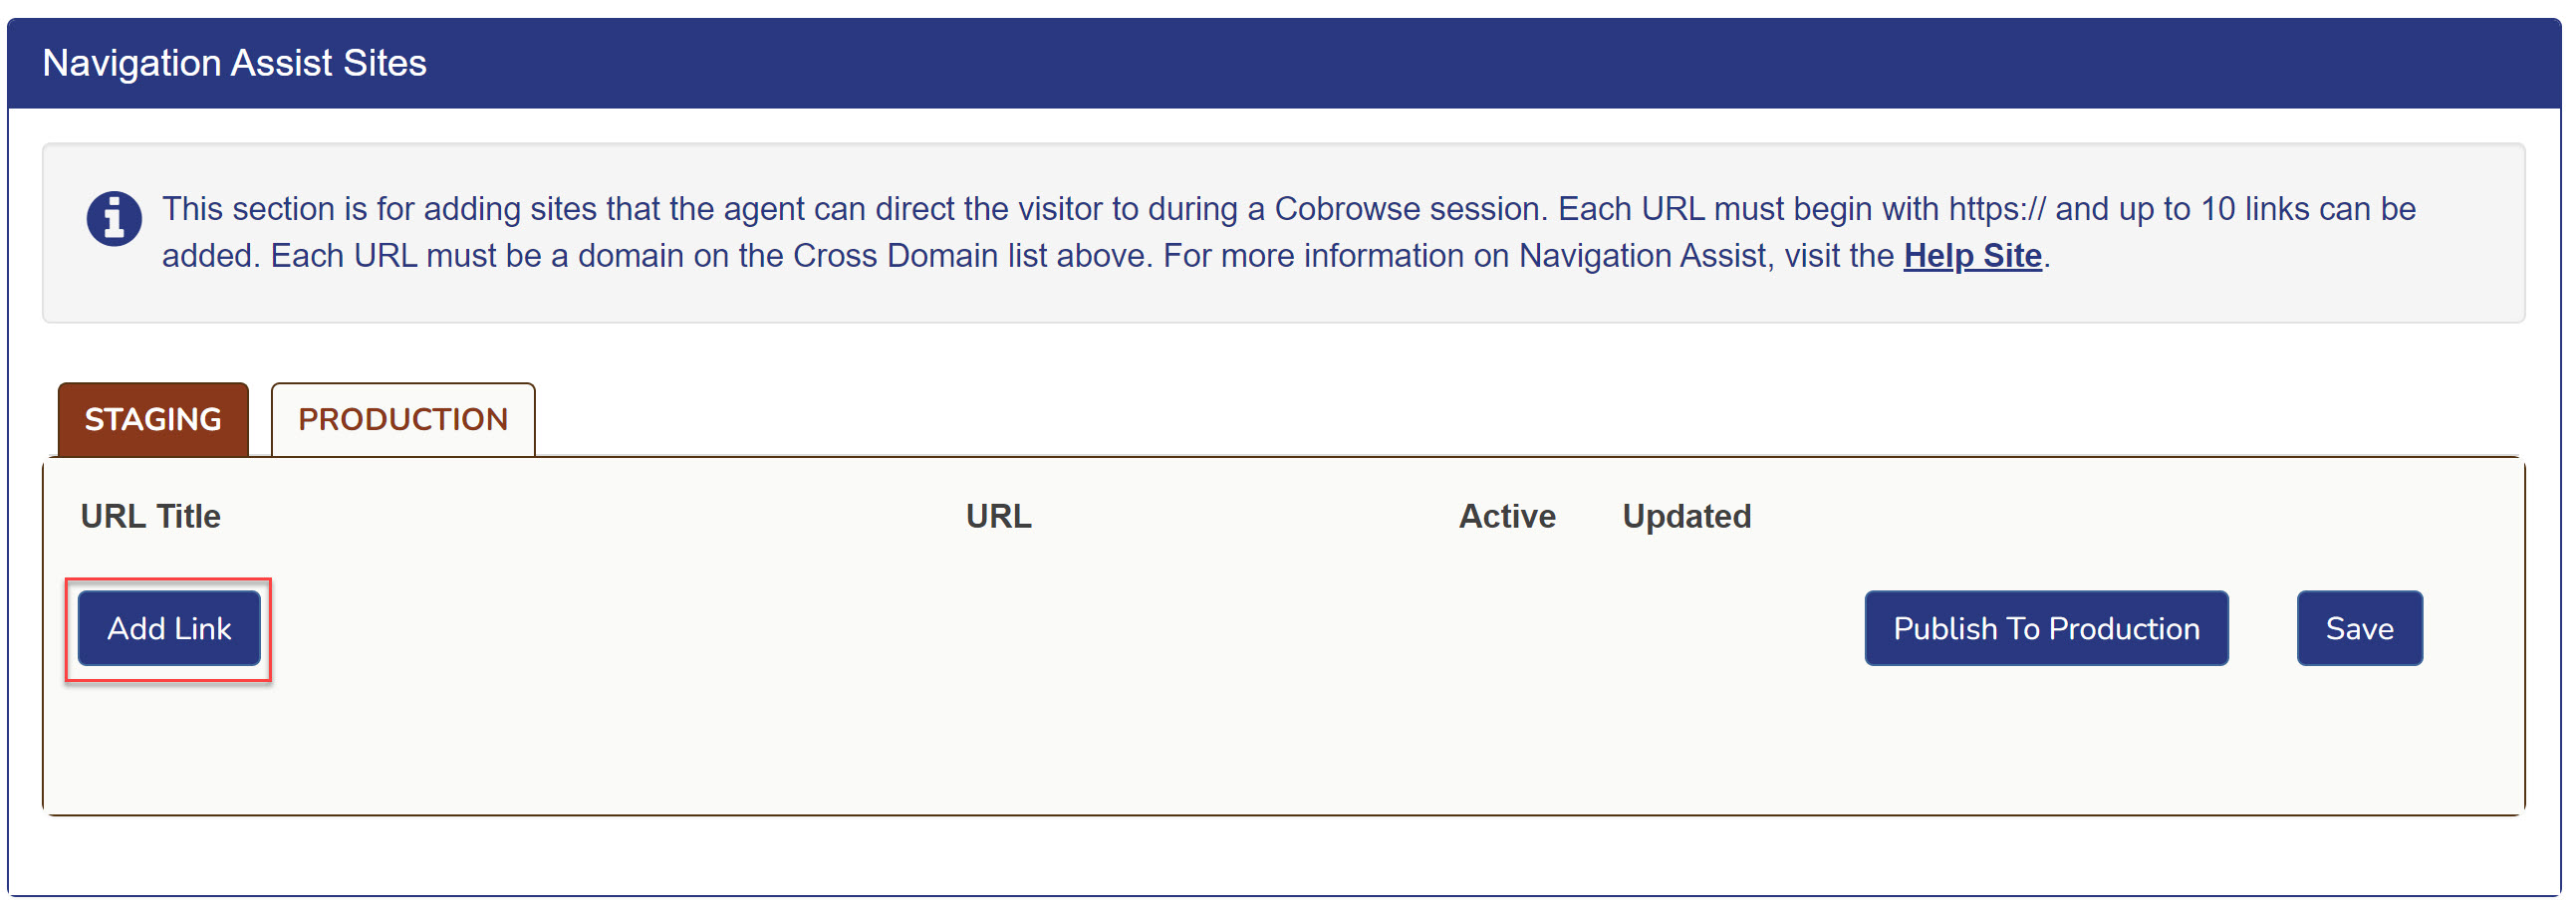 5. Input a **URL Title**, the **URL** of the website, and select the **Active** checkbox.
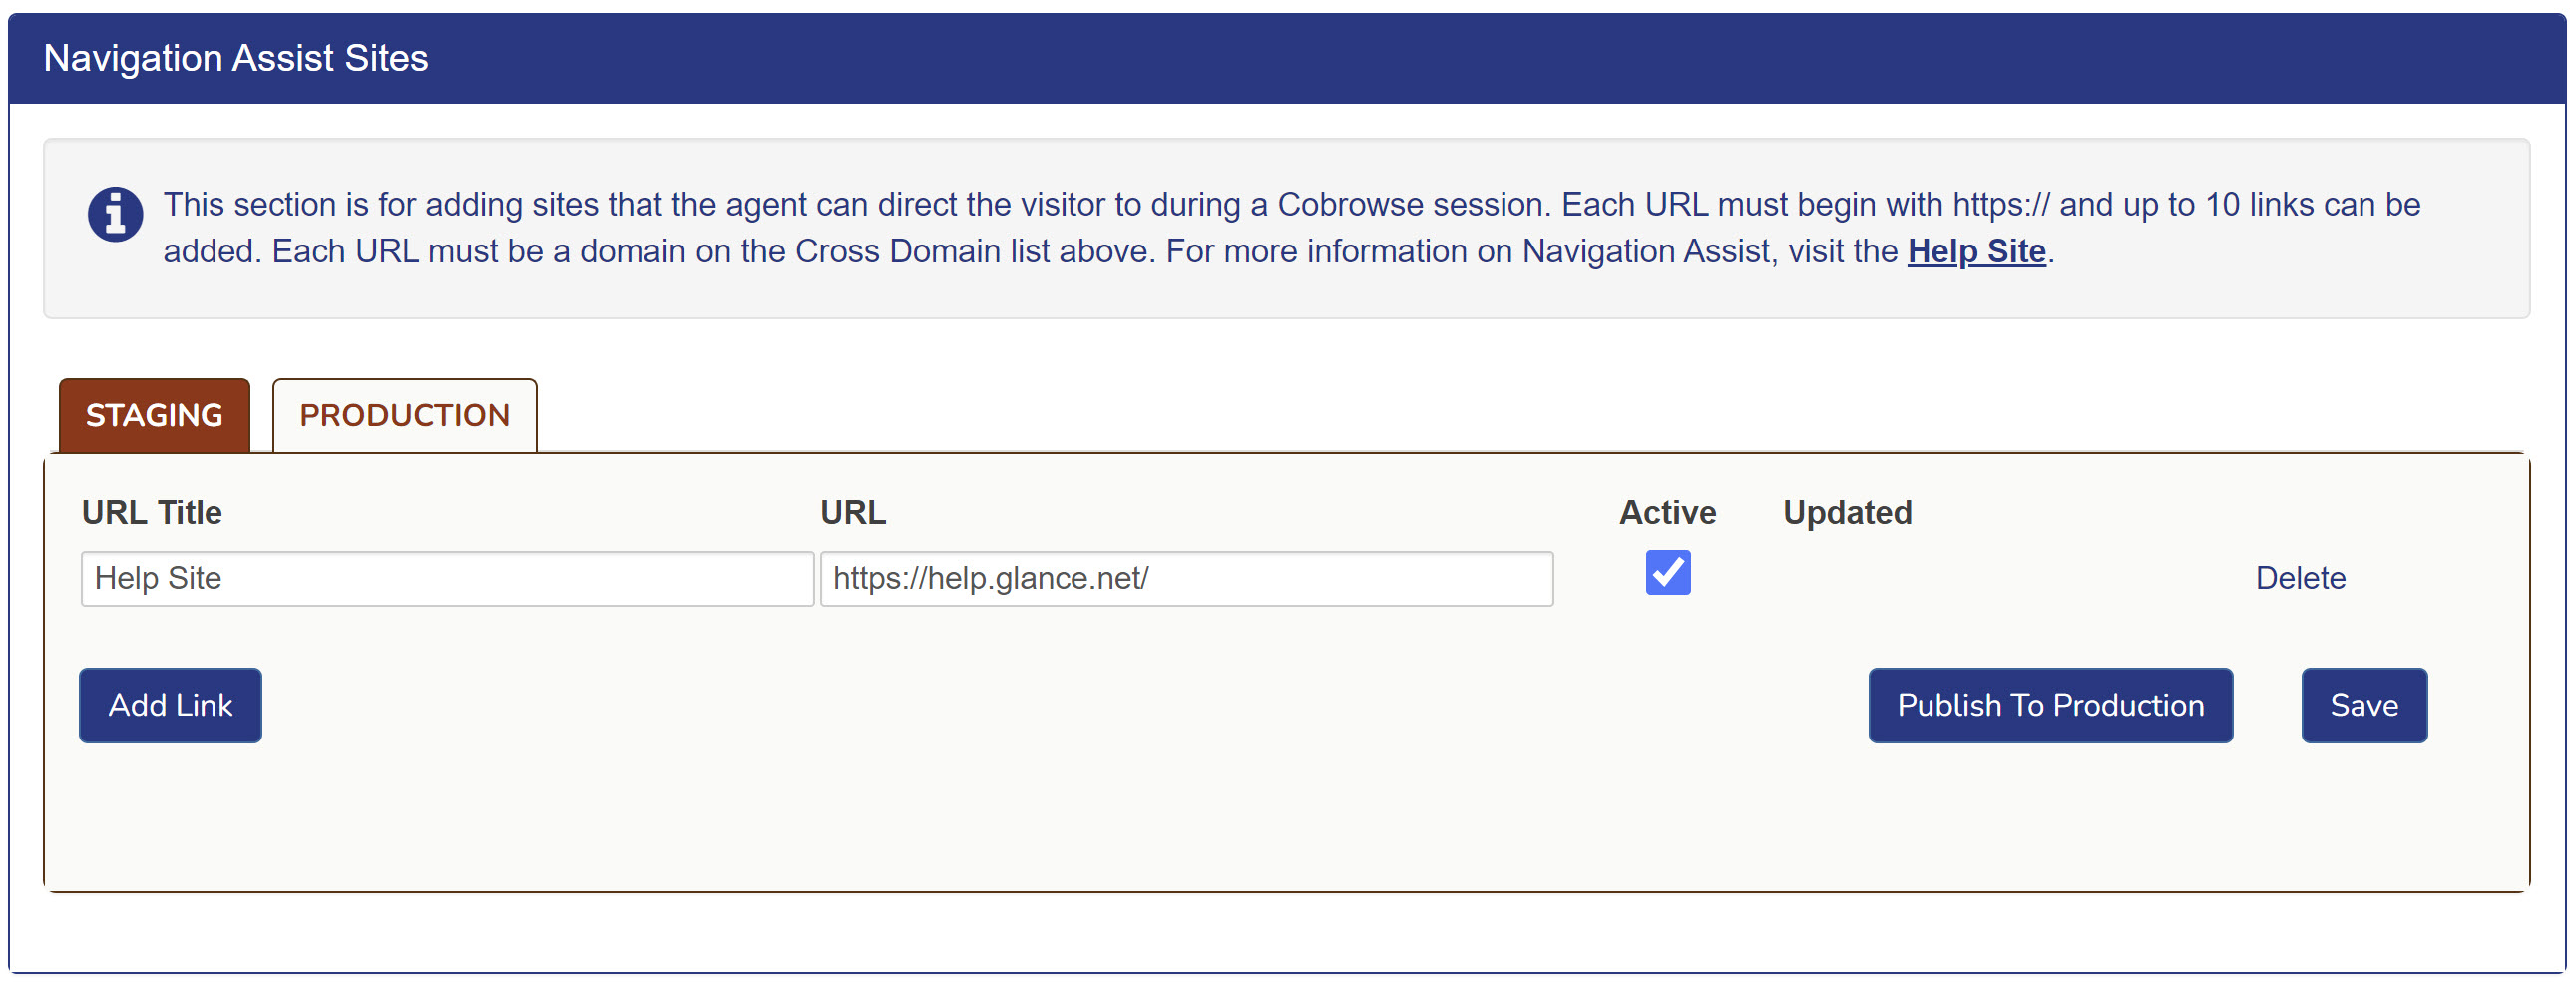
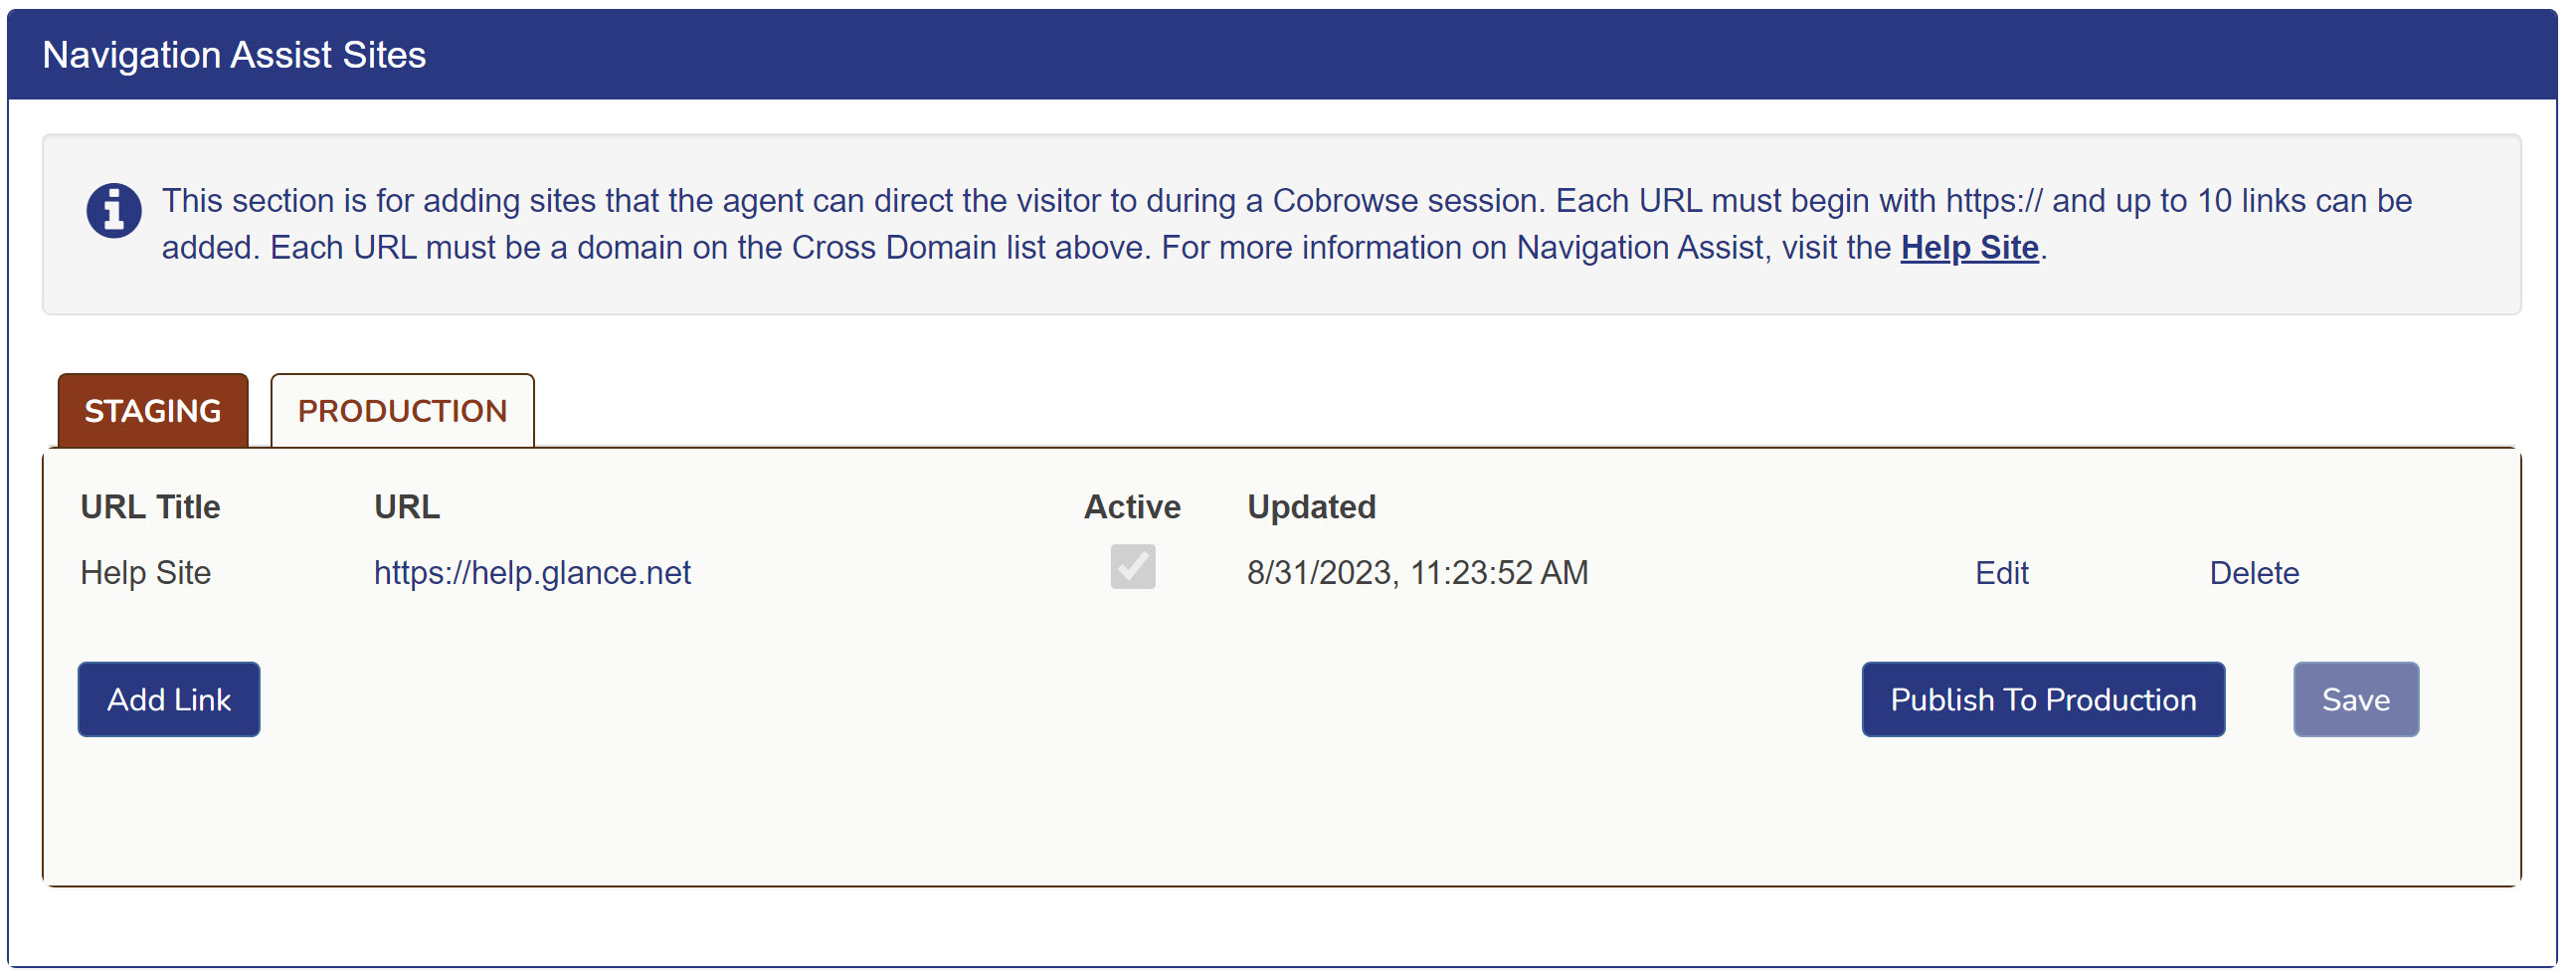 ## Activate Navigation Assist During Cobrowse
1. During a Cobrowse session, click on the folder icon to the left of the URL.
## Activate Navigation Assist During Cobrowse
1. During a Cobrowse session, click on the folder icon to the left of the URL.
 2. Select a site to navigate to from the dropdown list.
 3. The visitor will see a modal asking them to accept the navigation to the new site.
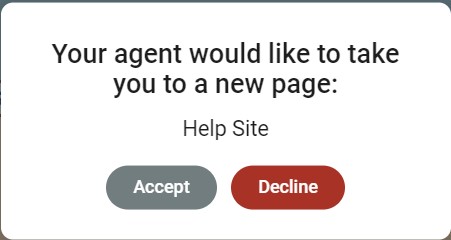 4. The visitor will be redirected to the new site after clicking **Accept**.
=================================================================
FILE: /users/glance-cobrowse/features/pdf_cobrowse
=================================================================
Glance Cobrowse supports cobrowsing PDF files that your customer may wish to view when navigating your website. The following section outlines requirements and implementation steps for enabling cobrowsing of PDF files on your web property.
4. The visitor will be redirected to the new site after clicking **Accept**.
=================================================================
FILE: /users/glance-cobrowse/features/pdf_cobrowse
=================================================================
Glance Cobrowse supports cobrowsing PDF files that your customer may wish to view when navigating your website. The following section outlines requirements and implementation steps for enabling cobrowsing of PDF files on your web property.
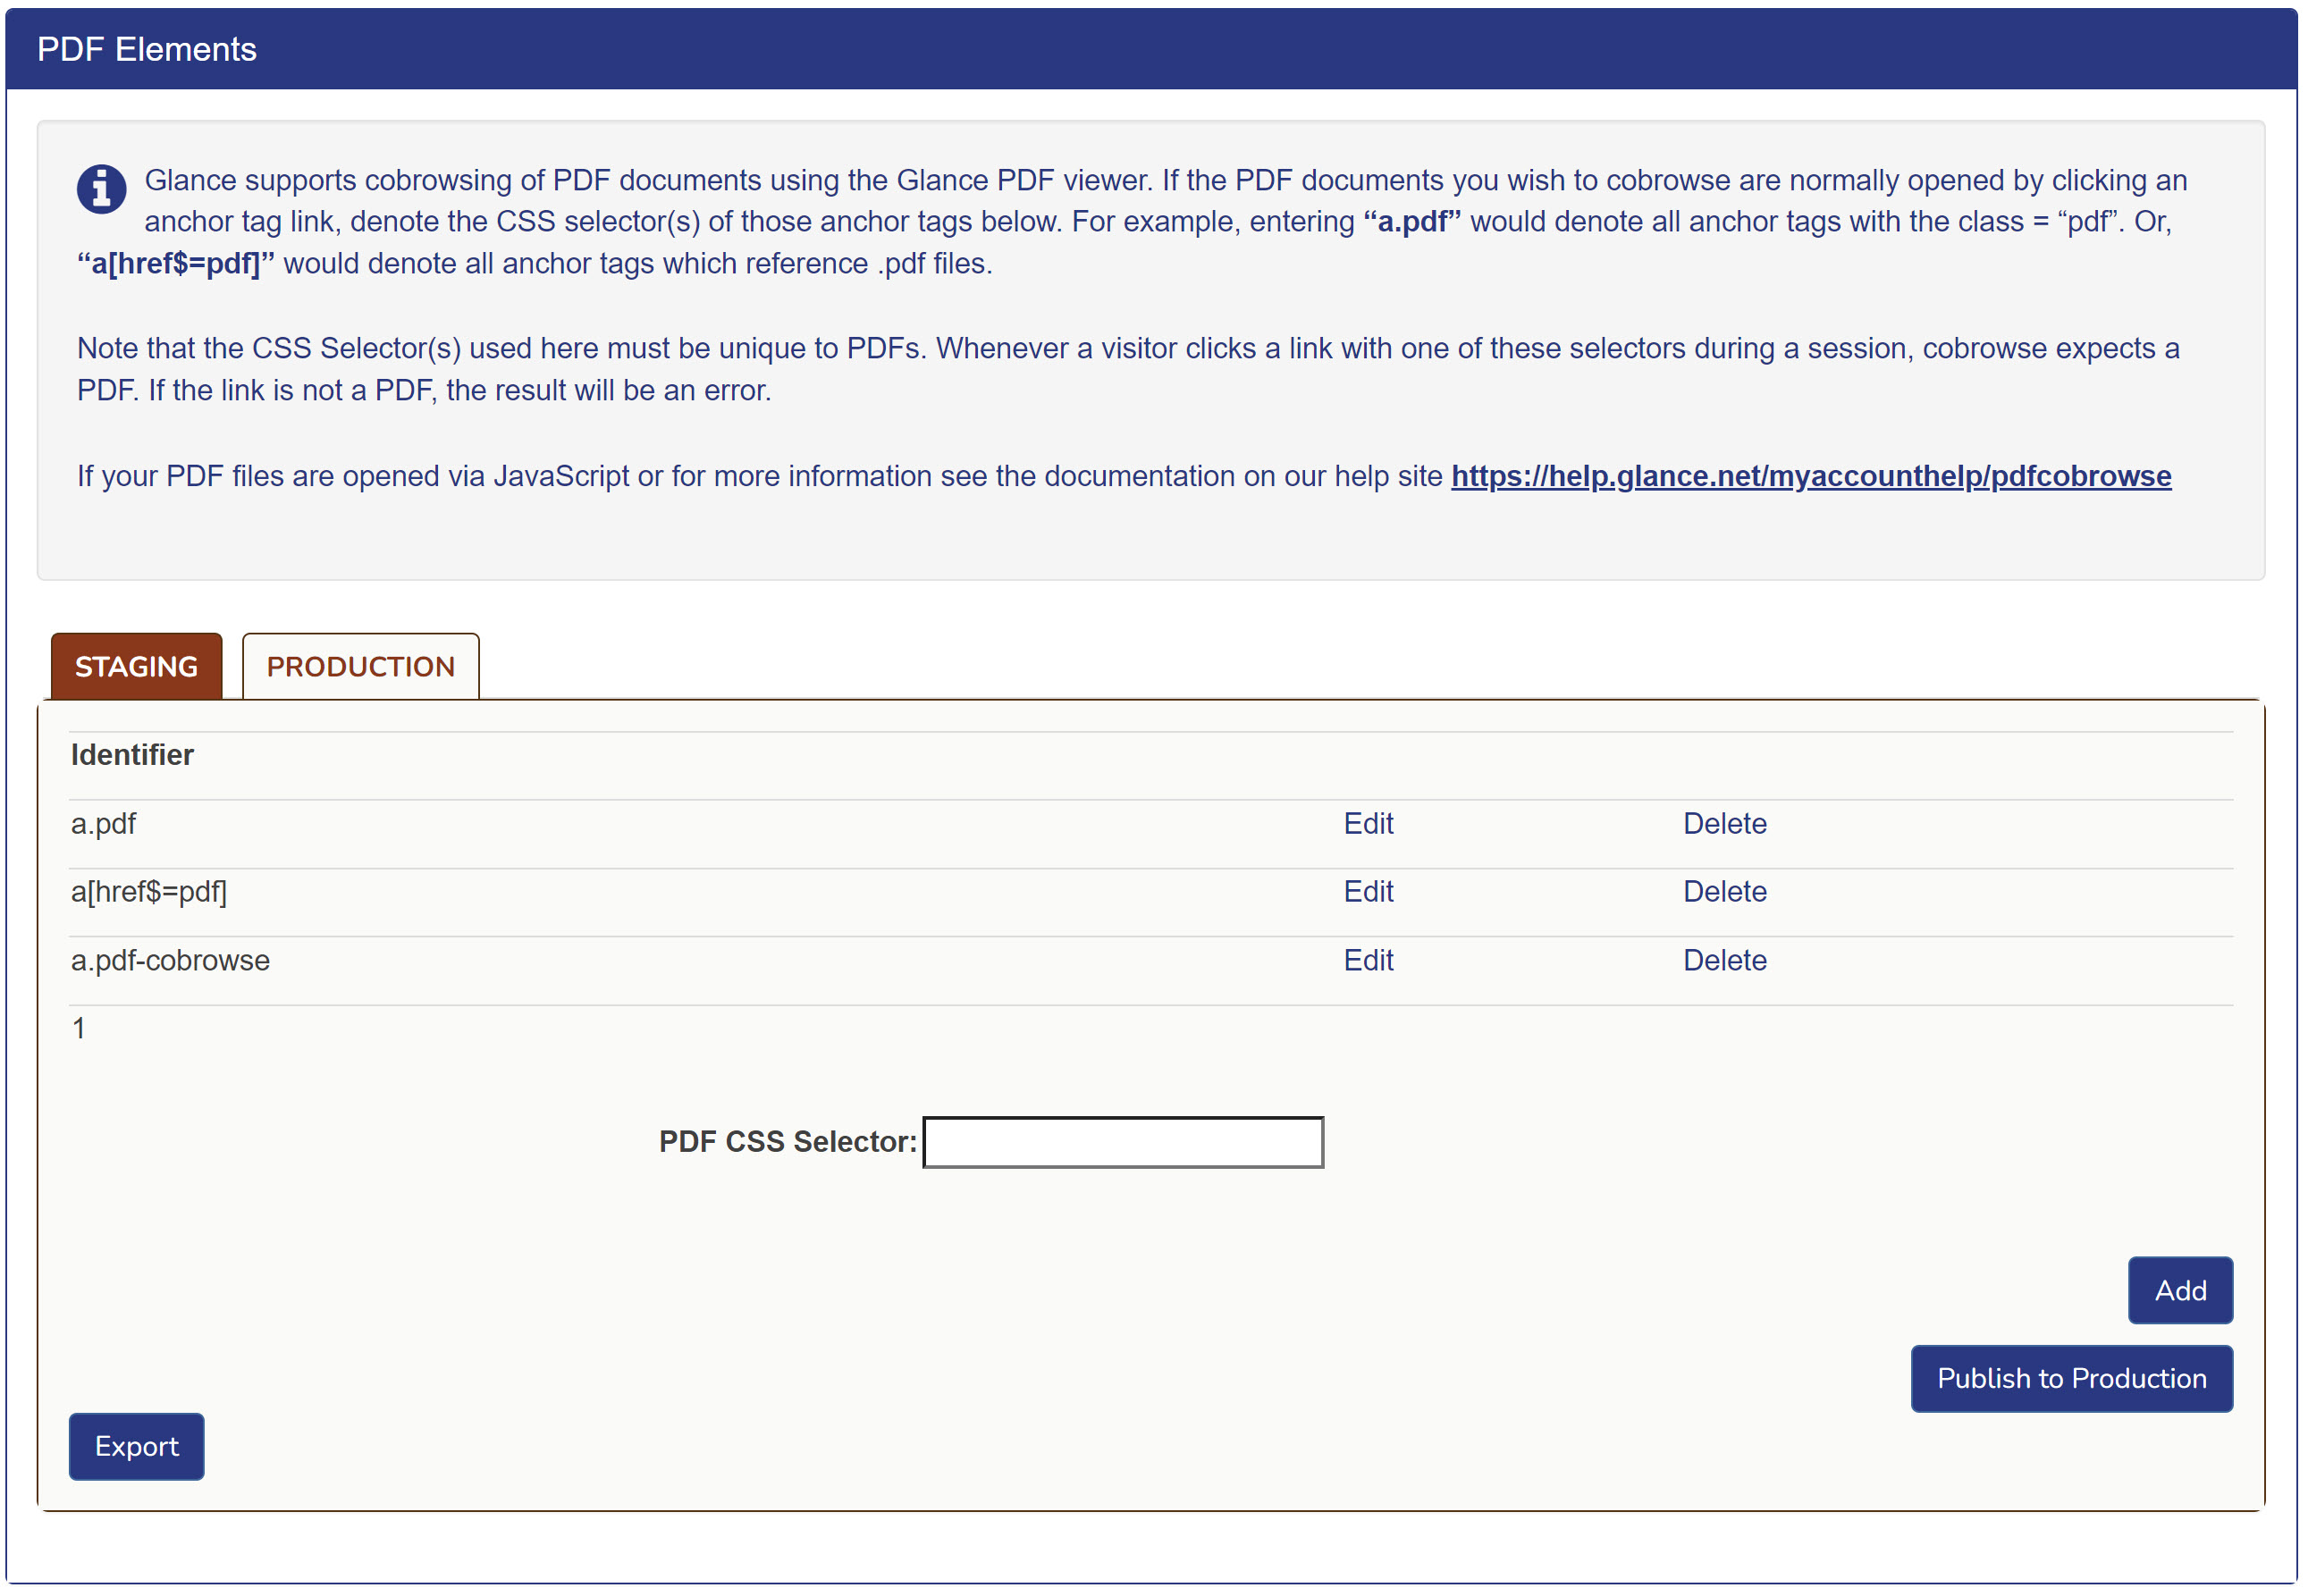 3. Enter the CSS selectors into the **PDF CSS Selectors** field, and click **Add**.
4. When you are ready to move from staging to production, click **Publish to Production**.
5. You can download a list of the selectors from the **Export** button.
### Option 2 - JavaScript API Call
Sometimes PDFs are opened via a `window.open` call in JavaScript. In this case, the JavaScript API Call method must be used. For example, if your web page has a button which opens a PDF file by calling:
```javascript
window.open("[https://www.glancevelo.com/pricelist.pdf](https://www.glancevelo.com/pricelist.pdf)");
```
You must modify your JavaScript to call `GLANCE.Cobrowse.Visitor.viewPDF()` instead when in a Cobrowse session:
```javascript
var url = "[https://www.glancevelo.com/pricelist.pdf](https://www.glancevelo.com/pricelist.pdf)";
if (GLANCE && GLANCE.Cobrowse && GLANCE.Cobrowse.Visitor && GLANCE.Cobrowse.Visitor.inSession()) {
GLANCE.Cobrowse.Visitor.viewPDF({url: url});
} else {
window.open(url);
}
```
The URL to the PDF file must be an absolute URL. If the JavaScript works with relative URLs, you can build an absolute URL by combining `window.location` with the relative path:
```javascript
var relativeUrl = "pricelist.pdf";
if (GLANCE && GLANCE.Cobrowse && GLANCE.Cobrowse.Visitor && GLANCE.Cobrowse.Visitor.inSession()) {
// the relative URL of the .pdf to view
var absURL = window.location.protocol + "//"
+ window.location.hostname
+ window.location.pathname + "/"
+ relativeUrl;
GLANCE.Cobrowse.Visitor.viewPDF({url: absURL});
} else {
window.open(relativeUrl);
}
```
If you want to prevent PDFs from being downloaded during the session, you can add the following option to the `viewPDF` API to hide the download button:
```javascript
GLANCE.Cobrowse.Visitor.viewPDF({url: "...", options: { hideDownload: true }});
```
## Enabling PDFs Sent as Binary Strings
3. Enter the CSS selectors into the **PDF CSS Selectors** field, and click **Add**.
4. When you are ready to move from staging to production, click **Publish to Production**.
5. You can download a list of the selectors from the **Export** button.
### Option 2 - JavaScript API Call
Sometimes PDFs are opened via a `window.open` call in JavaScript. In this case, the JavaScript API Call method must be used. For example, if your web page has a button which opens a PDF file by calling:
```javascript
window.open("[https://www.glancevelo.com/pricelist.pdf](https://www.glancevelo.com/pricelist.pdf)");
```
You must modify your JavaScript to call `GLANCE.Cobrowse.Visitor.viewPDF()` instead when in a Cobrowse session:
```javascript
var url = "[https://www.glancevelo.com/pricelist.pdf](https://www.glancevelo.com/pricelist.pdf)";
if (GLANCE && GLANCE.Cobrowse && GLANCE.Cobrowse.Visitor && GLANCE.Cobrowse.Visitor.inSession()) {
GLANCE.Cobrowse.Visitor.viewPDF({url: url});
} else {
window.open(url);
}
```
The URL to the PDF file must be an absolute URL. If the JavaScript works with relative URLs, you can build an absolute URL by combining `window.location` with the relative path:
```javascript
var relativeUrl = "pricelist.pdf";
if (GLANCE && GLANCE.Cobrowse && GLANCE.Cobrowse.Visitor && GLANCE.Cobrowse.Visitor.inSession()) {
// the relative URL of the .pdf to view
var absURL = window.location.protocol + "//"
+ window.location.hostname
+ window.location.pathname + "/"
+ relativeUrl;
GLANCE.Cobrowse.Visitor.viewPDF({url: absURL});
} else {
window.open(relativeUrl);
}
```
If you want to prevent PDFs from being downloaded during the session, you can add the following option to the `viewPDF` API to hide the download button:
```javascript
GLANCE.Cobrowse.Visitor.viewPDF({url: "...", options: { hideDownload: true }});
```
## Enabling PDFs Sent as Binary Strings
 2. As the visitor, click **Yes** to accept.
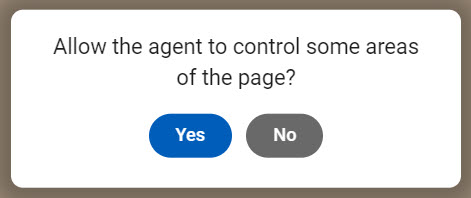 3. Now the agent can take control of the visitor's browser interface to help them navigate, select interface elements, or fill out form fields. When remote assist is on, a green dot in the middle of the **Remote Assist** icon is displayed, and the screen border turns red.
4. To stop remote assist, click the **Remote Assist** icon again.
* The agent can only remotely take control of the website interface tagged with Cobrowse.
* The agent cannot take control of the visitor's desktop applications or other browsers during the session.
* Gesturing is not available during remote assist mode.
* Interactions are logged in the [Event Stream](/developer/legacy_api/visitor_agent/visitor_event/#remote-control-events).
3. Now the agent can take control of the visitor's browser interface to help them navigate, select interface elements, or fill out form fields. When remote assist is on, a green dot in the middle of the **Remote Assist** icon is displayed, and the screen border turns red.
4. To stop remote assist, click the **Remote Assist** icon again.
* The agent can only remotely take control of the website interface tagged with Cobrowse.
* The agent cannot take control of the visitor's desktop applications or other browsers during the session.
* Gesturing is not available during remote assist mode.
* Interactions are logged in the [Event Stream](/developer/legacy_api/visitor_agent/visitor_event/#remote-control-events).
 2. The agent can choose to share their entire screen, a window, or a browser tab.
3. The agent clicks **Share** to share the content.
4. The visitor can view the agent's content.
## Multiple Participants Sharing Their Screen
If a session involves multiple agents, and a second agent shows their screen, the initial agent will get a message stating **Another agent is sharing their screen. You are no longer sharing your screen.**
2. The agent can choose to share their entire screen, a window, or a browser tab.
3. The agent clicks **Share** to share the content.
4. The visitor can view the agent's content.
## Multiple Participants Sharing Their Screen
If a session involves multiple agents, and a second agent shows their screen, the initial agent will get a message stating **Another agent is sharing their screen. You are no longer sharing your screen.**
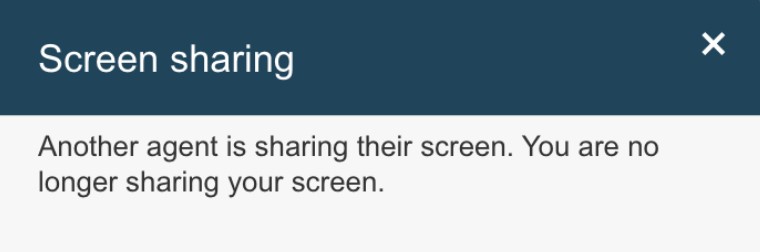 ### Screen Share Bookmarks
**Requires CB 5.3 or higher**
Glance also provides the ability to configure bookmark links of easy-to-share websites agents can share. Once enabled, these websites display in the **Screen Share** menu of the Agent Viewer for the agent to easily select.
### Configuring Screen Share Bookmarks and Folders
**Bookmark Folders Require CB 6.0 or higher**
As an administrator, from **Account Management** > **Settings** > **Manage your cobrowse settings**, go to the **Web Screen Share Bookmarks**.
### Screen Share Bookmarks
**Requires CB 5.3 or higher**
Glance also provides the ability to configure bookmark links of easy-to-share websites agents can share. Once enabled, these websites display in the **Screen Share** menu of the Agent Viewer for the agent to easily select.
### Configuring Screen Share Bookmarks and Folders
**Bookmark Folders Require CB 6.0 or higher**
As an administrator, from **Account Management** > **Settings** > **Manage your cobrowse settings**, go to the **Web Screen Share Bookmarks**.
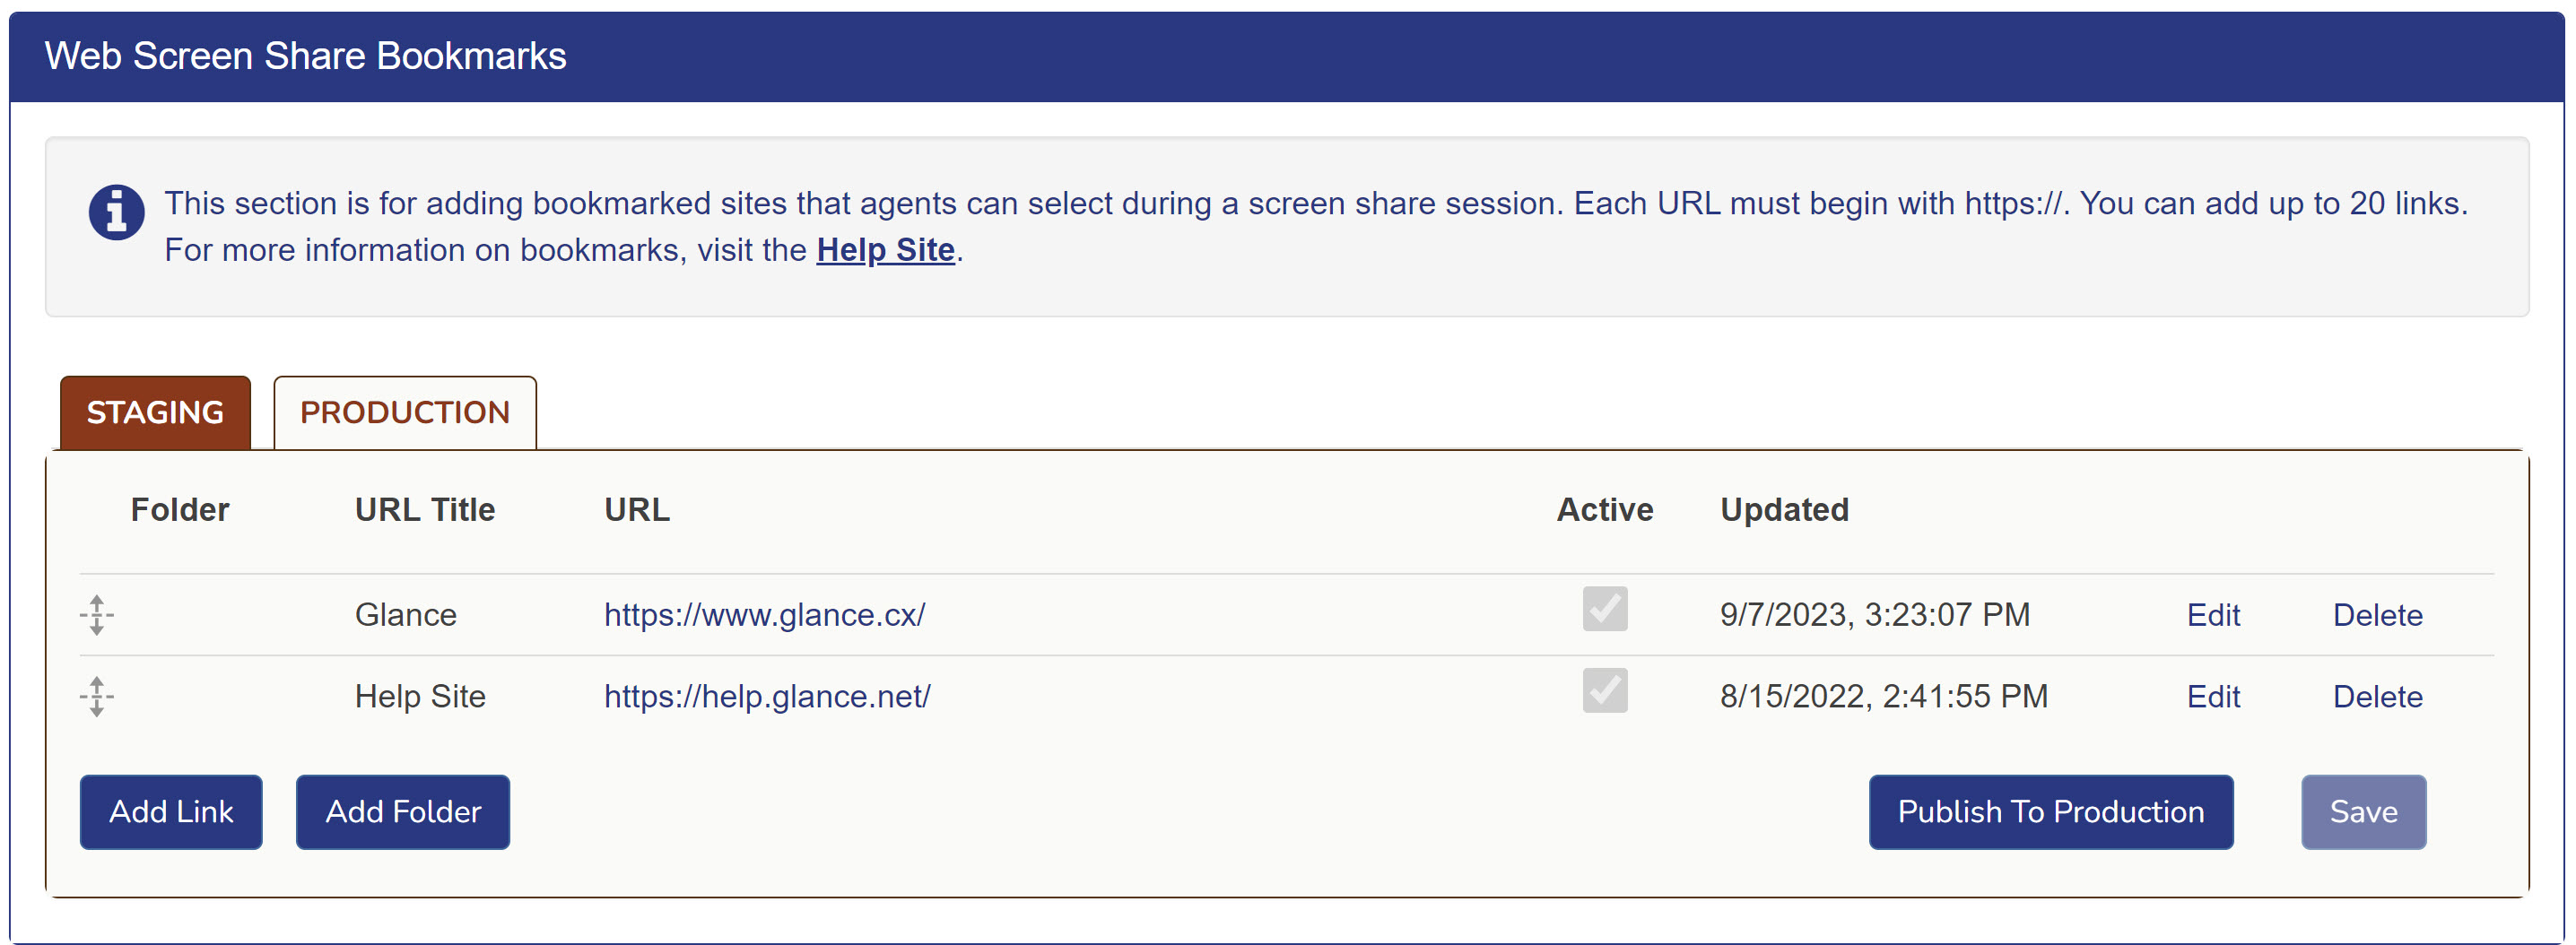 To add a bookmark:
1. For **URL Title**, enter the title for the bookmark link in the Agent Viewer.
2. For **URL**, enter the URL of the bookmark site.
3. Select the **Active** checkbox.
4. Click **Save**.
5. To add an additional bookmark, click the **Add Link** button.
6. After you test your changes in staging, click **Publish to Production**.
To add a folder:
1. Click the **Add Folder** button.
2. Input a name for your folder in the **Insert folder name** field.
3. Select the **Active** checkbox.
4. Click **Save**.
5. Create new bookmarks within your folder or drag existing bookmarks beneath the folder.
6. Click **Publish to Production**.
To add a bookmark:
1. For **URL Title**, enter the title for the bookmark link in the Agent Viewer.
2. For **URL**, enter the URL of the bookmark site.
3. Select the **Active** checkbox.
4. Click **Save**.
5. To add an additional bookmark, click the **Add Link** button.
6. After you test your changes in staging, click **Publish to Production**.
To add a folder:
1. Click the **Add Folder** button.
2. Input a name for your folder in the **Insert folder name** field.
3. Select the **Active** checkbox.
4. Click **Save**.
5. Create new bookmarks within your folder or drag existing bookmarks beneath the folder.
6. Click **Publish to Production**.
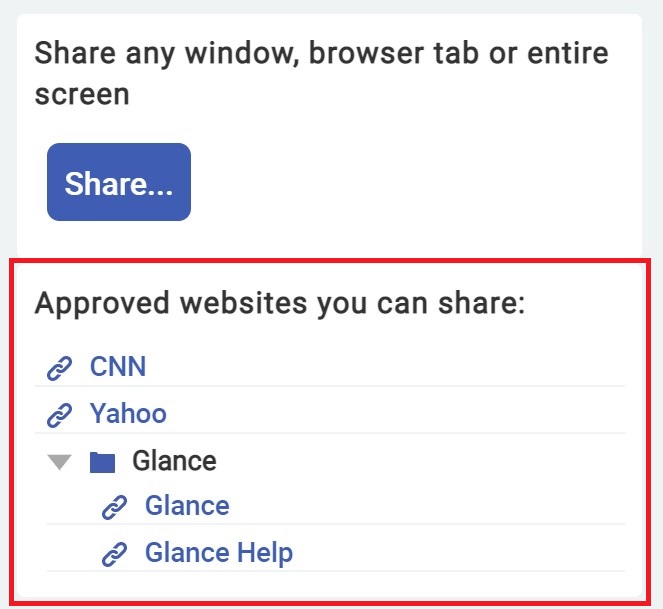 2. After clicking the link, the bookmark site will open in a new window, and the agent has the opportunity to preview the content.
3. Click **Share...** > **Window** > select the bookmark window from the available windows.
4. The visitor can view the agent's window.
5. Click **Stop Sharing** to end the screen share session. The cobrowse session will continue.
## Screen Share for Visitors
**Requires CB 5.7 or higher**
The agent is able to grant the visitor permission to share their desktop, application window, or browser tab with the agent to quickly resolve any issues.
Visitors must be on a PC or Mac to share their screen. Mobile devices do not support screen sharing from their browsers.
2. After clicking the link, the bookmark site will open in a new window, and the agent has the opportunity to preview the content.
3. Click **Share...** > **Window** > select the bookmark window from the available windows.
4. The visitor can view the agent's window.
5. Click **Stop Sharing** to end the screen share session. The cobrowse session will continue.
## Screen Share for Visitors
**Requires CB 5.7 or higher**
The agent is able to grant the visitor permission to share their desktop, application window, or browser tab with the agent to quickly resolve any issues.
Visitors must be on a PC or Mac to share their screen. Mobile devices do not support screen sharing from their browsers.
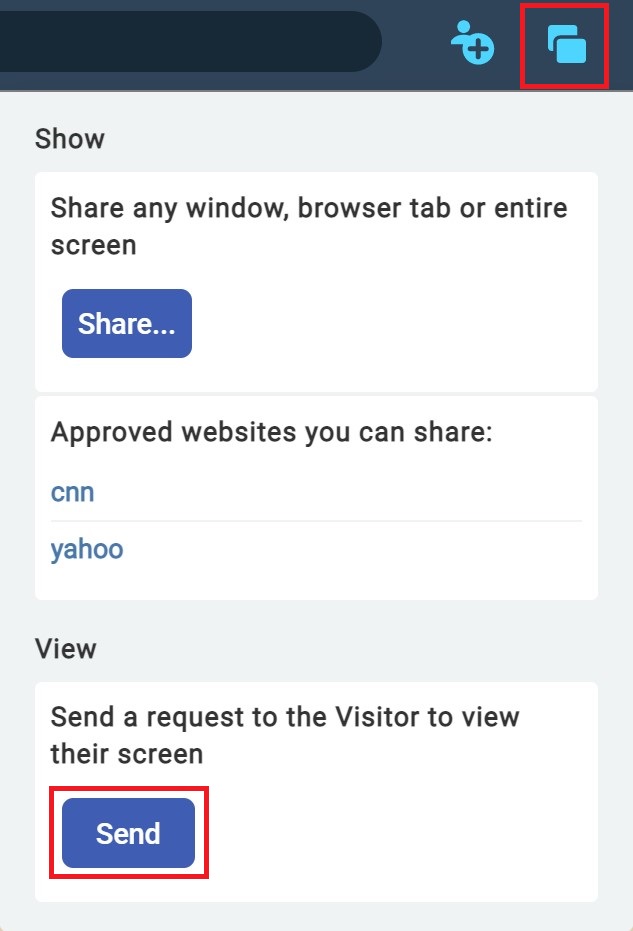 3. The visitor will receive a **Share Your Screen** modal in which they must click **Accept**.
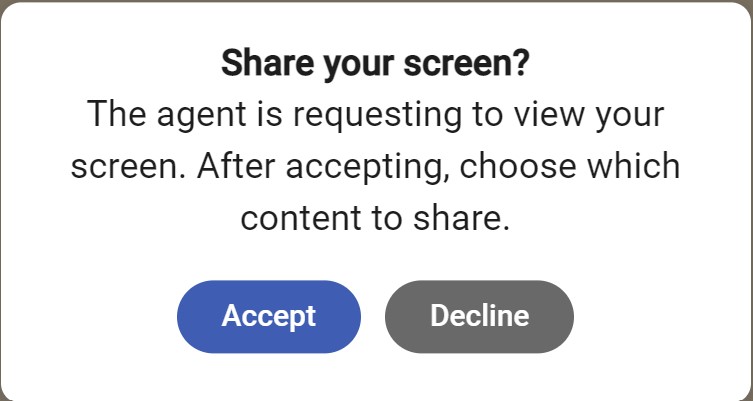 4. The visitor can then choose if they want to share their entire screen, a window, or a tab.
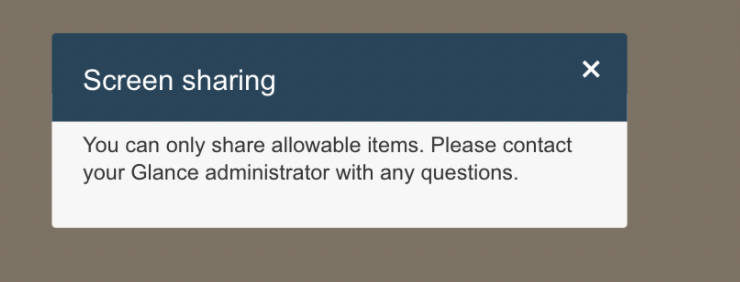 **Remediation:** You can click the Screen Share button and try to share the Window instead.
=================================================================
FILE: /users/glance-cobrowse/getting-started/CAM
=================================================================
In some scenarios, the Glance Cobrowse Agent Viewer may be unable to access certain assets required to fully render the browser page. When this occurs, agents may see missing images, styles, or fonts. While uncommon, this issue can arise if both of the following conditions are met:
* A session cookie is required to access the asset.
* The page's Content Security Policy (CSP) blocks XHR requests.
If this occurs, we recommend contacting [Glance Support](/users/account-management/contact/) to determine the best solution. In many cases, a small adjustment to the CSP can resolve the issue.
Alternatively, assets can be uploaded through **Cobrowse Asset Management** to ensure proper rendering.
To resolve issues with assets not loading in the Agent Viewer, follow these steps for each missing resource:
1. Identify the resource that is failing to load. On the agent side, open the browser's Network tab and look for fonts, images, or CSS files returning HTTP error statuses.
2. On the visitor side, use Chrome developer tools to locate the resource (click on **Application** and navigate to the resource under **Frames** on the left side).
3. Save the resource to your hard drive.
* For stylesheets, right-click and select **Save as**.
* For images or font files, you may need to save them to the **Overrides** area of Chrome DevTools.
4. Right-click the resource and choose **Copy URL** for future reference.
5. In the **Network** tab, check the **Content-Type** header in the response for the resource request.
6. Navigate to **Account Management** > **Settings** and select **Cobrowse Settings**. Scroll to the **Cobrowse Asset Management** section.
**Remediation:** You can click the Screen Share button and try to share the Window instead.
=================================================================
FILE: /users/glance-cobrowse/getting-started/CAM
=================================================================
In some scenarios, the Glance Cobrowse Agent Viewer may be unable to access certain assets required to fully render the browser page. When this occurs, agents may see missing images, styles, or fonts. While uncommon, this issue can arise if both of the following conditions are met:
* A session cookie is required to access the asset.
* The page's Content Security Policy (CSP) blocks XHR requests.
If this occurs, we recommend contacting [Glance Support](/users/account-management/contact/) to determine the best solution. In many cases, a small adjustment to the CSP can resolve the issue.
Alternatively, assets can be uploaded through **Cobrowse Asset Management** to ensure proper rendering.
To resolve issues with assets not loading in the Agent Viewer, follow these steps for each missing resource:
1. Identify the resource that is failing to load. On the agent side, open the browser's Network tab and look for fonts, images, or CSS files returning HTTP error statuses.
2. On the visitor side, use Chrome developer tools to locate the resource (click on **Application** and navigate to the resource under **Frames** on the left side).
3. Save the resource to your hard drive.
* For stylesheets, right-click and select **Save as**.
* For images or font files, you may need to save them to the **Overrides** area of Chrome DevTools.
4. Right-click the resource and choose **Copy URL** for future reference.
5. In the **Network** tab, check the **Content-Type** header in the response for the resource request.
6. Navigate to **Account Management** > **Settings** and select **Cobrowse Settings**. Scroll to the **Cobrowse Asset Management** section.
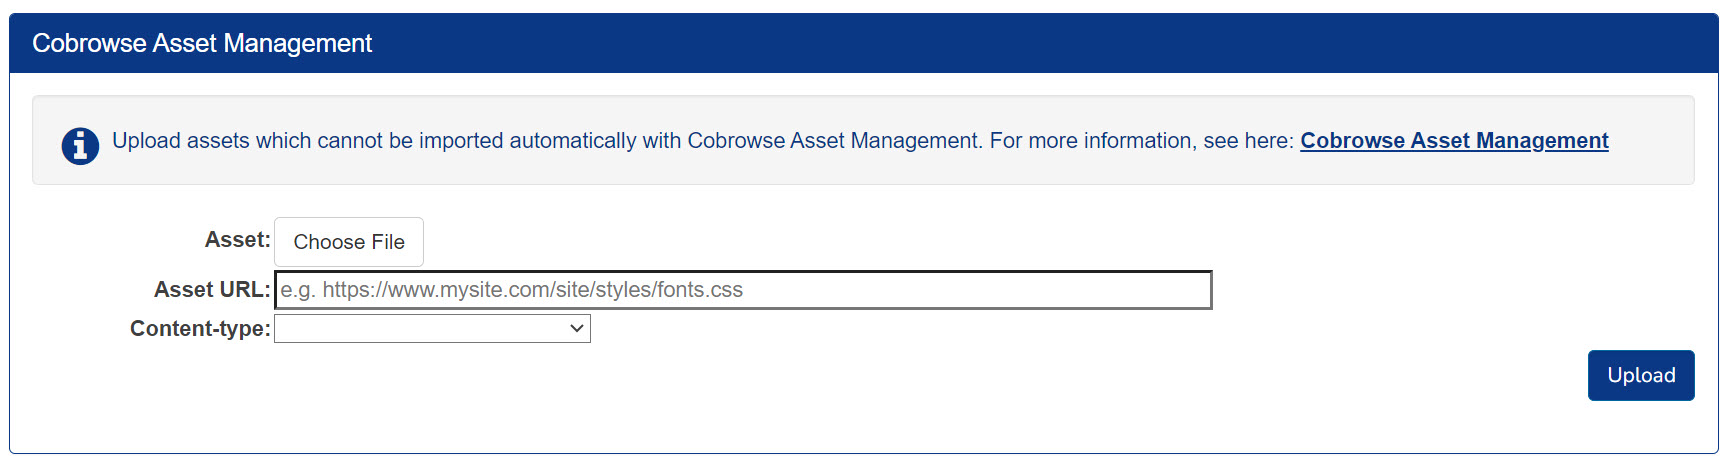 7. Select the saved resource file for upload.
8. Paste the full URL into the **Asset URL** box, including any query string parameters.
9. Select the content type from the drop-down menu (as identified in Step 5).
10. Click **Upload**.
Once uploaded, agents should be able to retrieve and view these assets correctly in their session view.
7. Select the saved resource file for upload.
8. Paste the full URL into the **Asset URL** box, including any query string parameters.
9. Select the content type from the drop-down menu (as identified in Step 5).
10. Click **Upload**.
Once uploaded, agents should be able to retrieve and view these assets correctly in their session view.
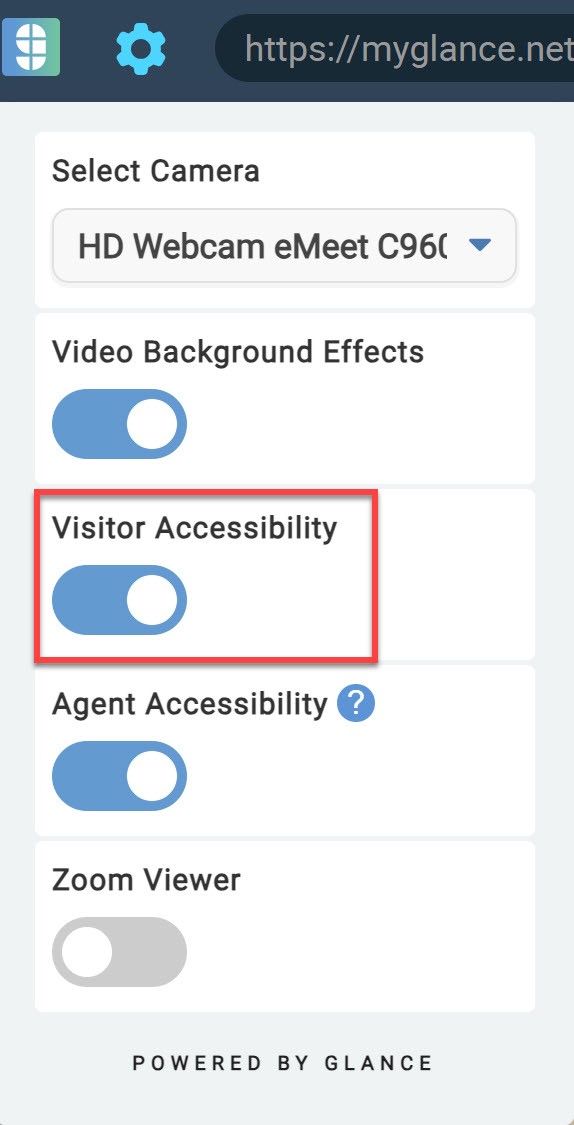 3. In the agent view, click an interface element.
4. The screen reader tool reads the clicked element out loud to the visually-impaired user.
## Agent-Side Accessibility
To better support agents with disabilities, Glance Cobrowse includes built-in accessibility features on the agent side. Agents can navigate the Cobrowse interface using keyboard gestures, pressing **Tab** to move between interface elements, with screen reader support that reads each element aloud as it receives focus.
The Agent Viewer is fully accessible, offering keyboard operability, screen reader compatibility, and visible focus indicators. Agents with the setting **Enable Agent Accessibility** in their account can also use the keyboard to have page contents read aloud. Additionally, if a field is masked, the screen reader will notify the agent.
To enable agent accessibility:
1. Navigate to **Account Management** and select the setting **Enable Agent Accessibility**.
2. The agent can turn on agent-side accessibility by clicking the **Gear** icon followed by the **Agent Accessibility** slider on the agent viewer.
3. In the agent view, click an interface element.
4. The screen reader tool reads the clicked element out loud to the visually-impaired user.
## Agent-Side Accessibility
To better support agents with disabilities, Glance Cobrowse includes built-in accessibility features on the agent side. Agents can navigate the Cobrowse interface using keyboard gestures, pressing **Tab** to move between interface elements, with screen reader support that reads each element aloud as it receives focus.
The Agent Viewer is fully accessible, offering keyboard operability, screen reader compatibility, and visible focus indicators. Agents with the setting **Enable Agent Accessibility** in their account can also use the keyboard to have page contents read aloud. Additionally, if a field is masked, the screen reader will notify the agent.
To enable agent accessibility:
1. Navigate to **Account Management** and select the setting **Enable Agent Accessibility**.
2. The agent can turn on agent-side accessibility by clicking the **Gear** icon followed by the **Agent Accessibility** slider on the agent viewer.
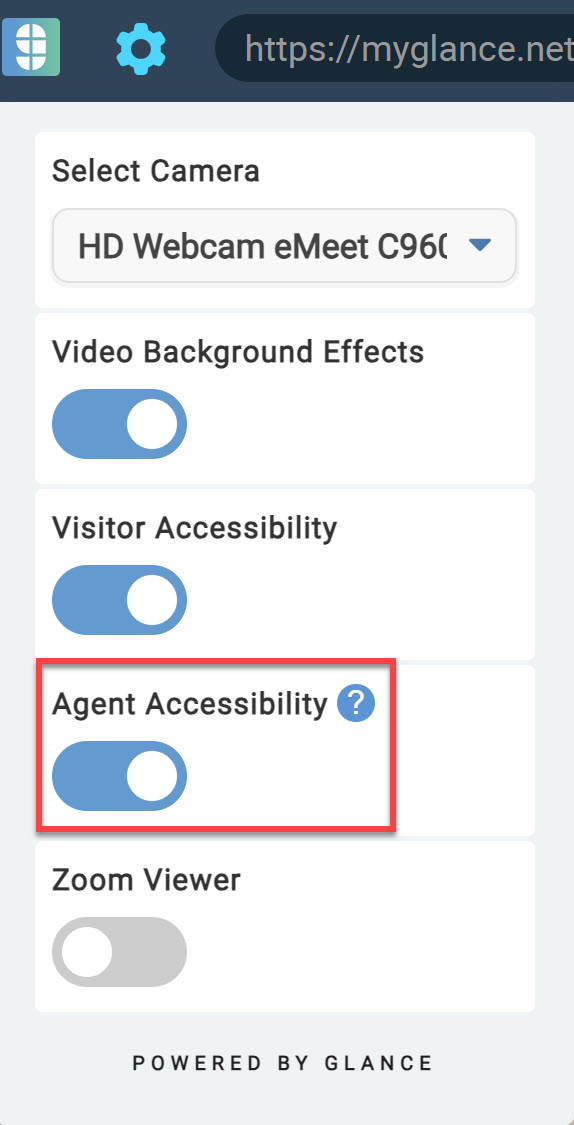 ## Using Agent-Side Accessibility
Agents can navigate the Cobrowse interface using standard keyboard gestures:
* Press **Tab** to move through interface elements in the header.
* Press **Enter** to open drop-down menus.
* Press **Esc** to close open drop-down menus.
These shortcuts enhance usability for agents relying on keyboard navigation and screen readers.
## Agent-Side Zoom
The agent can zoom in on the visitor's screen by utilizing the zoom function.
Click the **Gear** icon followed by the **Zoom Viewer** slider on the agent viewer.
## Using Agent-Side Accessibility
Agents can navigate the Cobrowse interface using standard keyboard gestures:
* Press **Tab** to move through interface elements in the header.
* Press **Enter** to open drop-down menus.
* Press **Esc** to close open drop-down menus.
These shortcuts enhance usability for agents relying on keyboard navigation and screen readers.
## Agent-Side Zoom
The agent can zoom in on the visitor's screen by utilizing the zoom function.
Click the **Gear** icon followed by the **Zoom Viewer** slider on the agent viewer.
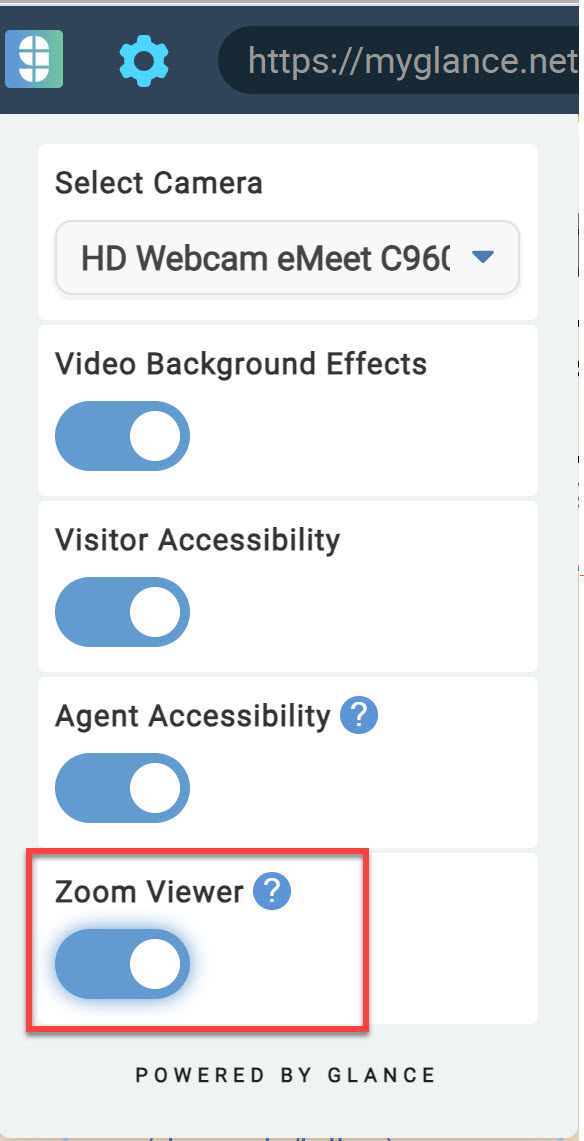 ## Guest Accessibility
Guests have the ability to zoom in while using the viewer by clicking the magnifying glass icon located in the top-right corner of the interface.
## Guest Accessibility
Guests have the ability to zoom in while using the viewer by clicking the magnifying glass icon located in the top-right corner of the interface.
 =================================================================
FILE: /users/glance-cobrowse/getting-started/cobrowse_requirements
=================================================================
Presence enables agents to initiate a Cobrowse session with visitors instantly without requiring the visitor to click a link, enter a hotkey sequence, or read a session key over the phone.
To use Presence, the following requirements must be met:
* Agents must be using Glance for Salesforce or a custom integration.
* Add `data-presence="on"` to the [Cobrowse script tag](/developer/glance-cobrowse/attributes/).
* Specify a unique [Visitor ID](/developer/legacy_api/visitor_agent/visitor/) on every page where a Cobrowse session can be initiated. The Visitor ID must:
* Be known to the agent's CRM.
* Be unique to each individual visitor. If two people browse your site using the same Visitor ID, the Presence service will be unable to distinguish between them.
* During 1-Click Connect sessions, the visitor ID acts as the Session Key, so it must meet all requirements of a Session Key as outlined [here](/developer/legacy_api/visitor_agent/visitor/#using-startsession).
* Agents must have an active Presence subscription.
* The agent's CRM must be integrated with the Glance Presence service via the Glance Presence API. Glance's Salesforce integration supports Presence out of the box.
For more details on the Glance Presence API, see the [Customizing](/developer/presence/) page.
=================================================================
FILE: /users/glance-cobrowse/getting-started/cobrowse_requirements
=================================================================
Presence enables agents to initiate a Cobrowse session with visitors instantly without requiring the visitor to click a link, enter a hotkey sequence, or read a session key over the phone.
To use Presence, the following requirements must be met:
* Agents must be using Glance for Salesforce or a custom integration.
* Add `data-presence="on"` to the [Cobrowse script tag](/developer/glance-cobrowse/attributes/).
* Specify a unique [Visitor ID](/developer/legacy_api/visitor_agent/visitor/) on every page where a Cobrowse session can be initiated. The Visitor ID must:
* Be known to the agent's CRM.
* Be unique to each individual visitor. If two people browse your site using the same Visitor ID, the Presence service will be unable to distinguish between them.
* During 1-Click Connect sessions, the visitor ID acts as the Session Key, so it must meet all requirements of a Session Key as outlined [here](/developer/legacy_api/visitor_agent/visitor/#using-startsession).
* Agents must have an active Presence subscription.
* The agent's CRM must be integrated with the Glance Presence service via the Glance Presence API. Glance's Salesforce integration supports Presence out of the box.
For more details on the Glance Presence API, see the [Customizing](/developer/presence/) page.
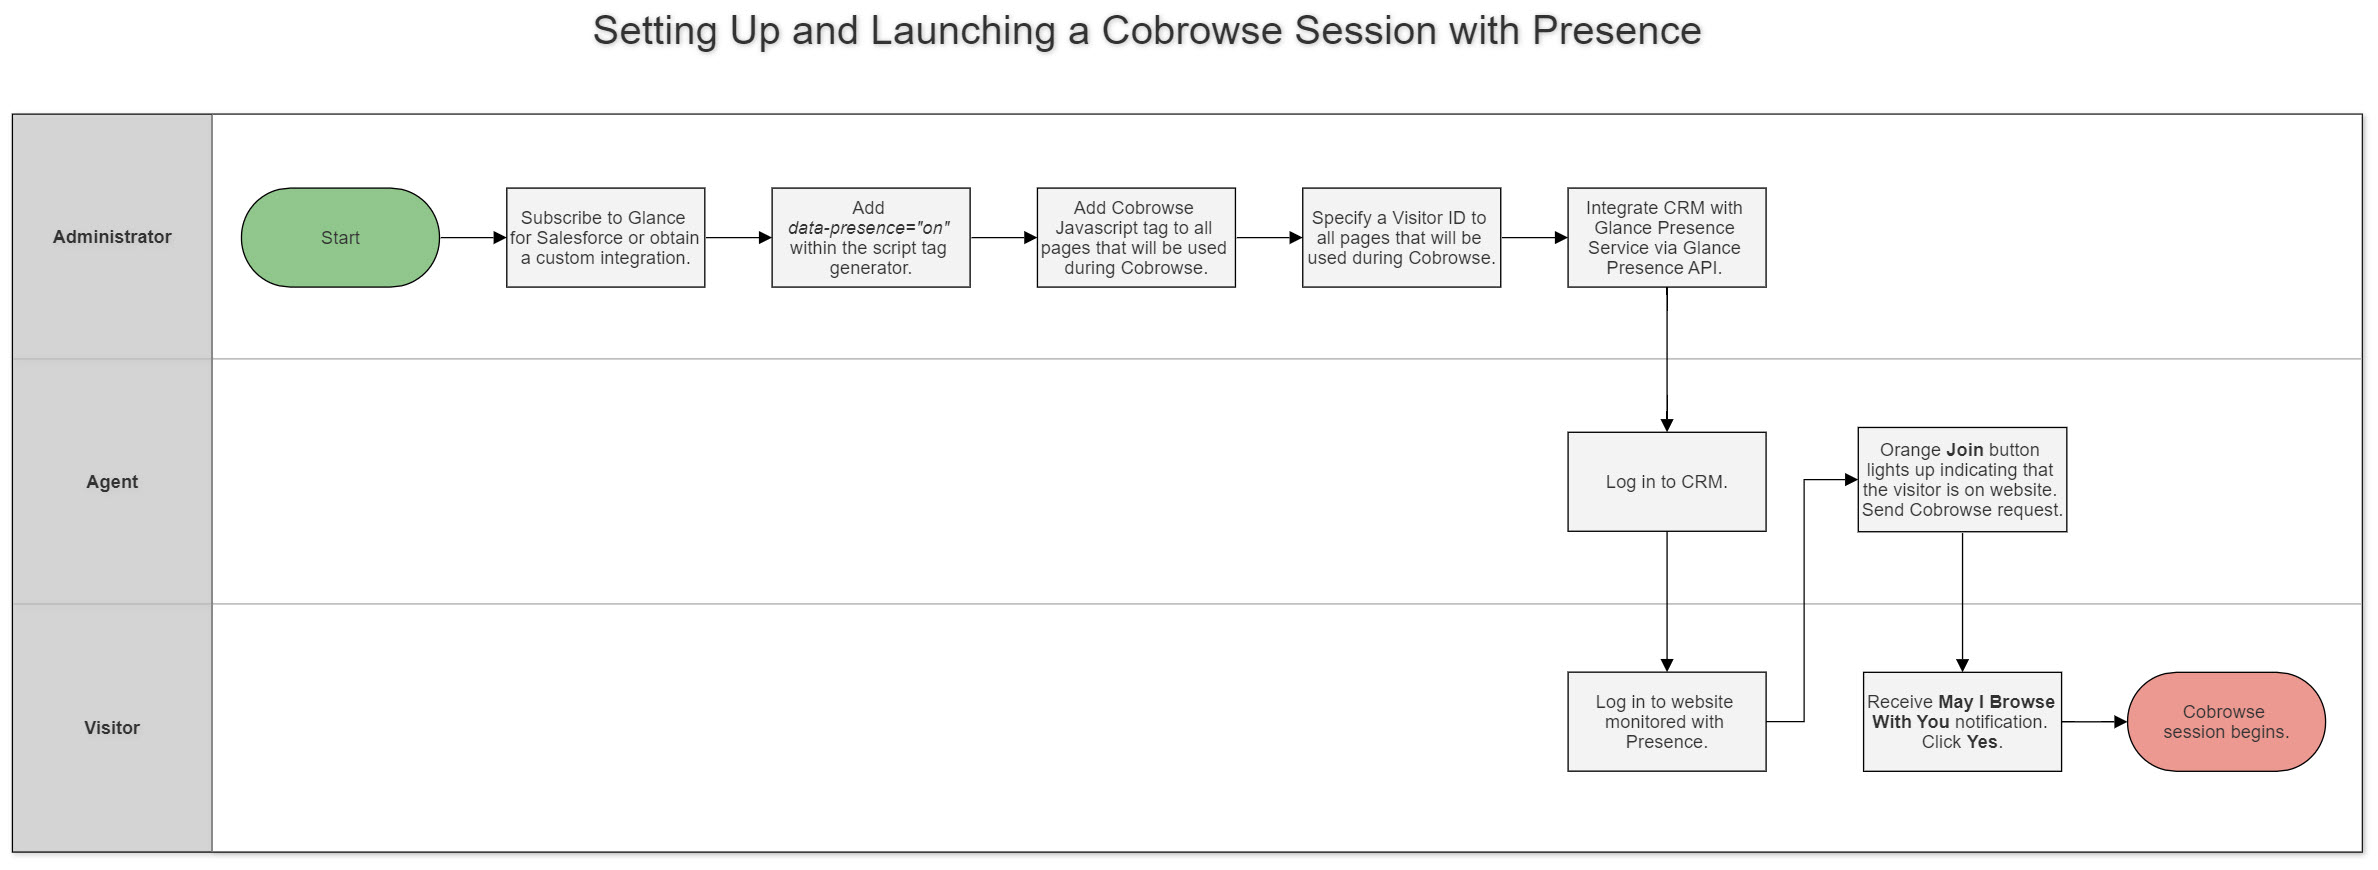 The diagram below illustrates a typical flow for initiating a Cobrowse session using Presence. Both the visitor and the agent connect to the Presence service using the same unique Visitor ID. Once connected, the agent and visitor can communicate through the Presence service. This flow is also applicable to visitors using the mobile SDK.
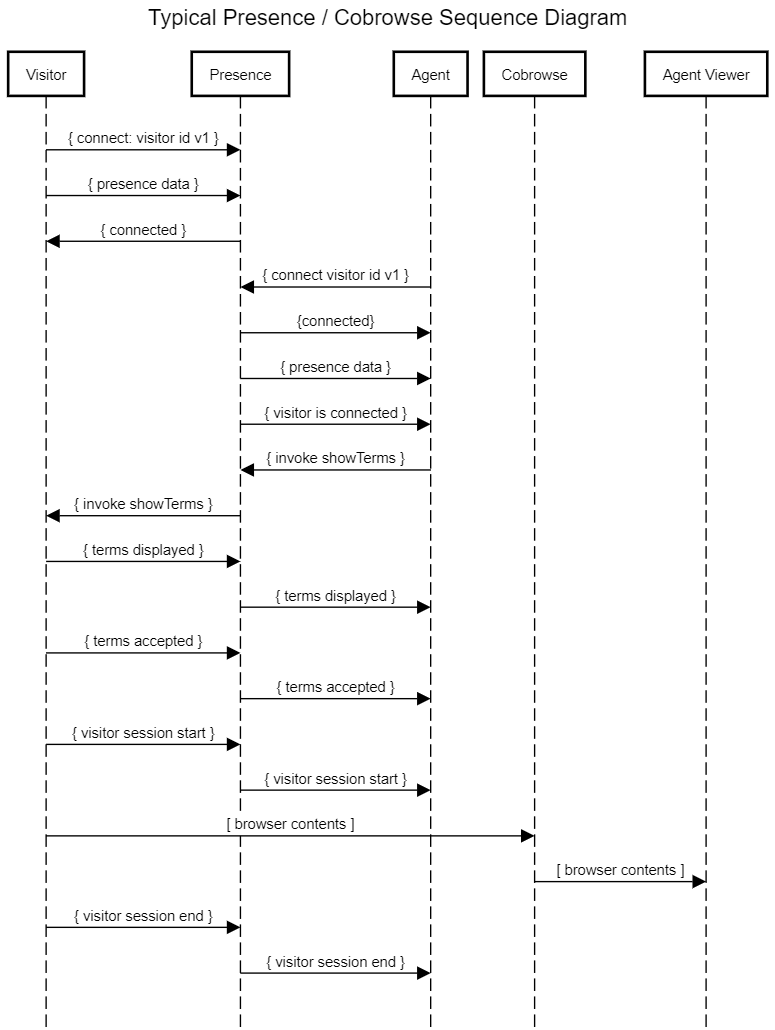 ## Disable Console Logs
 5. Refer to the [Manage Settings](/users/account-management/manage_settings/) page for additional information.
=================================================================
FILE: /users/glance-cobrowse/getting-started/cobrowse_sso
=================================================================
Agents already logged into their CRM console can use single sign-on (SSO) functionality to join a Glance Cobrowse session without needing to log in separately.
For more information, visit [Glance Integrations](/developer/integrations/).
**Example SSO URL:**
```text
https://glance.net/cobrowse/AgentView.aspx?SessionKey=[nnnn]&partnerid=[pid]&partneruserid=[puid]&loginkey=[loginkey]
```
Replace the bracketed placeholders with actual values to initiate a Cobrowse session using SSO.
=================================================================
FILE: /users/glance-cobrowse/getting-started/glossary
=================================================================
Below is a list of common terms used throughout Glance.
* **Agent:** Your company's representative who supports your visitors in carrying out various tasks such as completing a purchase. Representatives who use Glance to support your visitors are known as subscribers.
* **CDN:** A content delivery network or content distribution network is a geographically distributed network of proxy servers and their data centers.
* **Glance Address:** A subscriber's username on the Glance service. Glance Addresses have the form `person.example.glance.net`.
* **Glance Customer:** A customer of Glance who subscribes to the Cobrowsing service.
* **Group ID:** A unique ID, a four-, five-, or six-digit number assigned to your company by Glance. You may have separate Group IDs for your development, staging, and production environments.
* **Guest:** An additional party invited to a Cobrowse session.
* **Masked Element:** An element in your company website containing sensitive or confidential data. Masked elements should not be visible to agents.
* **Masked Field:** An input form field in your company website containing sensitive or confidential data such as a social security or credit card number. Masked fields should not be visible to agents.
* **Production:** This is your live site. When you are happy with how Cobrowse looks and performs in your staging environment, you can publish the changes to Production from the Settings page, and those changes will be live�no need to update any code on your production website.
* **Script Tag:** A short snippet of JavaScript furnished by Glance. When inserted into a website's HTML, the Script Tag enables Cobrowsing.
* **Session:** A Cobrowsing encounter between a visitor and an agent. A session may view one or more pages on a website.
* **Session Code:** A unique session identifier available to both the visitor and agent, allowing the agent to connect to the correct session.
* **Session Server:** A secured server that runs the Glance Cobrowse service, accepting session updates from the visitor and relaying them to the agent. Glance operates multiple Session Servers. Also known as a "CServer".
* **Staging:** Used for new website changes, where you can test and accept changes such as adjusting colors or text for the UI, masked fields, or new versions of Cobrowse. The staging site may require a different Cobrowse configuration from the production site.
* **Subscriber:** An agent or other person with an account on the Glance service.
* **Visitor:** Anyone navigating your company website. Your agents use Glance Cobrowse to assist your visitors.
=================================================================
FILE: /users/glance-cobrowse/getting-started
=================================================================
Once you set up Cobrowse, an agent can direct a visitor to click a link or button on the website and share the code that appears, or it can be integrated into the agent's [CRM system](/developer/integrations/) so that the agent can initiate a session for the visitor to accept.
5. Refer to the [Manage Settings](/users/account-management/manage_settings/) page for additional information.
=================================================================
FILE: /users/glance-cobrowse/getting-started/cobrowse_sso
=================================================================
Agents already logged into their CRM console can use single sign-on (SSO) functionality to join a Glance Cobrowse session without needing to log in separately.
For more information, visit [Glance Integrations](/developer/integrations/).
**Example SSO URL:**
```text
https://glance.net/cobrowse/AgentView.aspx?SessionKey=[nnnn]&partnerid=[pid]&partneruserid=[puid]&loginkey=[loginkey]
```
Replace the bracketed placeholders with actual values to initiate a Cobrowse session using SSO.
=================================================================
FILE: /users/glance-cobrowse/getting-started/glossary
=================================================================
Below is a list of common terms used throughout Glance.
* **Agent:** Your company's representative who supports your visitors in carrying out various tasks such as completing a purchase. Representatives who use Glance to support your visitors are known as subscribers.
* **CDN:** A content delivery network or content distribution network is a geographically distributed network of proxy servers and their data centers.
* **Glance Address:** A subscriber's username on the Glance service. Glance Addresses have the form `person.example.glance.net`.
* **Glance Customer:** A customer of Glance who subscribes to the Cobrowsing service.
* **Group ID:** A unique ID, a four-, five-, or six-digit number assigned to your company by Glance. You may have separate Group IDs for your development, staging, and production environments.
* **Guest:** An additional party invited to a Cobrowse session.
* **Masked Element:** An element in your company website containing sensitive or confidential data. Masked elements should not be visible to agents.
* **Masked Field:** An input form field in your company website containing sensitive or confidential data such as a social security or credit card number. Masked fields should not be visible to agents.
* **Production:** This is your live site. When you are happy with how Cobrowse looks and performs in your staging environment, you can publish the changes to Production from the Settings page, and those changes will be live�no need to update any code on your production website.
* **Script Tag:** A short snippet of JavaScript furnished by Glance. When inserted into a website's HTML, the Script Tag enables Cobrowsing.
* **Session:** A Cobrowsing encounter between a visitor and an agent. A session may view one or more pages on a website.
* **Session Code:** A unique session identifier available to both the visitor and agent, allowing the agent to connect to the correct session.
* **Session Server:** A secured server that runs the Glance Cobrowse service, accepting session updates from the visitor and relaying them to the agent. Glance operates multiple Session Servers. Also known as a "CServer".
* **Staging:** Used for new website changes, where you can test and accept changes such as adjusting colors or text for the UI, masked fields, or new versions of Cobrowse. The staging site may require a different Cobrowse configuration from the production site.
* **Subscriber:** An agent or other person with an account on the Glance service.
* **Visitor:** Anyone navigating your company website. Your agents use Glance Cobrowse to assist your visitors.
=================================================================
FILE: /users/glance-cobrowse/getting-started
=================================================================
Once you set up Cobrowse, an agent can direct a visitor to click a link or button on the website and share the code that appears, or it can be integrated into the agent's [CRM system](/developer/integrations/) so that the agent can initiate a session for the visitor to accept.
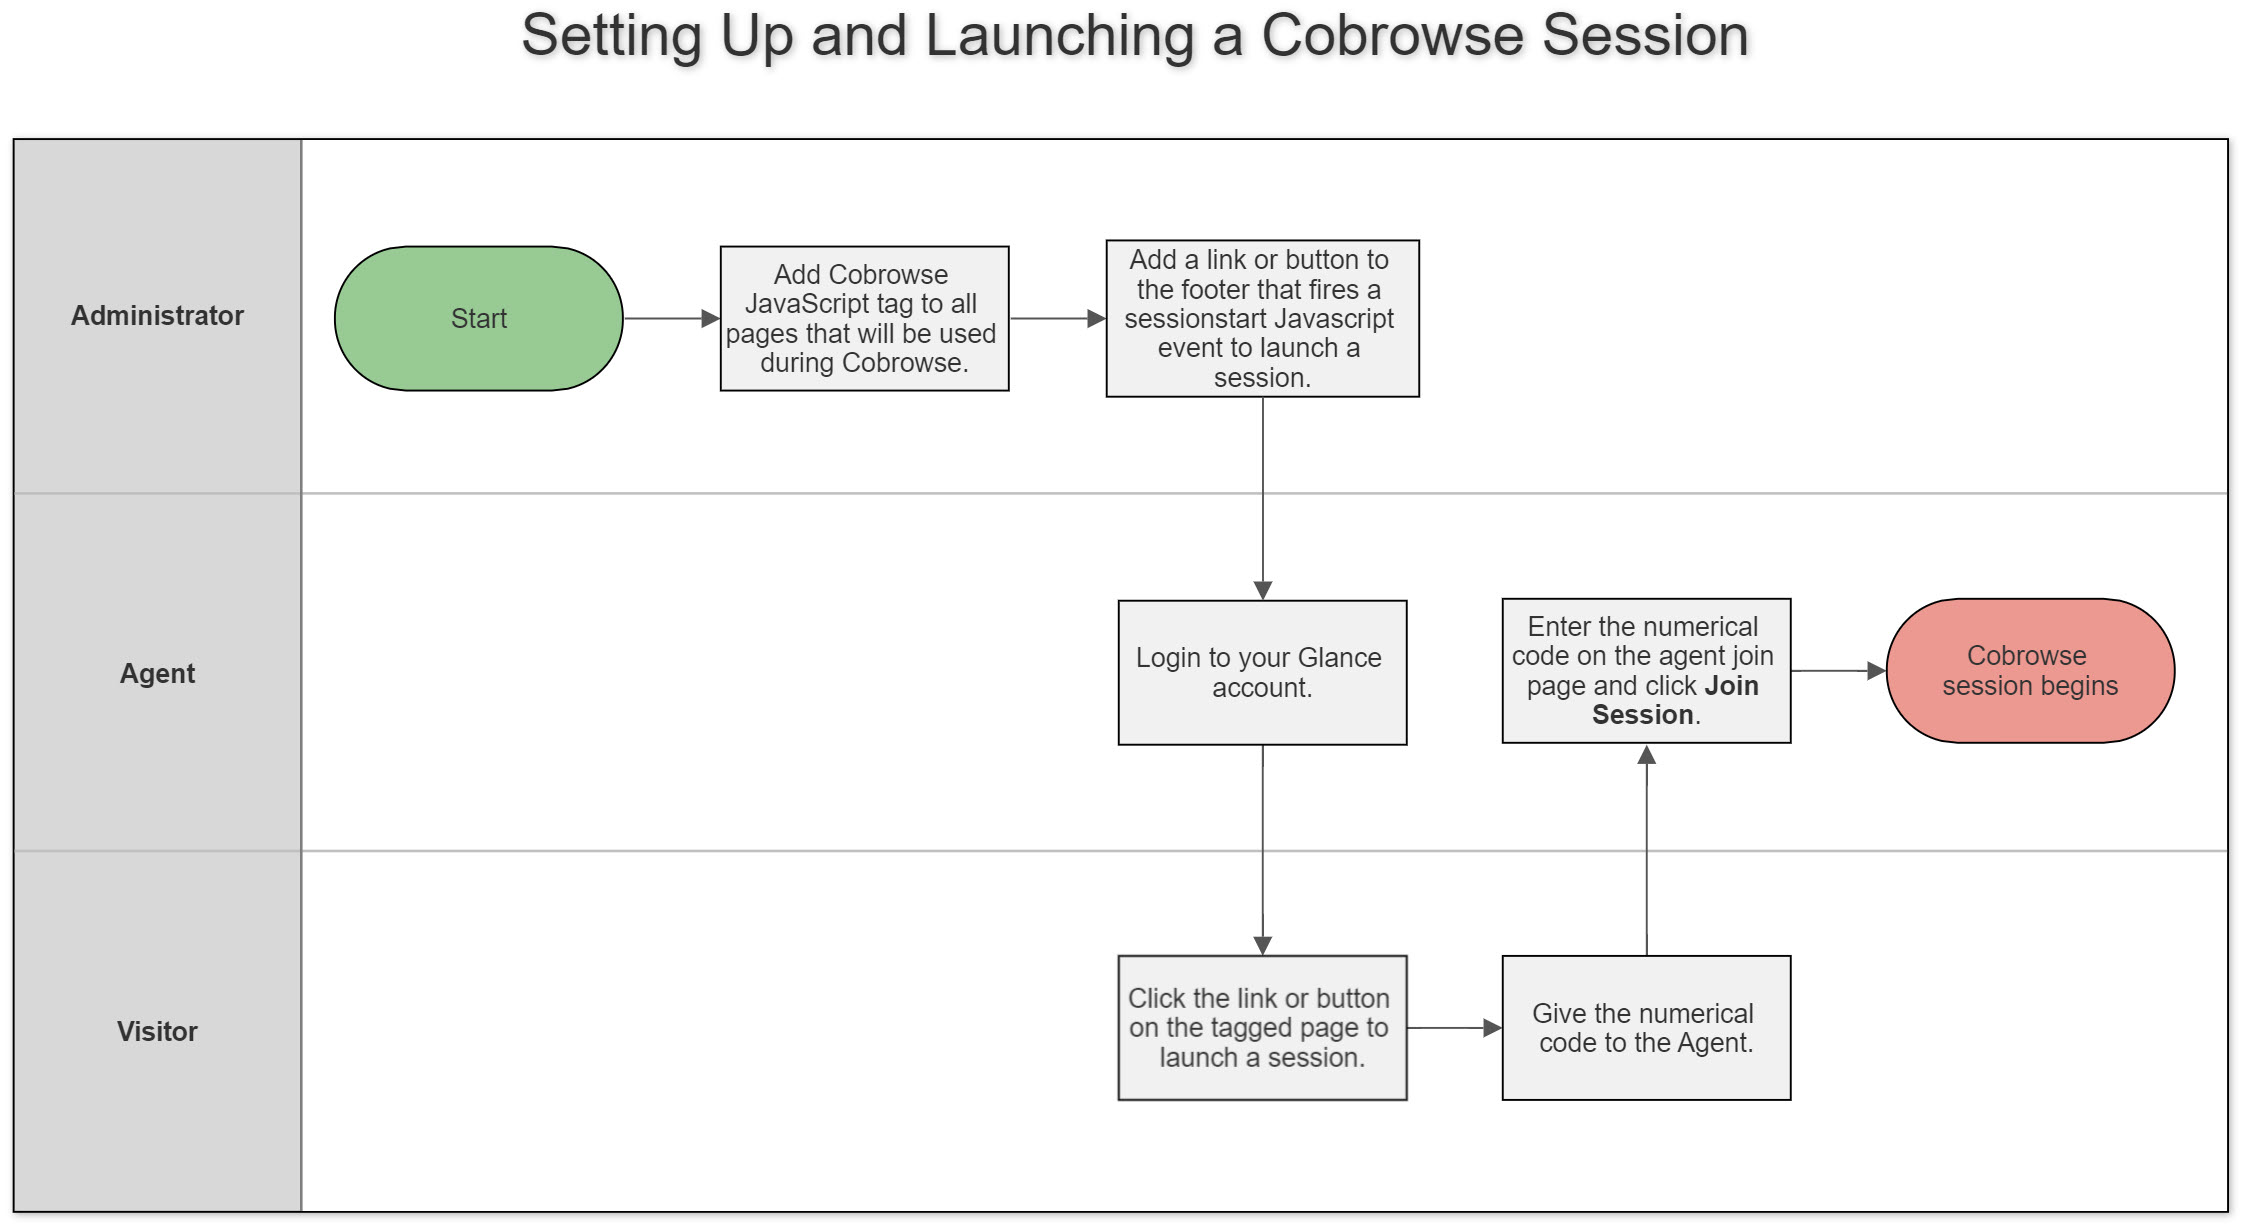 ## In This Section
{% children description="true" /%}
=================================================================
FILE: /users/glance-cobrowse/getting-started/join_session
=================================================================
If you are using Cobrowse as a stand-alone service without CRM integration, agents can join a session by visiting:
[https://www.glance.net/agentjoin](https://www.glance.net/agentjoin)
If the agent is not already logged in, they will be prompted to:
1. Log in using their Glance address and password.
2. Enter the **Session Code** provided by the website visitor.
## In This Section
{% children description="true" /%}
=================================================================
FILE: /users/glance-cobrowse/getting-started/join_session
=================================================================
If you are using Cobrowse as a stand-alone service without CRM integration, agents can join a session by visiting:
[https://www.glance.net/agentjoin](https://www.glance.net/agentjoin)
If the agent is not already logged in, they will be prompted to:
1. Log in using their Glance address and password.
2. Enter the **Session Code** provided by the website visitor.
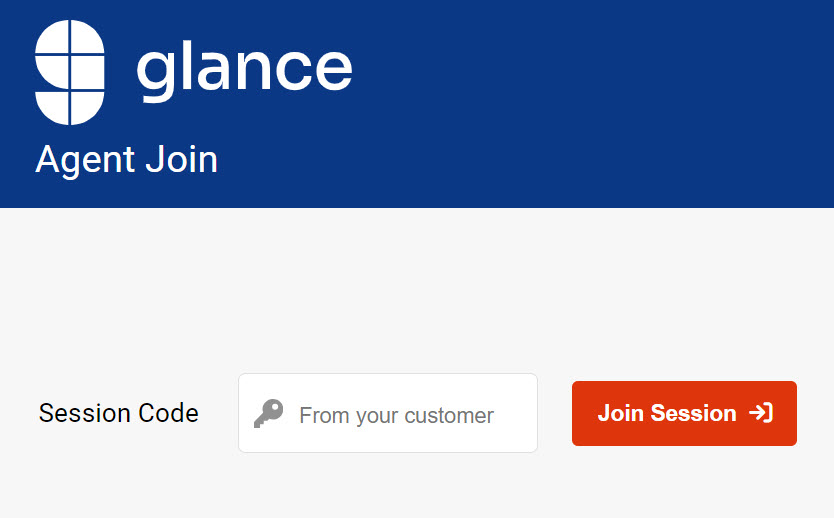 To avoid repeated logins throughout the day, agents can keep the following link open in their browser: [https://www.glance.net/account/accountkeepalive.aspx](https://www.glance.net/account/accountkeepalive.aspx). As long as this page remains open, the agent's session will stay active, and they will not need to re-authenticate when accessing the Agent Join page.
## Join a Session Through CRM Integration
If you are using a CRM integration such as Glance for Salesforce, you can join a Cobrowse session by setting up a field from a standard object (Lead, Case, Person, Opportunity, etc.) as the Visitor ID.
Once set up, the agent can click the Cobrowse button from Salesforce and when the button lights up orange�indicating that the visitor is currently active on the company's web property�they can be instantly connected to a Cobrowse session together.
This eliminates the need for the visitor to verbally share a session key. You can optionally configure this workflow to include a verbal confirmation, accept terms and conditions, or launch the session automatically. For more information, visit [Glance Integrations Support](/developer/integrations/).
=================================================================
FILE: /users/glance-cobrowse/getting-started/multiple_groups
=================================================================
All Cobrowse settings are specific to the group in which the session runs. These settings include:
* Masked elements
* Trusted domains for cross domain Cobrowse
* Trusted domains for invoking Cobrowse from a "chat" window
Cobrowse supports running multiple sessions across different groups on the same website, enabling flexible call center models. Agent permissions can be configured to allow access only to sessions within designated groups.
## Specify the Groups in the Script Tag
Customers can specify additional Group IDs in the script tag using the `data-additionalgroupids` attribute. For example:
```html
data-additionalgroupids="59923,50920"
```
This allows different pages to be tagged with different sets of Group IDs as needed. However, a primary Group ID (`data-groupid`) must still be specified. This ID serves as the default group and is also required for non-Cobrowse features such as Presence.
## Start a Session in a Particular Group
The `GLANCE.Cobrowse.Visitor.startSession()` API call accepts an optional `groupid` parameter, allowing you to specify the group in which the session should start. If this parameter is not provided, the session will default to the primary group defined in the script tag.
For example, this starts a session in group 72:
```javascript
GLANCE.Cobrowse.Visitor.startSession({ groupid : 72 });
```
Refer to the [API](/developer/legacy_api/visitor_agent/visitor/#using-startsession) section for more details.
An alternate Group ID can also be specified by the agent side when initiating a session via the Presence API.
To avoid repeated logins throughout the day, agents can keep the following link open in their browser: [https://www.glance.net/account/accountkeepalive.aspx](https://www.glance.net/account/accountkeepalive.aspx). As long as this page remains open, the agent's session will stay active, and they will not need to re-authenticate when accessing the Agent Join page.
## Join a Session Through CRM Integration
If you are using a CRM integration such as Glance for Salesforce, you can join a Cobrowse session by setting up a field from a standard object (Lead, Case, Person, Opportunity, etc.) as the Visitor ID.
Once set up, the agent can click the Cobrowse button from Salesforce and when the button lights up orange�indicating that the visitor is currently active on the company's web property�they can be instantly connected to a Cobrowse session together.
This eliminates the need for the visitor to verbally share a session key. You can optionally configure this workflow to include a verbal confirmation, accept terms and conditions, or launch the session automatically. For more information, visit [Glance Integrations Support](/developer/integrations/).
=================================================================
FILE: /users/glance-cobrowse/getting-started/multiple_groups
=================================================================
All Cobrowse settings are specific to the group in which the session runs. These settings include:
* Masked elements
* Trusted domains for cross domain Cobrowse
* Trusted domains for invoking Cobrowse from a "chat" window
Cobrowse supports running multiple sessions across different groups on the same website, enabling flexible call center models. Agent permissions can be configured to allow access only to sessions within designated groups.
## Specify the Groups in the Script Tag
Customers can specify additional Group IDs in the script tag using the `data-additionalgroupids` attribute. For example:
```html
data-additionalgroupids="59923,50920"
```
This allows different pages to be tagged with different sets of Group IDs as needed. However, a primary Group ID (`data-groupid`) must still be specified. This ID serves as the default group and is also required for non-Cobrowse features such as Presence.
## Start a Session in a Particular Group
The `GLANCE.Cobrowse.Visitor.startSession()` API call accepts an optional `groupid` parameter, allowing you to specify the group in which the session should start. If this parameter is not provided, the session will default to the primary group defined in the script tag.
For example, this starts a session in group 72:
```javascript
GLANCE.Cobrowse.Visitor.startSession({ groupid : 72 });
```
Refer to the [API](/developer/legacy_api/visitor_agent/visitor/#using-startsession) section for more details.
An alternate Group ID can also be specified by the agent side when initiating a session via the Presence API.
- A link with the
data-glancebuttonattribute. - Key combinations specified in the
data-inputeventsattribute in the script tag.
Allows the agent to resize the video window.

Allows the agent to turn their video on and off.

Allows the agent to eject the guest, if needed.
Allows the agent to pause the visitor's video.
The Cobrowse widget contains the End button and options to resize video or turn video on/off. The widget can be dragged and dropped on the screen during a session and will snap to a corner based on the quadrant it is moved into.

The G icon is only informational.

Provides the ability to choose a webcam, turn on video background effects, or turn on accessibility.

Choose which camera you want to use for the session.
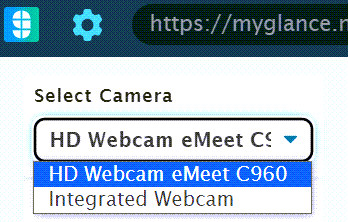
Turn background effects on or off.

If enabled, turn this switch on (blue) to enable accessibility. This feature allows agents to guide customers by clicking on a page element, which automatically activates the visitor's screen reader to read the clicked element out loud.
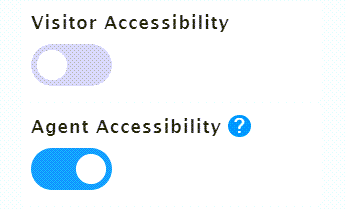
If remote assist is enabled, these buttons allow you to go back or forward.

If remote assist is enabled, this button allows you to refresh the page.

Allows the agent to invite guests to the session.
Once the agent clicks Add Guest, they can click the copy button to copy the URL to the guest join page to share with guests. Once the agent has a code from a guest, they enter the code into the field and click Admit.
If the agent has share screen privileges, it provides the ability for the agent to share a window, browser tab, or their entire screen. It also allows the agent to send a request to the visitor to view their screen.

If the agent has remote assist privileges, it provides the ability for the agent to request control of the visitor's interface. When remote assist is on, a green dot in the middle of the mouse icon is displayed. To stop remote assist, click the mouse button again.

If the agent has share document privileges, it provides the ability for the agent to share a document with the visitor or for the visitor to share a document with the agent.

If the agent has video privileges, it provides the ability for the agent to show video. Click the video button to start agent video. When video is on, a green dot in the middle of the camera icon is displayed. To stop agent video, click the video button again.

Provides relevant session details and diagnostics, including Session Code, Visitor OS, Browser Type, Browser Version, and Report a Problem (if enabled).

The End button ends the session and closes the browser window.

If a visitor is logged in, and an agent has 1-click connect enabled in a CRM, when the agent clicks the orange Join button, the visitor is presented with a set of terms and conditions.

If the camera isn't enabled, this is the first screen.
Video preview with session code once the camera is enabled.
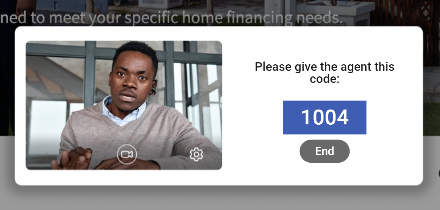
Visitor has clicked the block camera on the browser bar icon or turned off the camera in the modal.
Displays when the visitor has accepted terms, but is waiting for the agent to click Join.
Allows the visitor to accept the remote assist request.
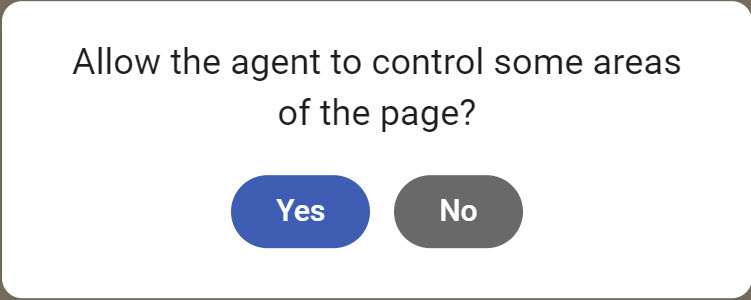
Allows the user to choose a camera.
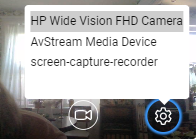
Allows the user to turn their camera on or off.

Allows the guest to enter their name. Once they click Join, a code appears.
Allows the guest to choose a camera.
Allows the guest to turn their camera on or off.
Once the guest has entered their name, a code box appears, which they will provide to the agent to admit them.
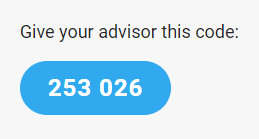
In small video mode, if you cannot see all participants in the session, this icon allows you to filter through different participants.

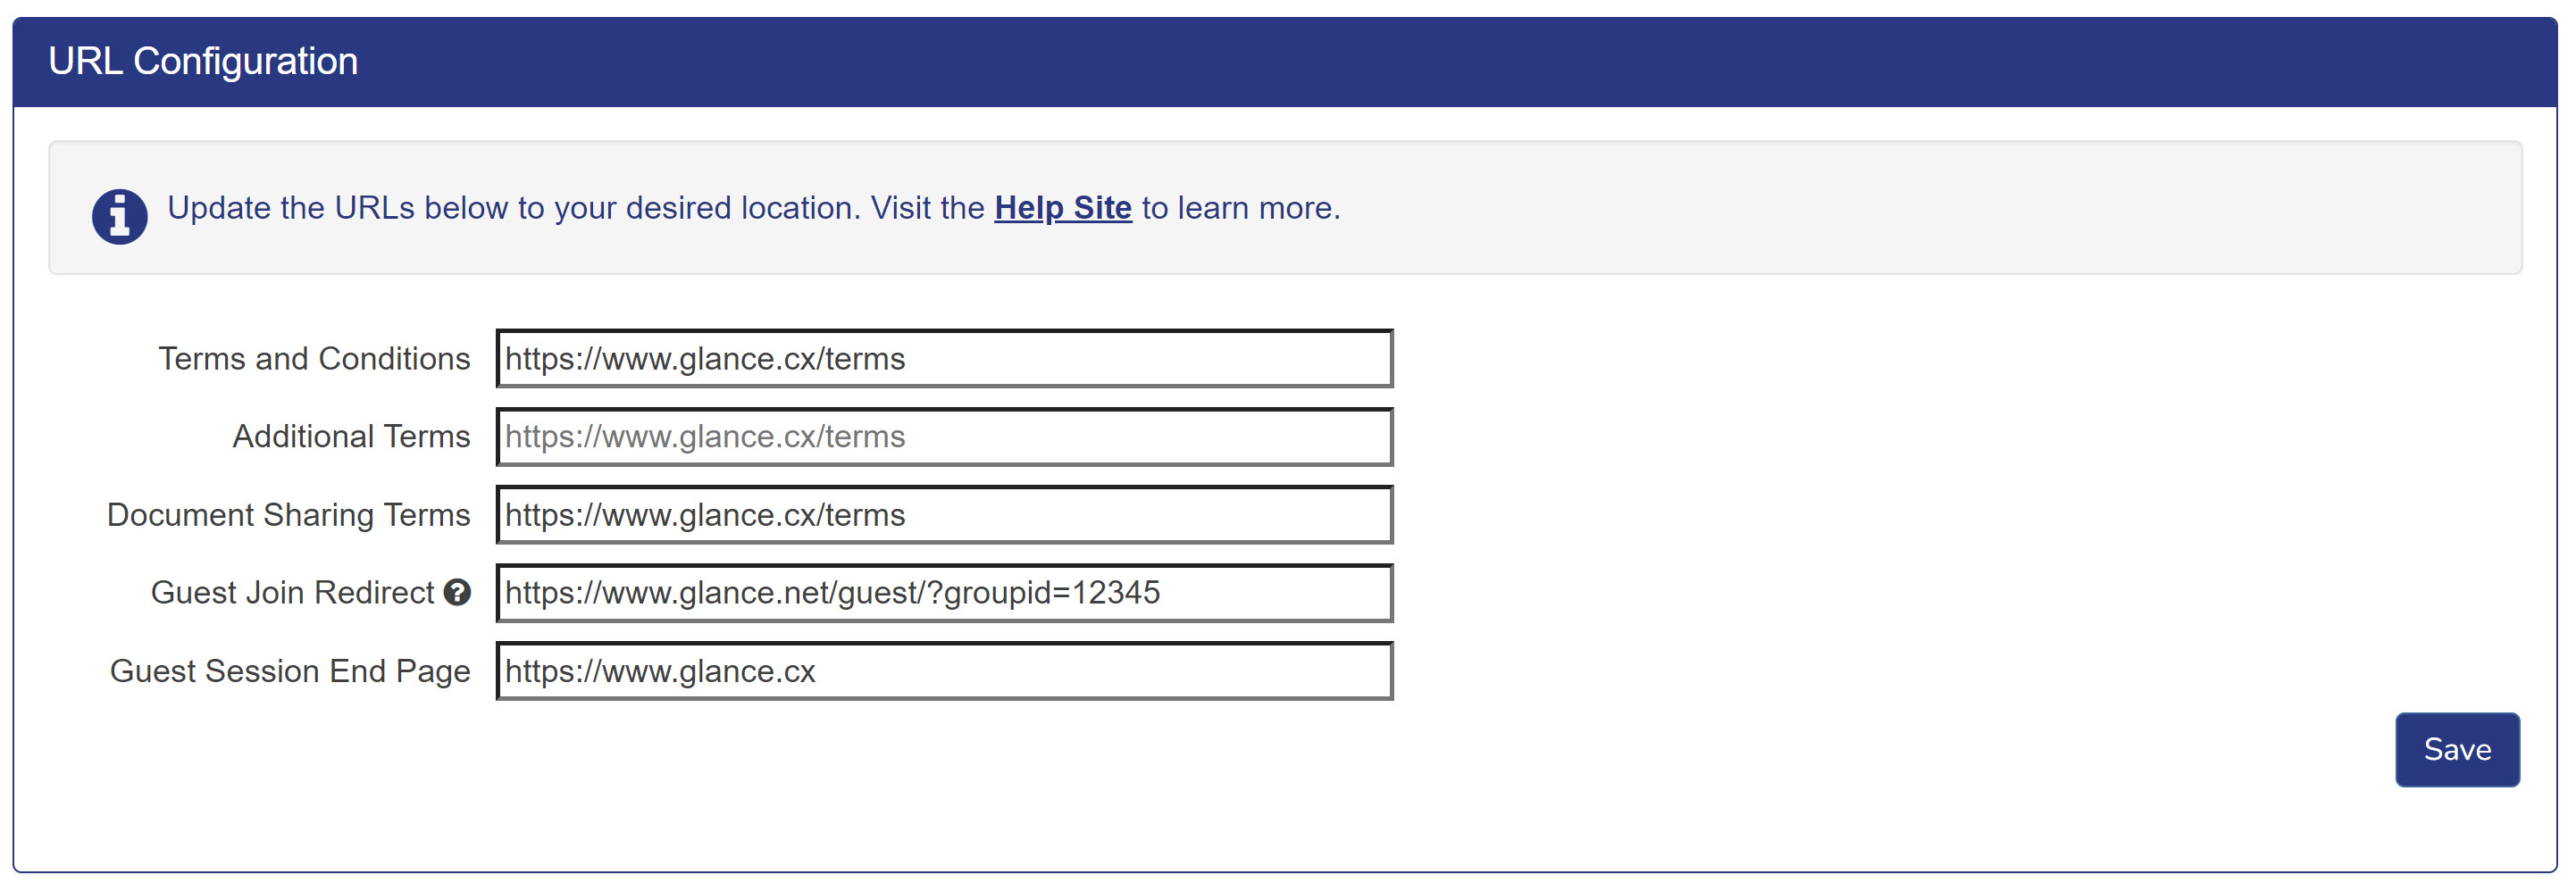 The **URL Configuration** section within **Cobrowse Settings** allows you to customize the URL links used during a Cobrowse session.
* **Terms and Conditions**: Provides customers with a terms and conditions agreement at the beginning of a Cobrowse session. This URL defaults to the Glance Terms and Conditions page.
* **Additional Terms**: An additional line for terms to show up below Terms and Conditions. If this field is not populated, nothing will display on the modal. If a URL is provided, text must be provided in the [Customization Tool](/users/glance-cobrowse/getting-started/widget-customization/) in order for this URL to be displayed.
* **Document Sharing Terms**: The Terms and Conditions displayed to the customer when an agent prompts a visitor to share a document. This URL defaults to the Glance Terms and Conditions page.
* **Guest Join Redirect**: Create a new URL for the Guest Join page to provide to the guest. The customer must create a page hosted on their own domain and then add a redirect to the Glance Guest Join page. This URL defaults to the Glance guest join page.
* **Guest Session End Page**: The page that guests are redirected to when a Cobrowse session ends. This URL defaults to Glance.cx.
=================================================================
FILE: /users/glance-cobrowse/getting-started/widget-customization
=================================================================
The Cobrowse Widget Customization UI contains two tabs at the top: one for **Staging** and one for **Production**. As you make changes to the respective sections, the preview will dynamically change to reflect your changes. After you finish making customization changes, first click **Save to Staging** to preview to Staging. Once you are satisfied with the changes, click **Publish to Production**.
This feature is supported for Cobrowse version 5.7 and later.
## Access
1. Administrators navigate to **Account Management**.
2. Click the **Settings** tab.
3. Scroll down to the **Session Settings** section and select **Manage your Cobrowse settings**.
4. Scroll down to the **Cobrowse Customizations** section and click **Manage cobrowse customizations**.
## Color
Choose the colors for the widget bar, buttons, and gesturing. You can customize the color of the following UI elements by entering the hex value into the field next to the element.
* Primary Color (Widget bar and all main buttons' background color and links)
* Button Text Color (Session code, all main buttons)
* Body background (Prompts and modal windows)
* Message text (Text and headlines that appear on all UI elements)
* Secondary button background (Usually a cancel or decline button)
* In-session border
* Remote Assist border
* Gesture
* Focus indicator color
The **URL Configuration** section within **Cobrowse Settings** allows you to customize the URL links used during a Cobrowse session.
* **Terms and Conditions**: Provides customers with a terms and conditions agreement at the beginning of a Cobrowse session. This URL defaults to the Glance Terms and Conditions page.
* **Additional Terms**: An additional line for terms to show up below Terms and Conditions. If this field is not populated, nothing will display on the modal. If a URL is provided, text must be provided in the [Customization Tool](/users/glance-cobrowse/getting-started/widget-customization/) in order for this URL to be displayed.
* **Document Sharing Terms**: The Terms and Conditions displayed to the customer when an agent prompts a visitor to share a document. This URL defaults to the Glance Terms and Conditions page.
* **Guest Join Redirect**: Create a new URL for the Guest Join page to provide to the guest. The customer must create a page hosted on their own domain and then add a redirect to the Glance Guest Join page. This URL defaults to the Glance guest join page.
* **Guest Session End Page**: The page that guests are redirected to when a Cobrowse session ends. This URL defaults to Glance.cx.
=================================================================
FILE: /users/glance-cobrowse/getting-started/widget-customization
=================================================================
The Cobrowse Widget Customization UI contains two tabs at the top: one for **Staging** and one for **Production**. As you make changes to the respective sections, the preview will dynamically change to reflect your changes. After you finish making customization changes, first click **Save to Staging** to preview to Staging. Once you are satisfied with the changes, click **Publish to Production**.
This feature is supported for Cobrowse version 5.7 and later.
## Access
1. Administrators navigate to **Account Management**.
2. Click the **Settings** tab.
3. Scroll down to the **Session Settings** section and select **Manage your Cobrowse settings**.
4. Scroll down to the **Cobrowse Customizations** section and click **Manage cobrowse customizations**.
## Color
Choose the colors for the widget bar, buttons, and gesturing. You can customize the color of the following UI elements by entering the hex value into the field next to the element.
* Primary Color (Widget bar and all main buttons' background color and links)
* Button Text Color (Session code, all main buttons)
* Body background (Prompts and modal windows)
* Message text (Text and headlines that appear on all UI elements)
* Secondary button background (Usually a cancel or decline button)
* In-session border
* Remote Assist border
* Gesture
* Focus indicator color
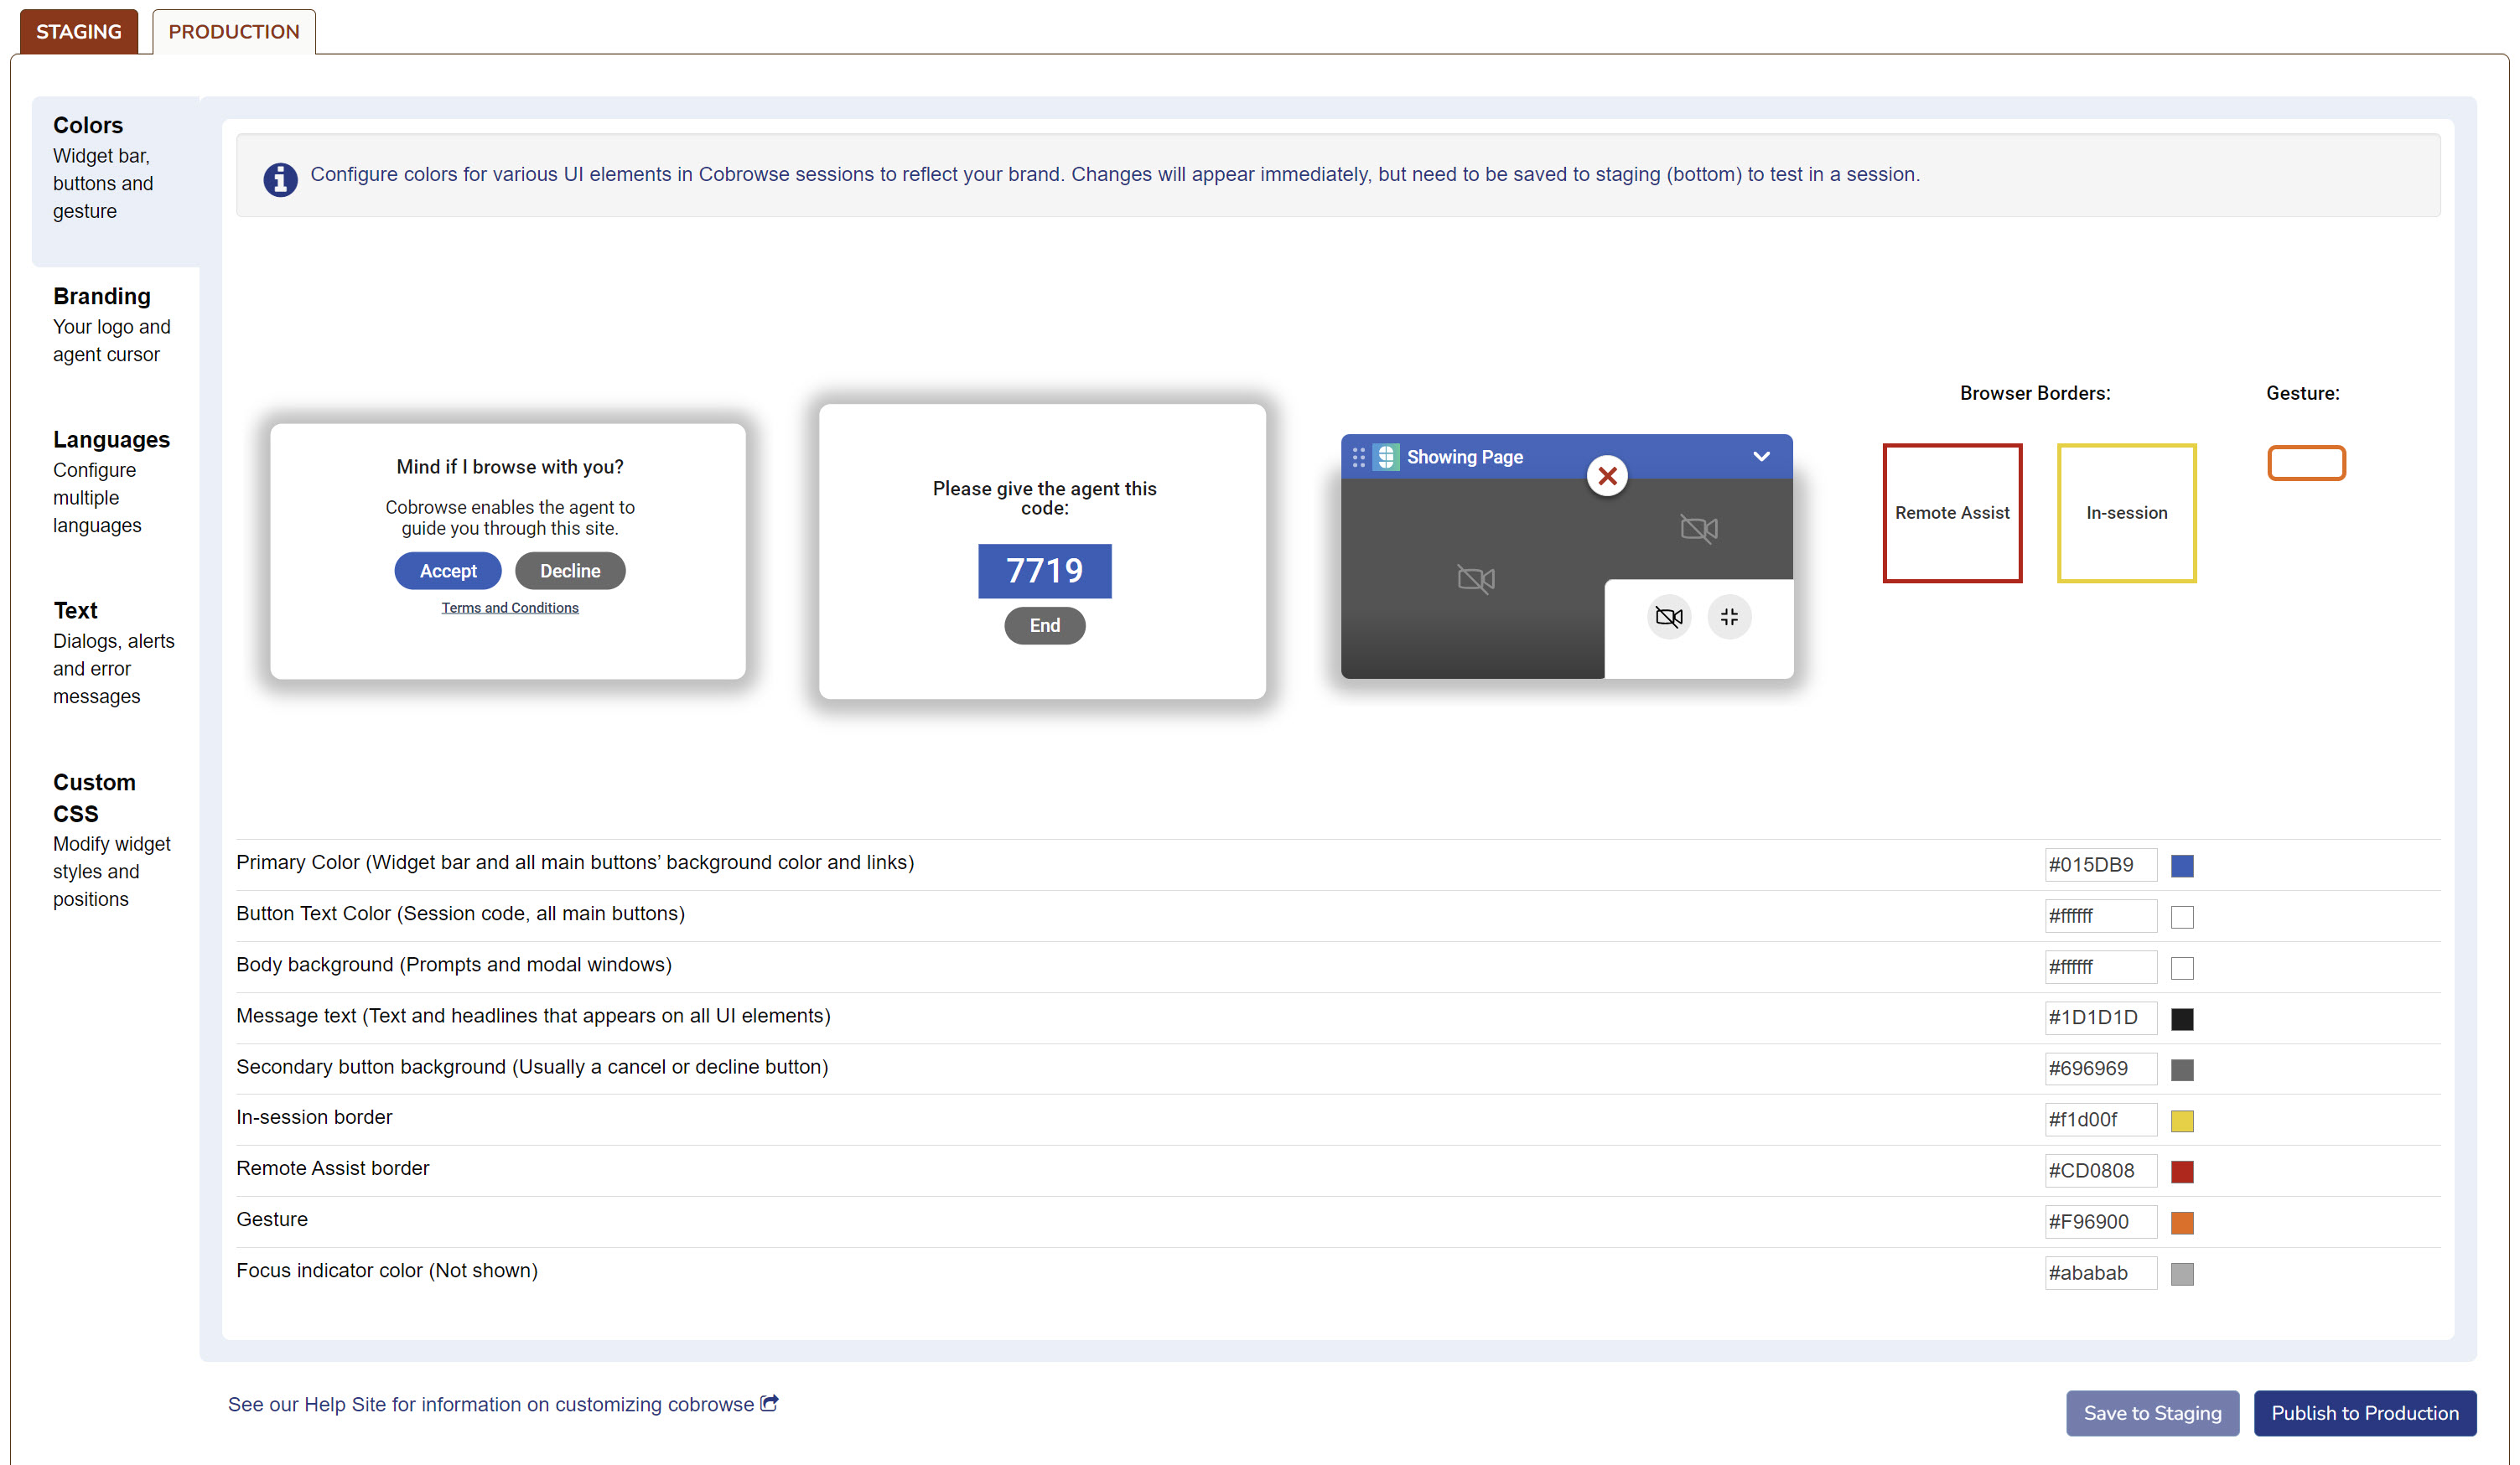 ### Demo
Below is a video demonstration of updating the colors of UI elements.
### Demo
Below is a video demonstration of updating the colors of UI elements.
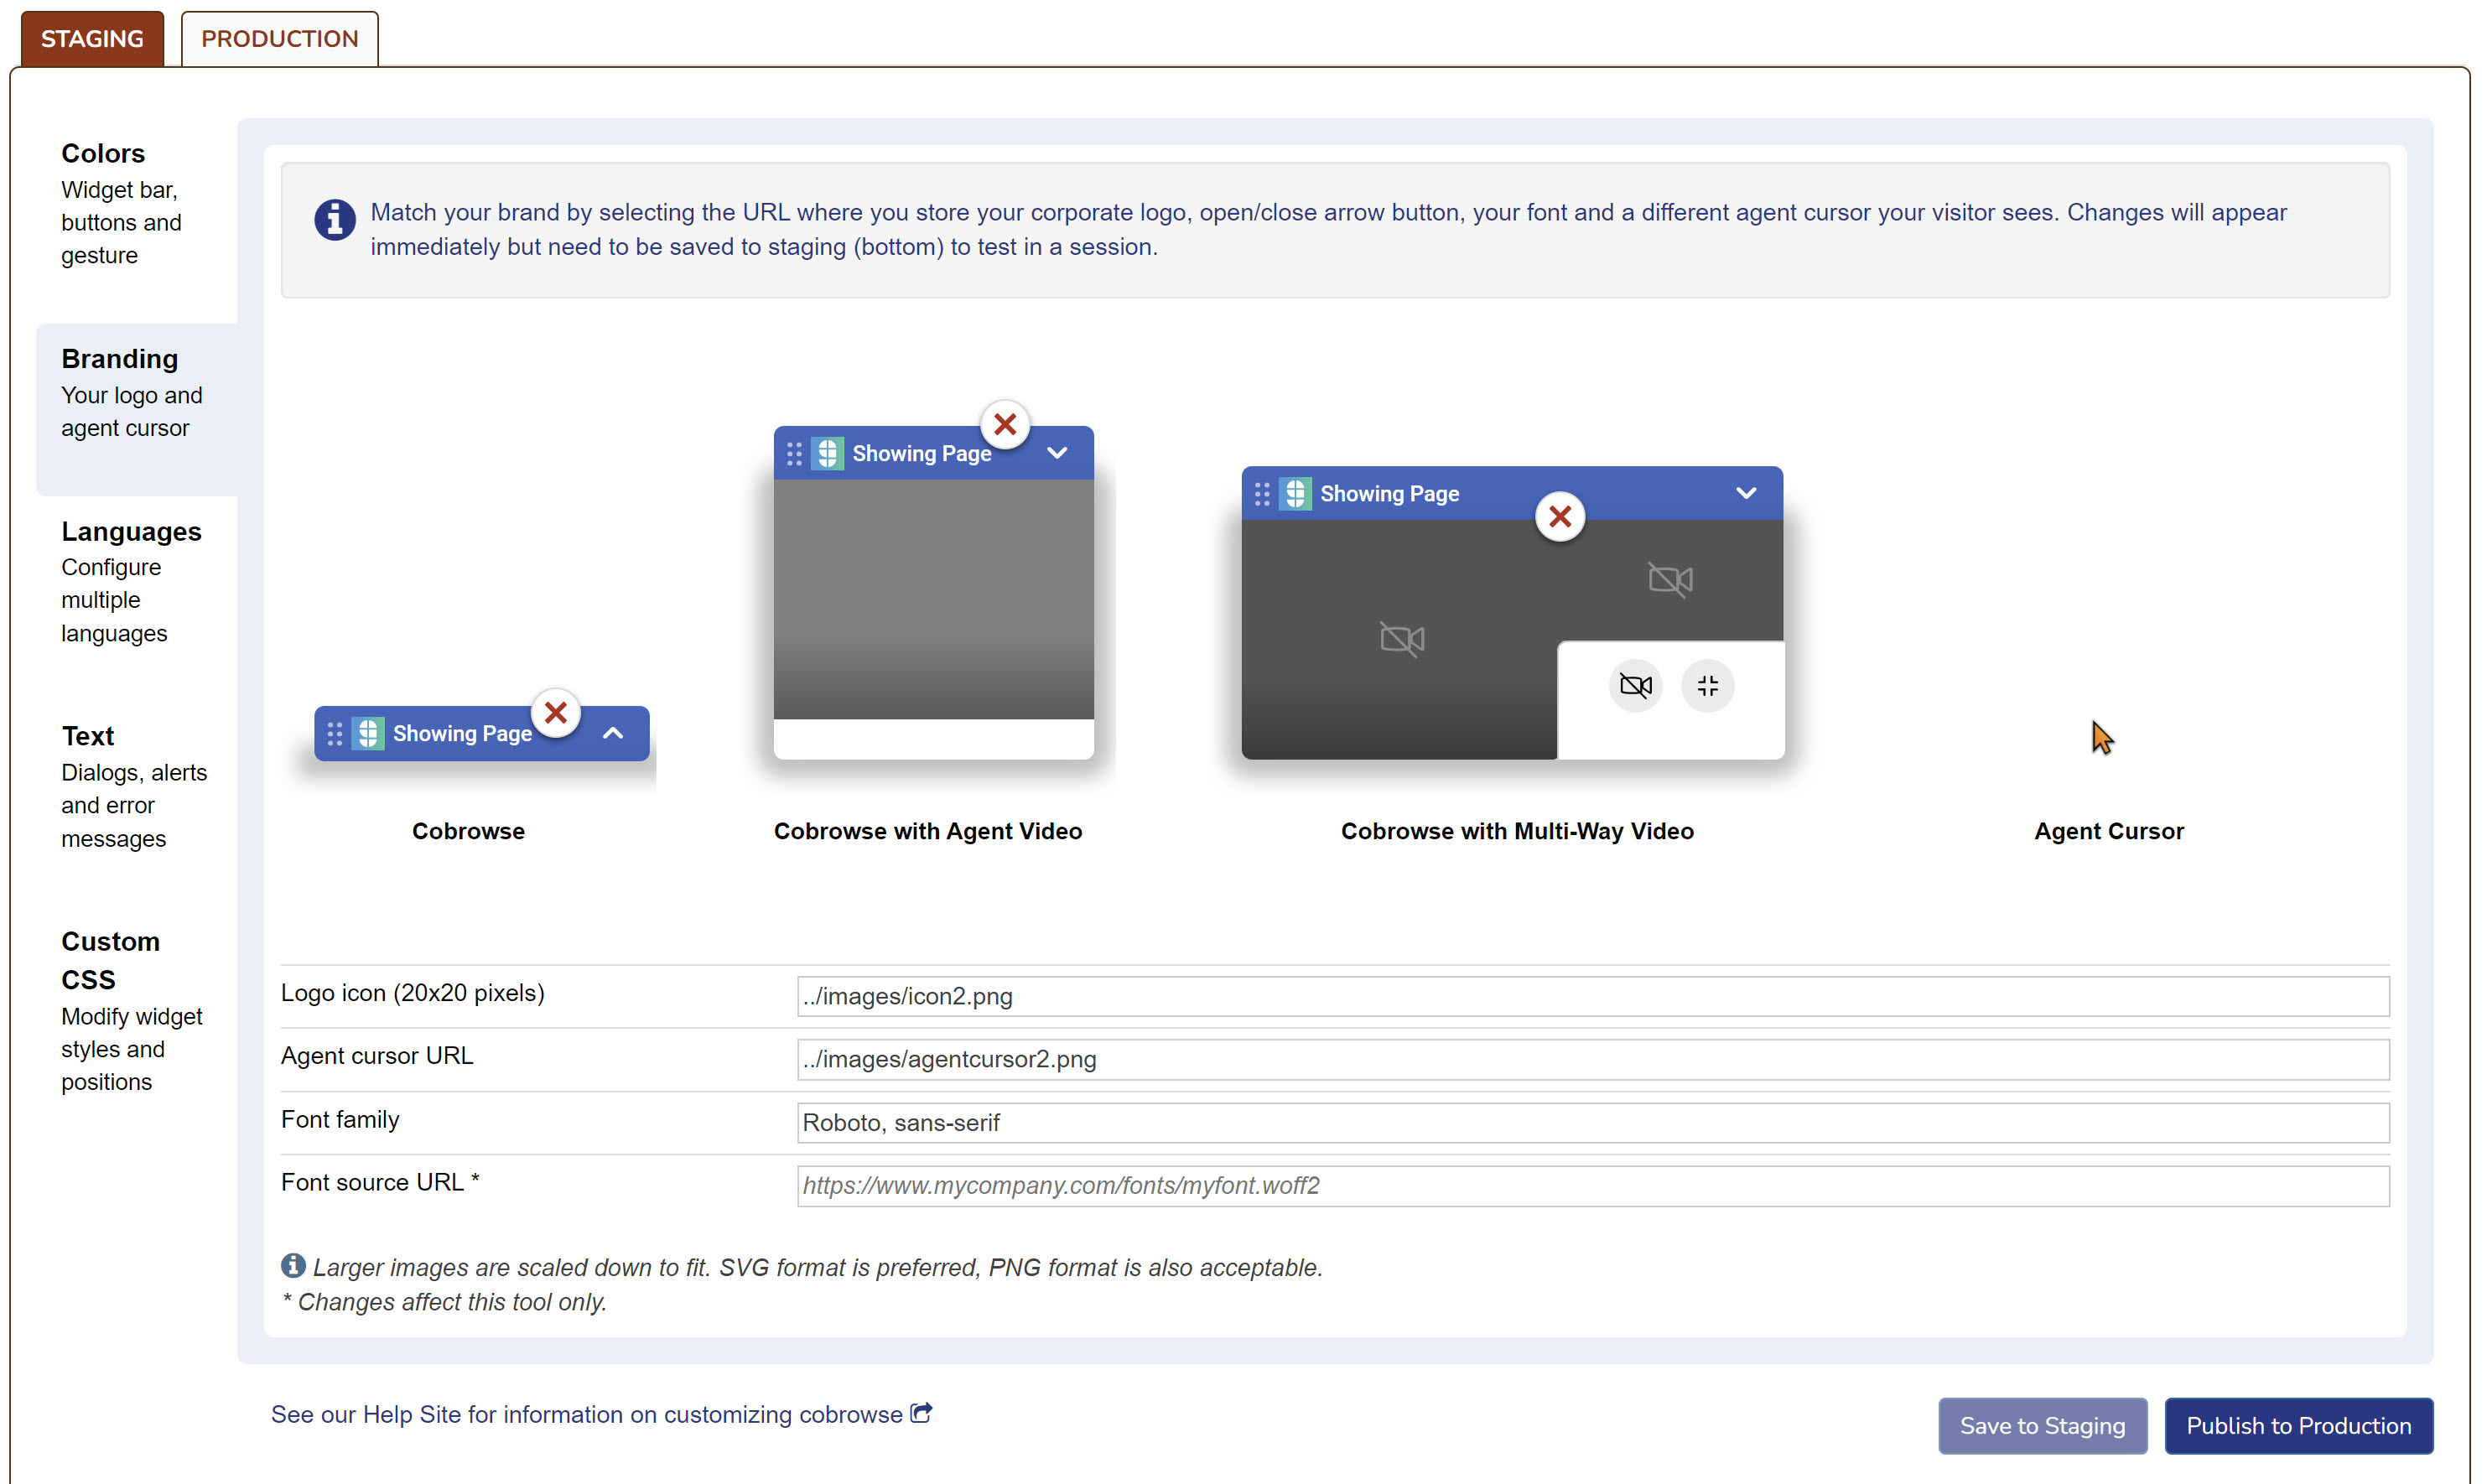 ## Languages
The **Language** section allows the user to customize which languages are enabled within the widget. The user is also able to make bulk updates to the text used within the modals by updating JSON files. The following languages are supported by Glance:
* English
* French
* French (Canada)
* German
* Italian
* Japanese
* Portuguese (Brazil)
* Spanish
* Spanish (Mexico)
* Spanish (US) - *only available for Cobrowse version 6.33 and later*
## Languages
The **Language** section allows the user to customize which languages are enabled within the widget. The user is also able to make bulk updates to the text used within the modals by updating JSON files. The following languages are supported by Glance:
* English
* French
* French (Canada)
* German
* Italian
* Japanese
* Portuguese (Brazil)
* Spanish
* Spanish (Mexico)
* Spanish (US) - *only available for Cobrowse version 6.33 and later*
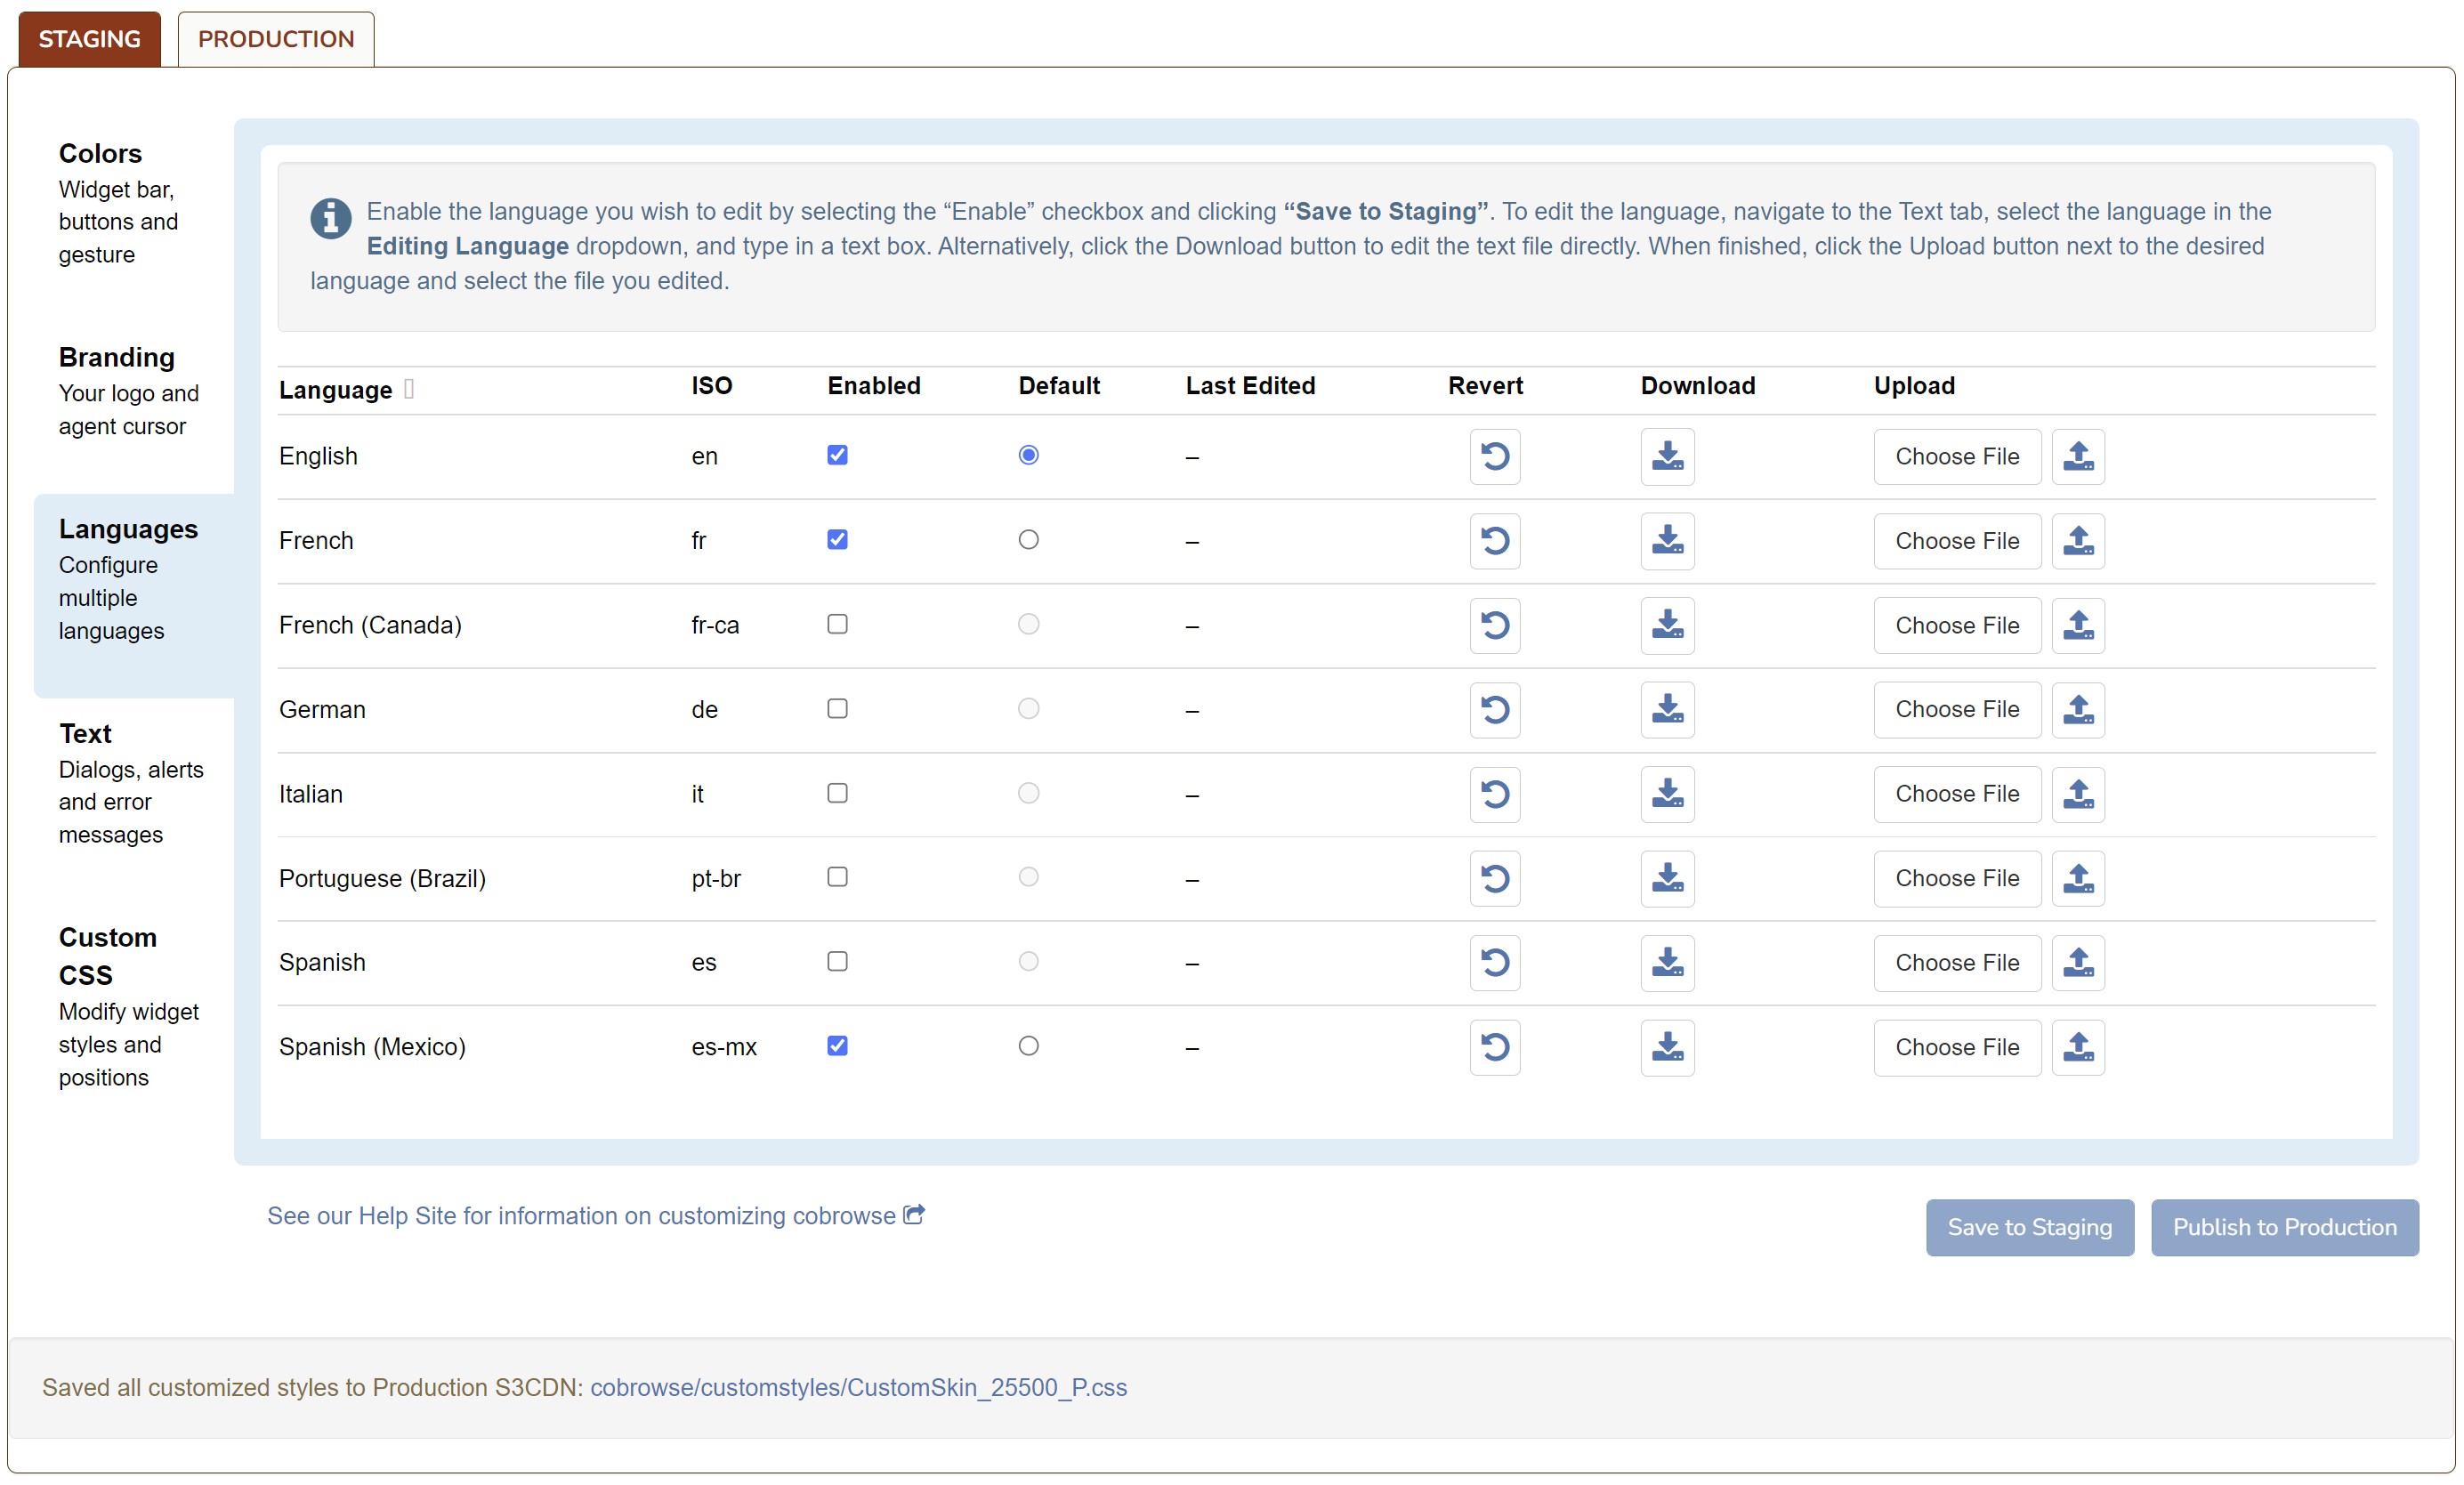 ### Enabled Language
Select the **Enabled** option next to each language that you wish to support.
### Enabled Language
Select the **Enabled** option next to each language that you wish to support.
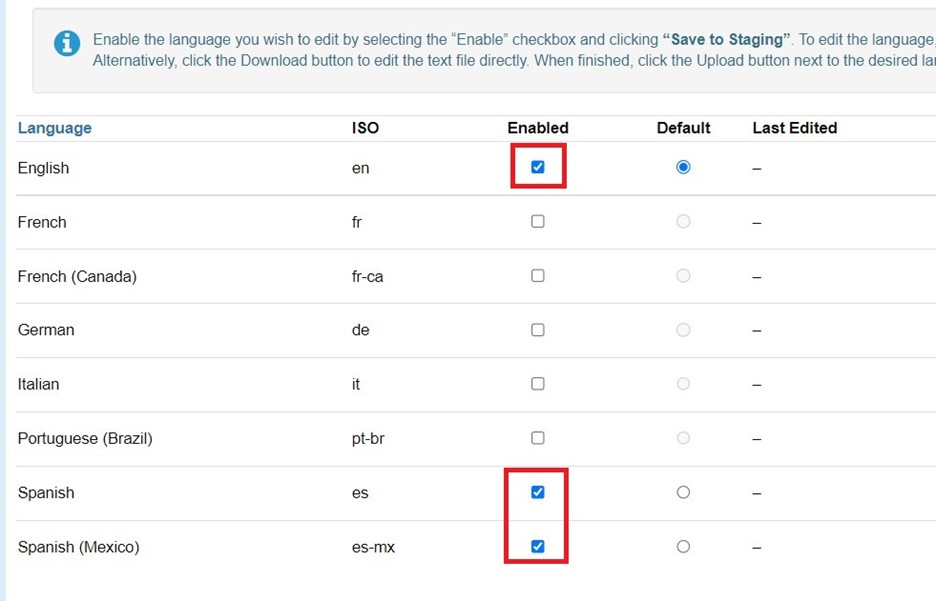 ### Default Language
Click the **Default** option next to a language to set it as the default language.
### Default Language
Click the **Default** option next to a language to set it as the default language.
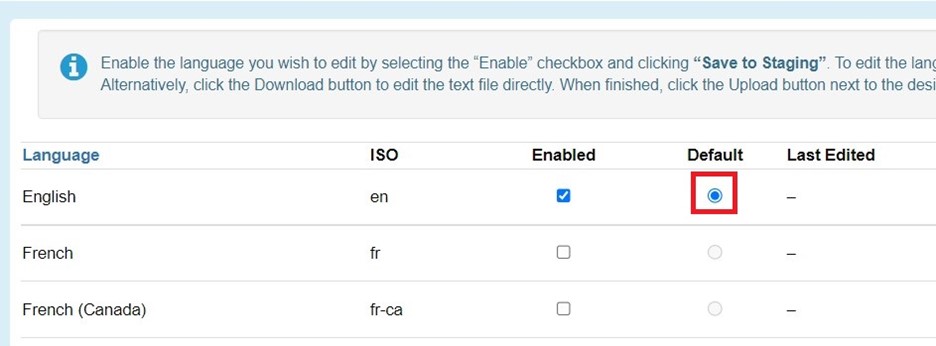 ### Language Hierarchy
When the Cobrowse session first starts, Glance will check the `` `lang` `` attribute on the `` `` `` tag of the page.
1. If the `` `lang` `` attribute is set to one of the enabled languages, that language will be used.
2. If there is no `` `lang` `` attribute or the `` `lang` `` attribute specifies a language not enabled for Cobrowse, then Glance checks the language setting in the visitor's browser. If the browser is set to a language enabled for Cobrowse, that language will be used.
3. If neither the language specified by the `` `lang` `` attribute nor the visitor's browser is an exact match of any of the languages enabled for the group, then the Cobrowse widget will display in an enabled language (if there are any) that shares the same main language code based on the HTML language attribute then the browser language setting. For example, if the visitor's browser is set for Spanish (`es`) but the group has only enabled Mexican Spanish (`es-mx`), then the widget will display using the strings set for Mexican Spanish, and vice versa.
4. If none of the above are applicable, the customer's default language will be used.
### Download A Language File
A language file can be downloaded in order to make bulk updates to the text within the modals. Complete the following steps to download, edit, and reupload a language file.
1. Click the **Download** button next to the desired language.
2. The file will download through your browser.
### Language Hierarchy
When the Cobrowse session first starts, Glance will check the `` `lang` `` attribute on the `` `` `` tag of the page.
1. If the `` `lang` `` attribute is set to one of the enabled languages, that language will be used.
2. If there is no `` `lang` `` attribute or the `` `lang` `` attribute specifies a language not enabled for Cobrowse, then Glance checks the language setting in the visitor's browser. If the browser is set to a language enabled for Cobrowse, that language will be used.
3. If neither the language specified by the `` `lang` `` attribute nor the visitor's browser is an exact match of any of the languages enabled for the group, then the Cobrowse widget will display in an enabled language (if there are any) that shares the same main language code based on the HTML language attribute then the browser language setting. For example, if the visitor's browser is set for Spanish (`es`) but the group has only enabled Mexican Spanish (`es-mx`), then the widget will display using the strings set for Mexican Spanish, and vice versa.
4. If none of the above are applicable, the customer's default language will be used.
### Download A Language File
A language file can be downloaded in order to make bulk updates to the text within the modals. Complete the following steps to download, edit, and reupload a language file.
1. Click the **Download** button next to the desired language.
2. The file will download through your browser.
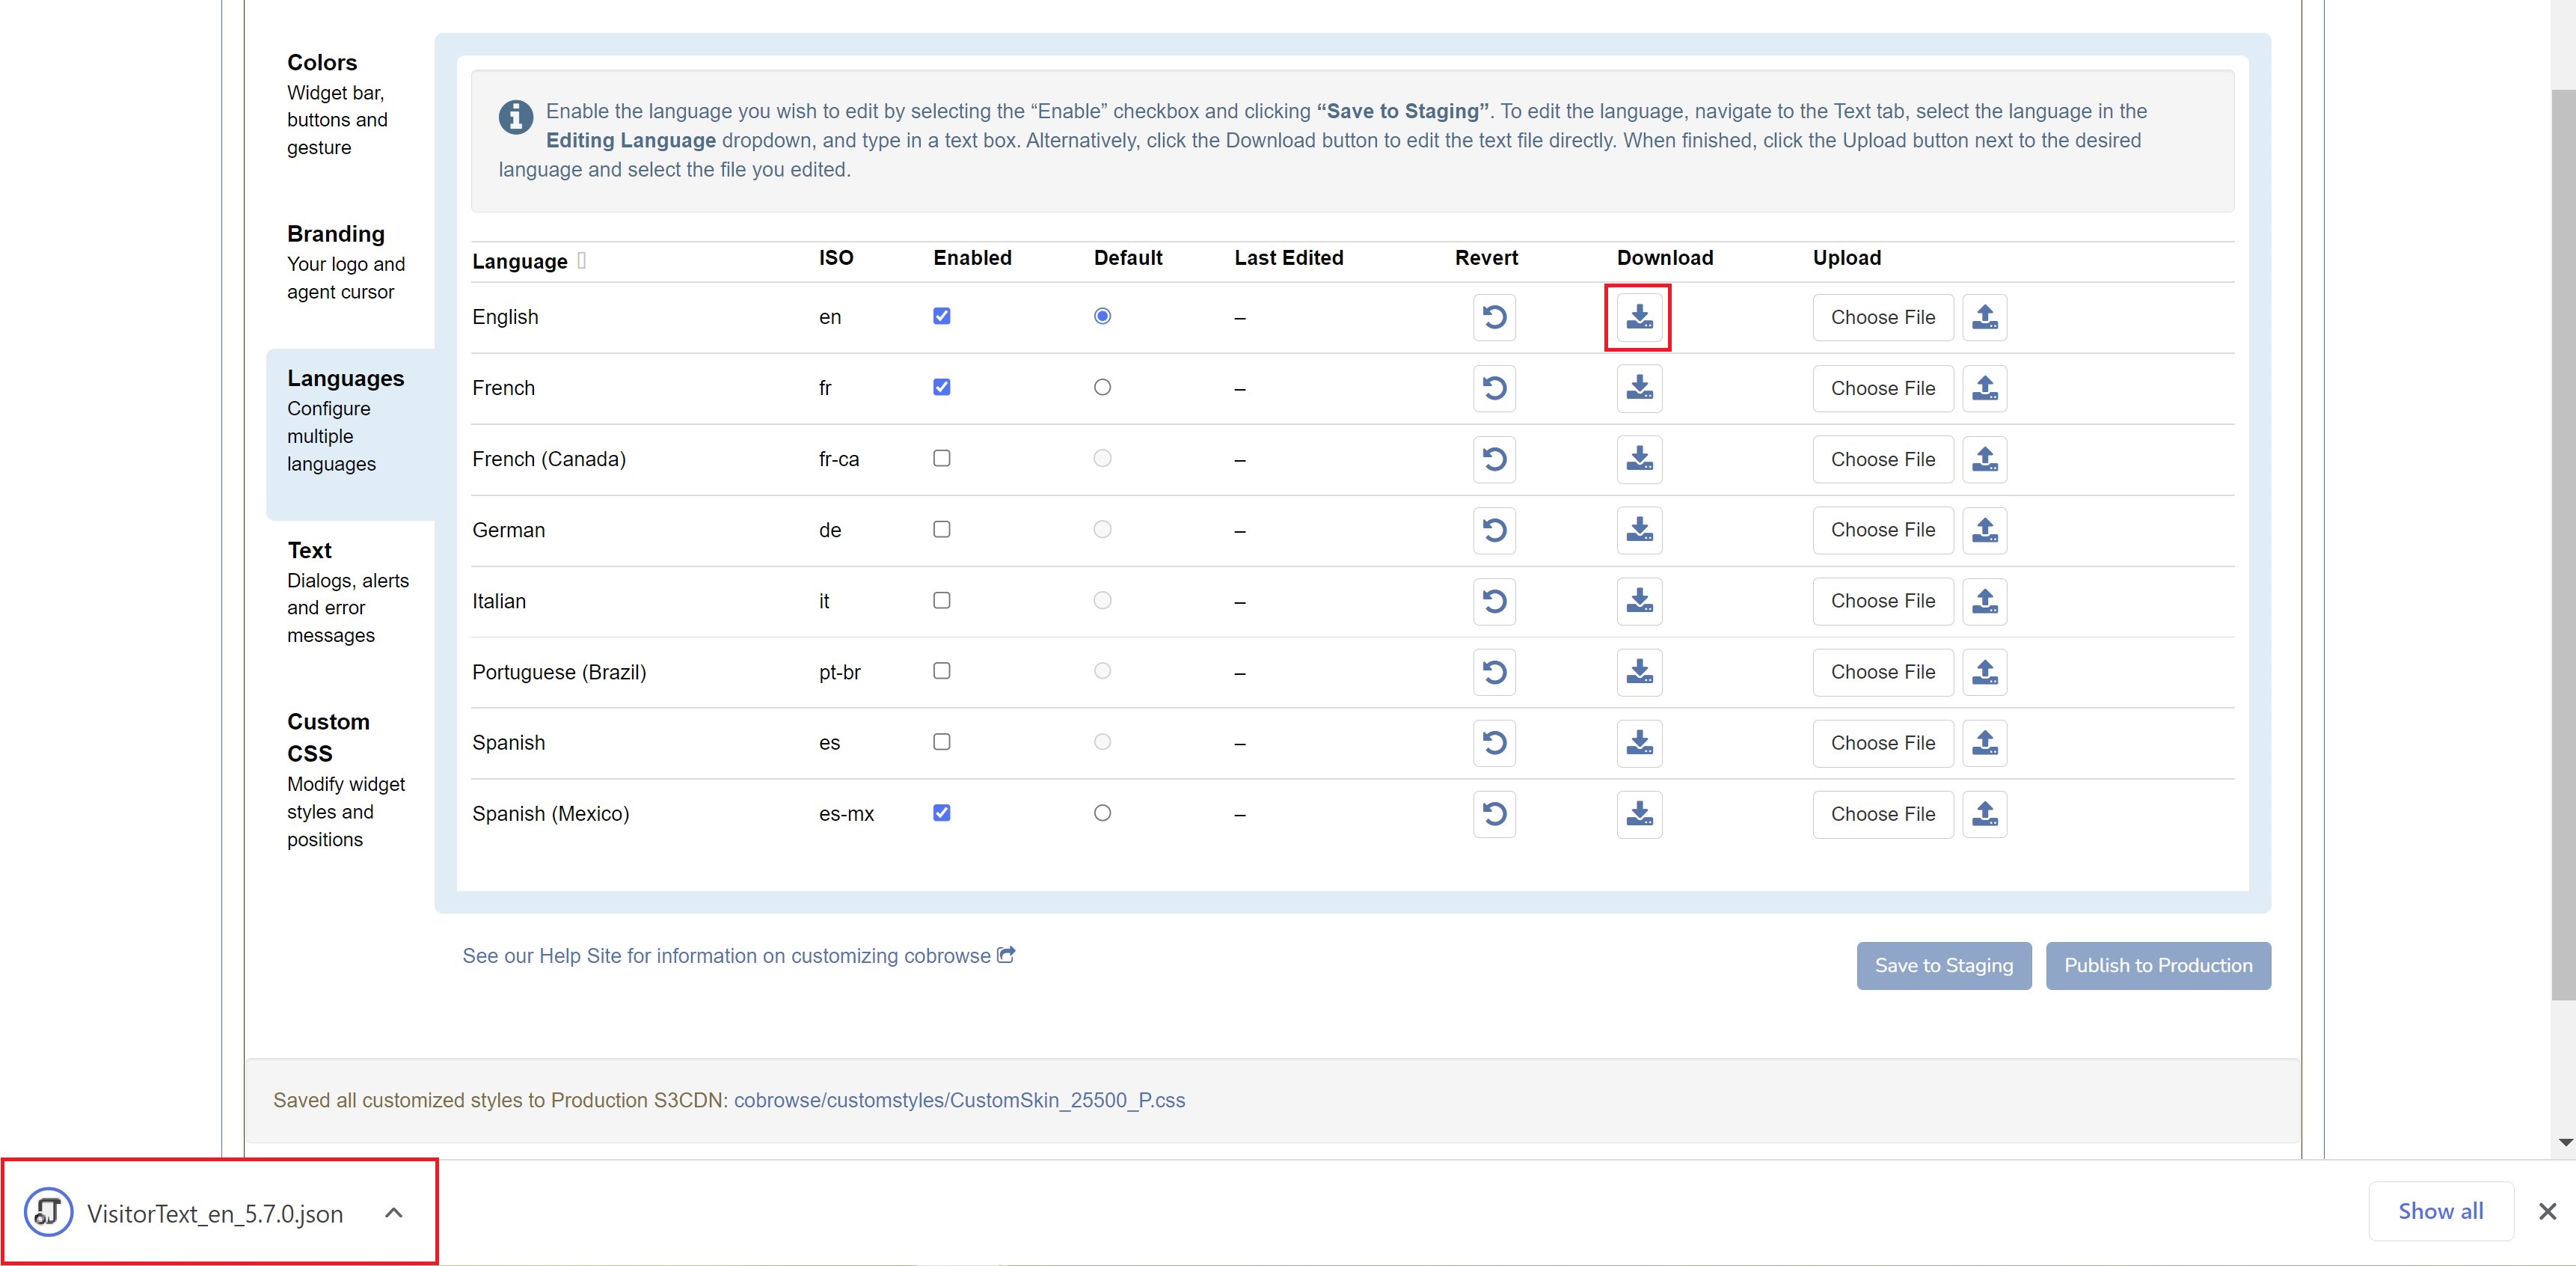 3. Save the file to your local drive and open it using a text editor.
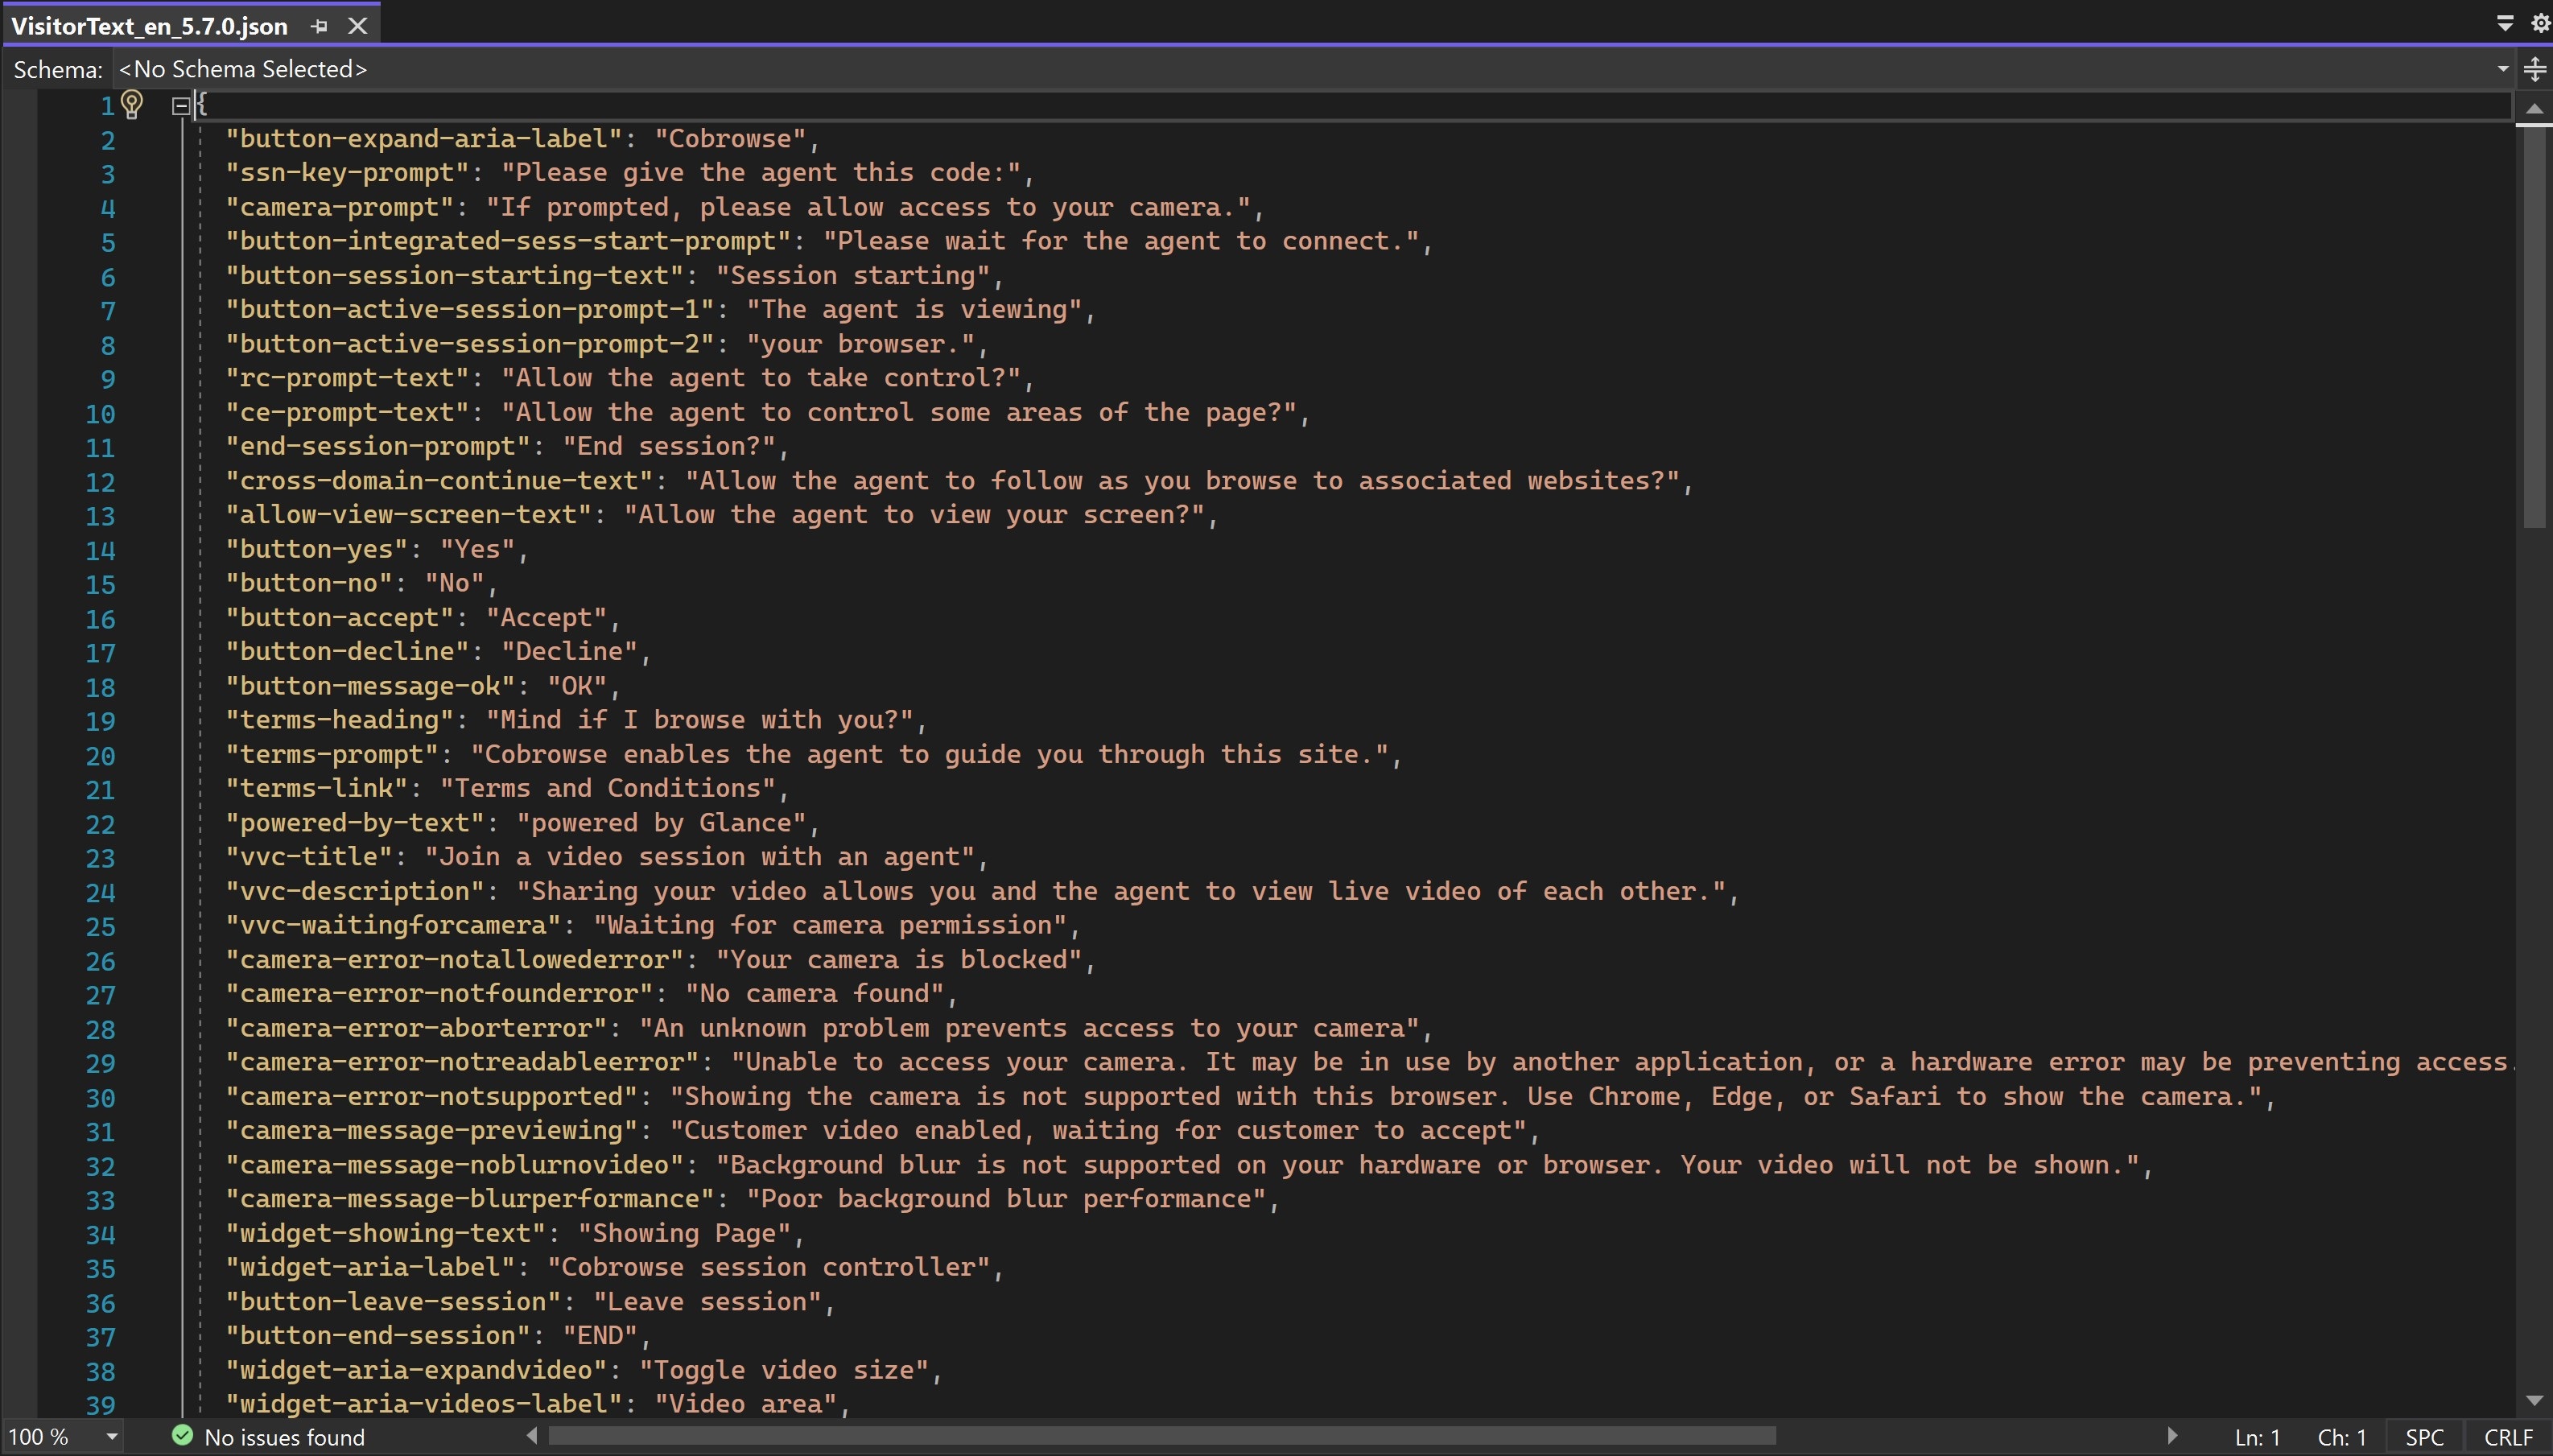 4. Make the desired changes to the JSON file.
5. Save the file as **VisitorText_[groupid]_language_S.json** (e.g., English Language = `VisitorText_12345_en_S.json`) when your changes are complete.
4. Make the desired changes to the JSON file.
5. Save the file as **VisitorText_[groupid]_language_S.json** (e.g., English Language = `VisitorText_12345_en_S.json`) when your changes are complete.
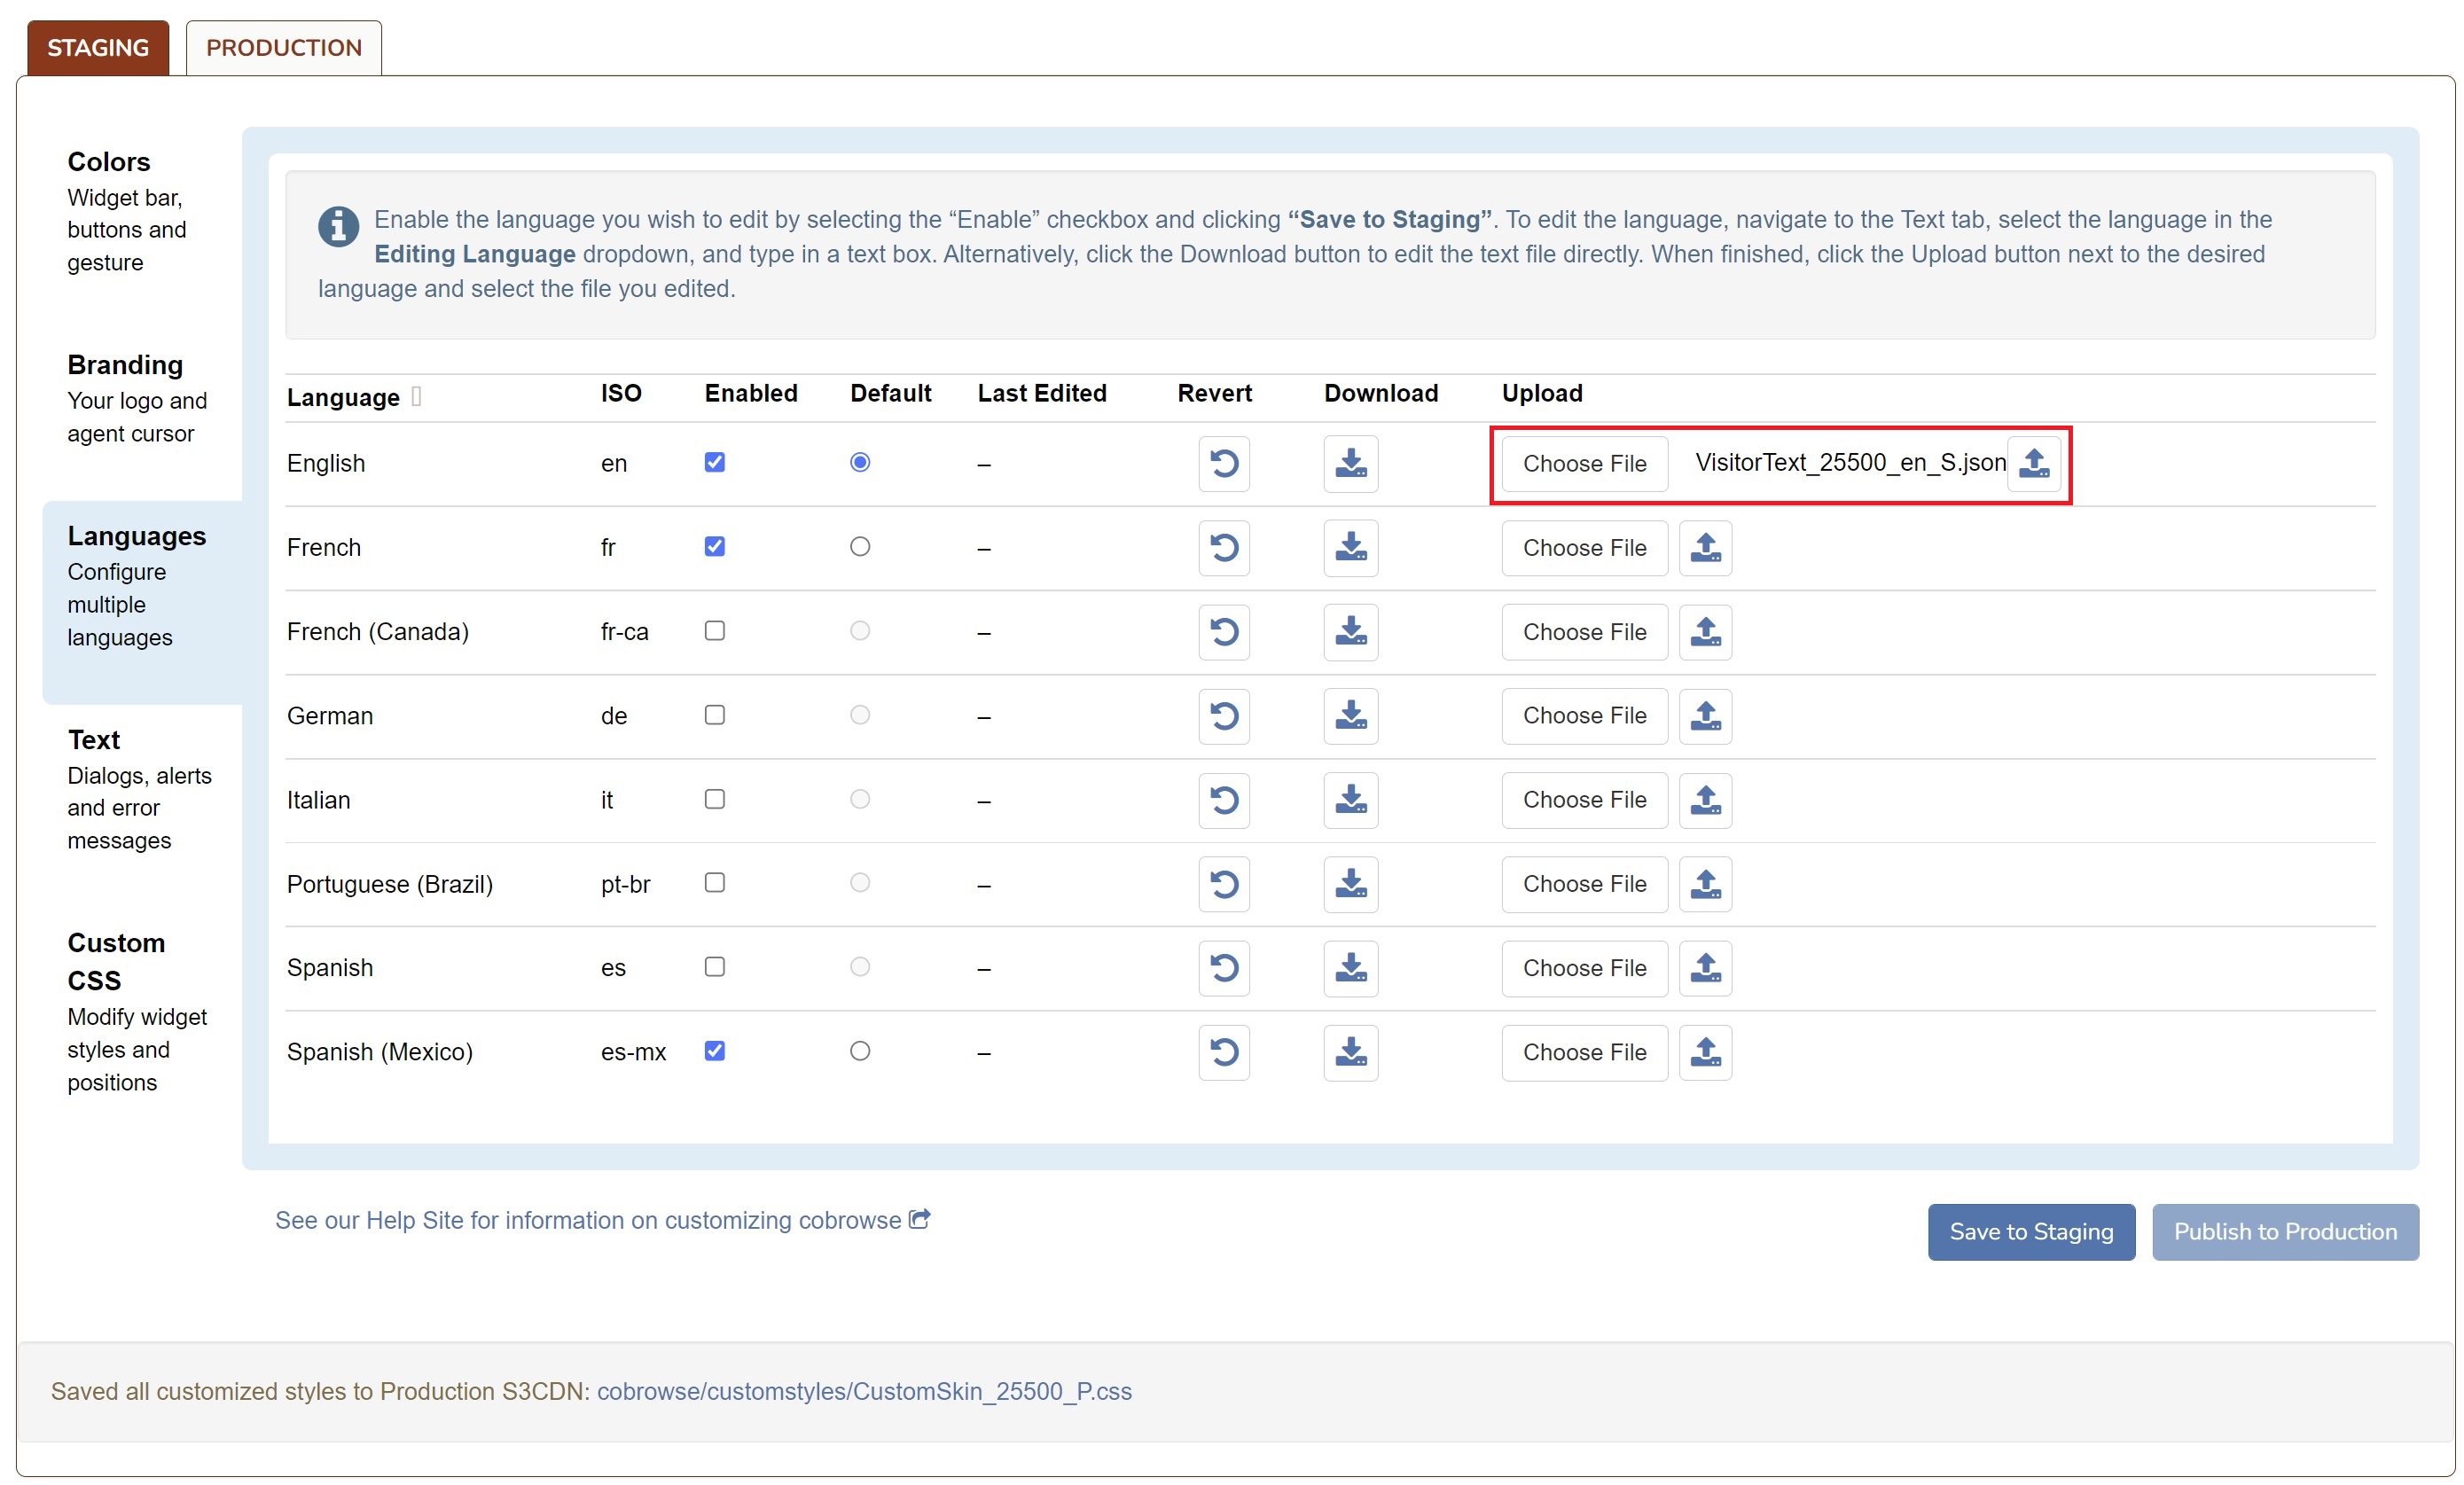 ## Text
The **Text** section allows the user to modify individual segments of text within the modals.
## Text
The **Text** section allows the user to modify individual segments of text within the modals.
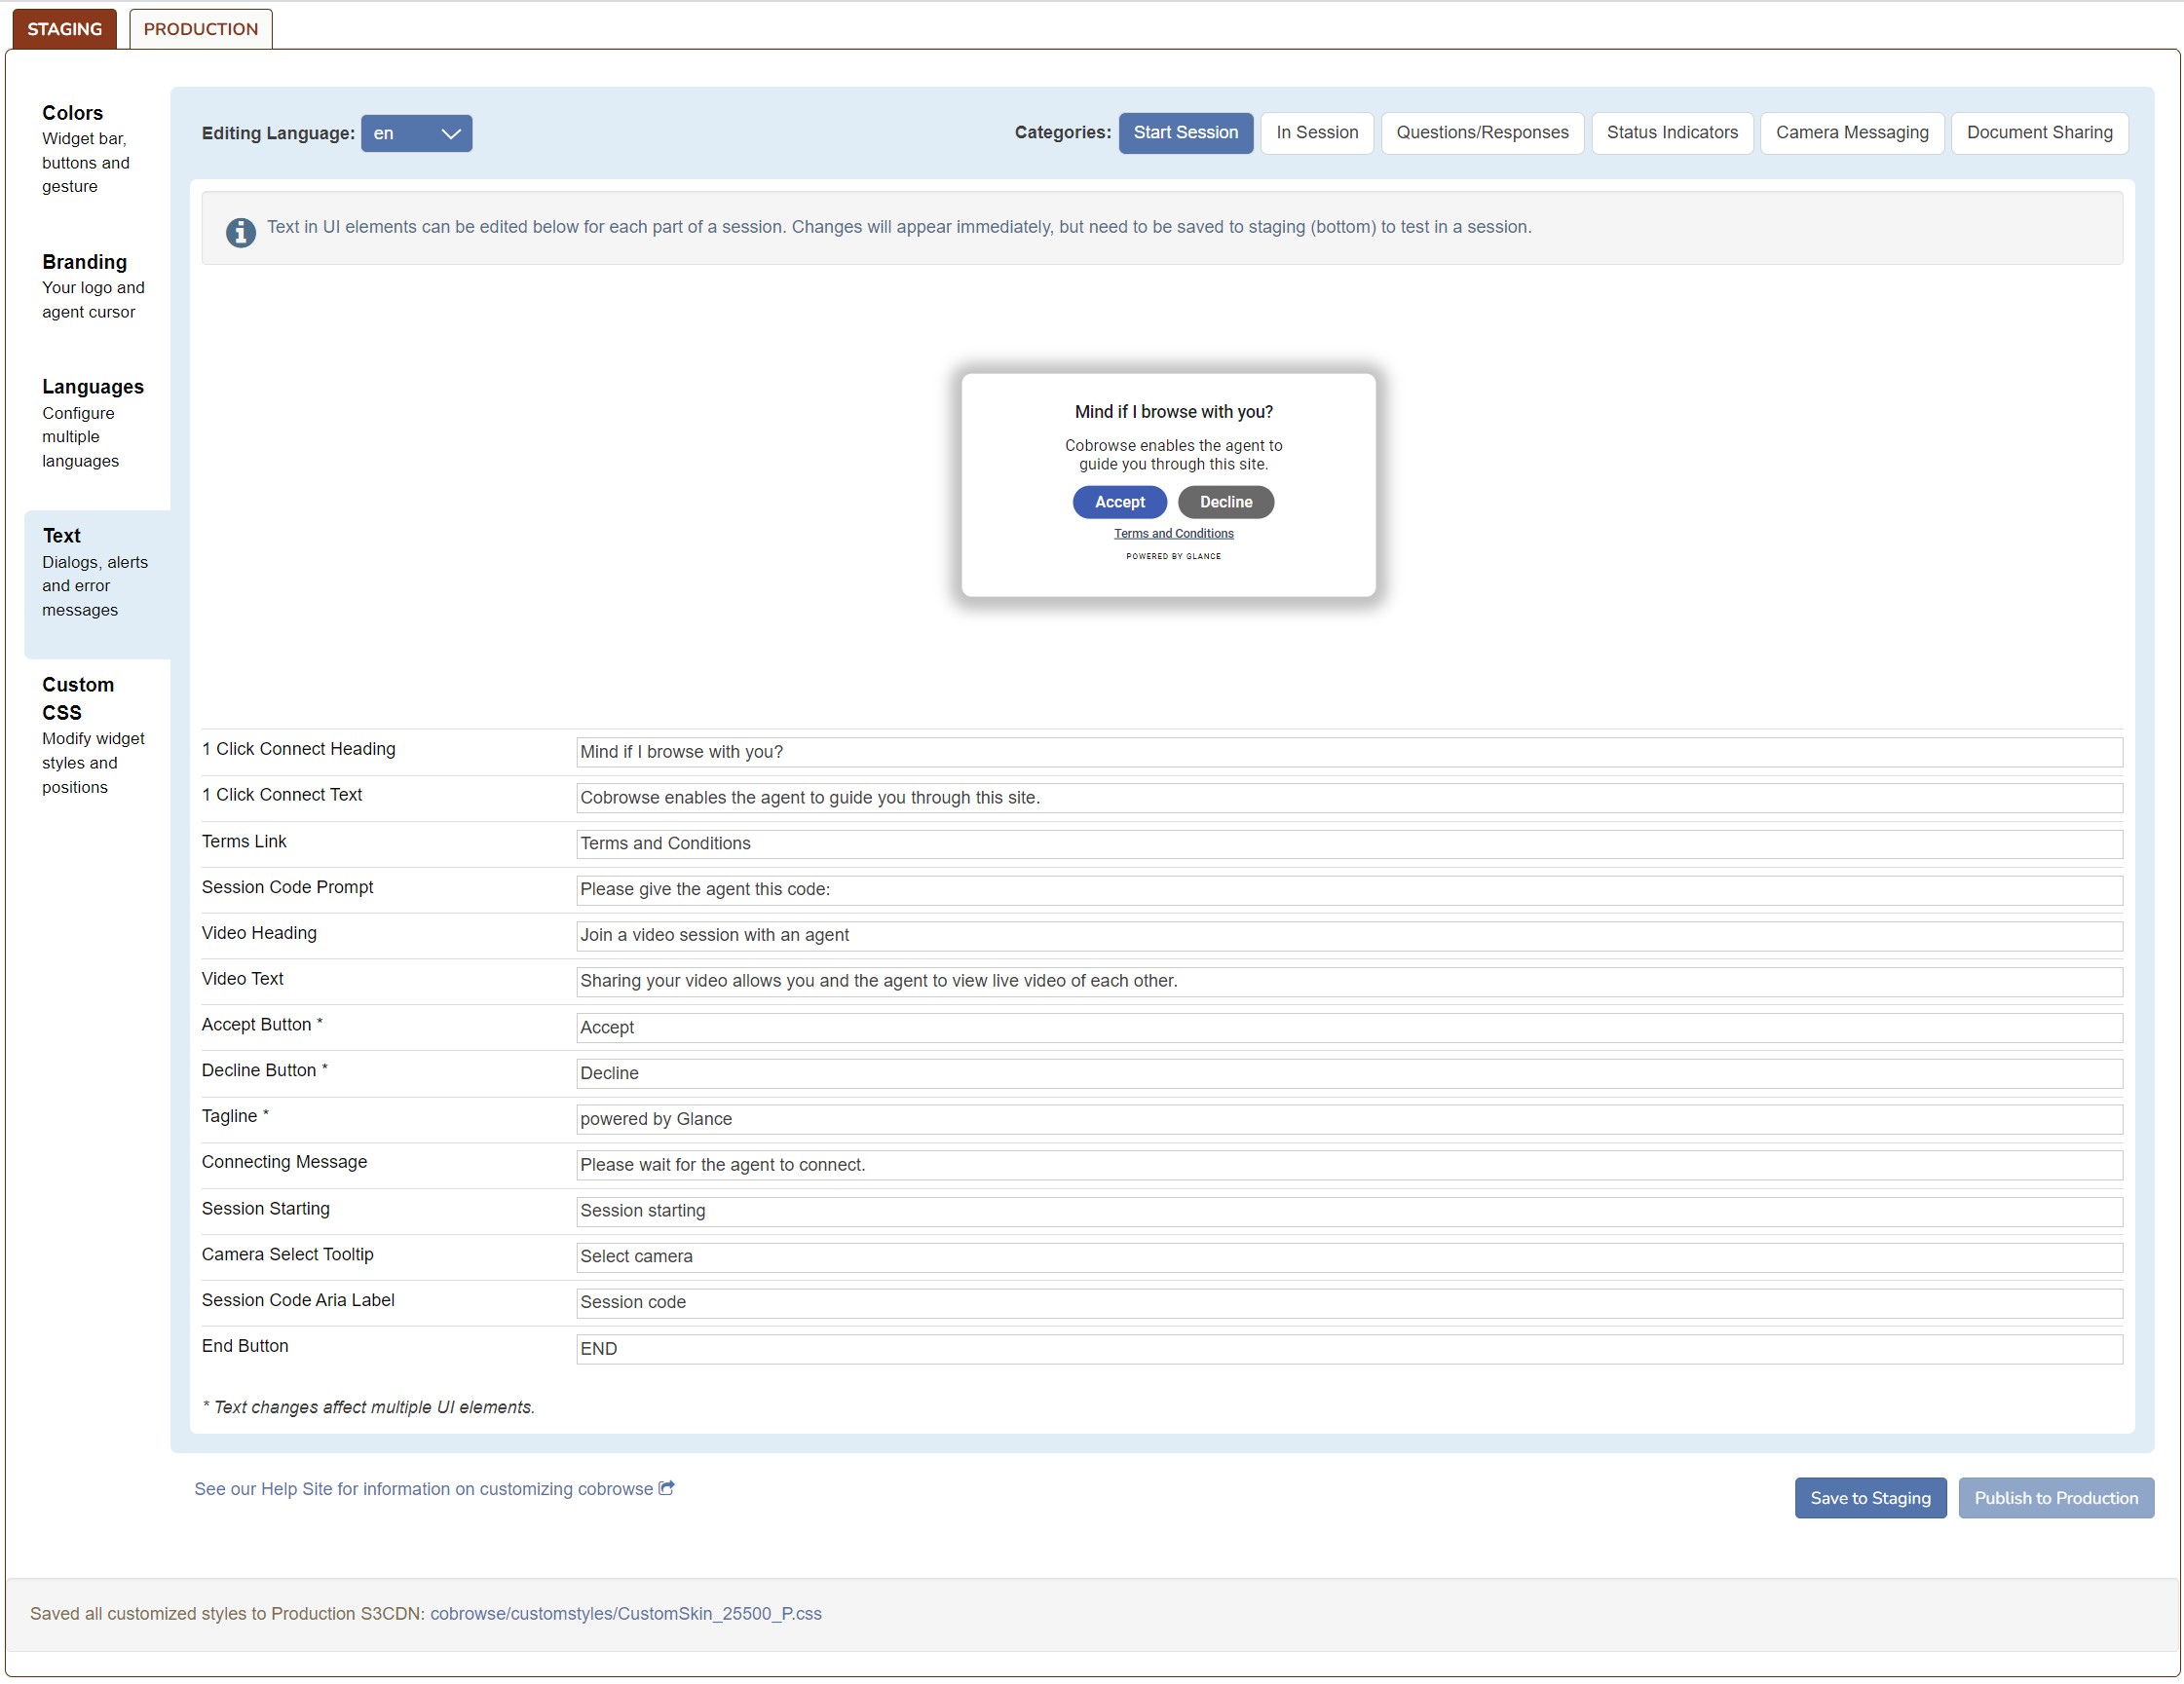
br can be used in the text to indicate a line break.
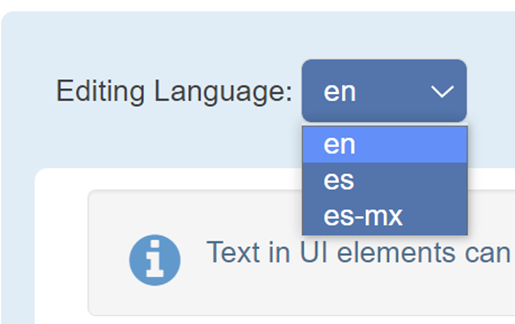 ### Categories
The **Categories** buttons allow users to select which part of the session they would like to modify. The user clicks on a category and the correlating text options are displayed below. Sessions are broken down into the following categories:
* Start Session
* In Session
* Questions/Responses
* Status Indicators
* Camera Messaging
### Categories
The **Categories** buttons allow users to select which part of the session they would like to modify. The user clicks on a category and the correlating text options are displayed below. Sessions are broken down into the following categories:
* Start Session
* In Session
* Questions/Responses
* Status Indicators
* Camera Messaging
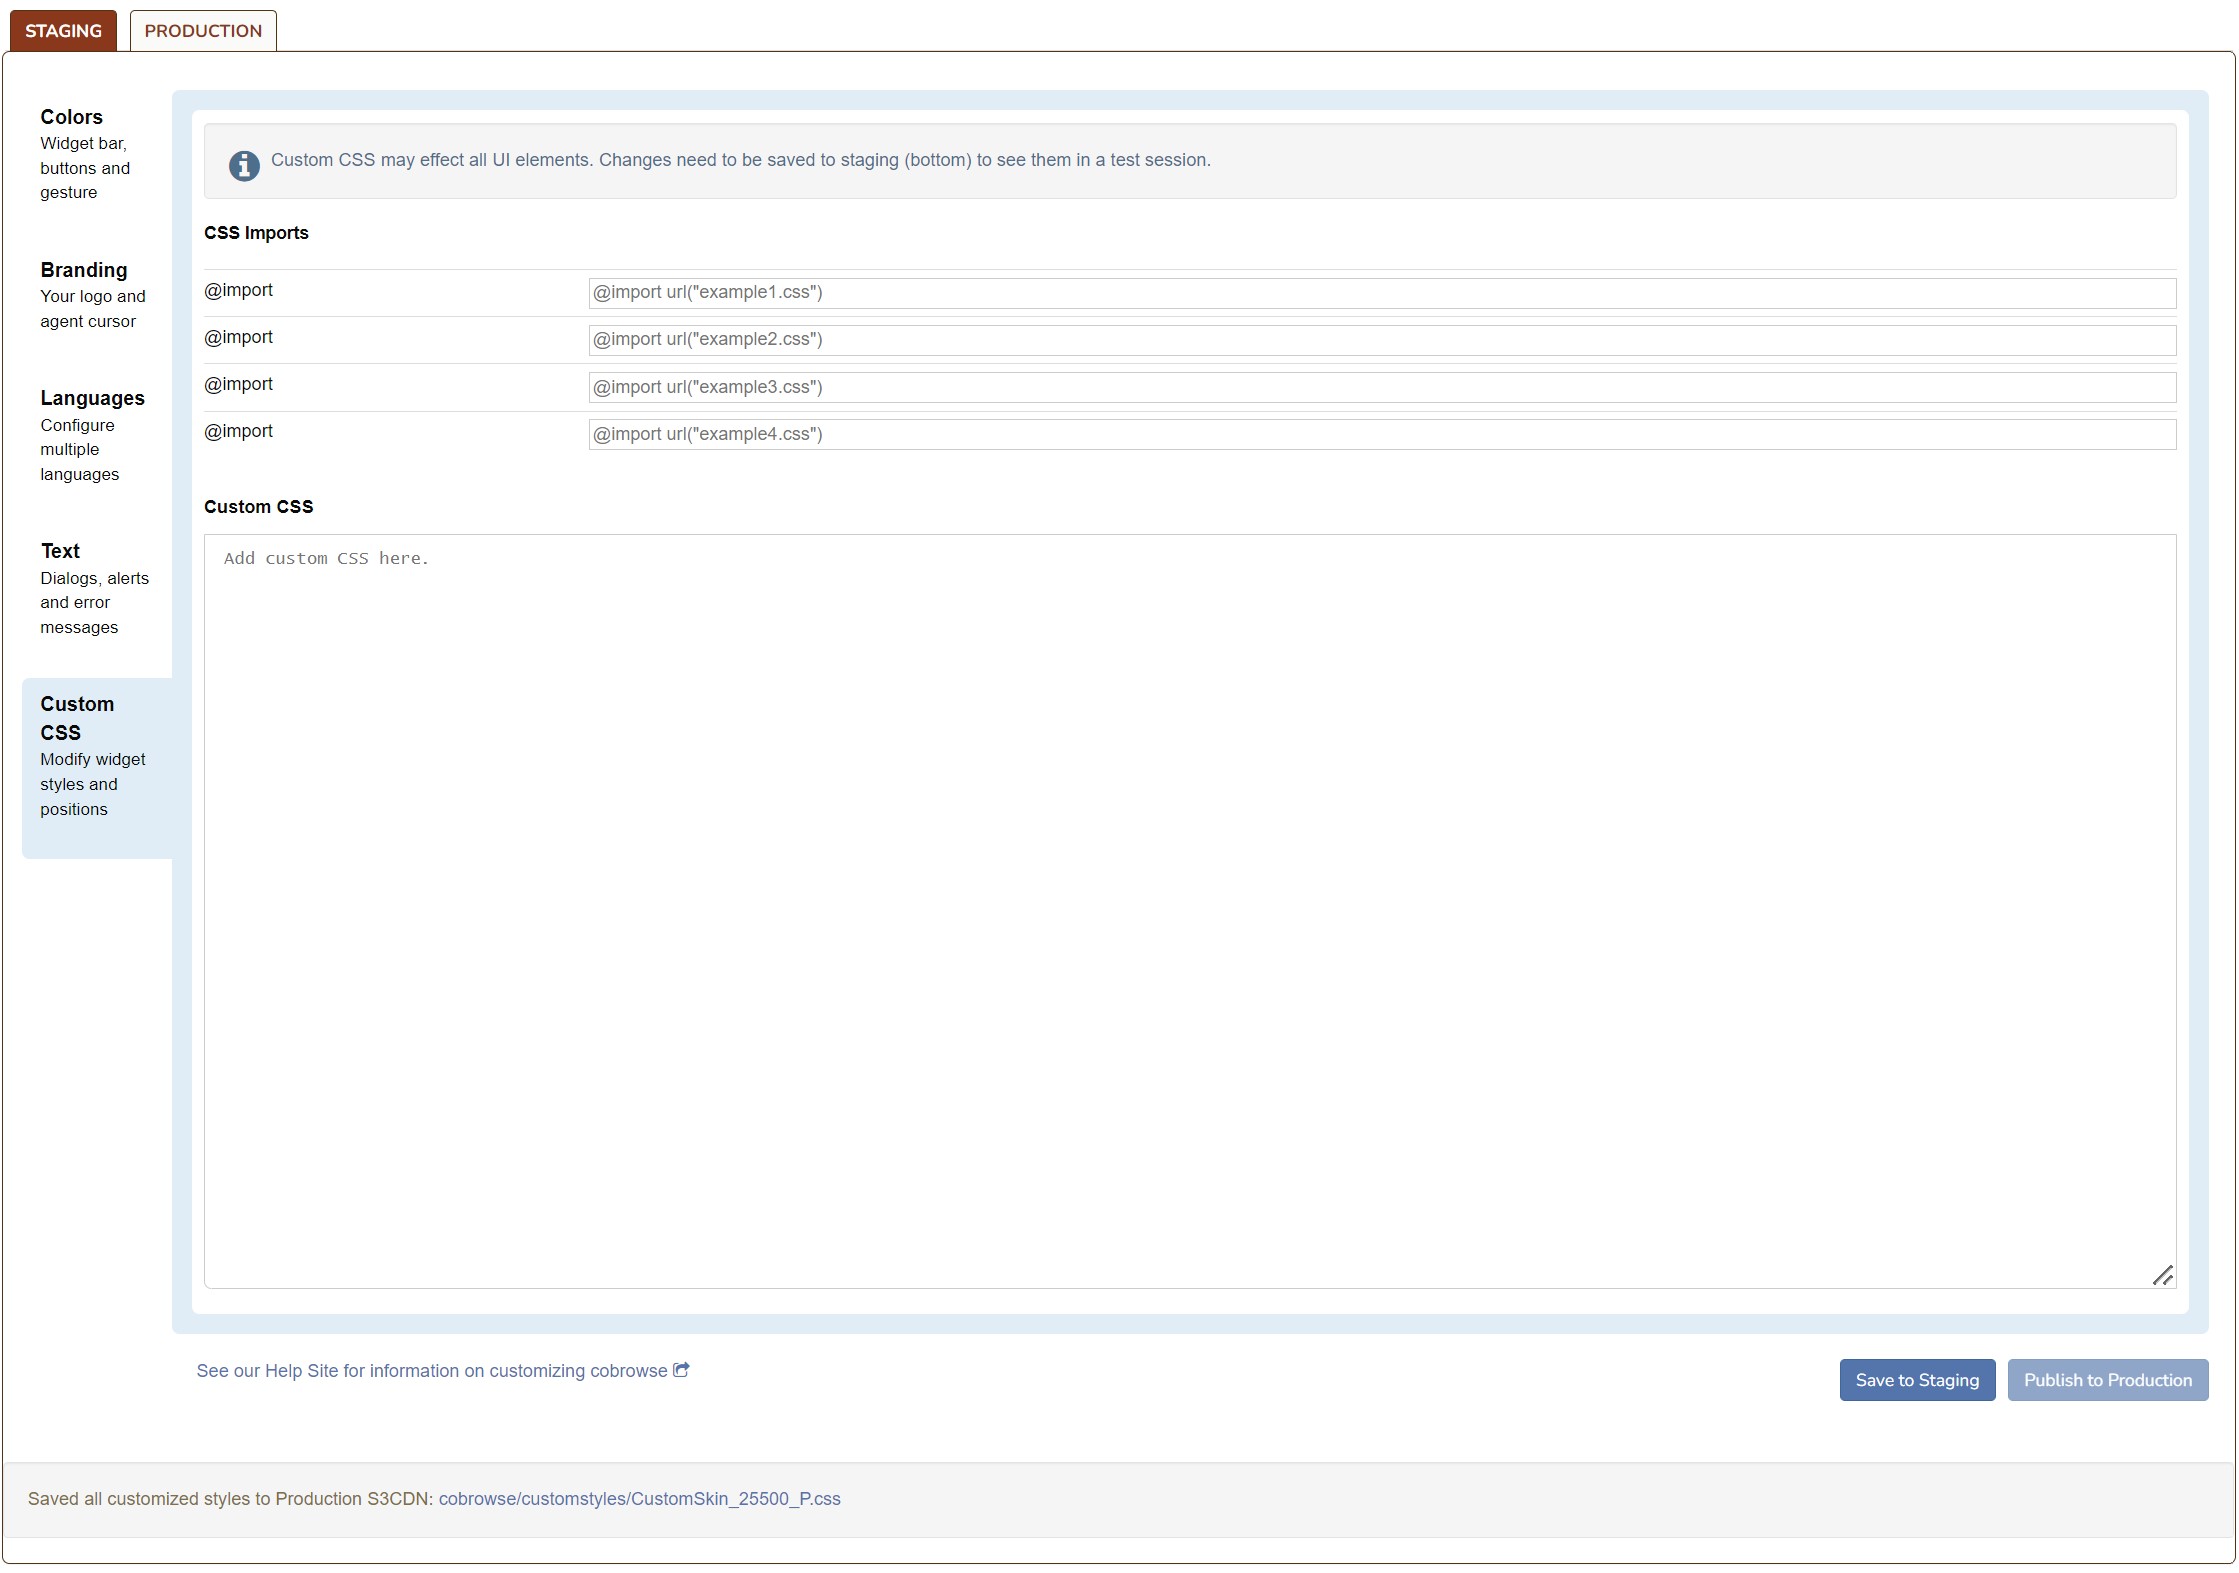
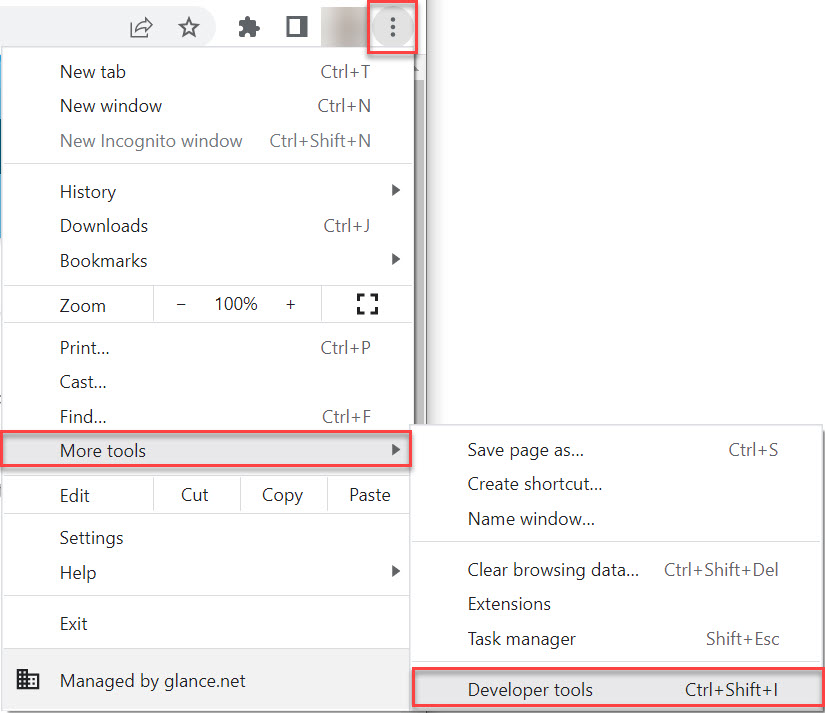 3. Select the **Network** tab.
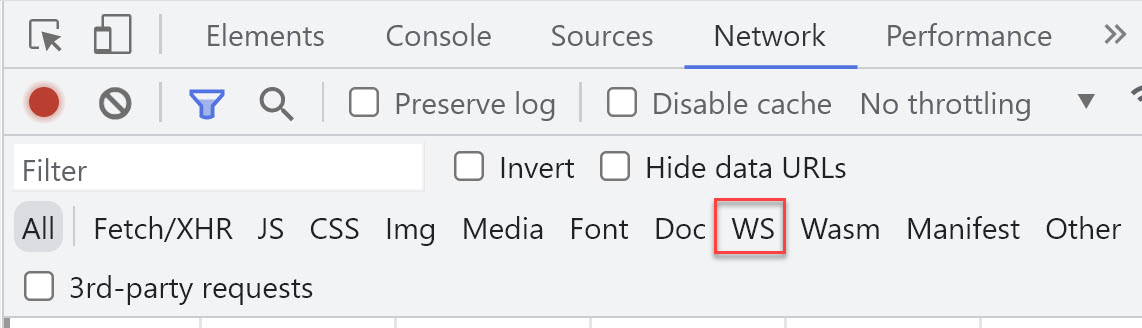 4. Confirm the record button in the upper left corner is red. If it is grey, click the button once to start recording.
5. Check the **Preserve Log** box.
6. Click the **Clear** button to clear any existing logs from the network tab.
4. Confirm the record button in the upper left corner is red. If it is grey, click the button once to start recording.
5. Check the **Preserve Log** box.
6. Click the **Clear** button to clear any existing logs from the network tab.
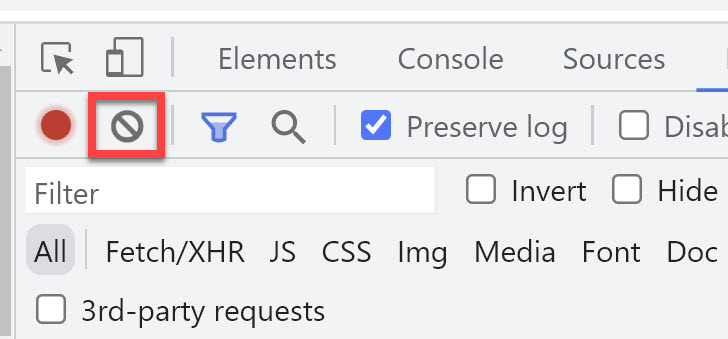 7. Reproduce the issue while the network requests are recorded.
8. Click the download button to save the file to your computer. Save the file as "HAR with Content".
7. Reproduce the issue while the network requests are recorded.
8. Click the download button to save the file to your computer. Save the file as "HAR with Content".
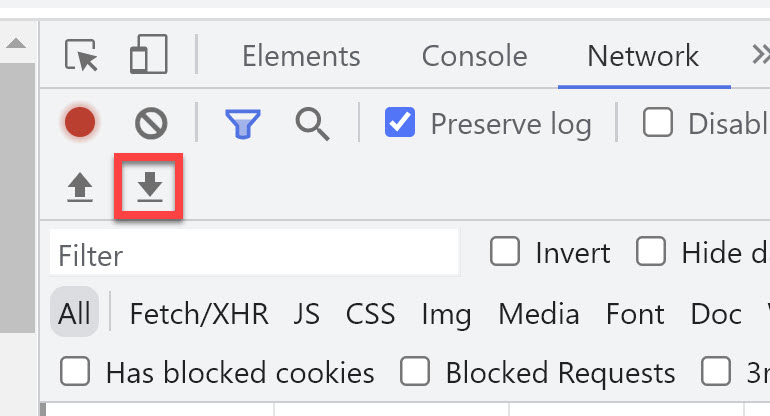 9. Upload the HAR file to your ticket with Glance Customer Support for further investigation.
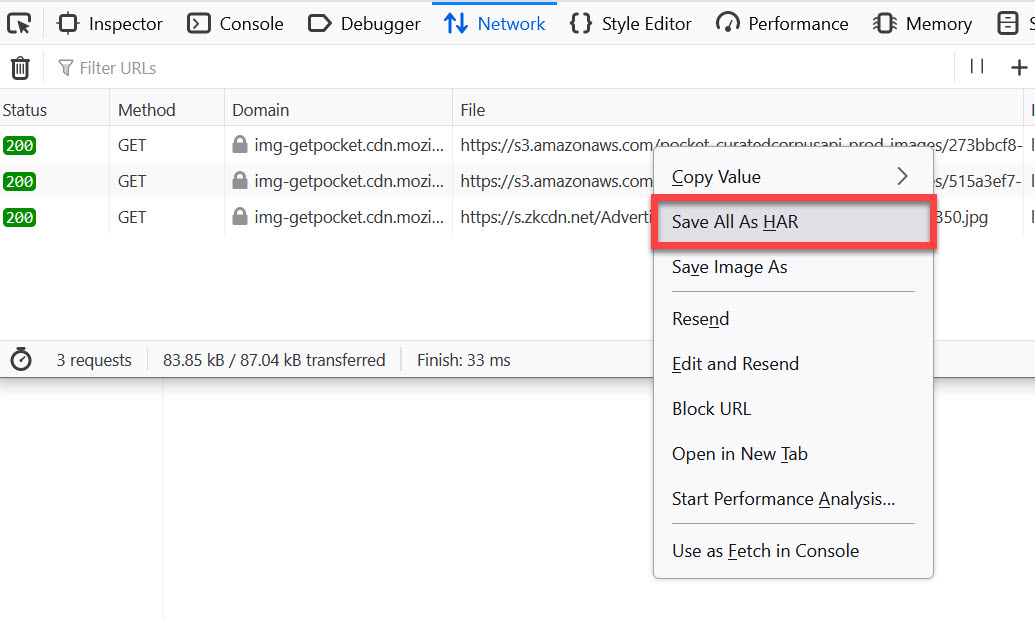 5. Save the HAR file to your desktop.
6. Upload the HAR file to your ticket with Glance Customer Support for further investigation.
5. Save the HAR file to your desktop.
6. Upload the HAR file to your ticket with Glance Customer Support for further investigation.
 6. Upload the HAR file to your ticket with Glance Customer Support for further investigation.
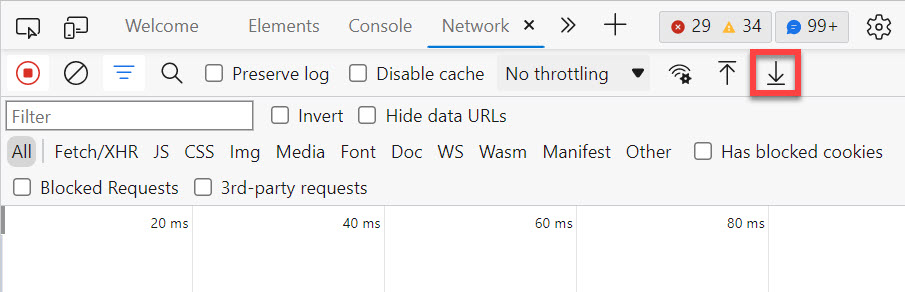 5. Upload the HAR file to your ticket with Glance Customer Support for further investigation.
unsafe-inline styles being blocked; these are harmless and can be ignored.
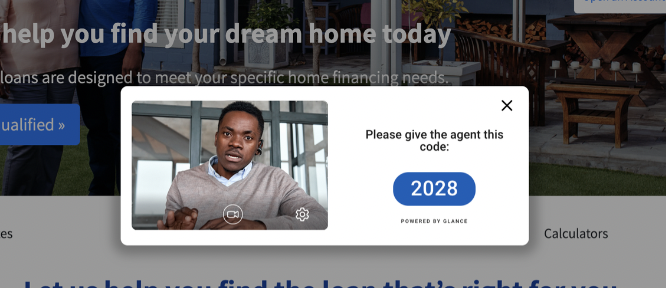 3. The agent enters the code in the Agent Join Page or CRM.
4. Depending how the group is configured, the agent will join with video on automatically, or they can click the video icon in the agent viewer to turn on their camera. Now the visitor and agent can see each other.
3. The agent enters the code in the Agent Join Page or CRM.
4. Depending how the group is configured, the agent will join with video on automatically, or they can click the video icon in the agent viewer to turn on their camera. Now the visitor and agent can see each other.
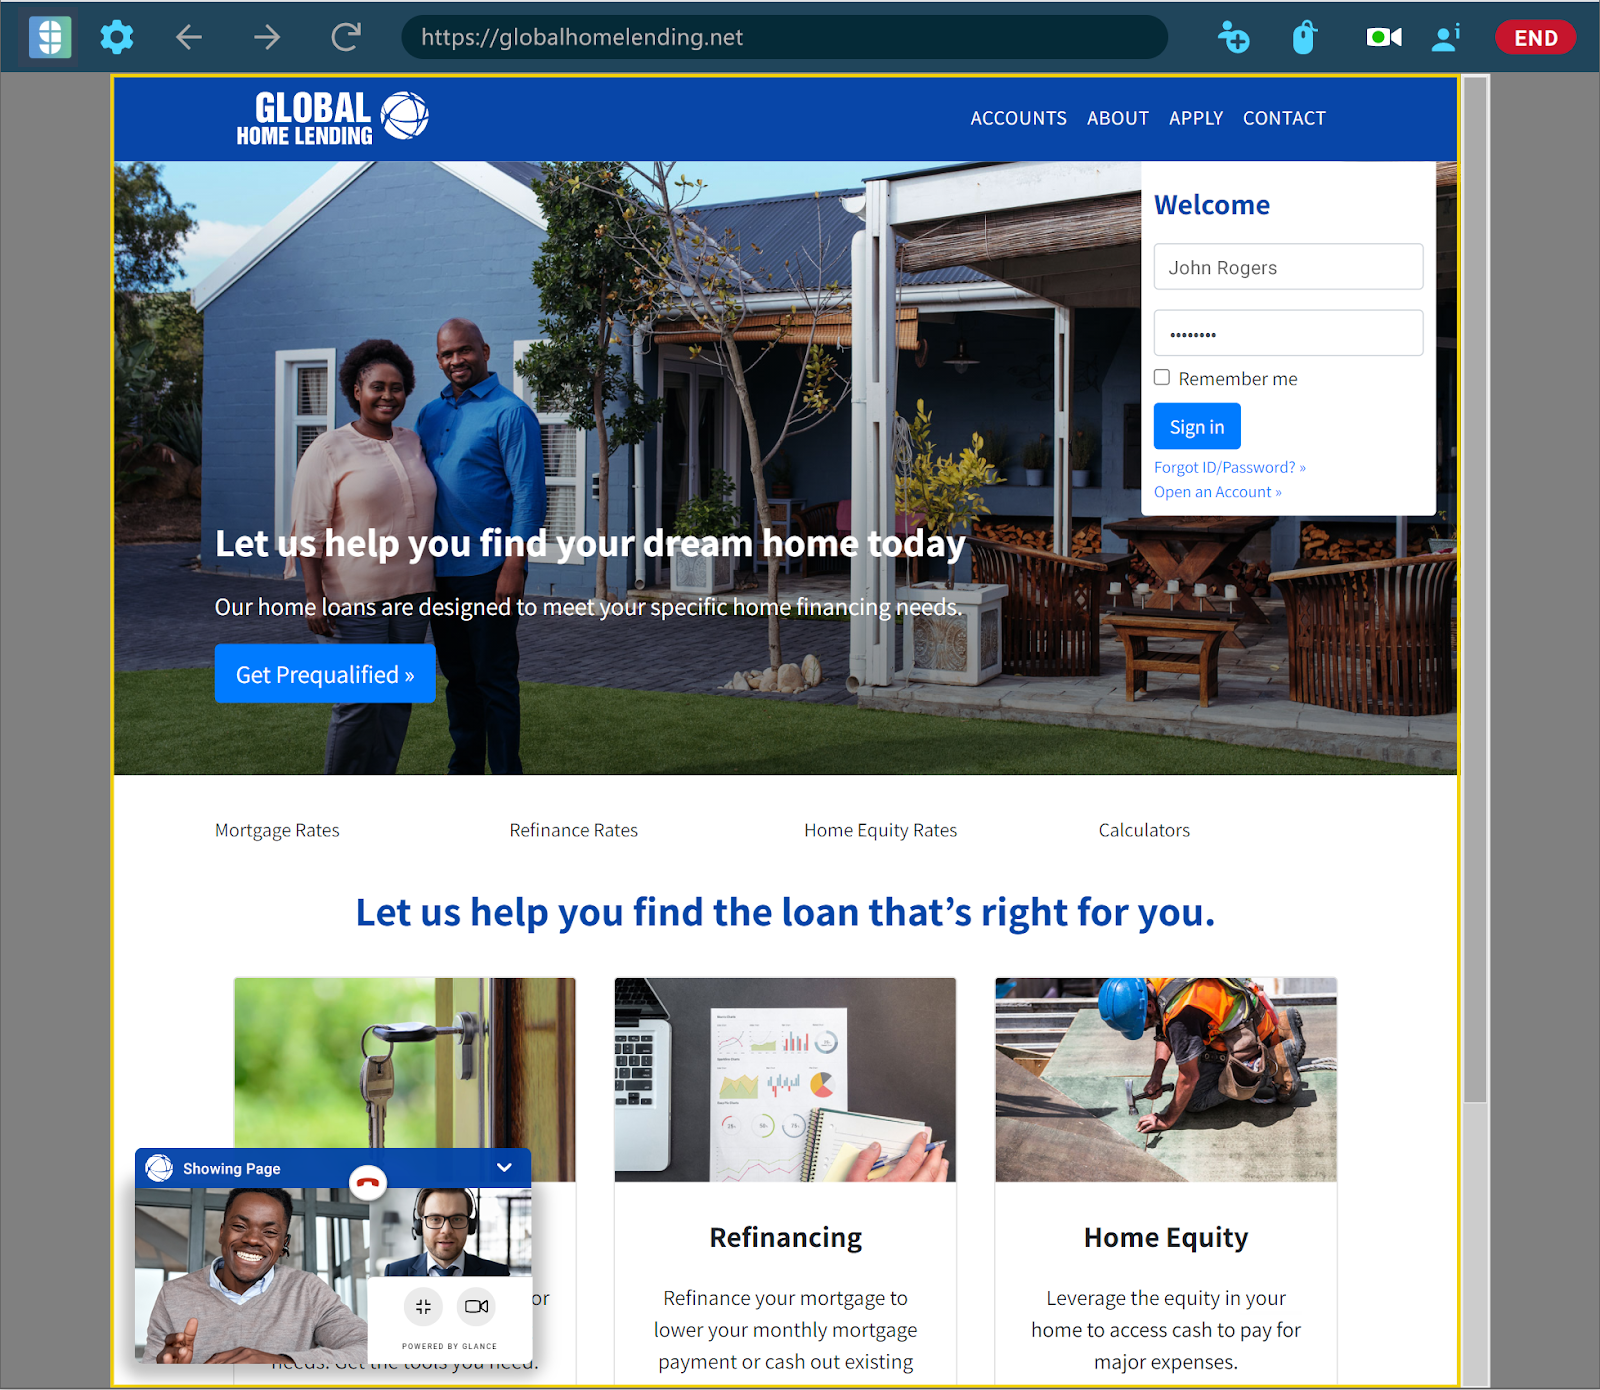 5. The visitor and agent can move from small or large video modes by clicking the resize icon.
 ## Capabilities By User
Users have different abilities during the session. The following table lists which capabilities are available to agents, viewers, and guests in the session.
| | **Agent** | **Visitor** | **Guests** |
|---|---|---|---|
| End Session | X | X | |
| Leave session | X (last agent leaving ends session) | X (leaving ends the session) | X |
| Scroll | X | X | |
| Gesture | X | | X |
| Turn on/off personal video | X | X | X |
| Turn off another agent's video | X | | |
| Turn off guest video(s) | X | | |
| Turn off visitor video | X | X | |
| Remove guest from a session | X | | |
| Add guest to session | X | | |
| Enlarge video | X | X | |
| Minimize video | X | X | |
=================================================================
FILE: /users/glance-cobrowse/video
=================================================================
Glance Video humanizes digital interactions by providing the ability for agents to participate and lead a web-based, multi-participant video session with a primary cobrowse visitor. By enabling agents, visitors, and participants to visually interact face-to-face, Glance Enterprise customers improve key business metrics such as CSAT, NPS, lead conversion, reduced customer churn, and increased sales close rates.
A few key benefits:
* Build, grow, and facilitate material relationships that rival in-person experiences.
* Built into pre-existing workflows - start calls with video and quickly escalate into cobrowse with video.
* Embeds directly into your website or mobile site, ensuring a consistent experience.
* Seamlessly connects into your existing CRM, telephony, and chat technology.
To enable this feature, [Contact Glance](/users/account-management/contact).
## Glance Video Features
* Ability to add additional guest participants.
* Multi-participant Video (up to 10 participants).
* Accessible UI (conforms to the WCAG 2.1 AA standard).
* Standard Cobrowse features such as PDF/XLS document viewing, masking, gesturing, Screen Share, and remote assist.
* Salesforce Integration (beta): agents can instantly join video sessions using 1-Click Connect.
## Display
* **Multi-way Video Large** (up to 10 participants)
* First 9 display in grid.
* 10+ see preview - but do not enter grid.
* If one person in the initial 9 leaves the grid, then the 10th enters the grid for display (and so on).
* **Multi-way Video Small** (display up to 4 participants with scrolling)
* All participants are shown in turn on the 'filmstrip' UI.
## Browser and Device Support
Glance Video is supported on a variety of devices, browsers, and operating systems, depending on the type of user in the session. Refer to the [Browser-Based Multi-Participant Video](/users/account-management/system_requirements/#browser-based-multi-participant-video) table for a detailed breakdown.
## Bandwidth Requirements
Glance Video will require different amounts of bandwidth depending on a number of factors. Refer to the [Bandwidth Requirements](/users/account-management/bandwidth_requirements/#glance-video) page for a detailed breakdown.
## In This Section
{% children description="true" /%}
=================================================================
FILE: /users/glance-cobrowse/video/troubleshoot
=================================================================
To use video, the participants must enable their camera in the browser during the session. The same instructions apply for both visitors and guests.
Glance Video is only supported on a limited number of browsers for visitors and guests. See [this page](/users/account-management/system_requirements/#browser-based-multi-participant-video) for more information. If the visitor or guest is on an unsupported browser, instruct them to use one of the supported browsers for best results.
## Enabling the Camera for Visitors
### In Chrome
1. Once the cobrowse session starts, the visitor will be prompted from their browser to allow the camera.
2. The visitor clicks **Allow**.
## Capabilities By User
Users have different abilities during the session. The following table lists which capabilities are available to agents, viewers, and guests in the session.
| | **Agent** | **Visitor** | **Guests** |
|---|---|---|---|
| End Session | X | X | |
| Leave session | X (last agent leaving ends session) | X (leaving ends the session) | X |
| Scroll | X | X | |
| Gesture | X | | X |
| Turn on/off personal video | X | X | X |
| Turn off another agent's video | X | | |
| Turn off guest video(s) | X | | |
| Turn off visitor video | X | X | |
| Remove guest from a session | X | | |
| Add guest to session | X | | |
| Enlarge video | X | X | |
| Minimize video | X | X | |
=================================================================
FILE: /users/glance-cobrowse/video
=================================================================
Glance Video humanizes digital interactions by providing the ability for agents to participate and lead a web-based, multi-participant video session with a primary cobrowse visitor. By enabling agents, visitors, and participants to visually interact face-to-face, Glance Enterprise customers improve key business metrics such as CSAT, NPS, lead conversion, reduced customer churn, and increased sales close rates.
A few key benefits:
* Build, grow, and facilitate material relationships that rival in-person experiences.
* Built into pre-existing workflows - start calls with video and quickly escalate into cobrowse with video.
* Embeds directly into your website or mobile site, ensuring a consistent experience.
* Seamlessly connects into your existing CRM, telephony, and chat technology.
To enable this feature, [Contact Glance](/users/account-management/contact).
## Glance Video Features
* Ability to add additional guest participants.
* Multi-participant Video (up to 10 participants).
* Accessible UI (conforms to the WCAG 2.1 AA standard).
* Standard Cobrowse features such as PDF/XLS document viewing, masking, gesturing, Screen Share, and remote assist.
* Salesforce Integration (beta): agents can instantly join video sessions using 1-Click Connect.
## Display
* **Multi-way Video Large** (up to 10 participants)
* First 9 display in grid.
* 10+ see preview - but do not enter grid.
* If one person in the initial 9 leaves the grid, then the 10th enters the grid for display (and so on).
* **Multi-way Video Small** (display up to 4 participants with scrolling)
* All participants are shown in turn on the 'filmstrip' UI.
## Browser and Device Support
Glance Video is supported on a variety of devices, browsers, and operating systems, depending on the type of user in the session. Refer to the [Browser-Based Multi-Participant Video](/users/account-management/system_requirements/#browser-based-multi-participant-video) table for a detailed breakdown.
## Bandwidth Requirements
Glance Video will require different amounts of bandwidth depending on a number of factors. Refer to the [Bandwidth Requirements](/users/account-management/bandwidth_requirements/#glance-video) page for a detailed breakdown.
## In This Section
{% children description="true" /%}
=================================================================
FILE: /users/glance-cobrowse/video/troubleshoot
=================================================================
To use video, the participants must enable their camera in the browser during the session. The same instructions apply for both visitors and guests.
Glance Video is only supported on a limited number of browsers for visitors and guests. See [this page](/users/account-management/system_requirements/#browser-based-multi-participant-video) for more information. If the visitor or guest is on an unsupported browser, instruct them to use one of the supported browsers for best results.
## Enabling the Camera for Visitors
### In Chrome
1. Once the cobrowse session starts, the visitor will be prompted from their browser to allow the camera.
2. The visitor clicks **Allow**.
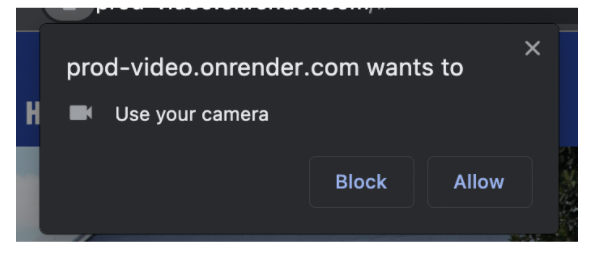 3. If the visitor has clicked **Block**, they will see a message in the video preview indicating their camera is blocked.
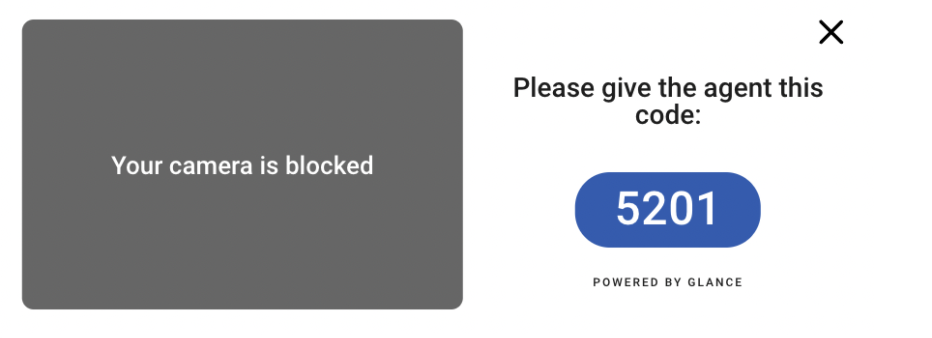 4. If the video has been blocked by the visitor/guest prior to joining the session, they will not be able to turn their camera back on during the session, and must start a new session to show video. To show video, the visitor will need to end the current session, click the camera icon in the top-right corner of the browser bar, and change to **Always Allow** > **Done**. Then the visitor can start a new video session.
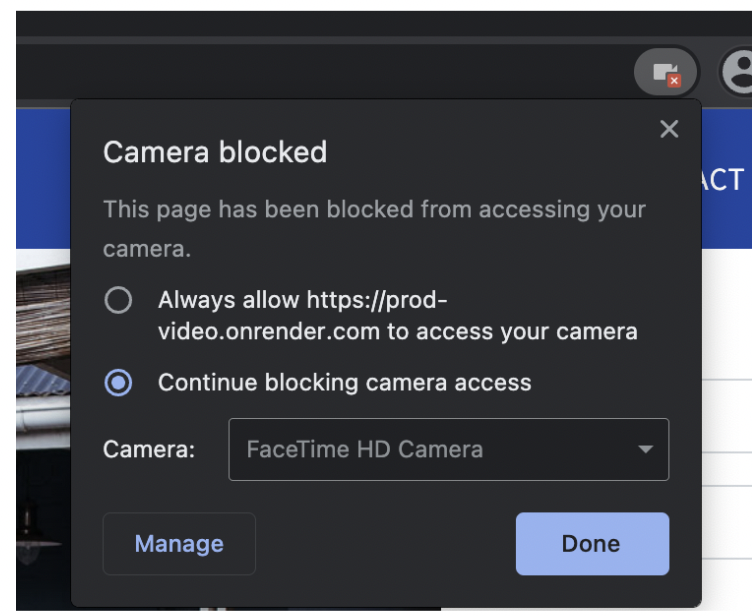 5. If the visitor has allowed the camera, but turned off their video, a video icon with a slash will display in the video preview for all parties. If they want to turn their video back on, they can click the red video icon at any time during the session.
 ### In Safari (macOS)
1. Once the Cobrowse session starts, the visitor will be prompted from their browser to allow the camera.
### In Safari (macOS)
1. Once the Cobrowse session starts, the visitor will be prompted from their browser to allow the camera.
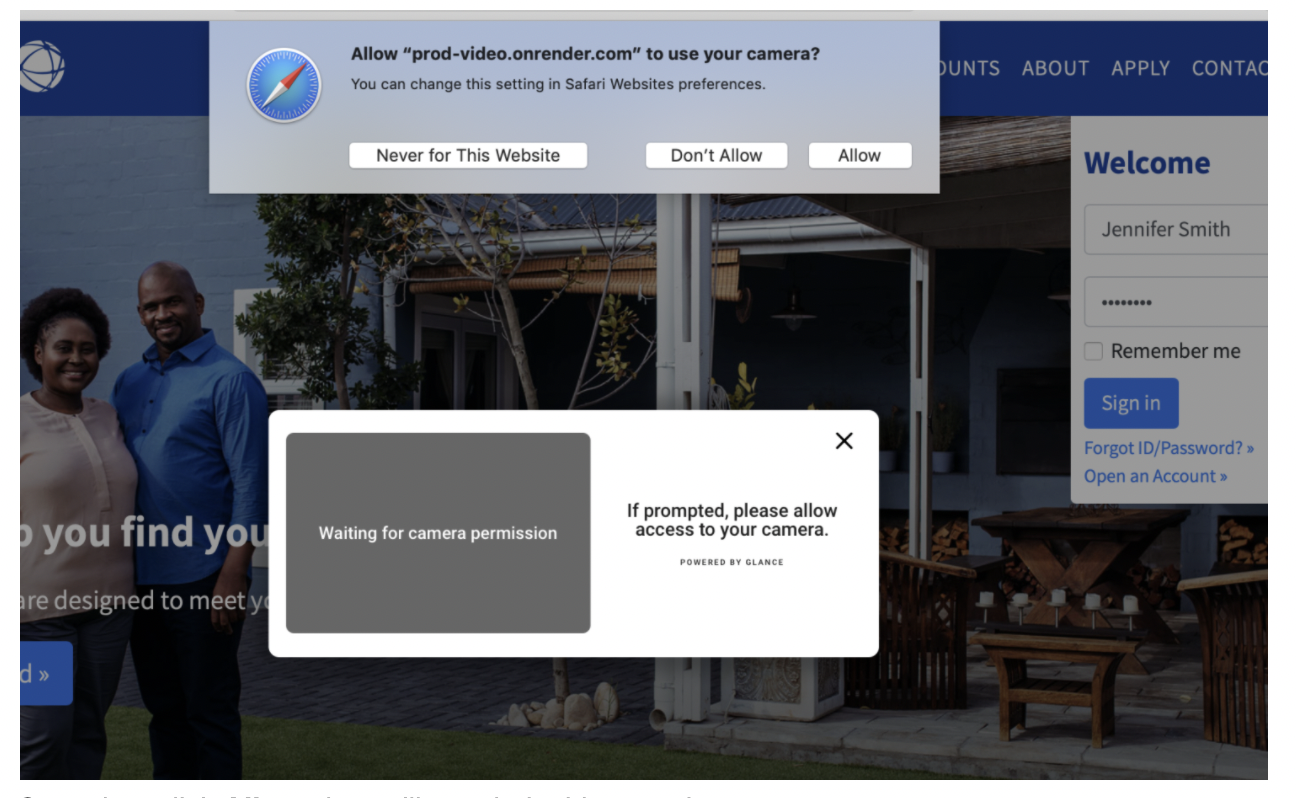 2. Once they click **Allow**, they will see their video preview.
3. If the visitor has clicked **Don't Allow**, they will see a message in the video preview indicating their camera is blocked.
2. Once they click **Allow**, they will see their video preview.
3. If the visitor has clicked **Don't Allow**, they will see a message in the video preview indicating their camera is blocked.
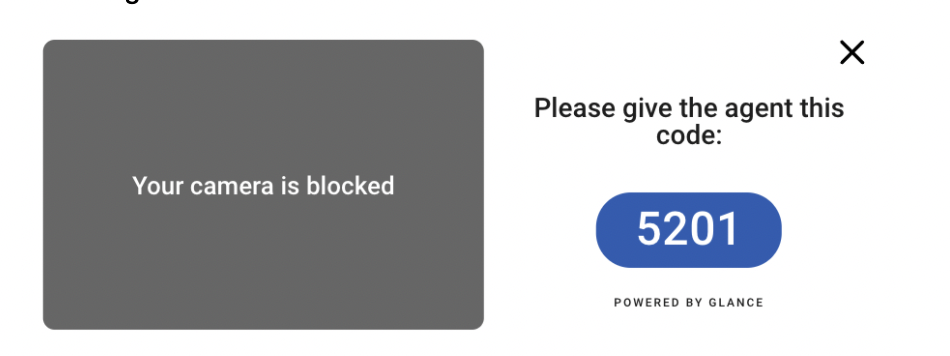 4. If the video has been blocked by the visitor prior to joining the session, they will not be able to turn their camera back on during the session, and must start a new session to show video. To show video, the visitor will need to end the current session, click the camera icon in the top-right corner of the browser bar, and change to **Allow**.
5. If the visitor has allowed the camera, but turned off their video, a video icon with a slash will display in the video preview for all parties. If they want to turn their video back on, they can click the red video icon at any time during the session.
4. If the video has been blocked by the visitor prior to joining the session, they will not be able to turn their camera back on during the session, and must start a new session to show video. To show video, the visitor will need to end the current session, click the camera icon in the top-right corner of the browser bar, and change to **Allow**.
5. If the visitor has allowed the camera, but turned off their video, a video icon with a slash will display in the video preview for all parties. If they want to turn their video back on, they can click the red video icon at any time during the session.
 ### In Safari (iOS)
1. Once the visitor starts the Cobrowse session, they will be prompted from their browser to allow the camera. In Safari on iOS, the camera will show the visitor video preview by default. When the browser is accessing the camera, a red video icon displays in the top-left corner of the address bar.
### In Safari (iOS)
1. Once the visitor starts the Cobrowse session, they will be prompted from their browser to allow the camera. In Safari on iOS, the camera will show the visitor video preview by default. When the browser is accessing the camera, a red video icon displays in the top-left corner of the address bar.
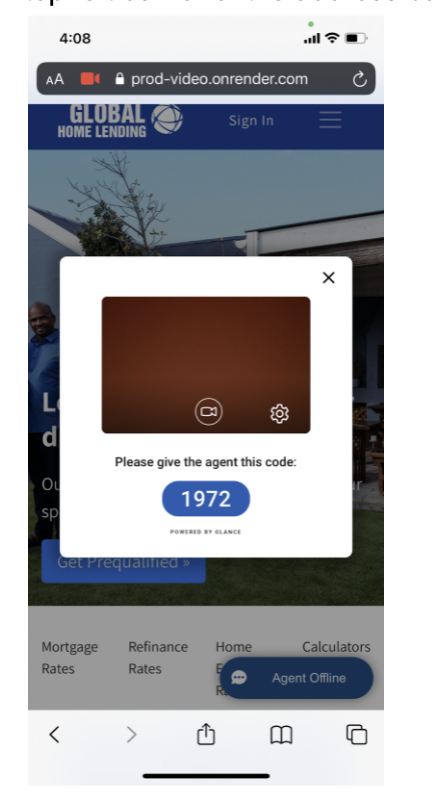 2. The visitor can change the front or back camera from the gear icon.
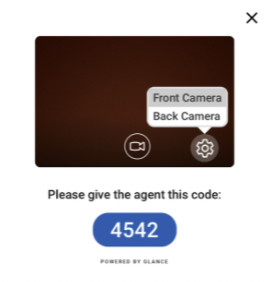 3. If the camera is blocked in the visitor browser, the video preview is gray, and there is no red video icon in the address bar.
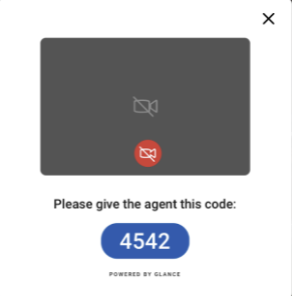 ### In Edge (Windows)
1. Once the Cobrowse session starts in Edge, the visitor will be prompted from their browser to allow the camera.
### In Edge (Windows)
1. Once the Cobrowse session starts in Edge, the visitor will be prompted from their browser to allow the camera.
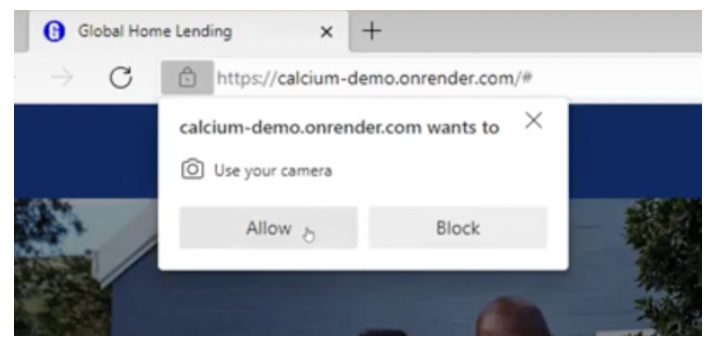 2. Once they click **Allow**, they will see their video preview.
3. If the visitor has clicked **Block**, they will see a message in the video preview indicating their camera is blocked.
2. Once they click **Allow**, they will see their video preview.
3. If the visitor has clicked **Block**, they will see a message in the video preview indicating their camera is blocked.
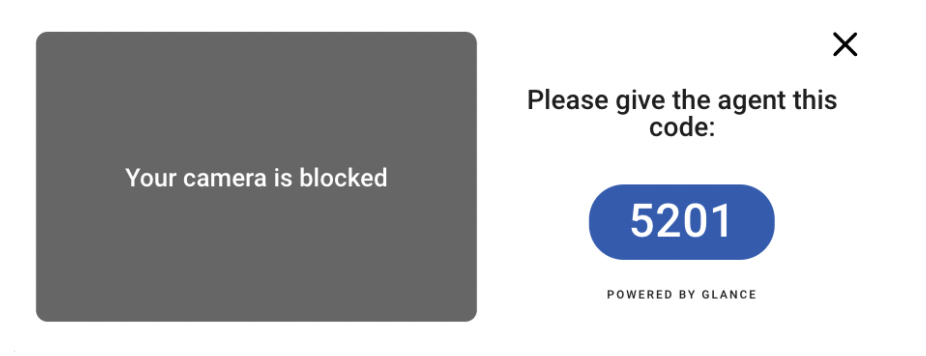 4. If the video has been blocked by the visitor prior to joining the session, they will not be able to turn their camera back on during the session, and must start a new session to show video. To show video, the visitor will need to end the current session, click the camera icon in the top-right corner of the browser bar, and change to **Always Allow** > **Done**.
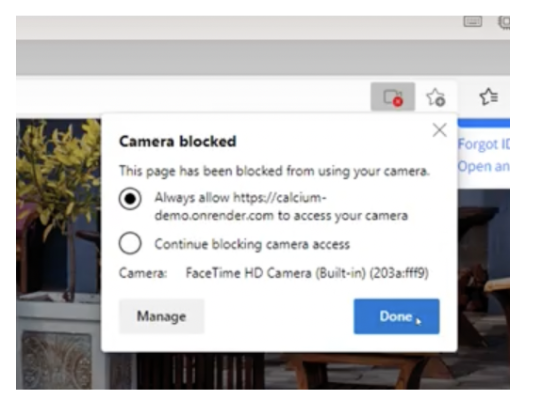 5. If the visitor has allowed the camera, but turned off their video, a video icon with a slash will display in the video preview for all parties. If they want to turn their video back on, they can click the red video icon at any time during the session.
 ### In Chrome (Android)
1. Once the Cobrowse session starts in Chrome on an Android device, the visitor will be prompted from their browser to allow the camera.
### In Chrome (Android)
1. Once the Cobrowse session starts in Chrome on an Android device, the visitor will be prompted from their browser to allow the camera.
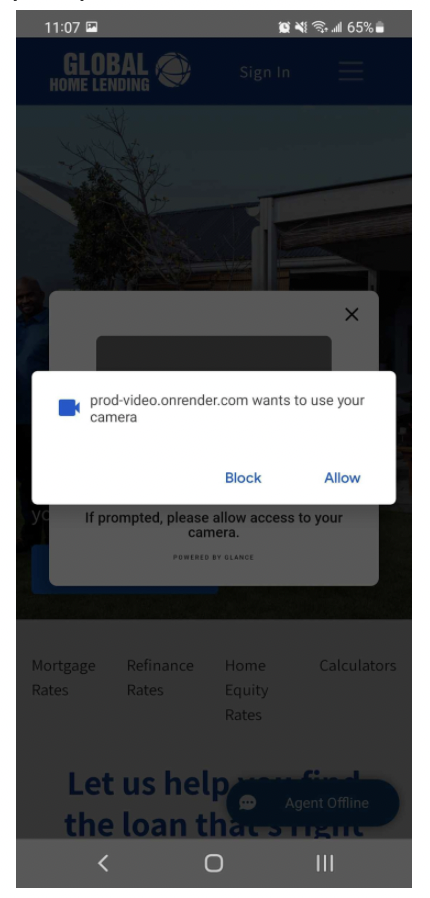 2. Once they click **Allow**, they will see their video preview.
3. If they click **Block**, the visitor can re-enable the camera from the 3 Dots in the upper right corner > **Settings** > **Site Settings** > **All Sites** > Search for the site in question > **Clear & reset**.
2. Once they click **Allow**, they will see their video preview.
3. If they click **Block**, the visitor can re-enable the camera from the 3 Dots in the upper right corner > **Settings** > **Site Settings** > **All Sites** > Search for the site in question > **Clear & reset**.
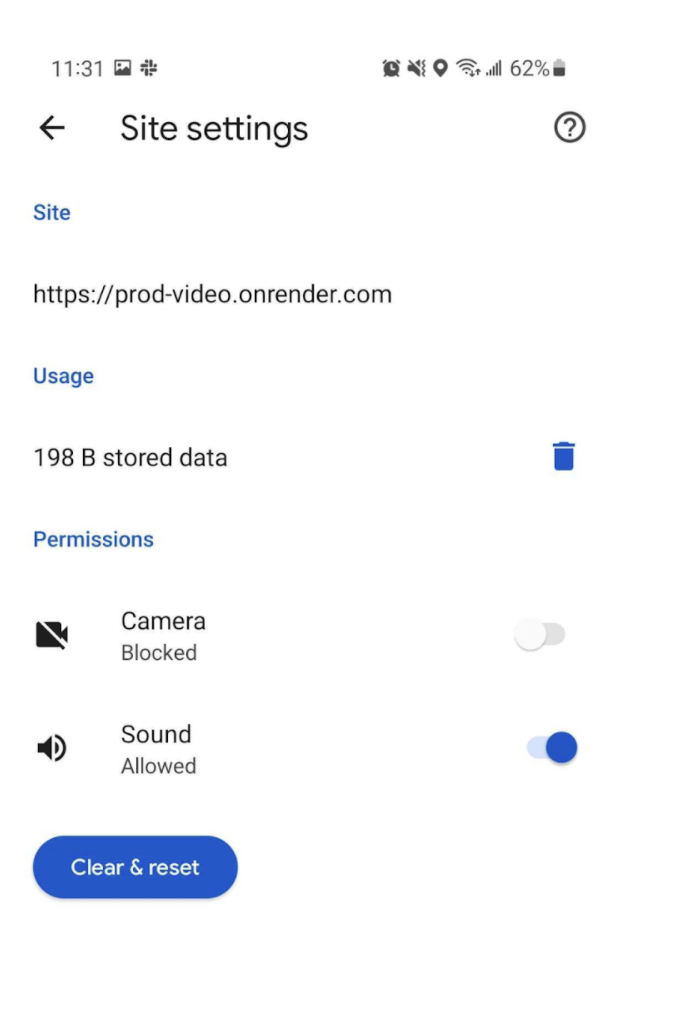 ## Blurring and Video Problems
### Blurring Problems
If the video is displayed, but the entire screen is blurred, try the following:
1. Change your distance from the camera.
* Your full head and the upper part of your shoulders should be in the frame.
* There should be a little distance between the top of your head and the top of the frame.
2. Make sure you are horizontally centered in the frame.
3. Make sure you have adequate lighting.
* The room should be well lit.
* Make sure the light is coming from the front of the agent, and that the agent's display is not the only/main source of light.
4. Change your background if possible.
* Maximize the contrast between your skin/hair/clothing and the colors in your background.
### Video Problems
If the video is not shown at all, try the following:
1. Verify the camera is not in use by any other applications.
2. Verify your browser can engage the camera.
1. Navigate to [this page](https://webrtc.github.io/samples/src/content/getusermedia/gum/) and click the **Open camera** button.
2. Verify your video appears on the page.
3. Verify your browser supports [WebGL](https://get.webgl.org).
* You should see a spinning cube and the words "Your browser supports WebGL" at the top of the page.
## Blurring and Video Problems
### Blurring Problems
If the video is displayed, but the entire screen is blurred, try the following:
1. Change your distance from the camera.
* Your full head and the upper part of your shoulders should be in the frame.
* There should be a little distance between the top of your head and the top of the frame.
2. Make sure you are horizontally centered in the frame.
3. Make sure you have adequate lighting.
* The room should be well lit.
* Make sure the light is coming from the front of the agent, and that the agent's display is not the only/main source of light.
4. Change your background if possible.
* Maximize the contrast between your skin/hair/clothing and the colors in your background.
### Video Problems
If the video is not shown at all, try the following:
1. Verify the camera is not in use by any other applications.
2. Verify your browser can engage the camera.
1. Navigate to [this page](https://webrtc.github.io/samples/src/content/getusermedia/gum/) and click the **Open camera** button.
2. Verify your video appears on the page.
3. Verify your browser supports [WebGL](https://get.webgl.org).
* You should see a spinning cube and the words "Your browser supports WebGL" at the top of the page.
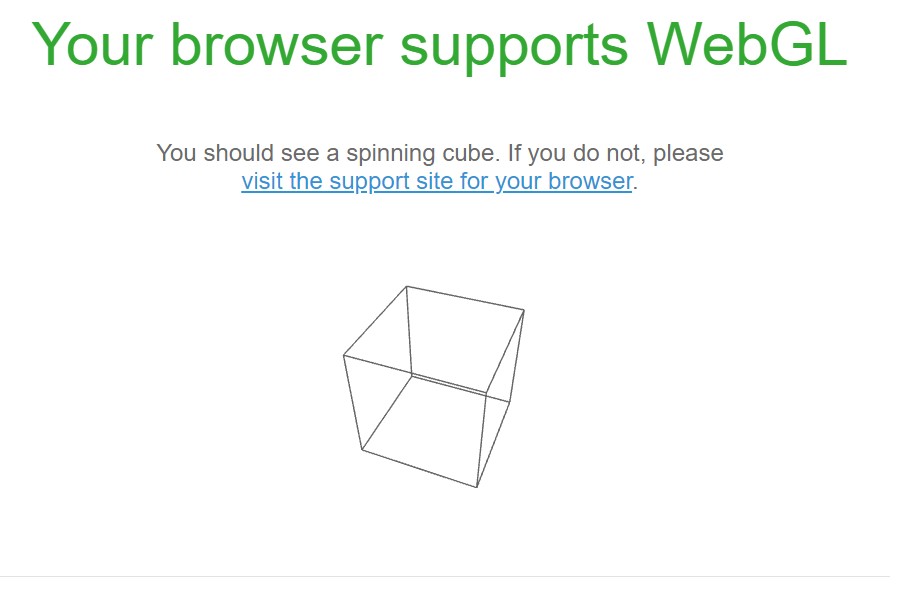 4. Navigate to [https://meet.google.com/](https://meet.google.com/) and start an empty Google meet.
* Does the video work?
* Does blurring work?
5. Verify hardware acceleration is enabled in Chrome.
* Navigate to **Settings > System** and enable **Use hardware acceleration when available**.
4. Navigate to [https://meet.google.com/](https://meet.google.com/) and start an empty Google meet.
* Does the video work?
* Does blurring work?
5. Verify hardware acceleration is enabled in Chrome.
* Navigate to **Settings > System** and enable **Use hardware acceleration when available**.
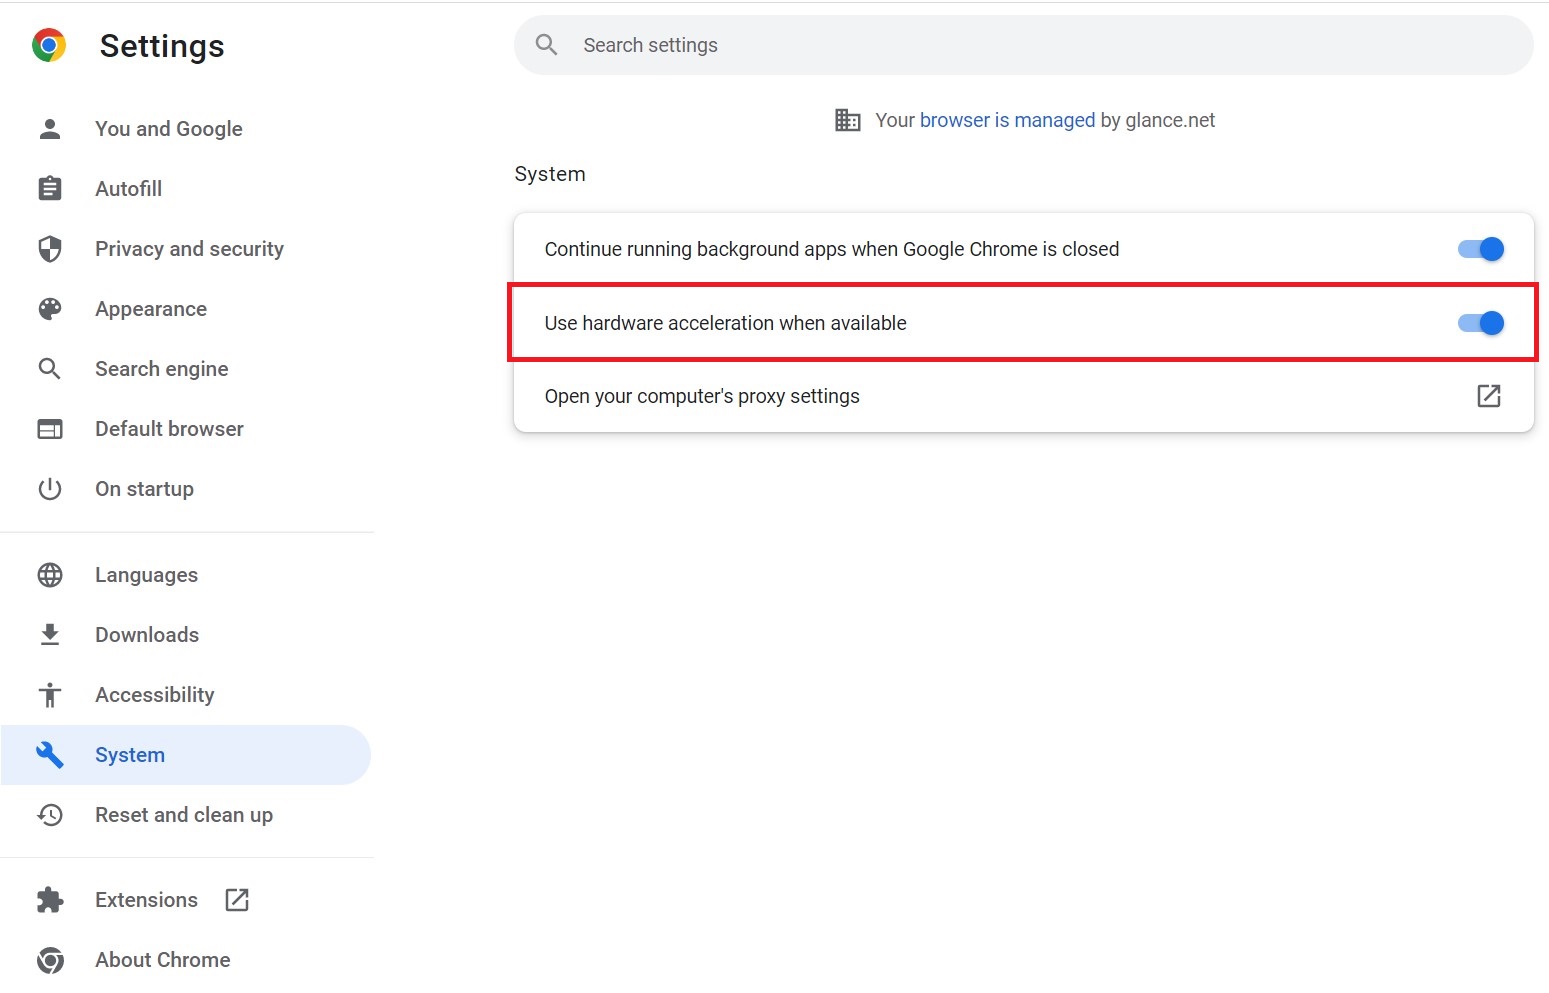 ### Open a Support Ticket
Please contact [Glance Support](/users/account-management/contact/) if the steps for [Video Problems](#video-problems) and [Blurring Problems](#blurring-problems) did not resolve the issue.
Include the following information for each impacted agent:
1. The agent's Glance username and description of the problem.
* What is the nature of the issue?
* When did it start occurring?
* How often does it occur (e.g., always, sometimes, etc.)?
2. The following hardware specifications for the agent:
* OS and Version
* Hardware model
* CPU, GPU, and RAM
3. The GPU log from the agent's machine, located at `chrome://gpu/`
4. A screenshot of the [WebGL report](https://webglreport.com/?v=1) from the agent's machine.
5. A screenshot of the console tab during the impacted session.
1. Right-click anywhere within the agent view window and choose **Inspect**.
### Open a Support Ticket
Please contact [Glance Support](/users/account-management/contact/) if the steps for [Video Problems](#video-problems) and [Blurring Problems](#blurring-problems) did not resolve the issue.
Include the following information for each impacted agent:
1. The agent's Glance username and description of the problem.
* What is the nature of the issue?
* When did it start occurring?
* How often does it occur (e.g., always, sometimes, etc.)?
2. The following hardware specifications for the agent:
* OS and Version
* Hardware model
* CPU, GPU, and RAM
3. The GPU log from the agent's machine, located at `chrome://gpu/`
4. A screenshot of the [WebGL report](https://webglreport.com/?v=1) from the agent's machine.
5. A screenshot of the console tab during the impacted session.
1. Right-click anywhere within the agent view window and choose **Inspect**.
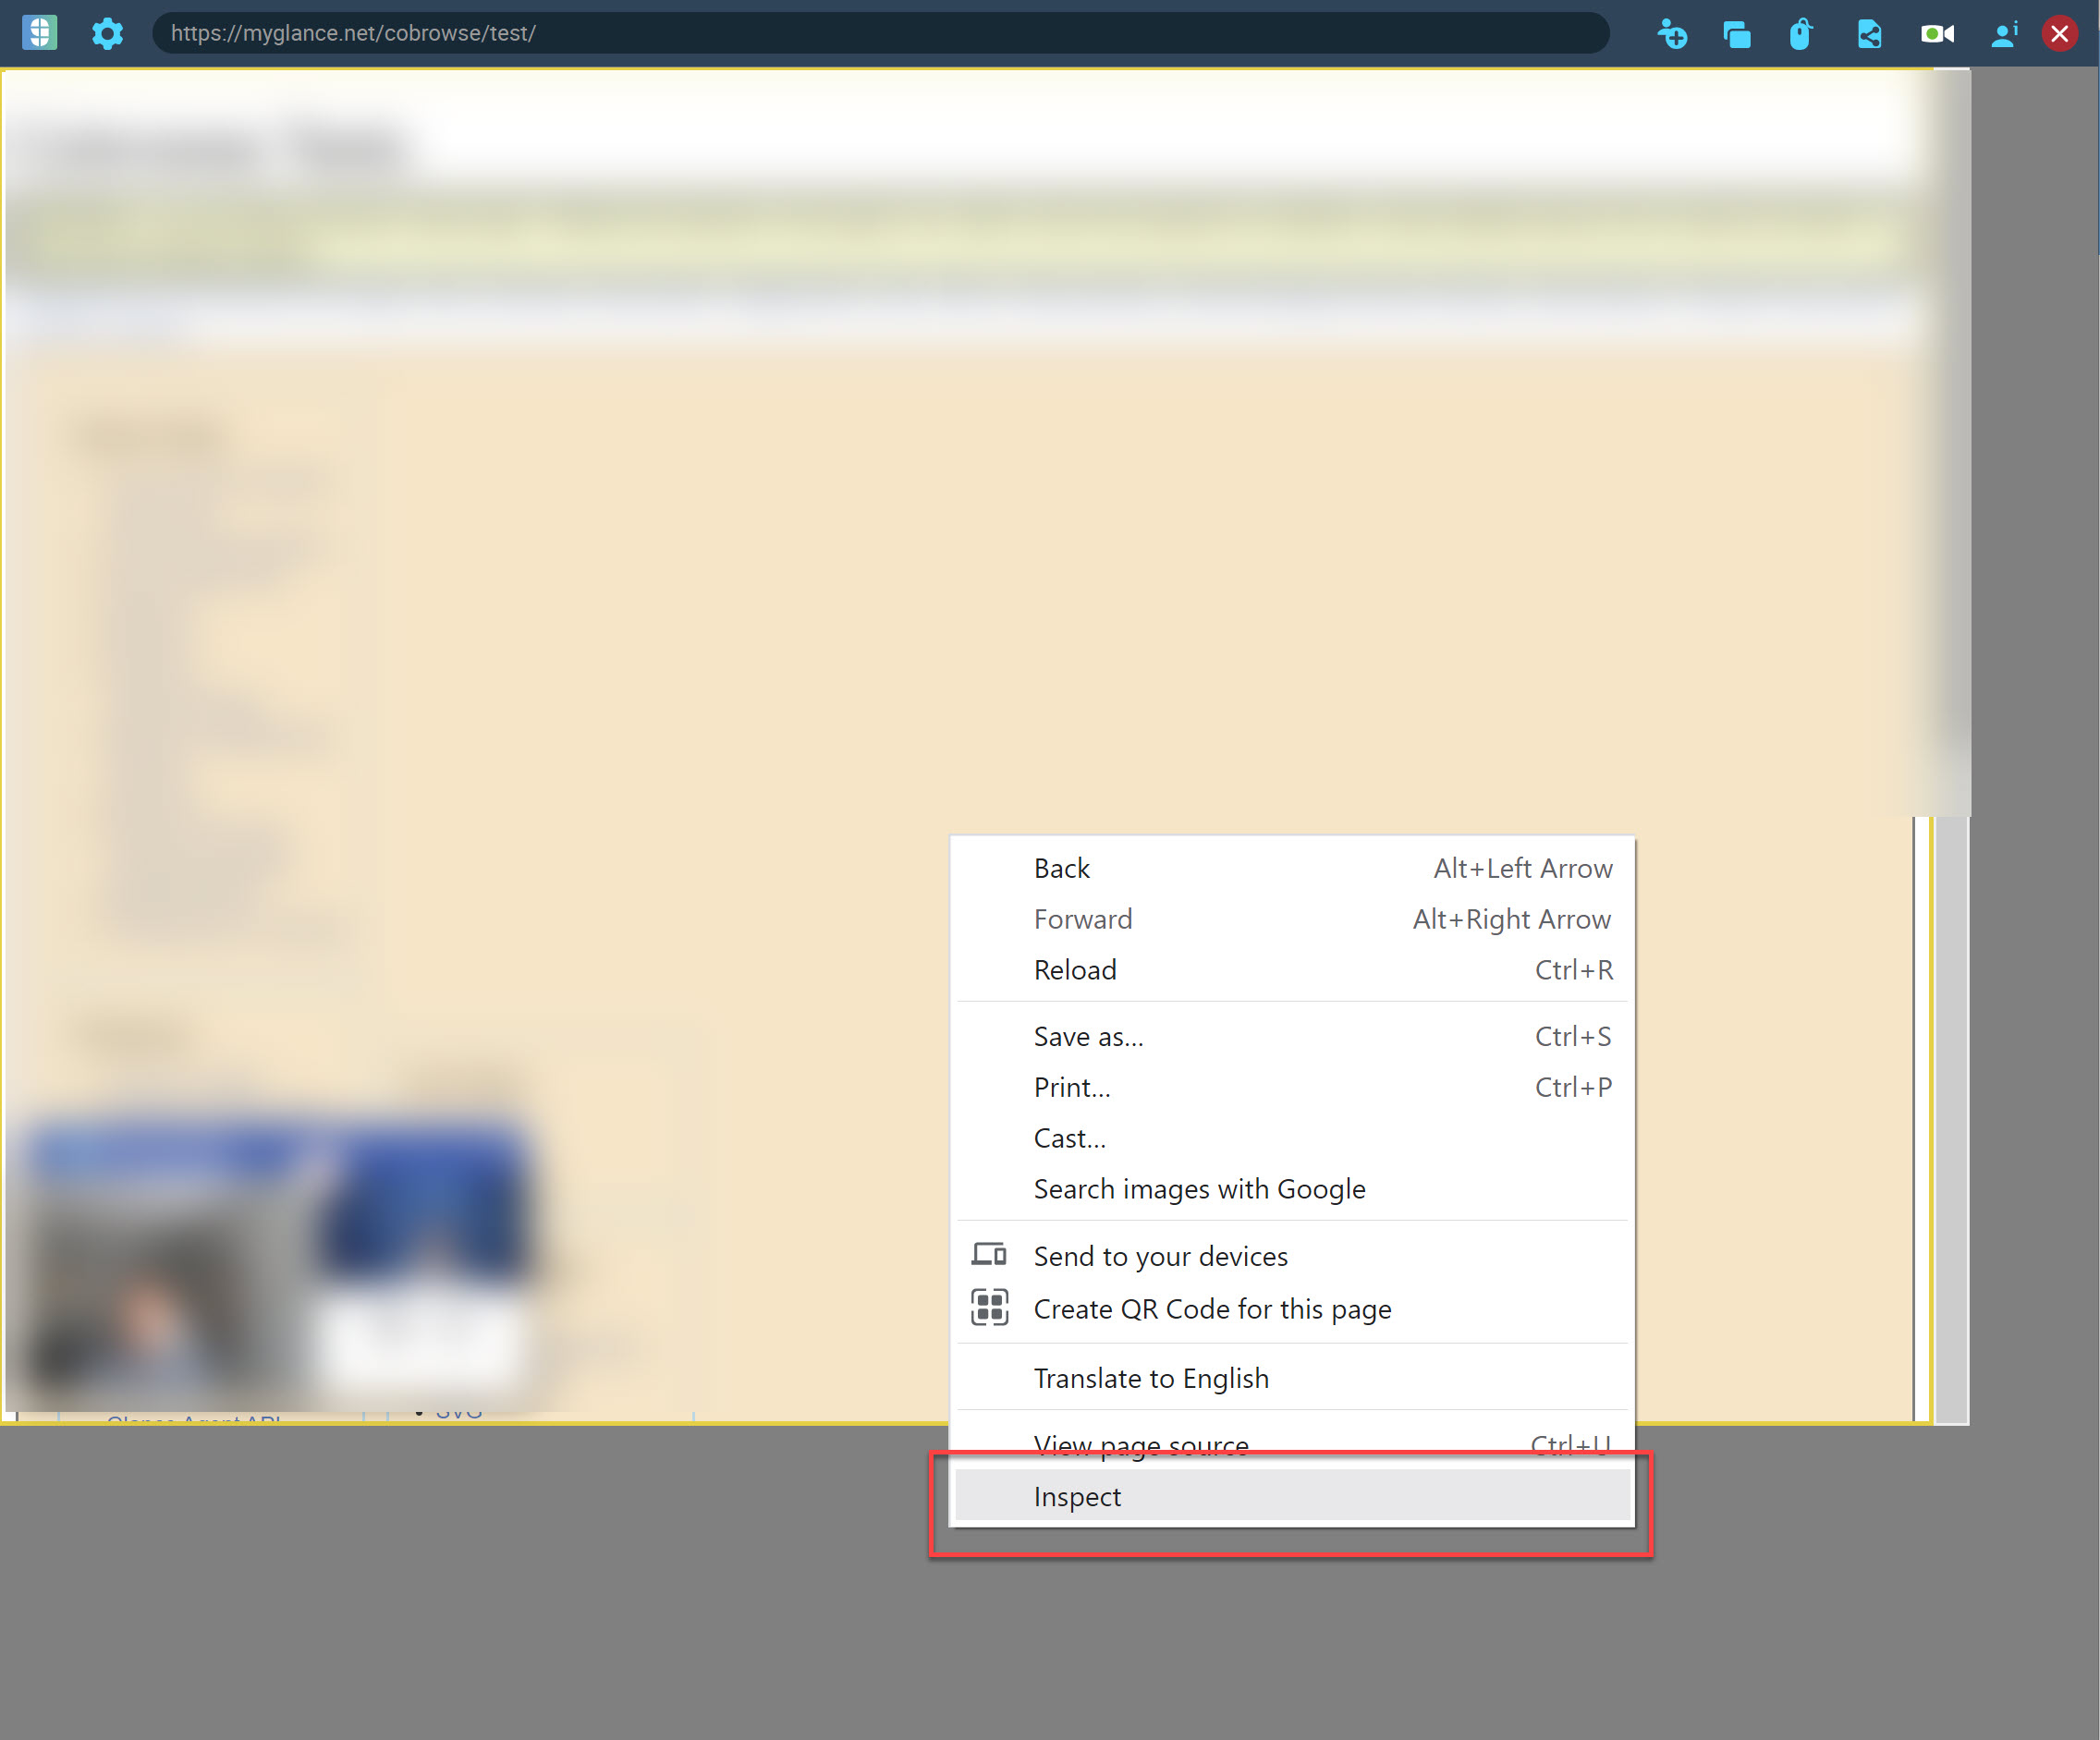 2. Select the **Console** tab.
3. Right-click within the **Console** tab and choose **Save as...**
2. Select the **Console** tab.
3. Right-click within the **Console** tab and choose **Save as...** 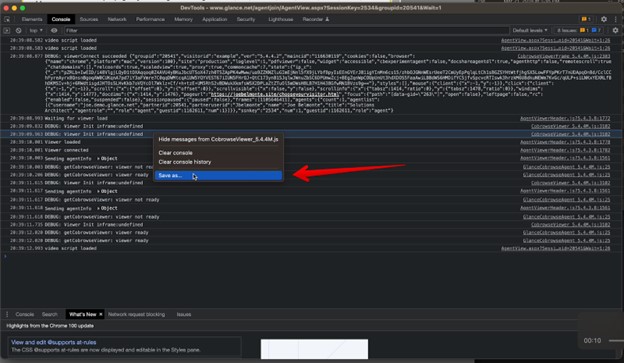 4. Save the file and include it in your support email.
=================================================================
FILE: /users/glance-screen-share/configuring
=================================================================
When your customers or session guests use Glance for desktop viewing or sharing, they will go to a Join Page to connect them to a session. Out of the box, these Join Pages will be styled to Glance's branding. As an admin in your group, you have the option to customize the Join Pages to match your company's branding.
## When are Join Pages used?
* Customers or Guests joining Desktop Show sessions hosted by one of your Glance users.
* Customers joining Desktop View sessions hosted by one of your Glance users.
* Customers initiating Desktop Show sessions for one of your Glance users to join.
* Customers joining mobile camera share sessions.
In the first two use cases, the Join Page asks for information from a Session Guest like a Session Key or a name, phone, or email address, if required. After that, the Join Page will either connect the guest as a viewer or deliver the Glance client to show their screen.
In the third use case, the Join Page simply delivers the Glance client to your customer and starts a session to show their screen to an authenticated user in your Group.
For each use case, these pages have been designed to make the connection process as simple and quick as possible.
## Customize Join Pages
The Page Customization editor can only be accessed by administrators in a Glance Group.
To find the branding editor:
1. Log in at [www.glance.net/login](https://www.glance.net/login).
2. From **Account Management**, click the **Settings** tab.
3. Under **Branding**, click on **Manage your page customization settings**.
4. Save the file and include it in your support email.
=================================================================
FILE: /users/glance-screen-share/configuring
=================================================================
When your customers or session guests use Glance for desktop viewing or sharing, they will go to a Join Page to connect them to a session. Out of the box, these Join Pages will be styled to Glance's branding. As an admin in your group, you have the option to customize the Join Pages to match your company's branding.
## When are Join Pages used?
* Customers or Guests joining Desktop Show sessions hosted by one of your Glance users.
* Customers joining Desktop View sessions hosted by one of your Glance users.
* Customers initiating Desktop Show sessions for one of your Glance users to join.
* Customers joining mobile camera share sessions.
In the first two use cases, the Join Page asks for information from a Session Guest like a Session Key or a name, phone, or email address, if required. After that, the Join Page will either connect the guest as a viewer or deliver the Glance client to show their screen.
In the third use case, the Join Page simply delivers the Glance client to your customer and starts a session to show their screen to an authenticated user in your Group.
For each use case, these pages have been designed to make the connection process as simple and quick as possible.
## Customize Join Pages
The Page Customization editor can only be accessed by administrators in a Glance Group.
To find the branding editor:
1. Log in at [www.glance.net/login](https://www.glance.net/login).
2. From **Account Management**, click the **Settings** tab.
3. Under **Branding**, click on **Manage your page customization settings**.
 4. On the left hand side of the page, edit the customization options. The right hand side of the page will give you a preview of how parts of the page will look according to the customization options applied.
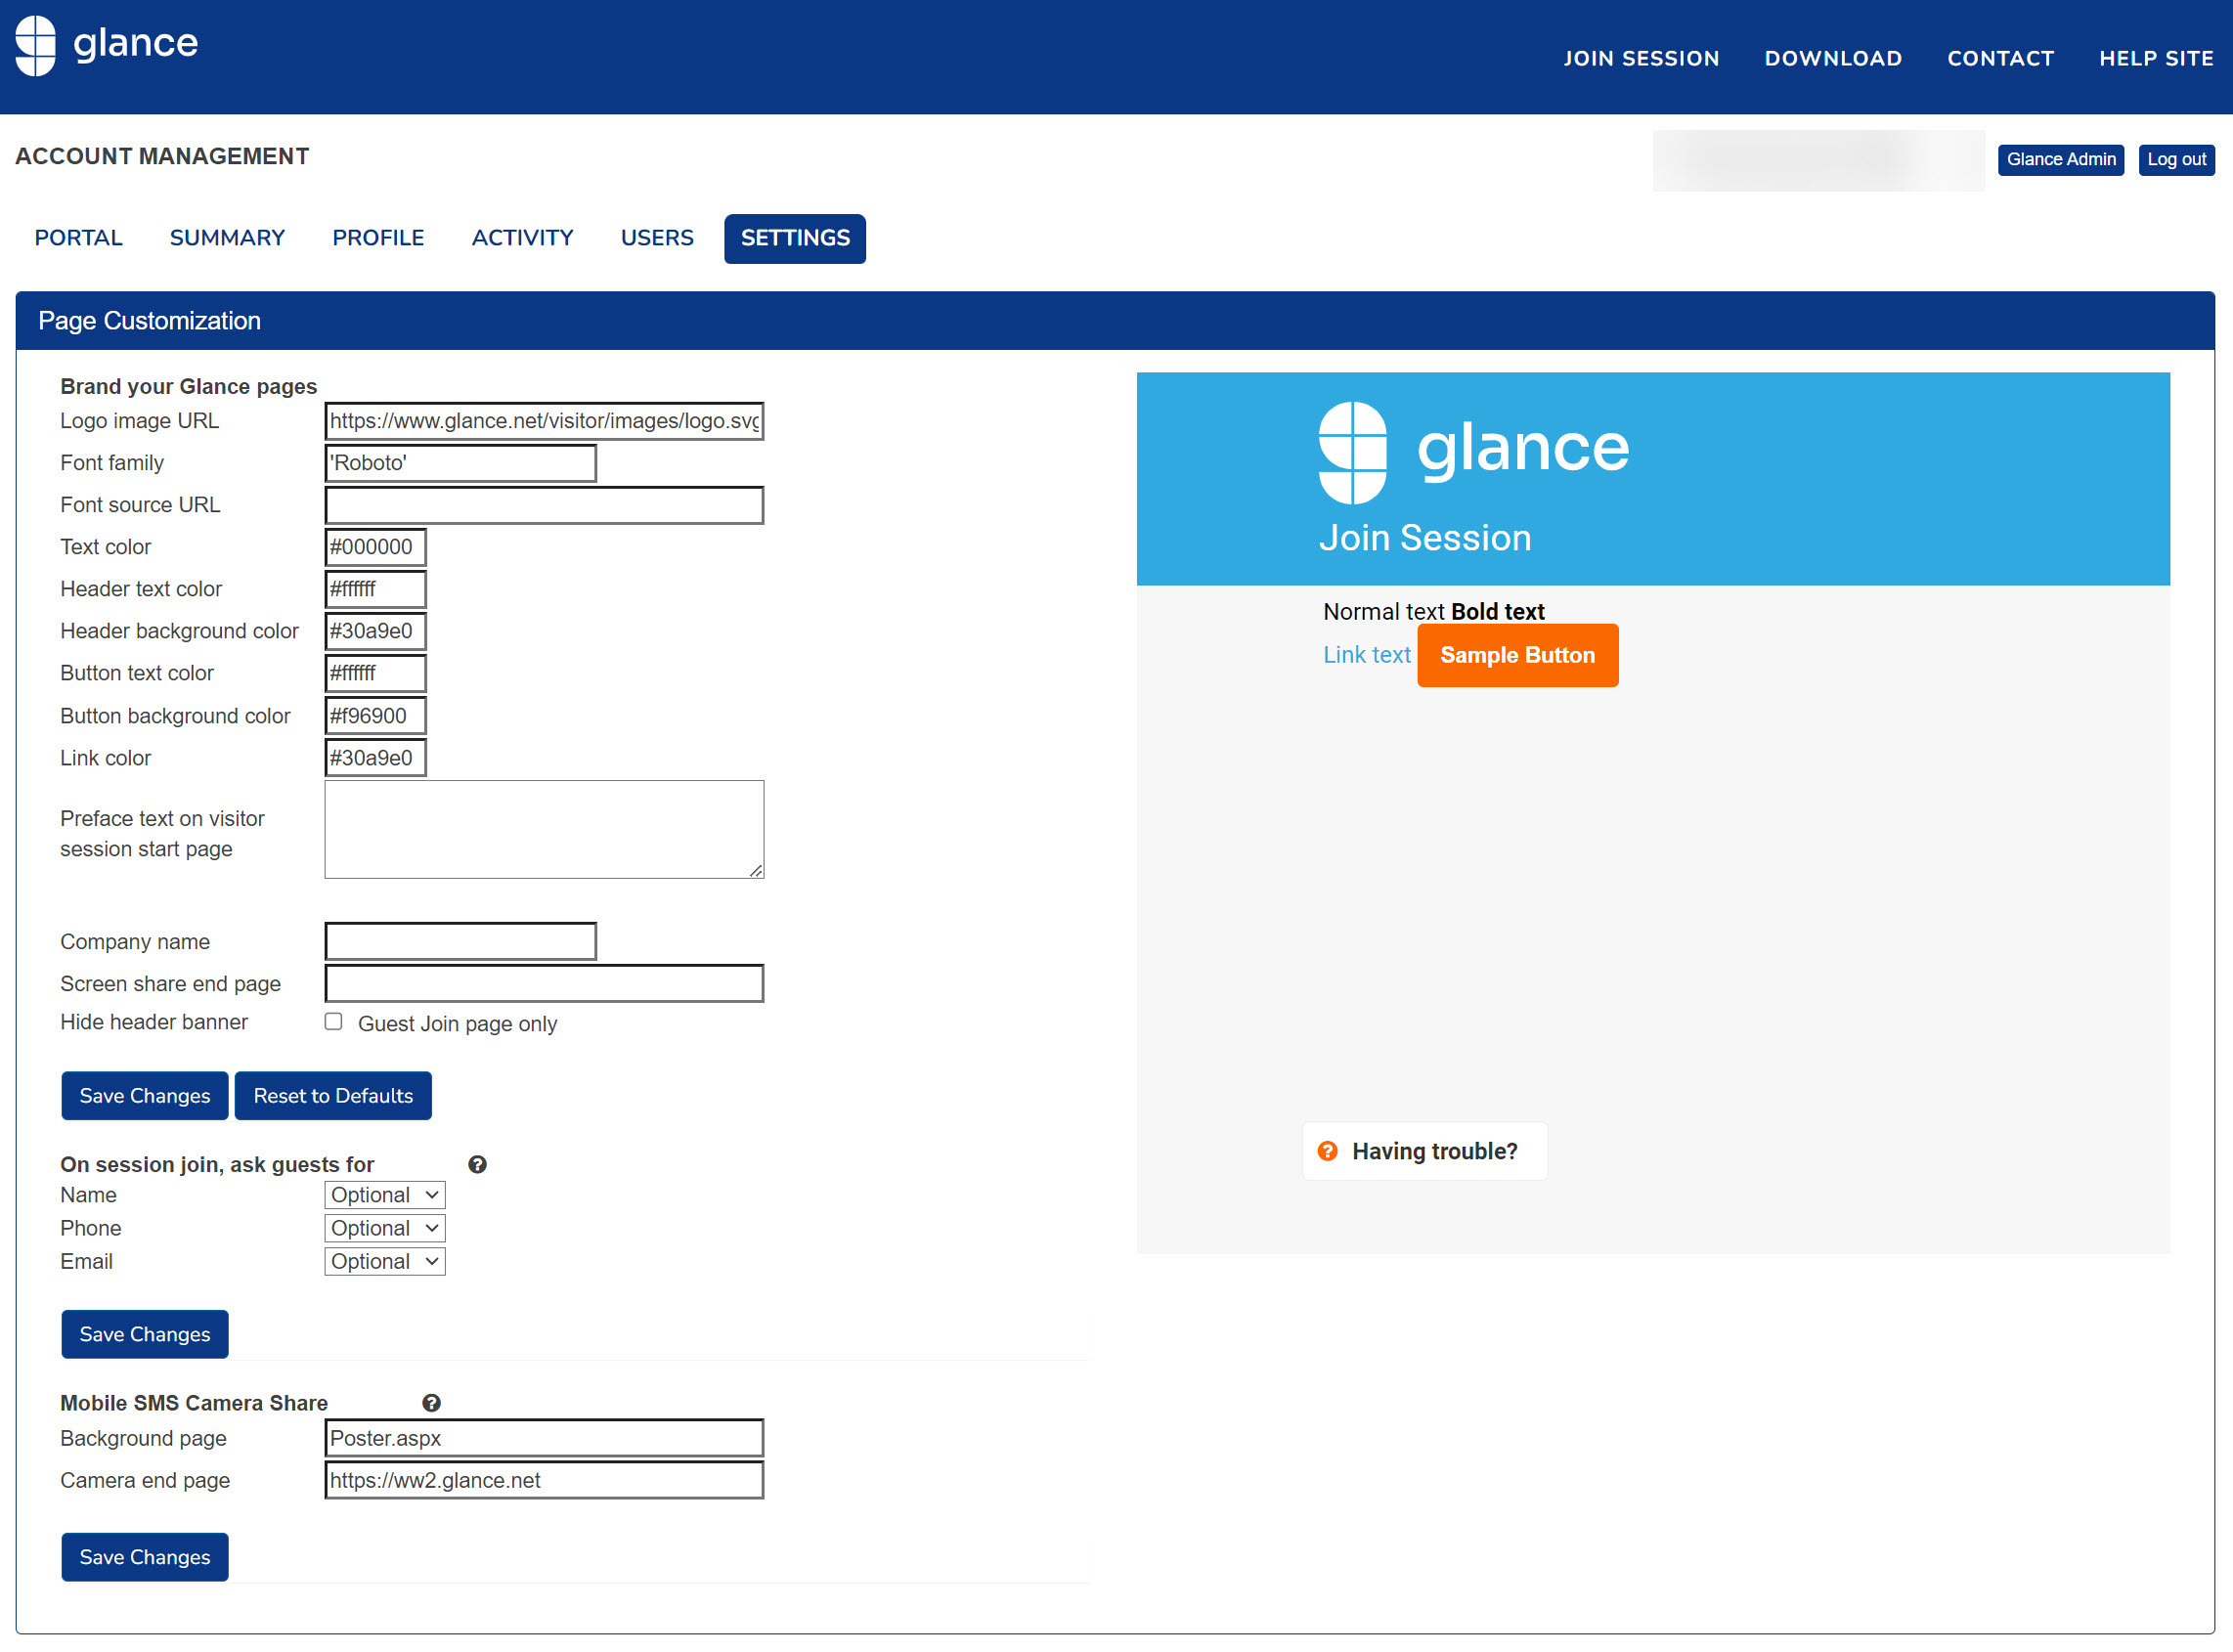 The following describes all the available options to brand your Glance pages:
* **Logo image URL:** Enter your Logo image file URL. Glance supports SVGs and PNGs, with or without transparency.
* **Font family:** If you are using a standard web font, specify it here. If you are using a custom font, enter the URL to retrieve it (see below), and specify the font family from your source file. By default, the pages use Roboto.
The following describes all the available options to brand your Glance pages:
* **Logo image URL:** Enter your Logo image file URL. Glance supports SVGs and PNGs, with or without transparency.
* **Font family:** If you are using a standard web font, specify it here. If you are using a custom font, enter the URL to retrieve it (see below), and specify the font family from your source file. By default, the pages use Roboto.
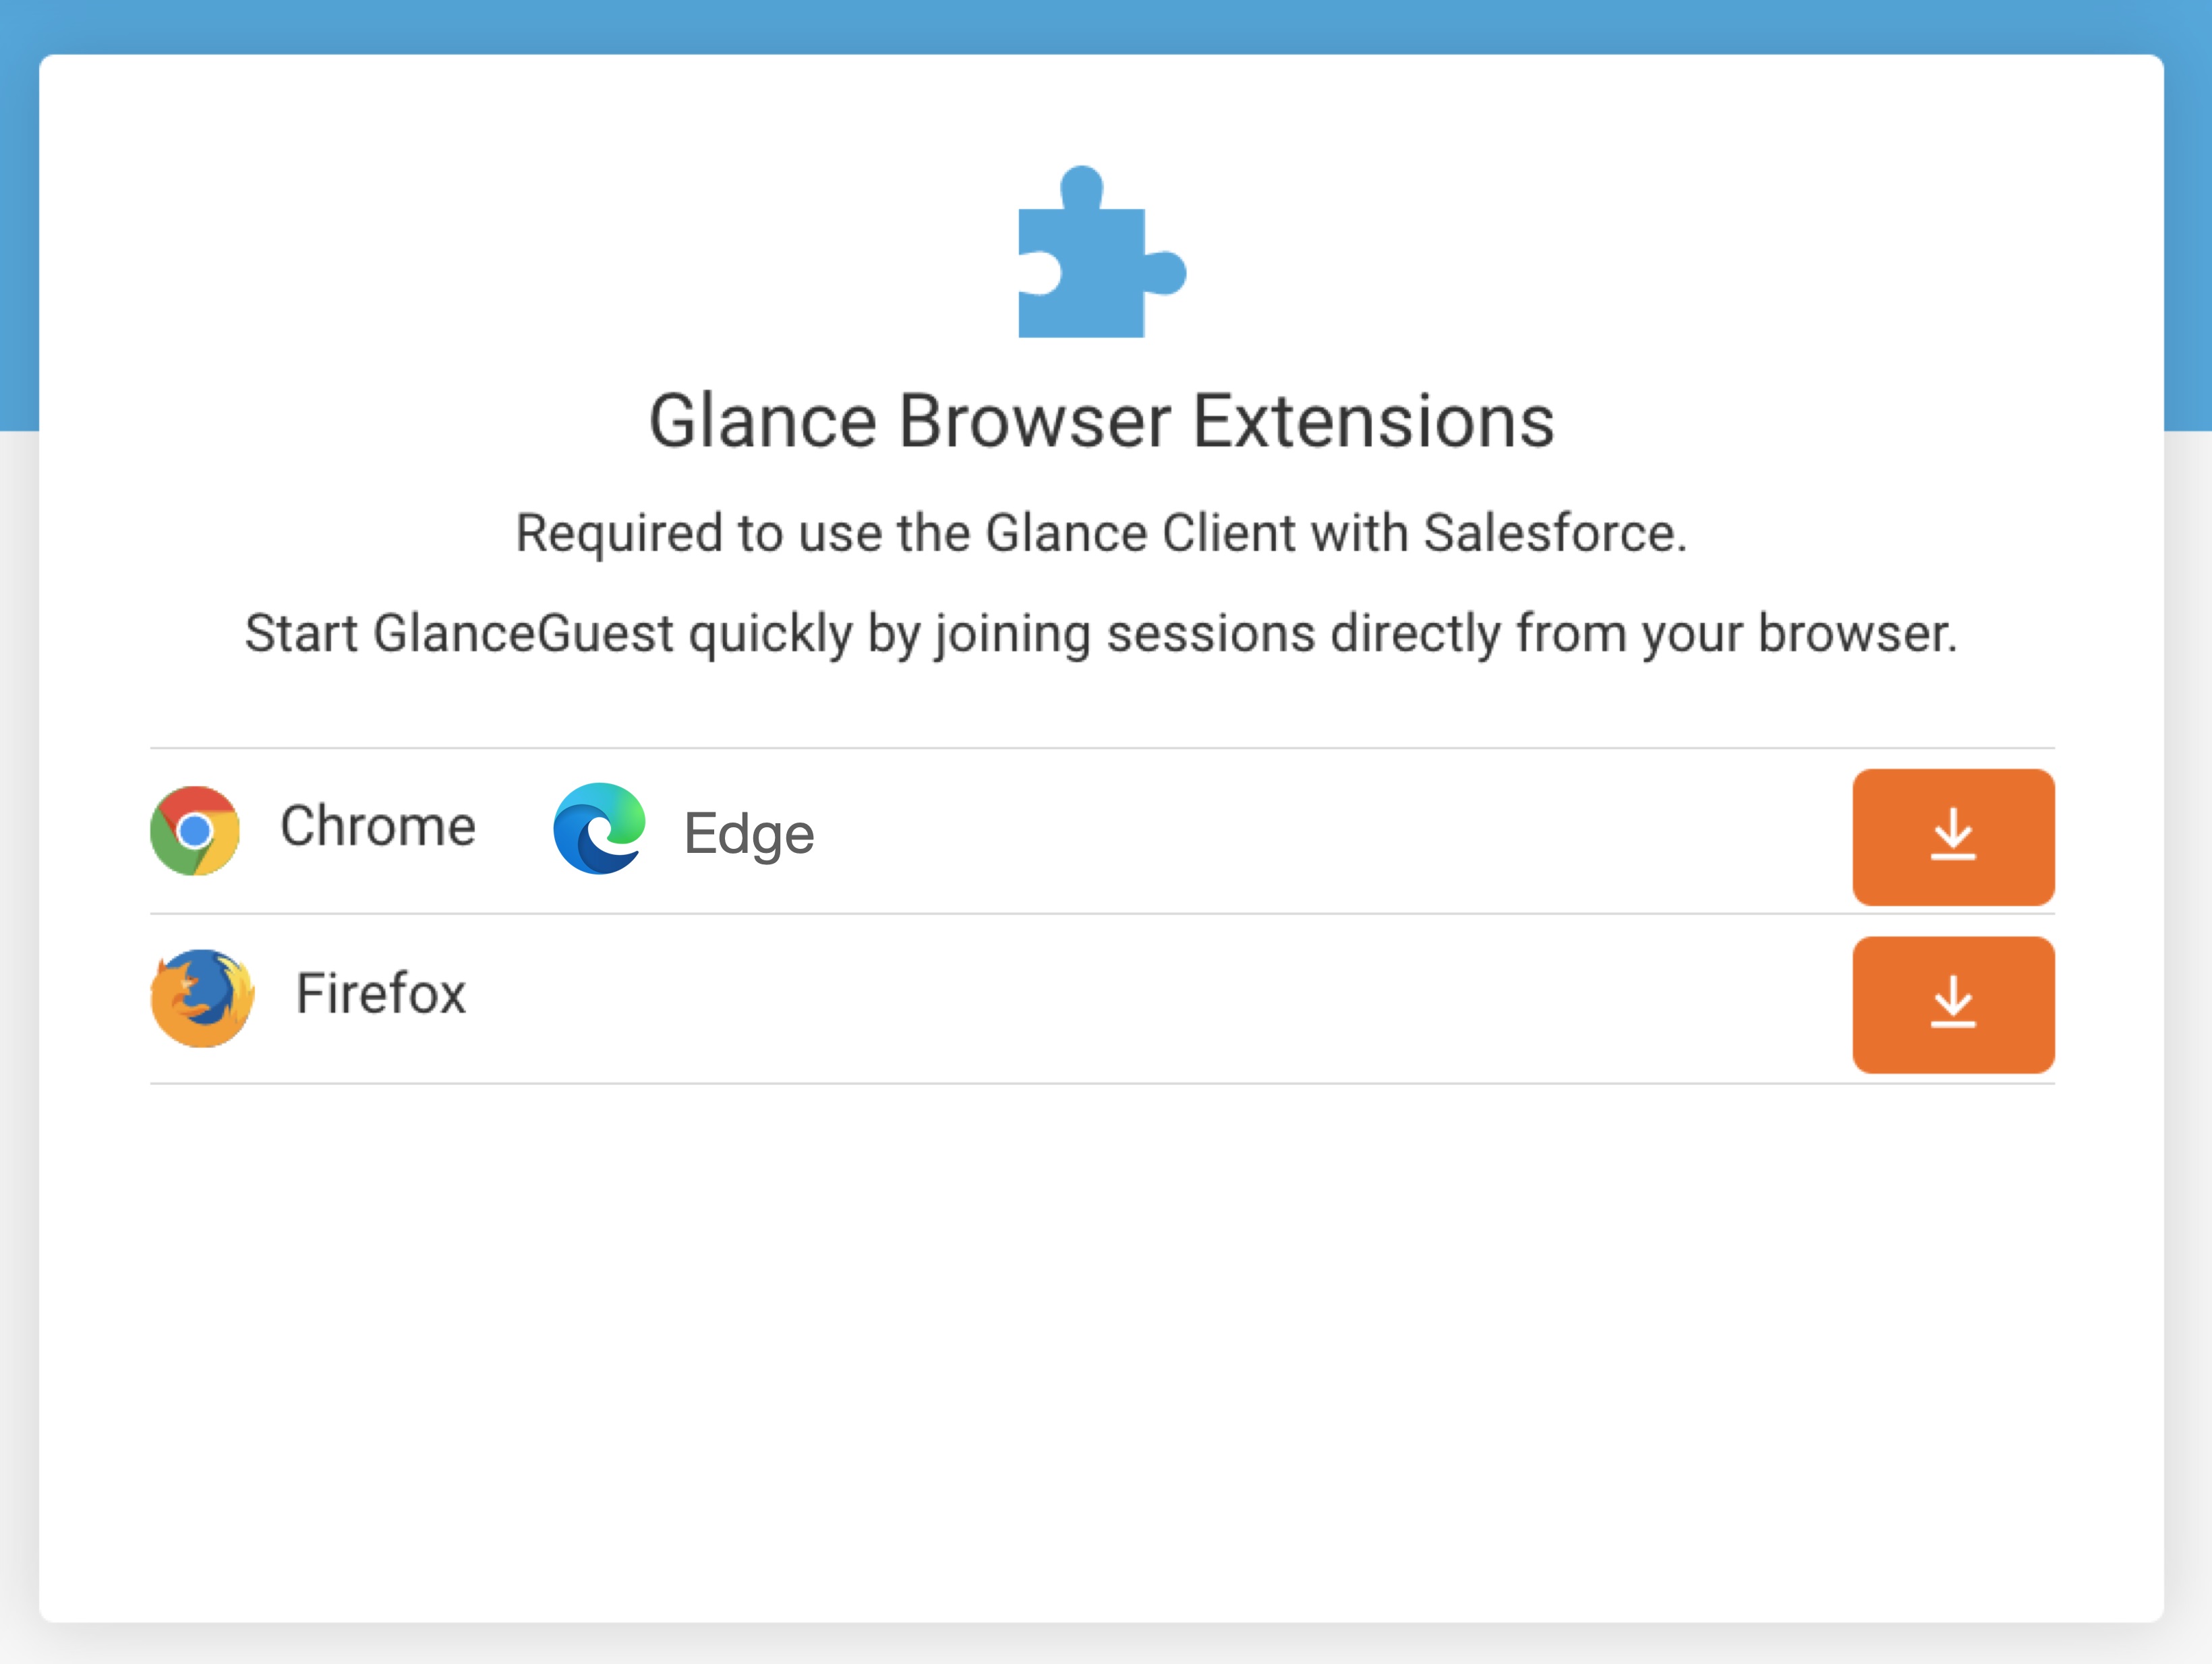 =================================================================
FILE: /users/glance-screen-share/faq
=================================================================
Browse the questions below to find quick answers regarding system compatibility, software features, and getting the best performance out of your Glance Screen Share sessions.
## Compatibility
### Which OS and browser versions work with Glance Screen Share?
A list of operating systems and browsers Glance supports is available on the [System Requirements](/users/account-management/system_requirements/) page.
### How do I connect to my guest's mobile devices (iPhone, iPad, Android, etc.)?
Guests may join and view your session from any device. To view your session, guests will only need a web browser and internet access.
### Does Glance Screen Share work with Parallels, Boot Camp, or VMware Fusion?
Yes, Glance Screen Share works with Parallels, Boot Camp, and VMware Fusion.
**Coherence Mode in Parallels**
If you are running Glance Screen Share from within the Windows environment in Coherence mode (which runs Windows applications on the macOS desktop), some special macOS functions (like zooming windows) may not work. Try running Glance from the macOS side to use and show macOS functions alongside Windows functions.
### Do I need to download Glance Screen Share?
Session hosts do need to download Glance Screen Share.
If you are hosting a Glance session, [download and install](https://glance.net/download) Glance Screen Share on your computer.
## Performance and Features
### What's the best way to view a Glance Screen Share session?
For the fastest performance, [download](https://glance.net/download) the Glance Client, and connect with its built-in viewer by clicking the **G** icon and selecting **SHOW** or **VIEW**.
### How much memory does Glance use?
When Glance is not in a session, it uses about the same amount of virtual memory as an instant messaging icon sitting idle (under 5MB). During a session, Glance needs as much memory as a multimedia player (15 to 20MB).
### How can I record a Glance session?
Glance solutions do not come with a recording technology.
### How can I get the fastest possible Glance Screen Share performance?
Below is some advice on how to get the best Glance Screen Share performance:
* **User-friendly firewall**: You may want to ask your network administrator to add a simple, secure rule to your company's firewall policy so Glance can run at peak efficiency.
* **Check your upload speed**: Many small business and home office networks enjoy fast download speeds, but their upload speed is often just a fraction as fast. Slow upload speed can cause slow Glance Screen Share performance.
### How can guests join my session without a Session Key?
Have your guests navigate to your Glance Address and join instantly.
1. Click the **G** icon near your computer's clock. The Glance menu opens.
2. From the **G** icon, click the Gear icon.
3. Select **Session**.
4. Under **Session Key**, choose **No key**.
To join your sessions, guests browse to your Glance Screen Share address. They join immediately after entering any contact information you might require.
### Glance Screen Share System and Performance Requirements
* **Glance Screen Share Show session:** A host shows their desktop screen to a guest.
* **Glance Screen Share View session:** A host views a guest's desktop screen.
* **Glance Screen Share View & Control session:** A host views and controls a guest's desktop screen.
**Host and Guest Show Session System Requirements**
Guests instantly join your Glance Screen Share Show session from any Windows or Mac computer or any mobile device without the need to install any software. They are also required to have internet access using any of the browsers listed on the [System Requirements](/users/account-management/system_requirements/) page.
### Does the Glance icon sitting in my system tray (near the clock) slow down my PC?
No. Glance only uses processing power during a session.
### Can I switch the monitor Glance Screen Share shows?
Yes. Your primary or main monitor is shown by default, but you can switch the monitor. Glance shows one monitor at a time, leaving your other displays private.
To show a different screen, follow the steps below:
1. Click the **G** icon.
2. Click the drop-down menu next to **SHOW**.
3. Choose the monitor you want to show.
You can even switch which monitor shows in the middle of your session. The yellow border will appear on the monitor you choose and your guest's Glance viewer window will show the contents of the newly chosen screen.
### Can I download/export Glance Screen Share session information?
Yes. You can export session details as a .csv (comma separated value) text file. Import it to any spreadsheet, from any time period, for one individual or everyone in your group.
**Export session information**
1. From the Glance home page, click the **Log in** button at the bottom of the page.
2. Log in using your Glance Address and password.
Then follow the steps below, depending on whether you want to export details for one or multiple sessions.
To export details for one session, follow the steps below:
1. Click the **Activity** tab.
2. Choose a date range that includes the session. (Account administrators can click the Session number to see all sessions for that date range.)
3. Click the session's **Detail** link.
4. Click the **Download** link in the Guests section.
To export details for multiple sessions or for your entire group, follow the steps below:
1. Click the **Activity** tab.
2. Choose a date range.
3. To export details for one Glance Address, click the **Export** link in that row.
To export details for all Glance Addresses in your group (you must be an account administrator), click **Export All** in the row at the bottom of the page.
### Can Glance solutions transfer files?
No, Glance solutions cannot transfer files.
You can reassure your security-conscious session guests that neither person can send any files during a Glance session. Should you need to transfer files, we suggest you send the files as an email attachment or provide them to your guests on your website.
=================================================================
FILE: /users/glance-screen-share/getting-started
=================================================================
# Getting Started
This section will walk you through how to set up, use, and configure Desktop Screen Share. More detailed information on how to personalize your Screen Share experience can be found under [Configuring](/users/glance-screen-share/configuring/).
Provisioned agents can share their desktop screen or company-approved applications instantly with customers without the customer requiring a download or installation. An agent can pass control to customers and allow them to show their screens. Remote control can be used to navigate and manage configurations on the customer's computer. Glance Screen Share also gives agents the ability to open multiple customer sessions to work across multiple views if necessary.
## Features
| Name | Description |
|---|---|
| **Gesturing** | Once in the session, viewers have the ability to gesture over elements on the presenter's browser to guide and indicate to the presenter. |
| **Screen Share** | Screen Share makes it easy to quickly see or show anything on your screen during a conversation. The agent or the visitor have the ability to share their screen. |
| **Remote Control** | Remote Control provides the option for the viewer to request control of the presenter's browser interface during the session. |
| **Agent Video** | Agent video provides the ability for the agent to lead a web-based video session during which a live video of the agent is displayed to the customer. |
=================================================================
FILE: /users/glance-screen-share/faq
=================================================================
Browse the questions below to find quick answers regarding system compatibility, software features, and getting the best performance out of your Glance Screen Share sessions.
## Compatibility
### Which OS and browser versions work with Glance Screen Share?
A list of operating systems and browsers Glance supports is available on the [System Requirements](/users/account-management/system_requirements/) page.
### How do I connect to my guest's mobile devices (iPhone, iPad, Android, etc.)?
Guests may join and view your session from any device. To view your session, guests will only need a web browser and internet access.
### Does Glance Screen Share work with Parallels, Boot Camp, or VMware Fusion?
Yes, Glance Screen Share works with Parallels, Boot Camp, and VMware Fusion.
**Coherence Mode in Parallels**
If you are running Glance Screen Share from within the Windows environment in Coherence mode (which runs Windows applications on the macOS desktop), some special macOS functions (like zooming windows) may not work. Try running Glance from the macOS side to use and show macOS functions alongside Windows functions.
### Do I need to download Glance Screen Share?
Session hosts do need to download Glance Screen Share.
If you are hosting a Glance session, [download and install](https://glance.net/download) Glance Screen Share on your computer.
## Performance and Features
### What's the best way to view a Glance Screen Share session?
For the fastest performance, [download](https://glance.net/download) the Glance Client, and connect with its built-in viewer by clicking the **G** icon and selecting **SHOW** or **VIEW**.
### How much memory does Glance use?
When Glance is not in a session, it uses about the same amount of virtual memory as an instant messaging icon sitting idle (under 5MB). During a session, Glance needs as much memory as a multimedia player (15 to 20MB).
### How can I record a Glance session?
Glance solutions do not come with a recording technology.
### How can I get the fastest possible Glance Screen Share performance?
Below is some advice on how to get the best Glance Screen Share performance:
* **User-friendly firewall**: You may want to ask your network administrator to add a simple, secure rule to your company's firewall policy so Glance can run at peak efficiency.
* **Check your upload speed**: Many small business and home office networks enjoy fast download speeds, but their upload speed is often just a fraction as fast. Slow upload speed can cause slow Glance Screen Share performance.
### How can guests join my session without a Session Key?
Have your guests navigate to your Glance Address and join instantly.
1. Click the **G** icon near your computer's clock. The Glance menu opens.
2. From the **G** icon, click the Gear icon.
3. Select **Session**.
4. Under **Session Key**, choose **No key**.
To join your sessions, guests browse to your Glance Screen Share address. They join immediately after entering any contact information you might require.
### Glance Screen Share System and Performance Requirements
* **Glance Screen Share Show session:** A host shows their desktop screen to a guest.
* **Glance Screen Share View session:** A host views a guest's desktop screen.
* **Glance Screen Share View & Control session:** A host views and controls a guest's desktop screen.
**Host and Guest Show Session System Requirements**
Guests instantly join your Glance Screen Share Show session from any Windows or Mac computer or any mobile device without the need to install any software. They are also required to have internet access using any of the browsers listed on the [System Requirements](/users/account-management/system_requirements/) page.
### Does the Glance icon sitting in my system tray (near the clock) slow down my PC?
No. Glance only uses processing power during a session.
### Can I switch the monitor Glance Screen Share shows?
Yes. Your primary or main monitor is shown by default, but you can switch the monitor. Glance shows one monitor at a time, leaving your other displays private.
To show a different screen, follow the steps below:
1. Click the **G** icon.
2. Click the drop-down menu next to **SHOW**.
3. Choose the monitor you want to show.
You can even switch which monitor shows in the middle of your session. The yellow border will appear on the monitor you choose and your guest's Glance viewer window will show the contents of the newly chosen screen.
### Can I download/export Glance Screen Share session information?
Yes. You can export session details as a .csv (comma separated value) text file. Import it to any spreadsheet, from any time period, for one individual or everyone in your group.
**Export session information**
1. From the Glance home page, click the **Log in** button at the bottom of the page.
2. Log in using your Glance Address and password.
Then follow the steps below, depending on whether you want to export details for one or multiple sessions.
To export details for one session, follow the steps below:
1. Click the **Activity** tab.
2. Choose a date range that includes the session. (Account administrators can click the Session number to see all sessions for that date range.)
3. Click the session's **Detail** link.
4. Click the **Download** link in the Guests section.
To export details for multiple sessions or for your entire group, follow the steps below:
1. Click the **Activity** tab.
2. Choose a date range.
3. To export details for one Glance Address, click the **Export** link in that row.
To export details for all Glance Addresses in your group (you must be an account administrator), click **Export All** in the row at the bottom of the page.
### Can Glance solutions transfer files?
No, Glance solutions cannot transfer files.
You can reassure your security-conscious session guests that neither person can send any files during a Glance session. Should you need to transfer files, we suggest you send the files as an email attachment or provide them to your guests on your website.
=================================================================
FILE: /users/glance-screen-share/getting-started
=================================================================
# Getting Started
This section will walk you through how to set up, use, and configure Desktop Screen Share. More detailed information on how to personalize your Screen Share experience can be found under [Configuring](/users/glance-screen-share/configuring/).
Provisioned agents can share their desktop screen or company-approved applications instantly with customers without the customer requiring a download or installation. An agent can pass control to customers and allow them to show their screens. Remote control can be used to navigate and manage configurations on the customer's computer. Glance Screen Share also gives agents the ability to open multiple customer sessions to work across multiple views if necessary.
## Features
| Name | Description |
|---|---|
| **Gesturing** | Once in the session, viewers have the ability to gesture over elements on the presenter's browser to guide and indicate to the presenter. |
| **Screen Share** | Screen Share makes it easy to quickly see or show anything on your screen during a conversation. The agent or the visitor have the ability to share their screen. |
| **Remote Control** | Remote Control provides the option for the viewer to request control of the presenter's browser interface during the session. |
| **Agent Video** | Agent video provides the ability for the agent to lead a web-based video session during which a live video of the agent is displayed to the customer. |
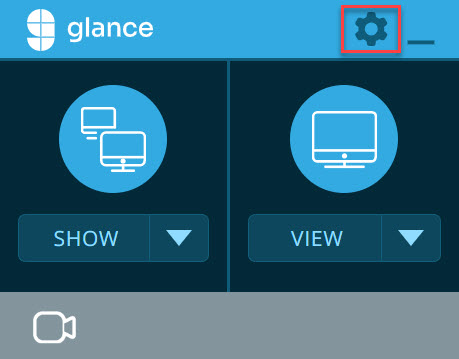 ## Session Settings
Session settings provide the ability to modify session settings such as keys, drawing, and if users can show their screens.
You can choose which type of key you want to use:
* **Random key:** Glance will generate a random key for every session.
* **Always use this key:** Every session will use the same key. Note that this option is less secure.
* **No key (fastest, least secure):** Guests join as soon as they go to your Glance address.
If you want users to have the ability to highlight interface elements while you are sharing, click **Draw on your screen**.
If you want users to have the ability to switch presenters, click **Show their own screen**. When this checkbox is clicked, guests who have Glance installed can click the G icon and switch to showing their screen on-the-fly. This is ideal for meetings when you need to change the presenter. Guests can download Glance from [www.glance.net/guest](https://www.glance.net/guest). They don't need a paid subscription, but you need a subscription that allows viewing other people's screens.
## Visitor Options
Visitor options allow you to modify which type of contact information visitors provide prior to the session. You can choose to have the visitor provide a name, phone, and/or email.
You can also determine if these settings are:
* **Required:** Guests must enter the information in order to join your session.
* **Optional:** Guests will have the option of entering the information.
* **Don't Ask:** Glance will not ask your guests for this information.
## Session Settings
Session settings provide the ability to modify session settings such as keys, drawing, and if users can show their screens.
You can choose which type of key you want to use:
* **Random key:** Glance will generate a random key for every session.
* **Always use this key:** Every session will use the same key. Note that this option is less secure.
* **No key (fastest, least secure):** Guests join as soon as they go to your Glance address.
If you want users to have the ability to highlight interface elements while you are sharing, click **Draw on your screen**.
If you want users to have the ability to switch presenters, click **Show their own screen**. When this checkbox is clicked, guests who have Glance installed can click the G icon and switch to showing their screen on-the-fly. This is ideal for meetings when you need to change the presenter. Guests can download Glance from [www.glance.net/guest](https://www.glance.net/guest). They don't need a paid subscription, but you need a subscription that allows viewing other people's screens.
## Visitor Options
Visitor options allow you to modify which type of contact information visitors provide prior to the session. You can choose to have the visitor provide a name, phone, and/or email.
You can also determine if these settings are:
* **Required:** Guests must enter the information in order to join your session.
* **Optional:** Guests will have the option of entering the information.
* **Don't Ask:** Glance will not ask your guests for this information.
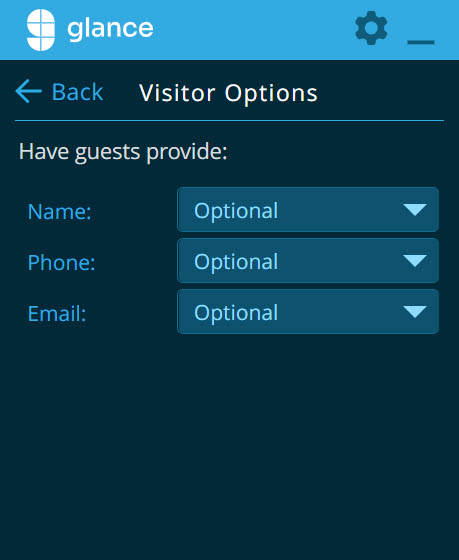 ## Account Settings
This section allows you to modify your name and title. Here you can also log out of the Glance Client.
## Advanced Settings
This section provides details about the version of the Glance Client you are using.
=================================================================
FILE: /users/glance-screen-share/getting-started/screenshare_schedule
=================================================================
Glance is designed to be used on-the-fly as the visual enabler for any conversation, so you shouldn't need to schedule a session most of the time. Unlike traditional meeting tools, Glance is simple enough to start up and connect in the middle of a meeting or over a conference call. It only takes a few seconds for everyone to join.
If you are giving a presentation where it's just you talking to a group instead of a freeform conversation, you might want to give everyone the details to join a Glance session in advance so that you can just focus on presenting instead of talking them through joining. You can do this by selecting **Always use this key**, and providing the key ahead of time to your guests.
## Host a Session Without a Key
If you're not sharing any sensitive information during your meeting, this is the easiest way to host a session. Send a message to your group that says:
> Join my Glance session at example.glance.net
## Account Settings
This section allows you to modify your name and title. Here you can also log out of the Glance Client.
## Advanced Settings
This section provides details about the version of the Glance Client you are using.
=================================================================
FILE: /users/glance-screen-share/getting-started/screenshare_schedule
=================================================================
Glance is designed to be used on-the-fly as the visual enabler for any conversation, so you shouldn't need to schedule a session most of the time. Unlike traditional meeting tools, Glance is simple enough to start up and connect in the middle of a meeting or over a conference call. It only takes a few seconds for everyone to join.
If you are giving a presentation where it's just you talking to a group instead of a freeform conversation, you might want to give everyone the details to join a Glance session in advance so that you can just focus on presenting instead of talking them through joining. You can do this by selecting **Always use this key**, and providing the key ahead of time to your guests.
## Host a Session Without a Key
If you're not sharing any sensitive information during your meeting, this is the easiest way to host a session. Send a message to your group that says:
> Join my Glance session at example.glance.net> Dial in: 702-589-8350 PIN: 5555555 1. Before your call, click the **G** icon and select the **Gear** icon. 2. Go to **Session**. Under **Session Key**, choose **No Key**. 3. Your guests will join as soon as they get to your Glance address. ================================================================= FILE: /users/glance-screen-share/getting-started/screenshare_setup ================================================================= Glance works on most current Windows and Macintosh operating systems. See the [System Requirements](/users/account-management/system_requirements/) page for more information. ## Download Glance Once you have an active subscription, you can download Glance at [www.glance.net/download](https://www.glance.net/download). ## Install Glance for Windows Once Glance has downloaded: 1. Enter your **Glance Address** and **Password**. 2. Click **Log In**.
You will now find Glance as a **G** icon in your system tray next to your computer's clock.
If you want to make sure the **G** icon stays visible, complete the following steps:
1. Click the hidden icon arrow in the tray.
2. Select the **G** icon.
3. Drag the **G** icon into the tray next to the clock.
## Install Glance for Mac
After the download has started, the Glance ZIP file is downloaded and opens automatically. The Glance Installer walks you through the steps necessary to install the Glance Client.
1. Enter your **Glance Address** and **Password**.
2. Click **Log In**.
3. Once installed, you will find Glance on your dock and menu bar.
* Dock:
 * Menu Bar:
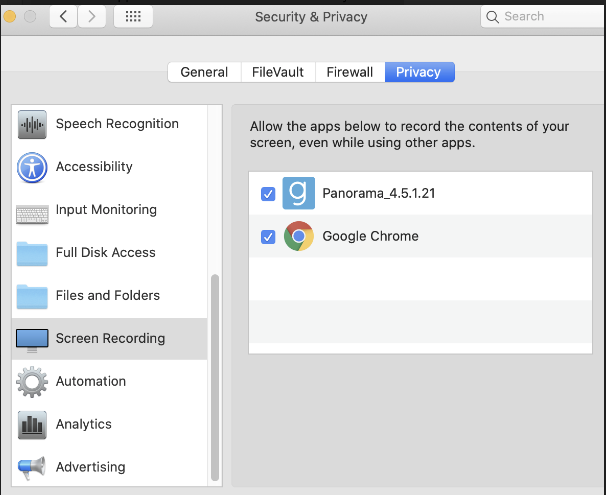 =================================================================
FILE: /users/glance-screen-share/getting-started/screenshare_using
=================================================================
Glance Screen Share makes it easy to quickly see or show anything on your screen during a conversation. If you are speaking with a person over the phone and you want to show your screen or see theirs, it only takes a few steps to set up.
## Start a Session
When you are on the phone with your guest and want to start a session, follow these steps:
1. On a PC, click the **G** icon in the corner of your screen next to your clock. On a Mac, click the **G** icon on your dock, then click the **G** icon in the menu bar.
2. Choose which kind of session you want to start:
* **Show:** to share your desktop with a guest. If you choose to show your screen, a border will be drawn around your screen to indicate that it is being shared. You also have the option to choose which monitor you want to view. Your guests will not need to download any software to view your screen.
* **View:** to view a guest's screen. You have the ability to choose if you want to use remote control or not. Select **View Only** to view without remote control, or **View and Control** to use remote control. After you start a session, the Session Info box appears with directions on how to invite guests to the session.
=================================================================
FILE: /users/glance-screen-share/getting-started/screenshare_using
=================================================================
Glance Screen Share makes it easy to quickly see or show anything on your screen during a conversation. If you are speaking with a person over the phone and you want to show your screen or see theirs, it only takes a few steps to set up.
## Start a Session
When you are on the phone with your guest and want to start a session, follow these steps:
1. On a PC, click the **G** icon in the corner of your screen next to your clock. On a Mac, click the **G** icon on your dock, then click the **G** icon in the menu bar.
2. Choose which kind of session you want to start:
* **Show:** to share your desktop with a guest. If you choose to show your screen, a border will be drawn around your screen to indicate that it is being shared. You also have the option to choose which monitor you want to view. Your guests will not need to download any software to view your screen.
* **View:** to view a guest's screen. You have the ability to choose if you want to use remote control or not. Select **View Only** to view without remote control, or **View and Control** to use remote control. After you start a session, the Session Info box appears with directions on how to invite guests to the session.
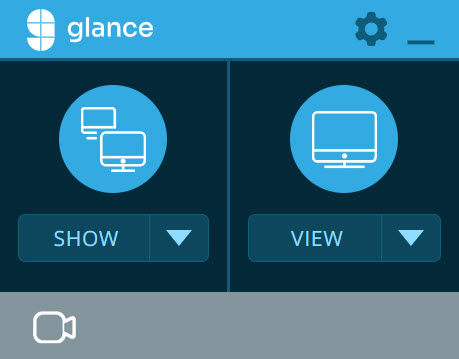 Once you start a session, the Session Info box is displayed with directions on how to invite guests to the session. After guests are connected, it also displays how many guests are connected to your session.
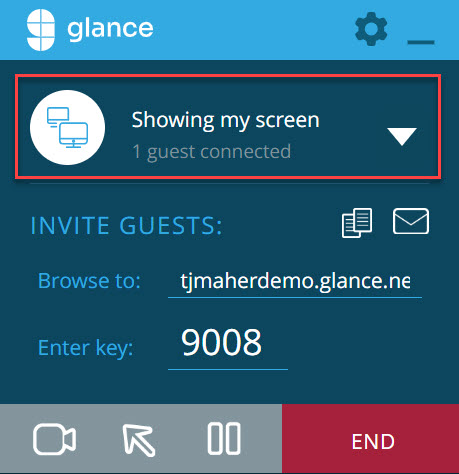 You can minimize this box at any time without affecting your session. To bring it back, click the **G** icon.
The Glance session times out if your first guest doesn't join within ten minutes.
## Invite Guests
Over the phone, invite guests by following the directions under **Invite Guests** on the Session Info box. You can use the buttons found below these directions to send session details to your guests.
You can minimize this box at any time without affecting your session. To bring it back, click the **G** icon.
The Glance session times out if your first guest doesn't join within ten minutes.
## Invite Guests
Over the phone, invite guests by following the directions under **Invite Guests** on the Session Info box. You can use the buttons found below these directions to send session details to your guests.
 * The copy button copies session details to your clipboard for you to paste into any other communication service.
* The envelope button opens your default email client and drafts a message with a link to join your session.
Once your guests access the URL, it should look similar to this:
* The copy button copies session details to your clipboard for you to paste into any other communication service.
* The envelope button opens your default email client and drafts a message with a link to join your session.
Once your guests access the URL, it should look similar to this:
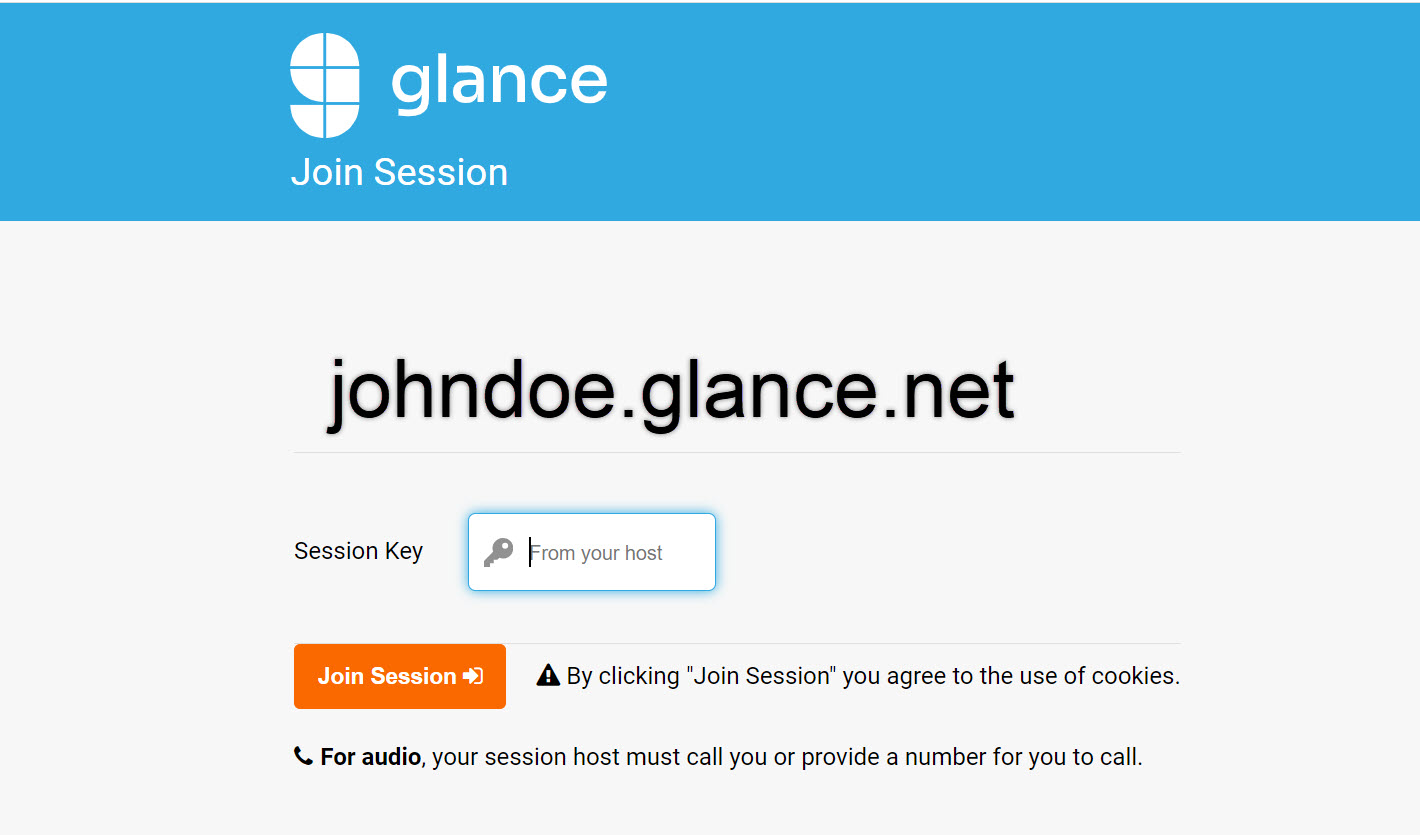 To connect, your guests simply enter the Session Key and click Join Session. If the session is to view their screen, they are prompted to download the Glance Guest software.
## During a Session
During your session, you have options that you can access by clicking on the **G** icon.
### Show
Show allows you to choose which monitor you want to use during the session.
### Gesture
During the session, the visitor and agent can:
* Move and Indicate - with their cursor (shows as a colored cursor for the presenter).
* Point - Click for a radiating indication, which will radiate for ~5 seconds.
* Gesture - Click and drag a rectangle to indicate an area.
Gesturing can be set on/off at group/role for View and Show sessions. It can also be set to on/off from the Glance Client.
### Hide My Screen
The pause button allows you to hide your screen while keeping your guests connected to your session. The border will disappear to indicate that sharing is suspended, the UI updates to say "Screen hidden", and your guests will see a message saying "Screen not being shown..."
To connect, your guests simply enter the Session Key and click Join Session. If the session is to view their screen, they are prompted to download the Glance Guest software.
## During a Session
During your session, you have options that you can access by clicking on the **G** icon.
### Show
Show allows you to choose which monitor you want to use during the session.
### Gesture
During the session, the visitor and agent can:
* Move and Indicate - with their cursor (shows as a colored cursor for the presenter).
* Point - Click for a radiating indication, which will radiate for ~5 seconds.
* Gesture - Click and drag a rectangle to indicate an area.
Gesturing can be set on/off at group/role for View and Show sessions. It can also be set to on/off from the Glance Client.
### Hide My Screen
The pause button allows you to hide your screen while keeping your guests connected to your session. The border will disappear to indicate that sharing is suspended, the UI updates to say "Screen hidden", and your guests will see a message saying "Screen not being shown..."
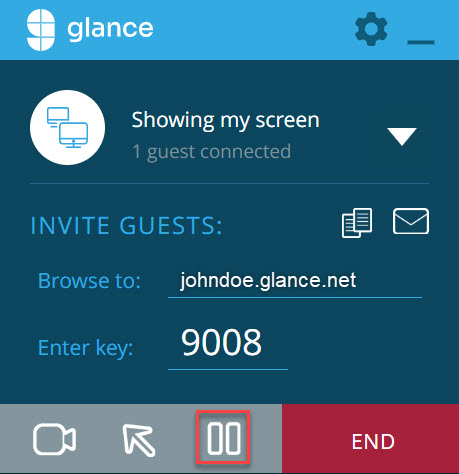 To show your screen again:
1. If Glance is minimized, click the **G** icon.
2. Click the **Play** icon to resume showing your screen.
To show your screen again:
1. If Glance is minimized, click the **G** icon.
2. Click the **Play** icon to resume showing your screen.
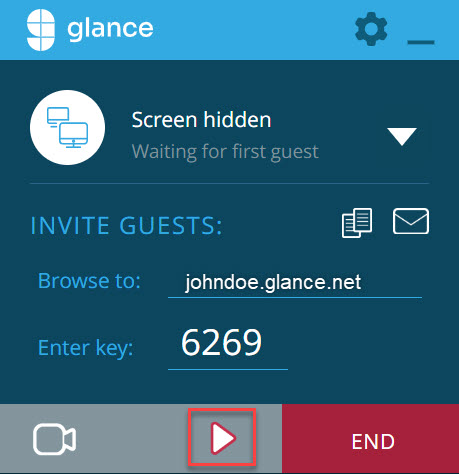 ### Allow Remote Control
Turning the remote control option on will allow viewers to remotely control the screen. When a guest has control, an orange dot appears over their cursor.
Whoever's screen is being shown has priority control. When they move their mouse or type on their keyboard, viewers are prevented from taking control. When the showing person stops, guests can take control again.
To turn off remote control:
1. If Glance is minimized, click the **G** icon.
2. Click the **Arrow** icon.
### Allow Remote Control
Turning the remote control option on will allow viewers to remotely control the screen. When a guest has control, an orange dot appears over their cursor.
Whoever's screen is being shown has priority control. When they move their mouse or type on their keyboard, viewers are prevented from taking control. When the showing person stops, guests can take control again.
To turn off remote control:
1. If Glance is minimized, click the **G** icon.
2. Click the **Arrow** icon.
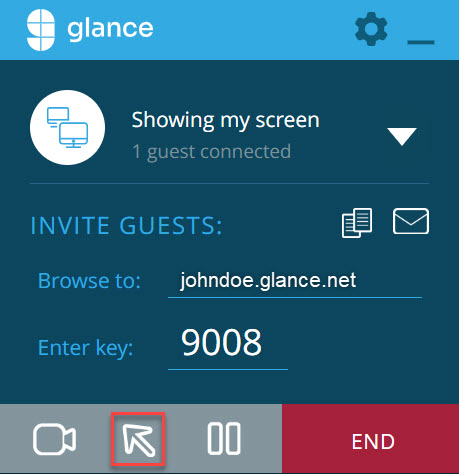 When the arrow icon has a white outline, the guest has the ability to use remote control but it is currently turned OFF. If the icon has a red outline, remote control is turned ON.
If you do not want your Glance users have the option to use remote control, you can disable it in your group settings.
When the arrow icon has a white outline, the guest has the ability to use remote control but it is currently turned OFF. If the icon has a red outline, remote control is turned ON.
If you do not want your Glance users have the option to use remote control, you can disable it in your group settings.
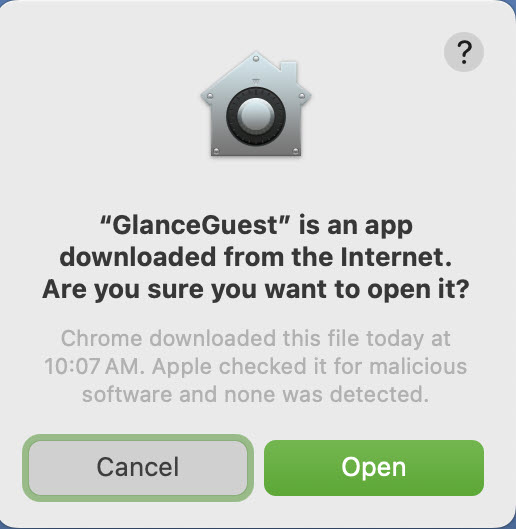 3. The visitor will then see instructions on giving Glance permission to record the screen. The visitor should click on **Open System Preferences**.
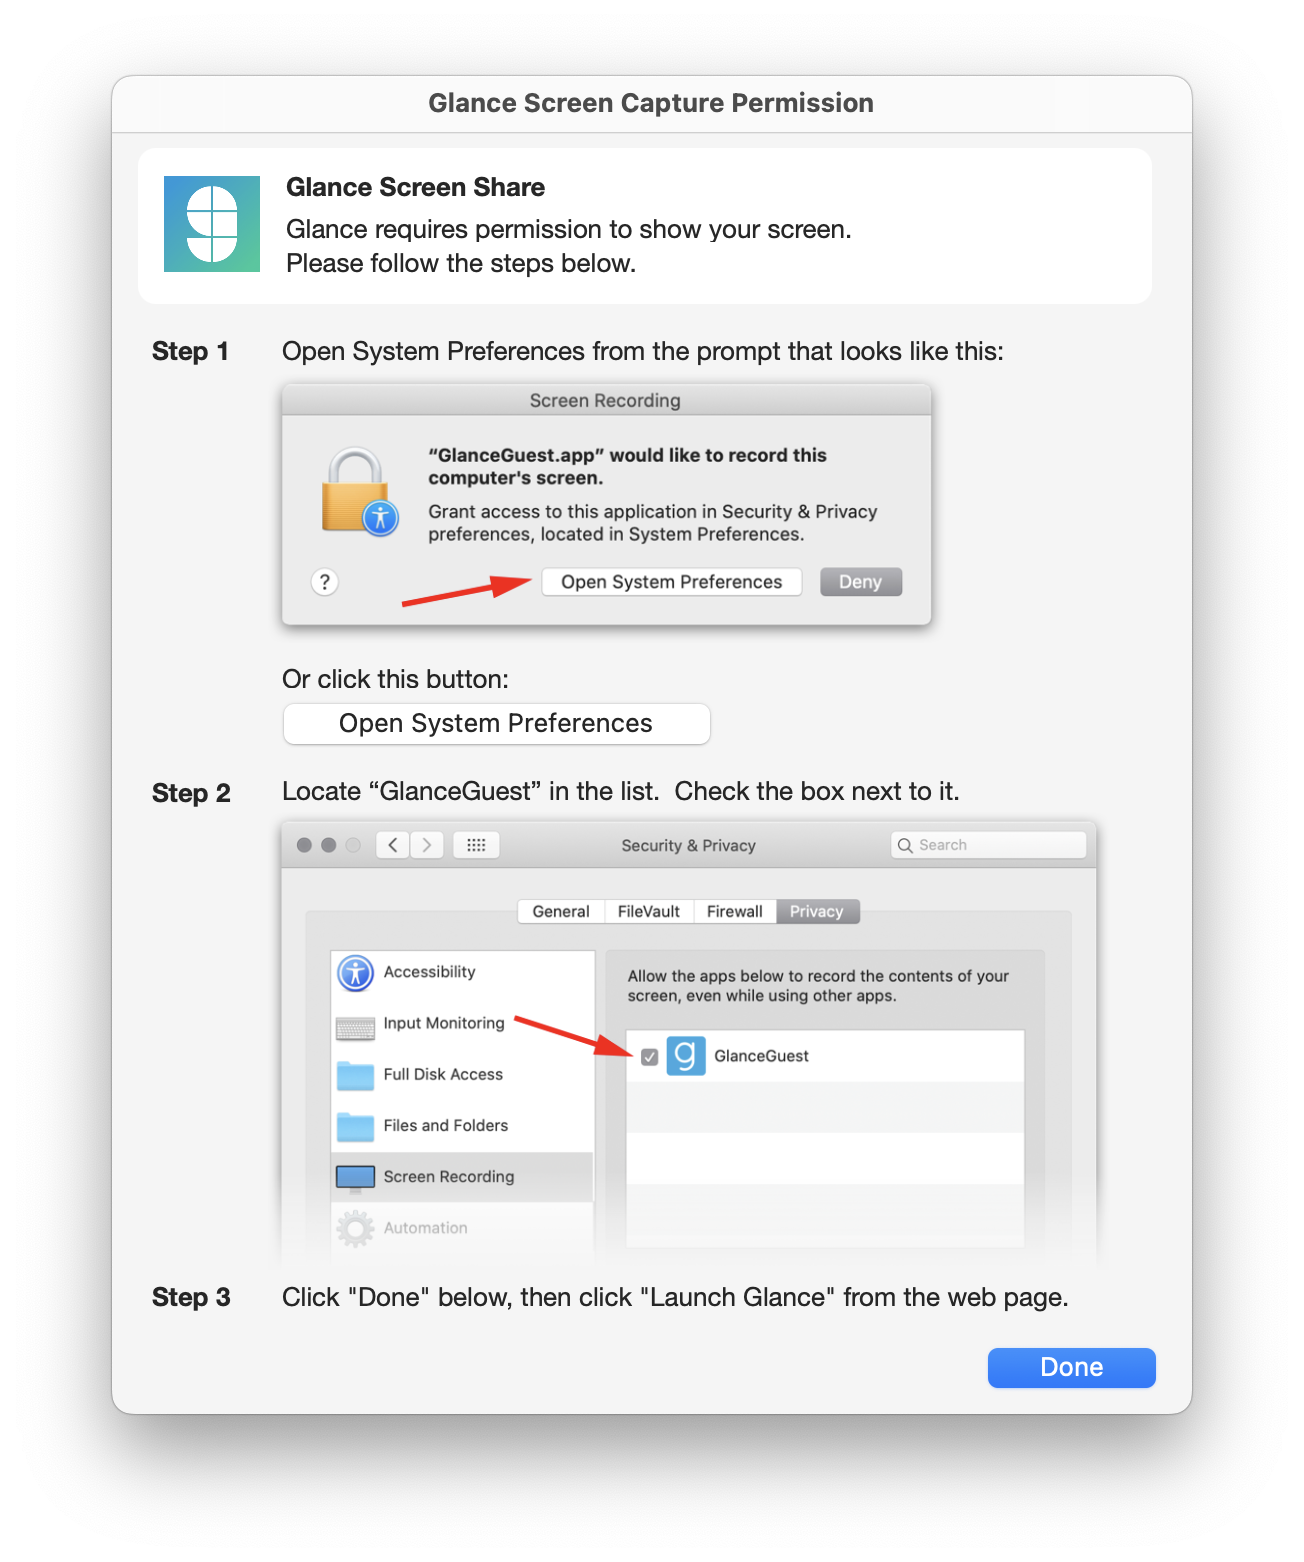 4. Within **Screen & System Audio Recording**, toggle GlanceGuest to on.
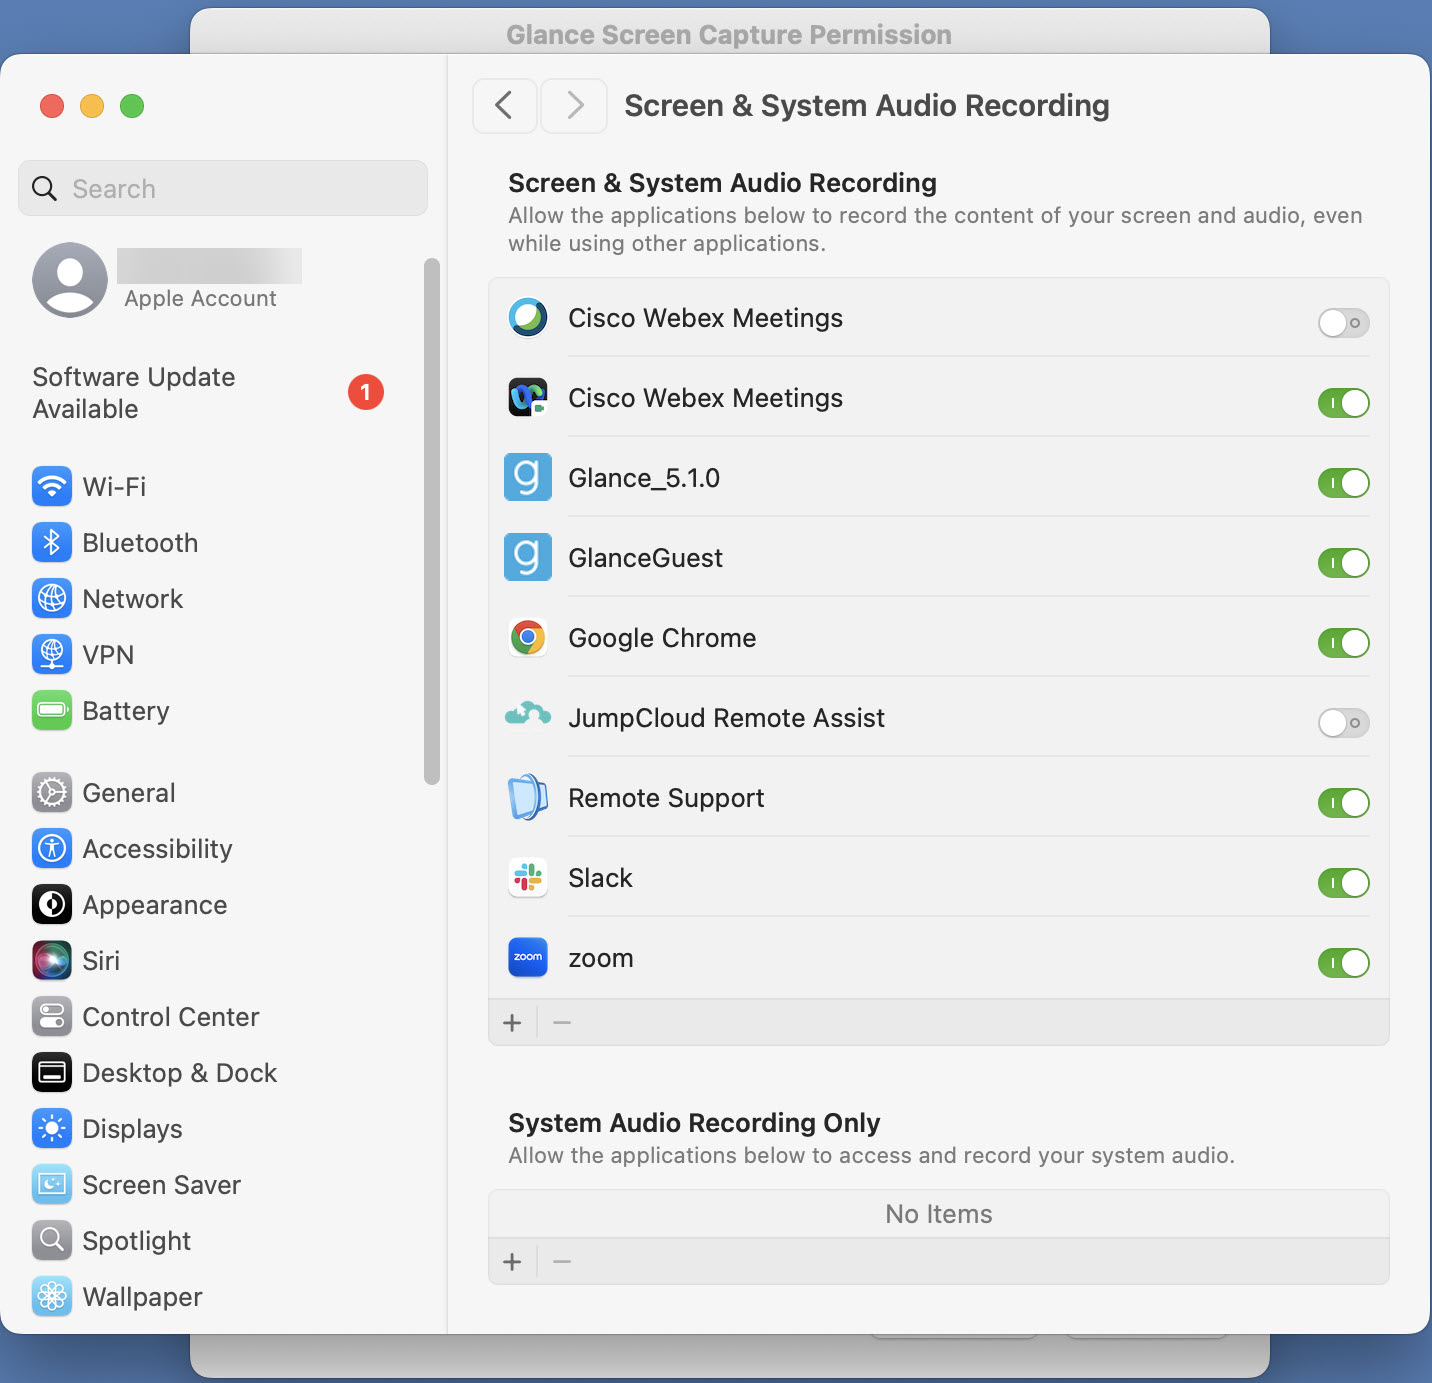 5. If prompted, enter your password to confirm the changes.
6. The visitor should go back to the session start page and click the link right after **allow the agent to view your screen**.
7. The visitor will see a confirmation from the browser to open the GlanceGuest.app. They should click "Open GlanceGuest.app". They then need to click **Allow** to start the session.
5. If prompted, enter your password to confirm the changes.
6. The visitor should go back to the session start page and click the link right after **allow the agent to view your screen**.
7. The visitor will see a confirmation from the browser to open the GlanceGuest.app. They should click "Open GlanceGuest.app". They then need to click **Allow** to start the session.
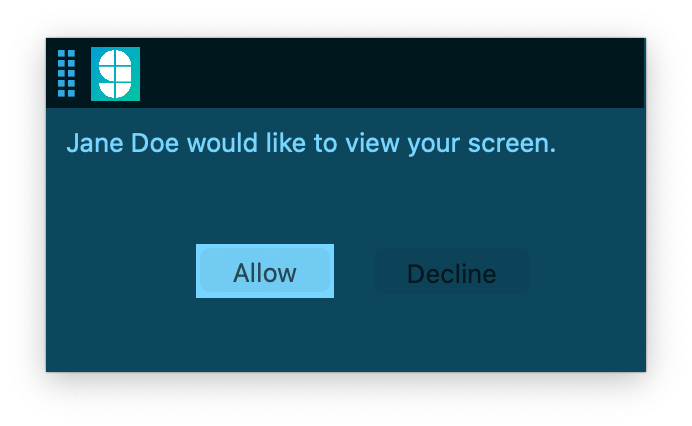 8. At this point the agent should be able to see, but not control, the visitor's entire desktop.
## View and Control Sessions
1. To start a View and Control session, first follow the steps above to launch a successful View Session.
2. The first time the agent attempts to control the visitor's screen, it will prompt the visitor to grant Accessibility Access.
8. At this point the agent should be able to see, but not control, the visitor's entire desktop.
## View and Control Sessions
1. To start a View and Control session, first follow the steps above to launch a successful View Session.
2. The first time the agent attempts to control the visitor's screen, it will prompt the visitor to grant Accessibility Access.
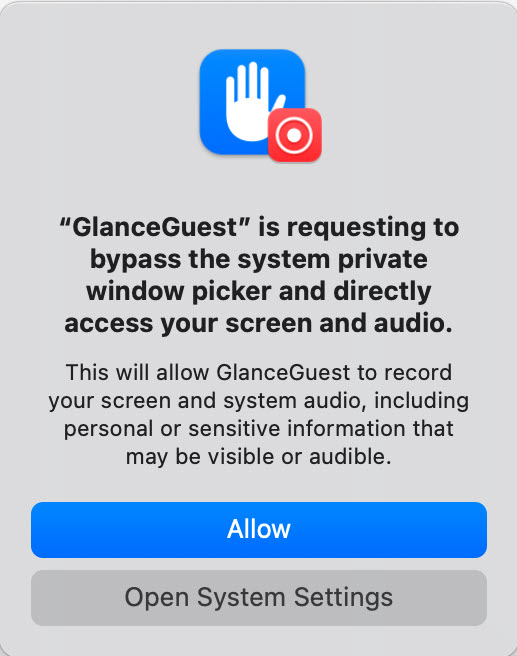 3. The visitor will need to go to **System Preferences** > **Security & Privacy** > **Accessibility**.
4. The visitor should toggle GlanceGuest on.
3. The visitor will need to go to **System Preferences** > **Security & Privacy** > **Accessibility**.
4. The visitor should toggle GlanceGuest on.
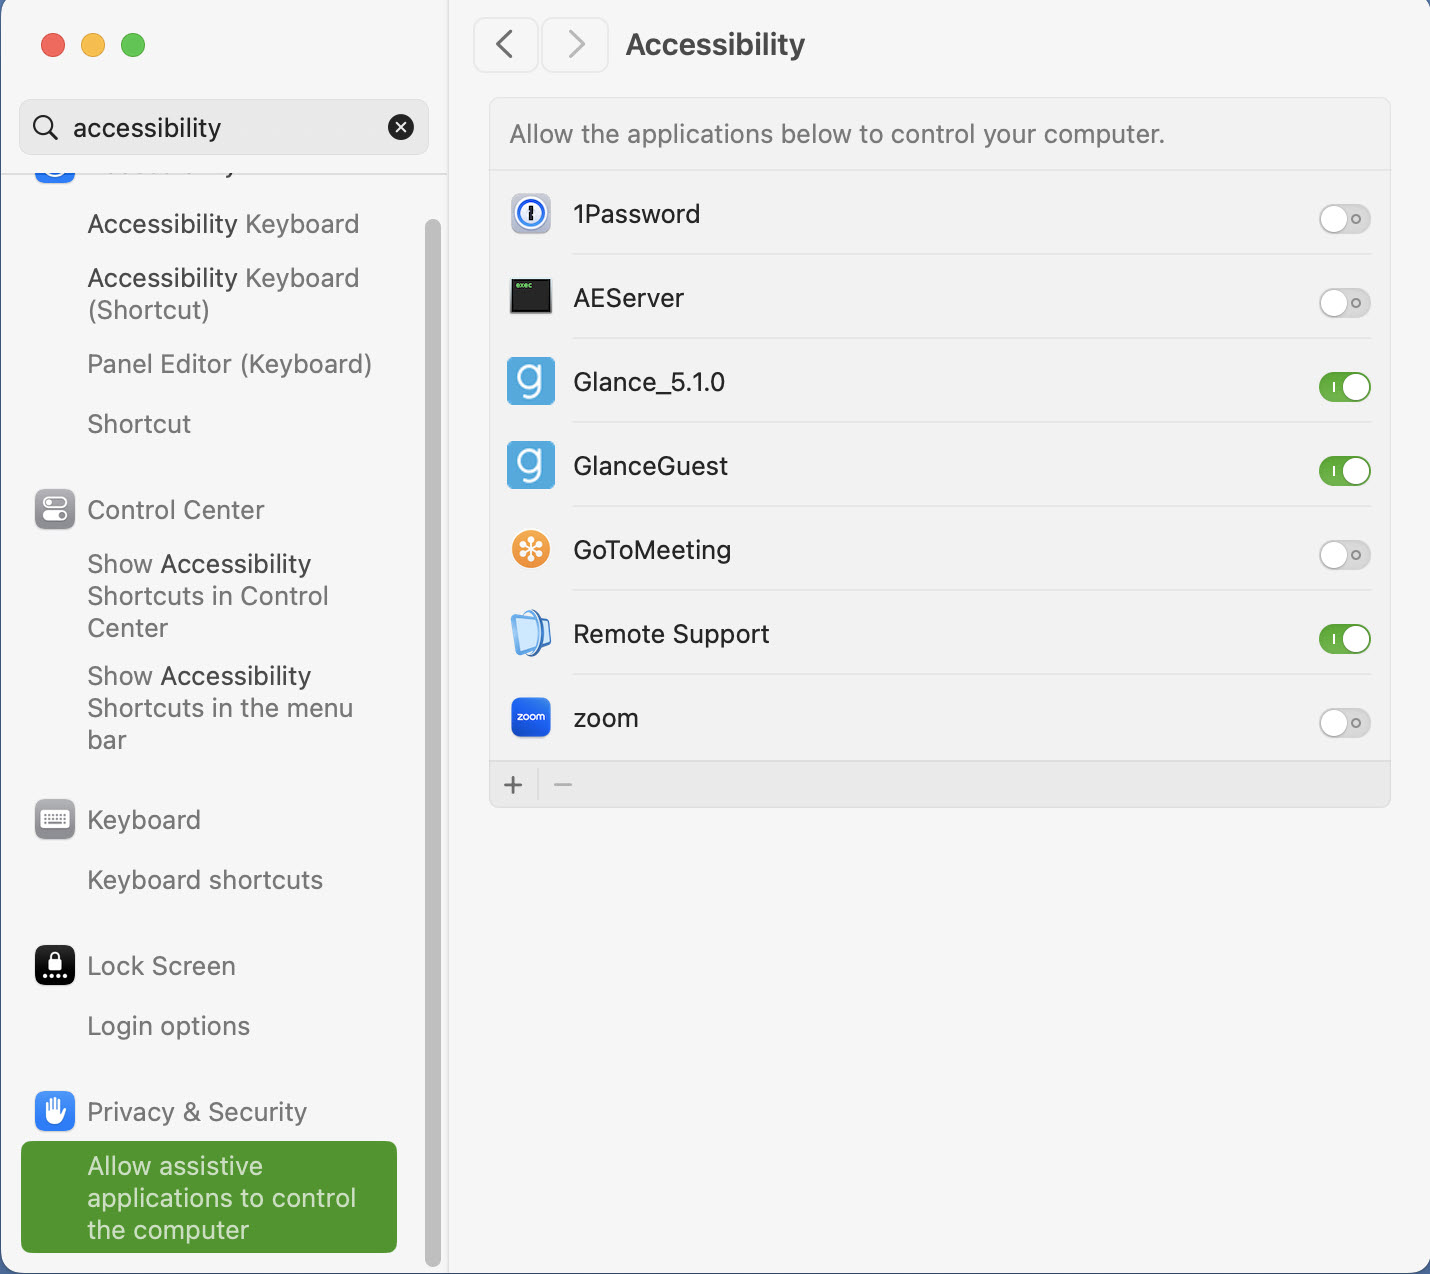 5. Once these permissions are granted, the agent will be able to **control** the visitor's screen.
## Other Scenarios
1. **Second View and Control Session without removing the GlanceGuest App**
If the visitor does not remove the GlanceClient and connects again with an agent at a future time, no alerts occur and no additional steps are needed.
2. **When the visitor connects in a session and has removed the GlanceGuest**
If the visitor deletes the GlanceGuest from their Downloads or Application folder, the GlanceGuest may be installed in the main system's application folder. In this case, the visitor connects in a View and Control session without the need to download the GlanceGuest application again and doesn't receive any alerts or additional steps.
3. **When the visitor connects in a session and has removed the GlanceGuest and the GlanceGuest did not install in the system's application folder.**
In this case, the visitor will need to re-install the GlanceGuest but will not see any alerts or additional steps needed.
4. **When the visitor was in a View Only session with an agent in the past, and connects again with an agent in the future in a View and Control Session**
* The first time the agent attempts to control the visitor's screen, it will prompt the visitor to grant Accessibility Access.
* Follow the steps above under **View and Control Sessions**.
=================================================================
FILE: /users/glance-screen-share/glance-guest
=================================================================
GlanceGuest is a lightweight application that allows unauthenticated visitors to share their screen with authenticated Glance agents.
GlanceGuest, available for Windows and Mac, must be downloaded, installed, and invoked for a particular Glance group before the screen sharing session can start. Once the session starts, only agents in the appropriate group can view the visitor's screen.
For more information on troubleshooting the installation process, see the [Troubleshooting](/users/glance-screen-share/troubleshooting/) section.
## Starting the Session
Refer to the [Starting a GlanceGuest Session](/users/glance-screen-share/glance-guest/starting-session/) page.
## During the Session
The following controls are available on the visitor side during the session (from left to right):
5. Once these permissions are granted, the agent will be able to **control** the visitor's screen.
## Other Scenarios
1. **Second View and Control Session without removing the GlanceGuest App**
If the visitor does not remove the GlanceClient and connects again with an agent at a future time, no alerts occur and no additional steps are needed.
2. **When the visitor connects in a session and has removed the GlanceGuest**
If the visitor deletes the GlanceGuest from their Downloads or Application folder, the GlanceGuest may be installed in the main system's application folder. In this case, the visitor connects in a View and Control session without the need to download the GlanceGuest application again and doesn't receive any alerts or additional steps.
3. **When the visitor connects in a session and has removed the GlanceGuest and the GlanceGuest did not install in the system's application folder.**
In this case, the visitor will need to re-install the GlanceGuest but will not see any alerts or additional steps needed.
4. **When the visitor was in a View Only session with an agent in the past, and connects again with an agent in the future in a View and Control Session**
* The first time the agent attempts to control the visitor's screen, it will prompt the visitor to grant Accessibility Access.
* Follow the steps above under **View and Control Sessions**.
=================================================================
FILE: /users/glance-screen-share/glance-guest
=================================================================
GlanceGuest is a lightweight application that allows unauthenticated visitors to share their screen with authenticated Glance agents.
GlanceGuest, available for Windows and Mac, must be downloaded, installed, and invoked for a particular Glance group before the screen sharing session can start. Once the session starts, only agents in the appropriate group can view the visitor's screen.
For more information on troubleshooting the installation process, see the [Troubleshooting](/users/glance-screen-share/troubleshooting/) section.
## Starting the Session
Refer to the [Starting a GlanceGuest Session](/users/glance-screen-share/glance-guest/starting-session/) page.
## During the Session
The following controls are available on the visitor side during the session (from left to right):
 1. **10-Square Icon:** Allows the visitor to drag the control bar around on their screen.
2. **Pause/Resume (Single Screen Icon):** Toggles Screen Share on and off.
* When turned off, the border disappears from the visitor's screen and the visitor sees a message saying:
1. **10-Square Icon:** Allows the visitor to drag the control bar around on their screen.
2. **Pause/Resume (Single Screen Icon):** Toggles Screen Share on and off.
* When turned off, the border disappears from the visitor's screen and the visitor sees a message saying:
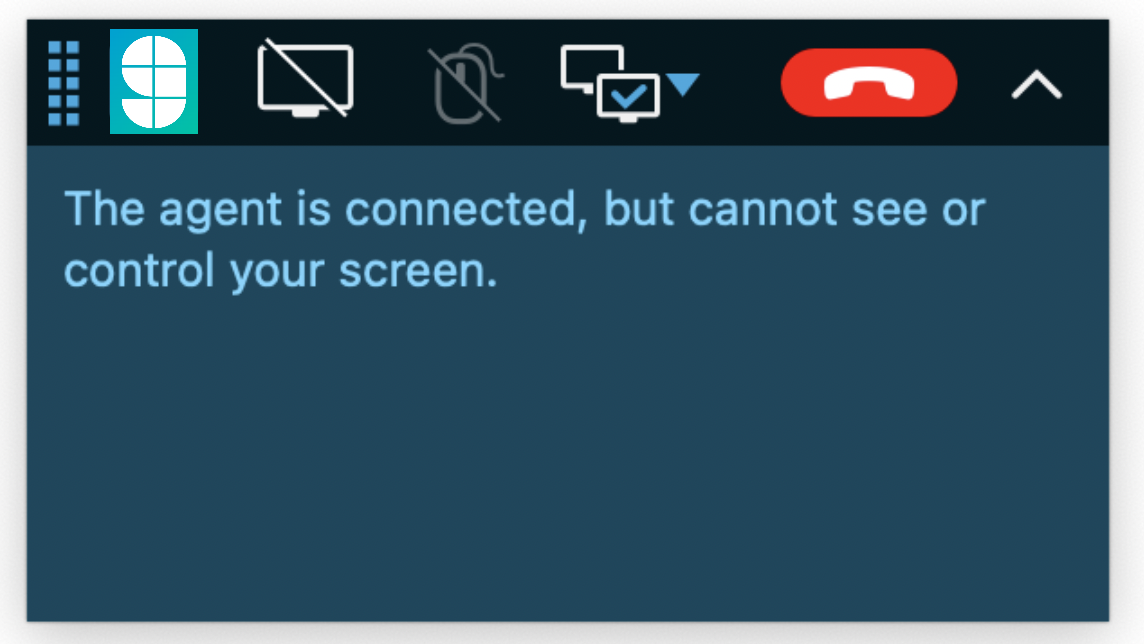 * The agent sees:
 3. **Remote Control (Mouse Icon):** Allows the visitor to toggle the session into and out of remote control mode.
* When in remote control mode, any agent with remote control privileges may control the visitor's computer.
* Agents without remote control privileges will not be able to control or gesture when in this mode.
* The visitor may immediately take back control temporarily by moving their mouse.
* The visitor can end remote control mode at any time by clicking the mouse icon again.
4. **Switch Display (Multi-Screen Icon):** Clicking this icon brings up a drop down list of all connected displays. The user can then switch the screen share to a different display as desired.
* If the visitor has only one display, this icon is omitted.
5. **Hang-up Button (End Session):** Allows the visitor to end the session.
## After the Session
When the session ends, the visitor will see the following message:
3. **Remote Control (Mouse Icon):** Allows the visitor to toggle the session into and out of remote control mode.
* When in remote control mode, any agent with remote control privileges may control the visitor's computer.
* Agents without remote control privileges will not be able to control or gesture when in this mode.
* The visitor may immediately take back control temporarily by moving their mouse.
* The visitor can end remote control mode at any time by clicking the mouse icon again.
4. **Switch Display (Multi-Screen Icon):** Clicking this icon brings up a drop down list of all connected displays. The user can then switch the screen share to a different display as desired.
* If the visitor has only one display, this icon is omitted.
5. **Hang-up Button (End Session):** Allows the visitor to end the session.
## After the Session
When the session ends, the visitor will see the following message:
 ## Using the Extension
The Glance Extension is a Chrome and Firefox extension that enables a faster session start experience with GlanceGuest by avoiding the need to download/install GlanceGuest during subsequent sessions. The extension allows the browser to know whether or not GlanceGuest is downloaded on the user's computer.
## Using the Extension
The Glance Extension is a Chrome and Firefox extension that enables a faster session start experience with GlanceGuest by avoiding the need to download/install GlanceGuest during subsequent sessions. The extension allows the browser to know whether or not GlanceGuest is downloaded on the user's computer.
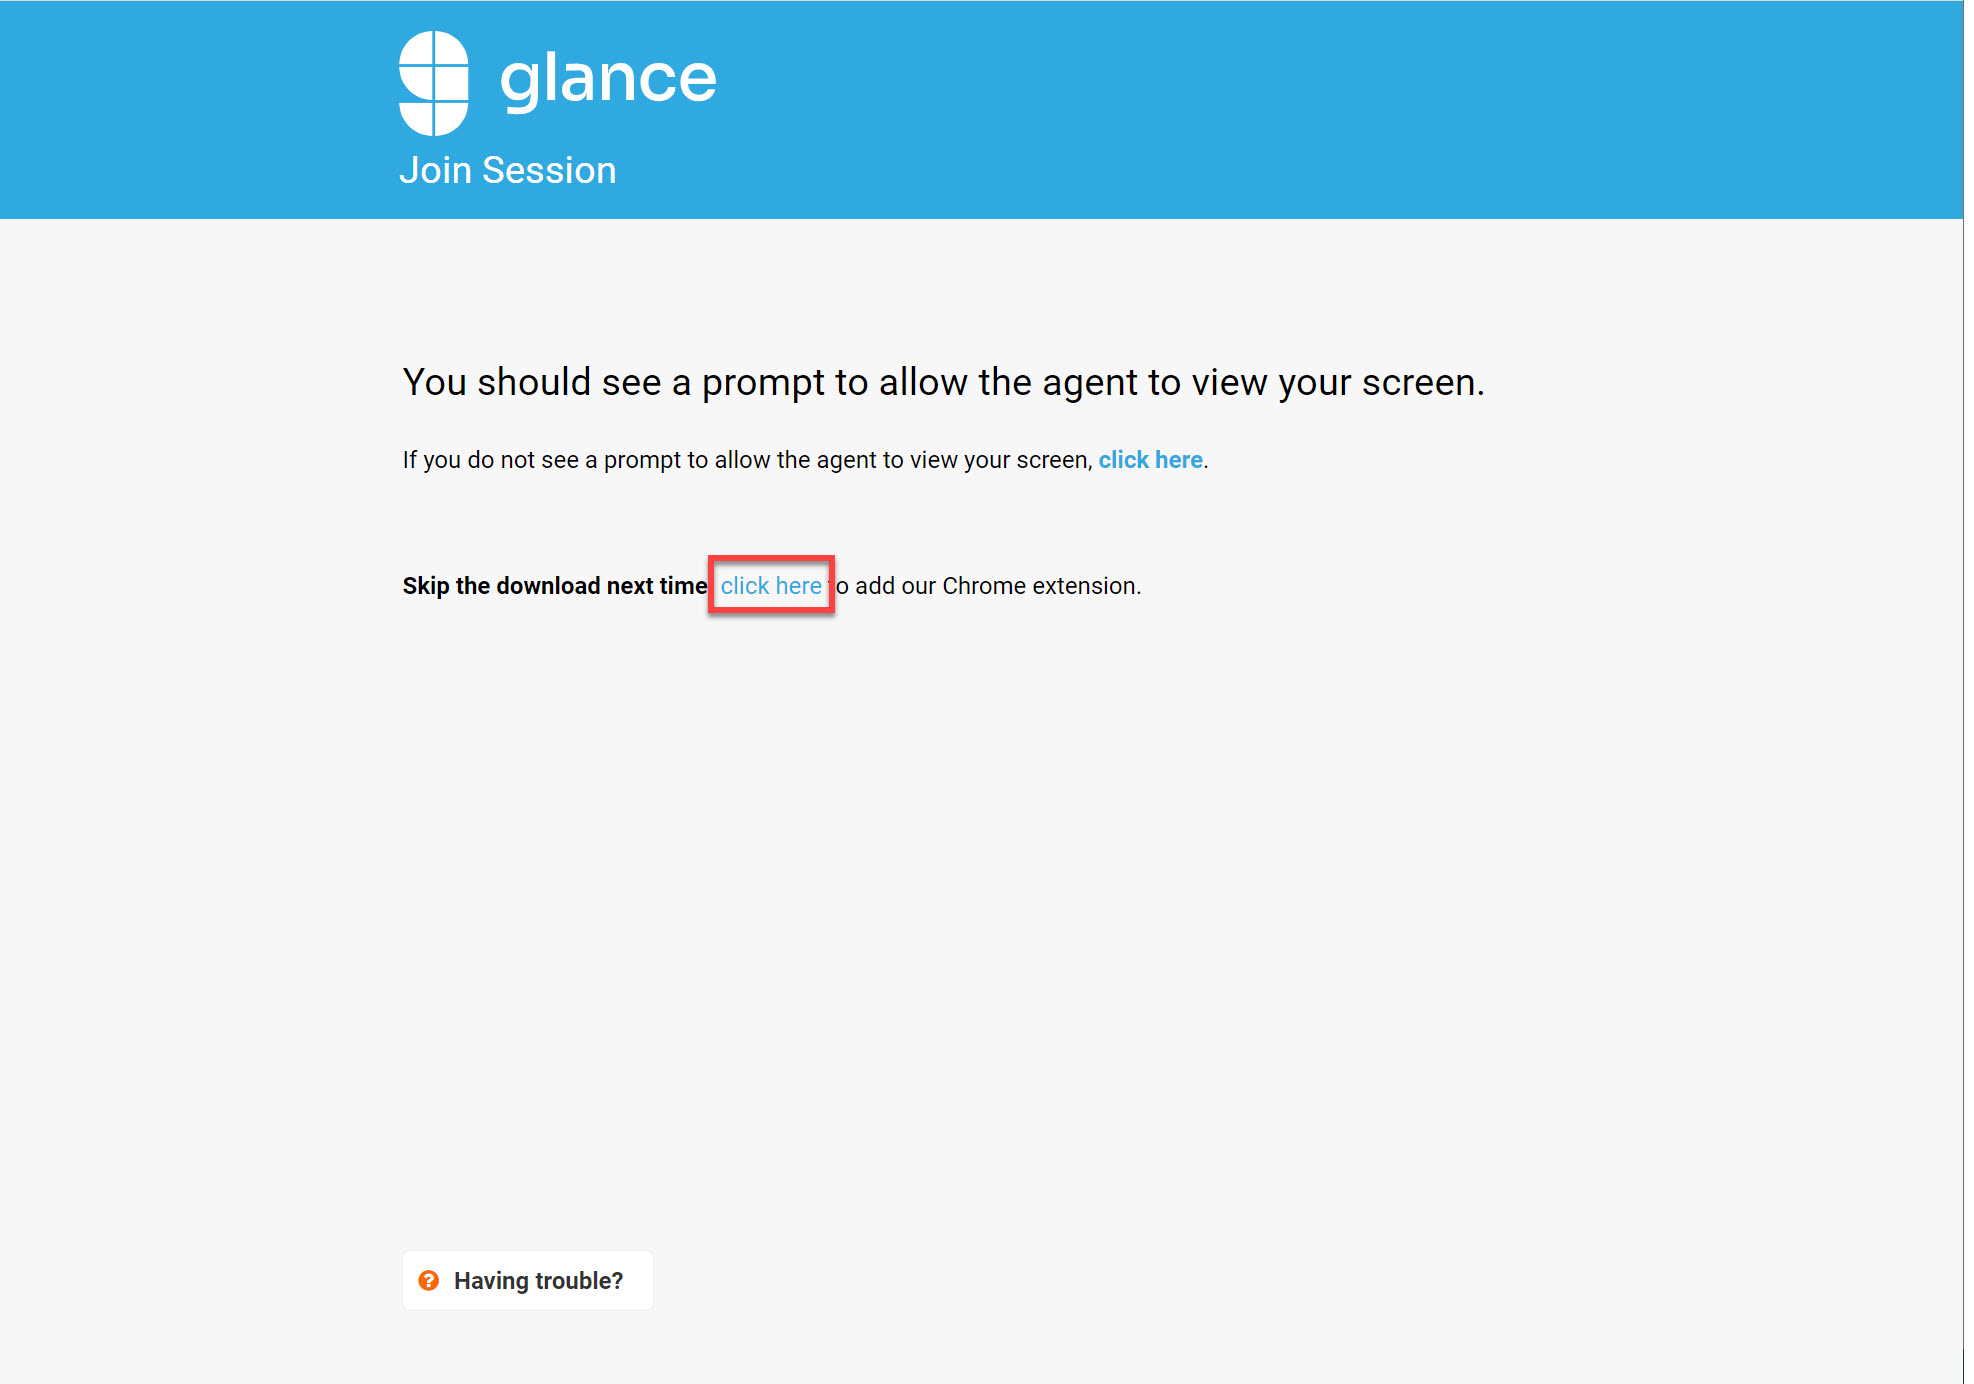 This extension, as well the latest version of the GlanceGuest application, is available on the [Glance downloads page](https://www.glance.net/install/install.aspx).
## In This Section
{% children description="true" /%}
=================================================================
FILE: /users/glance-screen-share/glance-guest/starting-session
=================================================================
## Starting the Session
Sessions start in the following ways:
### Visitor-Initiated
1. The agent directs the visitor to Screen Share via a link (e.g., `https://www.glance.net/visitor/start/?groupid=12345`).
This extension, as well the latest version of the GlanceGuest application, is available on the [Glance downloads page](https://www.glance.net/install/install.aspx).
## In This Section
{% children description="true" /%}
=================================================================
FILE: /users/glance-screen-share/glance-guest/starting-session
=================================================================
## Starting the Session
Sessions start in the following ways:
### Visitor-Initiated
1. The agent directs the visitor to Screen Share via a link (e.g., `https://www.glance.net/visitor/start/?groupid=12345`).
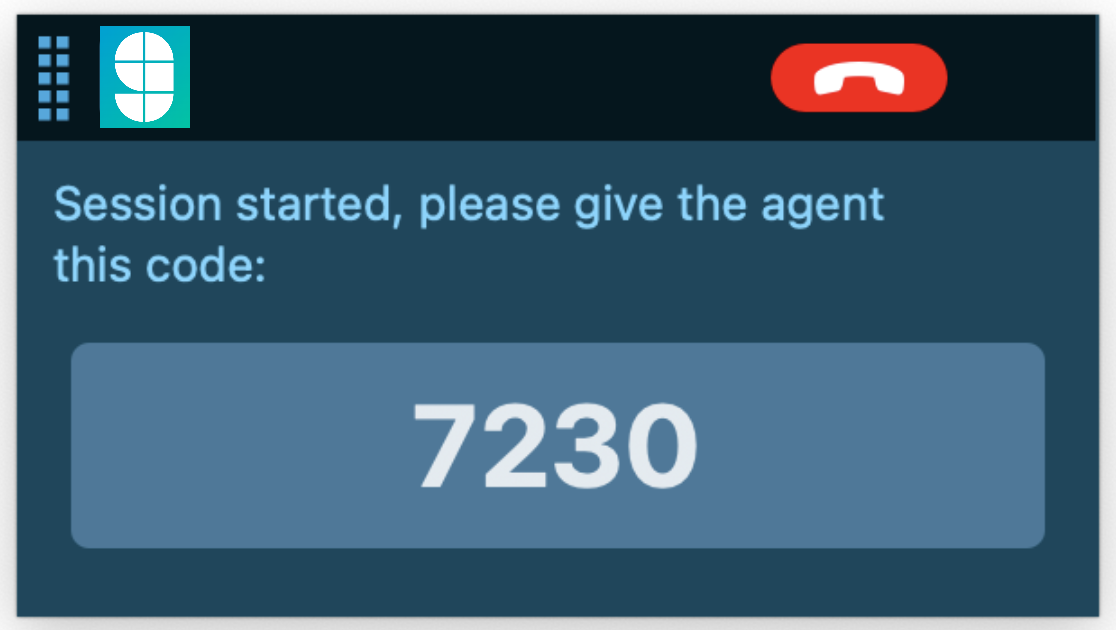 8. The agent joins the Screen Share session from the Agent Join page.
### Agent-Initiated
1. The agent starts a View session in the Glance client.
2. The agent directs the visitor to an agent-specific URL (e.g., `agent1.glance.net`).
3. The visitor enters the key received from the agent and clicks **Join Session**.
4. The visitor is redirected to a group-specific URL to download, open, and install GlanceGuest.
5. The visitor clicks **Click Here** to begin the session.
6. The visitor may receive a browser prompt to open GlanceGuest.
7. The visitor accepts the prompt from GlanceGuest that someone would like to view their screen. Sessions started by this method can begin in either gesture-only or remote-control mode.
Gesture Only Prompt:
8. The agent joins the Screen Share session from the Agent Join page.
### Agent-Initiated
1. The agent starts a View session in the Glance client.
2. The agent directs the visitor to an agent-specific URL (e.g., `agent1.glance.net`).
3. The visitor enters the key received from the agent and clicks **Join Session**.
4. The visitor is redirected to a group-specific URL to download, open, and install GlanceGuest.
5. The visitor clicks **Click Here** to begin the session.
6. The visitor may receive a browser prompt to open GlanceGuest.
7. The visitor accepts the prompt from GlanceGuest that someone would like to view their screen. Sessions started by this method can begin in either gesture-only or remote-control mode.
Gesture Only Prompt: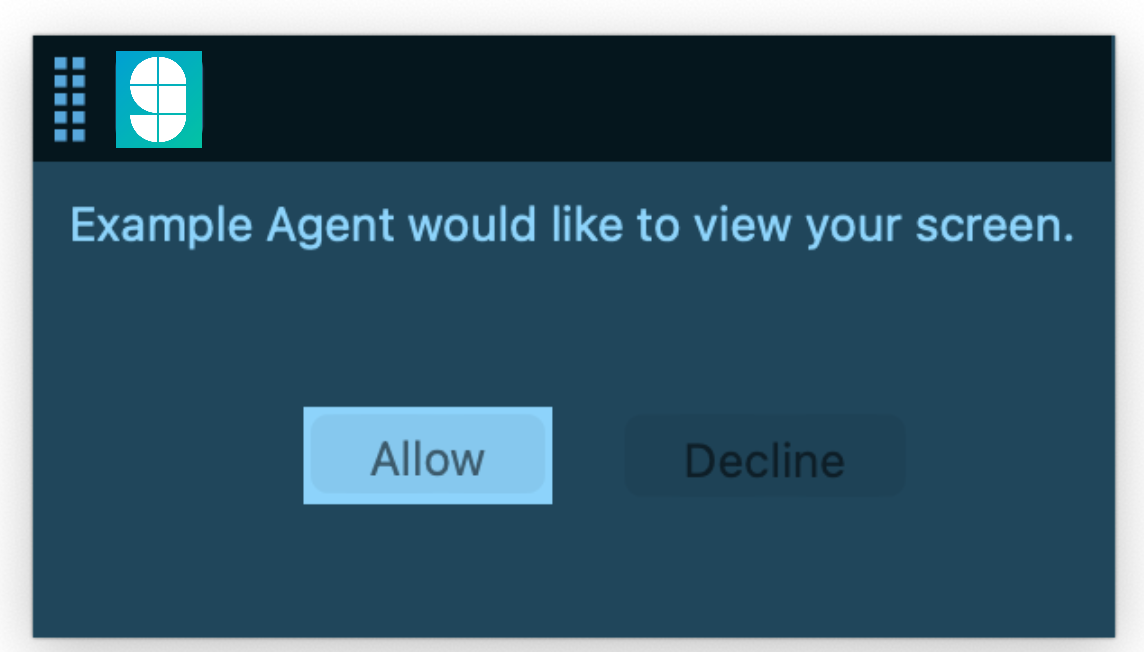
Remote Control Prompt:
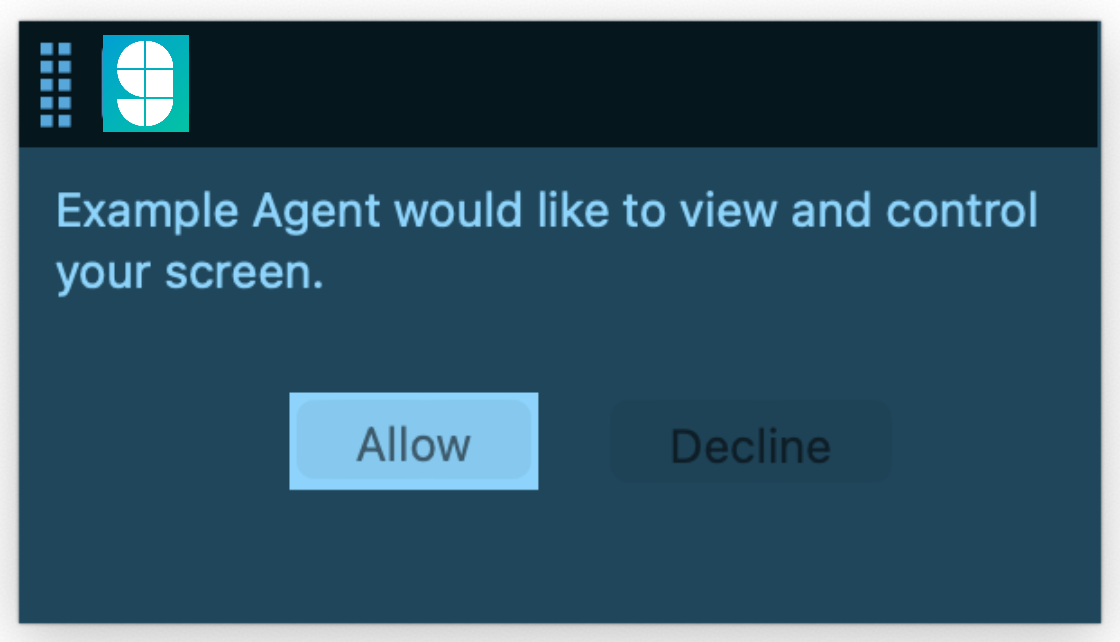 8. The agent can now view the visitor's screen.
### Session Initiated from Salesforce
Refer to the [Joining Sessions](/developer/integrations/salesforce/joining_sessions/#joining-sessions) page within the Glance for Salesforce section.
### Session Initiated from Genesys
Refer to the [Genesys](/developer/integrations/genesys/) page within the Integrations section.
=================================================================
FILE: /users/glance-screen-share
=================================================================
This section contains everything you need to successfully deploy, use, and troubleshoot Glance's Screen Sharing solutions.
Whether you are configuring Desktop Screen Share for the first time, helping visitors navigate the lightweight GlanceGuest application, integrating our core features directly into your own software using the Desktop SDK, or hunting for a quick answer in our FAQs, all the resources you need are here.
Explore the categories below to dive into the documentation.
## In This Section
{% children description="true" /%}
=================================================================
FILE: /users/glance-screen-share/troubleshooting
=================================================================
Browse the categories below to find step-by-step solutions for the most common issues. If you still can't resolve your problem, contact [Glance Support](/users/account-management/contact/) for further assistance.
## In This Section
{% children description="true" /%}
=================================================================
FILE: /users/glance-screen-share/troubleshooting/troubleshooting_join
=================================================================
## I get an error that Glance can't be opened on Mac
When I try to run the GlanceGuest application, I get this error:
8. The agent can now view the visitor's screen.
### Session Initiated from Salesforce
Refer to the [Joining Sessions](/developer/integrations/salesforce/joining_sessions/#joining-sessions) page within the Glance for Salesforce section.
### Session Initiated from Genesys
Refer to the [Genesys](/developer/integrations/genesys/) page within the Integrations section.
=================================================================
FILE: /users/glance-screen-share
=================================================================
This section contains everything you need to successfully deploy, use, and troubleshoot Glance's Screen Sharing solutions.
Whether you are configuring Desktop Screen Share for the first time, helping visitors navigate the lightweight GlanceGuest application, integrating our core features directly into your own software using the Desktop SDK, or hunting for a quick answer in our FAQs, all the resources you need are here.
Explore the categories below to dive into the documentation.
## In This Section
{% children description="true" /%}
=================================================================
FILE: /users/glance-screen-share/troubleshooting
=================================================================
Browse the categories below to find step-by-step solutions for the most common issues. If you still can't resolve your problem, contact [Glance Support](/users/account-management/contact/) for further assistance.
## In This Section
{% children description="true" /%}
=================================================================
FILE: /users/glance-screen-share/troubleshooting/troubleshooting_join
=================================================================
## I get an error that Glance can't be opened on Mac
When I try to run the GlanceGuest application, I get this error:
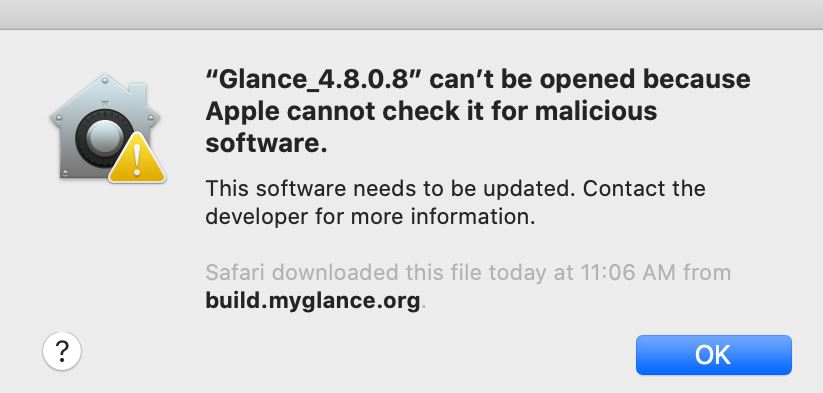 To resolve this issue:
1. Go to **System Preferences** > **Security & Privacy** > **General**.
2. Click the **Open Anyway** button in the bottom-right corner to allow GlanceGuest to run.
To resolve this issue:
1. Go to **System Preferences** > **Security & Privacy** > **General**.
2. Click the **Open Anyway** button in the bottom-right corner to allow GlanceGuest to run.
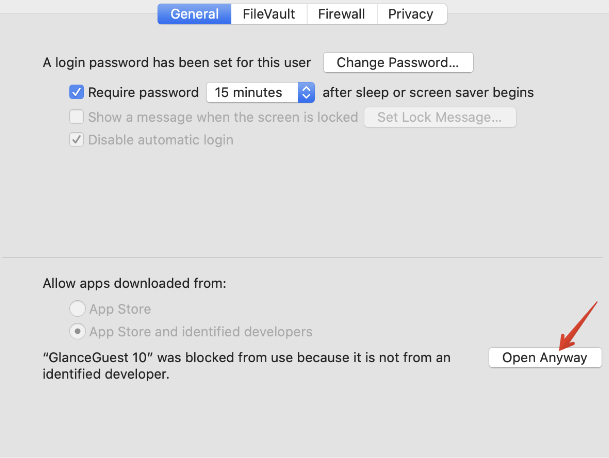 ## When joining a session a viewer window does not appear
Here are a few suggestions for the cause of your issue:
* Your viewer window might be behind other windows. Look underneath your current window.
* Your viewer window may not have opened. Look for a window with the message **Thank you for using Glance and click the link that says If you do not automatically join your session, click here**.
## The guest cannot find the Join Session page
Your guest probably searched for your Glance address (name.glance.net) with Google or Yahoo!. Make sure your guest types your Glance address into their browser's address field.
## Do people viewing a session need to install any software?
If you are joining to view a presentation, you can join instantly and no download is required. However, if the host is starting a session to view your screen, you will be prompted to download the Glance guest download.
## I was invited to a session as a guest, but I'm having trouble joining
Make sure that your device meets Glance's [System Requirements](/users/account-management/system_requirements/). If you're still having trouble, contact Glance for assistance.
## How do I enable the browser's JavaScript to join a session?
Glance works best when your browser's JavaScript is enabled. JavaScript is enabled by default, but if it has become disabled, you may see a message recommending that you re-enable it when joining a Glance session.
How you enable JavaScript depends on what type of browser you are using. Ask your system administrator, or look for an Enable JavaScript checkbox in your browser's Options, Settings, or Security dialog. You can also search for JavaScript in your browser's Help documentation.
## The Viewer doesn't get past "Negotiating with firewall" or "Requesting data"
A network security device is probably interfering with the session. Glance works through most network security devices, but some may have a policy that disrupts sessions.
Your guests might not be able to connect or your session might pause or drop unexpectedly for a few seconds or even a few minutes after your guests connect. You might be able to start another session (or your guest might manually reconnect), only to see the new connection fail again in the same manner.
If you or your guest connect through a corporate network and experience any of these symptoms, contact your respective IT department for help resolving the issue.
Since TLS is more efficient than HTTPS, a company that blocks port 5501 might consider adding a rule to their firewall policy that allows outbound connections to those ports at the http://glance.net servers.
=================================================================
FILE: /users/glance-screen-share/troubleshooting/troubleshooting_session
=================================================================
## I want to Screen Share with two monitors
If you use 2 monitors, both monitors need to be set to the same scaling settings. If they are different, it may cause the guest's view of the screen to be truncated.
## Using a webcam during a session
On a PC, power up your webcam and put it in preview mode so you can see yourself. Your guests will see you too.
On a Mac, open the Photo Booth application.
### Showing a video during a session
To show a video, all you have to do is play it.
### Video performance
Don't forget that internet services used by small businesses often let you upload data only about 10% as fast as you can download. This can limit video performance to only a few frames per second. You can improve quality by playing the video inside a smaller window or by getting a faster upload speed.
Some video players on PCs write directly into your video card's display memory, an operation that our solution might not detect.
## My session repeatedly drops when I am connected through my home office
If your sessions repeatedly drop (especially if this happens some minutes into a session) and you connect through a home office router, make sure the router has the latest software. We have found that a surprising number of inexpensive home office routers shipped in recent years with buggy software. They often work fine for typical web browsing (which mostly downloads data), but intermittently fail when hosting a Glance session (which uploads heavy bursts of data). Check the manufacturer's support page to make sure you are using the newest version: Linksys, Netgear, D-Link, etc. Contact us if you need further assistance.
## My Glance Screen Share session suddenly ended
Glance is like a phone call: either party can "hang up." The session ends when you click your Glance icon and choose **End Session** or when your last remaining guest closes the window showing your desktop.
If a session ends unexpectedly, then either your network or your guest's network dropped its connection to our service. If you experience session drops with guests from various locations, the problem most likely resides inside your network.
### Troubleshooting options
We have found that frequent network drops often can be traced to a weak wireless connection (which can fade or drop) or an inexpensive home office router that shipped with buggy software (like Linksys, D-Link, Netgear).
If you are experiencing issues, try the following actions:
* Make sure you are using the latest Glance software, which continuously monitors your internet connection and immediately attempts to re-establish communication whenever it detects a drop.
* If you were on a wireless network, try using a wired connection instead.
## My video background blurring isn't working
When doing a screen share session, older hardware may not have sufficient drivers to ensure that video background blurring is working. If a session is noted where the video is working and background blurring isn't happening, then you should attempt to update the camera firmware/drivers if any new versions are available. In addition, it may be necessary to update the computer firmware/BIOS to the latest version to make sure video blurring functions appropriately.
=================================================================
FILE: /users/glance-screen-share/troubleshooting/troubleshooting_start
=================================================================
## Challenges with Connecting
Typical connection issues include:
* Firewall blocks the download
* The guest cannot find the downloaded file
* The guest chooses not to "run" the download
* Security software prevents the guest from running the download
* Guest lacks the privilege to install the download
* Guest's security software quarantines the executable
* Guest's corporate firewall blocks its connection
Glance Screen Share employs multiple browser-based technologies and automatically selects the best one to use with each guest. Everyone connects quickly, sees virtually no UI that might confuse or distract them, and never finds unwanted icons left behind.
To adjust guest connections:
* Connect instantly (no download), usually with a general-purpose viewer.
* Get a compact, high-performance viewer, which most first-time guests install in less than 15 seconds.
In the first option, there is no download, install, security warning, or additional clicks. Guests connect instantly with their favorite browser on any PC, Mac, or Linux computer, smartphone (iPhone, Android), or tablet (iPad, Android). Glance Screen Share's general-purpose viewer runs inside the guest's browser, using AJAX technology. The device does not need Java or Flash, nor does the guest have to install a plug-in or download a custom app. Afterward, the session ends, and nothing is left behind.
The second option lets hosts ensure that their guests enjoy the best possible viewing experience. As each guest joins the session, Glance Screen Share silently and automatically selects the best viewer technology to use. The various Glance Screen Share viewers download quickly (less than 1.5 MB) and set up in seconds, often without additional clicks.
Viewers include:
* Native (executable) viewer for Firefox, Chrome, or Edge on PCs.
* Unsigned (running sandboxed) Java applet viewer for Java-enabled browsers on PCs and Macs.
* Built-in native viewer for guests joining from a PC or Mac that already has the Glance client.
* AJAX viewer for PCs, Macs, and any modern mobile device (smartphones and tablets).
Should Glance Screen Share's best first choice fail, it automatically tries the second (or even third) choice. Glance Screen Share supports every technology needed to connect nearly any device, quickly and reliably.
## Glance was downloaded and installed, but the session won't start
If you cannot start a session, check to make sure Glance (or Glance.exe) appears in your security software's list of allowed programs. Most third-party internet security programs are designed to prevent a new application on your computer from talking to the internet. A security program will usually prompt you the first time you start a Glance session. Tell it to Always Allow Glance access to the internet. You might try momentarily disabling the security software to see if the problem goes away. Contact your IT specialist or call Glance if you need assistance with configuring it.
Common products that could interfere with your Glance Screen Share sessions include:
* Norton™ Internet Security
* Norton™ Antivirus
* ZoneAlarm® Internet Security Suite
* Kaspersky® Antivirus
* AVG™ Anti-Virus
* Google™ Web Accelerator
## On Windows, I get an error that says "Glance Is Already Running"
On Windows, when launching the Glance Client, I get this error:
## When joining a session a viewer window does not appear
Here are a few suggestions for the cause of your issue:
* Your viewer window might be behind other windows. Look underneath your current window.
* Your viewer window may not have opened. Look for a window with the message **Thank you for using Glance and click the link that says If you do not automatically join your session, click here**.
## The guest cannot find the Join Session page
Your guest probably searched for your Glance address (name.glance.net) with Google or Yahoo!. Make sure your guest types your Glance address into their browser's address field.
## Do people viewing a session need to install any software?
If you are joining to view a presentation, you can join instantly and no download is required. However, if the host is starting a session to view your screen, you will be prompted to download the Glance guest download.
## I was invited to a session as a guest, but I'm having trouble joining
Make sure that your device meets Glance's [System Requirements](/users/account-management/system_requirements/). If you're still having trouble, contact Glance for assistance.
## How do I enable the browser's JavaScript to join a session?
Glance works best when your browser's JavaScript is enabled. JavaScript is enabled by default, but if it has become disabled, you may see a message recommending that you re-enable it when joining a Glance session.
How you enable JavaScript depends on what type of browser you are using. Ask your system administrator, or look for an Enable JavaScript checkbox in your browser's Options, Settings, or Security dialog. You can also search for JavaScript in your browser's Help documentation.
## The Viewer doesn't get past "Negotiating with firewall" or "Requesting data"
A network security device is probably interfering with the session. Glance works through most network security devices, but some may have a policy that disrupts sessions.
Your guests might not be able to connect or your session might pause or drop unexpectedly for a few seconds or even a few minutes after your guests connect. You might be able to start another session (or your guest might manually reconnect), only to see the new connection fail again in the same manner.
If you or your guest connect through a corporate network and experience any of these symptoms, contact your respective IT department for help resolving the issue.
Since TLS is more efficient than HTTPS, a company that blocks port 5501 might consider adding a rule to their firewall policy that allows outbound connections to those ports at the http://glance.net servers.
=================================================================
FILE: /users/glance-screen-share/troubleshooting/troubleshooting_session
=================================================================
## I want to Screen Share with two monitors
If you use 2 monitors, both monitors need to be set to the same scaling settings. If they are different, it may cause the guest's view of the screen to be truncated.
## Using a webcam during a session
On a PC, power up your webcam and put it in preview mode so you can see yourself. Your guests will see you too.
On a Mac, open the Photo Booth application.
### Showing a video during a session
To show a video, all you have to do is play it.
### Video performance
Don't forget that internet services used by small businesses often let you upload data only about 10% as fast as you can download. This can limit video performance to only a few frames per second. You can improve quality by playing the video inside a smaller window or by getting a faster upload speed.
Some video players on PCs write directly into your video card's display memory, an operation that our solution might not detect.
## My session repeatedly drops when I am connected through my home office
If your sessions repeatedly drop (especially if this happens some minutes into a session) and you connect through a home office router, make sure the router has the latest software. We have found that a surprising number of inexpensive home office routers shipped in recent years with buggy software. They often work fine for typical web browsing (which mostly downloads data), but intermittently fail when hosting a Glance session (which uploads heavy bursts of data). Check the manufacturer's support page to make sure you are using the newest version: Linksys, Netgear, D-Link, etc. Contact us if you need further assistance.
## My Glance Screen Share session suddenly ended
Glance is like a phone call: either party can "hang up." The session ends when you click your Glance icon and choose **End Session** or when your last remaining guest closes the window showing your desktop.
If a session ends unexpectedly, then either your network or your guest's network dropped its connection to our service. If you experience session drops with guests from various locations, the problem most likely resides inside your network.
### Troubleshooting options
We have found that frequent network drops often can be traced to a weak wireless connection (which can fade or drop) or an inexpensive home office router that shipped with buggy software (like Linksys, D-Link, Netgear).
If you are experiencing issues, try the following actions:
* Make sure you are using the latest Glance software, which continuously monitors your internet connection and immediately attempts to re-establish communication whenever it detects a drop.
* If you were on a wireless network, try using a wired connection instead.
## My video background blurring isn't working
When doing a screen share session, older hardware may not have sufficient drivers to ensure that video background blurring is working. If a session is noted where the video is working and background blurring isn't happening, then you should attempt to update the camera firmware/drivers if any new versions are available. In addition, it may be necessary to update the computer firmware/BIOS to the latest version to make sure video blurring functions appropriately.
=================================================================
FILE: /users/glance-screen-share/troubleshooting/troubleshooting_start
=================================================================
## Challenges with Connecting
Typical connection issues include:
* Firewall blocks the download
* The guest cannot find the downloaded file
* The guest chooses not to "run" the download
* Security software prevents the guest from running the download
* Guest lacks the privilege to install the download
* Guest's security software quarantines the executable
* Guest's corporate firewall blocks its connection
Glance Screen Share employs multiple browser-based technologies and automatically selects the best one to use with each guest. Everyone connects quickly, sees virtually no UI that might confuse or distract them, and never finds unwanted icons left behind.
To adjust guest connections:
* Connect instantly (no download), usually with a general-purpose viewer.
* Get a compact, high-performance viewer, which most first-time guests install in less than 15 seconds.
In the first option, there is no download, install, security warning, or additional clicks. Guests connect instantly with their favorite browser on any PC, Mac, or Linux computer, smartphone (iPhone, Android), or tablet (iPad, Android). Glance Screen Share's general-purpose viewer runs inside the guest's browser, using AJAX technology. The device does not need Java or Flash, nor does the guest have to install a plug-in or download a custom app. Afterward, the session ends, and nothing is left behind.
The second option lets hosts ensure that their guests enjoy the best possible viewing experience. As each guest joins the session, Glance Screen Share silently and automatically selects the best viewer technology to use. The various Glance Screen Share viewers download quickly (less than 1.5 MB) and set up in seconds, often without additional clicks.
Viewers include:
* Native (executable) viewer for Firefox, Chrome, or Edge on PCs.
* Unsigned (running sandboxed) Java applet viewer for Java-enabled browsers on PCs and Macs.
* Built-in native viewer for guests joining from a PC or Mac that already has the Glance client.
* AJAX viewer for PCs, Macs, and any modern mobile device (smartphones and tablets).
Should Glance Screen Share's best first choice fail, it automatically tries the second (or even third) choice. Glance Screen Share supports every technology needed to connect nearly any device, quickly and reliably.
## Glance was downloaded and installed, but the session won't start
If you cannot start a session, check to make sure Glance (or Glance.exe) appears in your security software's list of allowed programs. Most third-party internet security programs are designed to prevent a new application on your computer from talking to the internet. A security program will usually prompt you the first time you start a Glance session. Tell it to Always Allow Glance access to the internet. You might try momentarily disabling the security software to see if the problem goes away. Contact your IT specialist or call Glance if you need assistance with configuring it.
Common products that could interfere with your Glance Screen Share sessions include:
* Norton™ Internet Security
* Norton™ Antivirus
* ZoneAlarm® Internet Security Suite
* Kaspersky® Antivirus
* AVG™ Anti-Virus
* Google™ Web Accelerator
## On Windows, I get an error that says "Glance Is Already Running"
On Windows, when launching the Glance Client, I get this error:
 To resolve this issue:
1. Navigate to your Windows tray and find all instances of Glance:
To resolve this issue:
1. Navigate to your Windows tray and find all instances of Glance:
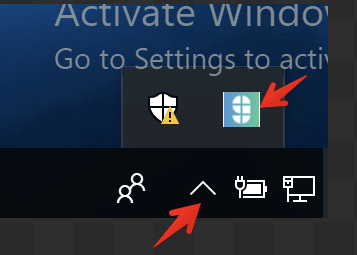 2. Click on the **Gear** icon > **Advanced**, and select the option to **Exit Glance**.
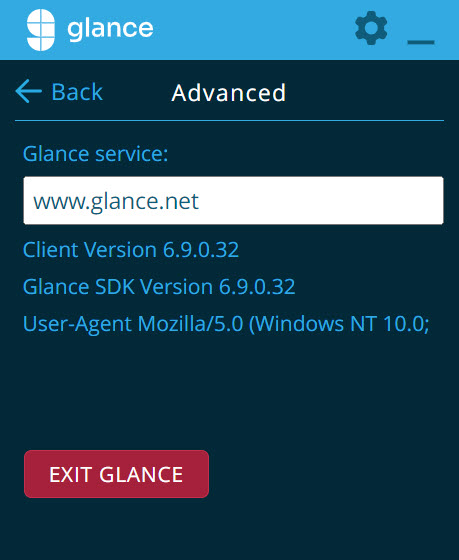 3. Repeat this for each **G** icon you have.
4. Relaunch Glance from your applications menu.
Whenever you want to use Glance moving forward, it will be available in your tray. Always launch Glance from your tray.
## I enter my credentials and click log in but nothing happens
1. Click on the **Gear** icon > **Advanced**, and verify "www.glance.net" is populated underneath **Glance Service**.
3. Repeat this for each **G** icon you have.
4. Relaunch Glance from your applications menu.
Whenever you want to use Glance moving forward, it will be available in your tray. Always launch Glance from your tray.
## I enter my credentials and click log in but nothing happens
1. Click on the **Gear** icon > **Advanced**, and verify "www.glance.net" is populated underneath **Glance Service**.
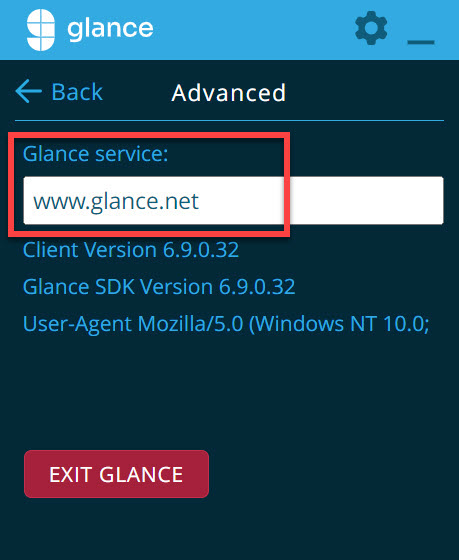 ## The message "Glance is unable to connect securely" when starting a session
If you try starting a session and get a message saying "Glance cannot connect securely...", there's a problem accepting our SSL certificate.
To disable Glance's secure login feature, follow the steps below:
### For PC users
1. Click the **G** icon in your system tray. A menu is displayed.
2. Choose the **Settings** option.
3. Select the **Account** tab.
4. Place your pointer in the large blank space below the **Manage** button.
5. While holding down the Shift key on your keyboard, double-click your mouse.
6. A **Network information** section is displayed. Uncheck Secure login.
7. Click **OK**.
### For Mac users
1. Click the **G** icon in the Menu Bar (near your clock). A menu is displayed.
2. Choose the **Settings** option.
3. Select the **Account** tab.
4. In the **Network information** section, uncheck **Secure login**.
5. Close the Settings window.
## Desktop background vanishes when a Glance Screen Share session starts
Many background designs are detailed, which creates data that Glance has to transmit. To speed up performance, Glance usually turns off your computer's background during a session. The background reappears when your Glance session ends.
If you would prefer to keep your desktop background visible during sessions, follow these steps:
1. Click on the **G** icon.
2. Select **Settings**.
3. Click on the **Advanced** tab.
4. Uncheck **Hide desktop background**.
## Connecting through a corporate firewall or network security device
Glance works through most network security devices. However, some may have a network policy that disrupts Glance sessions. Your guests might not be able to connect or your session might pause or drop unexpectedly - a few seconds or even a few minutes after your guests connect. You may be able to start another session (or your guest might manually reconnect), only to see the new connection fail again in the same manner.
If you or your guest connect through a corporate network and experience any of these symptoms, contact your respective IT department for help resolving the issue.
Since TLS is more efficient than HTTPS, a company that blocks port 5501 might consider adding a rule to their firewall policy that allows outbound connections to those ports at the http://glance.net servers.
## Issues Entering Login Information
* If you are having issues entering login information or selecting text boxes in the login area, ensure your video drivers are up-to-date.
* If your Cobrowse or Screen Share sessions freeze or don't display properly, check to see if you have the Intel Iris XE Display driver.
You can update drivers using the instructions below.
### Update Drivers in Windows
1. In the search box on the taskbar, enter "device manager", then select **Device Manager**.
2. Select a category to see the names of devices, then right-click (or press and hold) the one you would like to update.
3. Select **Search automatically for updated driver software**.
4. Select **Update Driver**.
### Update Drivers in Windows 11
1. Download [this driver](https://downloadmirror.intel.com/751359/gfx_win_101.3790_101.2114.exe).
2. Restart your computer.
3. Restart Glance.
### Update Drivers in macOS
1. Click the Apple logo.
2. On the **Apple** menu, click **System Settings** (or **Software Update** on older versions).
3. If there is a macOS update available, you can install it. If there is a graphics driver update, it will be included in the macOS update.
=================================================================
FILE: /users/glance-screen-share/user-guide/before-login
=================================================================
Use the following instructions to make screen share available for both pre- and post-login scenarios. The examples on this page are macOS specific in Swift, but the concepts are similar in other platforms.
## Initialization
After the application launches (most likely in `UIApplicationDelegate application:didFinishLaunchingWithOptions:` or the `UIViewController viewDidLoad` delegate method for the main view) the application should call `GlanceVisitor.initVisitor` without a visitor ID:
```swift
let GLANCE_GROUP_ID : Int32 = 12345 // Replace the group ID number with your group ID.
GlanceVisitor.initVisitor(GLANCE_GROUP_ID, token: "",
name: "", email: "", phone: "")
```
Upon receiving `EventVisitorInitialized`, the screen share button should be made visible.
## UI
If you are implementing your own custom UI, you must disable the Glance Default UI. After calling `initVisitor` the first time, the application calls: `GlanceVisitor.defaultUI(false);`
## Starting a Session
The handler for the screen share button starts the session with a random key: `GlanceVisitor.startSession("GLANCE_KEYTYPE_RANDOM")`
Upon receiving `EventConnectedToSession`, the key is retrieved from the event and displayed to the customer.
```swift
case EventConnectedToSession:
// Show any UI to indicate the session has started
// event.properties includes the sessionKey which can be
// displayed to the user to read to the agent
myShowKeyMethod(event.properties["sessionkey"] as! String)
break
```
The customer will verbally give the key to the agent. After the agent enters the key and connects, the application will receive `EventGuestCountChanged`.
## After Login
After the customer logs in and is identified, the implementation uses the Glance Presence ("One-click Screen share") functionality. In addition, to support the case where the support agent is not on the correct customer record in the CRM, there is a manual verbal key fallback that works similarly to the pre-login case.
### Initialization
After customer login, the application calls `GlanceVisitor.initVisitor` again with a visitor ID. The application must pass the same Glance Group ID used in the initial call above:
```swift
GlanceVisitor.initVisitor(GLANCE_GROUP_ID, token: "",
name: "", email: "", phone: "",
visitorid: visitorid)
```
Upon receiving `EventVisitorInitialized` the application calls `GlancePresenceVisitor.connect`.
If you are implementing your own custom Presence UI, disable the Glance default Presence UI.
Example:
```swift
switch event.code {
case EventVisitorInitialized:
DispatchQueue.main.async {
GlancePresenceVisitor.connect()
GlancePresenceVisitor.setDefaultUI(false)
}
break;
```
### One-Click Session Start
The agent is notified when the customer is online and may start a screen sharing session. Typically, a button will light up on the CRM record in the agent's browser. When the agent clicks the button, a signal is relayed to the SDK where an `EventPresenceShowTerms` event fires.
If you have a custom Presence UI, when `EventPresenceShowTerms` is received, the application will show any terms and conditions and display buttons for the customer to Accept or Decline screen sharing.
When terms and conditions are presented to the customer, the application should signal the agent by calling:
```swift
GlancePresenceVisitor.signalAgent("terms", map: ["status": "displayed"])
```
If the customer declines screen sharing, the application notifies the agent by calling:
```swift
GlancePresenceVisitor.signalAgent("terms", map: ["status": "declined"])
```
If the customer accepts screen sharing, the application notifies the agent and starts the session by calling `GlanceVisitor.startSession` with NO arguments:
```swift
GlancePresenceVisitor.signalAgent("terms", map: ["status": "accepted"])
GlanceVisitor.startSession()
```
Calling `startSession` with no arguments starts a session using the visitor ID supplied in `initVisitor`. The agent will be waiting for a session with this key.
The same session events as noted above are posted, specifically, `EventSessionConnected` when the application connects to the server and `EventGuestCountChanged` when the agent connects to the session. Unlike the pre-login case above, or manual case below, the application will not show the session key to the customer on `EventSessionConnected`.
### Manual Session Start
Although the visitor may be logged in and connected to the Presence service, the agent may be on the wrong customer record in the CRM or have some other difficulty initiating the session automatically.
As a fallback for this case, the application can also contain a screen share button that the agent may direct the customer to tap.
The button handler for the screen share button starts a session with a random key by calling:
```swift
GlanceVisitor.startSession("GLANCE_KEYTYPE_RANDOM")
```
This is the same call as in the pre-login case; manually tapping the screen share button should always invoke this method.
Again, as in the pre-login case, on receiving `EventSessionConnected` the application must display the random key retrieved from the event. The application should keep track of whether a session was manually started or not to decide whether or not to show the key to the customer.
The application should call `PresenceVisitor.disconnect()` when the user logs out or when exiting.
The SDK automatically manages the presence connection when the application goes into the background and when it is reactivated; the application should not attempt to handle this with calls to disconnect and connect.
=================================================================
FILE: /users/glance-screen-share/user-guide
=================================================================
This section provides developers with comprehensive documentation for integrating Glance Screen Share functionality directly into your desktop applications.
Browse the pages below to explore the core capabilities of the Glance Desktop SDK, learn how to configure One-Click Connect and Screen Share APIs, and find step-by-step instructions for implementing both manual and automated session workflows.
## In This Section
{% children description="true" /%}
=================================================================
FILE: /users/glance-screen-share/user-guide/presence-sdk
=================================================================
One-Click Connect allows a support agent to:
* See basic information about what the Visitor is doing with the application.
* Remotely initiate a screen share session for an application user.
Presence must be configured for your group by Glance Support before you can use the Presence functionality in your application.
To support One-Click Connect, an application must connect to the Glance Presence Service in order to receive messages relayed by the Agent. Each application user must connect with his own unique Visitor ID.
The One-Click Connect API is implemented on `Glance.PresenceVisitor`.
Typically an application will connect to the Presence service while the Visitor is logged into the application, and will disconnect when the Visitor logs out or exits the application.
You should make all `PresenceVisitor` API calls from the main thread.
## Initialization
See the [Initialization](/users/glance-screen-share/user-guide/quickstart/#initialization) documentation for `Glance.Visitor.init`. Before connecting to the Glance Presence service, an application must call `Glance.Visitor.init` with a Visitor ID.
* The same Visitor ID should be used when the same visitor is logged into the application on another device, or in a web application instrumented for Glance One-Click Cobrowse.
* Only one user can be signalable by the One-Click service at a time with a given Visitor ID.
* If two application instances connect using the same Visitor ID, the most recently active application has "focus" and will receive any signals sent by the Agent.
* By default, the Visitor ID will also be used as the session key for any screensharing session started with `StartSession()`.
* The application should wait for `EventVisitorInitialized` to fire before calling `Glance.PresenceVisitor.connect`.
## Connecting to Presence
### GlancePresenceVisitor connect(pushNotifications)
The Visitor must be connected to send presence information or receive signals from the Agent.
Once `EventVisitorInitialized` has fired, the application may call `GlancePresenceVisitor.connect` to connect to the presence service. The application should wait for the `EventPresenceConnected` event before attempting to call any additional `GlancePresenceVisitor` methods.
The application may also receive `EventPresenceConnectFail` or `EventPresenceNotConfigured` if there is an error connecting to the Presence service.
For mobile platforms only: if `pushNotifications` is true, the application will request permission to send push notifications, if not already granted. This allows the application to be signaled even when running in the background. See "Background / Foreground Transitions".
If the SDK is already connected, calling `connect()` again does nothing.
While connected to the Presence service, the application will notify the service about various visitor side events:
| **Event** | **Data** | **Agent Side Event** |
| --- | --- | --- |
| `visitorerror`
## The message "Glance is unable to connect securely" when starting a session
If you try starting a session and get a message saying "Glance cannot connect securely...", there's a problem accepting our SSL certificate.
To disable Glance's secure login feature, follow the steps below:
### For PC users
1. Click the **G** icon in your system tray. A menu is displayed.
2. Choose the **Settings** option.
3. Select the **Account** tab.
4. Place your pointer in the large blank space below the **Manage** button.
5. While holding down the Shift key on your keyboard, double-click your mouse.
6. A **Network information** section is displayed. Uncheck Secure login.
7. Click **OK**.
### For Mac users
1. Click the **G** icon in the Menu Bar (near your clock). A menu is displayed.
2. Choose the **Settings** option.
3. Select the **Account** tab.
4. In the **Network information** section, uncheck **Secure login**.
5. Close the Settings window.
## Desktop background vanishes when a Glance Screen Share session starts
Many background designs are detailed, which creates data that Glance has to transmit. To speed up performance, Glance usually turns off your computer's background during a session. The background reappears when your Glance session ends.
If you would prefer to keep your desktop background visible during sessions, follow these steps:
1. Click on the **G** icon.
2. Select **Settings**.
3. Click on the **Advanced** tab.
4. Uncheck **Hide desktop background**.
## Connecting through a corporate firewall or network security device
Glance works through most network security devices. However, some may have a network policy that disrupts Glance sessions. Your guests might not be able to connect or your session might pause or drop unexpectedly - a few seconds or even a few minutes after your guests connect. You may be able to start another session (or your guest might manually reconnect), only to see the new connection fail again in the same manner.
If you or your guest connect through a corporate network and experience any of these symptoms, contact your respective IT department for help resolving the issue.
Since TLS is more efficient than HTTPS, a company that blocks port 5501 might consider adding a rule to their firewall policy that allows outbound connections to those ports at the http://glance.net servers.
## Issues Entering Login Information
* If you are having issues entering login information or selecting text boxes in the login area, ensure your video drivers are up-to-date.
* If your Cobrowse or Screen Share sessions freeze or don't display properly, check to see if you have the Intel Iris XE Display driver.
You can update drivers using the instructions below.
### Update Drivers in Windows
1. In the search box on the taskbar, enter "device manager", then select **Device Manager**.
2. Select a category to see the names of devices, then right-click (or press and hold) the one you would like to update.
3. Select **Search automatically for updated driver software**.
4. Select **Update Driver**.
### Update Drivers in Windows 11
1. Download [this driver](https://downloadmirror.intel.com/751359/gfx_win_101.3790_101.2114.exe).
2. Restart your computer.
3. Restart Glance.
### Update Drivers in macOS
1. Click the Apple logo.
2. On the **Apple** menu, click **System Settings** (or **Software Update** on older versions).
3. If there is a macOS update available, you can install it. If there is a graphics driver update, it will be included in the macOS update.
=================================================================
FILE: /users/glance-screen-share/user-guide/before-login
=================================================================
Use the following instructions to make screen share available for both pre- and post-login scenarios. The examples on this page are macOS specific in Swift, but the concepts are similar in other platforms.
## Initialization
After the application launches (most likely in `UIApplicationDelegate application:didFinishLaunchingWithOptions:` or the `UIViewController viewDidLoad` delegate method for the main view) the application should call `GlanceVisitor.initVisitor` without a visitor ID:
```swift
let GLANCE_GROUP_ID : Int32 = 12345 // Replace the group ID number with your group ID.
GlanceVisitor.initVisitor(GLANCE_GROUP_ID, token: "",
name: "", email: "", phone: "")
```
Upon receiving `EventVisitorInitialized`, the screen share button should be made visible.
## UI
If you are implementing your own custom UI, you must disable the Glance Default UI. After calling `initVisitor` the first time, the application calls: `GlanceVisitor.defaultUI(false);`
## Starting a Session
The handler for the screen share button starts the session with a random key: `GlanceVisitor.startSession("GLANCE_KEYTYPE_RANDOM")`
Upon receiving `EventConnectedToSession`, the key is retrieved from the event and displayed to the customer.
```swift
case EventConnectedToSession:
// Show any UI to indicate the session has started
// event.properties includes the sessionKey which can be
// displayed to the user to read to the agent
myShowKeyMethod(event.properties["sessionkey"] as! String)
break
```
The customer will verbally give the key to the agent. After the agent enters the key and connects, the application will receive `EventGuestCountChanged`.
## After Login
After the customer logs in and is identified, the implementation uses the Glance Presence ("One-click Screen share") functionality. In addition, to support the case where the support agent is not on the correct customer record in the CRM, there is a manual verbal key fallback that works similarly to the pre-login case.
### Initialization
After customer login, the application calls `GlanceVisitor.initVisitor` again with a visitor ID. The application must pass the same Glance Group ID used in the initial call above:
```swift
GlanceVisitor.initVisitor(GLANCE_GROUP_ID, token: "",
name: "", email: "", phone: "",
visitorid: visitorid)
```
Upon receiving `EventVisitorInitialized` the application calls `GlancePresenceVisitor.connect`.
If you are implementing your own custom Presence UI, disable the Glance default Presence UI.
Example:
```swift
switch event.code {
case EventVisitorInitialized:
DispatchQueue.main.async {
GlancePresenceVisitor.connect()
GlancePresenceVisitor.setDefaultUI(false)
}
break;
```
### One-Click Session Start
The agent is notified when the customer is online and may start a screen sharing session. Typically, a button will light up on the CRM record in the agent's browser. When the agent clicks the button, a signal is relayed to the SDK where an `EventPresenceShowTerms` event fires.
If you have a custom Presence UI, when `EventPresenceShowTerms` is received, the application will show any terms and conditions and display buttons for the customer to Accept or Decline screen sharing.
When terms and conditions are presented to the customer, the application should signal the agent by calling:
```swift
GlancePresenceVisitor.signalAgent("terms", map: ["status": "displayed"])
```
If the customer declines screen sharing, the application notifies the agent by calling:
```swift
GlancePresenceVisitor.signalAgent("terms", map: ["status": "declined"])
```
If the customer accepts screen sharing, the application notifies the agent and starts the session by calling `GlanceVisitor.startSession` with NO arguments:
```swift
GlancePresenceVisitor.signalAgent("terms", map: ["status": "accepted"])
GlanceVisitor.startSession()
```
Calling `startSession` with no arguments starts a session using the visitor ID supplied in `initVisitor`. The agent will be waiting for a session with this key.
The same session events as noted above are posted, specifically, `EventSessionConnected` when the application connects to the server and `EventGuestCountChanged` when the agent connects to the session. Unlike the pre-login case above, or manual case below, the application will not show the session key to the customer on `EventSessionConnected`.
### Manual Session Start
Although the visitor may be logged in and connected to the Presence service, the agent may be on the wrong customer record in the CRM or have some other difficulty initiating the session automatically.
As a fallback for this case, the application can also contain a screen share button that the agent may direct the customer to tap.
The button handler for the screen share button starts a session with a random key by calling:
```swift
GlanceVisitor.startSession("GLANCE_KEYTYPE_RANDOM")
```
This is the same call as in the pre-login case; manually tapping the screen share button should always invoke this method.
Again, as in the pre-login case, on receiving `EventSessionConnected` the application must display the random key retrieved from the event. The application should keep track of whether a session was manually started or not to decide whether or not to show the key to the customer.
The application should call `PresenceVisitor.disconnect()` when the user logs out or when exiting.
The SDK automatically manages the presence connection when the application goes into the background and when it is reactivated; the application should not attempt to handle this with calls to disconnect and connect.
=================================================================
FILE: /users/glance-screen-share/user-guide
=================================================================
This section provides developers with comprehensive documentation for integrating Glance Screen Share functionality directly into your desktop applications.
Browse the pages below to explore the core capabilities of the Glance Desktop SDK, learn how to configure One-Click Connect and Screen Share APIs, and find step-by-step instructions for implementing both manual and automated session workflows.
## In This Section
{% children description="true" /%}
=================================================================
FILE: /users/glance-screen-share/user-guide/presence-sdk
=================================================================
One-Click Connect allows a support agent to:
* See basic information about what the Visitor is doing with the application.
* Remotely initiate a screen share session for an application user.
Presence must be configured for your group by Glance Support before you can use the Presence functionality in your application.
To support One-Click Connect, an application must connect to the Glance Presence Service in order to receive messages relayed by the Agent. Each application user must connect with his own unique Visitor ID.
The One-Click Connect API is implemented on `Glance.PresenceVisitor`.
Typically an application will connect to the Presence service while the Visitor is logged into the application, and will disconnect when the Visitor logs out or exits the application.
You should make all `PresenceVisitor` API calls from the main thread.
## Initialization
See the [Initialization](/users/glance-screen-share/user-guide/quickstart/#initialization) documentation for `Glance.Visitor.init`. Before connecting to the Glance Presence service, an application must call `Glance.Visitor.init` with a Visitor ID.
* The same Visitor ID should be used when the same visitor is logged into the application on another device, or in a web application instrumented for Glance One-Click Cobrowse.
* Only one user can be signalable by the One-Click service at a time with a given Visitor ID.
* If two application instances connect using the same Visitor ID, the most recently active application has "focus" and will receive any signals sent by the Agent.
* By default, the Visitor ID will also be used as the session key for any screensharing session started with `StartSession()`.
* The application should wait for `EventVisitorInitialized` to fire before calling `Glance.PresenceVisitor.connect`.
## Connecting to Presence
### GlancePresenceVisitor connect(pushNotifications)
The Visitor must be connected to send presence information or receive signals from the Agent.
Once `EventVisitorInitialized` has fired, the application may call `GlancePresenceVisitor.connect` to connect to the presence service. The application should wait for the `EventPresenceConnected` event before attempting to call any additional `GlancePresenceVisitor` methods.
The application may also receive `EventPresenceConnectFail` or `EventPresenceNotConfigured` if there is an error connecting to the Presence service.
For mobile platforms only: if `pushNotifications` is true, the application will request permission to send push notifications, if not already granted. This allows the application to be signaled even when running in the background. See "Background / Foreground Transitions".
If the SDK is already connected, calling `connect()` again does nothing.
While connected to the Presence service, the application will notify the service about various visitor side events:
| **Event** | **Data** | **Agent Side Event** |
| --- | --- | --- |
| `visitorerror`e.g. no gserver configured for sdk version | "code":"conndrop"
"msg":"Connect failed","params": | `onvisitorerror` | | `visitorsessionstart` | | `onvisitorsessionstart` | | `visitorsessionend` | "reason":error_message | `onvisitorsessionend` | | `visibility` | hidden (background)
visible (foreground) | `onvisibility` | ## GlancePresenceVisitor disconnect To disconnect from the Presence service, typically on logout or application exit, the application should call `Glance.PresenceVisitor.disconnect`.
The event properties include:
- reason: Diagnostic text message suitable for logging. Applications can continue to call `presence()` and signal methods anyway, as those methods will retry the connection. | | **EventPresenceShowTerms** | Info | The Agent has signaled the Visitor to display a screen share Terms and Conditions dialog box. If the Visitor agrees to the terms, the application should start a screen share session. This event only needs to be handled if not using the Default UI.
**Properties:**
- sessionkey: The key to use for the session, if the user agrees to start
- onetermsurl: A link to the terms and conditions web page that should be displayed in the dialog box. | | **EventPresenceSignal** | Info | A signal was received from the Agent. In a future implementation, this event can be used to handle custom signals from the Agent. | | **EventPresenceBlur** | Info | Another application or web page has connected to the Presence service, and this application is losing focus. The application will automatically regain focus the next time `presence`, `signalAgent`, or `signalVisibility` is called. | | **EventPresenceSendFail** | Warning | A signal could not be sent to the Agent because the connection to the presence service is currently down. | | **EventPresenceNotConfigured** | Warning | Presence is disabled for the group or is not correctly configured. | | **EventPresenceDisconnected** | Info | The Glance SDK has successfully disconnected from the Presence service. | | **glancePresenceDialogDidTapYes** | Info | The visitor tapped Accept within the presence terms dialog. | | **glancePresenceDialogDidTapNo** | Info | The visitor tapped Decline within the presence terms dialog. | ## Monitoring User Activity ### Glance.PresenceVisitor.presence(map
**Properties:** The "error" property will contain an error code if the problem was an inability to connect to the internet. | | **EventSessionEnded** | Info | The session and any child sessions have all ended.
**Properties:** The "reason" property will be one of the following codes:
• **SessionEndReasonThisSide:** The session was intentionally ended by a call to EndSession()
• **SessionEndReasonOtherSide:** The session was ended by the Agent
• **SessionEndReasonCantConnect:** The session ended because the Glance SDK was never able to connect to the Glance screen share service.
• **SessionEndReasonConnDrop:** The session ended because the connection dropped and could not be re-established.
• **SessionEndReasonKilled:** The session was killed due to too many simultaneous sessions.
• **SessionEndTimedout:** The session ended because no Agent joined.
• **SessionEndReasonError:** The session ended due to an unexpected error. | | **EventTunneling** | Info | The Glance SDK was unable to connect using a TCP socket, typically due to a firewall restriction, and is connected to the Glance Screen Share Service using a tunneling protocol. No action is needed on the part of the application to handle this event, but the session performance may be slightly degraded. | | **EventConnectionWarning** | Warning | The connection has dropped. The Glance SDK will attempt to automatically reconnect for up to one minute. If the reconnect attempt succeeds, EventClearWarning fires. Otherwise the session ends with EventSessionEnded. | | **EventClearWarning** | Info | The dropped connection has been reestablished. | | **EventGuestCountChange** | Info | An Agent has joined or left the session. | | **EventRCDisabled** | Info | There was an attempt to allow remote control, but remote control is not enabled for the account. | | **EventDeviceDisconnected** | Info | The device being shared has been disconnected from the Visitor's computer. | | **EventDeviceReconnected** | Info | The device being shared has been reconnected. | | **EventException** | Error | An unexpected error has occurred. | | **EventScreenshareInvitation** | | *Not used with GlanceVisitor API* | | **EventMessageReceived** | Info | The Agent sent a custom message through the screen share session.
**Properties:** The message properties are determined by the Agent client sending the message. | | **EventChildSessionStarted** | Info | A child session has started. The Glance SDK automatically joins child sessions.
**Properties:**
• **sessionkey:** The session key of the child session
• **sessiontype:** The session type specified by the Agent, for example "agentVideo"
• **timestamp:** *Internal use only*
• **username:** The Glance username for the Agent | | **EventJoinChildSessionFailed** | Info | The Visitor received an invitation to join a child session but was unable to join it. | ================================================================= FILE: /users =================================================================
Users & Administrators
Essential guides, configuration settings, and best practices for agents using Glance and administrators managing the platform.
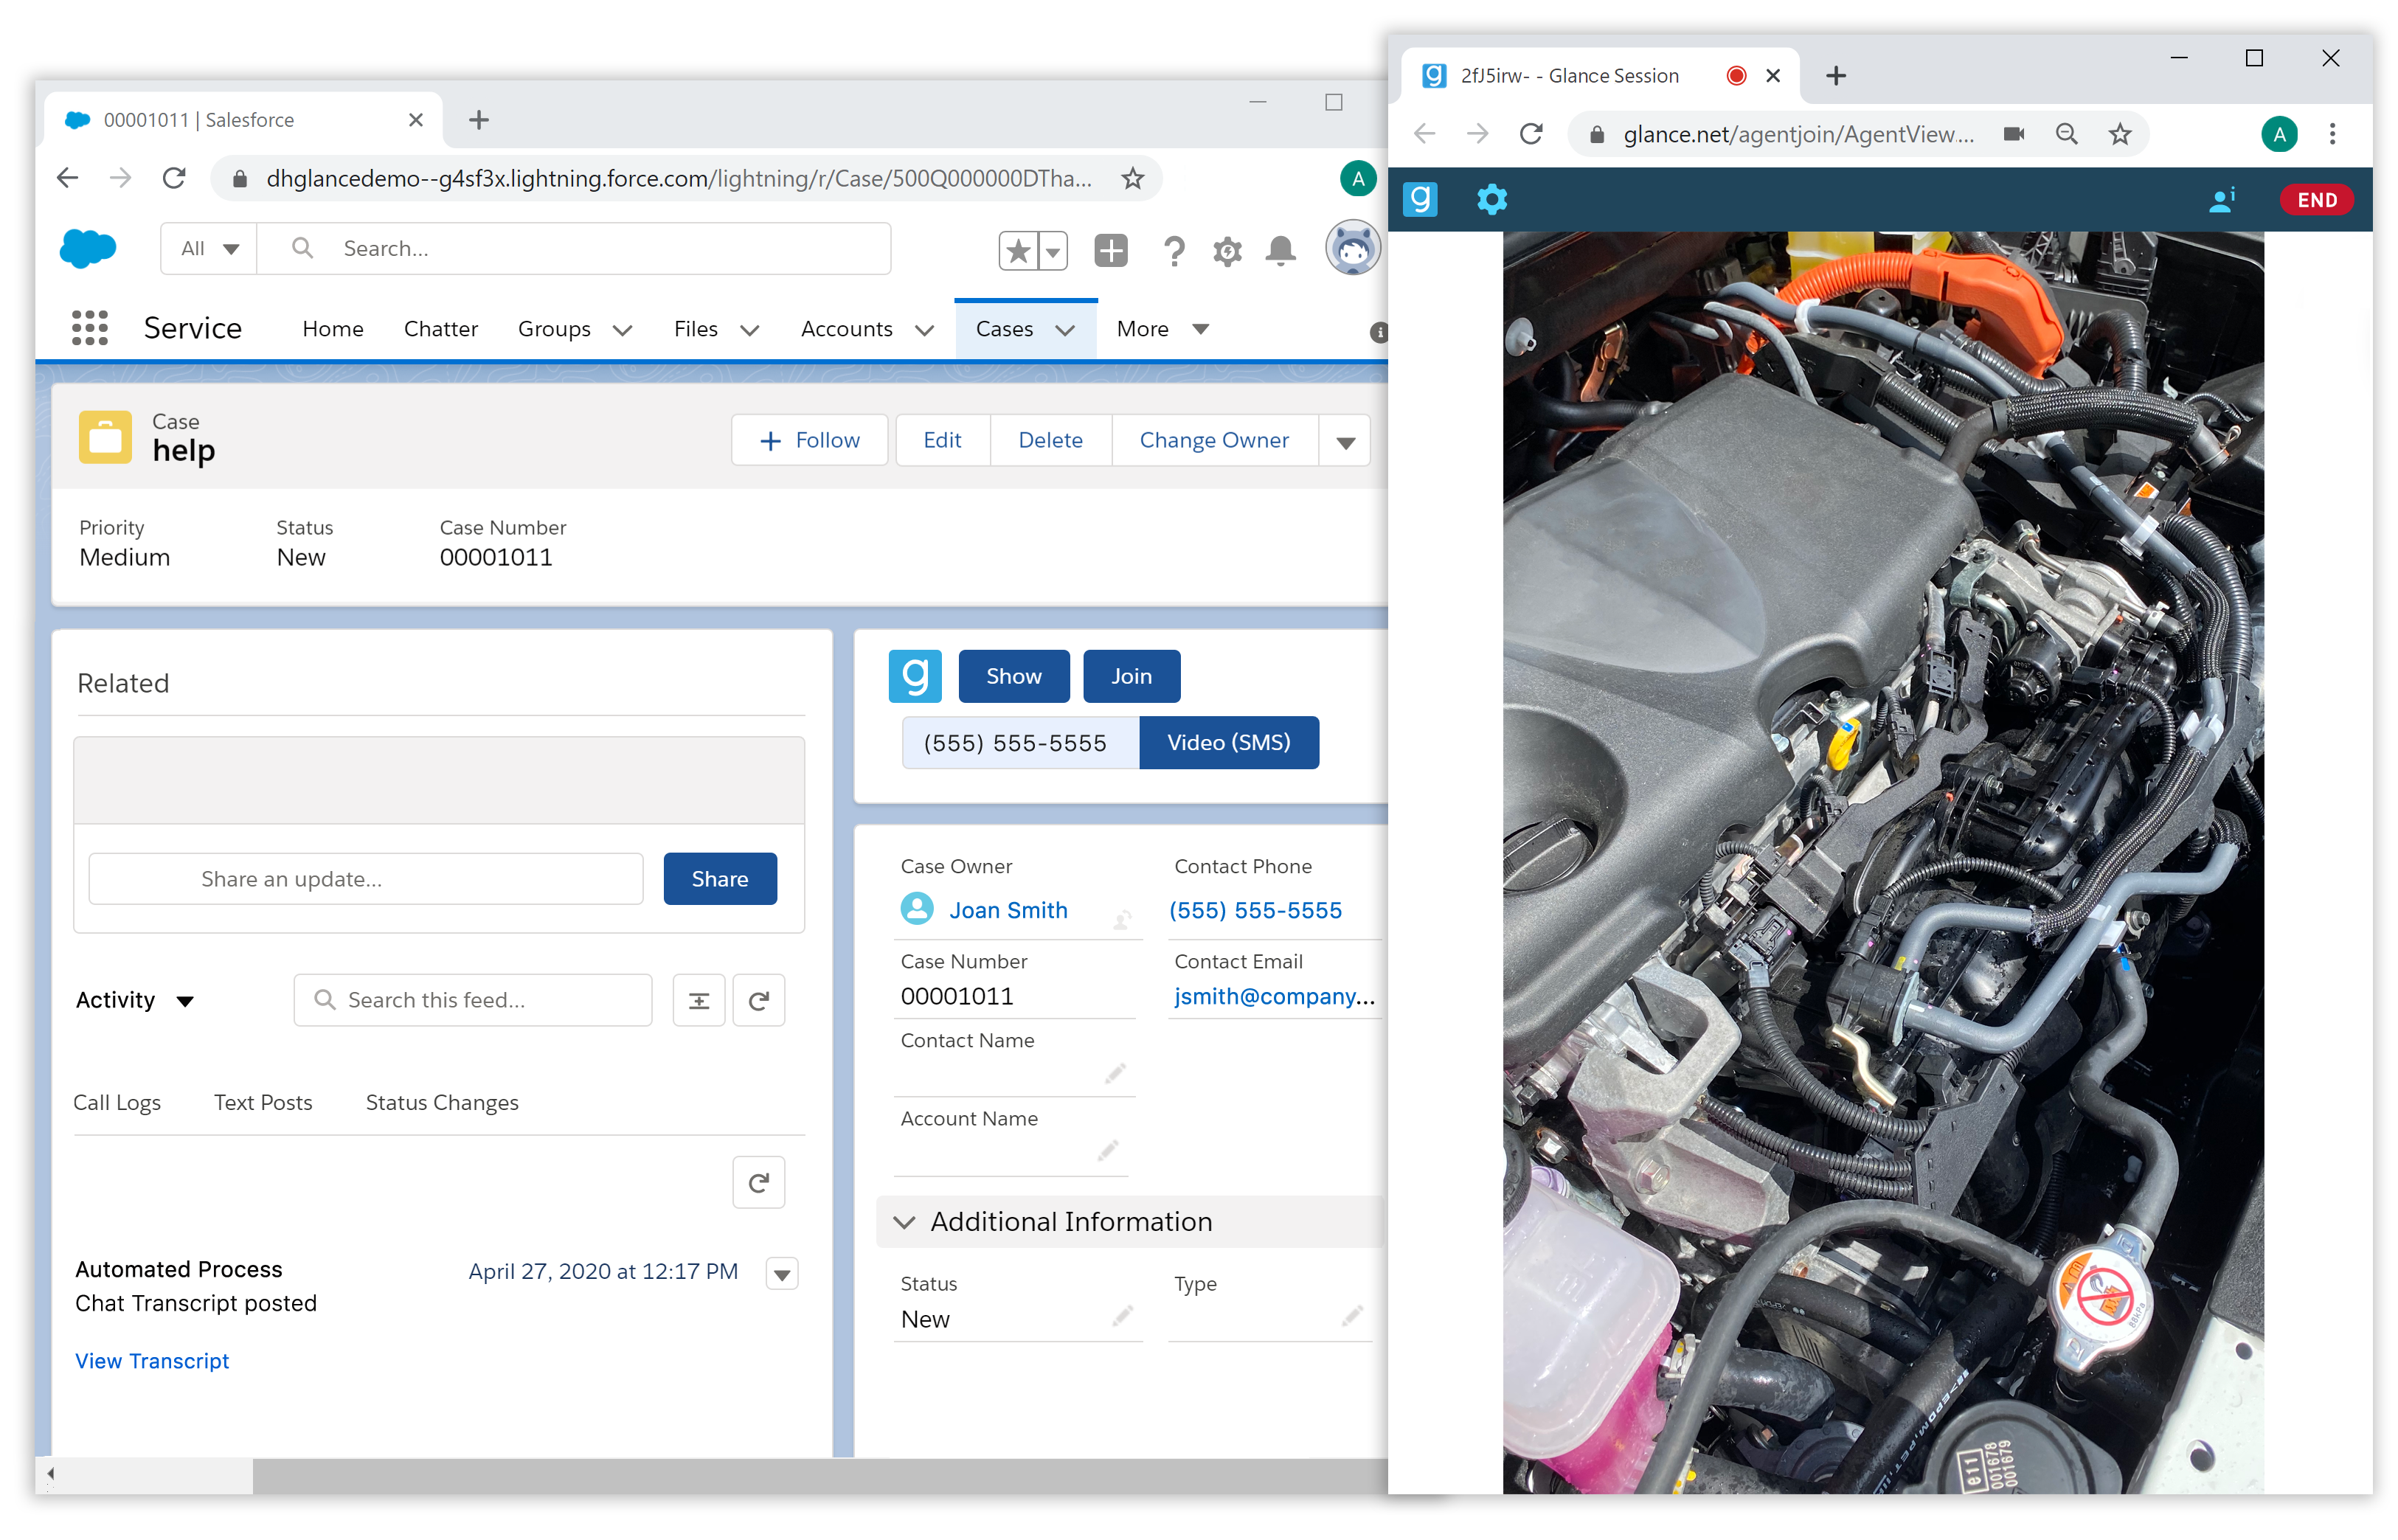 ## Using Mobile Camera Share from the Web
**Before you begin, you need:**
* Access to a Glance Group configured with Mobile Camera Share. [Contact Glance](/users/account-management/contact/) to enable this feature.
* The permission **Join Mobile Camera Share sessions**.
## Using Mobile Camera Share from the Web
**Before you begin, you need:**
* Access to a Glance Group configured with Mobile Camera Share. [Contact Glance](/users/account-management/contact/) to enable this feature.
* The permission **Join Mobile Camera Share sessions**.
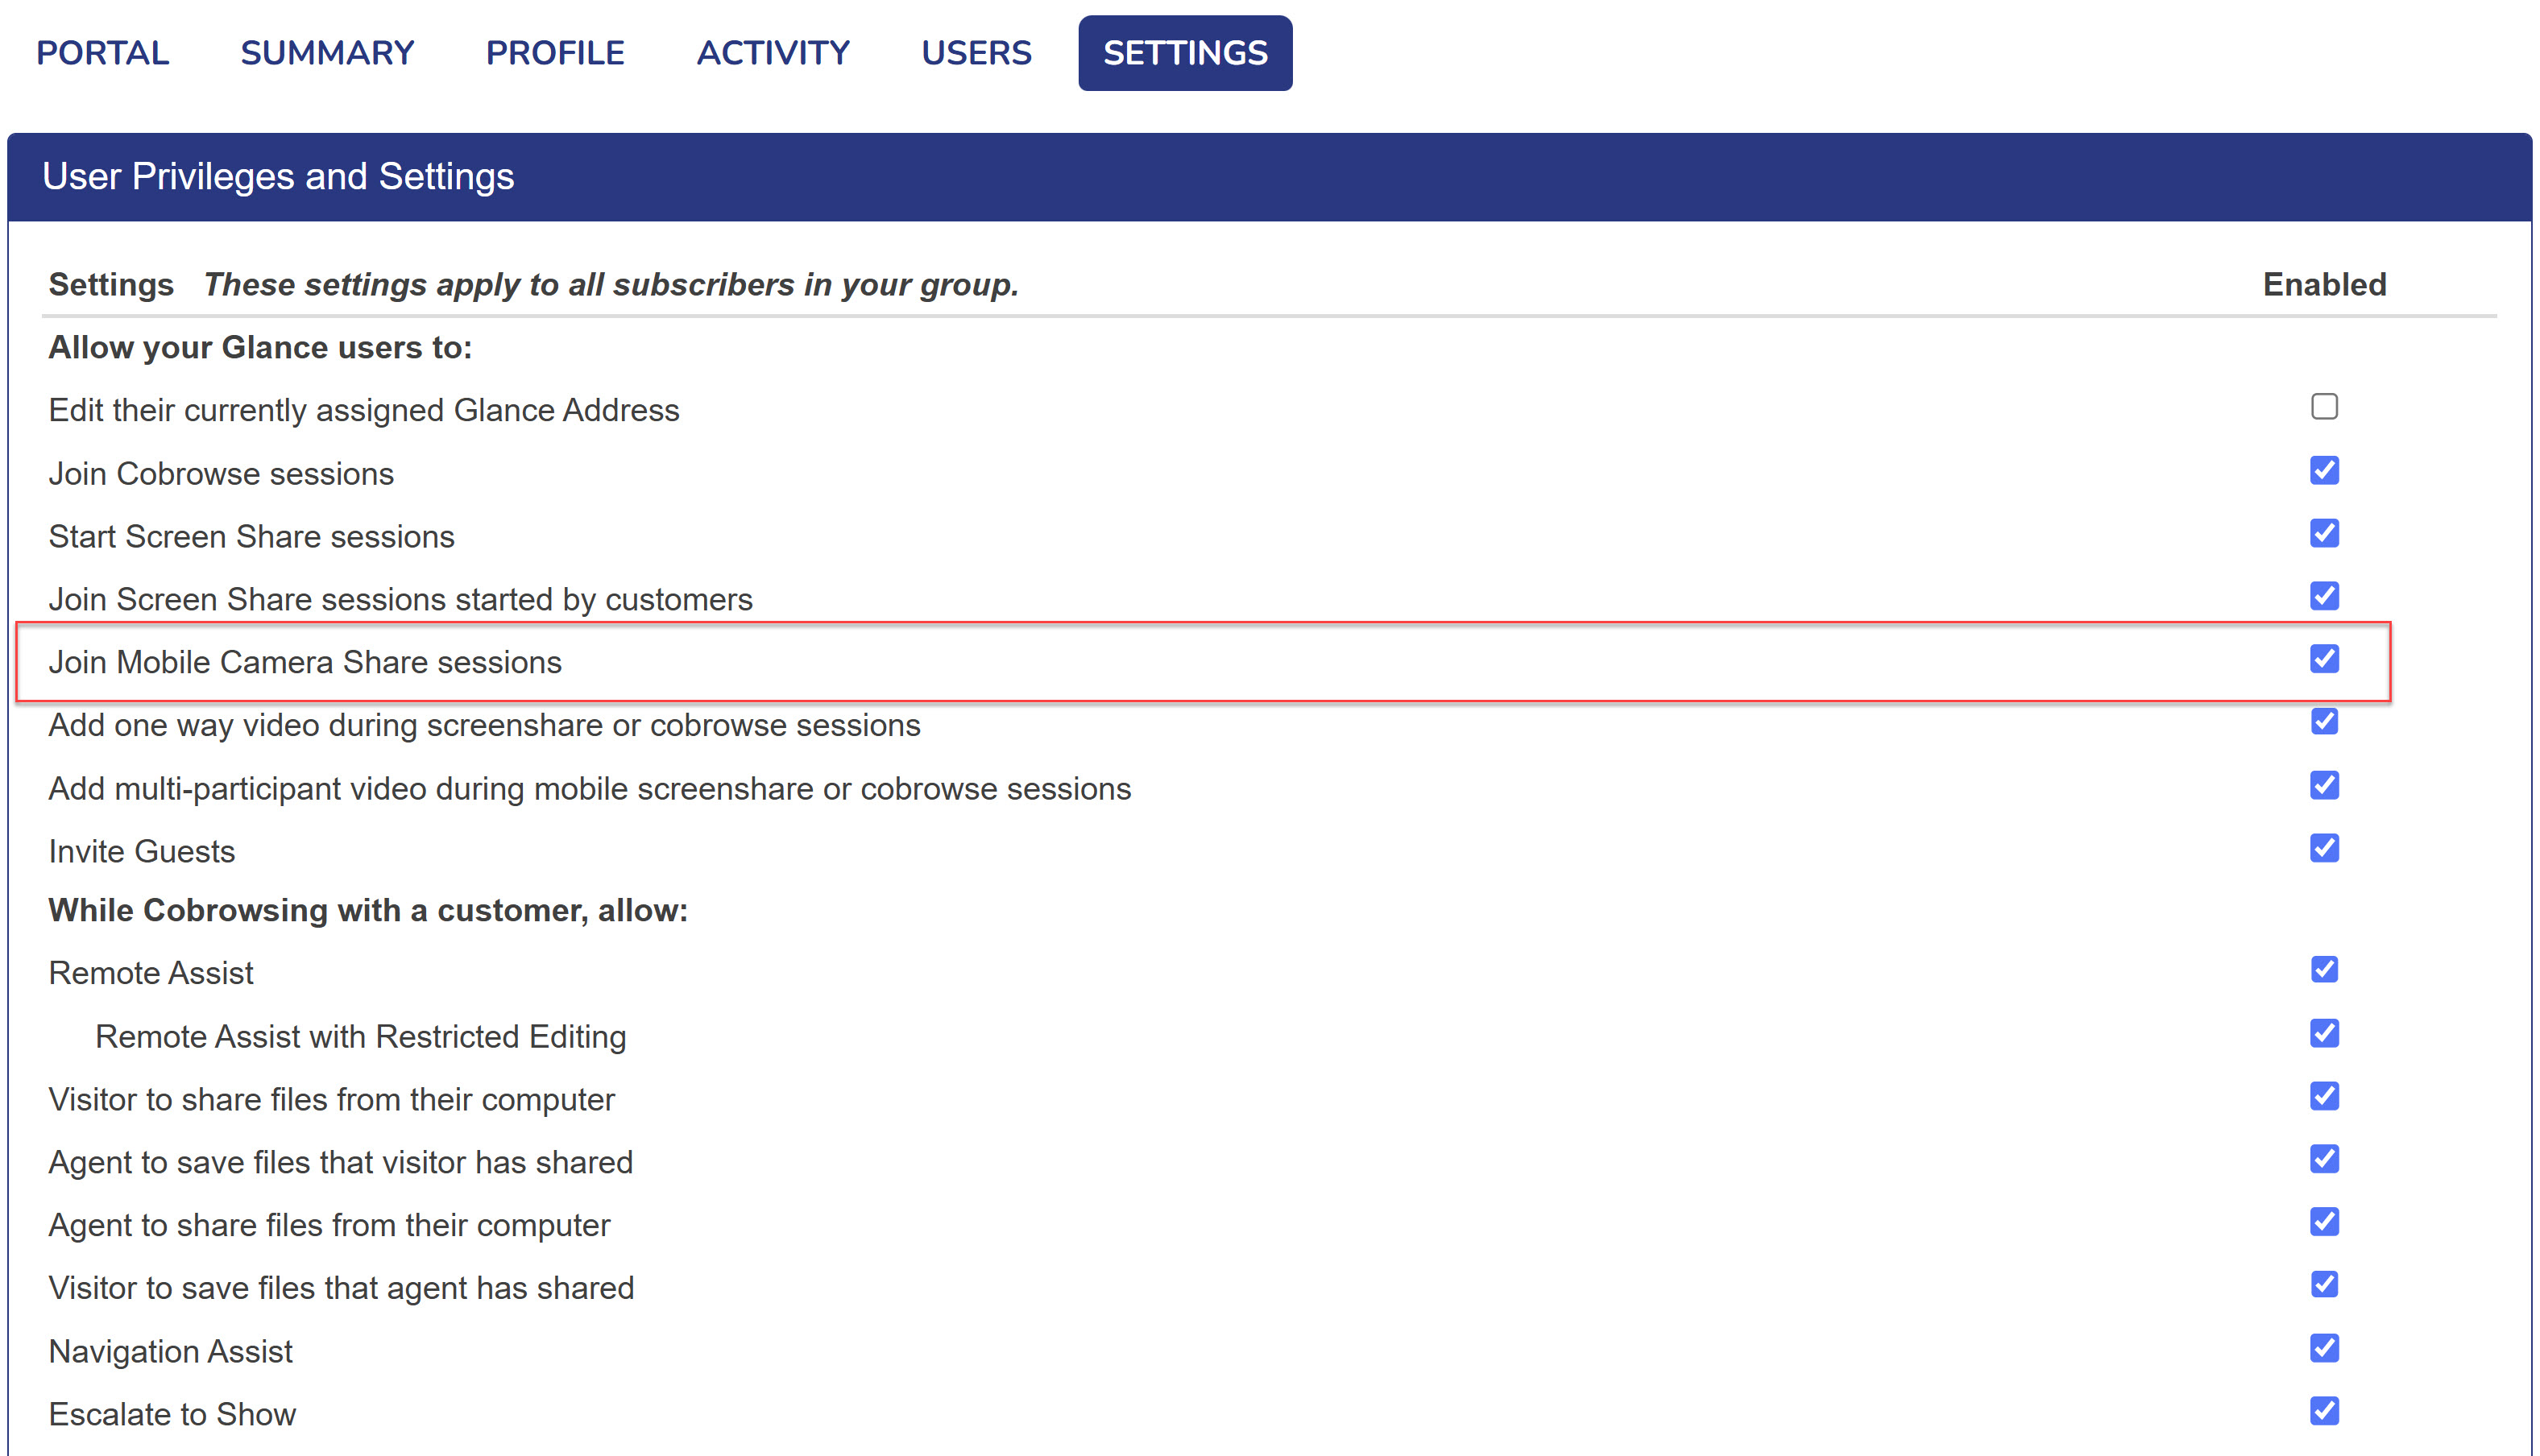 To start a session:
1. Go to the [SMS Agent Join Page](https://www.glance.net/agentjoin/AgentJoin.aspx?mode=smsinvitation).
2. Log in with your Glance Address.
3. Enter the customer's mobile phone number and click **Video SMS**.
4. On the mobile device, click the link in the text to start the video.
## Troubleshooting
**Why does my camera zoom when I click the button to flip the camera?**
* Many mobile devices now have multiple back cameras and sometimes multiple front cameras. The button will cycle through the cameras, so it may take a few taps to get the camera you need.
## FAQ
* **Question:** Does Glance retain the customer's phone number or just pass it to Twilio?
* **Answer:** Glance does not retain any phone numbers.
* **Question:** How long does Twilio retain customer's phone numbers?
* **Answer:** Twilio stores phone numbers based on their retention policy outlined [here](https://support.twilio.com/hc/en-us/articles/223181008-Twilio-SMS-message-and-traffic-storage).
=================================================================
FILE: /users/portal/access_log
=================================================================
The **Access Log** in the Portal records all activity that occurs within the Portal and within the Glance backend settings for a group.
To view the **Access Log**, log in to the Portal and click **Access Log** in the left navigation panel.
Input the **Start date** and **End date** for the activities to review, then click the green **Go** button.
To start a session:
1. Go to the [SMS Agent Join Page](https://www.glance.net/agentjoin/AgentJoin.aspx?mode=smsinvitation).
2. Log in with your Glance Address.
3. Enter the customer's mobile phone number and click **Video SMS**.
4. On the mobile device, click the link in the text to start the video.
## Troubleshooting
**Why does my camera zoom when I click the button to flip the camera?**
* Many mobile devices now have multiple back cameras and sometimes multiple front cameras. The button will cycle through the cameras, so it may take a few taps to get the camera you need.
## FAQ
* **Question:** Does Glance retain the customer's phone number or just pass it to Twilio?
* **Answer:** Glance does not retain any phone numbers.
* **Question:** How long does Twilio retain customer's phone numbers?
* **Answer:** Twilio stores phone numbers based on their retention policy outlined [here](https://support.twilio.com/hc/en-us/articles/223181008-Twilio-SMS-message-and-traffic-storage).
=================================================================
FILE: /users/portal/access_log
=================================================================
The **Access Log** in the Portal records all activity that occurs within the Portal and within the Glance backend settings for a group.
To view the **Access Log**, log in to the Portal and click **Access Log** in the left navigation panel.
Input the **Start date** and **End date** for the activities to review, then click the green **Go** button.
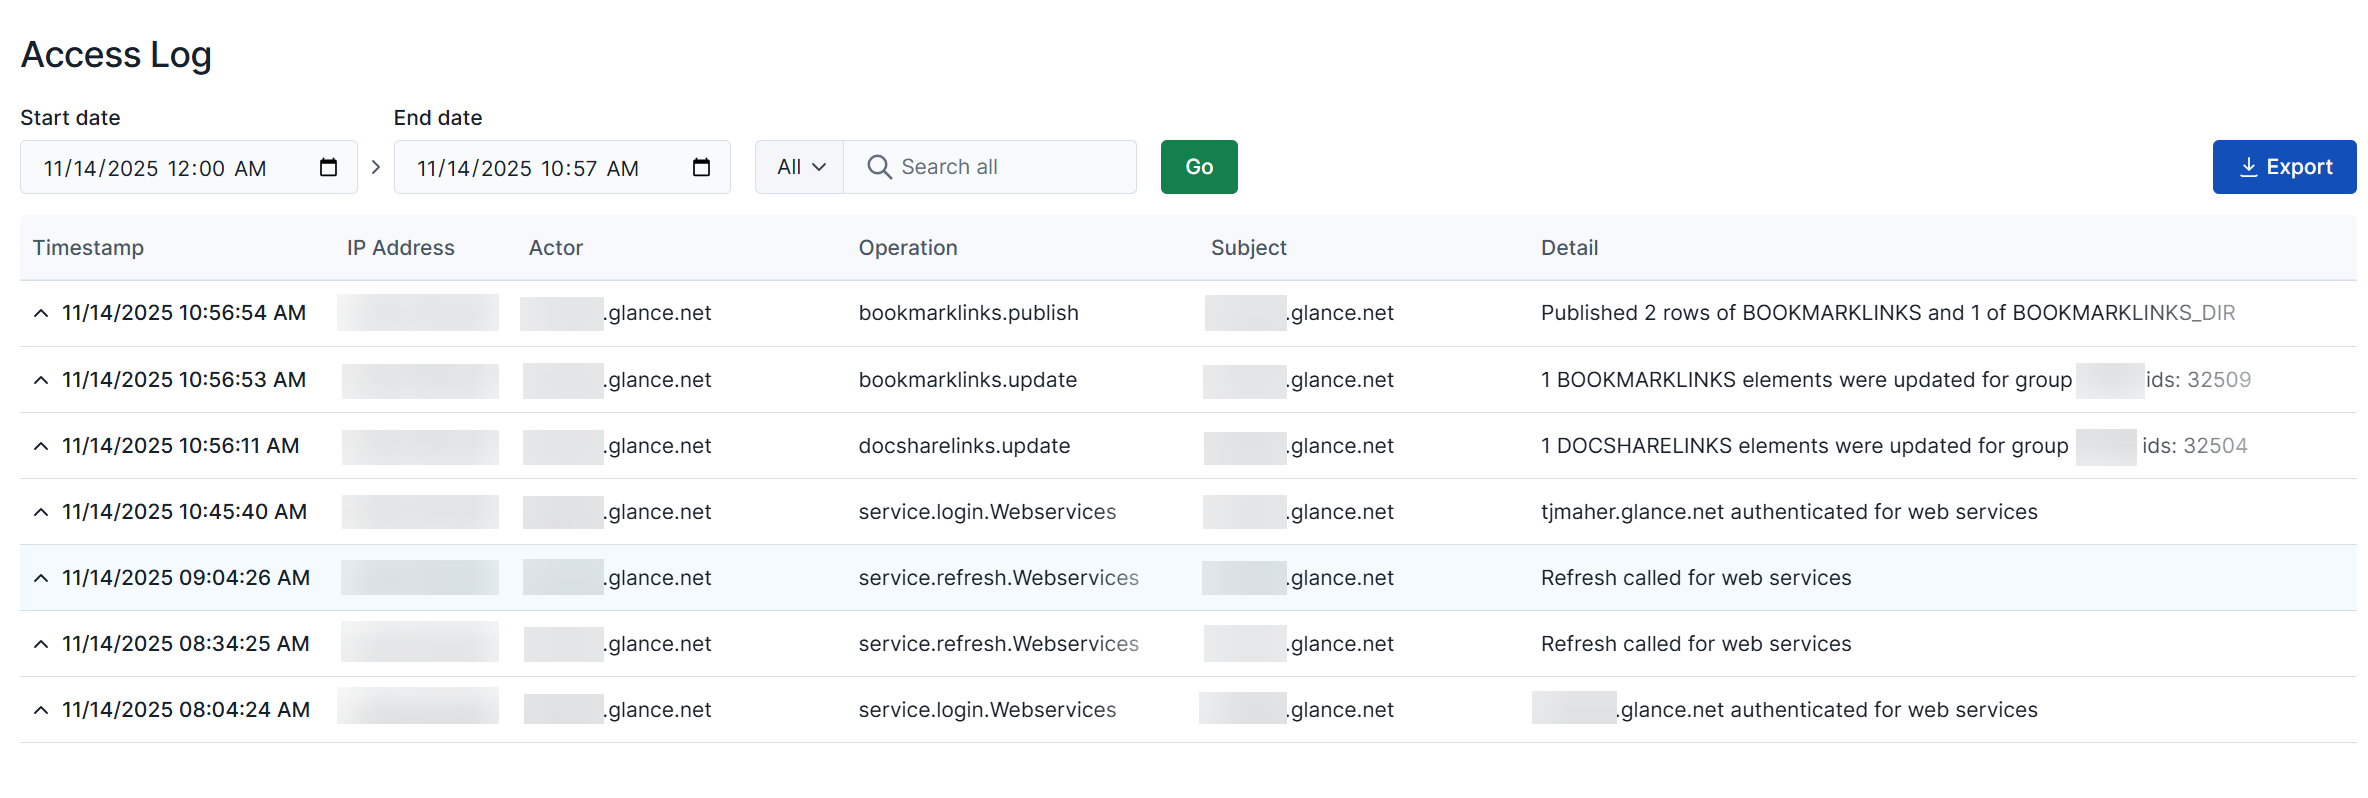 * The **Timestamp** column displays when the activity occurred.
* The **IP Address** column displays the IP address from where the activity occurred.
* The **Actor** column displays the user responsible for the activity.
* The **Operation** column displays where the activity occurred and the type of action taken.
* The **Subject** column displays the user impacted by the activity. This name will default to the user responsible for the activity if it impacts the entire group.
* The **Detail** column displays additional information regarding the activity.
Click the caret next to the magnifying glass icon to search for specific activities by user or operation.
* The **Timestamp** column displays when the activity occurred.
* The **IP Address** column displays the IP address from where the activity occurred.
* The **Actor** column displays the user responsible for the activity.
* The **Operation** column displays where the activity occurred and the type of action taken.
* The **Subject** column displays the user impacted by the activity. This name will default to the user responsible for the activity if it impacts the entire group.
* The **Detail** column displays additional information regarding the activity.
Click the caret next to the magnifying glass icon to search for specific activities by user or operation.
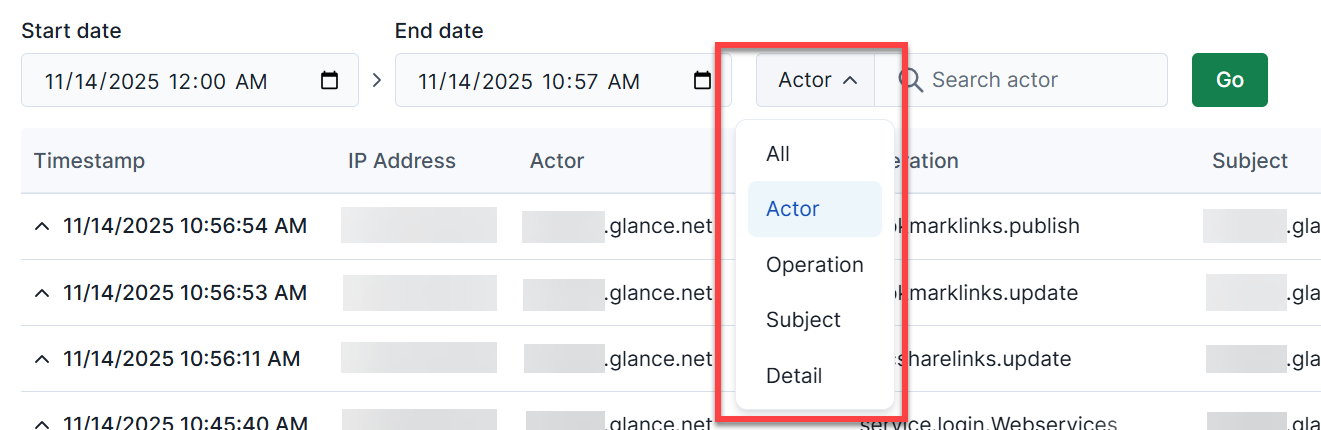 Click the caret next to the **Timestamp** column to view additional details about the activity.
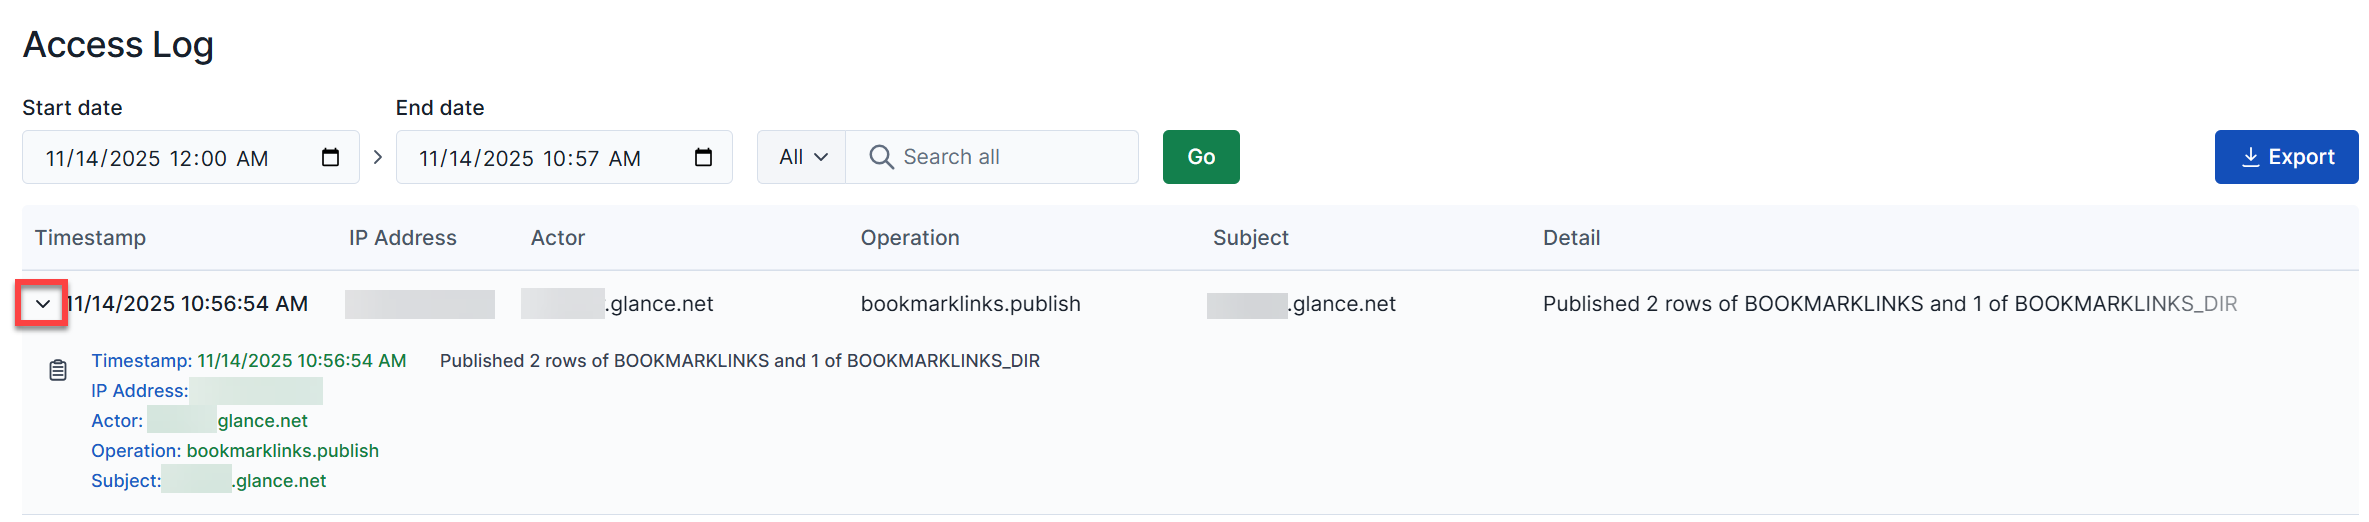 Click the blue **Export** button to download a CSV file containing the results.
=================================================================
FILE: /users/portal/advanced
=================================================================
The Advanced page, located in the Settings section, allows the user to configure additional settings for Cobrowse.
Click the blue **Export** button to download a CSV file containing the results.
=================================================================
FILE: /users/portal/advanced
=================================================================
The Advanced page, located in the Settings section, allows the user to configure additional settings for Cobrowse.
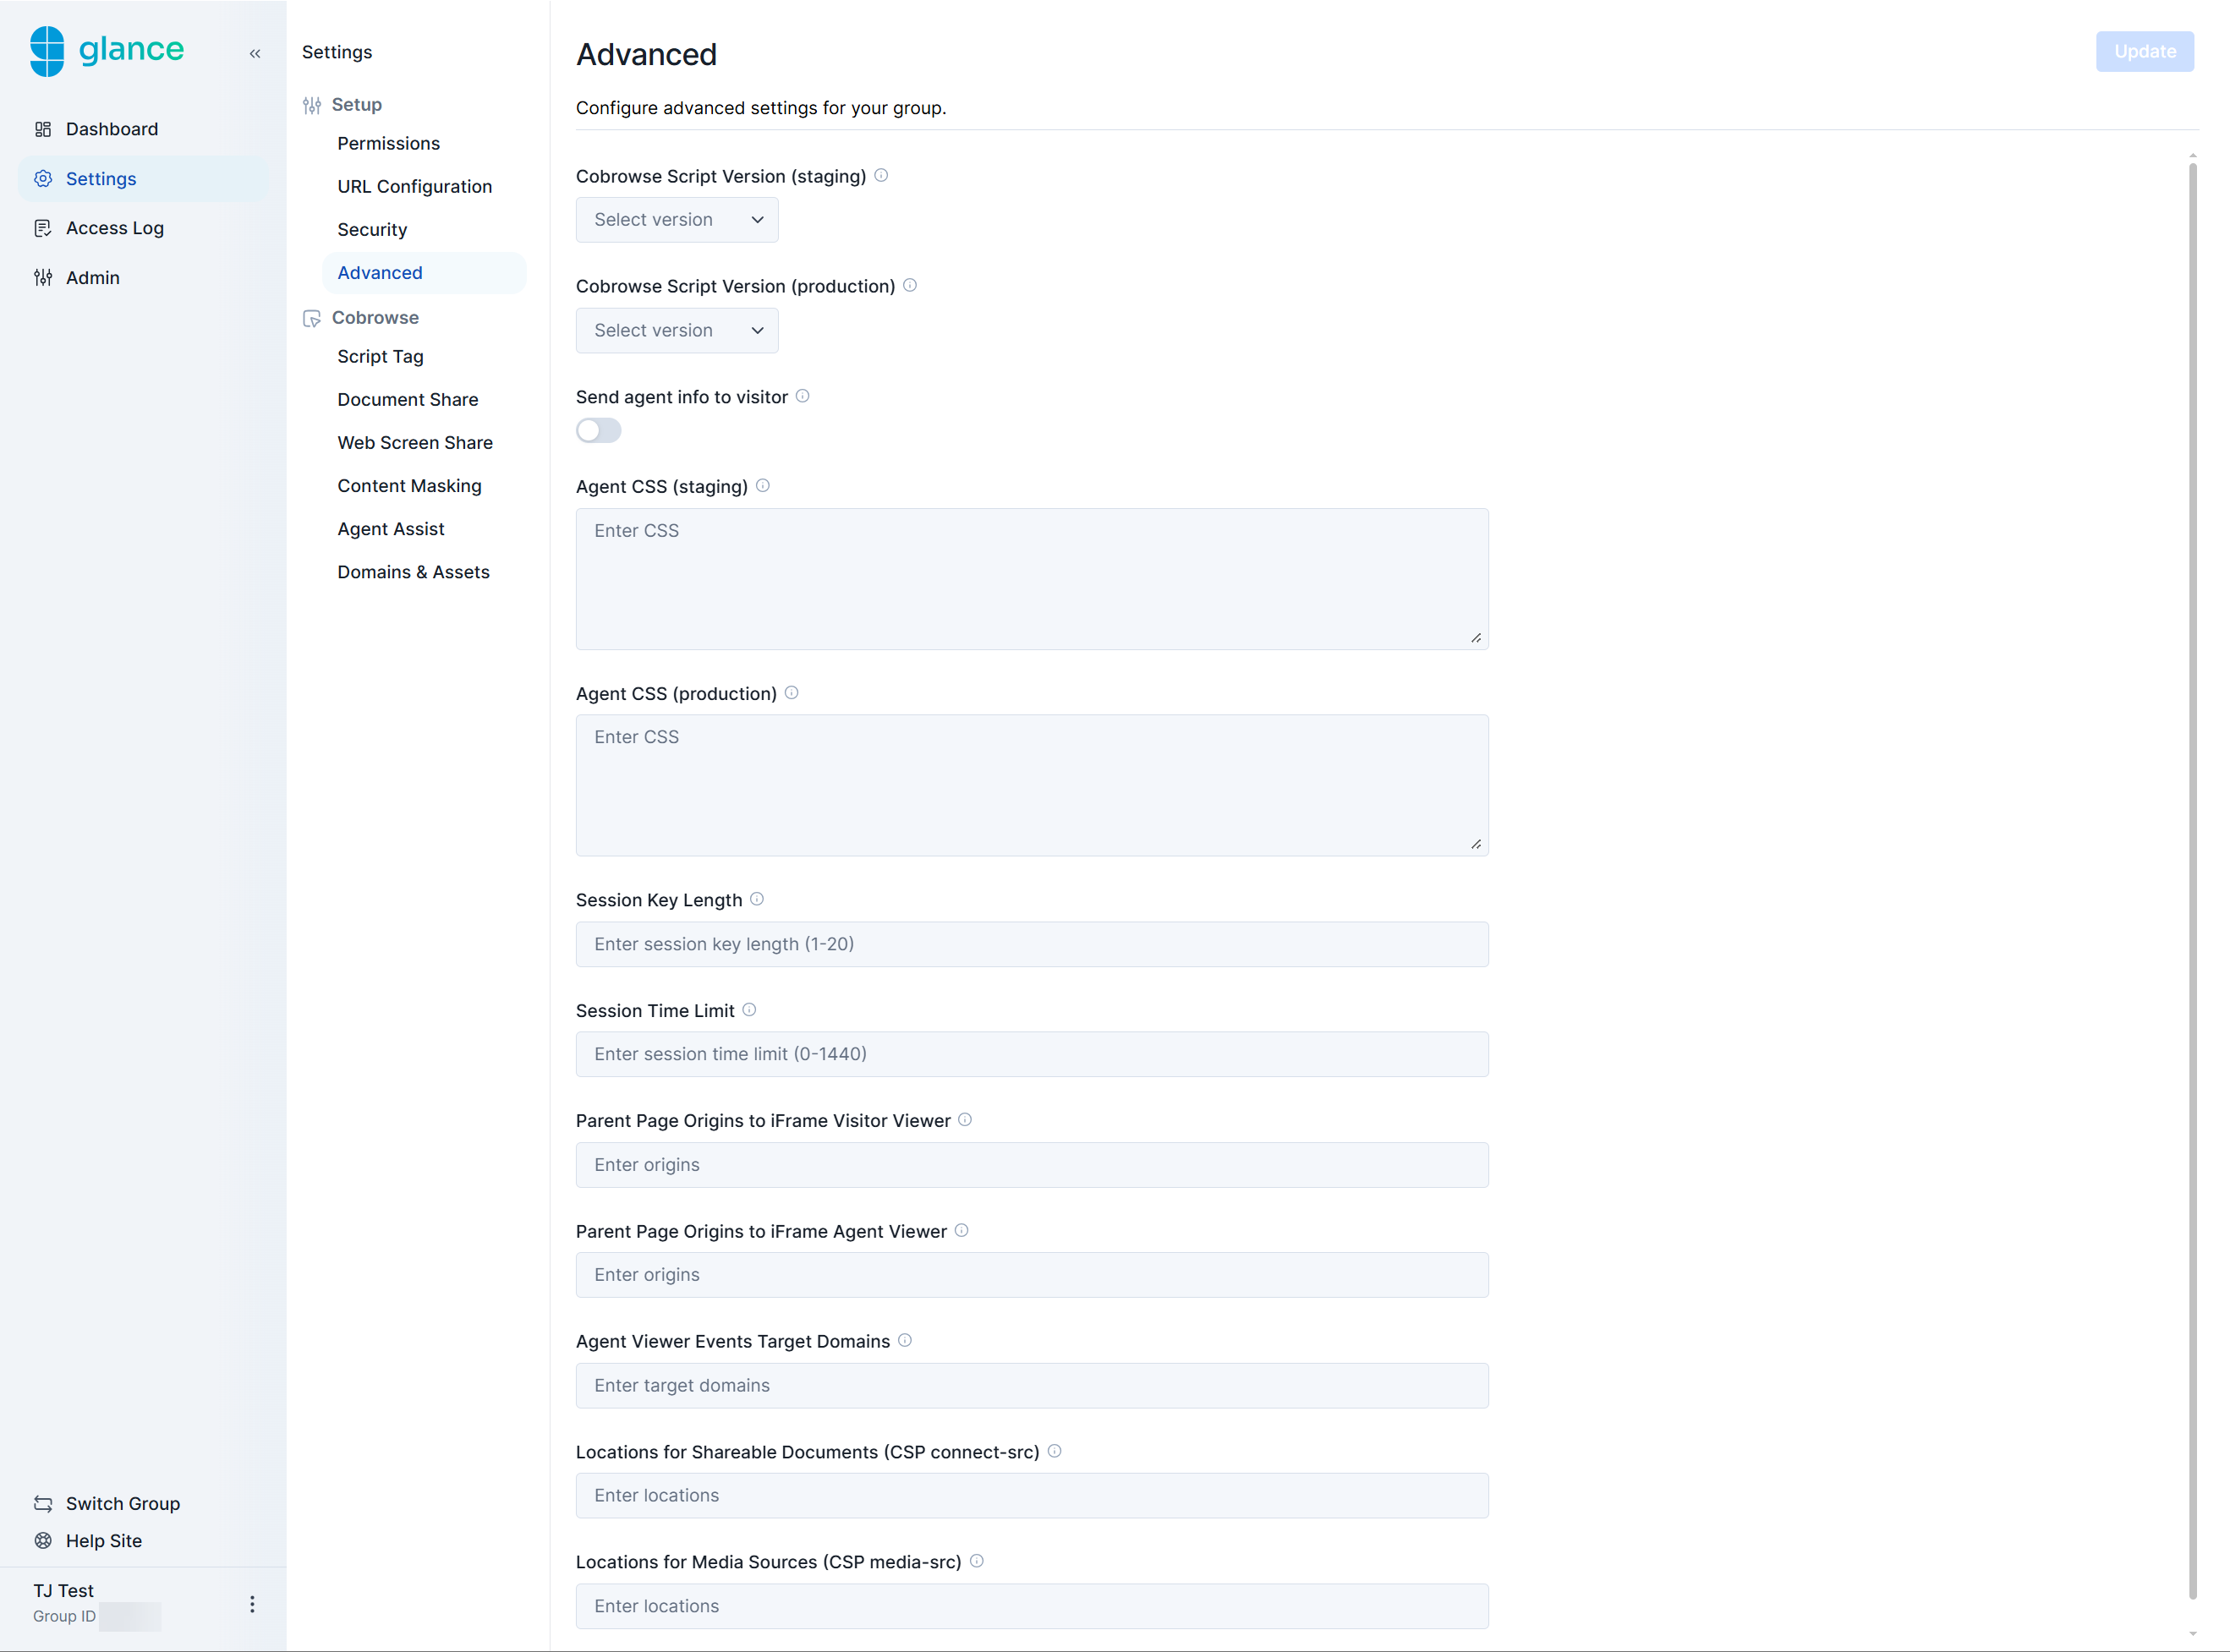 **Cobrowse Script Version (staging & production)**
Select which version of the Cobrowse script is used during a Cobrowse session.
**Send agent info to visitor**
Enabling this setting allows the visitor to see the agent's name, title, partner user ID, and Glance Address in the agent events.
**Agent CSS (staging & production)**
Agent CSS allows you to quickly fix specific pages or repeated elements with similar classes. Enter any CSS changes needed to ensure the content on the visitor's screen accurately renders for the agent (usually used for fonts or masking elements).
**Session Key Length**
Set the length of the session key for a Cobrowse or Screen Share session. The default is four characters.
**Session Time Limit**
Set a maximum time limit (in minutes) for how long a Screen Share session can last.
**Parent Page Origins to iFrame Visitor Viewer**
Used when launching the visitor viewer from an external system (such as Salesforce). Enter the URL where the join page and visitor viewer will be embedded (iframed).
**Parent Page Origins to iFrame Agent Viewer**
Used when launching the agent viewer from an external system (such as Salesforce). Enter the URL where the join page and agent viewer will be embedded (iframed).
**Agent Viewer Events Target Domains**
This setting determines which hostnames are allowed to receive session events (e.g., session ended) posted from the Glance Viewer. You may use a wildcard (*) to allow all hostnames, but for security reasons, it is strongly recommended to restrict this to trusted domains only.
**Cobrowse Script Version (staging & production)**
Select which version of the Cobrowse script is used during a Cobrowse session.
**Send agent info to visitor**
Enabling this setting allows the visitor to see the agent's name, title, partner user ID, and Glance Address in the agent events.
**Agent CSS (staging & production)**
Agent CSS allows you to quickly fix specific pages or repeated elements with similar classes. Enter any CSS changes needed to ensure the content on the visitor's screen accurately renders for the agent (usually used for fonts or masking elements).
**Session Key Length**
Set the length of the session key for a Cobrowse or Screen Share session. The default is four characters.
**Session Time Limit**
Set a maximum time limit (in minutes) for how long a Screen Share session can last.
**Parent Page Origins to iFrame Visitor Viewer**
Used when launching the visitor viewer from an external system (such as Salesforce). Enter the URL where the join page and visitor viewer will be embedded (iframed).
**Parent Page Origins to iFrame Agent Viewer**
Used when launching the agent viewer from an external system (such as Salesforce). Enter the URL where the join page and agent viewer will be embedded (iframed).
**Agent Viewer Events Target Domains**
This setting determines which hostnames are allowed to receive session events (e.g., session ended) posted from the Glance Viewer. You may use a wildcard (*) to allow all hostnames, but for security reasons, it is strongly recommended to restrict this to trusted domains only.
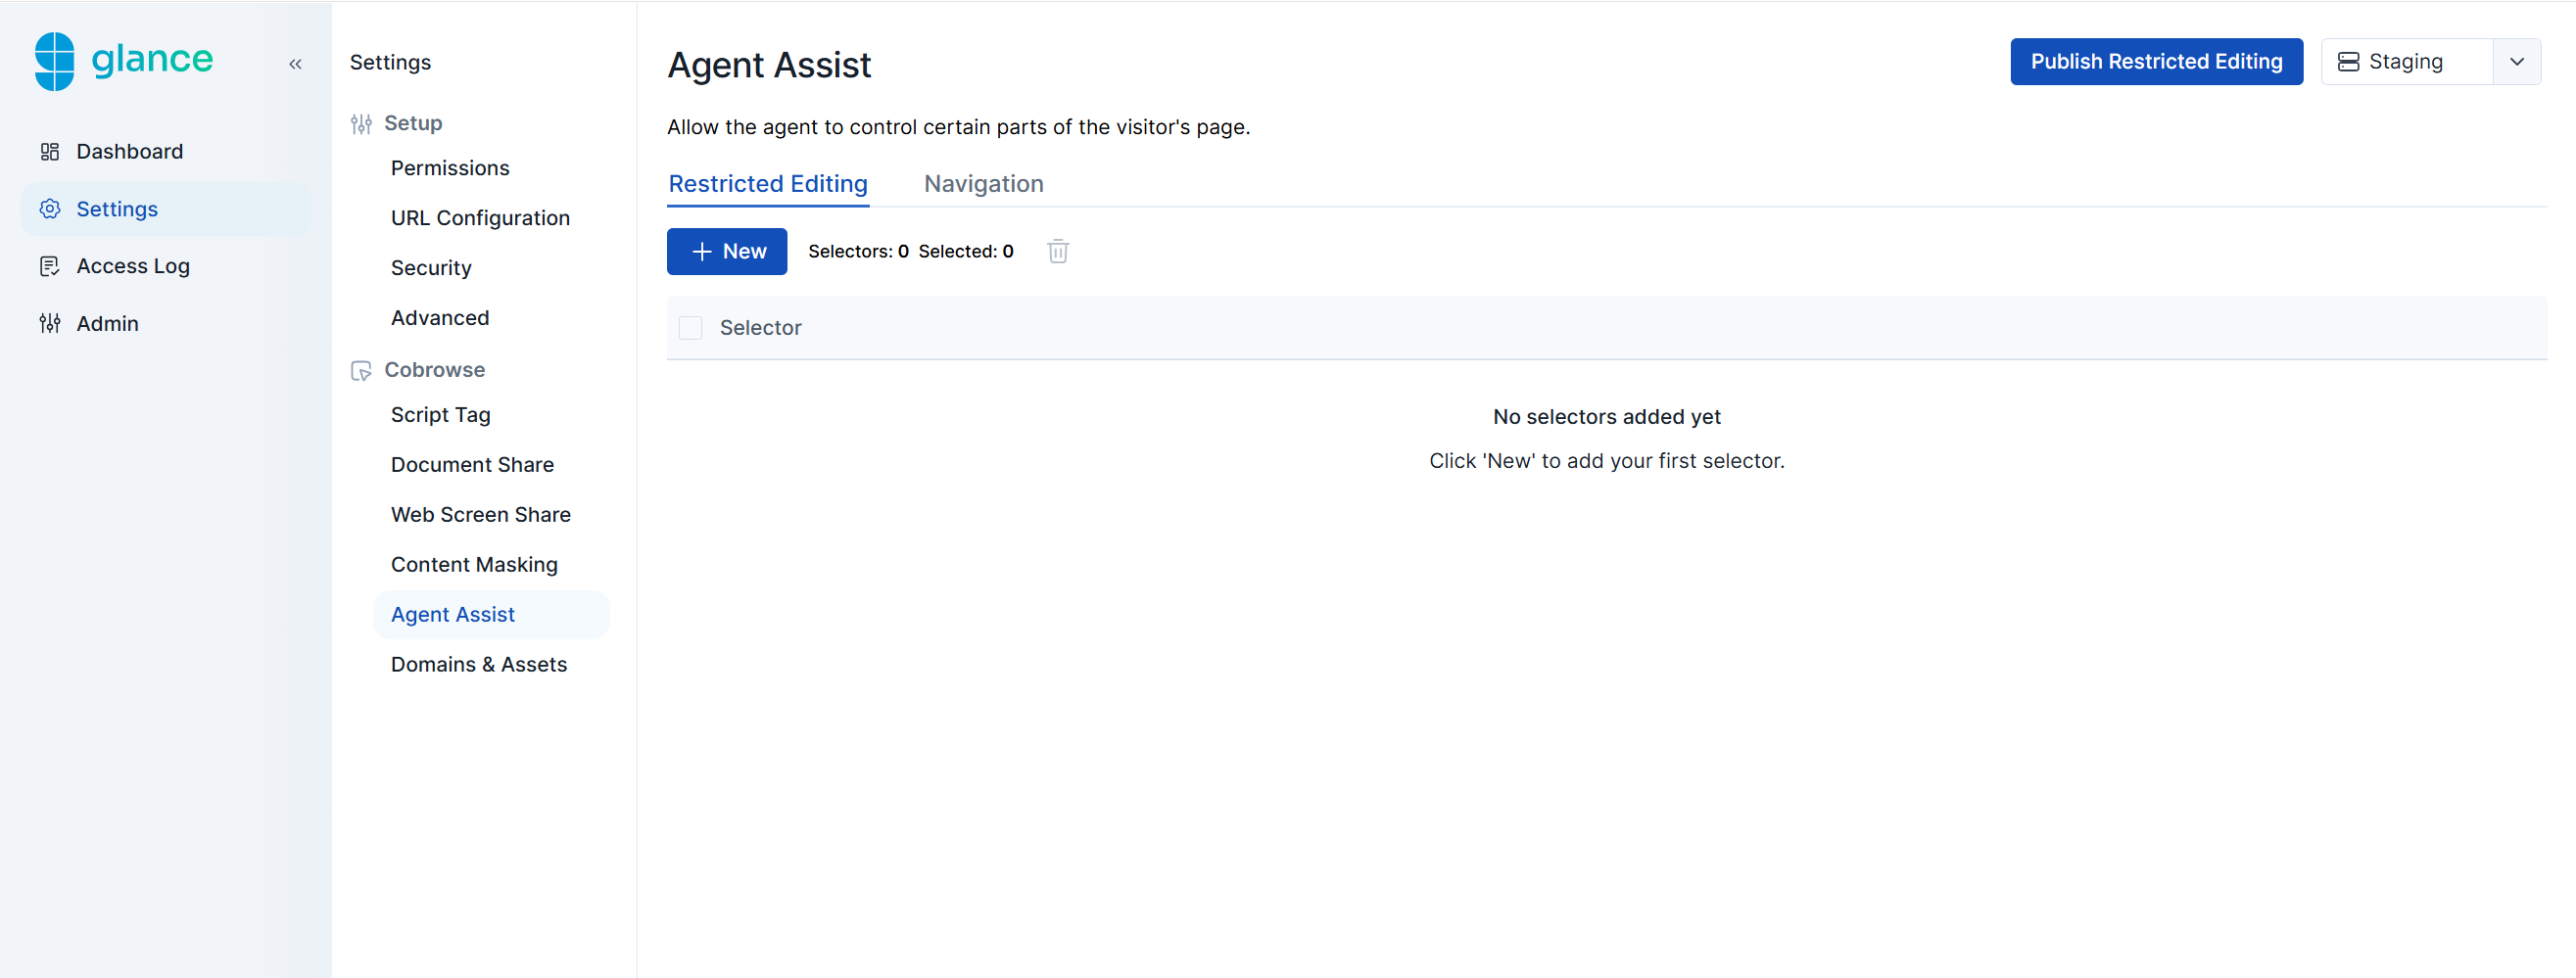 Restricted Editing provides the ability for the agent to request control of the visitor's browser interface during the session.
To configure which fields the agent can control during a Cobrowse session:
1. Click the **New** button.
2. In the **Selector** field, enter the CSS selectors of the UI elements you want agents to control.
3. Click **Create**.
4. Click the **Publish Restricted Editing** button in the upper-right corner.
## Navigation Assist
Restricted Editing provides the ability for the agent to request control of the visitor's browser interface during the session.
To configure which fields the agent can control during a Cobrowse session:
1. Click the **New** button.
2. In the **Selector** field, enter the CSS selectors of the UI elements you want agents to control.
3. Click **Create**.
4. Click the **Publish Restricted Editing** button in the upper-right corner.
## Navigation Assist
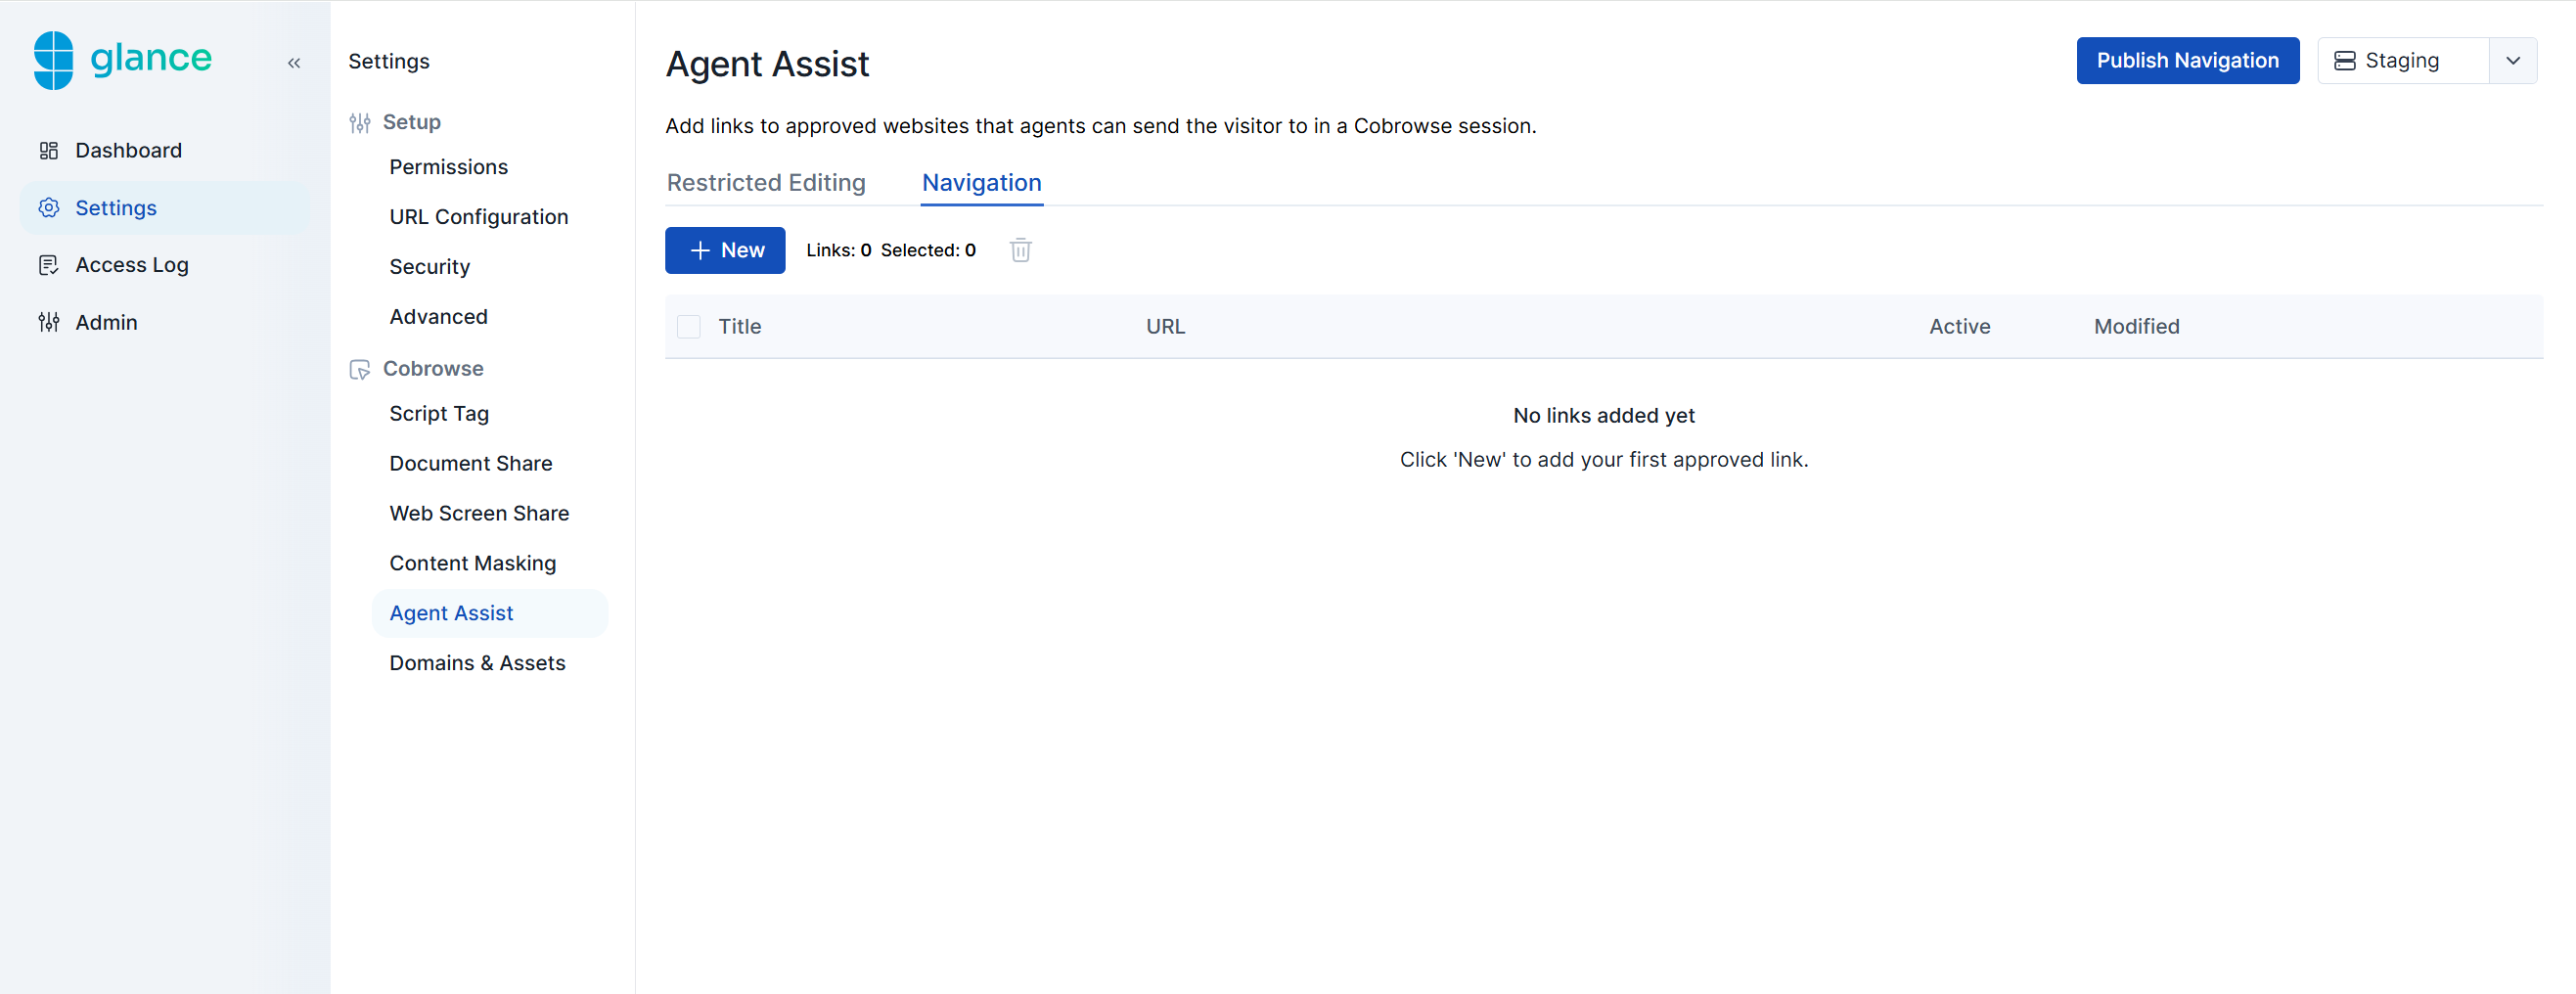 Navigation Assist allows the agent to navigate to a URL on the visitor's behalf by clicking on a bookmark within the agent viewer.
To configure which URLs the agent can navigate to during a Cobrowse session:
1. Click the **New** button.
2. Enter a URL Title and the website URL, then select the **Active** checkbox.
3. Click **Create**.
4. Click the **Publish Navigation** button in the upper-right corner.
Navigation Assist allows the agent to navigate to a URL on the visitor's behalf by clicking on a bookmark within the agent viewer.
To configure which URLs the agent can navigate to during a Cobrowse session:
1. Click the **New** button.
2. Enter a URL Title and the website URL, then select the **Active** checkbox.
3. Click **Create**.
4. Click the **Publish Navigation** button in the upper-right corner.
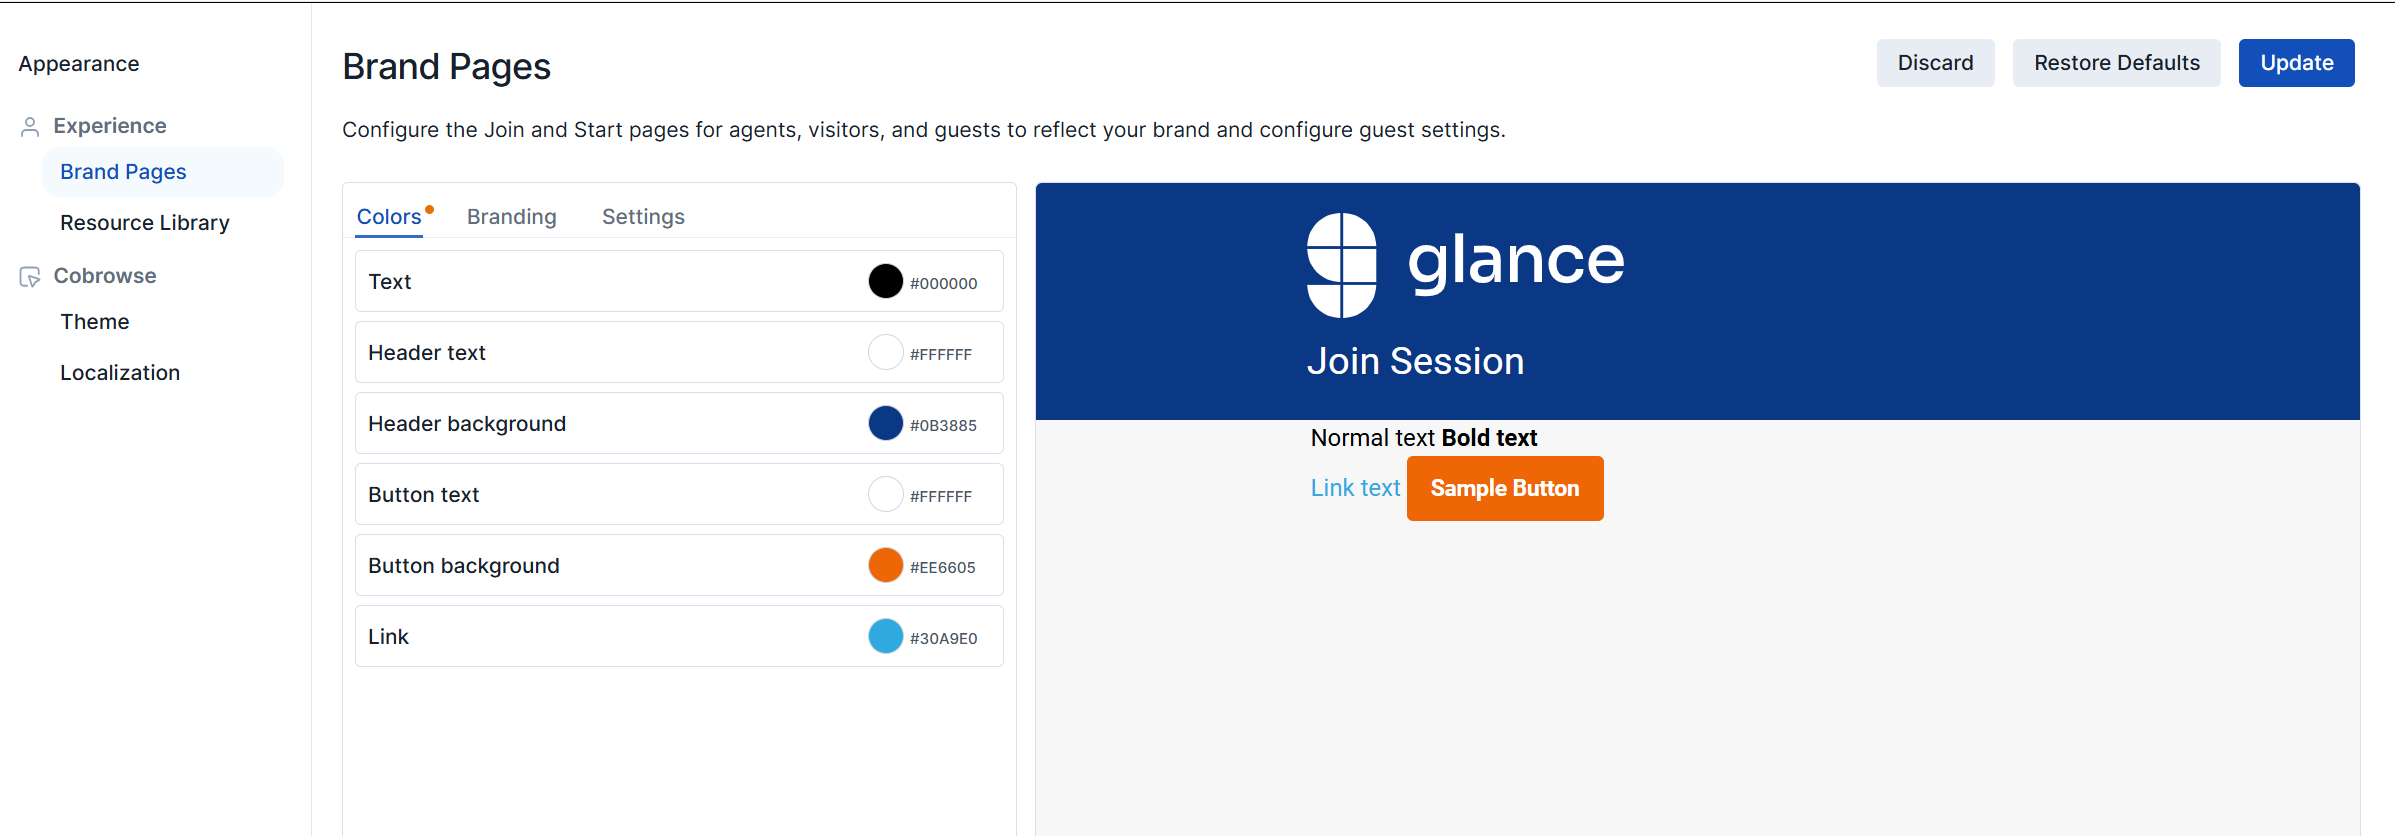 You can customize the color of the following UI elements by selecting the hex value next to the element:
* **Text** - Updates the text color found directly beneath the header.
* **Header text** - Updates the text color found within the header.
* **Header background** - Updates the background color of the header.
* **Button text** - Updates the color of the text within the button.
* **Button background** - Updates the background color of the button.
* **Link** - Updates the link color.
### Branding
You can customize the color of the following UI elements by selecting the hex value next to the element:
* **Text** - Updates the text color found directly beneath the header.
* **Header text** - Updates the text color found within the header.
* **Header background** - Updates the background color of the header.
* **Button text** - Updates the color of the text within the button.
* **Button background** - Updates the background color of the button.
* **Link** - Updates the link color.
### Branding
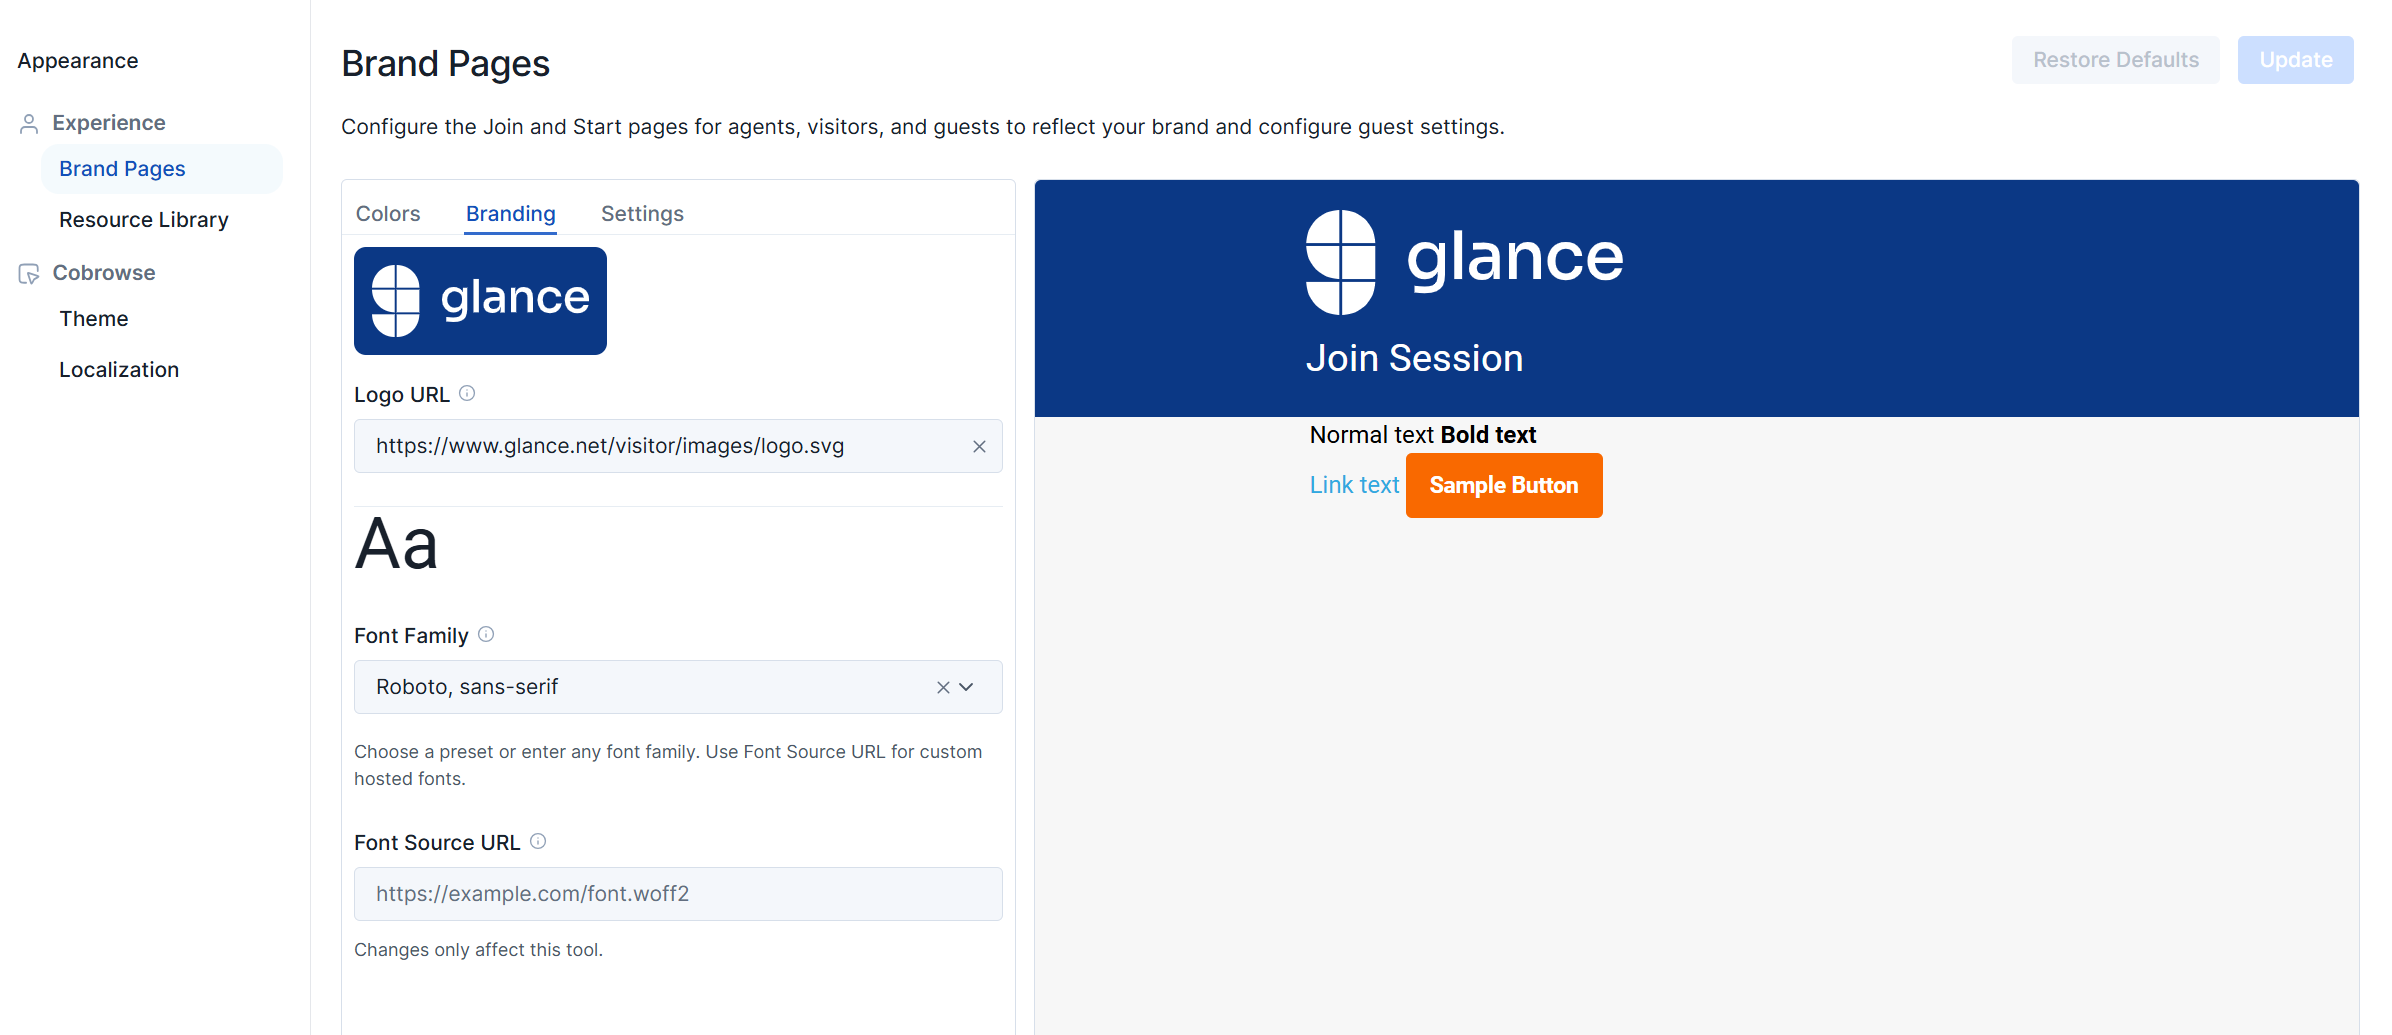 You can customize the Logo and Font used on the **Branding** tab.
* **Logo URL** - Enter an image URL to update the logo displayed in the header.
* **Font Family** - Select a font from the dropdown menu to update the font.
* **Font Source URL** - Enter a font URL to use a custom font.
### Settings
You can customize the Logo and Font used on the **Branding** tab.
* **Logo URL** - Enter an image URL to update the logo displayed in the header.
* **Font Family** - Select a font from the dropdown menu to update the font.
* **Font Source URL** - Enter a font URL to use a custom font.
### Settings
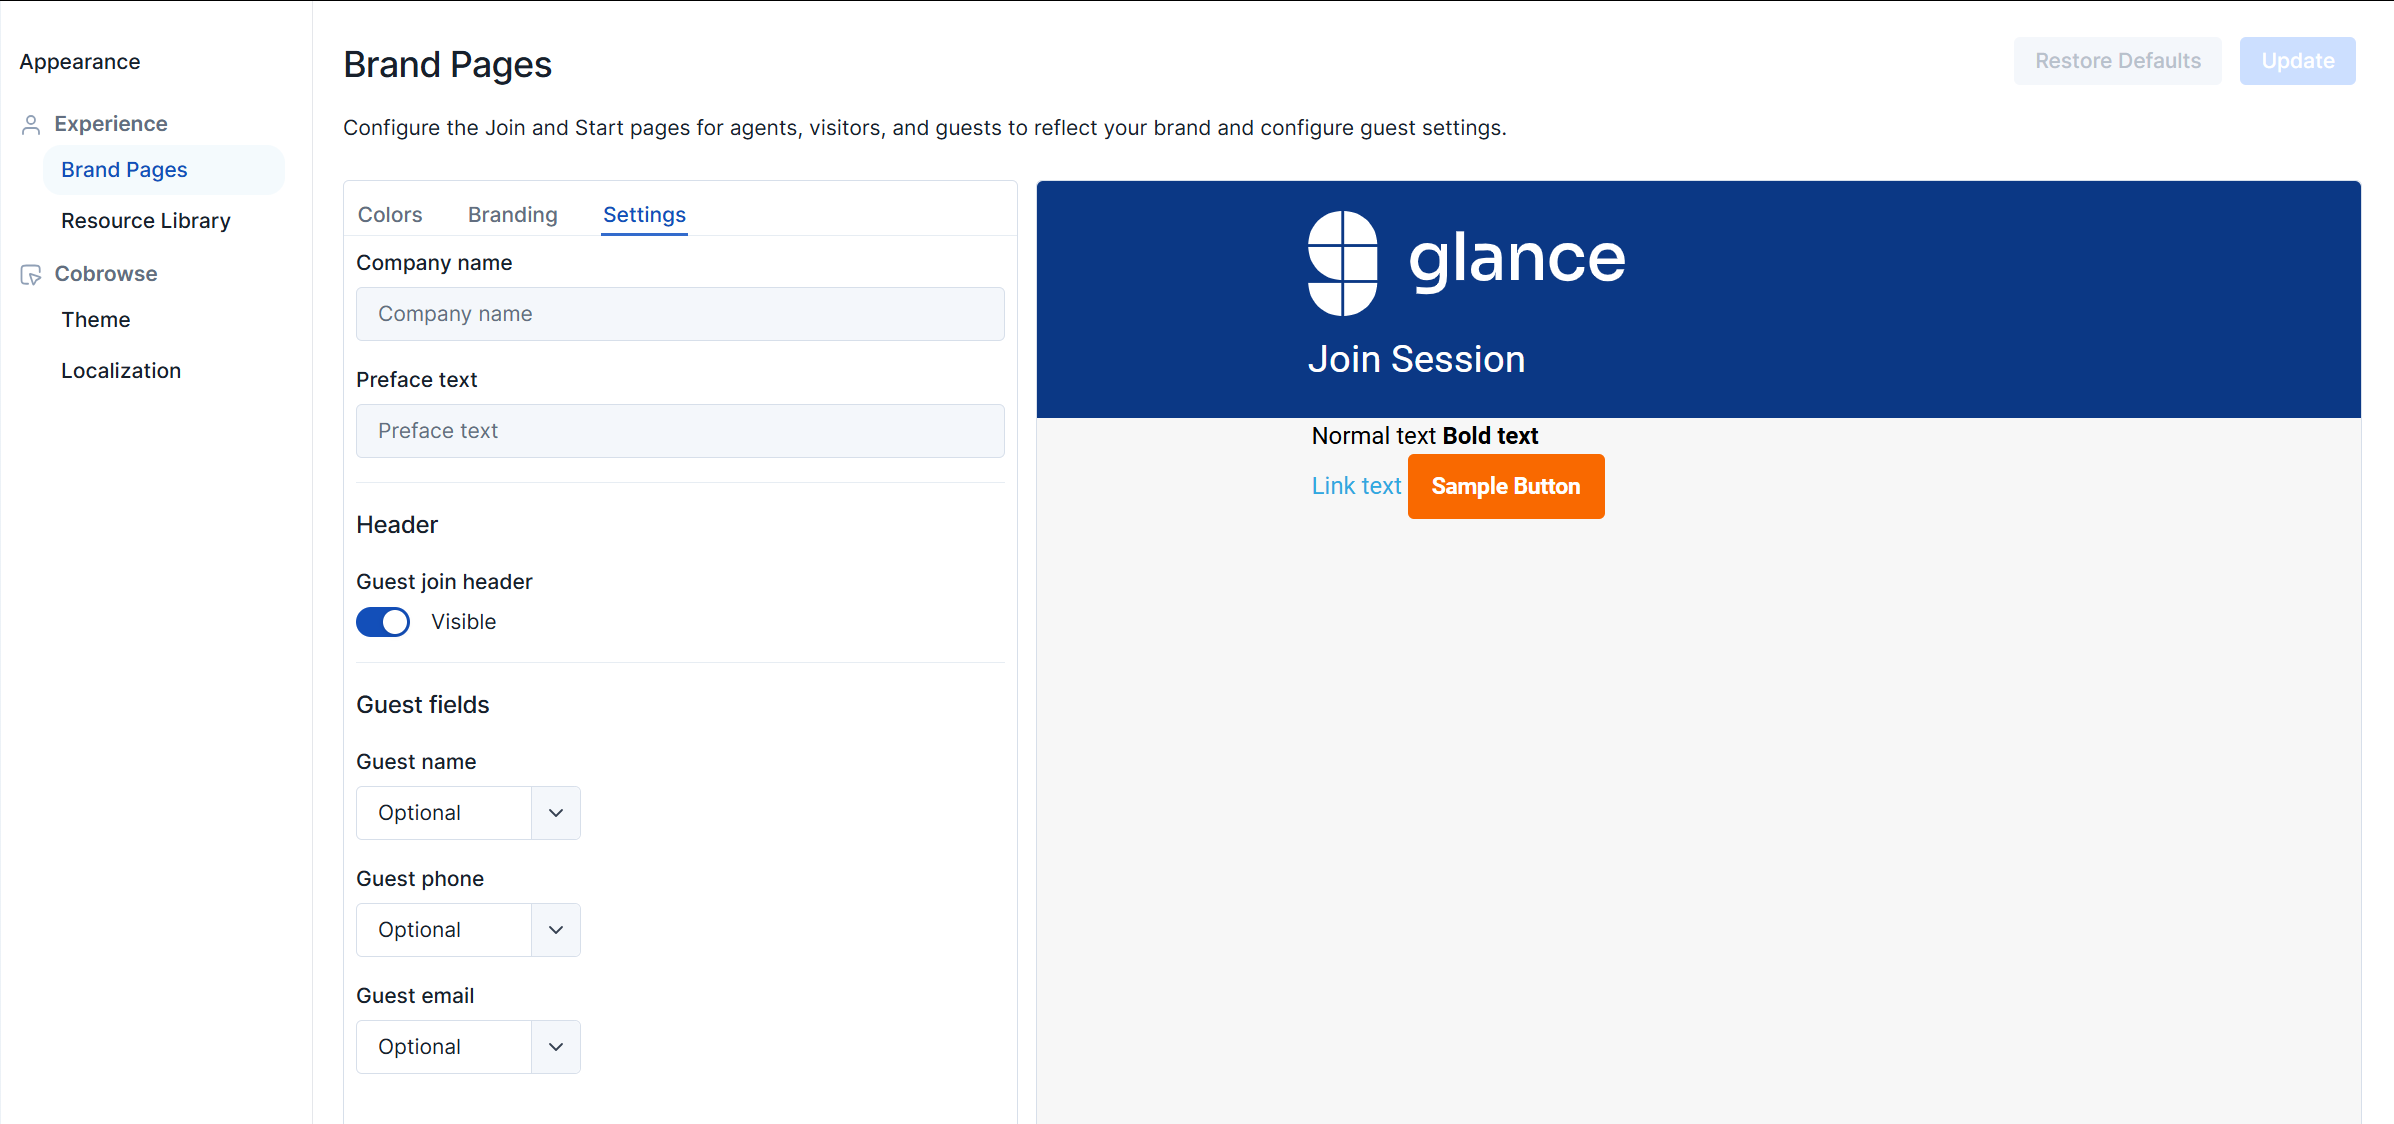 You can further customize the join page and the guest join page from the **Settings** tab.
* **Preface text** - Add an additional row of text directly beneath the header.
* **Guest join header** - Displays the header on the guest join page if enabled.
* **Guest field** - Select from the dropdown to determine what information is required when a guest joins. Options include Optional, Hidden, and Required.
* **Guest name** - Require the guest to enter their name when joining.
* **Guest phone** - Require the guest to enter their phone number when joining.
* **Guest email** - Require the guest to enter their email address when joining.
## Resource Library
You can further customize the join page and the guest join page from the **Settings** tab.
* **Preface text** - Add an additional row of text directly beneath the header.
* **Guest join header** - Displays the header on the guest join page if enabled.
* **Guest field** - Select from the dropdown to determine what information is required when a guest joins. Options include Optional, Hidden, and Required.
* **Guest name** - Require the guest to enter their name when joining.
* **Guest phone** - Require the guest to enter their phone number when joining.
* **Guest email** - Require the guest to enter their email address when joining.
## Resource Library
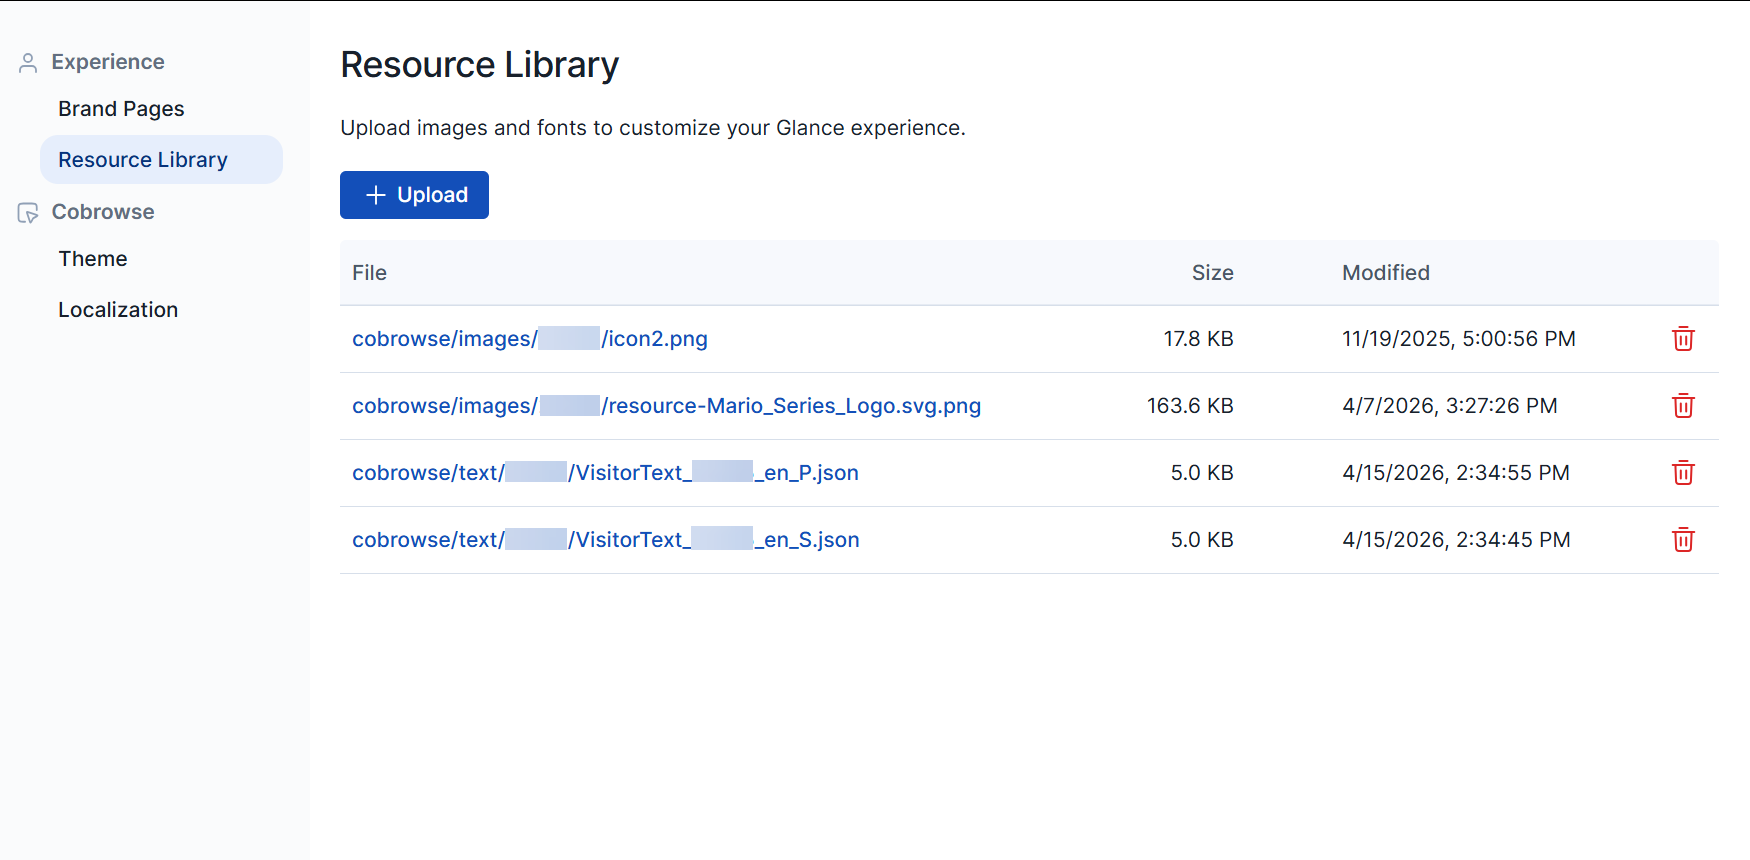 Upload and manage image and font files in the **Resource Library**. Once uploaded, they can be referenced throughout the **Appearance** section.
## Theme
The **Theme** page is found within the **Cobrowse** section and allows administrators to customize the widgets that are displayed during a Cobrowse session.
### Colors
Upload and manage image and font files in the **Resource Library**. Once uploaded, they can be referenced throughout the **Appearance** section.
## Theme
The **Theme** page is found within the **Cobrowse** section and allows administrators to customize the widgets that are displayed during a Cobrowse session.
### Colors
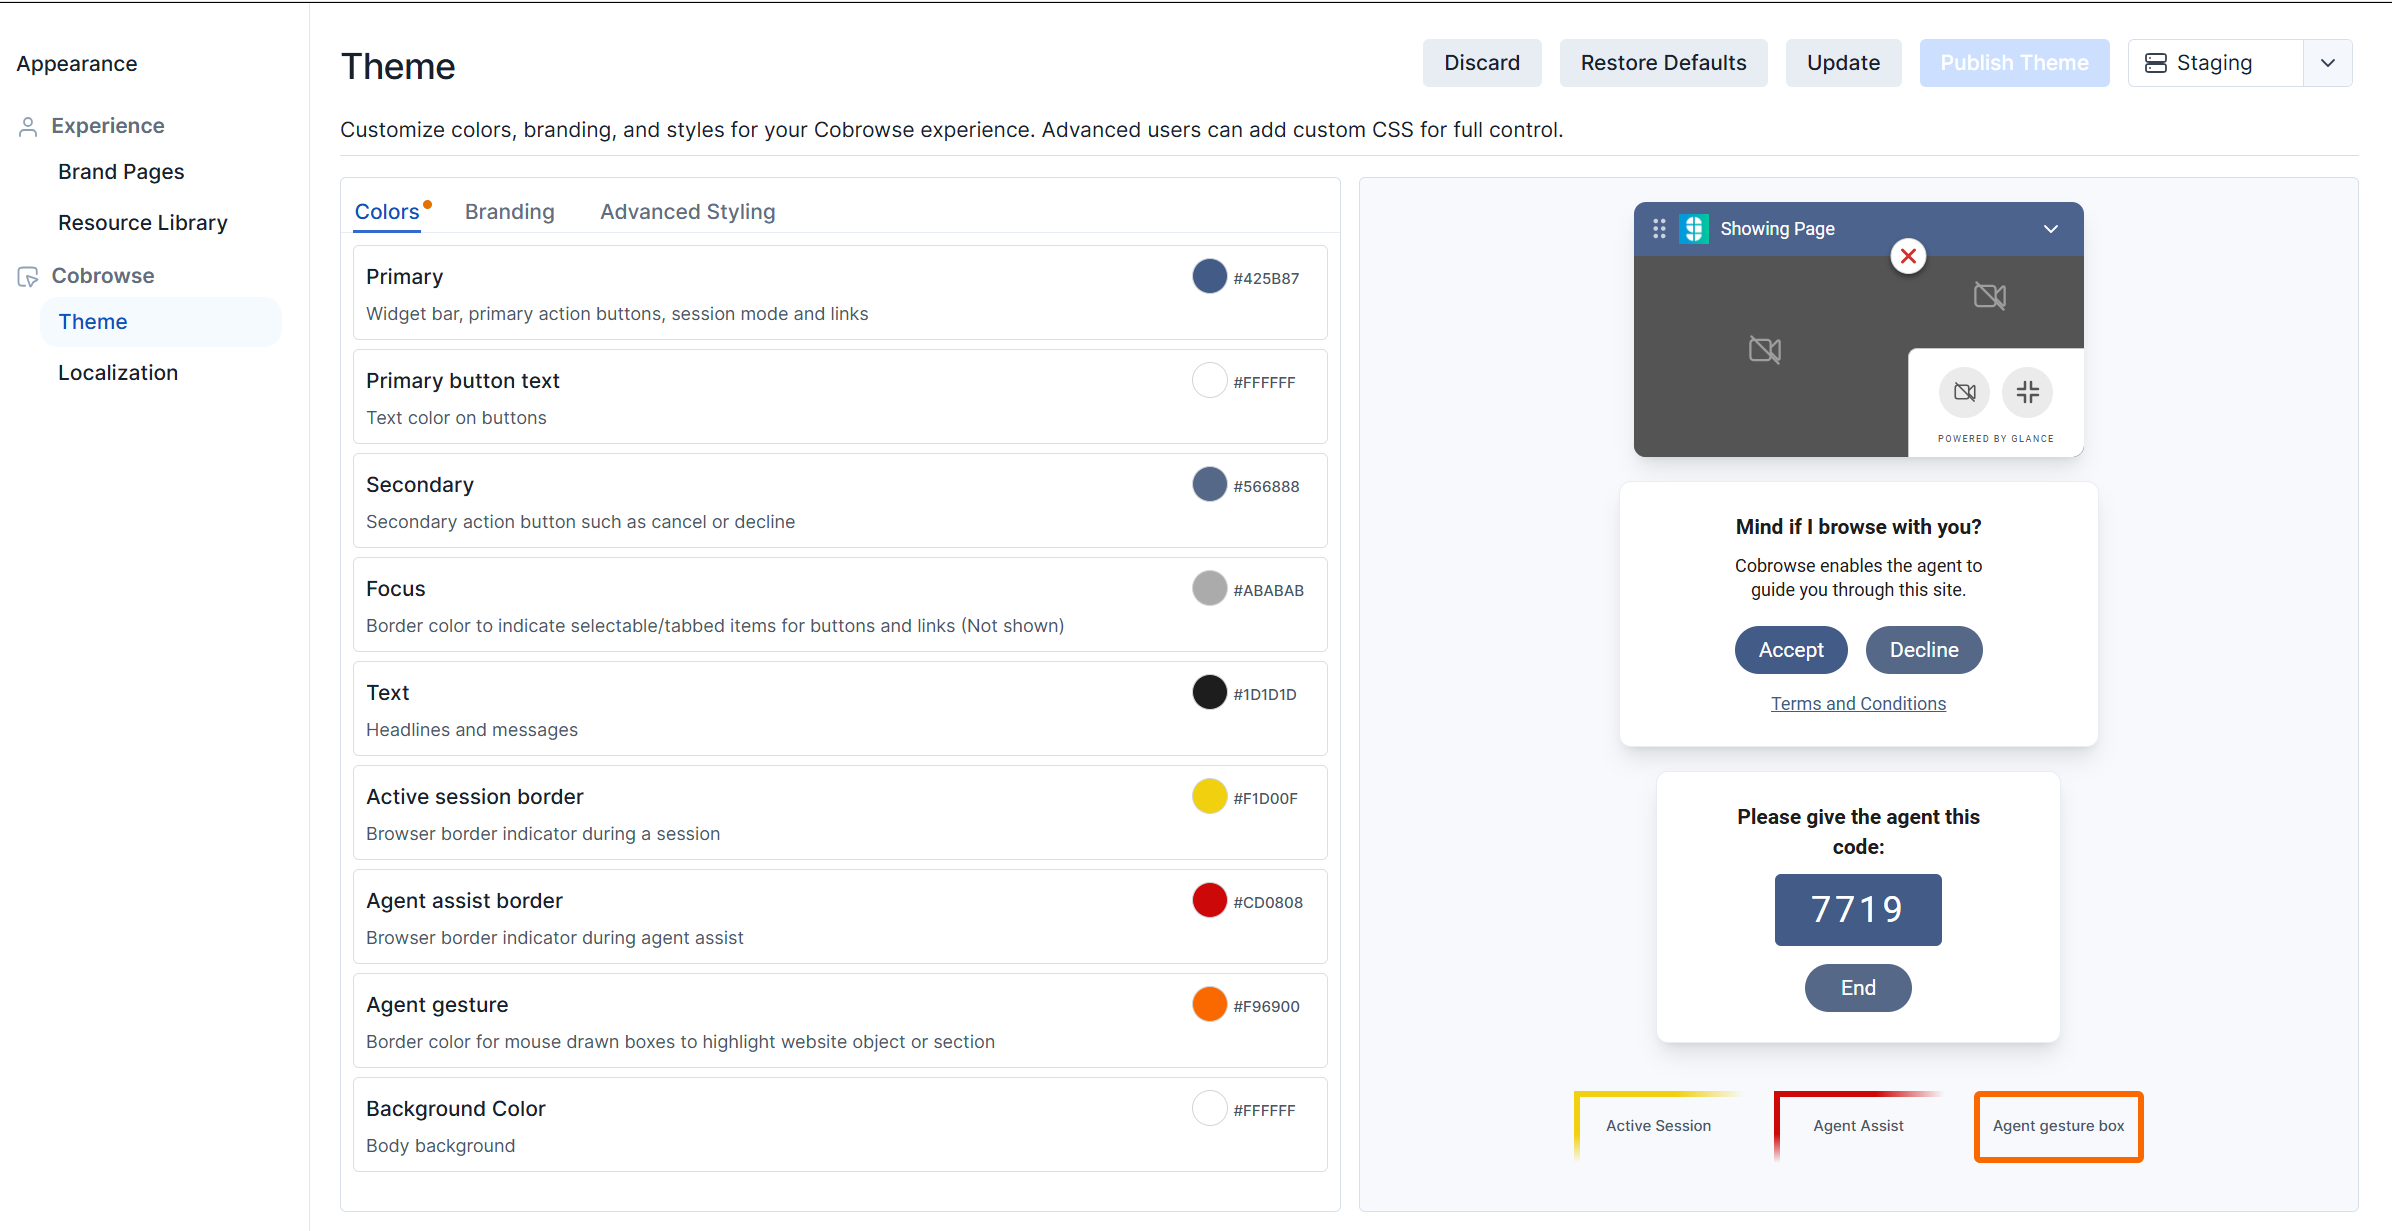 Choose the colors for the widget bar, buttons, borders, backgrounds, and gesturing. You can customize the color of the following UI elements by selecting the hex value next to the element:
* **Primary** - The primary background color used in the widget bar, action buttons, session mode, and links.
* **Brand Color** - The color used on buttons, the session code, and headers.
* **Secondary** - The background color for secondary buttons such as decline, cancel, or end.
* **Focus** - The border color used to indicate selectable or tabbed items for buttons and links.
* **Text** - The primary text color used within widgets.
* **Active session border** - The border color of a browser being shared during a session.
* **Agent assist border** - The border color of a browser being shared while agent assist is active.
* **Agent gesture** - The border color of the boxes drawn by an agent during gesturing.
* **Background color** - The background color of the widgets.
### Branding
Choose the colors for the widget bar, buttons, borders, backgrounds, and gesturing. You can customize the color of the following UI elements by selecting the hex value next to the element:
* **Primary** - The primary background color used in the widget bar, action buttons, session mode, and links.
* **Brand Color** - The color used on buttons, the session code, and headers.
* **Secondary** - The background color for secondary buttons such as decline, cancel, or end.
* **Focus** - The border color used to indicate selectable or tabbed items for buttons and links.
* **Text** - The primary text color used within widgets.
* **Active session border** - The border color of a browser being shared during a session.
* **Agent assist border** - The border color of a browser being shared while agent assist is active.
* **Agent gesture** - The border color of the boxes drawn by an agent during gesturing.
* **Background color** - The background color of the widgets.
### Branding
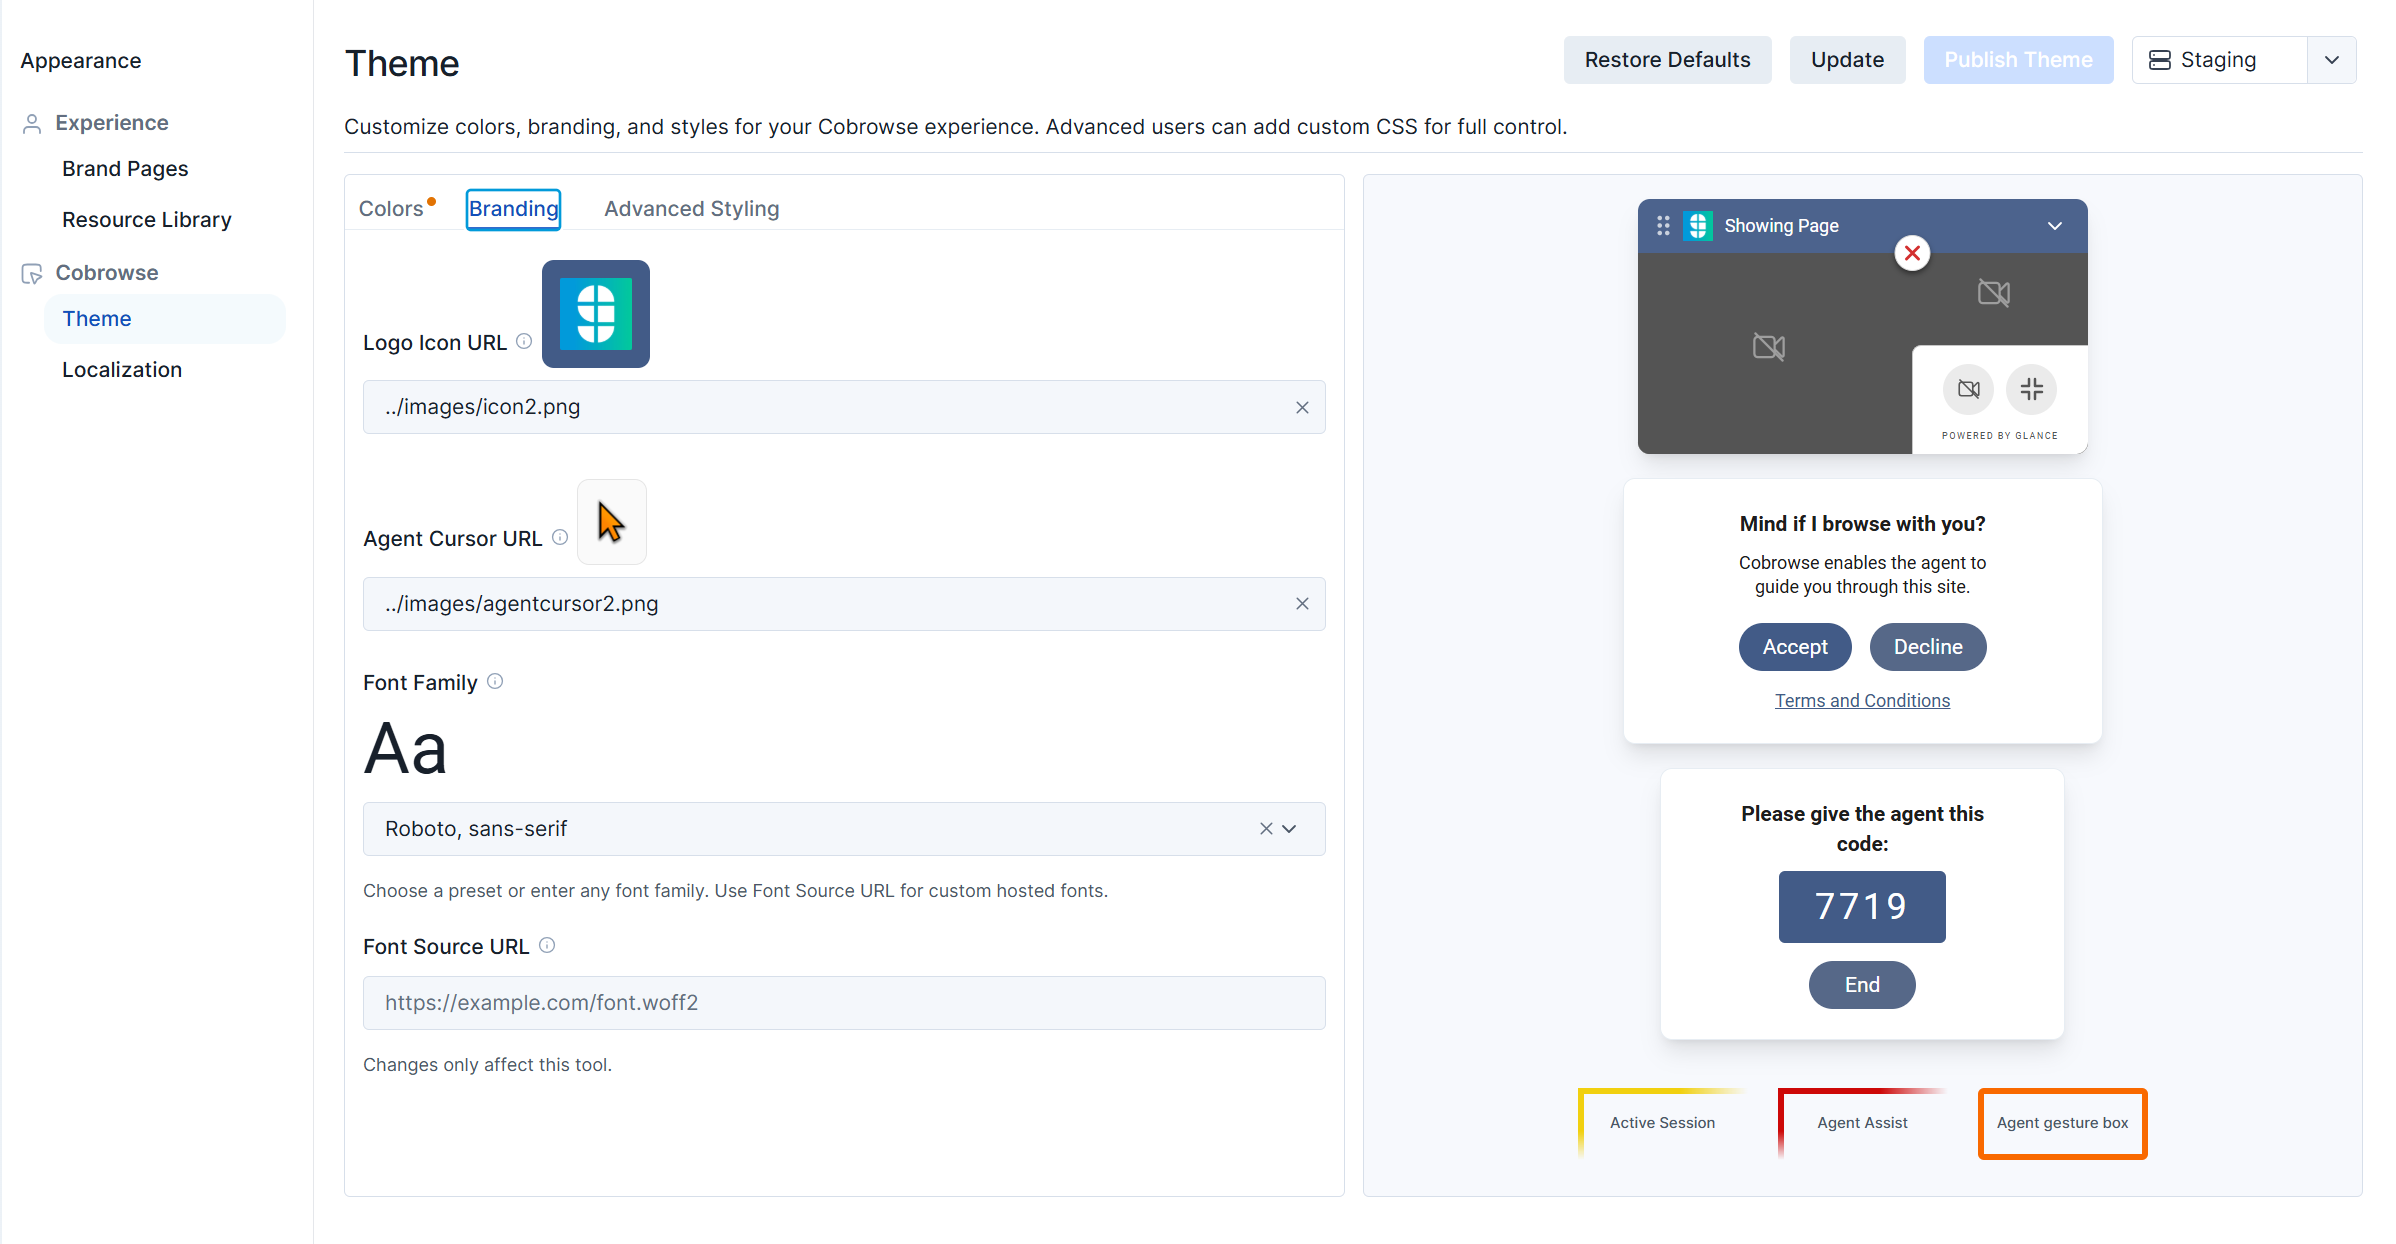 The **Branding** section allows you to customize the logo and font displayed on the modals. You can also customize the cursor display for the agent.
* **Logo icon** - Enter the URL where the logo icon is stored. The image must be in SVG or PNG format. This logo will be displayed on the Showing Page widget.
* **Agent Cursor** - Enter a URL where the cursor icon is stored. The image must be in SVG or PNG format.
* **Font Family** - Select a font from the dropdown menu to update the font.
* **Font Source URL** - Enter a font URL to use a custom font.
### Advanced Styling
The **Branding** section allows you to customize the logo and font displayed on the modals. You can also customize the cursor display for the agent.
* **Logo icon** - Enter the URL where the logo icon is stored. The image must be in SVG or PNG format. This logo will be displayed on the Showing Page widget.
* **Agent Cursor** - Enter a URL where the cursor icon is stored. The image must be in SVG or PNG format.
* **Font Family** - Select a font from the dropdown menu to update the font.
* **Font Source URL** - Enter a font URL to use a custom font.
### Advanced Styling
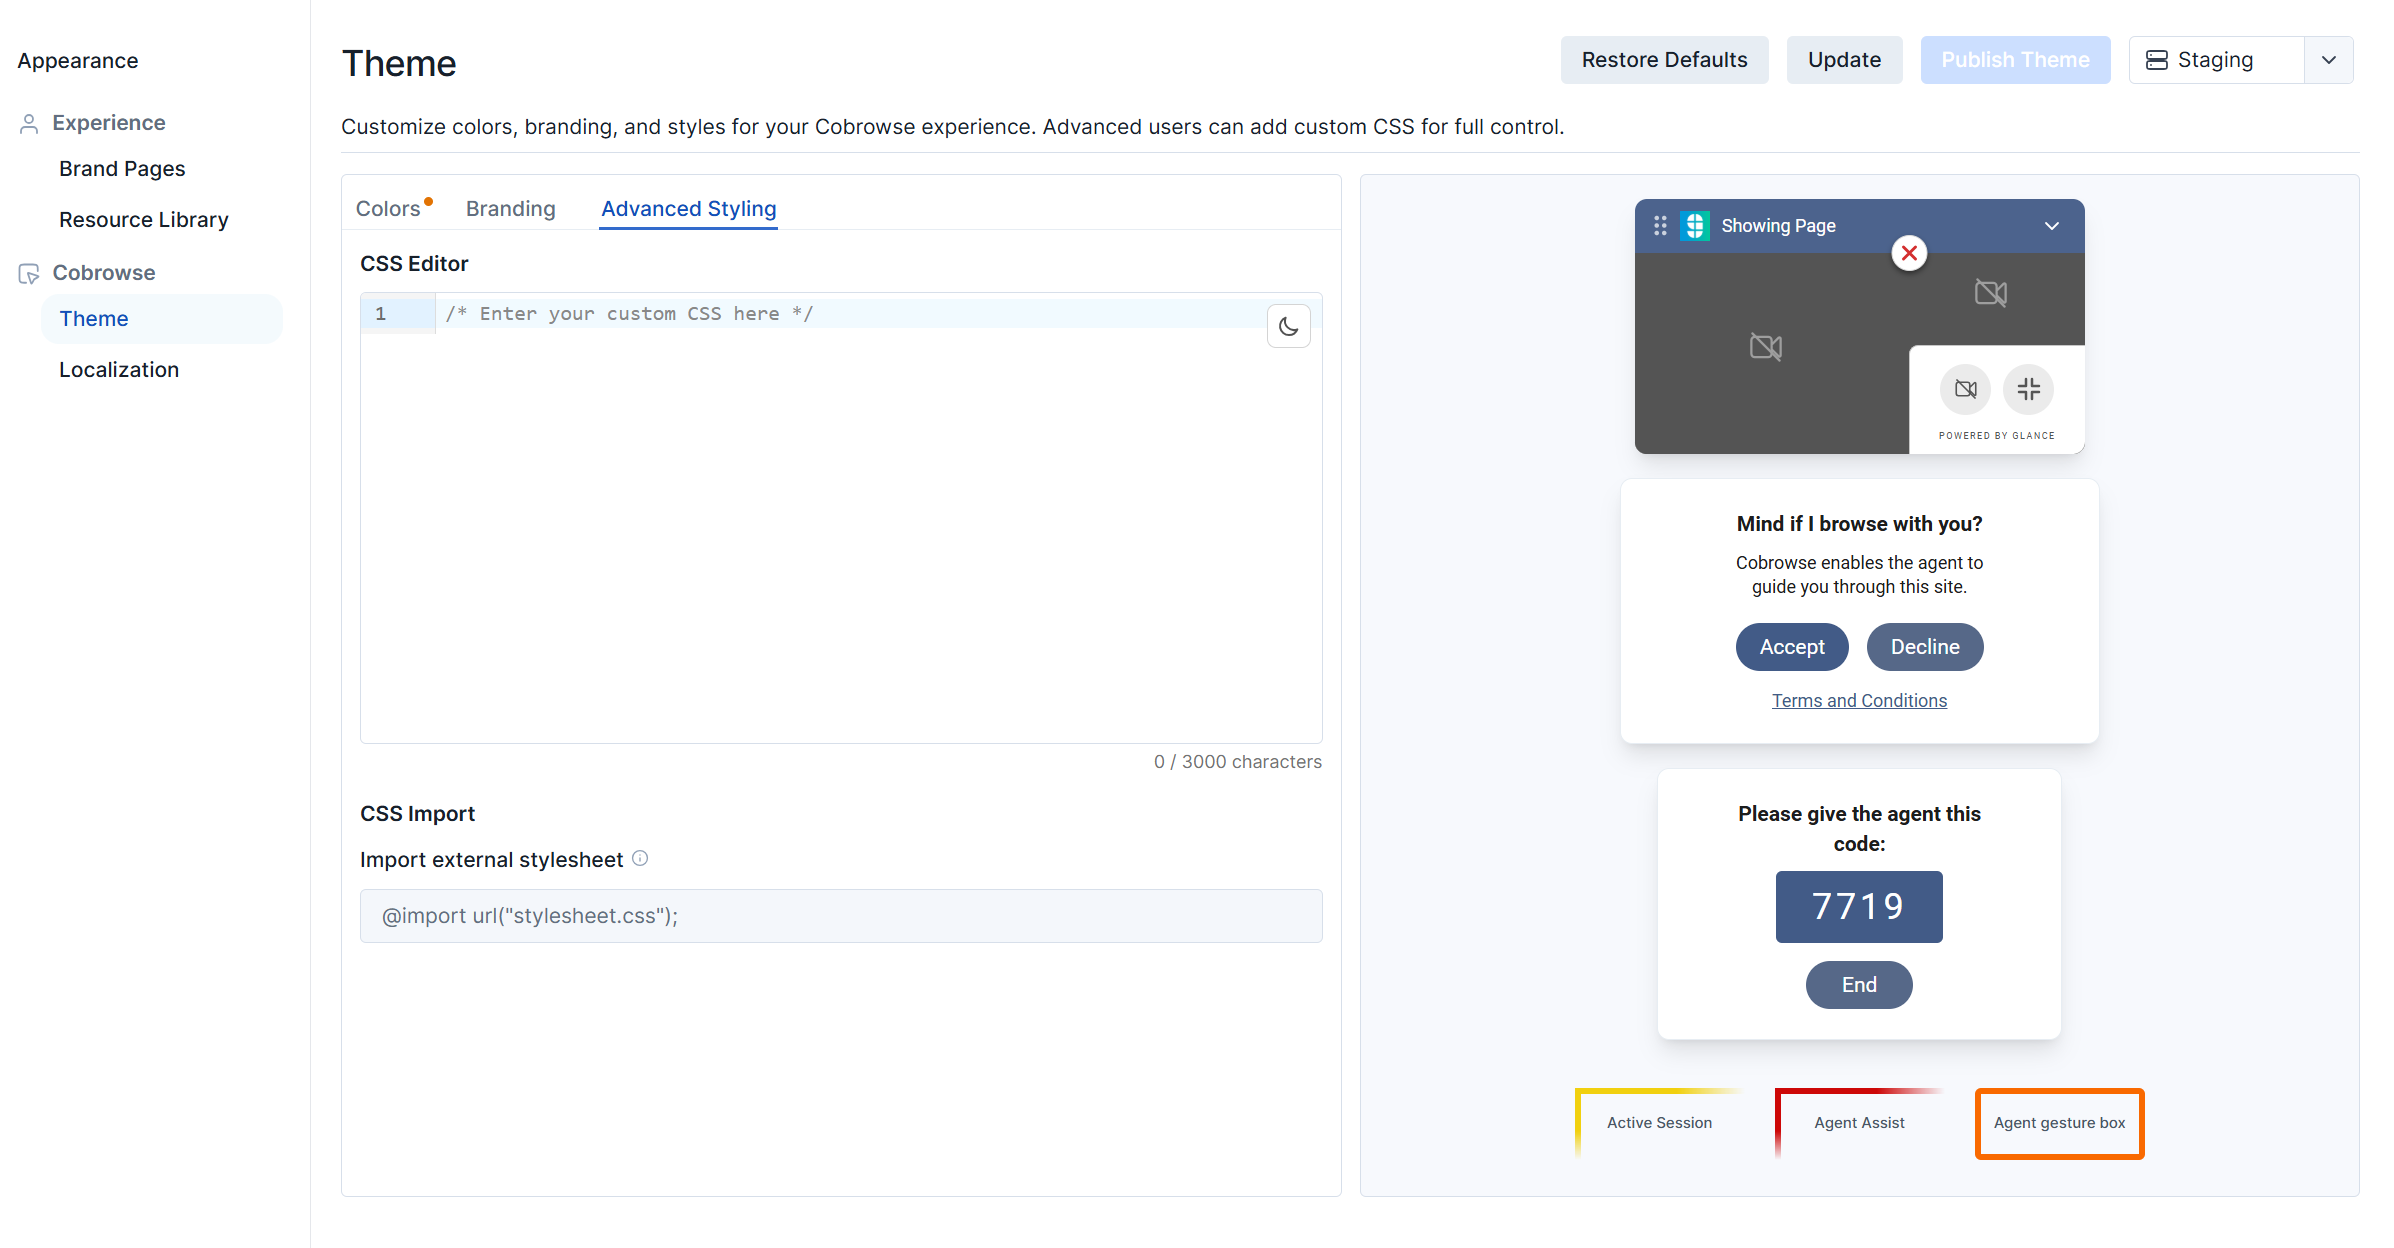 The **Advanced Styling** section allows you to modify widget styles and positions. CSS files can be imported using the **CSS Imports** section, or CSS can be modified directly using the **CSS Editor** section.
## Localization
The **Localization** page is found within the **Cobrowse** section and allows administrators to designate the languages and text used during a Cobrowse session.
### Languages
The **Languages** section allows you to customize which languages are enabled within the widget. You are also able to make bulk updates to the text used within the modals by updating JSON files. The following languages are supported by Glance:
* English
* French
* French Canadian
* German
* Italian
* Japanese
* Portuguese Brazilian
* Spanish
* Spanish Mexican
* Spanish US
**Enabled Language**
Select the **Enabled** option next to each language that you wish to support.
**Default Language**
Click the **Default** option next to a language to set it as the default language.
#### Language Hierarchy
When the Cobrowse session first starts, Glance will check the `lang` attribute on the `` tag of the page.
1. If the `lang` attribute is set to one of the enabled languages, that language will be used.
2. If there is no `lang` attribute, or the `lang` attribute specifies a language not enabled for Cobrowse, Glance checks the language setting in the visitor's browser. If the browser is set to a language enabled for Cobrowse, that language will be used.
3. If neither the language specified by the `lang` attribute nor the visitor's browser is an exact match of any of the languages enabled for the group, the Cobrowse widget will display in an enabled language (if there are any) that shares the same main language code. It bases this first on the HTML language attribute, then the browser language setting. For example, if the visitor's browser is set for Spanish (`es`) but the group has only enabled Mexican Spanish (`es-mx`), the widget will display using the strings set for Mexican Spanish, and vice versa.
4. If none of the above are applicable, the customer's default language will be used.
#### Download a Language File
A language file can be downloaded in order to make bulk updates to the text within the modals. Complete the following steps to download, edit, and re-upload a language file:
1. Click the **ellipsis (...)** next to the desired language and choose **Download File**.
2. The file will download through your browser.
The **Advanced Styling** section allows you to modify widget styles and positions. CSS files can be imported using the **CSS Imports** section, or CSS can be modified directly using the **CSS Editor** section.
## Localization
The **Localization** page is found within the **Cobrowse** section and allows administrators to designate the languages and text used during a Cobrowse session.
### Languages
The **Languages** section allows you to customize which languages are enabled within the widget. You are also able to make bulk updates to the text used within the modals by updating JSON files. The following languages are supported by Glance:
* English
* French
* French Canadian
* German
* Italian
* Japanese
* Portuguese Brazilian
* Spanish
* Spanish Mexican
* Spanish US
**Enabled Language**
Select the **Enabled** option next to each language that you wish to support.
**Default Language**
Click the **Default** option next to a language to set it as the default language.
#### Language Hierarchy
When the Cobrowse session first starts, Glance will check the `lang` attribute on the `` tag of the page.
1. If the `lang` attribute is set to one of the enabled languages, that language will be used.
2. If there is no `lang` attribute, or the `lang` attribute specifies a language not enabled for Cobrowse, Glance checks the language setting in the visitor's browser. If the browser is set to a language enabled for Cobrowse, that language will be used.
3. If neither the language specified by the `lang` attribute nor the visitor's browser is an exact match of any of the languages enabled for the group, the Cobrowse widget will display in an enabled language (if there are any) that shares the same main language code. It bases this first on the HTML language attribute, then the browser language setting. For example, if the visitor's browser is set for Spanish (`es`) but the group has only enabled Mexican Spanish (`es-mx`), the widget will display using the strings set for Mexican Spanish, and vice versa.
4. If none of the above are applicable, the customer's default language will be used.
#### Download a Language File
A language file can be downloaded in order to make bulk updates to the text within the modals. Complete the following steps to download, edit, and re-upload a language file:
1. Click the **ellipsis (...)** next to the desired language and choose **Download File**.
2. The file will download through your browser. 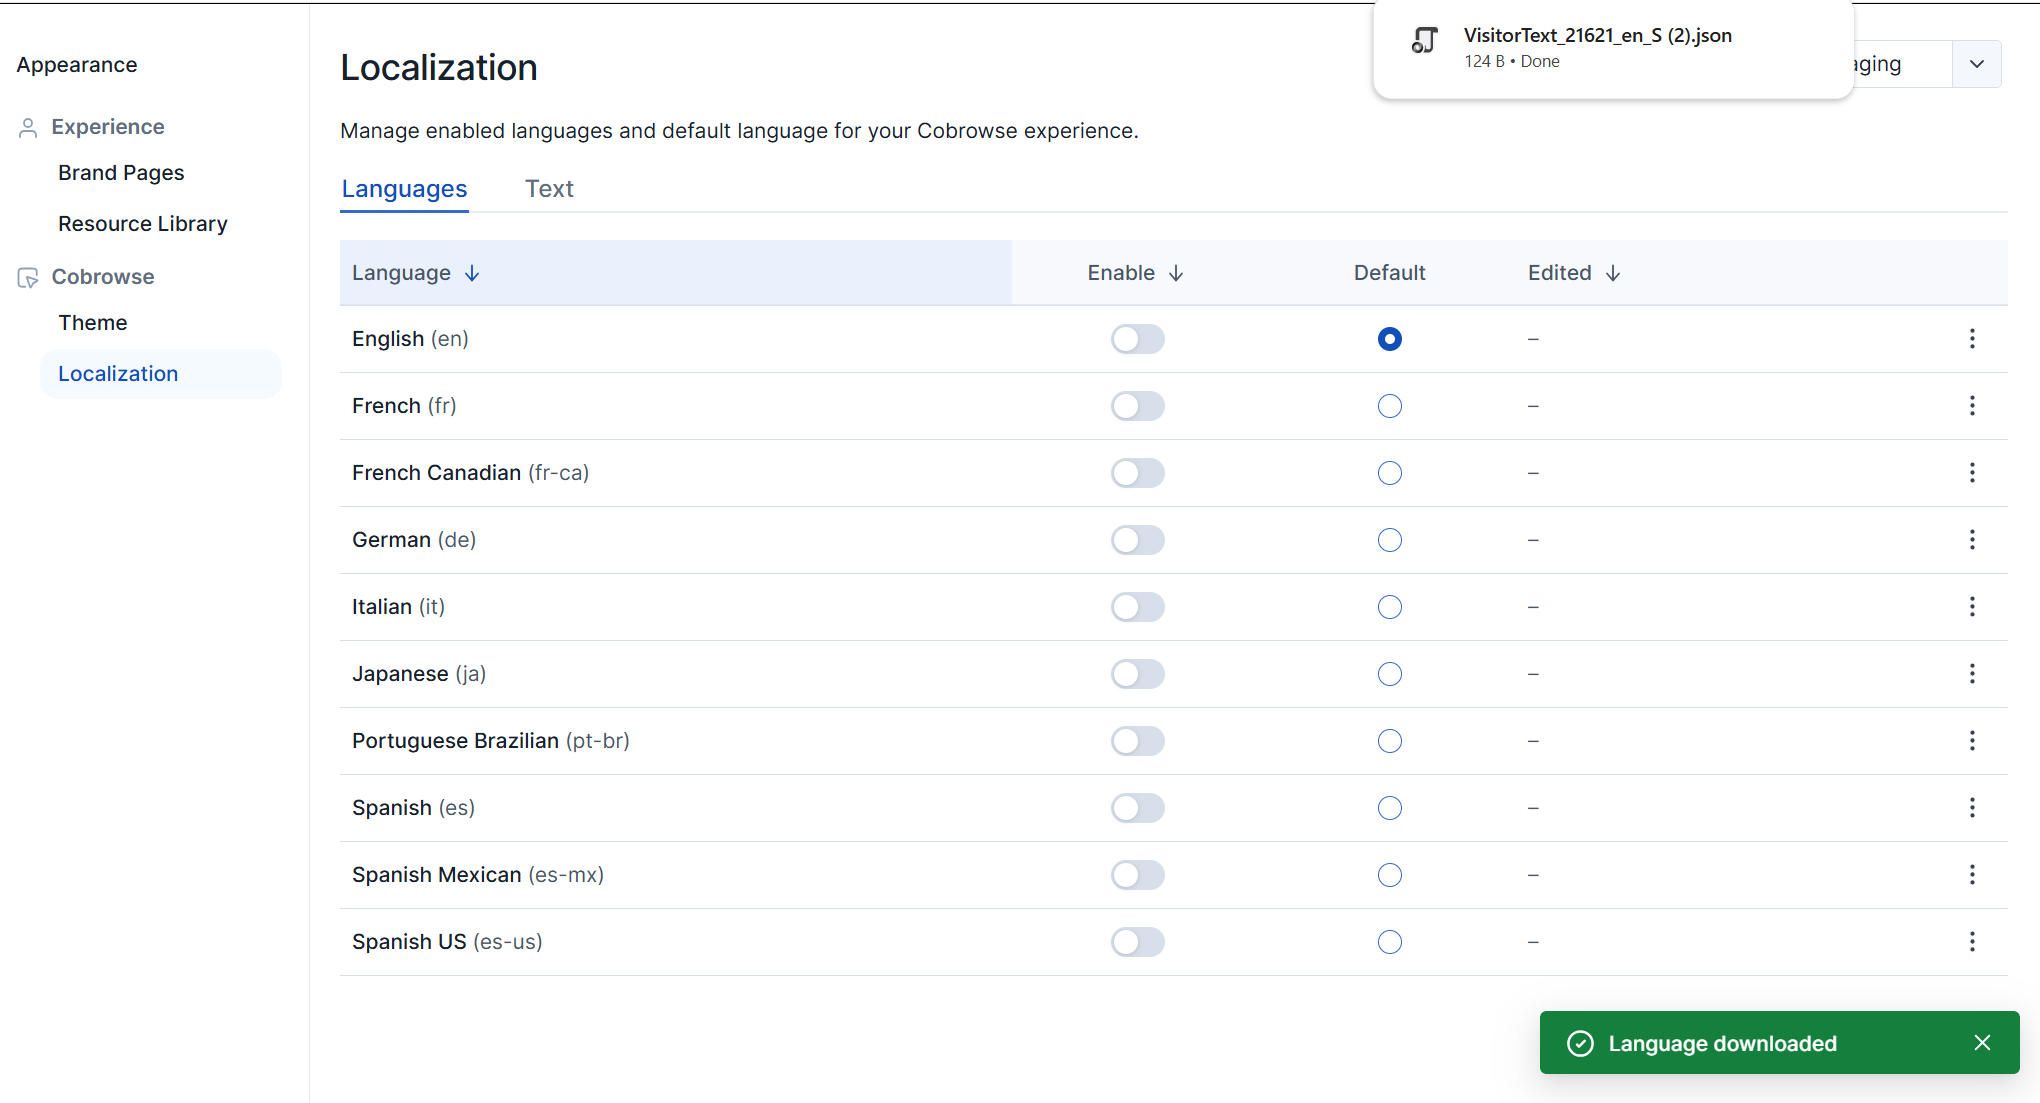 3. Save the file to your local drive and open it using a text editor.
4. Make the desired changes to the JSON file.
5. Save the file as `VisitorText_[groupid]_language_S.json` (i.e., English Language = `VisitorText_12345_en_S.json`) when your changes are complete.
3. Save the file to your local drive and open it using a text editor.
4. Make the desired changes to the JSON file.
5. Save the file as `VisitorText_[groupid]_language_S.json` (i.e., English Language = `VisitorText_12345_en_S.json`) when your changes are complete. 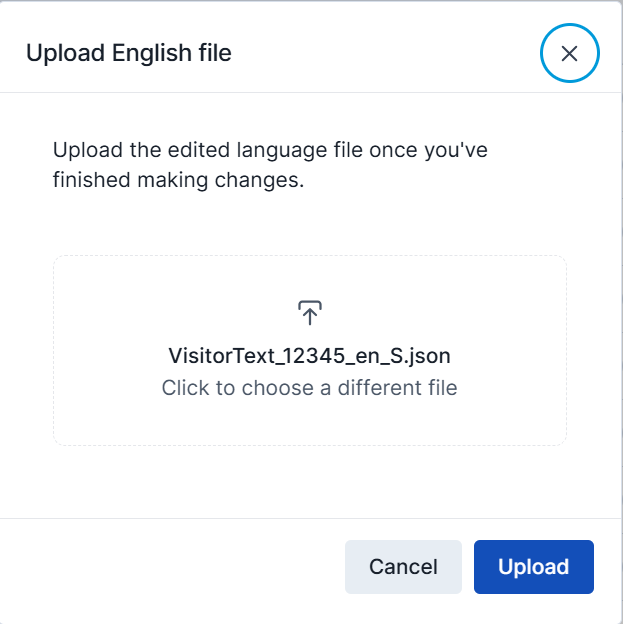 ### Text
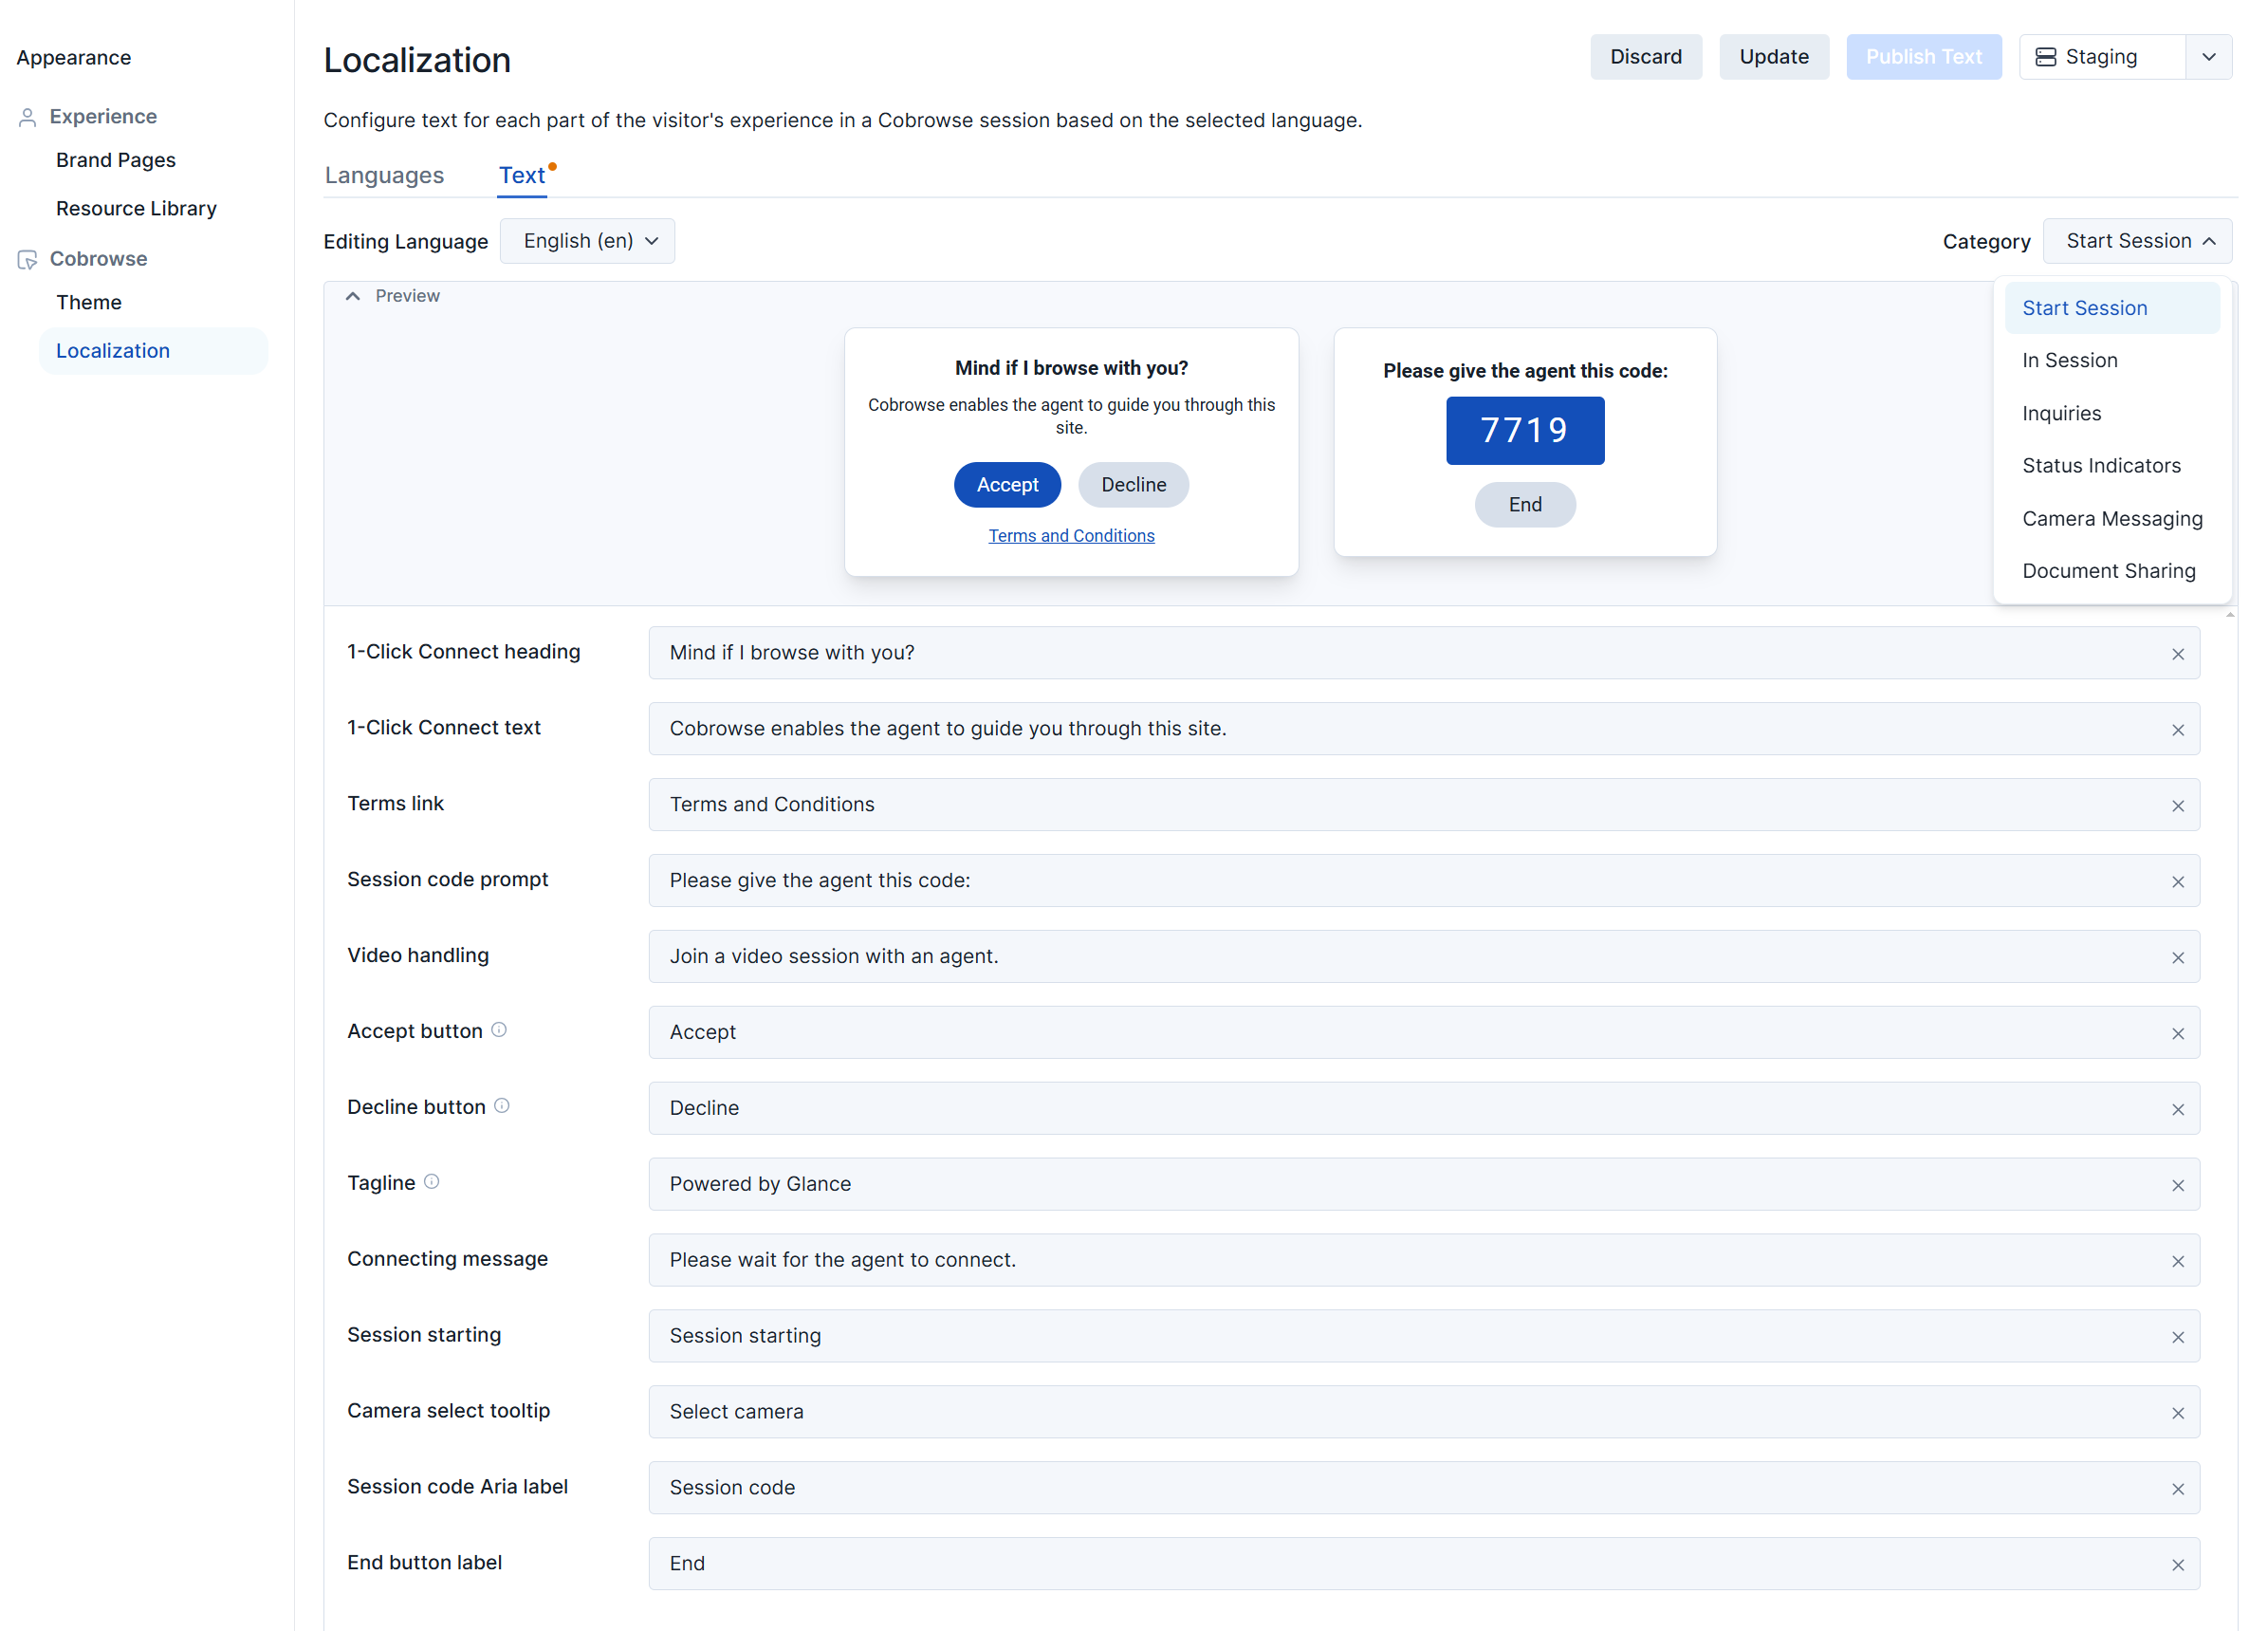 The **Text** section allows you to modify individual segments of text within the modals.
#### Editing Language
The **Editing Language** dropdown allows you to select the language to modify. The languages available in the dropdown are based on the languages enabled within the **Languages** tab.
#### Category
The **Category** buttons allow you to select which part of the session you would like to modify. Click on a category, and the correlating text options will display below. Sessions are broken down into the following categories:
* Start Session
* In Session
* Inquiries
* Status Indicators
* Camera Messaging
* Document Sharing
=================================================================
FILE: /users/portal/camera_share
=================================================================
The **Camera Share** page, located in the **Settings** section, allows users to configure SMS Camera Share settings for their organization.
The **Text** section allows you to modify individual segments of text within the modals.
#### Editing Language
The **Editing Language** dropdown allows you to select the language to modify. The languages available in the dropdown are based on the languages enabled within the **Languages** tab.
#### Category
The **Category** buttons allow you to select which part of the session you would like to modify. Click on a category, and the correlating text options will display below. Sessions are broken down into the following categories:
* Start Session
* In Session
* Inquiries
* Status Indicators
* Camera Messaging
* Document Sharing
=================================================================
FILE: /users/portal/camera_share
=================================================================
The **Camera Share** page, located in the **Settings** section, allows users to configure SMS Camera Share settings for their organization.
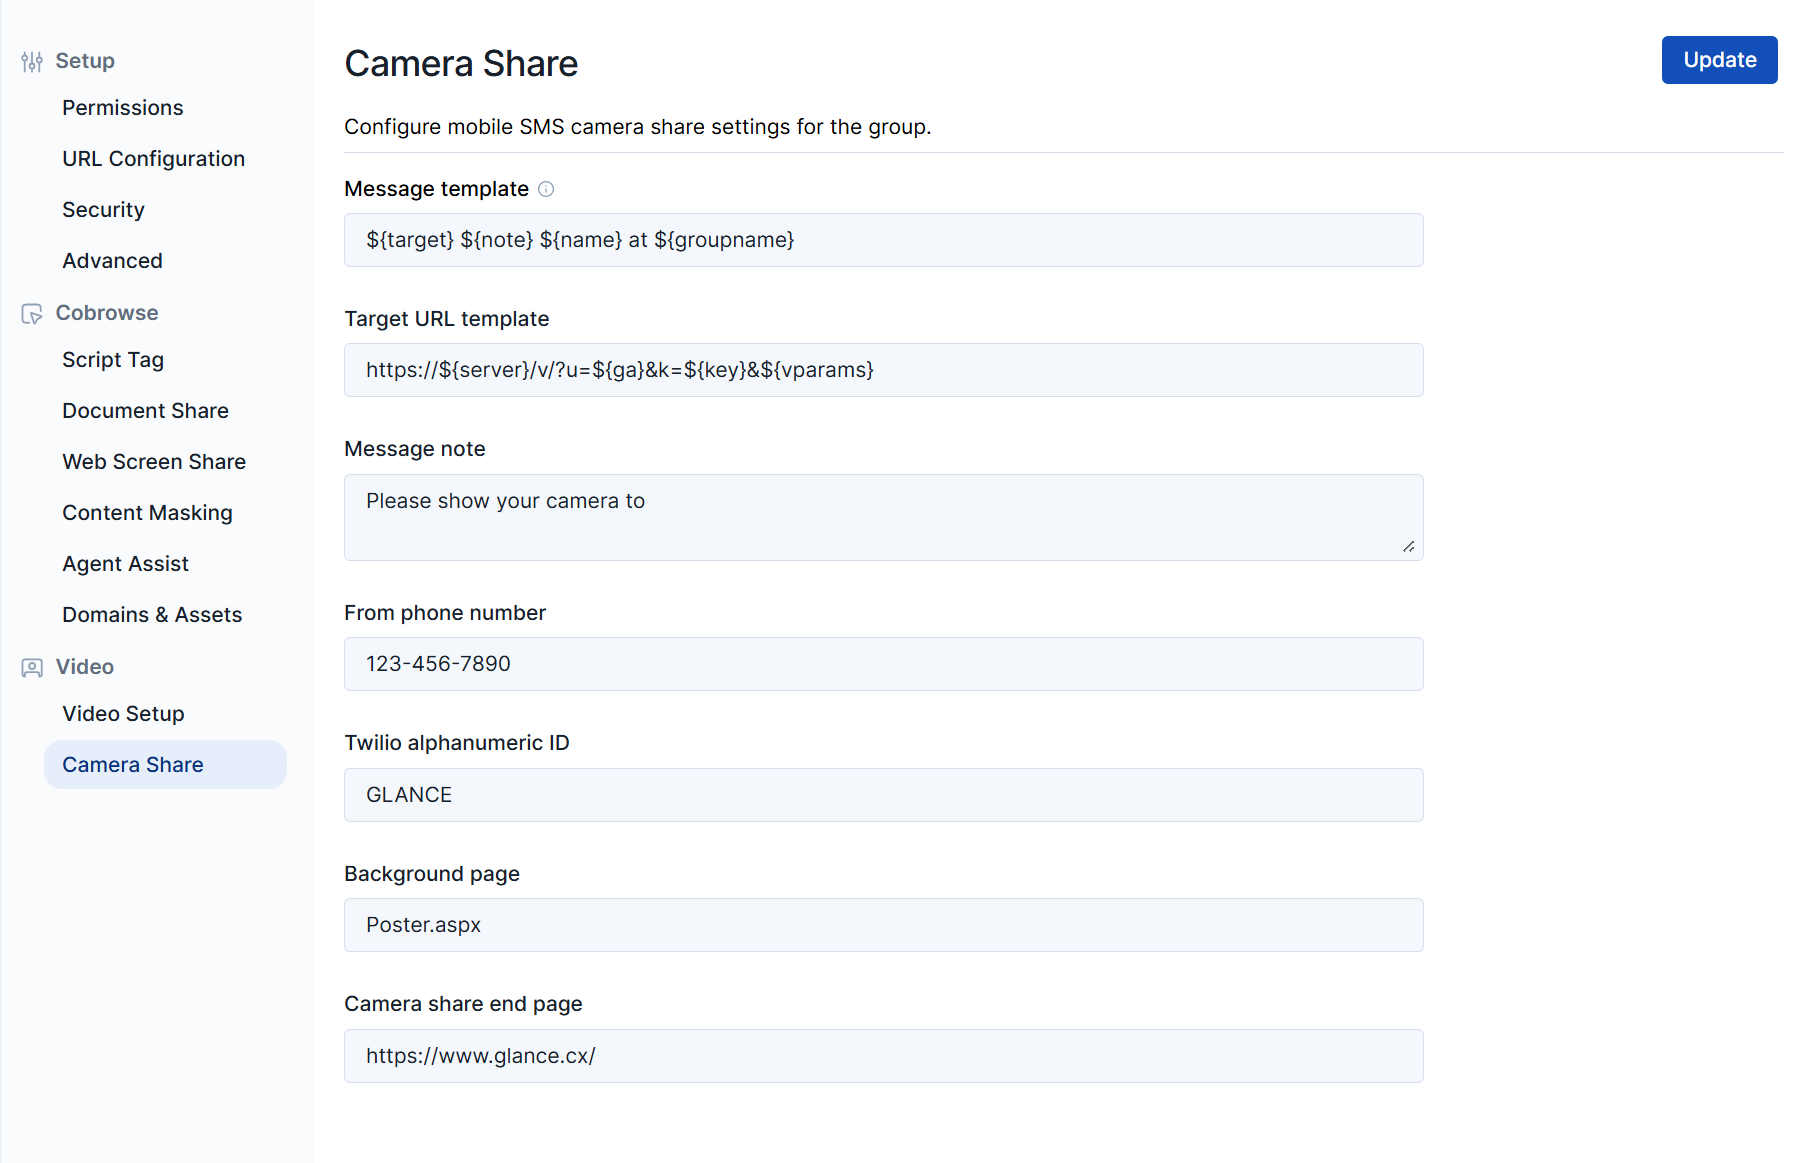 ## Configuration Settings
| Setting | Description |
| :--- | :--- |
| **Message template** | Update which parameters are included in the text message and in which order. Click the tooltip in the UI for a list of available parameters. |
| **Target URL template** | The specific URL included in the text message that visitors tap to join the session. |
| **Message note** | The custom text note included alongside the link in the SMS message. |
| **From phone number** | The designated phone number the text message is sent from. |
| **Twilio alphanumeric ID** | The company name or brand used as the Sender ID (Defaults to `GLANCE`). |
| **Background page** | The URL of the page to display in the background while the mobile device is prompting the user to share their camera. |
| **Camera share end page** | The URL of the page where customers are redirected when the session concludes. |
=================================================================
FILE: /users/portal/document_sharing
=================================================================
**Requires CB 5.2 or higher**
Document sharing is a feature that allows visitors and agents to share documents with each other during the session. Users can optionally save the files shared with them to their local computer. This is additive to our existing support for [PDF](/users/glance-cobrowse/features/pdf_cobrowse/) and [Excel](/users/glance-cobrowse/features/excel_cobrowse/) Cobrowsing, which provides the ability to cobrowse PDF or Excel documents hosted on the customer website.
* Only PDF, XLS, and CSV files are supported.
* Document sharing from the agent/visitor desktop is only supported in Cobrowse 5.1 and later.
* Document sharing is not supported on unsecure pages.
* Only the 'Accessible' Cobrowse widget is supported.
* Agents must join the session through a web browser, not the Glance Client.
## Configuration Settings
| Setting | Description |
| :--- | :--- |
| **Message template** | Update which parameters are included in the text message and in which order. Click the tooltip in the UI for a list of available parameters. |
| **Target URL template** | The specific URL included in the text message that visitors tap to join the session. |
| **Message note** | The custom text note included alongside the link in the SMS message. |
| **From phone number** | The designated phone number the text message is sent from. |
| **Twilio alphanumeric ID** | The company name or brand used as the Sender ID (Defaults to `GLANCE`). |
| **Background page** | The URL of the page to display in the background while the mobile device is prompting the user to share their camera. |
| **Camera share end page** | The URL of the page where customers are redirected when the session concludes. |
=================================================================
FILE: /users/portal/document_sharing
=================================================================
**Requires CB 5.2 or higher**
Document sharing is a feature that allows visitors and agents to share documents with each other during the session. Users can optionally save the files shared with them to their local computer. This is additive to our existing support for [PDF](/users/glance-cobrowse/features/pdf_cobrowse/) and [Excel](/users/glance-cobrowse/features/excel_cobrowse/) Cobrowsing, which provides the ability to cobrowse PDF or Excel documents hosted on the customer website.
* Only PDF, XLS, and CSV files are supported.
* Document sharing from the agent/visitor desktop is only supported in Cobrowse 5.1 and later.
* Document sharing is not supported on unsecure pages.
* Only the 'Accessible' Cobrowse widget is supported.
* Agents must join the session through a web browser, not the Glance Client.
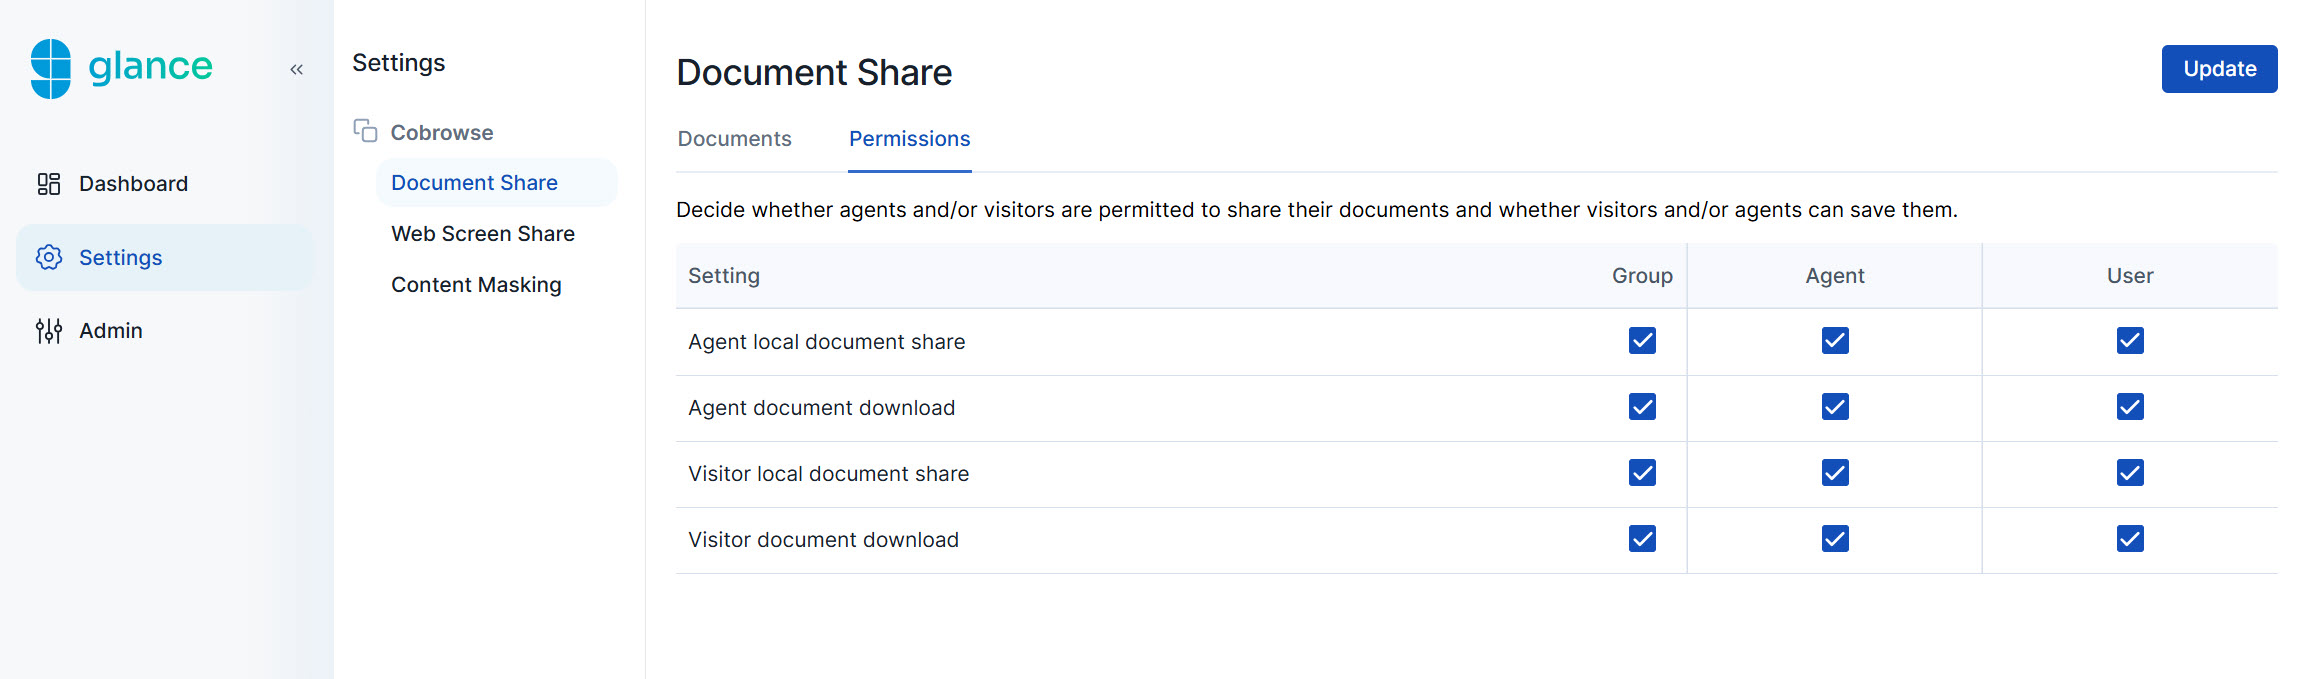 To share files:
* Visitor local document share
* Agent local document share
To download files:
* Agent document download
* Visitor document download
## Agent-Initiated Sharing
If the agent would like to share a document with the visitor during a session:
1. From the **Document Share** icon in the agent viewer, select **Choose a File**.
2. The agent is prompted to choose a file from their local computer, then clicks **Open**.
3. The agent gets the opportunity to preview the file, then clicks **Share**.
4. The agent is now cobrowsing the document with the visitor.
5. Click the magnifying glass to search for text within the document.
6. The visitor can download the document to their local drive if this function is enabled.
7. Click the **X** in the top-right corner to close the document.
## Visitor-Initiated Sharing
If the visitor would like to share a document with the agent during a session:
1. The agent clicks the document share icon and selects **Send Request**.
2. The visitor accepts the request.
3. The visitor is prompted to drag or open a file from their local computer.
4. The visitor gets the opportunity to preview the file, then clicks **Share**.
5. The agent can now cobrowse the document with the visitor.
6. Click the magnifying glass to search for text within the document.
7. The agent can download the document to their local drive if this function is enabled.
8. Click the **X** in the top-right corner to close the document.
## Document Sharing Links
Glance enables you to seamlessly add links to approved PDF, CSV, and Excel documents, which agents can easily share during sessions. Additionally, you can organize these documents into folders for better management.
To share files:
* Visitor local document share
* Agent local document share
To download files:
* Agent document download
* Visitor document download
## Agent-Initiated Sharing
If the agent would like to share a document with the visitor during a session:
1. From the **Document Share** icon in the agent viewer, select **Choose a File**.
2. The agent is prompted to choose a file from their local computer, then clicks **Open**.
3. The agent gets the opportunity to preview the file, then clicks **Share**.
4. The agent is now cobrowsing the document with the visitor.
5. Click the magnifying glass to search for text within the document.
6. The visitor can download the document to their local drive if this function is enabled.
7. Click the **X** in the top-right corner to close the document.
## Visitor-Initiated Sharing
If the visitor would like to share a document with the agent during a session:
1. The agent clicks the document share icon and selects **Send Request**.
2. The visitor accepts the request.
3. The visitor is prompted to drag or open a file from their local computer.
4. The visitor gets the opportunity to preview the file, then clicks **Share**.
5. The agent can now cobrowse the document with the visitor.
6. Click the magnifying glass to search for text within the document.
7. The agent can download the document to their local drive if this function is enabled.
8. Click the **X** in the top-right corner to close the document.
## Document Sharing Links
Glance enables you to seamlessly add links to approved PDF, CSV, and Excel documents, which agents can easily share during sessions. Additionally, you can organize these documents into folders for better management.
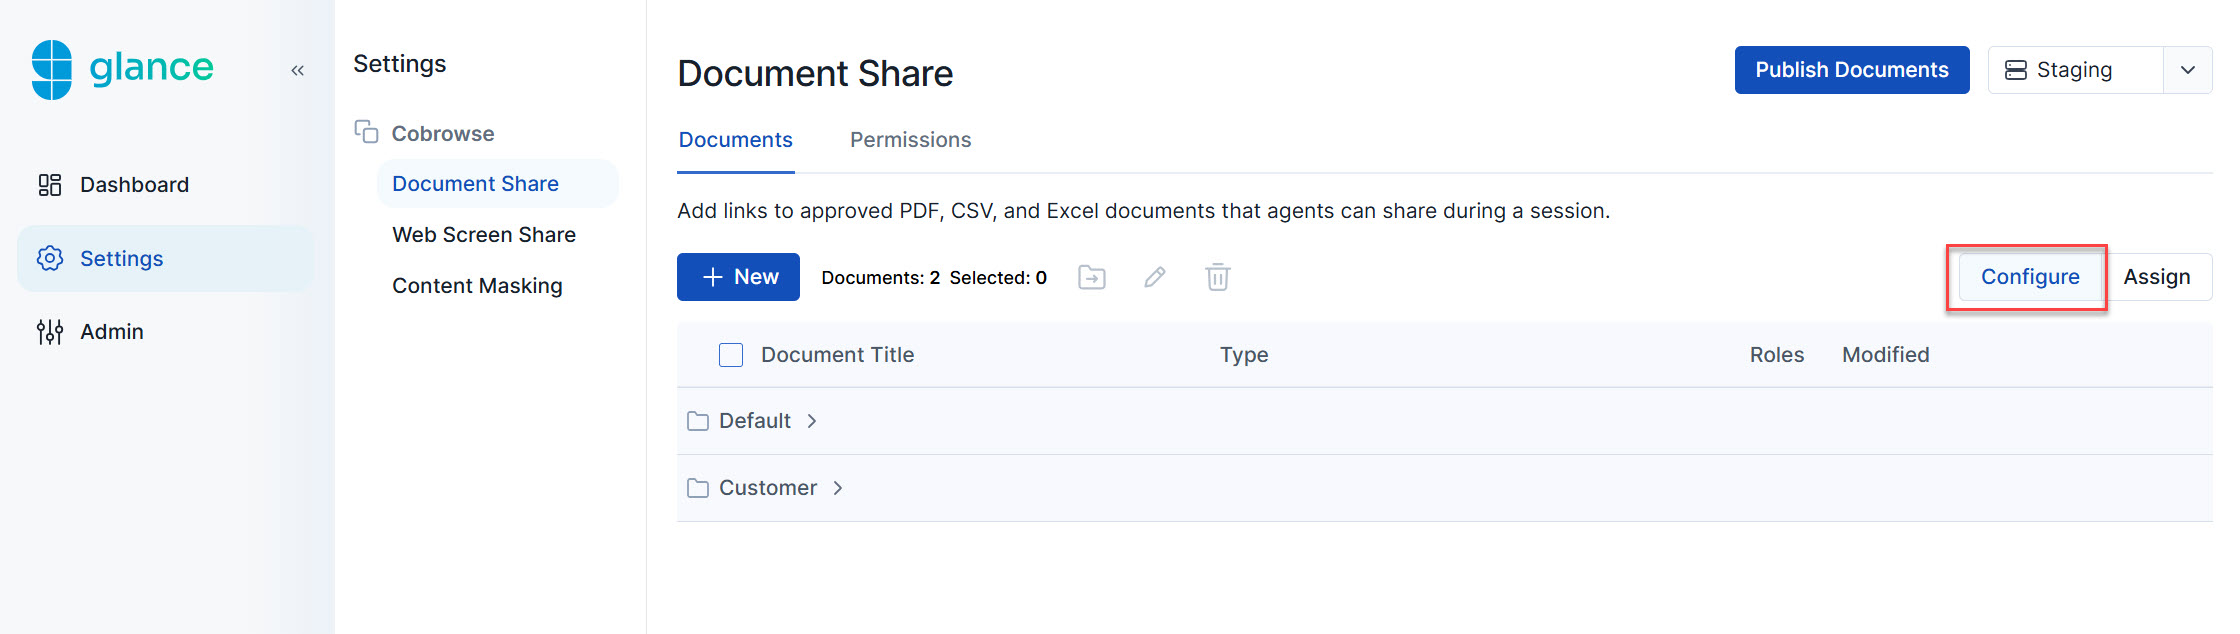 2. Click the **New** button.
3. Select **Document** or **Folder**.
2. Click the **New** button.
3. Select **Document** or **Folder**. 4. For **Folder**, input the desired name of the folder and click the **Create** button.
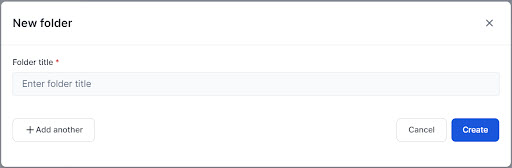 5. For **Document**, complete the following steps:
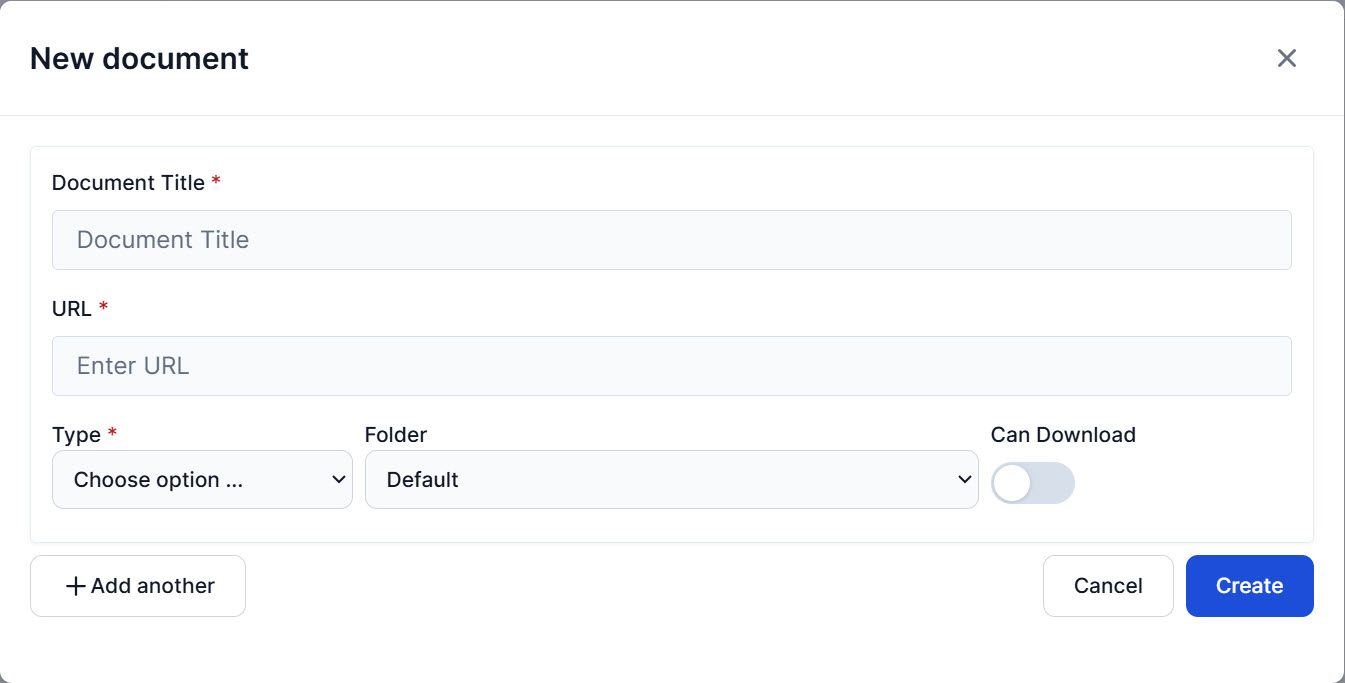 * **Document Title** - Enter the name you want to display for the link in the agent viewer.
* **URL** - Add a link to the location of the file.
* **Type** - Select the type of document: **PDF** or **Excel/XLS**.
* **Folder** - (optional) Select which folder you want this document stored in.
* **Can Download** - Toggle this button on or off to make the document downloadable.
6. Click the **Create** button.
7. Click the **Publish Documents** button.
* **Document Title** - Enter the name you want to display for the link in the agent viewer.
* **URL** - Add a link to the location of the file.
* **Type** - Select the type of document: **PDF** or **Excel/XLS**.
* **Folder** - (optional) Select which folder you want this document stored in.
* **Can Download** - Toggle this button on or off to make the document downloadable.
6. Click the **Create** button.
7. Click the **Publish Documents** button.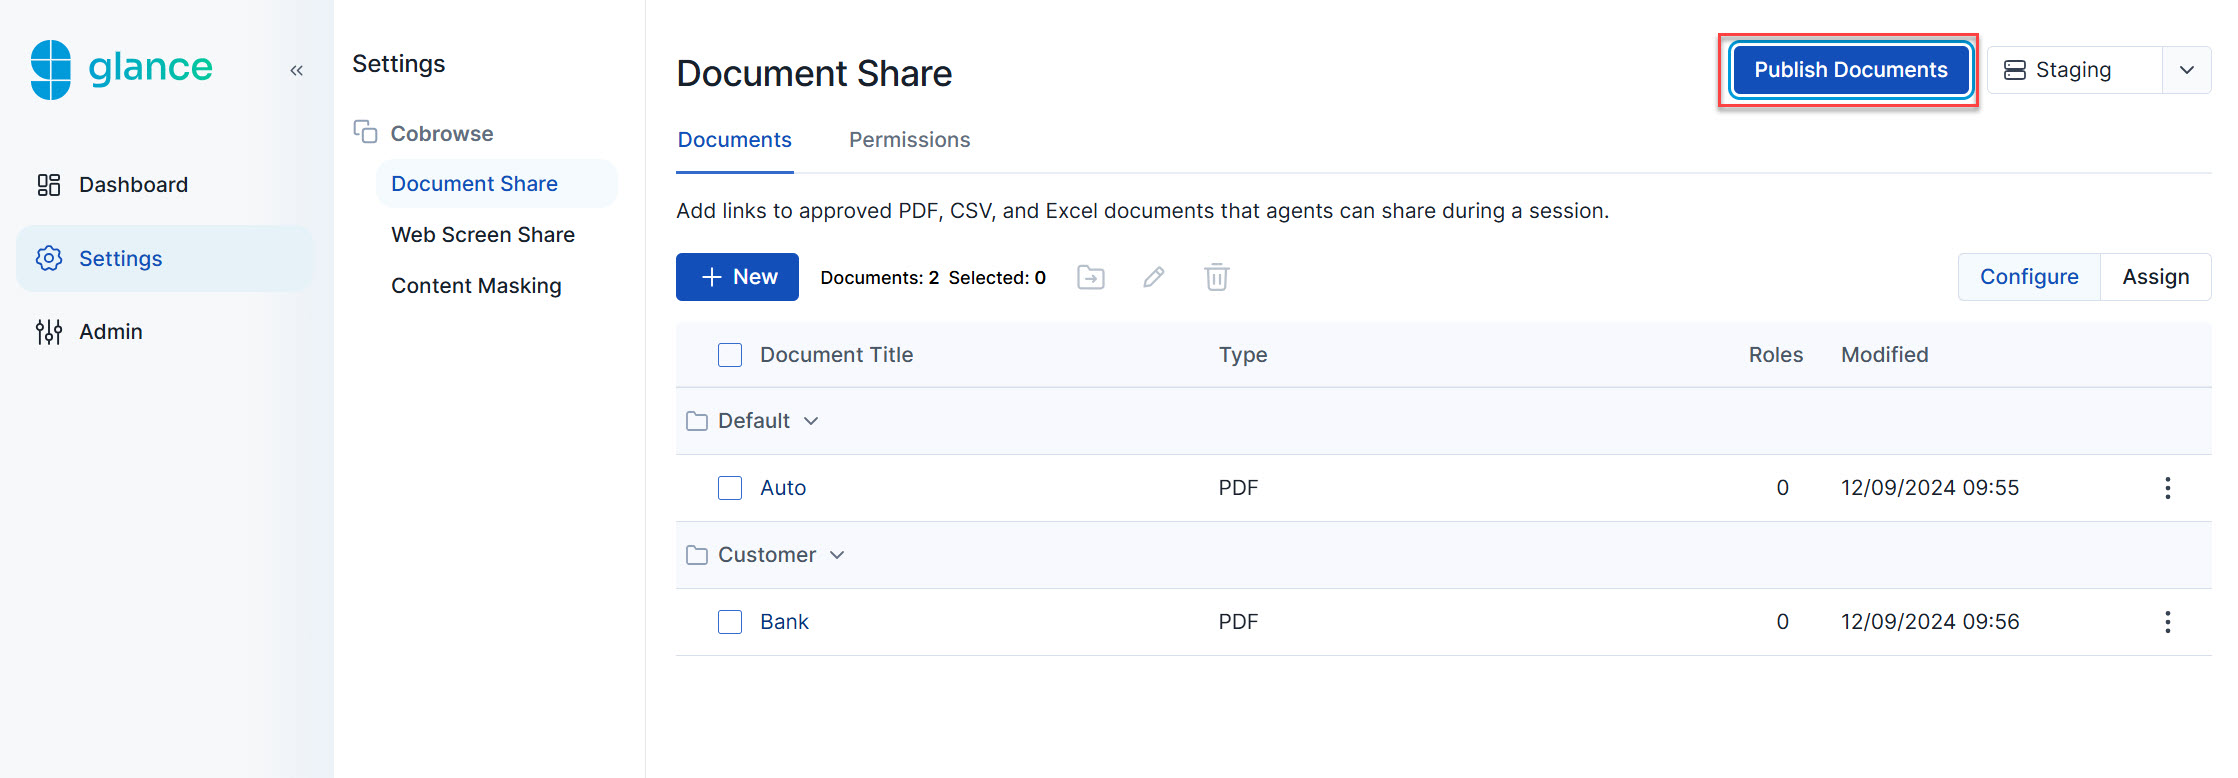 ### Assigning Documents
Documents can be assigned to specific roles within your group, ensuring that only authorized agents have the ability to share them.
1. Click the **Assign** tab.
### Assigning Documents
Documents can be assigned to specific roles within your group, ensuring that only authorized agents have the ability to share them.
1. Click the **Assign** tab.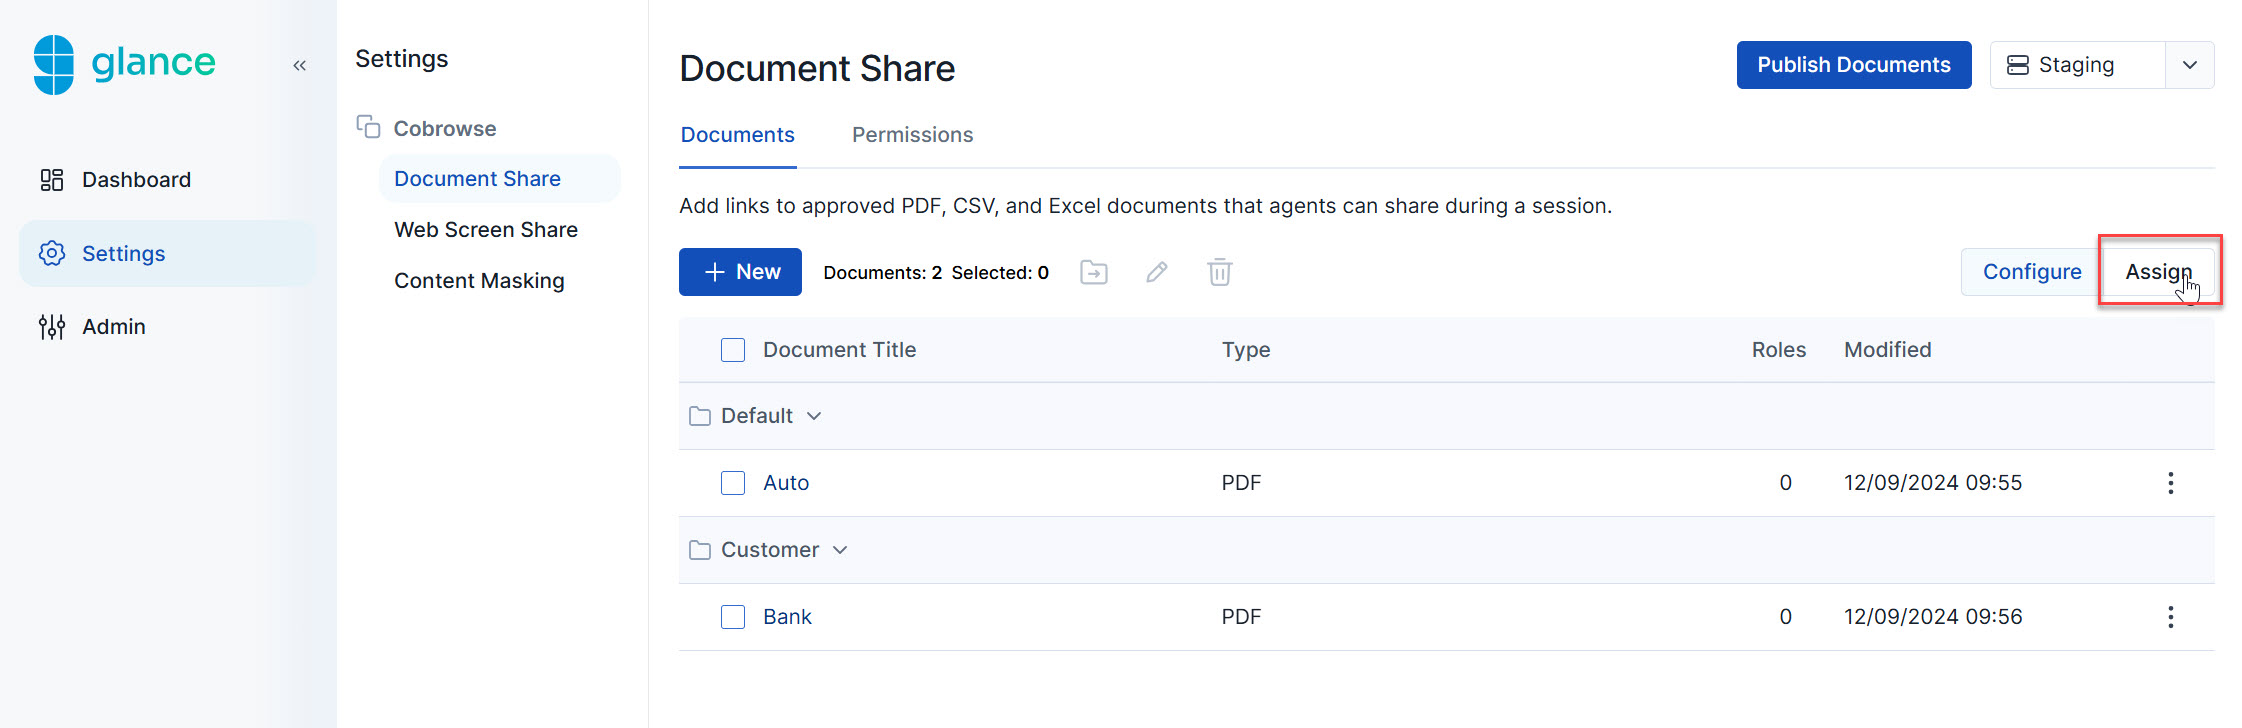 2. Click the checkbox underneath each role that needs to utilize the document.
3. Click **Update**.
2. Click the checkbox underneath each role that needs to utilize the document.
3. Click **Update**.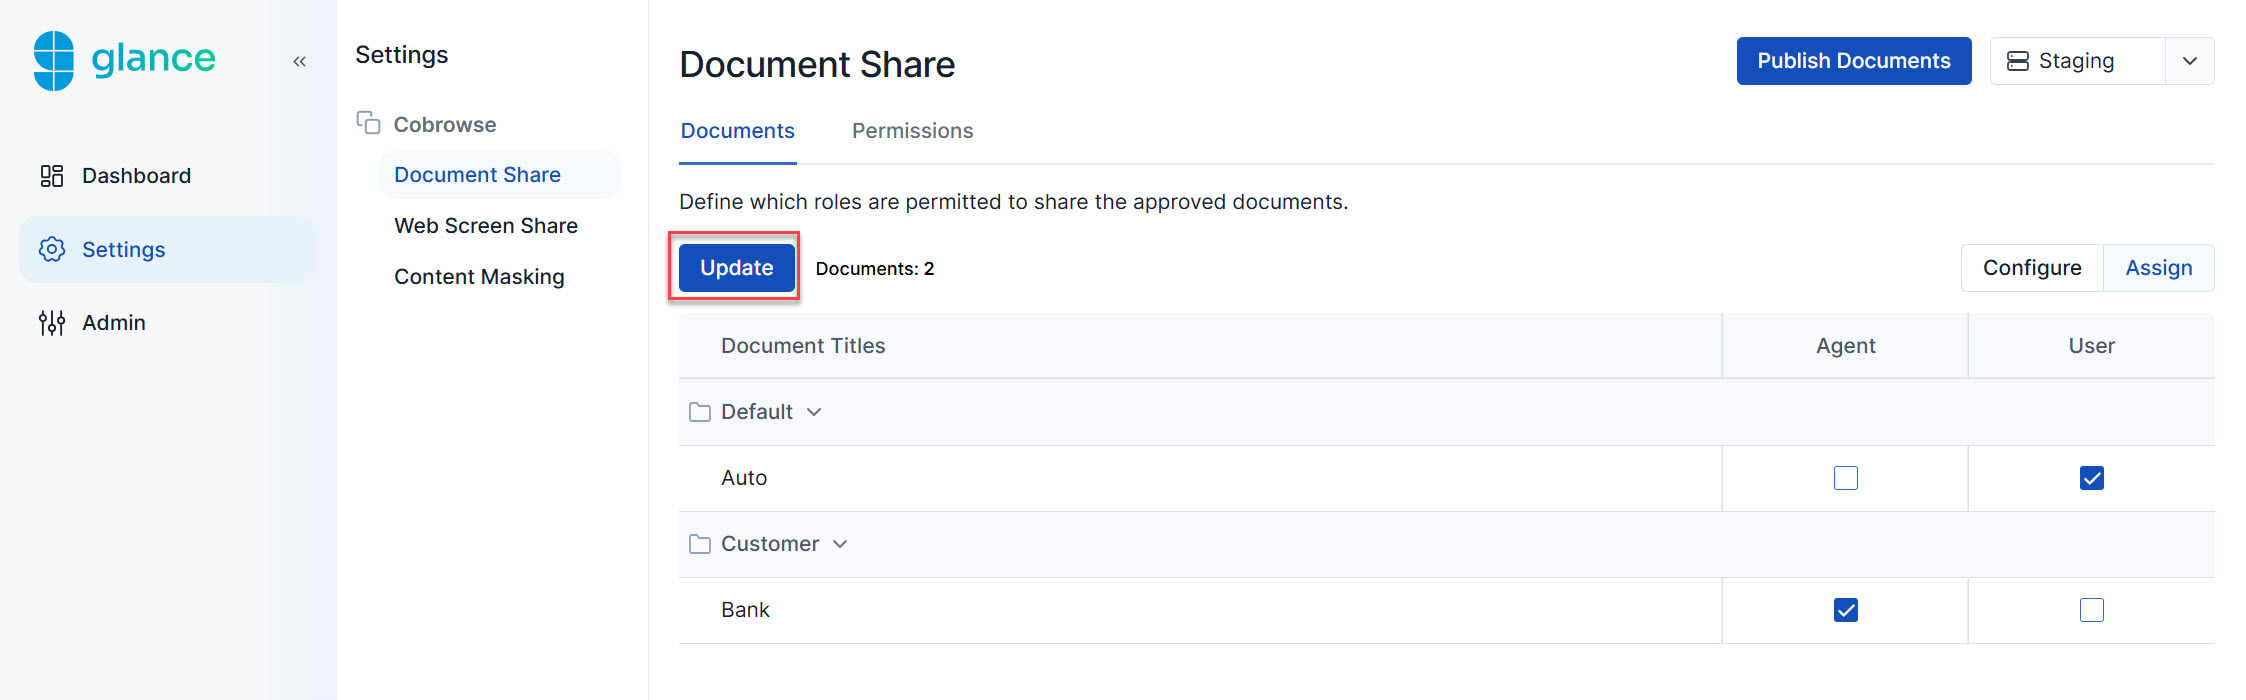 ### Moving a Document to a New Folder
1. Click on the ellipsis next to the document.
2. Click **Move to folder**.
### Moving a Document to a New Folder
1. Click on the ellipsis next to the document.
2. Click **Move to folder**.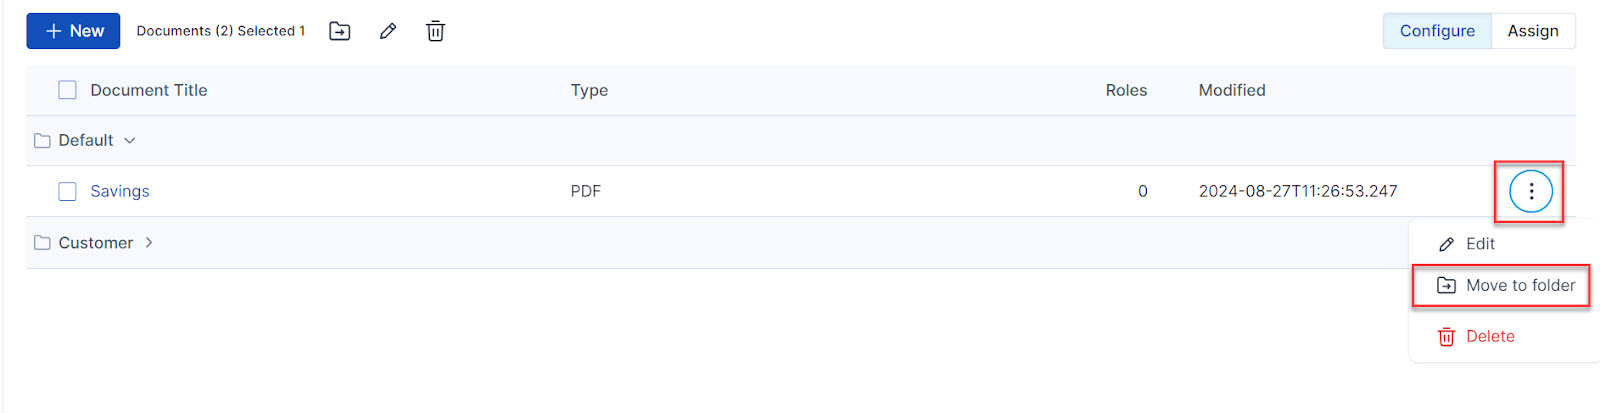 3. Select the new folder from the drop-down menu and click **Update**.
### Using Document Sharing Links
If document sharing has been configured to **Active** in **Account Management**:
1. From the document share icon, select a file from the list of **Approved documents you can share**.
2. The agent gets the opportunity to preview the file, then clicks **Share**.
3. The agent and visitor can cobrowse the document together.
4. If this capability is enabled, the visitor can download the document to their local drive.
5. Click the **X** in the top-right corner to close the document.
## Events
For events related to document sharing, see [Cobrowse Visitor Events](/developer/legacy_api/visitor_agent/visitor_event/#document-sharing-events) and [Browser Agent API Events](/developer/sdk/browseragent/reference/#agent-events).
=================================================================
FILE: /users/portal
=================================================================
## Welcome to the New Glance Portal
The Glance Portal is our new administrative interface, designed to streamline and modernize how you manage your experience. The Portal will eventually replace Account Management for the majority of our customers.
As we transition between systems, we are continuously updating the Portal with new and reimagined workflows. During this interim period, any management functions you cannot find here can still be accessed through the classic Account Management interface.
### Accessing the Portal
* **Log In:** If your account is ready, log in directly at [https://www.glance.net/apps/portal/](https://www.glance.net/apps/portal/).
* **Request Access:** If you are an existing customer and need access, email us at [portal-request@glance.net](mailto:portal-request@glance.net).
## In This Section
{% children description="true" /%}
=================================================================
FILE: /users/portal/manage_group
=================================================================
The Manage Groups section allows you to create and manage subgroups within your current group.
3. Select the new folder from the drop-down menu and click **Update**.
### Using Document Sharing Links
If document sharing has been configured to **Active** in **Account Management**:
1. From the document share icon, select a file from the list of **Approved documents you can share**.
2. The agent gets the opportunity to preview the file, then clicks **Share**.
3. The agent and visitor can cobrowse the document together.
4. If this capability is enabled, the visitor can download the document to their local drive.
5. Click the **X** in the top-right corner to close the document.
## Events
For events related to document sharing, see [Cobrowse Visitor Events](/developer/legacy_api/visitor_agent/visitor_event/#document-sharing-events) and [Browser Agent API Events](/developer/sdk/browseragent/reference/#agent-events).
=================================================================
FILE: /users/portal
=================================================================
## Welcome to the New Glance Portal
The Glance Portal is our new administrative interface, designed to streamline and modernize how you manage your experience. The Portal will eventually replace Account Management for the majority of our customers.
As we transition between systems, we are continuously updating the Portal with new and reimagined workflows. During this interim period, any management functions you cannot find here can still be accessed through the classic Account Management interface.
### Accessing the Portal
* **Log In:** If your account is ready, log in directly at [https://www.glance.net/apps/portal/](https://www.glance.net/apps/portal/).
* **Request Access:** If you are an existing customer and need access, email us at [portal-request@glance.net](mailto:portal-request@glance.net).
## In This Section
{% children description="true" /%}
=================================================================
FILE: /users/portal/manage_group
=================================================================
The Manage Groups section allows you to create and manage subgroups within your current group.
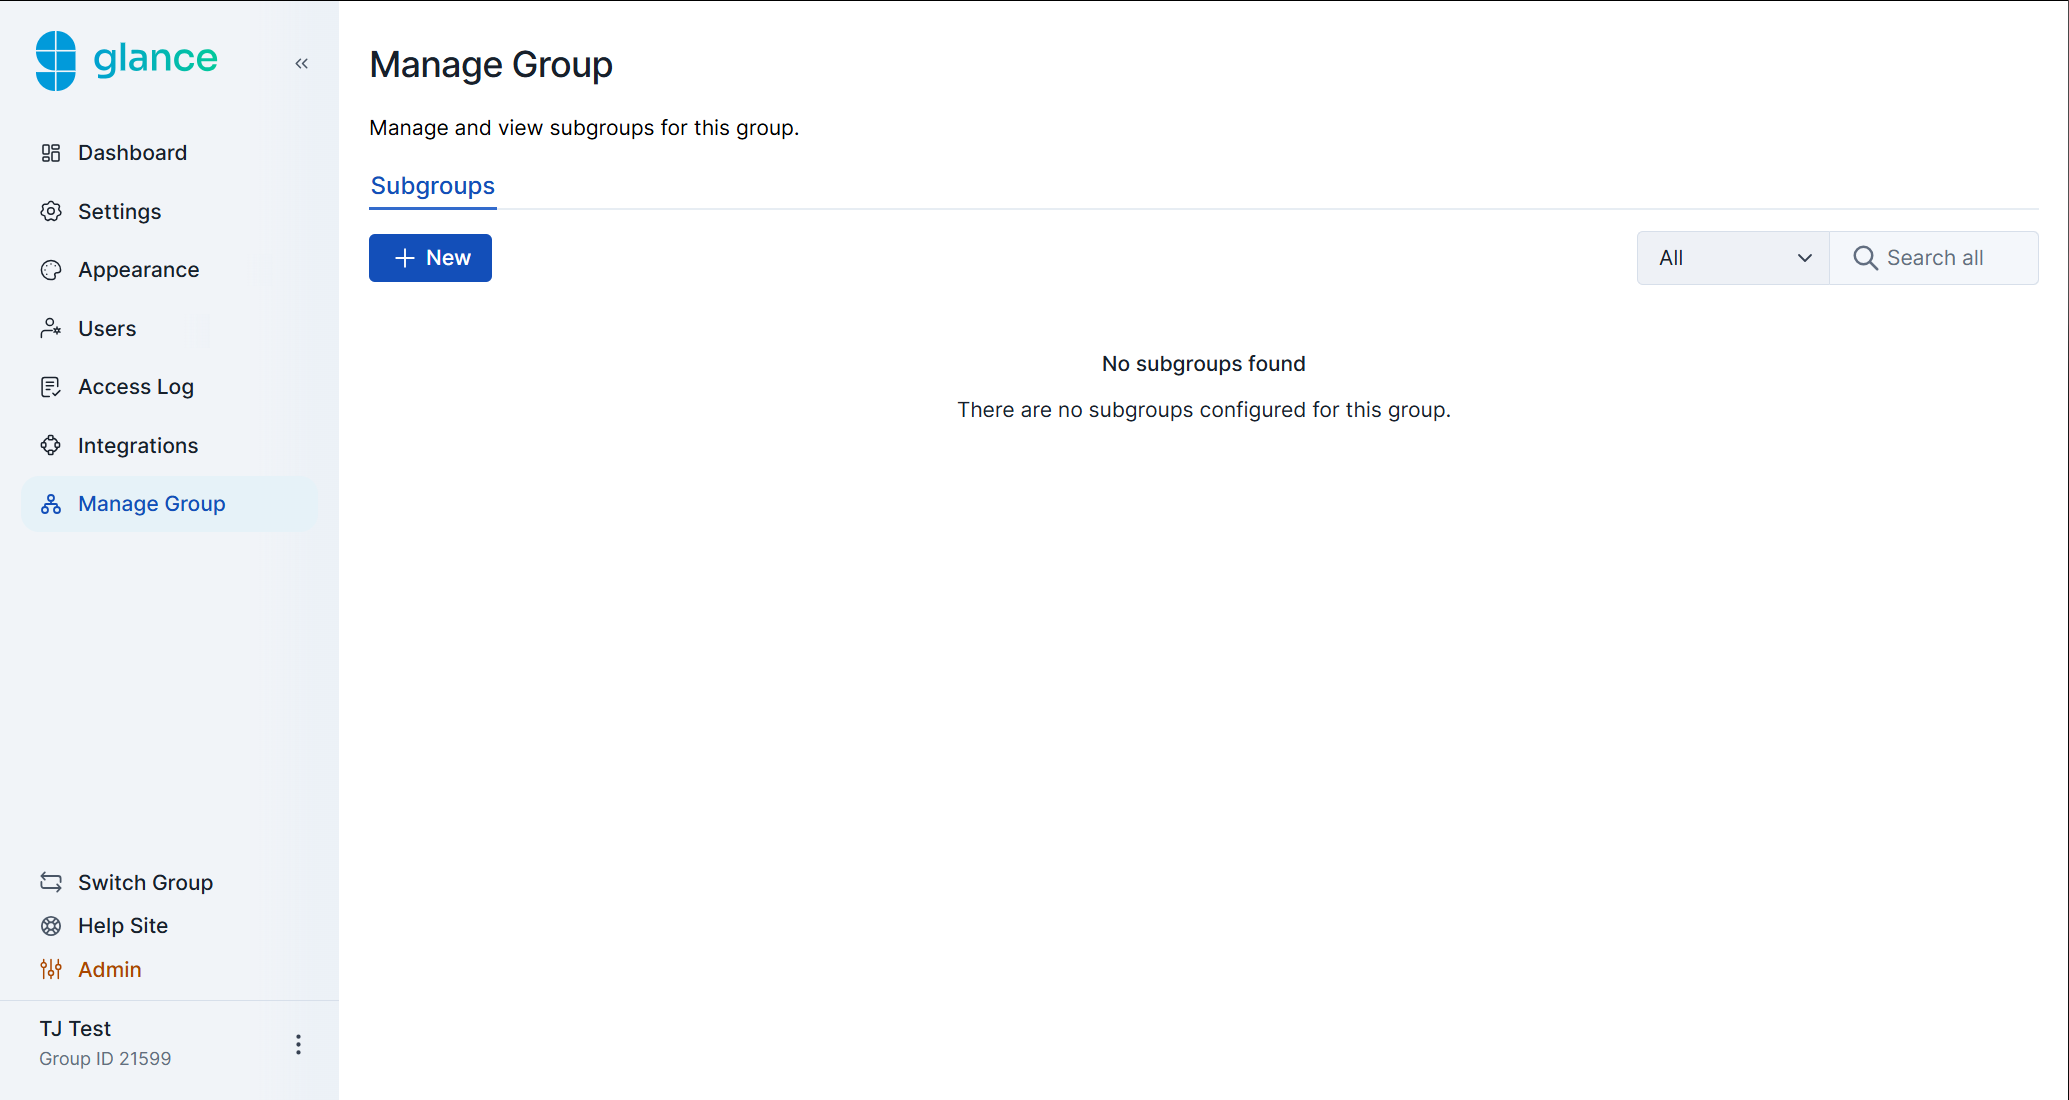 ## Creating a New Subgroup
1. Click **New**.
## Creating a New Subgroup
1. Click **New**.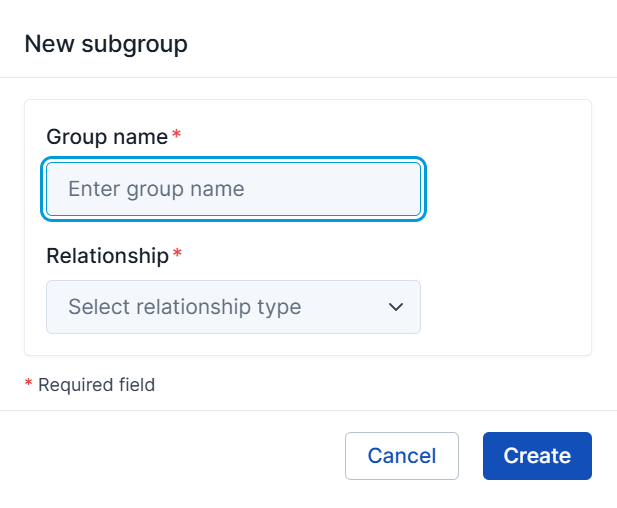 2. Enter a **Group name**.
3. Select a **Relationship** type (**member** or **customer**). This determines how the parent group assigns permissions to this subgroup.
4. Click **Create**.
## Editing a Subgroup
Click the **ellipsis (...)** on the right side of the subgroup's row.
2. Enter a **Group name**.
3. Select a **Relationship** type (**member** or **customer**). This determines how the parent group assigns permissions to this subgroup.
4. Click **Create**.
## Editing a Subgroup
Click the **ellipsis (...)** on the right side of the subgroup's row.
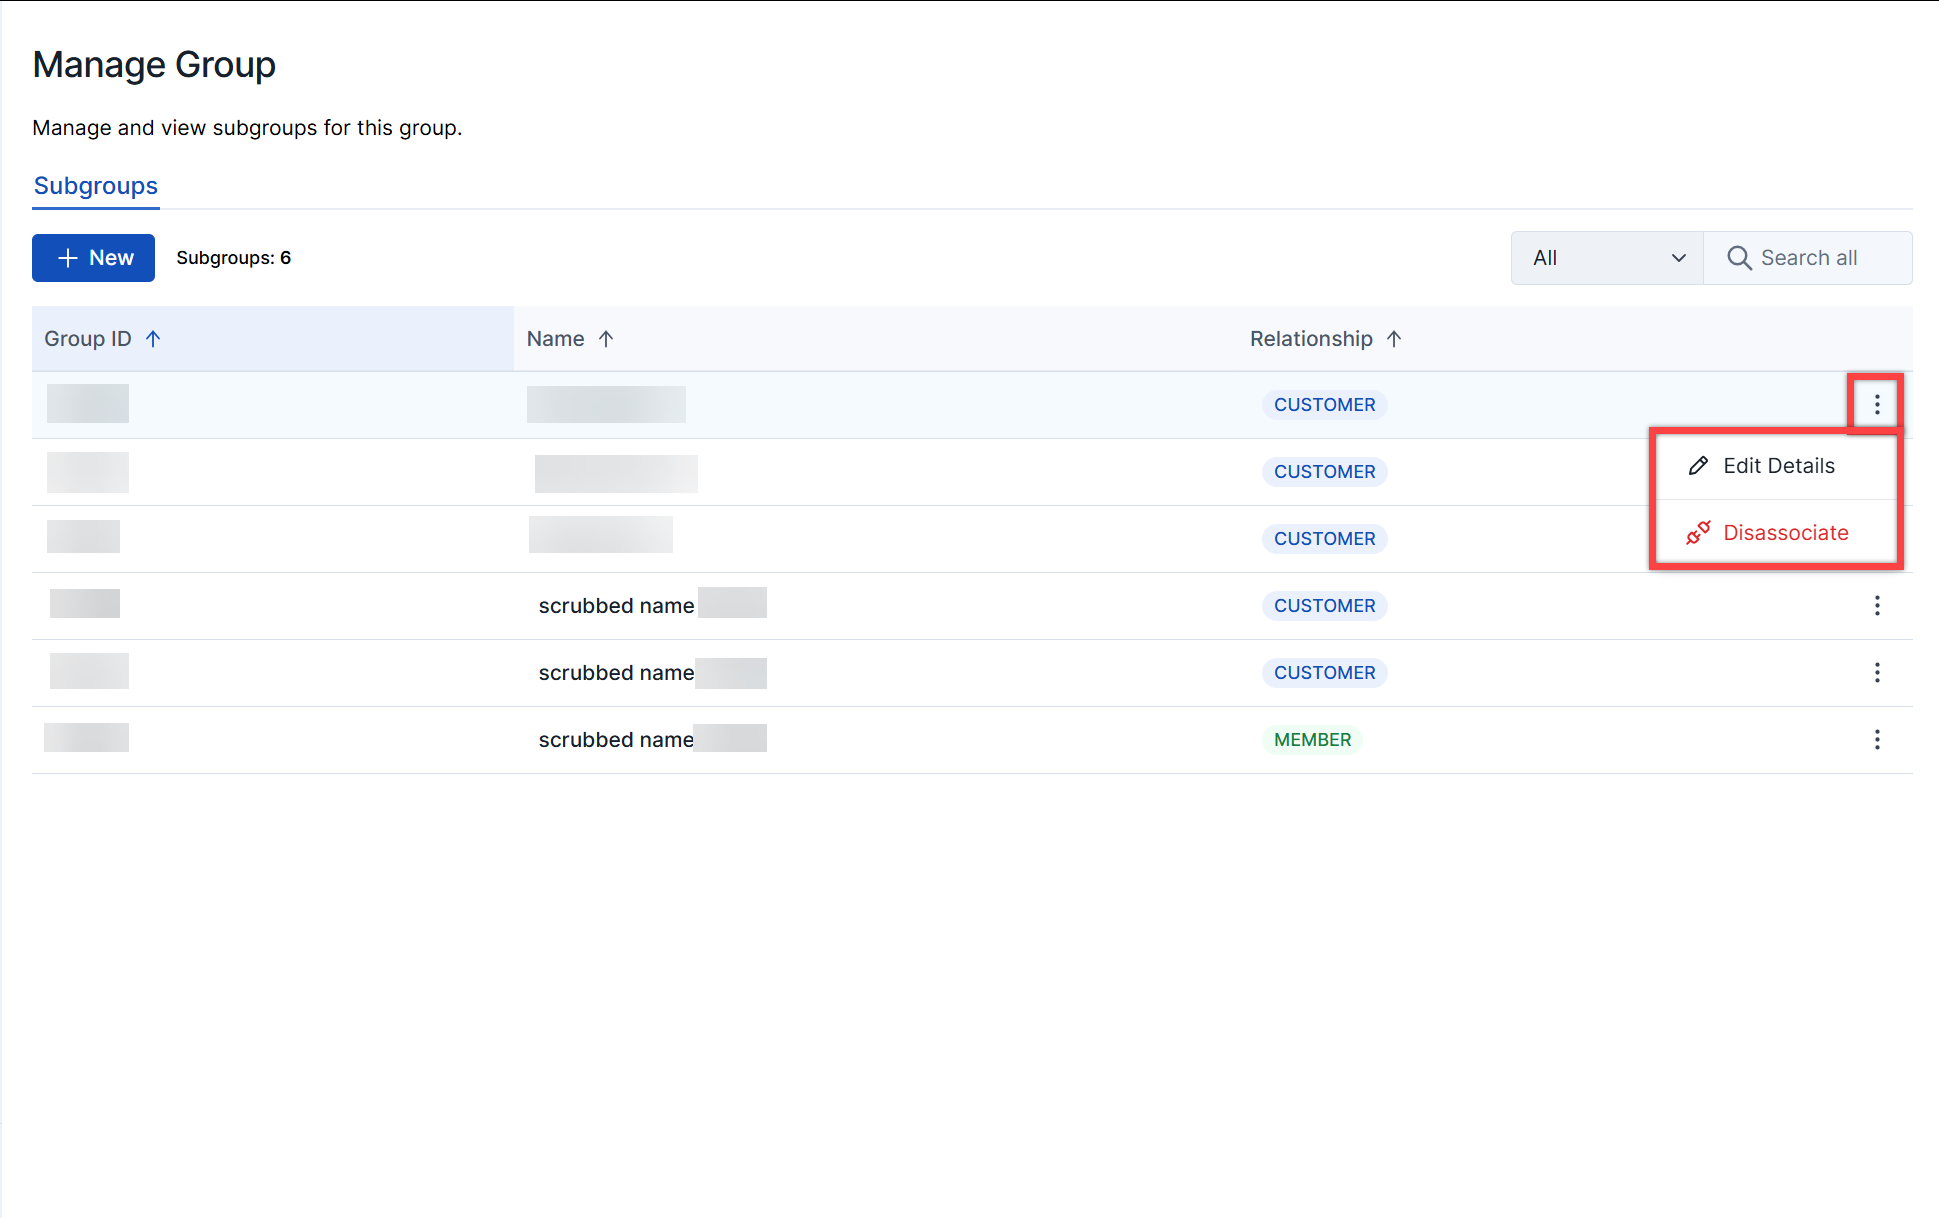 * **Edit Details** - Update the group's name and relationship type.
* **Disassociate** - Remove the subgroup from its parent group.
=================================================================
FILE: /users/portal/manage_users
=================================================================
Within the **Users** section, you can add, edit, and delete users and roles.
## Add Users to Your Account
To add users to your account:
1. Navigate to the Portal and click on the **Users** section.
* **Edit Details** - Update the group's name and relationship type.
* **Disassociate** - Remove the subgroup from its parent group.
=================================================================
FILE: /users/portal/manage_users
=================================================================
Within the **Users** section, you can add, edit, and delete users and roles.
## Add Users to Your Account
To add users to your account:
1. Navigate to the Portal and click on the **Users** section.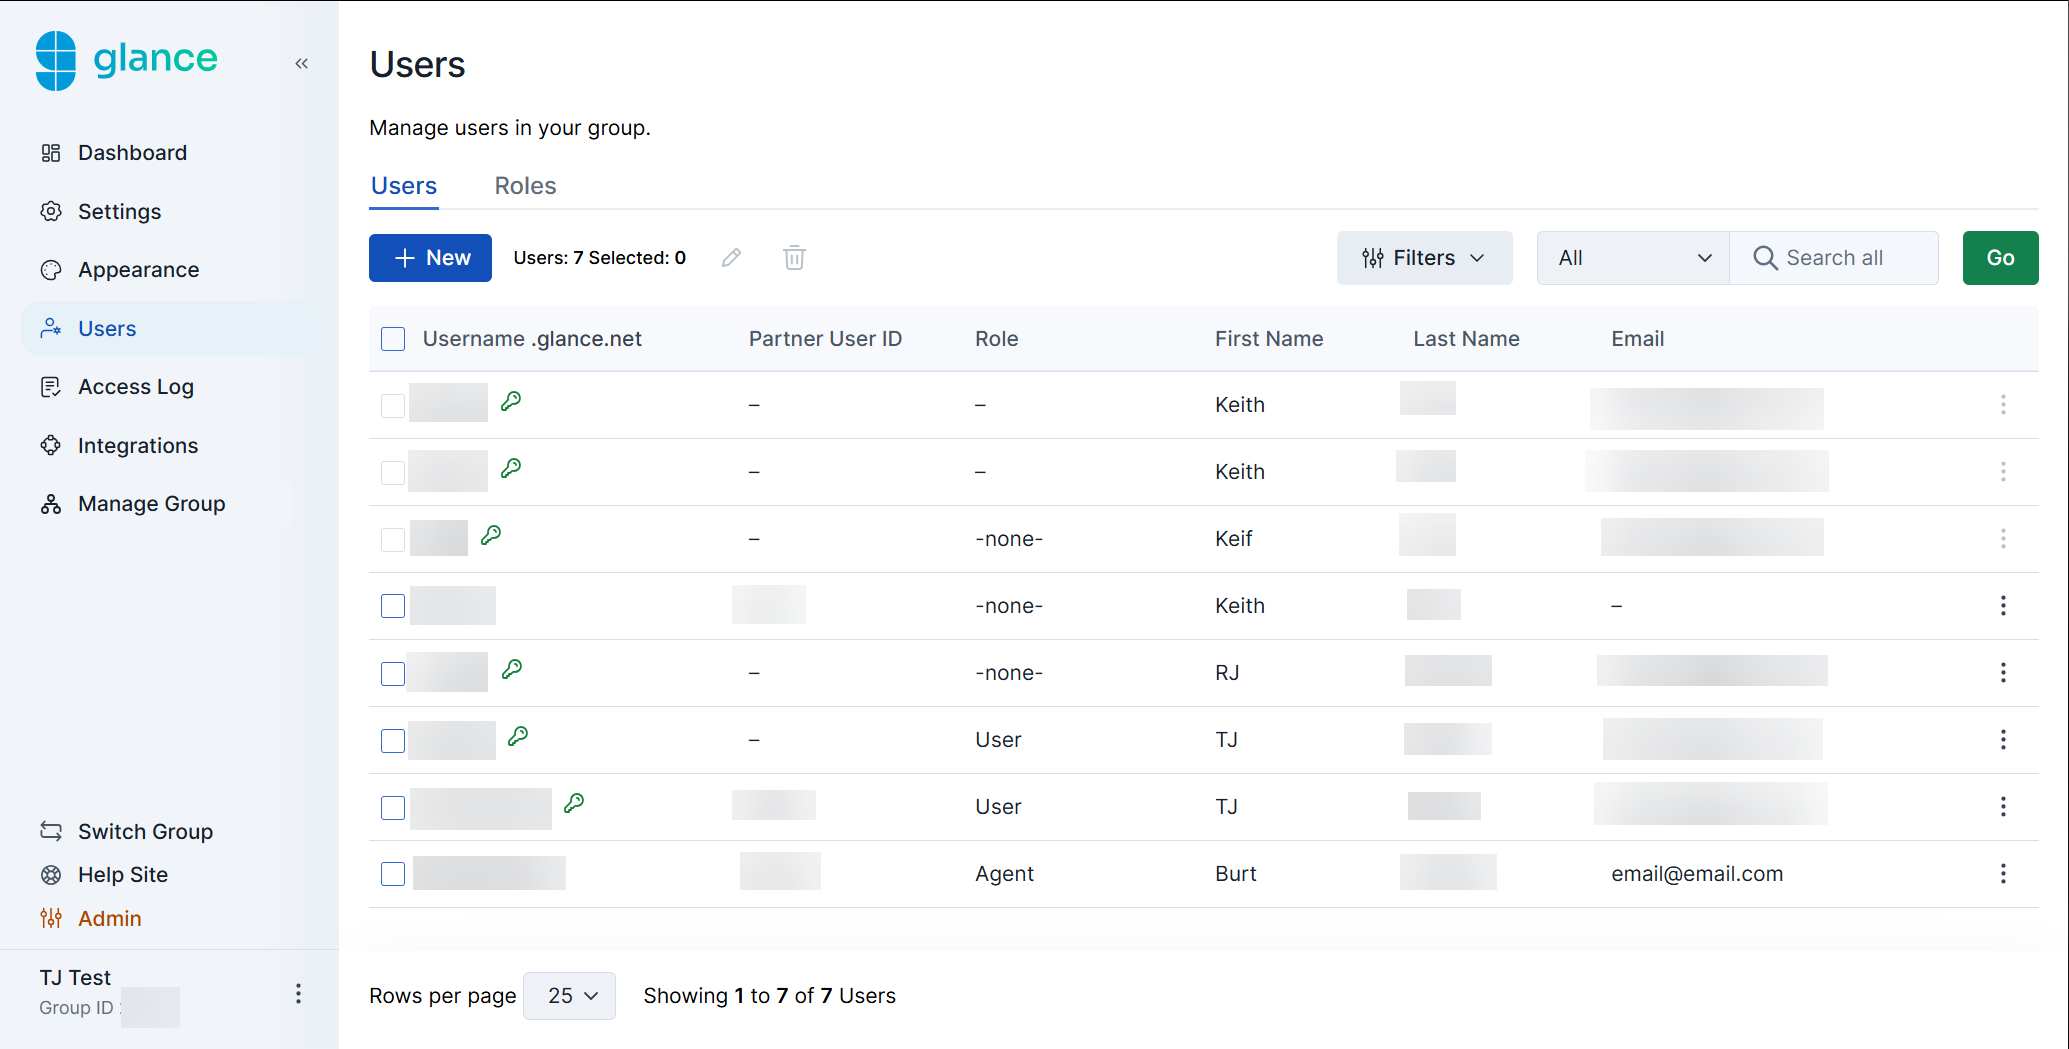 2. Click **New**.
3. Complete the applicable fields for the new user:
* **Username** - The user name that they will use to login
* **Partner User ID** - The user id
* **First Name** - The first name of the user
* **Last Name** - The last name of the user
* **Role** - The role for the user (if required)
* **Email** - The email for the user
* **Password** - The password for the user
* **Confirm Password** - The password for the user
2. Click **New**.
3. Complete the applicable fields for the new user:
* **Username** - The user name that they will use to login
* **Partner User ID** - The user id
* **First Name** - The first name of the user
* **Last Name** - The last name of the user
* **Role** - The role for the user (if required)
* **Email** - The email for the user
* **Password** - The password for the user
* **Confirm Password** - The password for the user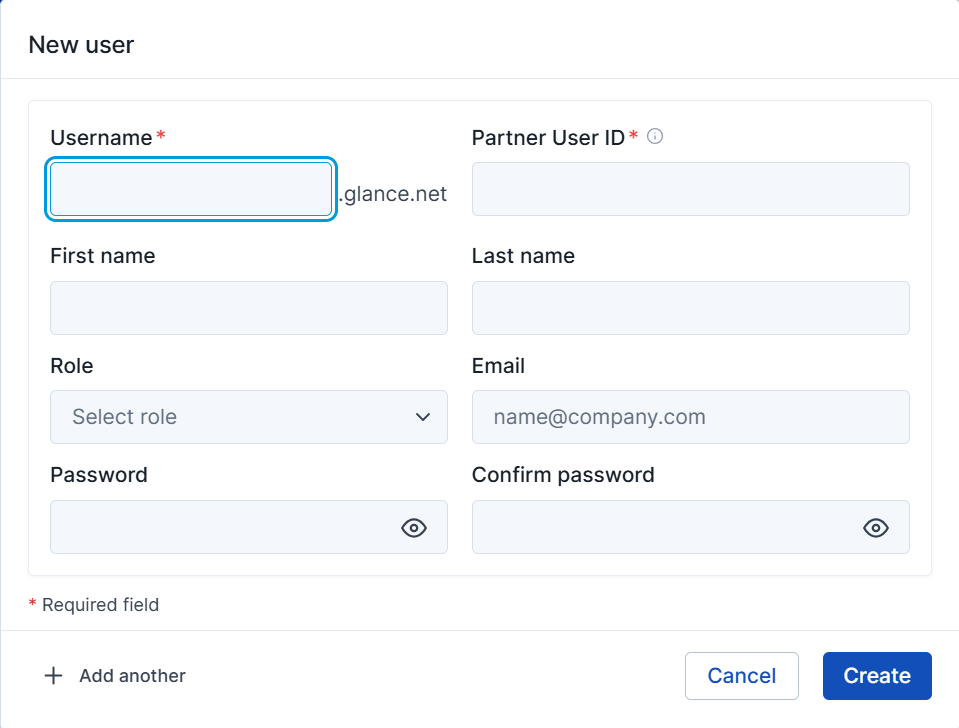 4. Click **Create**.
## Edit User Information Within Your Account
Follow the steps below to update user information.
1. Navigate to the **Users** section.
2. Click the ellipsis on the right side within the user's row.
4. Click **Create**.
## Edit User Information Within Your Account
Follow the steps below to update user information.
1. Navigate to the **Users** section.
2. Click the ellipsis on the right side within the user's row.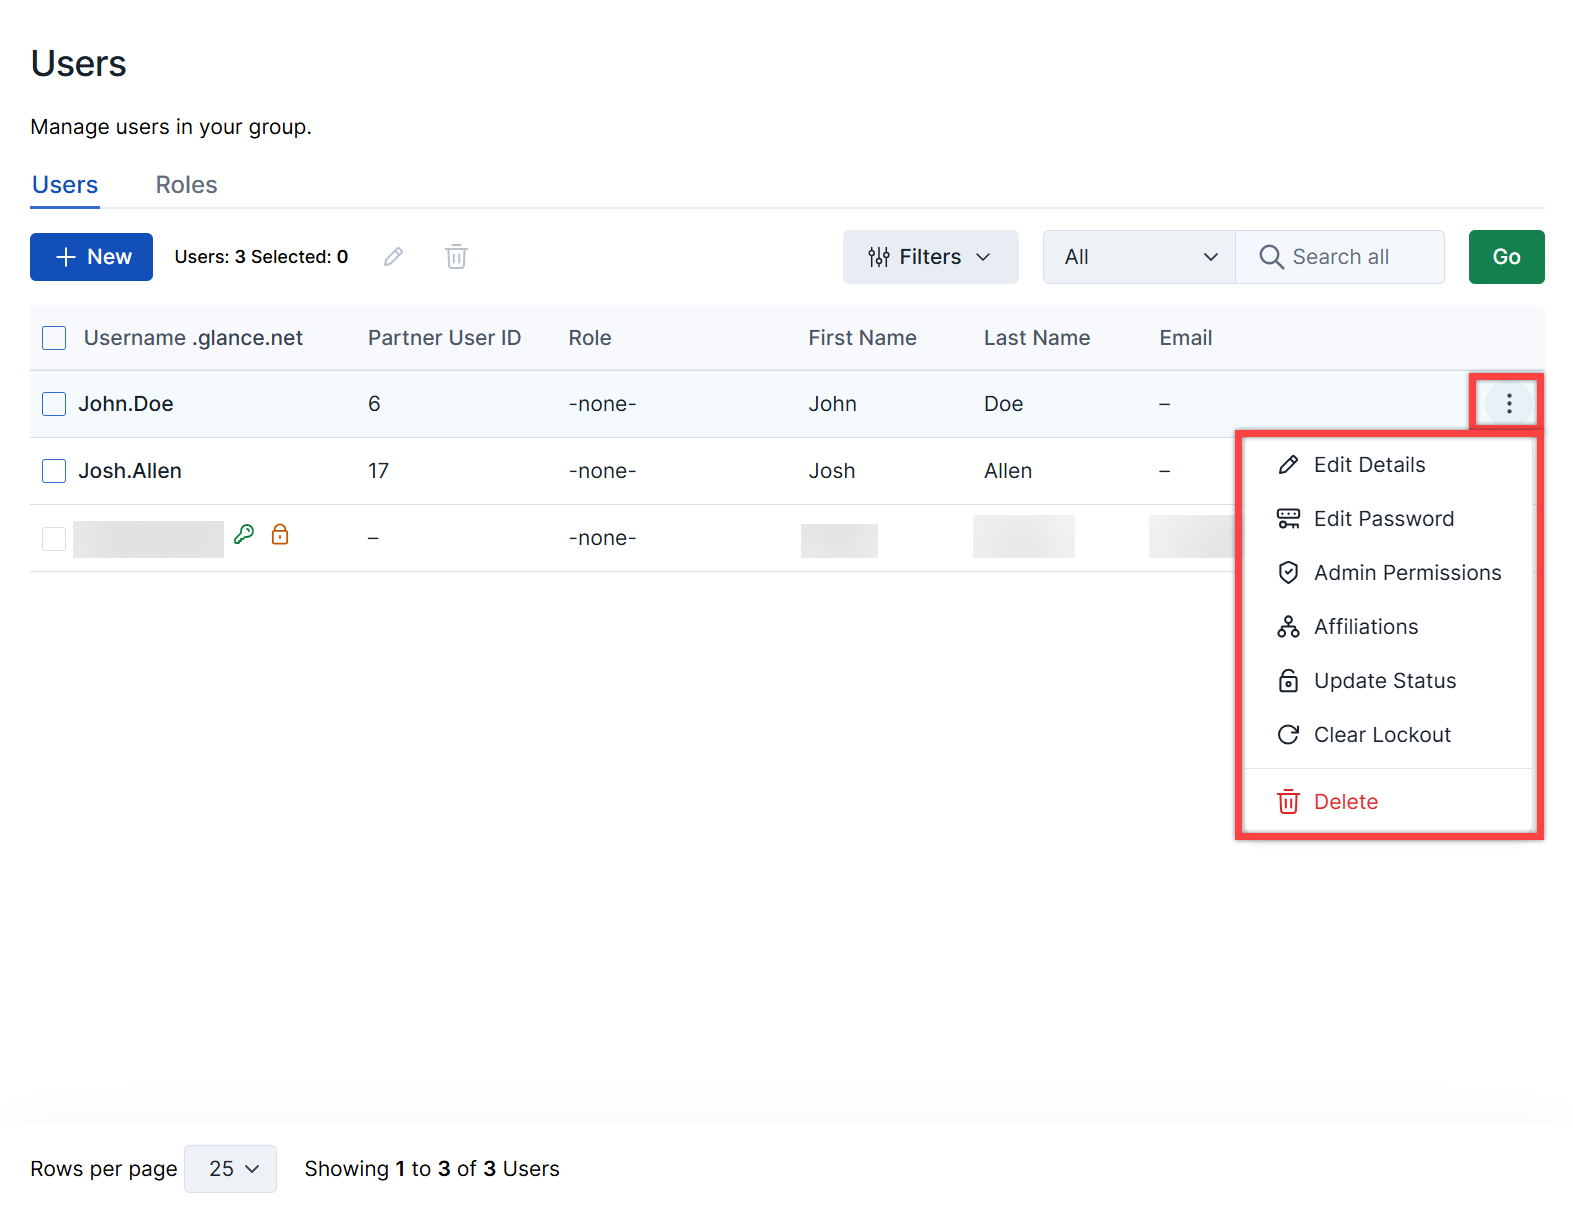 * **Edit Details** - Update the username, Partner User ID, role, first name, last name, and email.
* **Edit Password** - Update the password.
* **Admin Permissions** - Modify admin access and permissions.
* **Affiliations** - Manage subgroup affiliations.
* **Update Status** - Activate or deactivate the account.
* **Clear Lockout** - Remove a login lockout.
* **Delete** - Permanently remove the user.
## Create Roles
Roles can be created within the Portal to:
* Provide specific team members special access to Glance feature(s).
* Run session activity reports on teams.
Complete the following steps to create a role:
1. Navigate to the **Users** section and click the **Roles** tab.
2. Click **New**.
* **Edit Details** - Update the username, Partner User ID, role, first name, last name, and email.
* **Edit Password** - Update the password.
* **Admin Permissions** - Modify admin access and permissions.
* **Affiliations** - Manage subgroup affiliations.
* **Update Status** - Activate or deactivate the account.
* **Clear Lockout** - Remove a login lockout.
* **Delete** - Permanently remove the user.
## Create Roles
Roles can be created within the Portal to:
* Provide specific team members special access to Glance feature(s).
* Run session activity reports on teams.
Complete the following steps to create a role:
1. Navigate to the **Users** section and click the **Roles** tab.
2. Click **New**.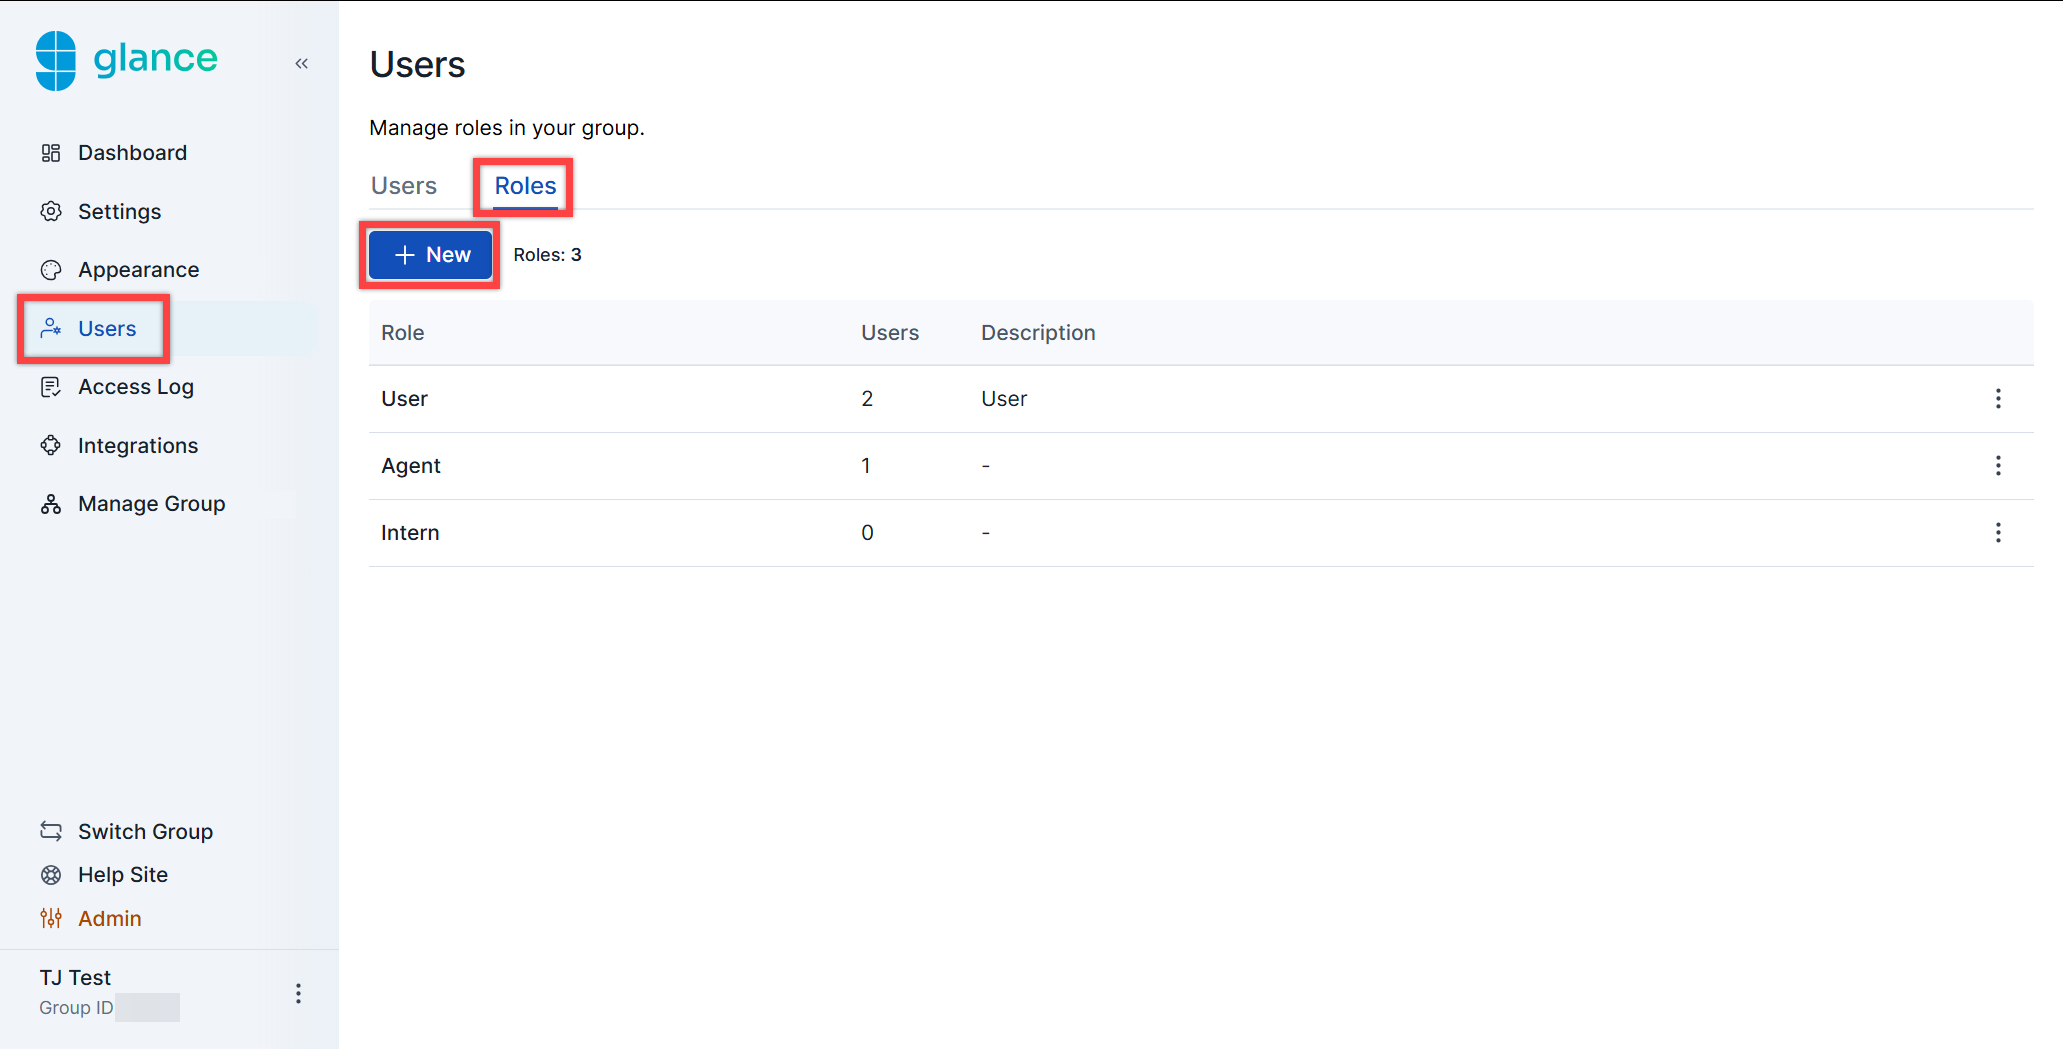 3. Fill out the following:
* **Role**: Assign a name for the role.
* **Description**: Give a brief description which will be helpful for your team when reviewing the role.
* **Role Permissions**: Assign the capabilities and features for this role.
3. Fill out the following:
* **Role**: Assign a name for the role.
* **Description**: Give a brief description which will be helpful for your team when reviewing the role.
* **Role Permissions**: Assign the capabilities and features for this role.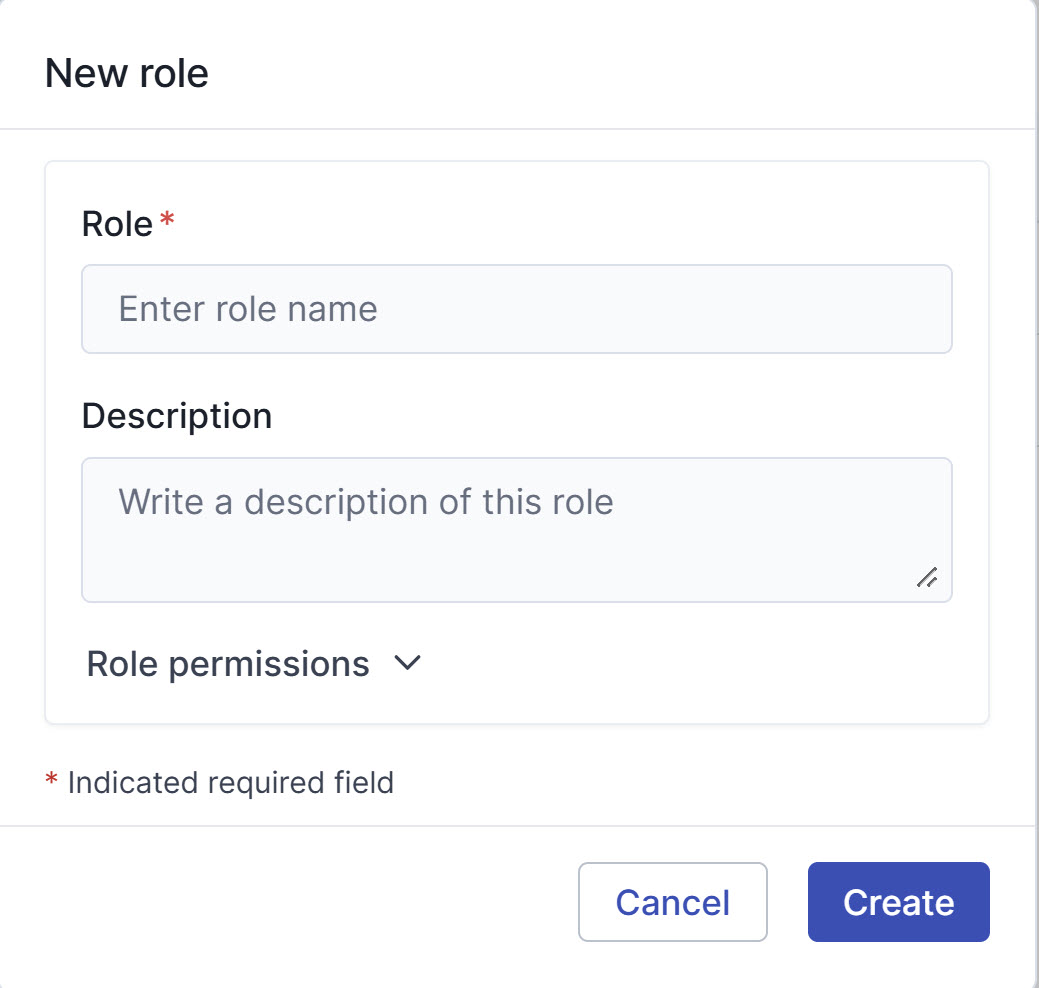 4. Click **Create**.
## Edit Role Details Within Your Account
Follow the steps below to update role names, descriptions, and permissions.
1. Navigate to the **Users** section.
2. Click the **Roles** tab.
3. Click the ellipsis on the right side within the role's row.
4. Click **Create**.
## Edit Role Details Within Your Account
Follow the steps below to update role names, descriptions, and permissions.
1. Navigate to the **Users** section.
2. Click the **Roles** tab.
3. Click the ellipsis on the right side within the role's row.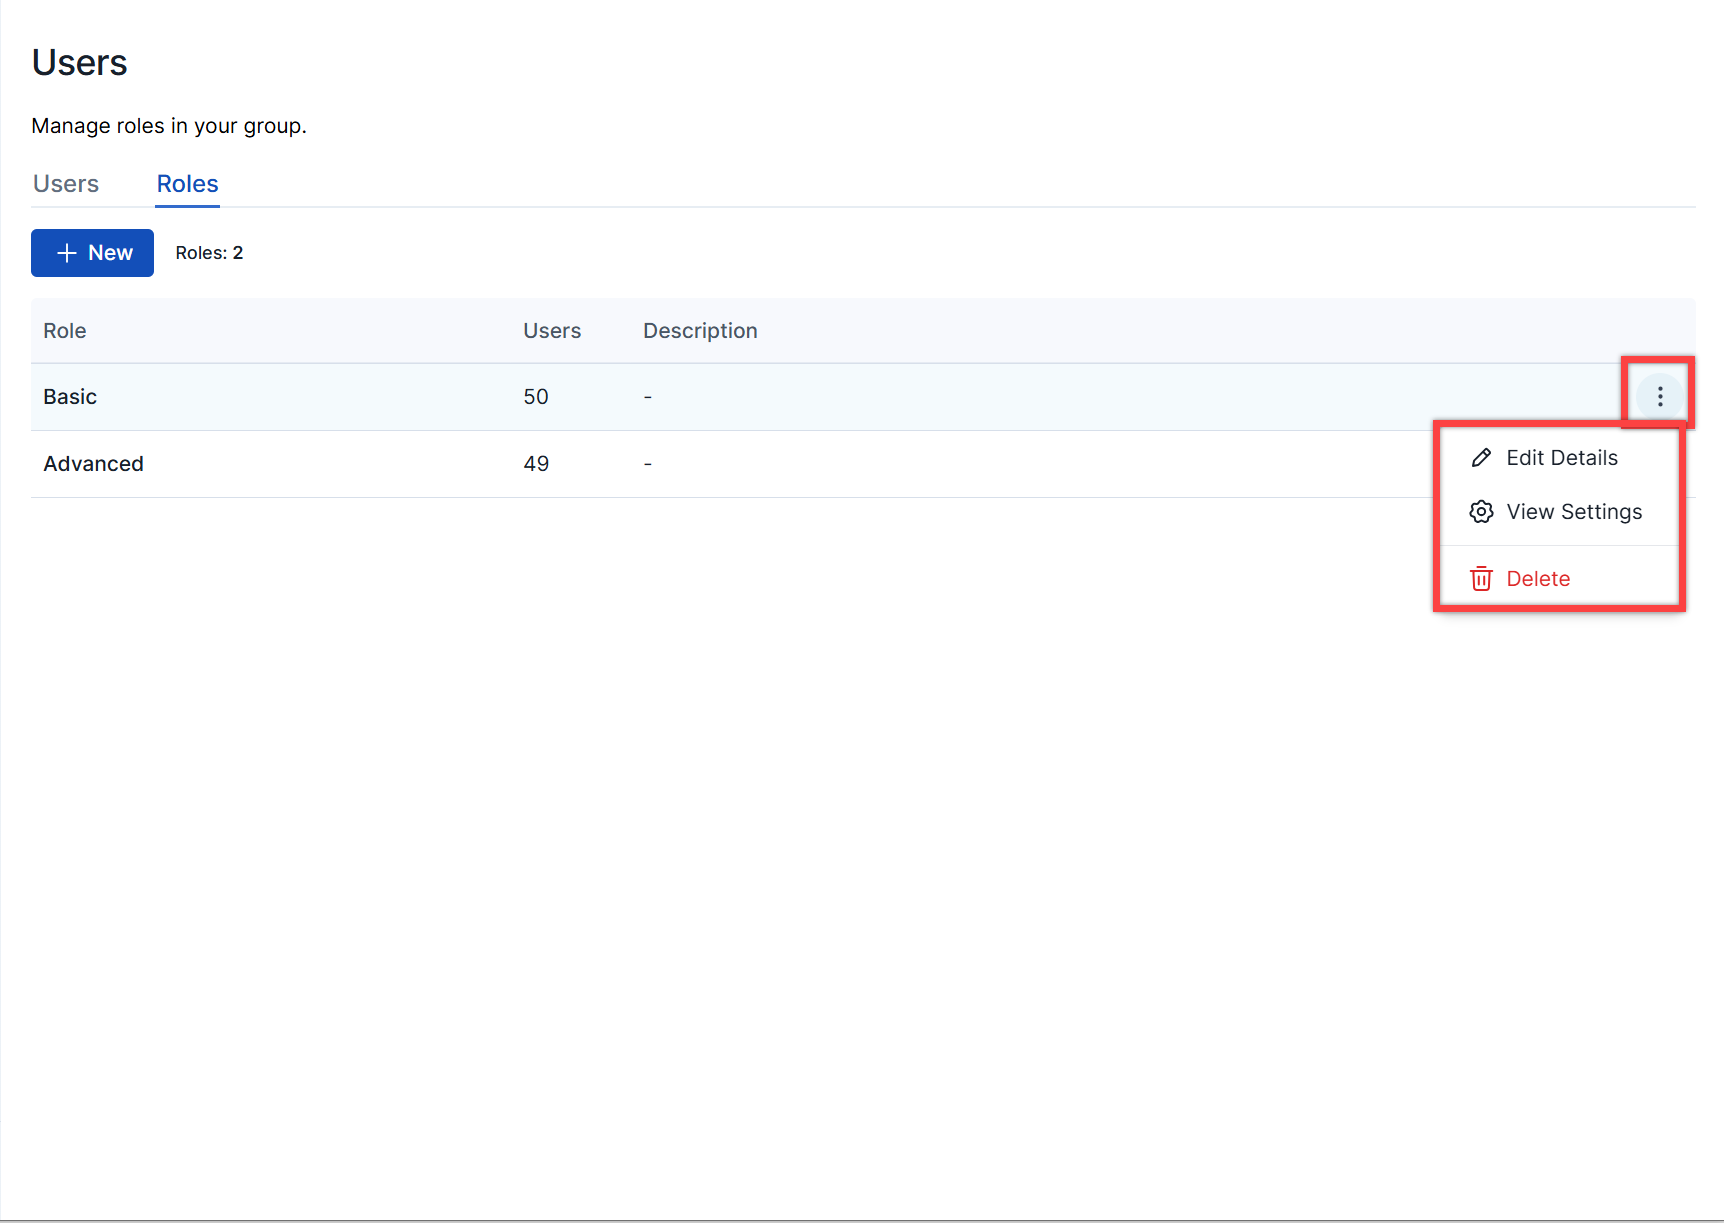 * **Edit Details** - Modify the role's name and description.
* **View Settings** - Review assigned permissions and settings.
* **Delete** - Permanently remove the role.
=================================================================
FILE: /users/portal/masking
=================================================================
Pages or elements can be masked from the agent's view by utilizing this section.
## Masking Elements
The contents of specific element fields, such as credit card numbers or password fields, can be masked from view by agents. Masked elements can be identified by any CSS selector, including the html name or id attribute. When a text element is masked, agents will only see asterisks in their view. Agents will not be able to see the status of masked dropdown boxes, radio buttons, or checkboxes.
You can also mask non-input page elements. Masking an element also masks any nested elements and input fields that are contained by the masked element. The dimensions of masked elements are preserved, but text content and images are removed. The values of HREF and SRC attributes are cleared and the contents of SVG audio and video tags are removed.
Keep in mind the following:
* If a form field is identified to be masked and to be edited, masking will take priority.
* These selectors are linked to the table in Account Management, meaning any edits to this list will be reflected in both locations. However, assigning these elements to roles is exclusively managed in this section.
* Glance masks page elements which match any of the CSS selectors specified, as well as elements with `class="glance_masked"` or attribute `glance_masked="true"`. Regardless of role, these elements will always be masked.
### Configuring Masked Elements
You can configure masking from the Content Masking page. No customer website modifications are required to add or change masked field definitions.
To configure the masked elements:
1. As an administrator, navigate to **Settings** > **Content Masking** > **Elements**.
2. Click the **New** button.
* **Edit Details** - Modify the role's name and description.
* **View Settings** - Review assigned permissions and settings.
* **Delete** - Permanently remove the role.
=================================================================
FILE: /users/portal/masking
=================================================================
Pages or elements can be masked from the agent's view by utilizing this section.
## Masking Elements
The contents of specific element fields, such as credit card numbers or password fields, can be masked from view by agents. Masked elements can be identified by any CSS selector, including the html name or id attribute. When a text element is masked, agents will only see asterisks in their view. Agents will not be able to see the status of masked dropdown boxes, radio buttons, or checkboxes.
You can also mask non-input page elements. Masking an element also masks any nested elements and input fields that are contained by the masked element. The dimensions of masked elements are preserved, but text content and images are removed. The values of HREF and SRC attributes are cleared and the contents of SVG audio and video tags are removed.
Keep in mind the following:
* If a form field is identified to be masked and to be edited, masking will take priority.
* These selectors are linked to the table in Account Management, meaning any edits to this list will be reflected in both locations. However, assigning these elements to roles is exclusively managed in this section.
* Glance masks page elements which match any of the CSS selectors specified, as well as elements with `class="glance_masked"` or attribute `glance_masked="true"`. Regardless of role, these elements will always be masked.
### Configuring Masked Elements
You can configure masking from the Content Masking page. No customer website modifications are required to add or change masked field definitions.
To configure the masked elements:
1. As an administrator, navigate to **Settings** > **Content Masking** > **Elements**.
2. Click the **New** button.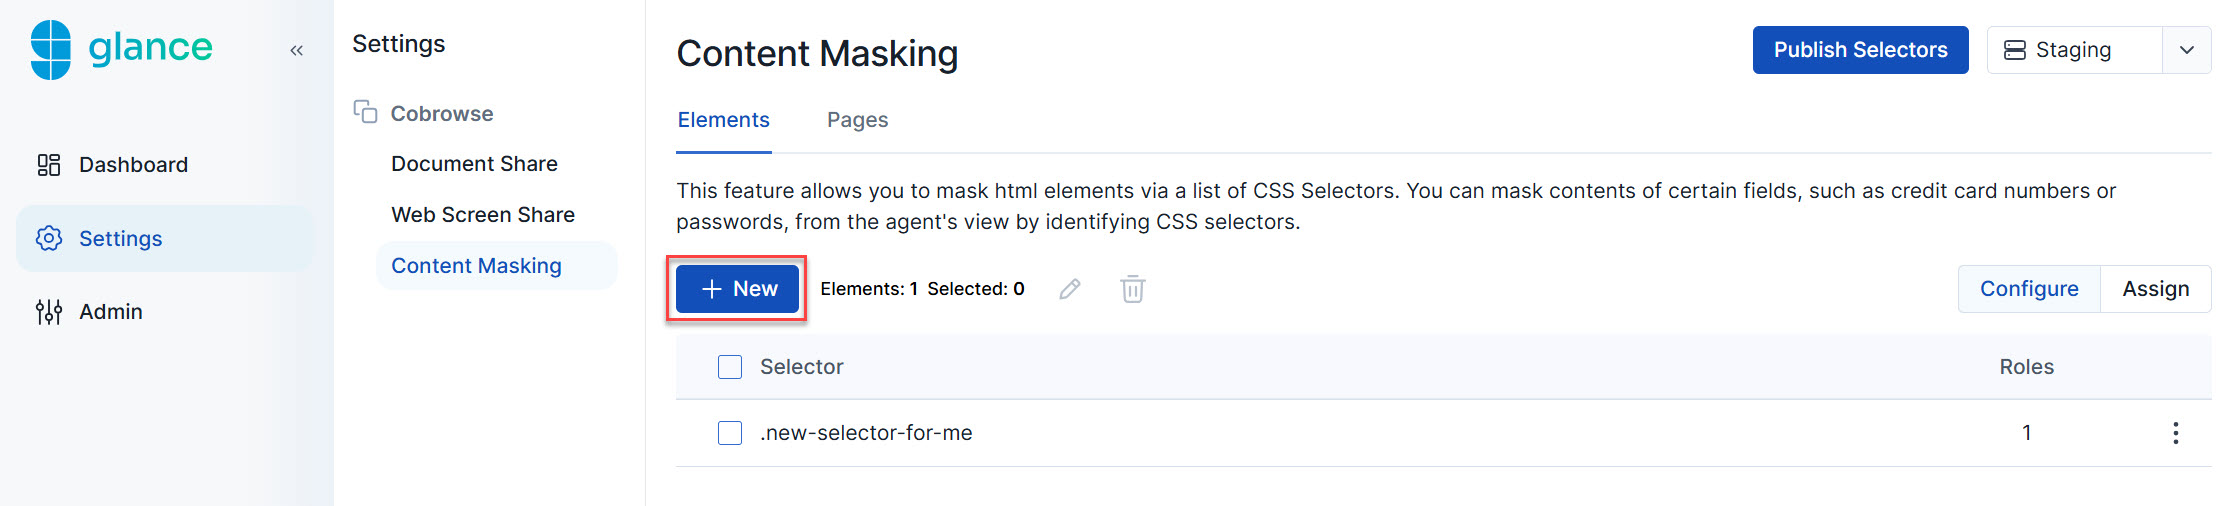 3. Input the element that needs to be masked in the **Selector Identifier** field and click **Create**.
4. After you test your changes in staging, click **Publish Selectors**.
3. Input the element that needs to be masked in the **Selector Identifier** field and click **Create**.
4. After you test your changes in staging, click **Publish Selectors**.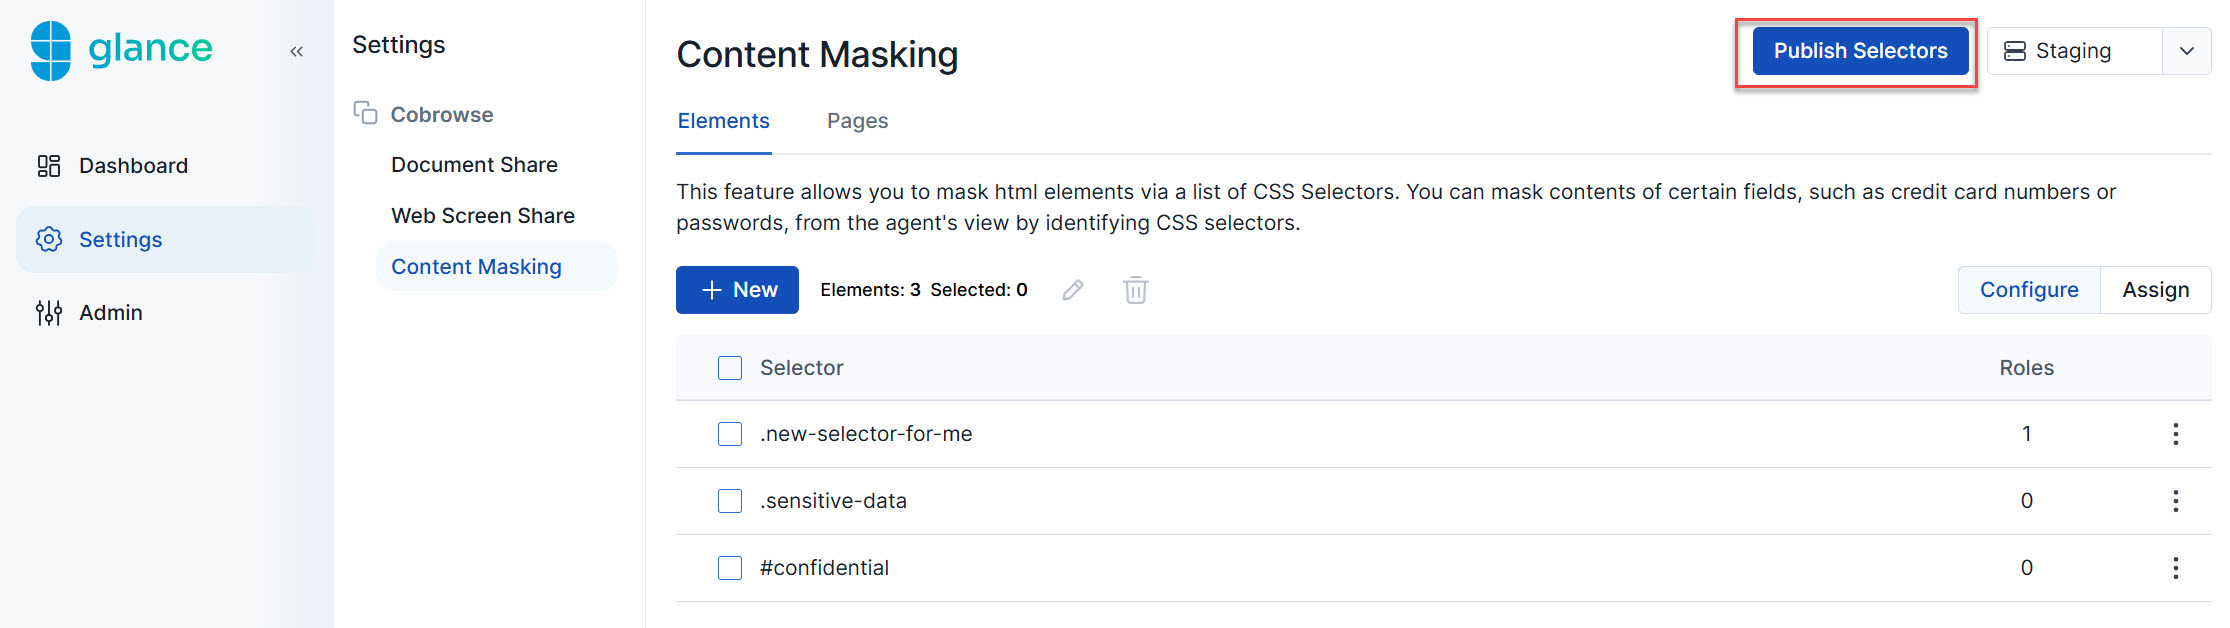
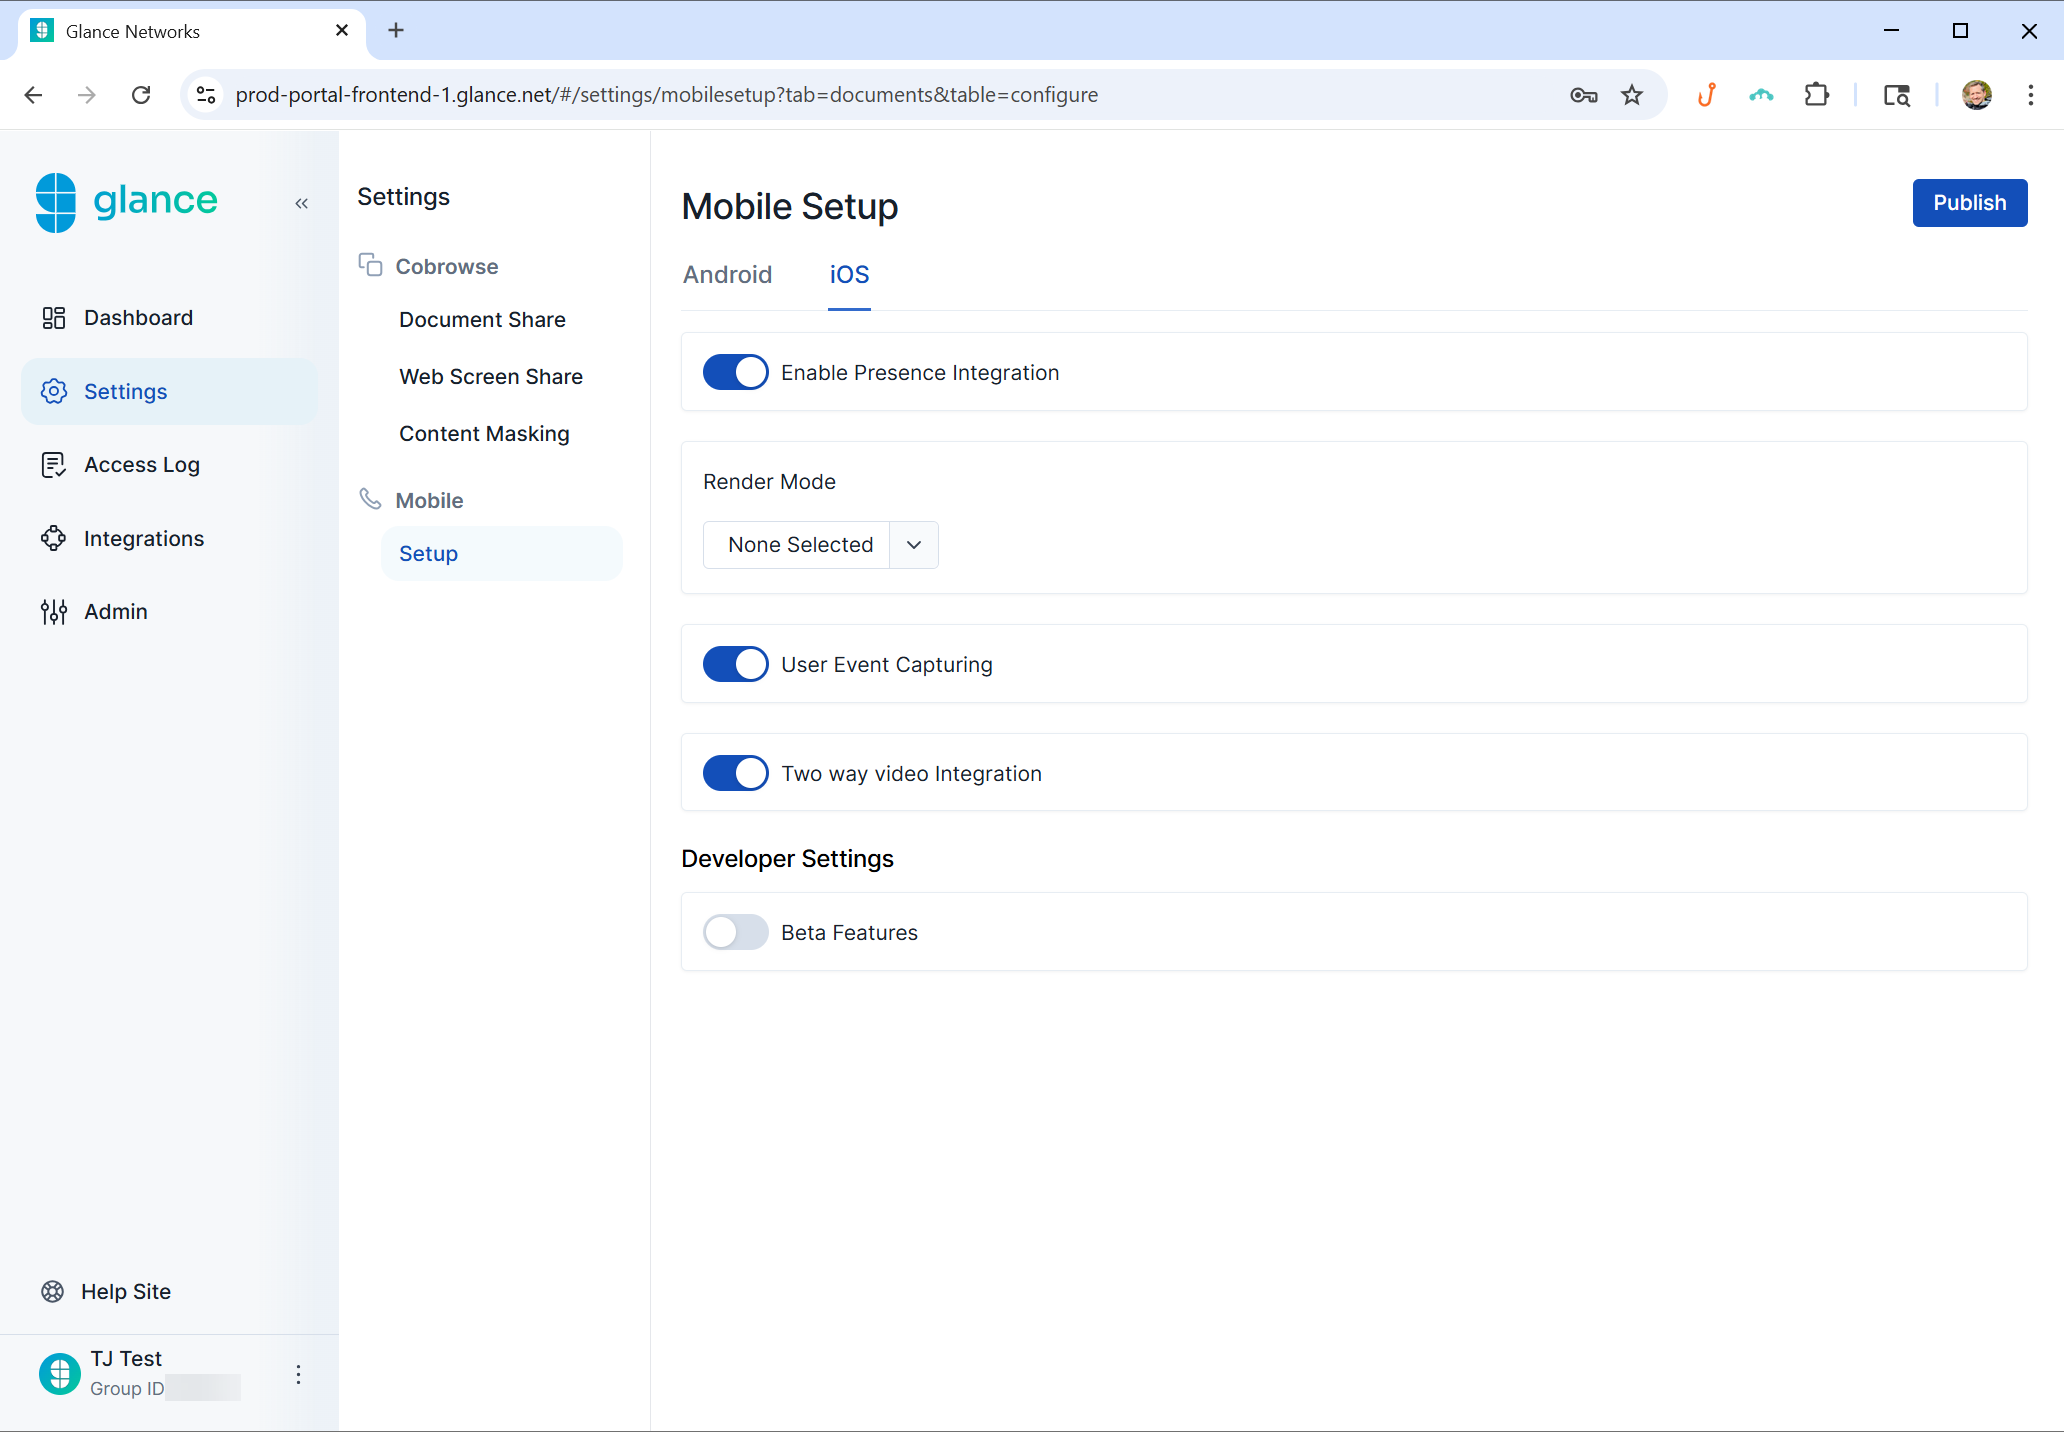 * **Enable Presence Integration** - Enable or disable the SDK's ability to support Presence.
* **Render Mode (Only available on iOS)** - Change the method that the SDK uses to capture the screen during sessions.
* **Render in context** - The SDK's features and UI elements appear directly within your app's existing screens, instead of opening a separate window or taking users out of the app experience.
* **Draw View in Hierarchy** - The SDK's interface is displayed as part of your app's existing view structure, alongside your own UI elements.
* **None Selected** - No preference is chosen; the SDK will use the default behavior.
* **User Event Capturing** - To be released at a later date.
* **Two Way Video Integration** - Enable or disable the SDK's ability to support two-way video sessions between the user and the agent.
* **Beta Features** - Allows the SDK access to beta features with the option to disable if preferred.
=================================================================
FILE: /users/portal/permissions
=================================================================
# Permissions
The **Permissions** tab allows you to manage user privileges and configuration. To access it, navigate to the Portal, select Settings from the left pane, and click **Permissions** under the **Setup** menu.
To enable permissions for an entire group, select the checkbox in the **Group** column. To enable it for a specific role, select the checkbox under the corresponding **Role** column.
* **Enable Presence Integration** - Enable or disable the SDK's ability to support Presence.
* **Render Mode (Only available on iOS)** - Change the method that the SDK uses to capture the screen during sessions.
* **Render in context** - The SDK's features and UI elements appear directly within your app's existing screens, instead of opening a separate window or taking users out of the app experience.
* **Draw View in Hierarchy** - The SDK's interface is displayed as part of your app's existing view structure, alongside your own UI elements.
* **None Selected** - No preference is chosen; the SDK will use the default behavior.
* **User Event Capturing** - To be released at a later date.
* **Two Way Video Integration** - Enable or disable the SDK's ability to support two-way video sessions between the user and the agent.
* **Beta Features** - Allows the SDK access to beta features with the option to disable if preferred.
=================================================================
FILE: /users/portal/permissions
=================================================================
# Permissions
The **Permissions** tab allows you to manage user privileges and configuration. To access it, navigate to the Portal, select Settings from the left pane, and click **Permissions** under the **Setup** menu.
To enable permissions for an entire group, select the checkbox in the **Group** column. To enable it for a specific role, select the checkbox under the corresponding **Role** column.
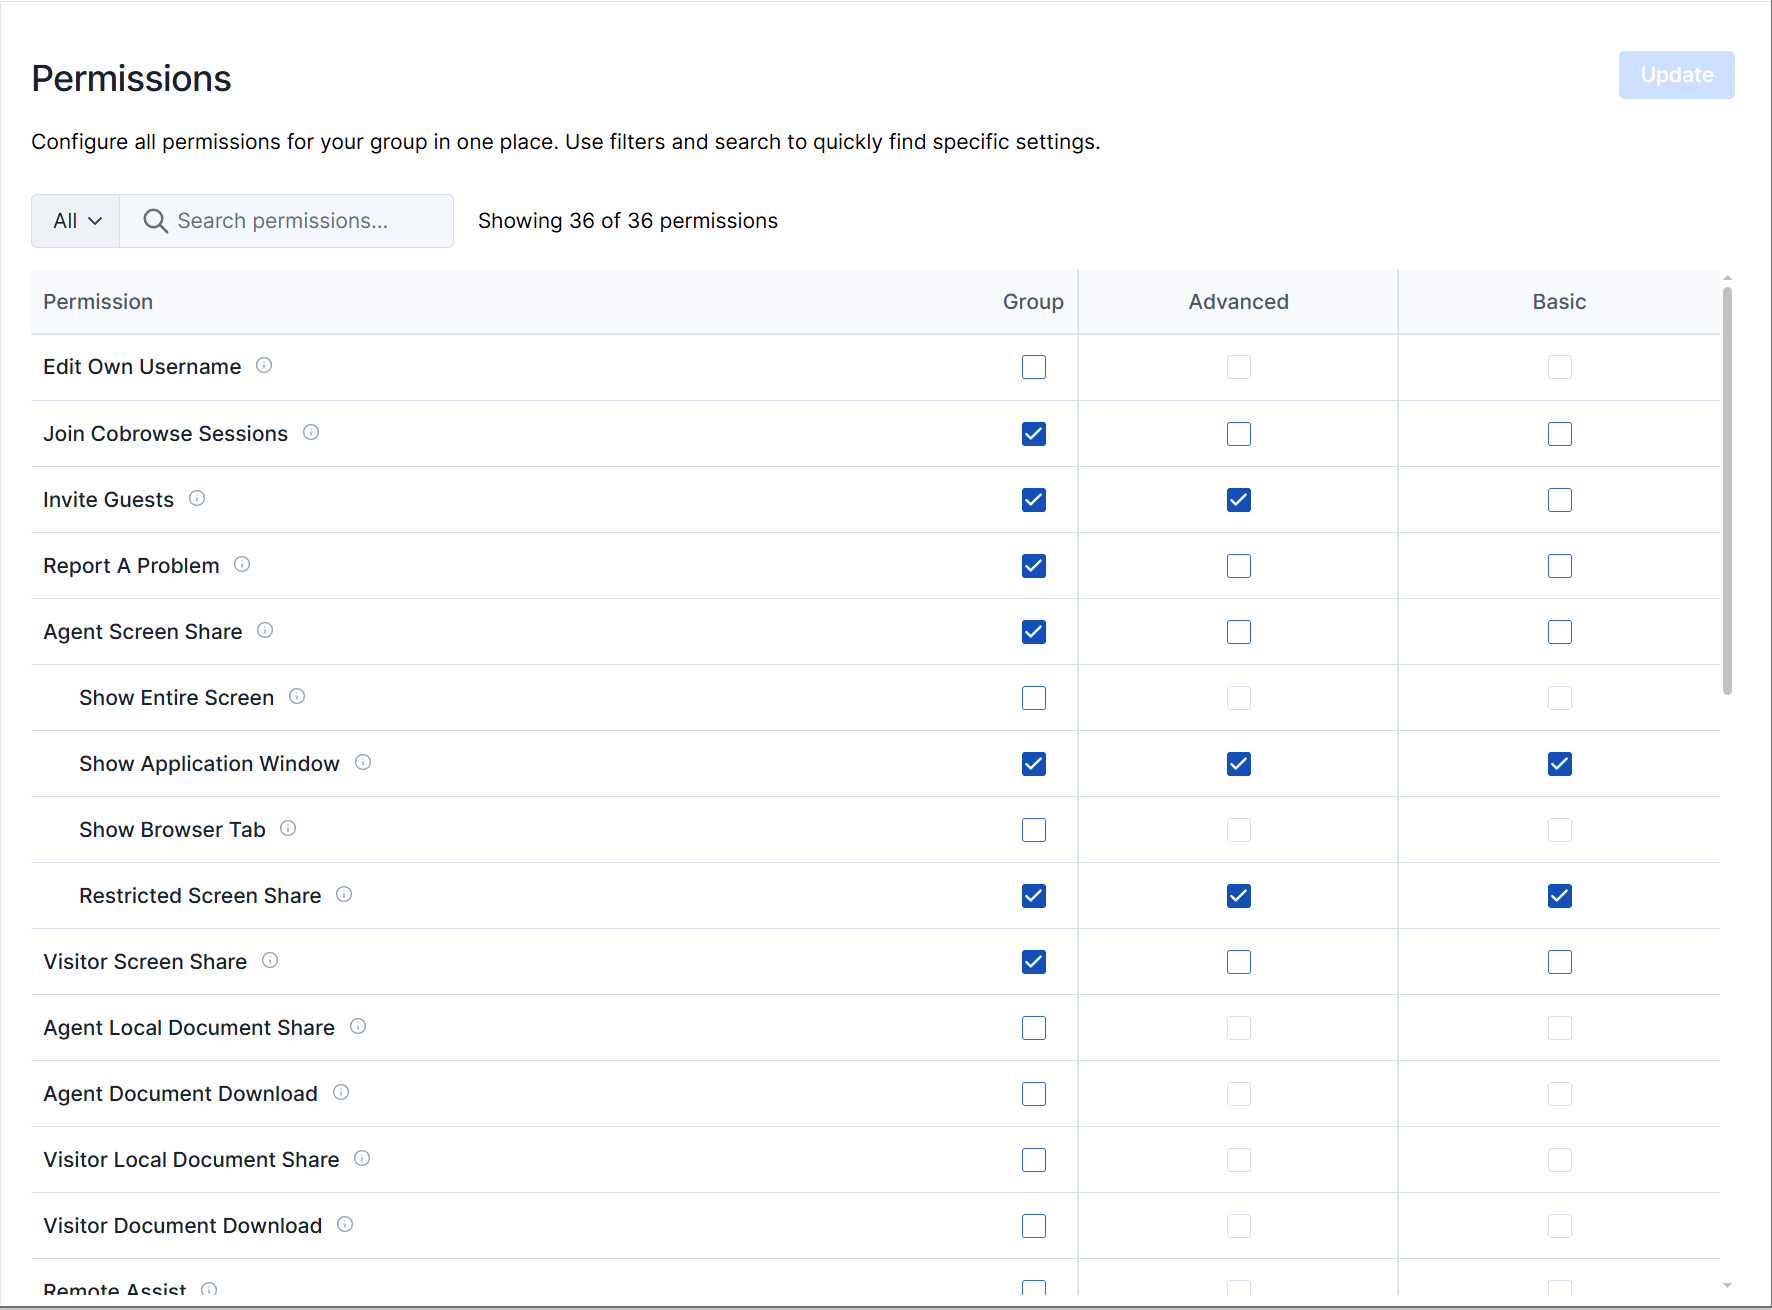 | Permission Name | Description |
| :--- | :--- |
| **Edit own username** | Allows the user to update their Glance username. |
| **Join Cobrowse sessions** | Allows the user to conduct Cobrowse sessions. |
| **Invite guests** | Allows the user to invite guests to a Cobrowse session. |
| **Report a Problem** | Enables the [Report a Problem](/users/glance-cobrowse/rap/) button within the Agent Console. |
| **Agent Screen Share** | Allows the user to share their screen during a Cobrowse session. |
| **Show Entire Screen** | Allows the user to share their entire screen during a Cobrowse session. |
| **Show Application Window** | Allows the user to share a specific application window during a Cobrowse session. |
| **Show Browser Tab** | Allows the user to share a browser tab during a Cobrowse session. |
| **Visitor Screen Share** | Allows the visitor to share their screen during a Cobrowse session. |
| **Agent Local Document Share** | Allows the user to share a local document during a Cobrowse session. |
| **Agent Document Download** | Allows the agent to download a document that was shared with them during a Cobrowse session. |
| **Visitor Local Document Share** | Allows the visitor to share a local document during a Cobrowse session. |
| **Visitor Document Download** | Allows the visitor to download a document that was shared with them during a Cobrowse session. |
| **Remote Assist** | Enables the [Remote Assist](/users/glance-cobrowse/features/remote_assist/) button within the Agent Console. |
| **Restricted Editing** | Enables [Restricted Editing](/users/glance-cobrowse/features/remote_assist/#remote-assist-with-restricted-editing) during a Cobrowse session. |
| **Navigation Assist** | Enables the [Navigation Assist](/users/glance-cobrowse/features/navigation_assist/) button within the Agent Console. |
| **Screen Reader Gesturing** | Enables [Screen Reading](/users/glance-cobrowse/getting-started/accessibility/#using-screen-reader-gesturing) for a visitor during a Cobrowse session. |
| **Agent Accessibility** | Enables [Agent-Side Accessibility](/users/glance-cobrowse/getting-started/accessibility/#agent-side-accessibility) during a Cobrowse session. |
| **Start Screen Share Session** | Allows the user to start Screen Share sessions. |
| **Join Screen Share Sessions** | Allows the user to join Screen Share sessions. |
| **Keyless Sessions** | Enables Screen Share sessions to be started without a Join Key. |
| **Show Screen** | Allows the user to show their screen during a Screen Share session. |
| **Guest Remote Control** | Allows the guest to control the user's mouse during a Screen Share session. |
| **Guest Share Screen** | Allows the guest to share their screen during an agent-initiated Screen Share session. |
| **View a guest's Screen** | Allows the user to view a guest's screen during a Screen Share session. |
| **Agent Remote Control** | Allows the user to control the guest's mouse during a Screen Share session. |
| **Guest Annotation** | Allows the guest to gesture on the agent's screen. |
| **Agent Annotation** | Allows the user to gesture on the guest's screen. |
| **Data Capture For Name, Phone, Email** | Enables Glance to capture a guest's name, phone, or email when they join a session. |
| **Guest Video (Mobile SDK)** | Enables guest video during a Mobile SDK session. |
| **Agent Video** | Enables agent video for Cobrowse and Mobile SDK sessions. |
| **Agent Video Background Effects** | Enables agent background effects for Cobrowse and Mobile SDK sessions. |
| **Visitor and Guest Video** | Enables guest and visitor video during Cobrowse. |
| **Mobile Camera Share** | Enables the visitor to share their mobile camera. |
=================================================================
FILE: /users/portal/profile
=================================================================
The Profile section allows you to view and manage your personal information and portal preferences. To access these settings, click **Profile** in the lower-left corner of the navigation pane.
| Permission Name | Description |
| :--- | :--- |
| **Edit own username** | Allows the user to update their Glance username. |
| **Join Cobrowse sessions** | Allows the user to conduct Cobrowse sessions. |
| **Invite guests** | Allows the user to invite guests to a Cobrowse session. |
| **Report a Problem** | Enables the [Report a Problem](/users/glance-cobrowse/rap/) button within the Agent Console. |
| **Agent Screen Share** | Allows the user to share their screen during a Cobrowse session. |
| **Show Entire Screen** | Allows the user to share their entire screen during a Cobrowse session. |
| **Show Application Window** | Allows the user to share a specific application window during a Cobrowse session. |
| **Show Browser Tab** | Allows the user to share a browser tab during a Cobrowse session. |
| **Visitor Screen Share** | Allows the visitor to share their screen during a Cobrowse session. |
| **Agent Local Document Share** | Allows the user to share a local document during a Cobrowse session. |
| **Agent Document Download** | Allows the agent to download a document that was shared with them during a Cobrowse session. |
| **Visitor Local Document Share** | Allows the visitor to share a local document during a Cobrowse session. |
| **Visitor Document Download** | Allows the visitor to download a document that was shared with them during a Cobrowse session. |
| **Remote Assist** | Enables the [Remote Assist](/users/glance-cobrowse/features/remote_assist/) button within the Agent Console. |
| **Restricted Editing** | Enables [Restricted Editing](/users/glance-cobrowse/features/remote_assist/#remote-assist-with-restricted-editing) during a Cobrowse session. |
| **Navigation Assist** | Enables the [Navigation Assist](/users/glance-cobrowse/features/navigation_assist/) button within the Agent Console. |
| **Screen Reader Gesturing** | Enables [Screen Reading](/users/glance-cobrowse/getting-started/accessibility/#using-screen-reader-gesturing) for a visitor during a Cobrowse session. |
| **Agent Accessibility** | Enables [Agent-Side Accessibility](/users/glance-cobrowse/getting-started/accessibility/#agent-side-accessibility) during a Cobrowse session. |
| **Start Screen Share Session** | Allows the user to start Screen Share sessions. |
| **Join Screen Share Sessions** | Allows the user to join Screen Share sessions. |
| **Keyless Sessions** | Enables Screen Share sessions to be started without a Join Key. |
| **Show Screen** | Allows the user to show their screen during a Screen Share session. |
| **Guest Remote Control** | Allows the guest to control the user's mouse during a Screen Share session. |
| **Guest Share Screen** | Allows the guest to share their screen during an agent-initiated Screen Share session. |
| **View a guest's Screen** | Allows the user to view a guest's screen during a Screen Share session. |
| **Agent Remote Control** | Allows the user to control the guest's mouse during a Screen Share session. |
| **Guest Annotation** | Allows the guest to gesture on the agent's screen. |
| **Agent Annotation** | Allows the user to gesture on the guest's screen. |
| **Data Capture For Name, Phone, Email** | Enables Glance to capture a guest's name, phone, or email when they join a session. |
| **Guest Video (Mobile SDK)** | Enables guest video during a Mobile SDK session. |
| **Agent Video** | Enables agent video for Cobrowse and Mobile SDK sessions. |
| **Agent Video Background Effects** | Enables agent background effects for Cobrowse and Mobile SDK sessions. |
| **Visitor and Guest Video** | Enables guest and visitor video during Cobrowse. |
| **Mobile Camera Share** | Enables the visitor to share their mobile camera. |
=================================================================
FILE: /users/portal/profile
=================================================================
The Profile section allows you to view and manage your personal information and portal preferences. To access these settings, click **Profile** in the lower-left corner of the navigation pane.
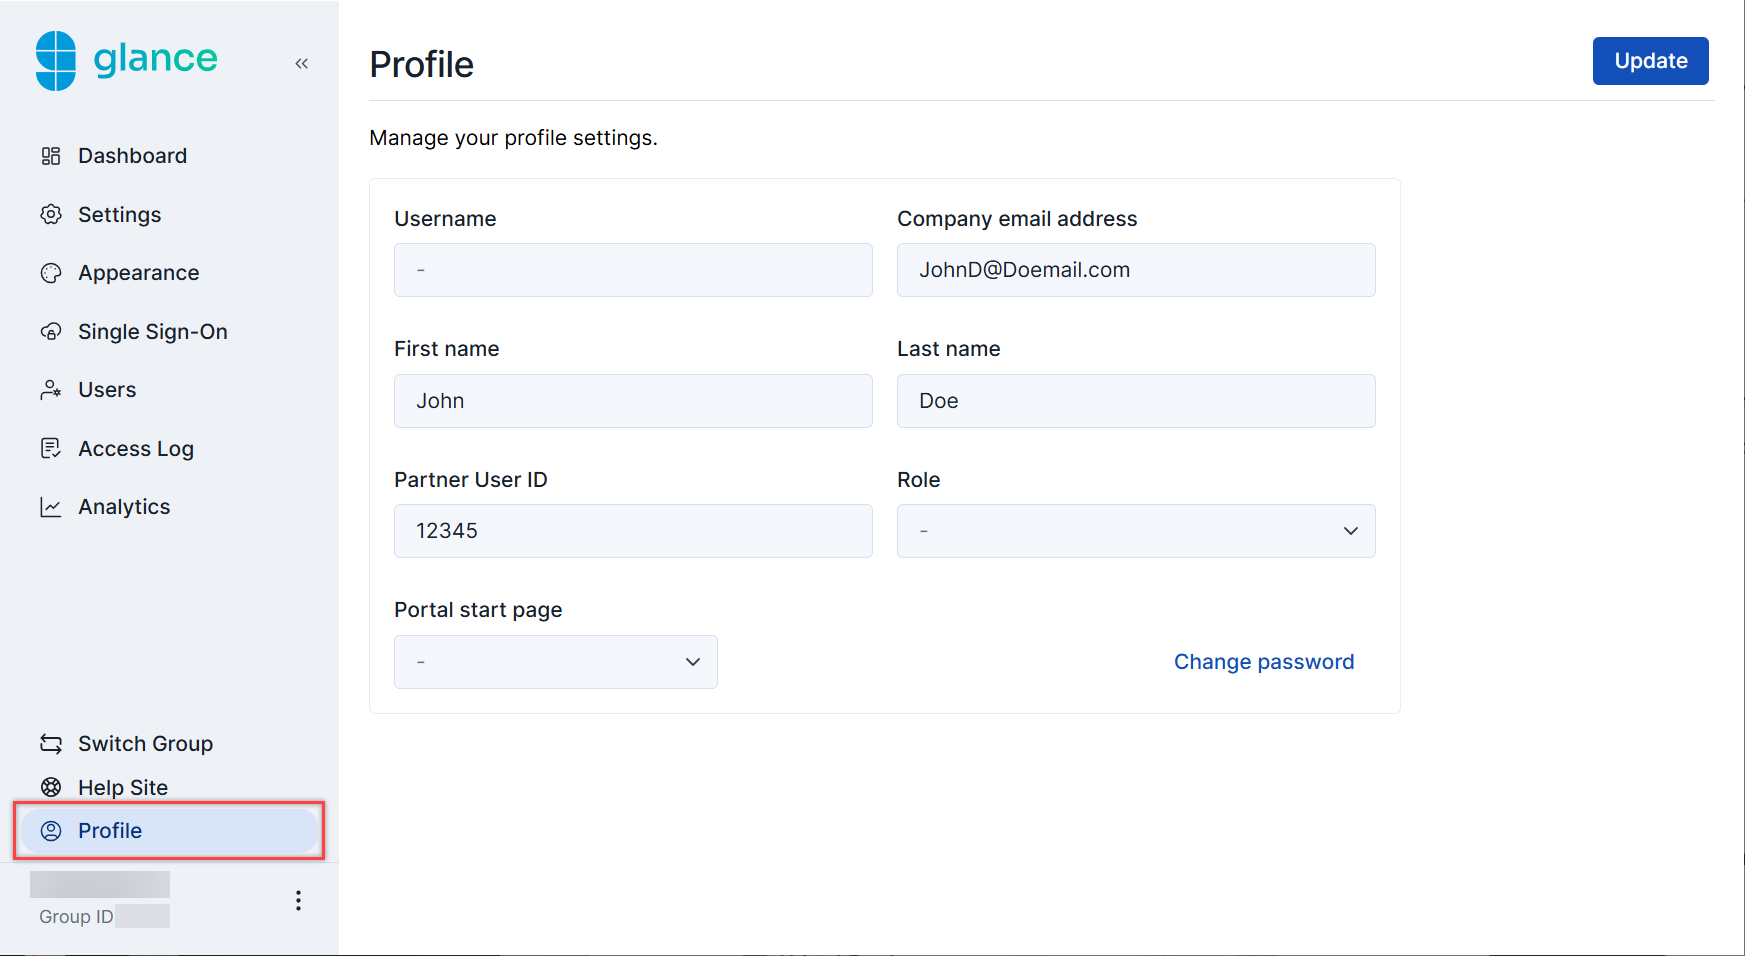 ## Profile Settings
| Field | Description |
| :--- | :--- |
| **Username** | Displays your login name (this field is read-only). |
| **Company email address** | Updates your contact email address. |
| **First name** | Updates your first name. |
| **Last name** | Updates your last name. |
| **Partner User ID** | Updates your unique Partner User ID. |
| **Role** | Changes your assigned role within the group. |
| **Portal start page** | Sets the default landing page that displays when you open the portal. |
| **Change password** | Updates the password for your account. |
=================================================================
FILE: /users/portal/script
=================================================================
The **Script Tag** page allows Glance administrators to modify attributes to create a custom script tag that enables Cobrowse on websites. This interface lets users fill out each individual attribute for the script tag and then generate a script that can be copied and pasted into their website.
## Profile Settings
| Field | Description |
| :--- | :--- |
| **Username** | Displays your login name (this field is read-only). |
| **Company email address** | Updates your contact email address. |
| **First name** | Updates your first name. |
| **Last name** | Updates your last name. |
| **Partner User ID** | Updates your unique Partner User ID. |
| **Role** | Changes your assigned role within the group. |
| **Portal start page** | Sets the default landing page that displays when you open the portal. |
| **Change password** | Updates the password for your account. |
=================================================================
FILE: /users/portal/script
=================================================================
The **Script Tag** page allows Glance administrators to modify attributes to create a custom script tag that enables Cobrowse on websites. This interface lets users fill out each individual attribute for the script tag and then generate a script that can be copied and pasted into their website.
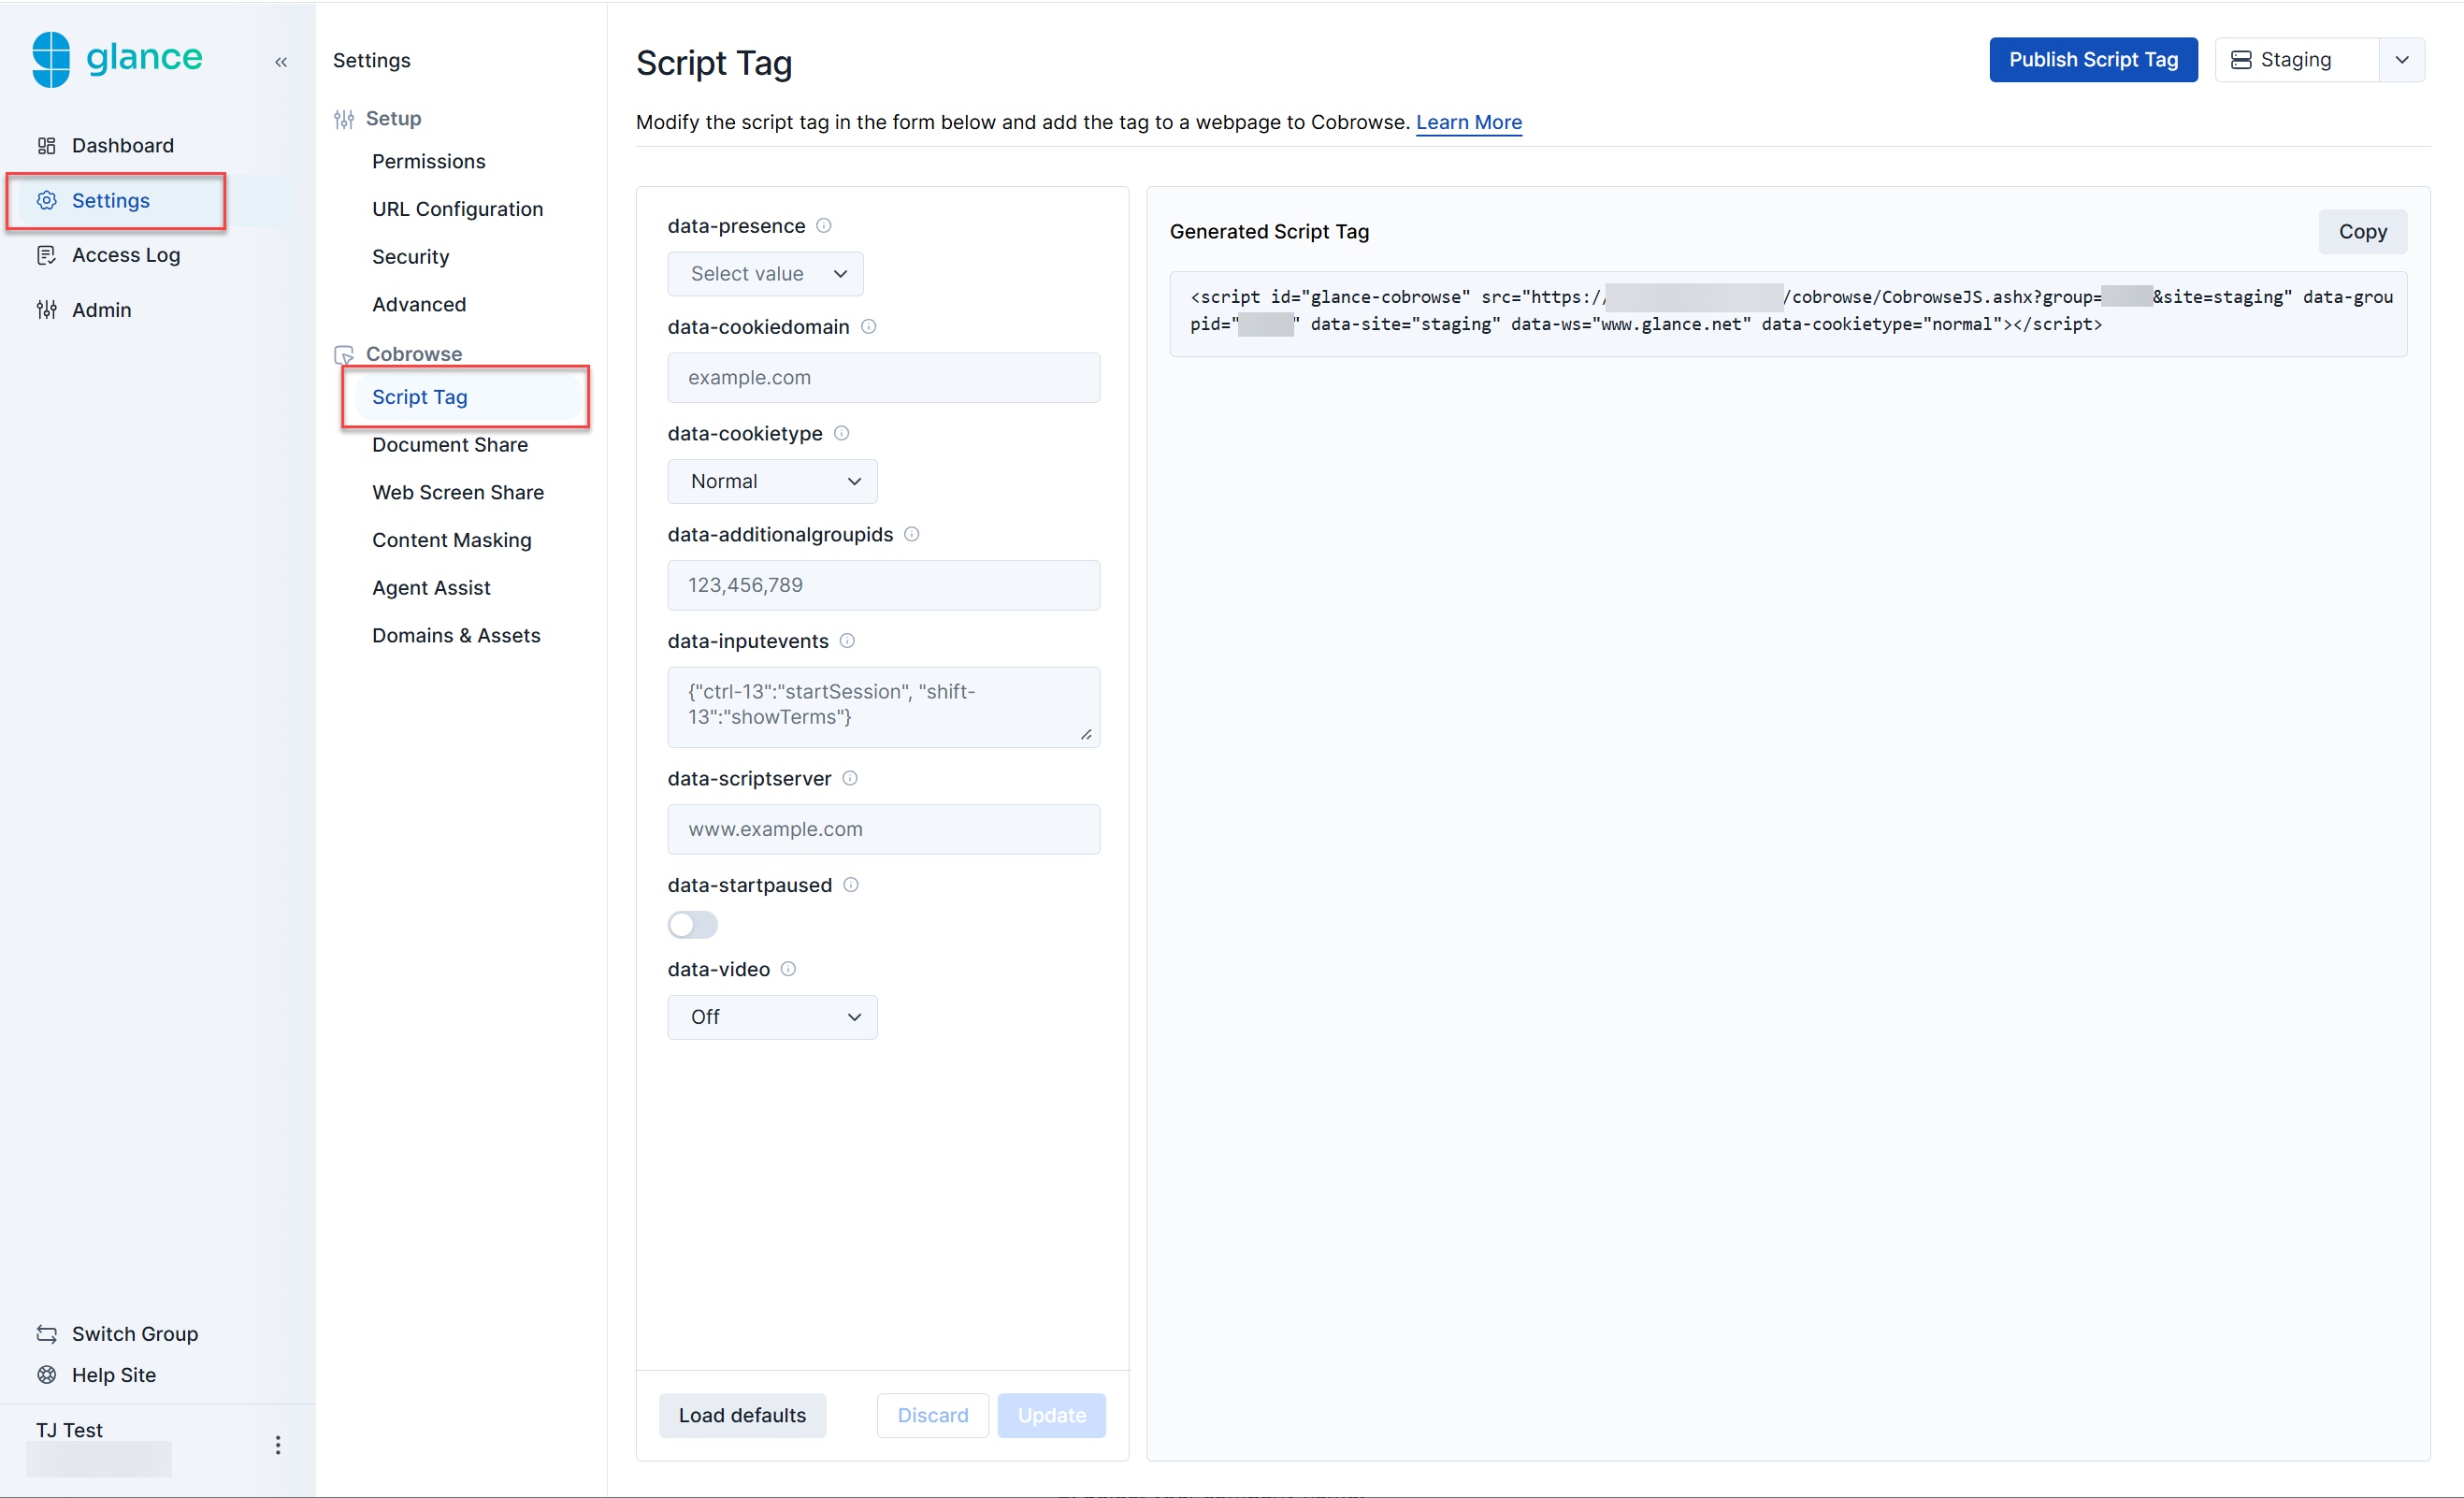 The following attributes can be found within the script tag.
## Read Only Tag
Read-only attributes are generated based on previous selections made by the user. The following attributes are generated within the script as read only:
* **script id** - The identifier used for this script, defaults to `glance-cobrowse`.
* **src** - The source of the cobrowse loader script.
* **data-groupid** - Your assigned Group ID number provided by Glance.
* **data-site** - The environment (staging or production) that this tag will be deployed to. Select **Staging** or **Production** from the drop-down menu to identify what needs to be generated for this script.
* **data-ws** - The webserver being used (e.g., `www.glance.net`). When implementing the script tag on your website, this can be changed for use in beta or a customer-specific environment.
The following attributes can be found within the script tag.
## Read Only Tag
Read-only attributes are generated based on previous selections made by the user. The following attributes are generated within the script as read only:
* **script id** - The identifier used for this script, defaults to `glance-cobrowse`.
* **src** - The source of the cobrowse loader script.
* **data-groupid** - Your assigned Group ID number provided by Glance.
* **data-site** - The environment (staging or production) that this tag will be deployed to. Select **Staging** or **Production** from the drop-down menu to identify what needs to be generated for this script.
* **data-ws** - The webserver being used (e.g., `www.glance.net`). When implementing the script tag on your website, this can be changed for use in beta or a customer-specific environment.
file:// protocol. If you are trying out Cobrowse on a local website, please access it via a host name added to your local hosts file or equivalent.
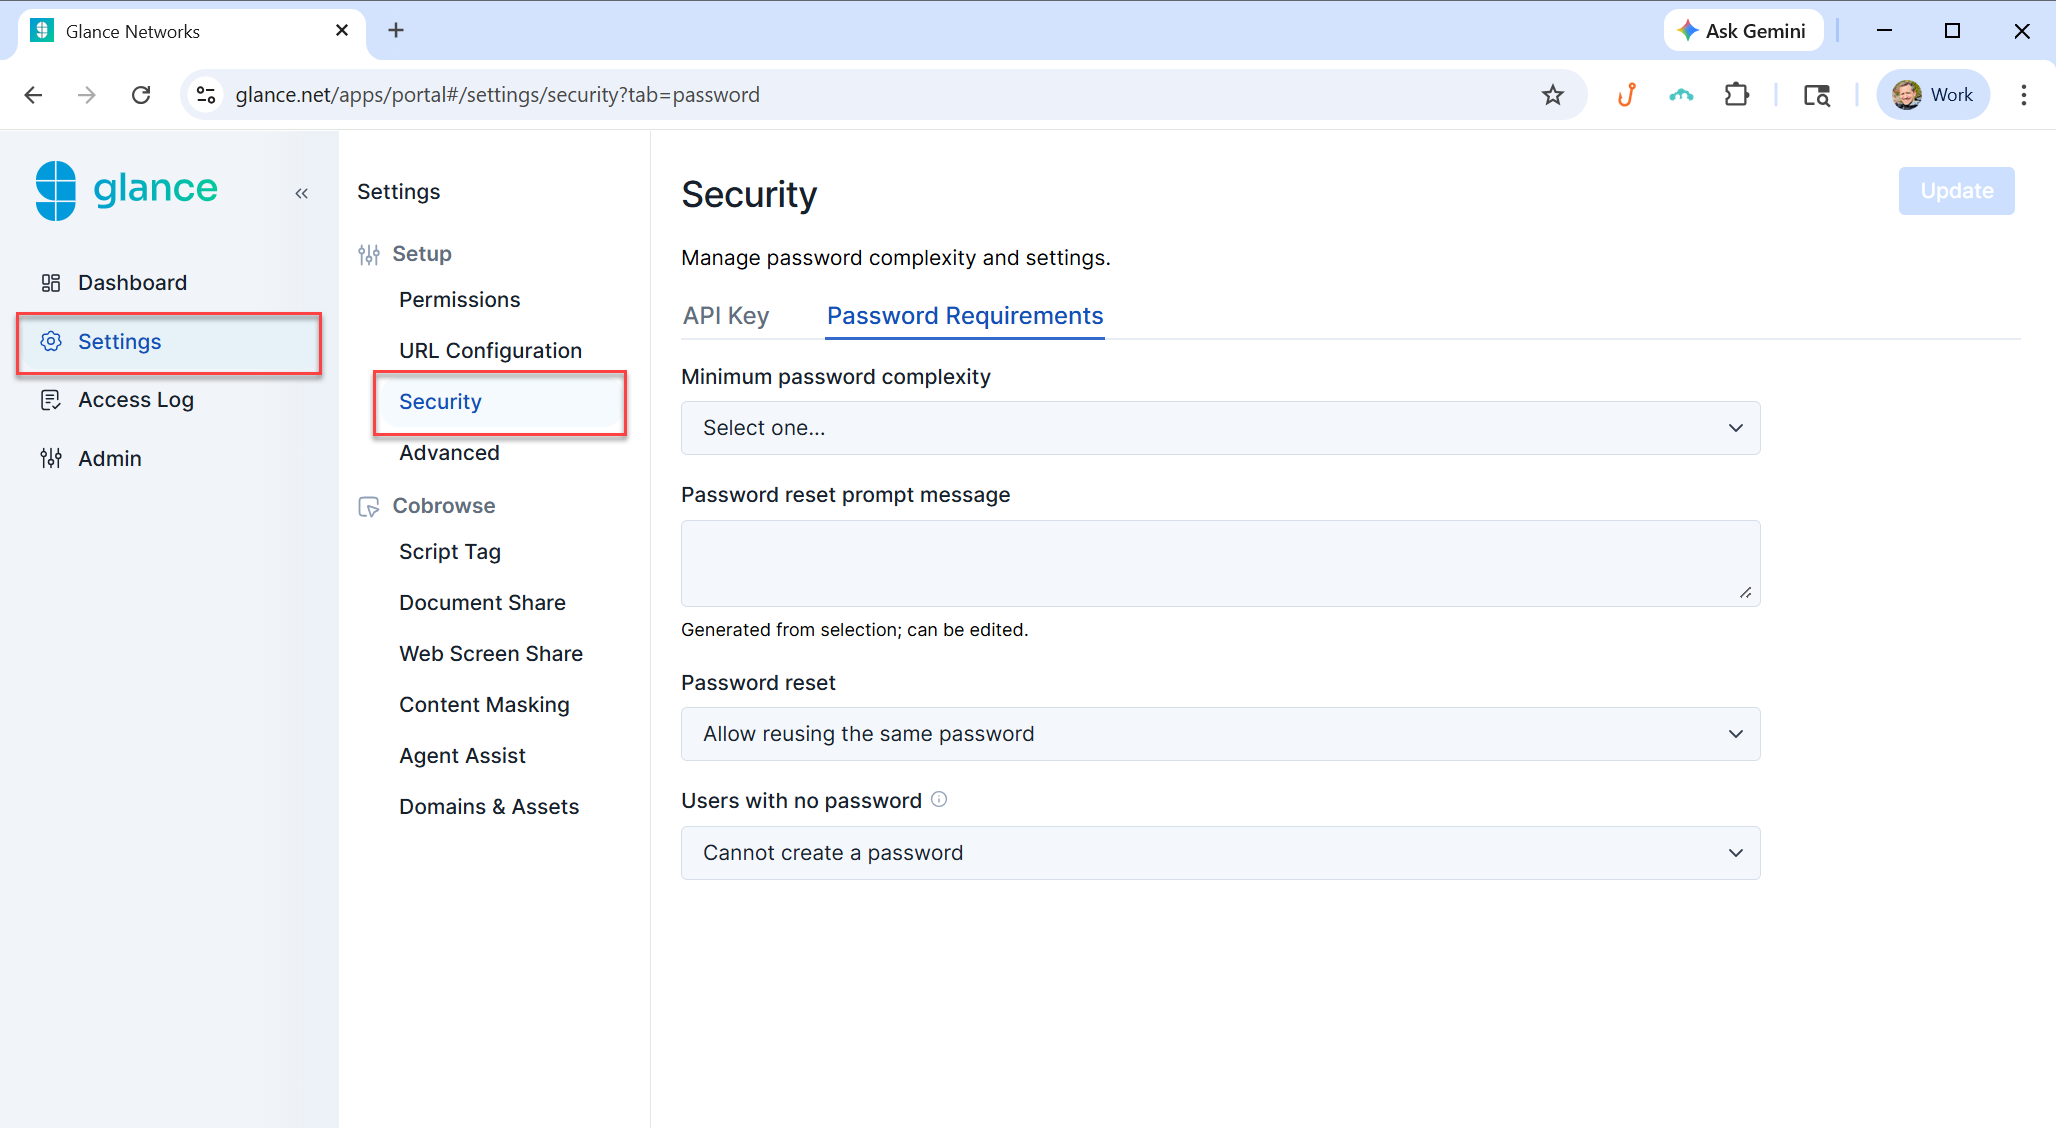 ## API Keys
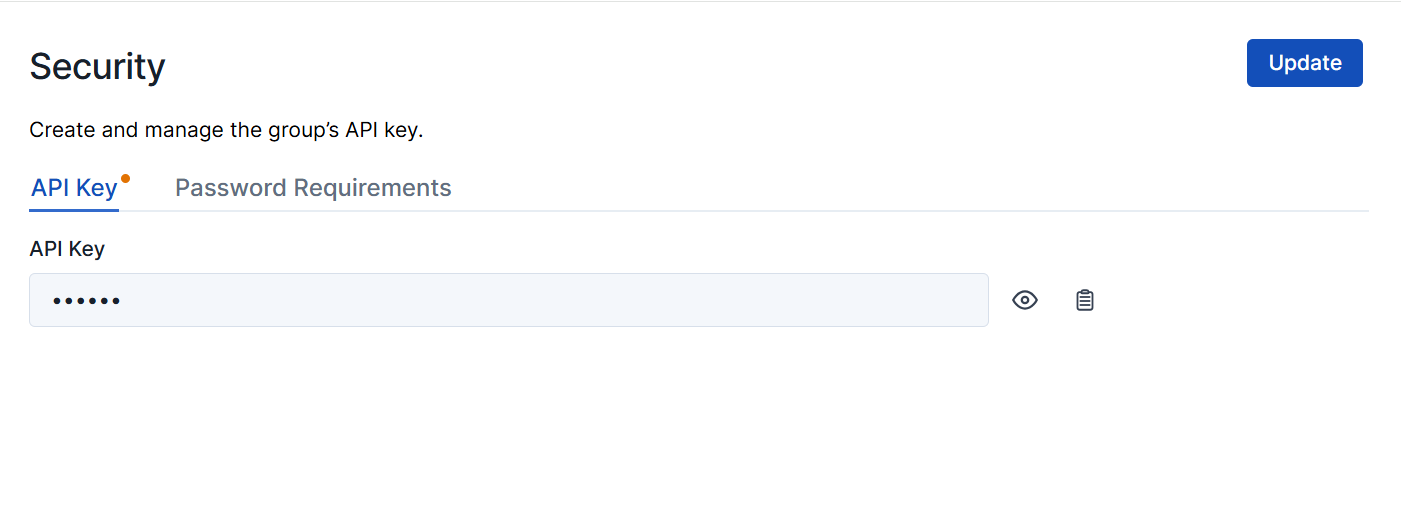 Each Glance customer account has an API Key. It is used to generate Login Keys to grant access to Glance.
* Select the clipboard icon next to the **API Key** field to copy your key.
* Input a new API Key and click the **Update** button to change your current API Key.
Each Glance customer account has an API Key. It is used to generate Login Keys to grant access to Glance.
* Select the clipboard icon next to the **API Key** field to copy your key.
* Input a new API Key and click the **Update** button to change your current API Key.
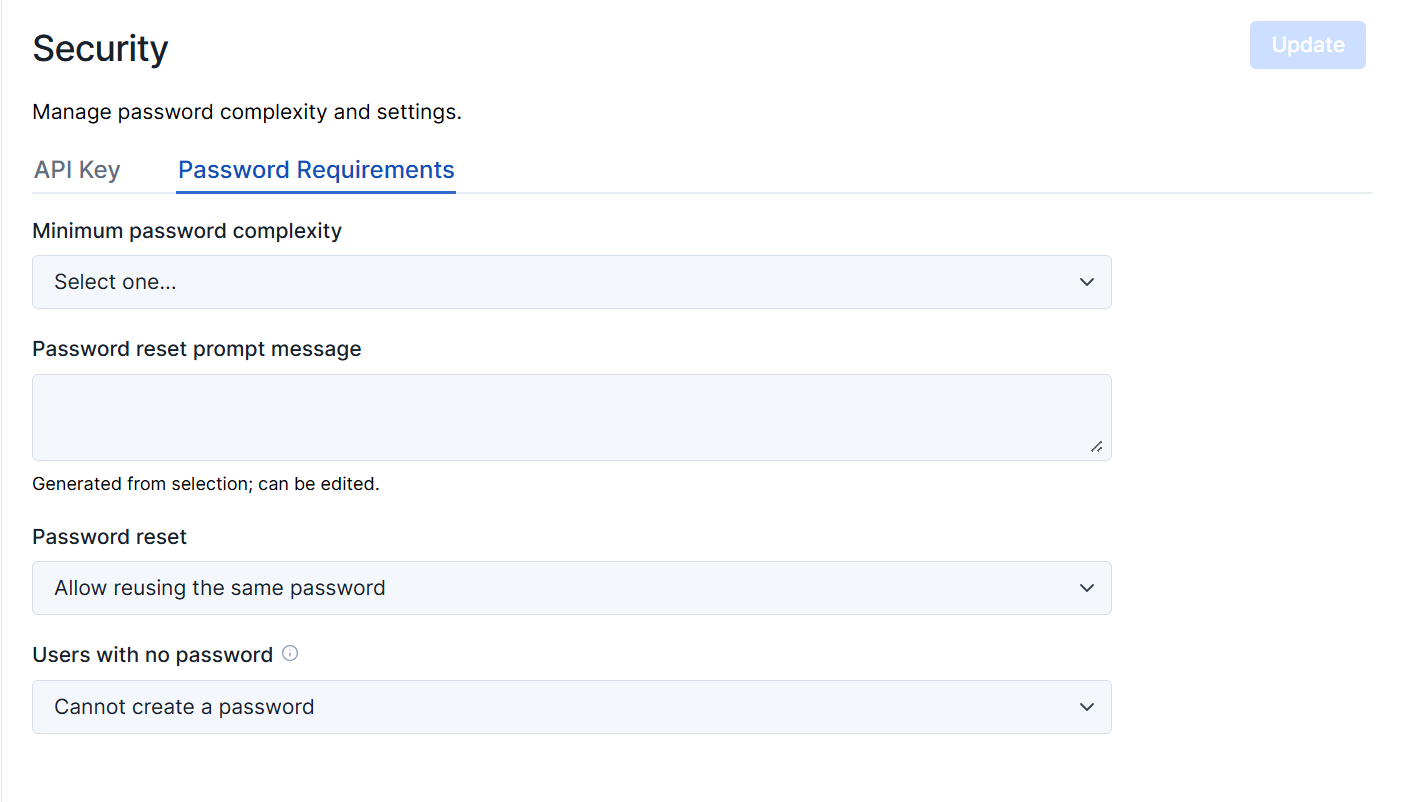 Password requirement settings apply to the passwords used to log into Glance. They are only enforced when users create new passwords or change existing passwords. They do not apply to:
* Session Keys
* Login Keys
* API Keys
**Minimum password complexity**
Choose one of the following for password complexity:
* 6-character minimum length (not secure).
* 7-character minimum, with uppercase, lowercase, and digit characters.
* 8-character minimum.
* 8-character minimum, with uppercase, lowercase, and digit characters.
* 8-character minimum, with one or more non-alphanumeric characters.
* 9-character minimum.
* 9-character minimum, with uppercase, lowercase, and digit characters.
* 9-character minimum, with one or more non-alphanumeric characters.
**Password reset prompt message**
The message shown when resetting a password.
**Password reset**
Select the requirements for when a user changes their password:
* Allow reusing the same password.
* Require a new password.
**Users with no password**
Select the action for users without a password:
* Cannot create a password.
* Can create a password via Password Reset.
=================================================================
FILE: /users/portal/sso_autoprovisioning
=================================================================
Customers who subscribe to Glance products offering autoprovisioning can skip the step of pre-provisioning each of their users who must use Glance. Instead, a Glance subscriber account is created on the fly the first time each user accesses the Glance product via SAML single sign-on.
## Requirements
You must contact your Glance representative in order to activate autoprovisioning on your account.
Autoprovisioning only works for SAML-integrated customer accounts. Set up SAML access to Glance, and verify it is working correctly for Glance subscribers. When valid SAML Assertion documents are being presented to the Glance service, the autoprovisioning user interface uses them to help choose the appropriate attributes to use for new Glance subscribers.
Autoprovisioning requires certain identifying attributes to be provided by the customer's SAML single sign-on identity provider. To autoprovision an account, Glance needs:
* An agreed-upon unique identifier for each new subscriber.
* A way to create a Glance Address from the user's profile information.
* Name, email, and telephone number attributes are helpful but not required.
## Configuring Autoprovisioning
When Glance is integrated with your SAML enterprise single sign-on solution, you can automatically create and provision a new Glance account for each new subscriber from your organization. This panel provides the information required to provision these accounts correctly.
Glance identifies your subscribers with these attributes (items of data):
* GlanceAddress (required)
* PartnerUID
* FirstName
* LastName
* Email
* Phone
* Role
Most subscribers need a valid and unique PartnerUID. This can be an employee number or any other unique alphanumeric code assigned by your organization and can be the same value as the GlanceAddress.
The other information (name, email, and phone number) is not required. It helps support and keep track of subscribers.
Your SAML enterprise single sign-on solution is configured to present particular attributes of each user to Glance. Follow these steps to map them:
1. Select **Yes** on the **Autoprovision new users** dropdown.
2. Choose which SAML attributes to use for new Glance subscribers on the **Transformation Table**.
3. Select the SAML Attribute to use to create the Glance Address. The example values shown next to each attribute name should help you make the choice. In this case, the **GroupID** attribute is used.
Password requirement settings apply to the passwords used to log into Glance. They are only enforced when users create new passwords or change existing passwords. They do not apply to:
* Session Keys
* Login Keys
* API Keys
**Minimum password complexity**
Choose one of the following for password complexity:
* 6-character minimum length (not secure).
* 7-character minimum, with uppercase, lowercase, and digit characters.
* 8-character minimum.
* 8-character minimum, with uppercase, lowercase, and digit characters.
* 8-character minimum, with one or more non-alphanumeric characters.
* 9-character minimum.
* 9-character minimum, with uppercase, lowercase, and digit characters.
* 9-character minimum, with one or more non-alphanumeric characters.
**Password reset prompt message**
The message shown when resetting a password.
**Password reset**
Select the requirements for when a user changes their password:
* Allow reusing the same password.
* Require a new password.
**Users with no password**
Select the action for users without a password:
* Cannot create a password.
* Can create a password via Password Reset.
=================================================================
FILE: /users/portal/sso_autoprovisioning
=================================================================
Customers who subscribe to Glance products offering autoprovisioning can skip the step of pre-provisioning each of their users who must use Glance. Instead, a Glance subscriber account is created on the fly the first time each user accesses the Glance product via SAML single sign-on.
## Requirements
You must contact your Glance representative in order to activate autoprovisioning on your account.
Autoprovisioning only works for SAML-integrated customer accounts. Set up SAML access to Glance, and verify it is working correctly for Glance subscribers. When valid SAML Assertion documents are being presented to the Glance service, the autoprovisioning user interface uses them to help choose the appropriate attributes to use for new Glance subscribers.
Autoprovisioning requires certain identifying attributes to be provided by the customer's SAML single sign-on identity provider. To autoprovision an account, Glance needs:
* An agreed-upon unique identifier for each new subscriber.
* A way to create a Glance Address from the user's profile information.
* Name, email, and telephone number attributes are helpful but not required.
## Configuring Autoprovisioning
When Glance is integrated with your SAML enterprise single sign-on solution, you can automatically create and provision a new Glance account for each new subscriber from your organization. This panel provides the information required to provision these accounts correctly.
Glance identifies your subscribers with these attributes (items of data):
* GlanceAddress (required)
* PartnerUID
* FirstName
* LastName
* Email
* Phone
* Role
Most subscribers need a valid and unique PartnerUID. This can be an employee number or any other unique alphanumeric code assigned by your organization and can be the same value as the GlanceAddress.
The other information (name, email, and phone number) is not required. It helps support and keep track of subscribers.
Your SAML enterprise single sign-on solution is configured to present particular attributes of each user to Glance. Follow these steps to map them:
1. Select **Yes** on the **Autoprovision new users** dropdown.
2. Choose which SAML attributes to use for new Glance subscribers on the **Transformation Table**.
3. Select the SAML Attribute to use to create the Glance Address. The example values shown next to each attribute name should help you make the choice. In this case, the **GroupID** attribute is used.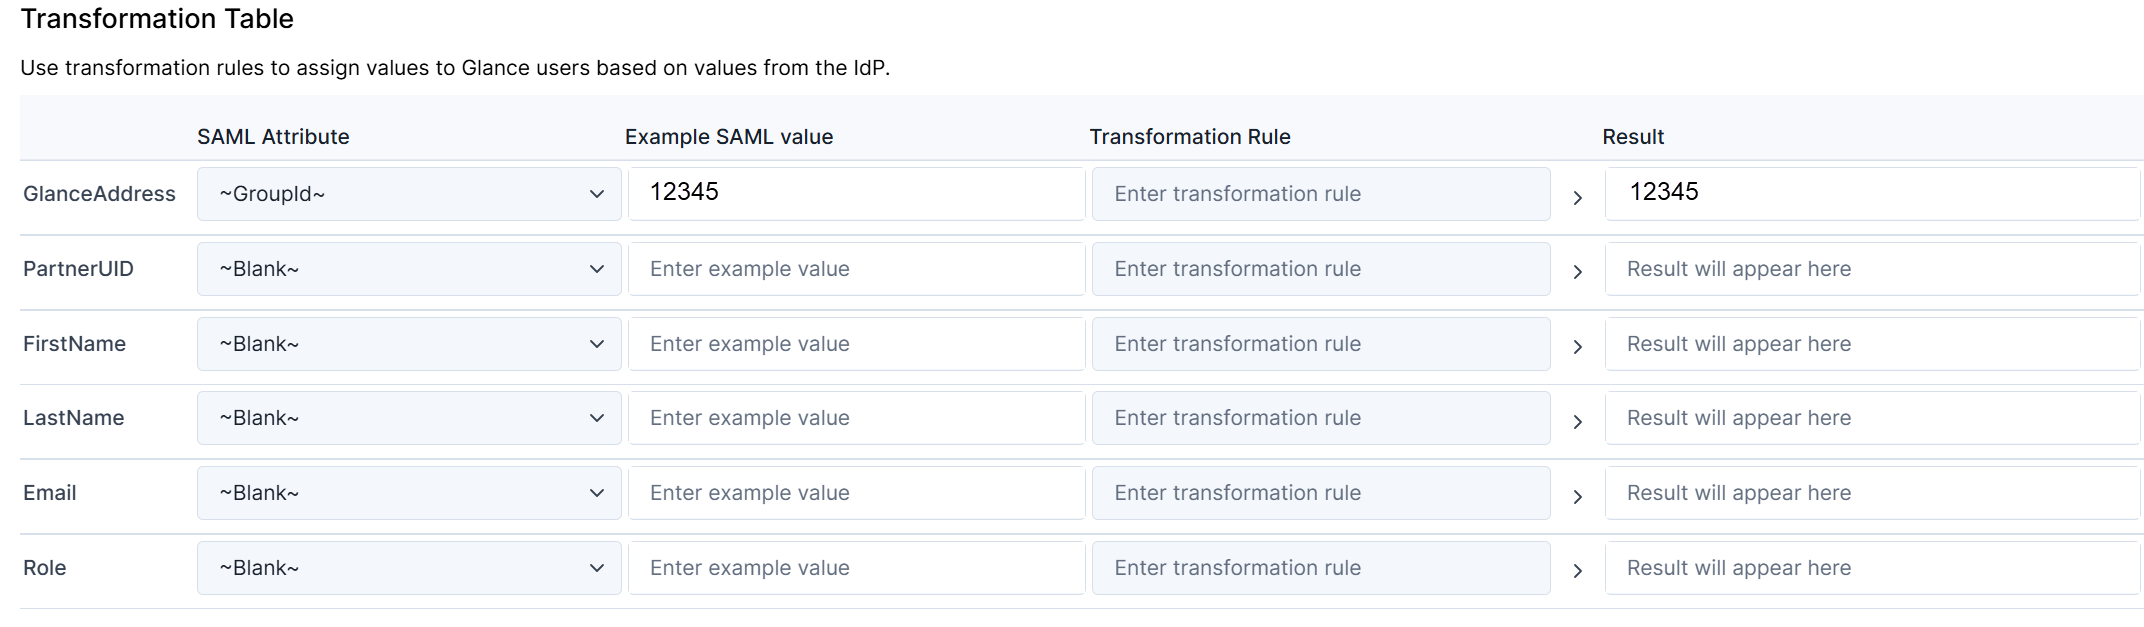 4. Select a Transformation Rule from the **Transformation Guide** and enter it in the **Transformation Rule** cell. In this example, `{RandomDigits(d+)}` is used, which adds a specified number of random digits to the end of the group ID.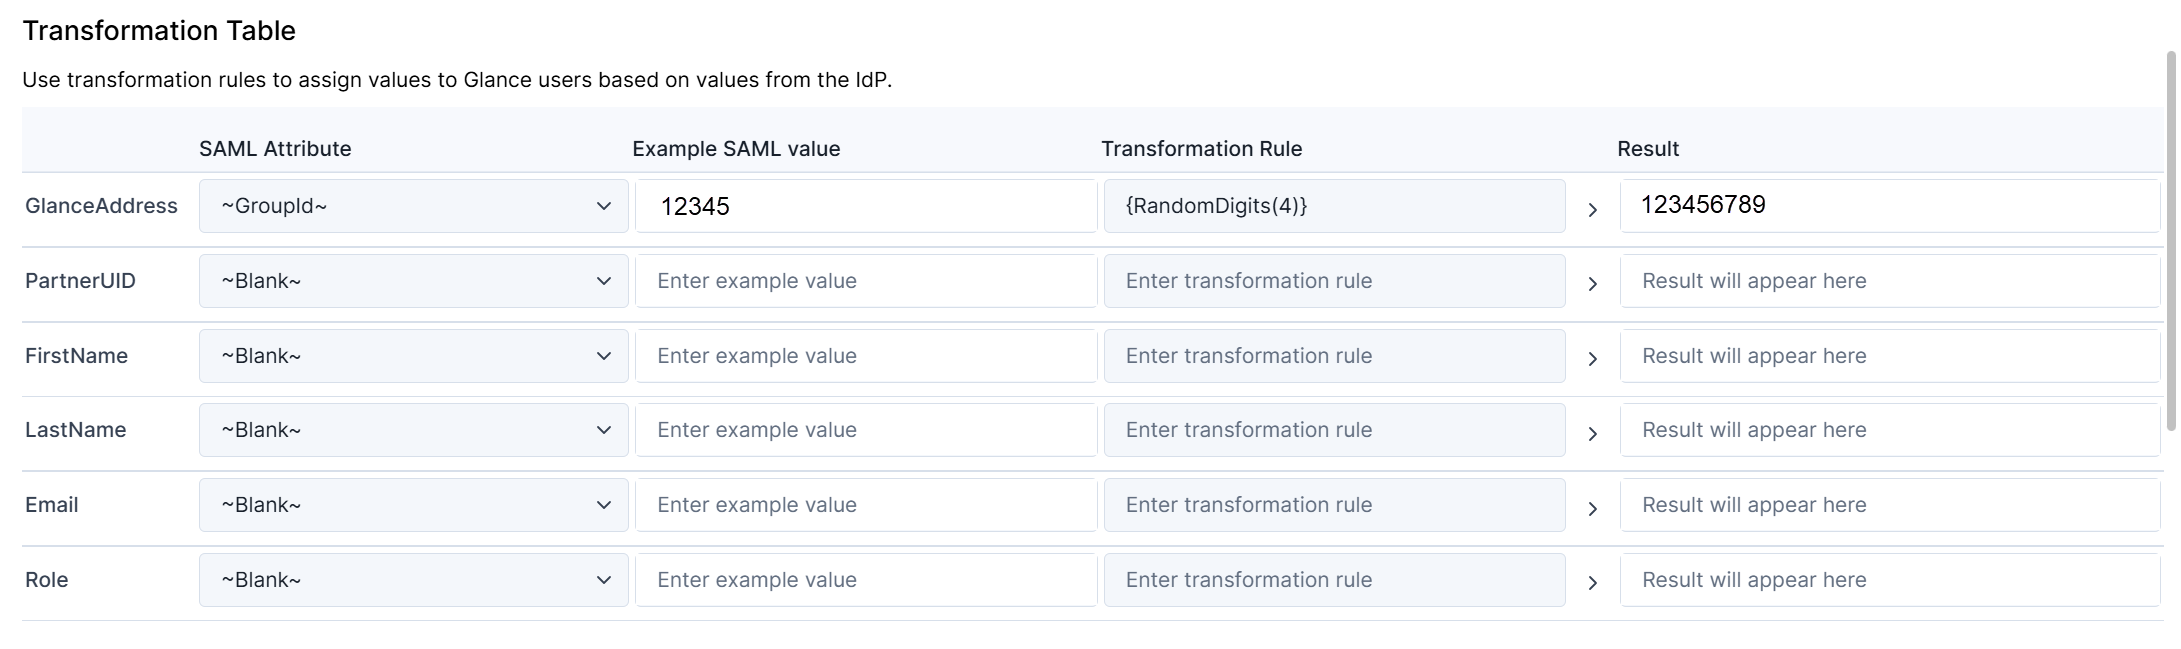
You may specify SAML Attributes and Transformation Rules for all six items in this panel. You must specify them for the Glance Address, and it is helpful to specify them for partnerUID.
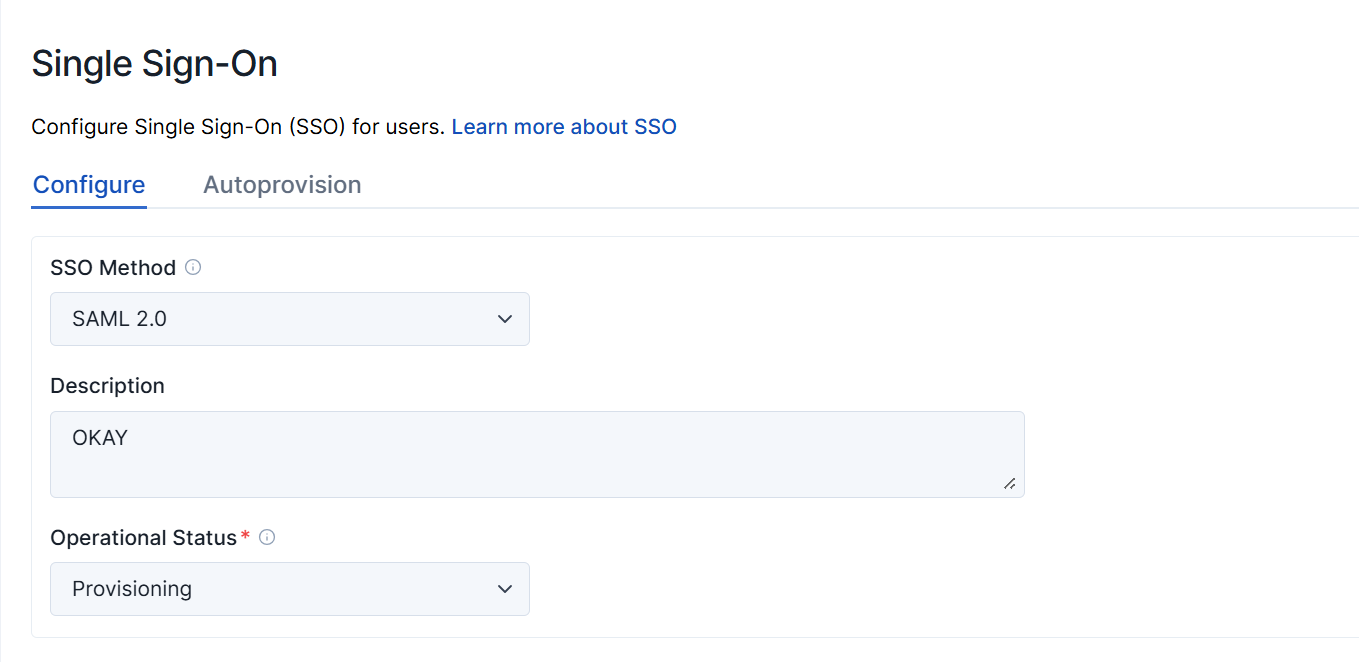 | Field | Description |
| :--- | :--- |
| **SSO Method** | Sets the SSO protocol. Options include *Off*, *SAML 2.0*, or *Encrypted SAML 2.0*. Most SAML customers use standard *SAML 2.0* (without encryption). |
| **Description** | Provides a custom text description of your SAML setup. |
| **Operational Status** | Sets the deployment state. When first provisioning an account, set this to *Provisioning* to log SAML authentication attempts in the Access Log. Once stable, change this to *Production*. |
## Identity Provider Configuration
| Field | Description |
| :--- | :--- |
| **SSO Method** | Sets the SSO protocol. Options include *Off*, *SAML 2.0*, or *Encrypted SAML 2.0*. Most SAML customers use standard *SAML 2.0* (without encryption). |
| **Description** | Provides a custom text description of your SAML setup. |
| **Operational Status** | Sets the deployment state. When first provisioning an account, set this to *Provisioning* to log SAML authentication attempts in the Access Log. Once stable, change this to *Production*. |
## Identity Provider Configuration
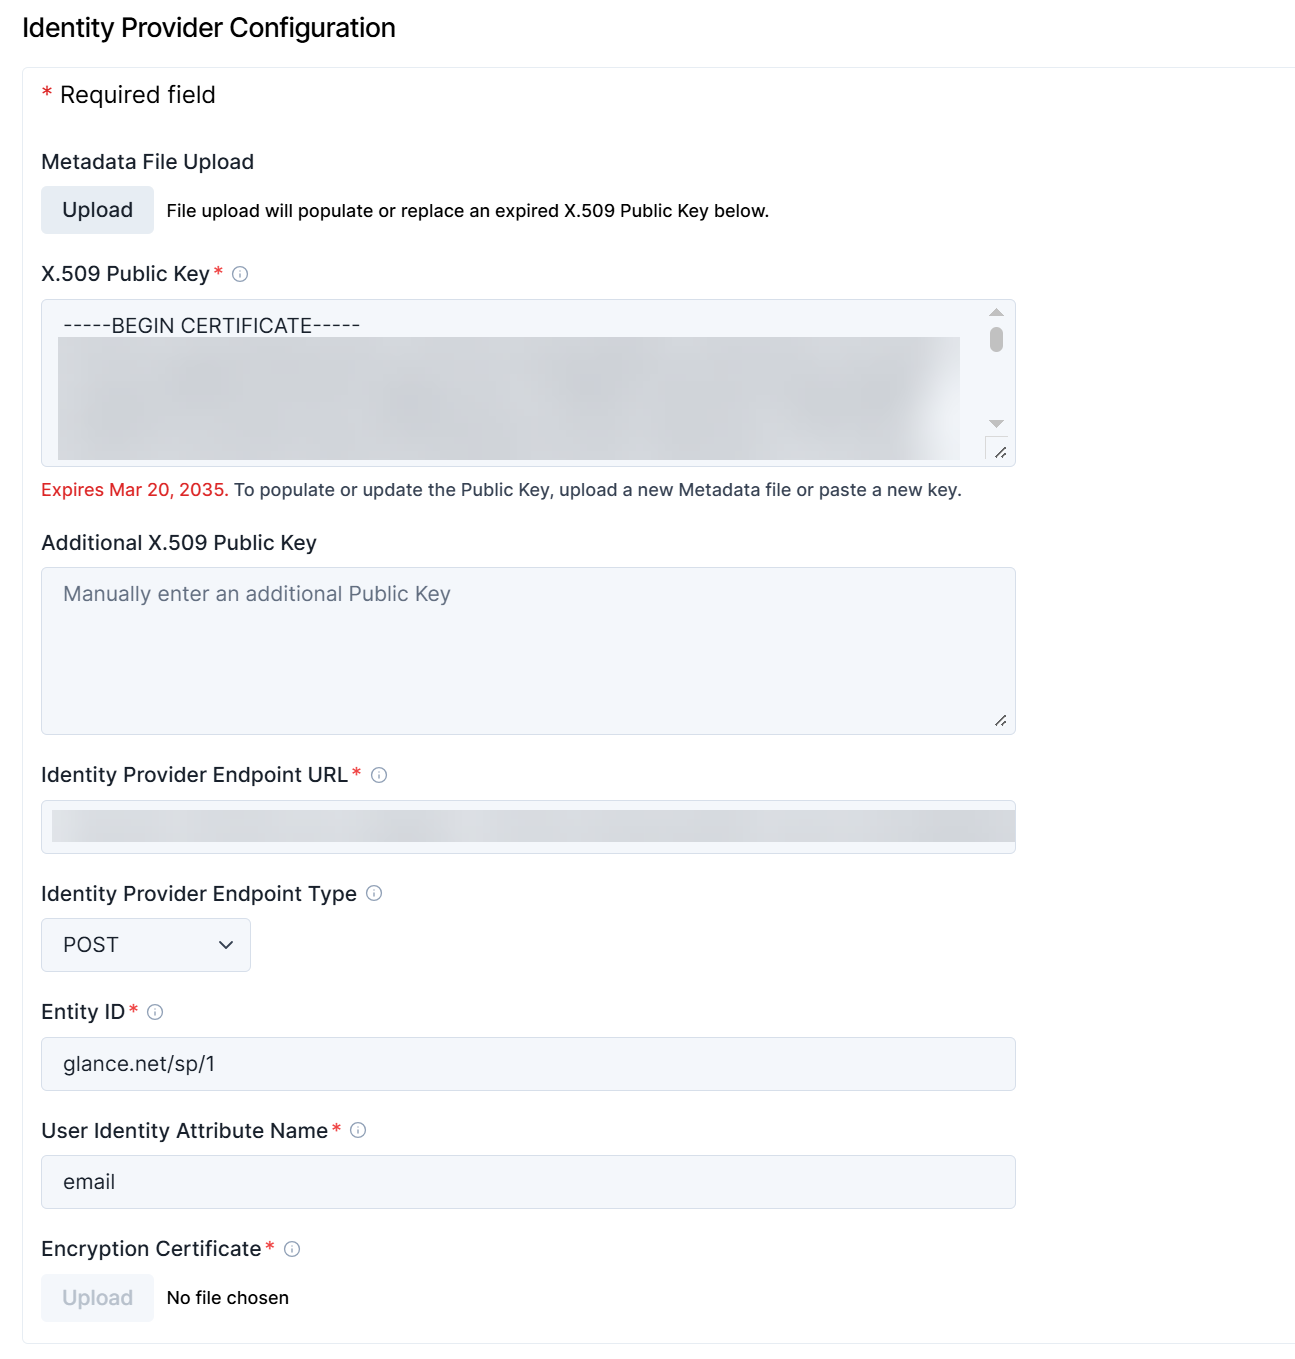 | Field | Description |
| :--- | :--- |
| **Metadata File Upload** | Uploads an XML document furnished by the identity provider. Metadata Discovery Endpoints automatically populate most of the required fields on this provisioning page. |
| **X.509 Public Key** | Validates Assertions (tokens sent to Glance) using the public key furnished by your identity provider. The identity provider cryptographically signs Assertions with a matching private key to prevent forgery. |
| **Additional X.509 Public Key** | Stores an additional public key certificate if your identity provider has supplied one (useful during key rotation). |
| **Identity Provider Endpoint URL** | Determines the URL where Glance presents authentication requests. A Metadata Discovery Endpoint document contains this value. |
| **Identity Provider Endpoint Type** | Defines how Glance presents authentication requests to your identity provider (using either an HTTPS redirect or an HTTPS POST operation). |
| **Entity ID** | Sets the federation entity ID (or relying party trust identifier) for the Glance service provider. In most cases, this should be set to `glance.net/sp/1`. |
| **User Identity Attribute Name** | Specifies the name of the attribute uniquely identifying the user within the Assertion token. The attribute value must uniquely match the user's Glance Address, Partner User ID, or Email Address. |
| **Encryption Certificate** | Displays when *Encrypted SAML 2.0* is selected. This is the key certificate Glance uses to decrypt Assertion documents. A Glance staff member will upload the key certificate file and update the portal, providing you with the corresponding public key to share with your identity provider operator.
| Field | Description |
| :--- | :--- |
| **Metadata File Upload** | Uploads an XML document furnished by the identity provider. Metadata Discovery Endpoints automatically populate most of the required fields on this provisioning page. |
| **X.509 Public Key** | Validates Assertions (tokens sent to Glance) using the public key furnished by your identity provider. The identity provider cryptographically signs Assertions with a matching private key to prevent forgery. |
| **Additional X.509 Public Key** | Stores an additional public key certificate if your identity provider has supplied one (useful during key rotation). |
| **Identity Provider Endpoint URL** | Determines the URL where Glance presents authentication requests. A Metadata Discovery Endpoint document contains this value. |
| **Identity Provider Endpoint Type** | Defines how Glance presents authentication requests to your identity provider (using either an HTTPS redirect or an HTTPS POST operation). |
| **Entity ID** | Sets the federation entity ID (or relying party trust identifier) for the Glance service provider. In most cases, this should be set to `glance.net/sp/1`. |
| **User Identity Attribute Name** | Specifies the name of the attribute uniquely identifying the user within the Assertion token. The attribute value must uniquely match the user's Glance Address, Partner User ID, or Email Address. |
| **Encryption Certificate** | Displays when *Encrypted SAML 2.0* is selected. This is the key certificate Glance uses to decrypt Assertion documents. A Glance staff member will upload the key certificate file and update the portal, providing you with the corresponding public key to share with your identity provider operator.*Note: Encrypted SAML provides an extra measure of security beyond HTTPS. However, most SAML users rely on HTTPS alone rather than using encryption.* | ## Optional Configuration
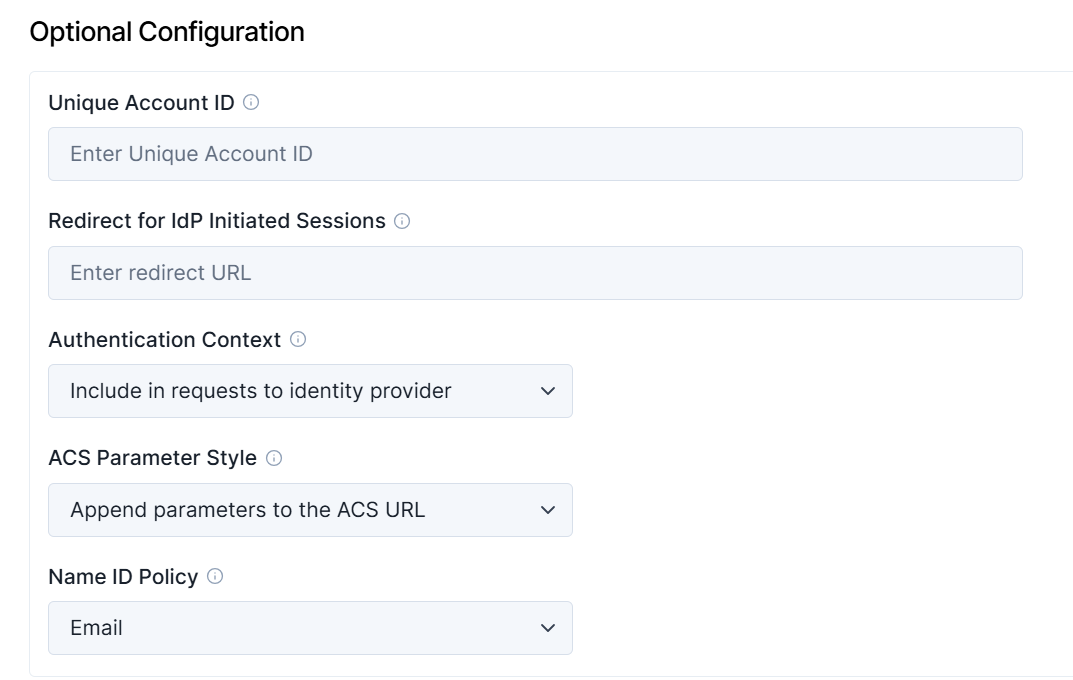 | Field | Description |
| :--- | :--- |
| **Unique Account ID** | Requires a specific value for certain identity providers. For Salesforce accounts, use the `Organization ID`. For Entra accounts, use the `Tenant Unique Name`. If set, you can use its value in the `idptoken` parameter in Service Target URLs. Leave blank if not required. |
| **Redirect for IdP-initiated sessions** | Redirects users who initiate single sign-on directly from the identity provider's UI to an appropriate page on the Glance service (e.g., `/agentjoin/agentjoin.aspx` presents the Cobrowse join page). This must be a relative URL, not an absolute URL starting with `https://`. |
| **Authentication Context** | Defines specific authentication contexts required (or disallowed) by your identity provider when Glance sends single sign-on requests. |
| **ACS Parameter Style** | Configures how your identity provider responds to single sign-on requests using a Glance URL called an Assertion Consumer Service (ACS). Parameters are usually appended to the ACS, but some providers pass them in a separate Relay State element. |
| **Name ID Policy** | Sets the NameID Policy required by your identity provider when Glance sends an SSO request. In most cases, this should specify `Email`, though some providers require `Unspecified`. |
## Changing Public Keys
Glance supports multiple public keys. Each one is used in turn to attempt to validate each SAML Assertion.
From time to time, identity provider operators may replace (rotate) the cryptographic key they use to sign SAML assertions. These steps allow for seamless key-pair changes without the need to actively synchronize downtime between your identity provider and Glance:
1. The identity provider operator generates a new public/private key pair.
2. Glance puts the new public key into the provisioning screen as an **Additional X.509 Public Key**.
3. The identity provider operator starts using the new key pair.
=================================================================
FILE: /users/portal/video_setup
=================================================================
As an administrator, you can configure background effects for agents and visitors during Cobrowse and Mobile SDK video sessions.
## Effects
| Field | Description |
| :--- | :--- |
| **Unique Account ID** | Requires a specific value for certain identity providers. For Salesforce accounts, use the `Organization ID`. For Entra accounts, use the `Tenant Unique Name`. If set, you can use its value in the `idptoken` parameter in Service Target URLs. Leave blank if not required. |
| **Redirect for IdP-initiated sessions** | Redirects users who initiate single sign-on directly from the identity provider's UI to an appropriate page on the Glance service (e.g., `/agentjoin/agentjoin.aspx` presents the Cobrowse join page). This must be a relative URL, not an absolute URL starting with `https://`. |
| **Authentication Context** | Defines specific authentication contexts required (or disallowed) by your identity provider when Glance sends single sign-on requests. |
| **ACS Parameter Style** | Configures how your identity provider responds to single sign-on requests using a Glance URL called an Assertion Consumer Service (ACS). Parameters are usually appended to the ACS, but some providers pass them in a separate Relay State element. |
| **Name ID Policy** | Sets the NameID Policy required by your identity provider when Glance sends an SSO request. In most cases, this should specify `Email`, though some providers require `Unspecified`. |
## Changing Public Keys
Glance supports multiple public keys. Each one is used in turn to attempt to validate each SAML Assertion.
From time to time, identity provider operators may replace (rotate) the cryptographic key they use to sign SAML assertions. These steps allow for seamless key-pair changes without the need to actively synchronize downtime between your identity provider and Glance:
1. The identity provider operator generates a new public/private key pair.
2. Glance puts the new public key into the provisioning screen as an **Additional X.509 Public Key**.
3. The identity provider operator starts using the new key pair.
=================================================================
FILE: /users/portal/video_setup
=================================================================
As an administrator, you can configure background effects for agents and visitors during Cobrowse and Mobile SDK video sessions.
## Effects
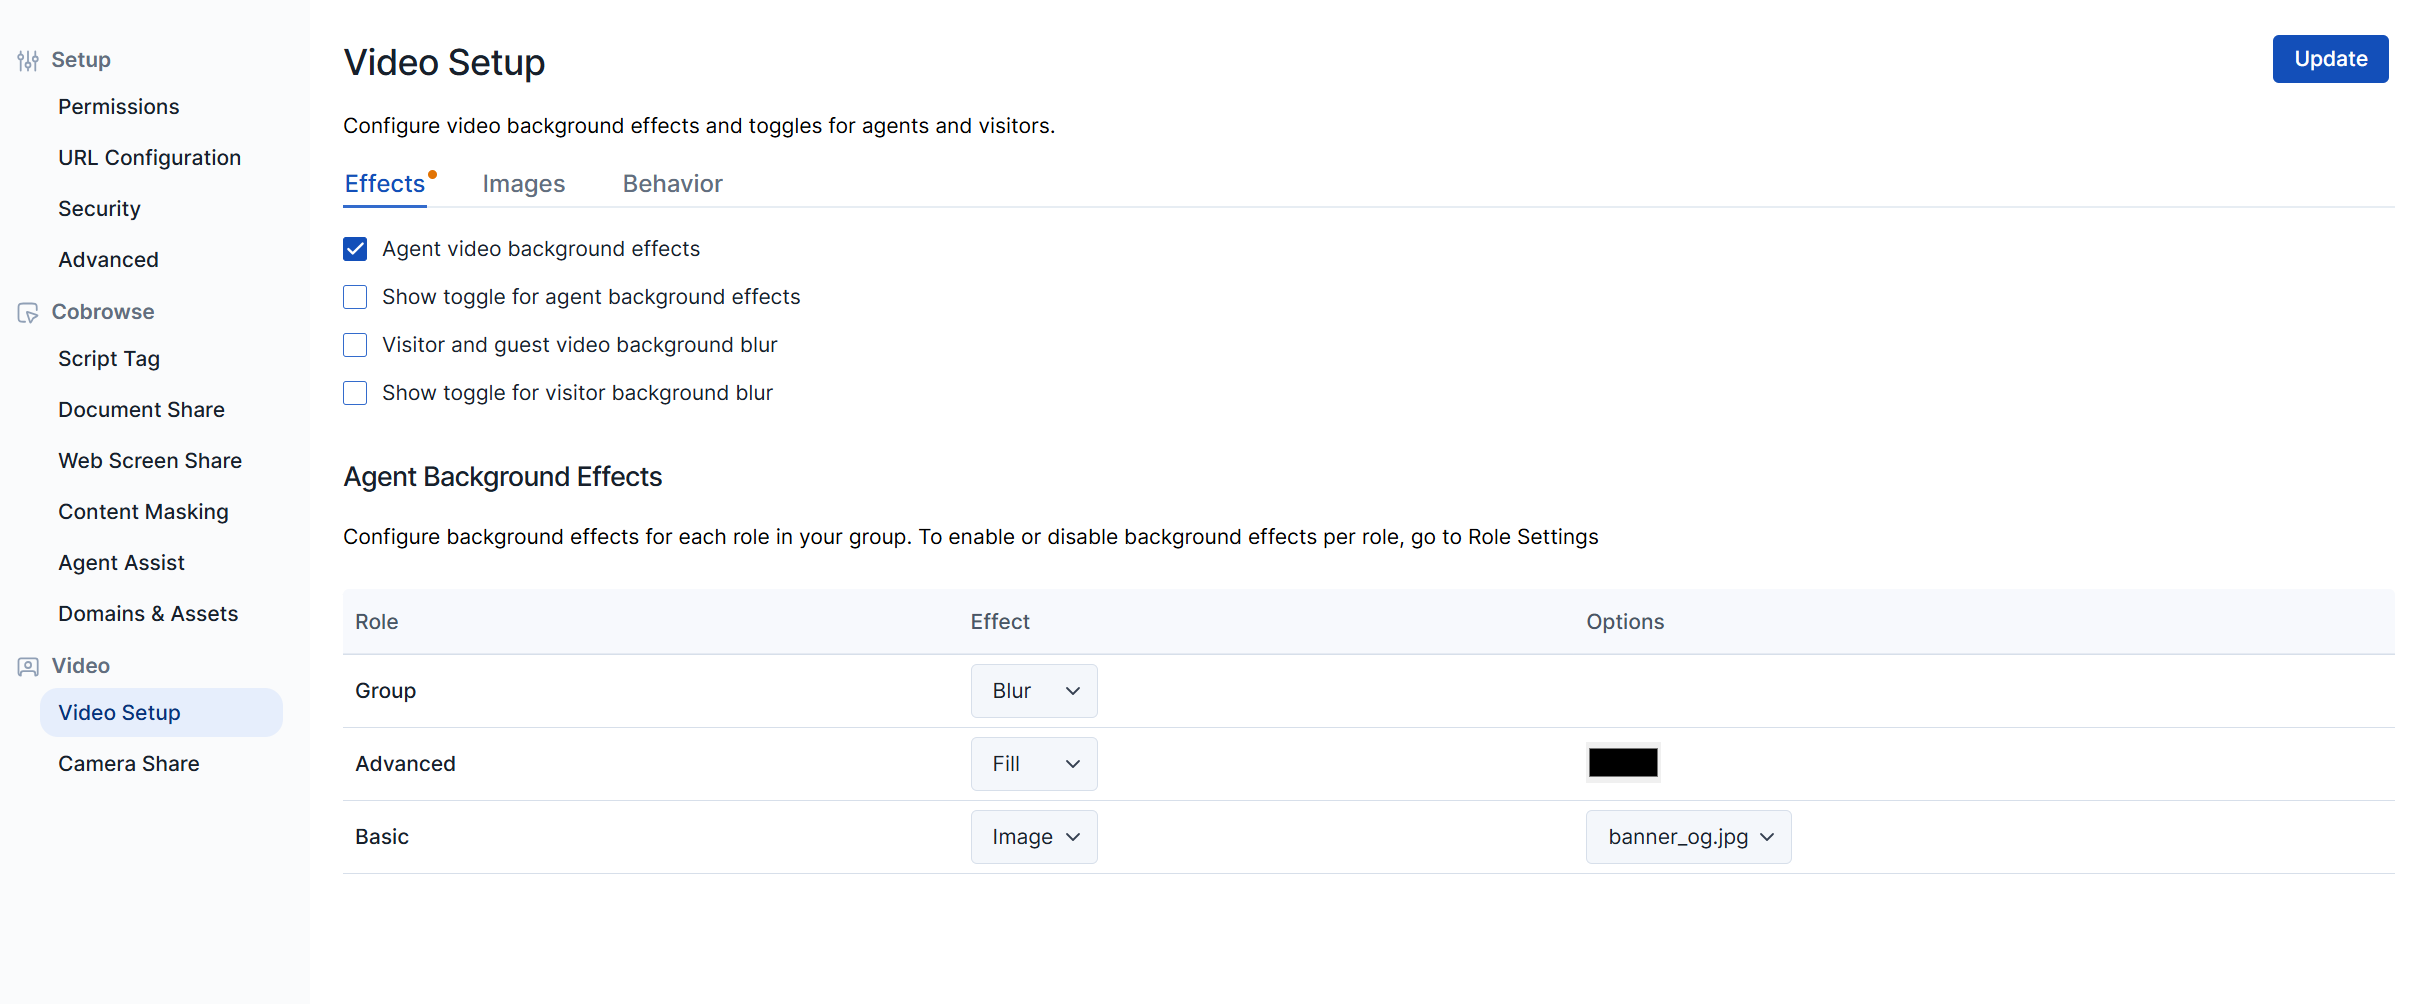 Administrators can configure which background options are available for the agent and guest within the Effects section:
* **Agent video background effects:** Allows the agent to add background effects.
* **Show toggle for agent background effects:** Displays a button for the agent to toggle background effects on or off.
* **Visitor and guest video background blur:** Allows visitors and guests to add background blur.
* **Show toggle for visitor background blur:** Displays a button for the visitor to toggle background blur on or off.
### Agent Background Effects
Under **Agent Background Effect,** choose the default agent video background experience. Note that **Role** indicates which role you are updating the background for.
| Effect | Description | Options |
| --- | --- | --- |
| **Blur** | Blurs the agent's background. | None |
| **Fill** | Choose a color to display behind the agent. | Select the color you want to use. |
| **Image** | Choose an image to display behind the agent. | Select a background that has been uploaded to the **Images** tab. |
During the session, if the toggle button is enabled, agents can turn their background effects on or off from the **Gear icon** > **Video Background Effects**.
Visitors and guests can toggle their blur off from the blur icon while Cobrowsing on a mobile device or computer.
### Best Practices for Agent Background Selection
* In general, light replacement backgrounds work better because the algorithm attempts to 'feather' the edging, which will always look more distinct if there is a big disparity between the colors.
* A detailed background (like a picture of an office or branch) may work better than a solid color.
* Make sure the agent has proper lighting and is centered in view, as the background detection algorithm is trained for the human to be in the center.
* Whenever possible, minimize wide variations in color in the agent's physical background (e.g., columns that are white versus black).
---
## Images
Administrators can configure which background options are available for the agent and guest within the Effects section:
* **Agent video background effects:** Allows the agent to add background effects.
* **Show toggle for agent background effects:** Displays a button for the agent to toggle background effects on or off.
* **Visitor and guest video background blur:** Allows visitors and guests to add background blur.
* **Show toggle for visitor background blur:** Displays a button for the visitor to toggle background blur on or off.
### Agent Background Effects
Under **Agent Background Effect,** choose the default agent video background experience. Note that **Role** indicates which role you are updating the background for.
| Effect | Description | Options |
| --- | --- | --- |
| **Blur** | Blurs the agent's background. | None |
| **Fill** | Choose a color to display behind the agent. | Select the color you want to use. |
| **Image** | Choose an image to display behind the agent. | Select a background that has been uploaded to the **Images** tab. |
During the session, if the toggle button is enabled, agents can turn their background effects on or off from the **Gear icon** > **Video Background Effects**.
Visitors and guests can toggle their blur off from the blur icon while Cobrowsing on a mobile device or computer.
### Best Practices for Agent Background Selection
* In general, light replacement backgrounds work better because the algorithm attempts to 'feather' the edging, which will always look more distinct if there is a big disparity between the colors.
* A detailed background (like a picture of an office or branch) may work better than a solid color.
* Make sure the agent has proper lighting and is centered in view, as the background detection algorithm is trained for the human to be in the center.
* Whenever possible, minimize wide variations in color in the agent's physical background (e.g., columns that are white versus black).
---
## Images
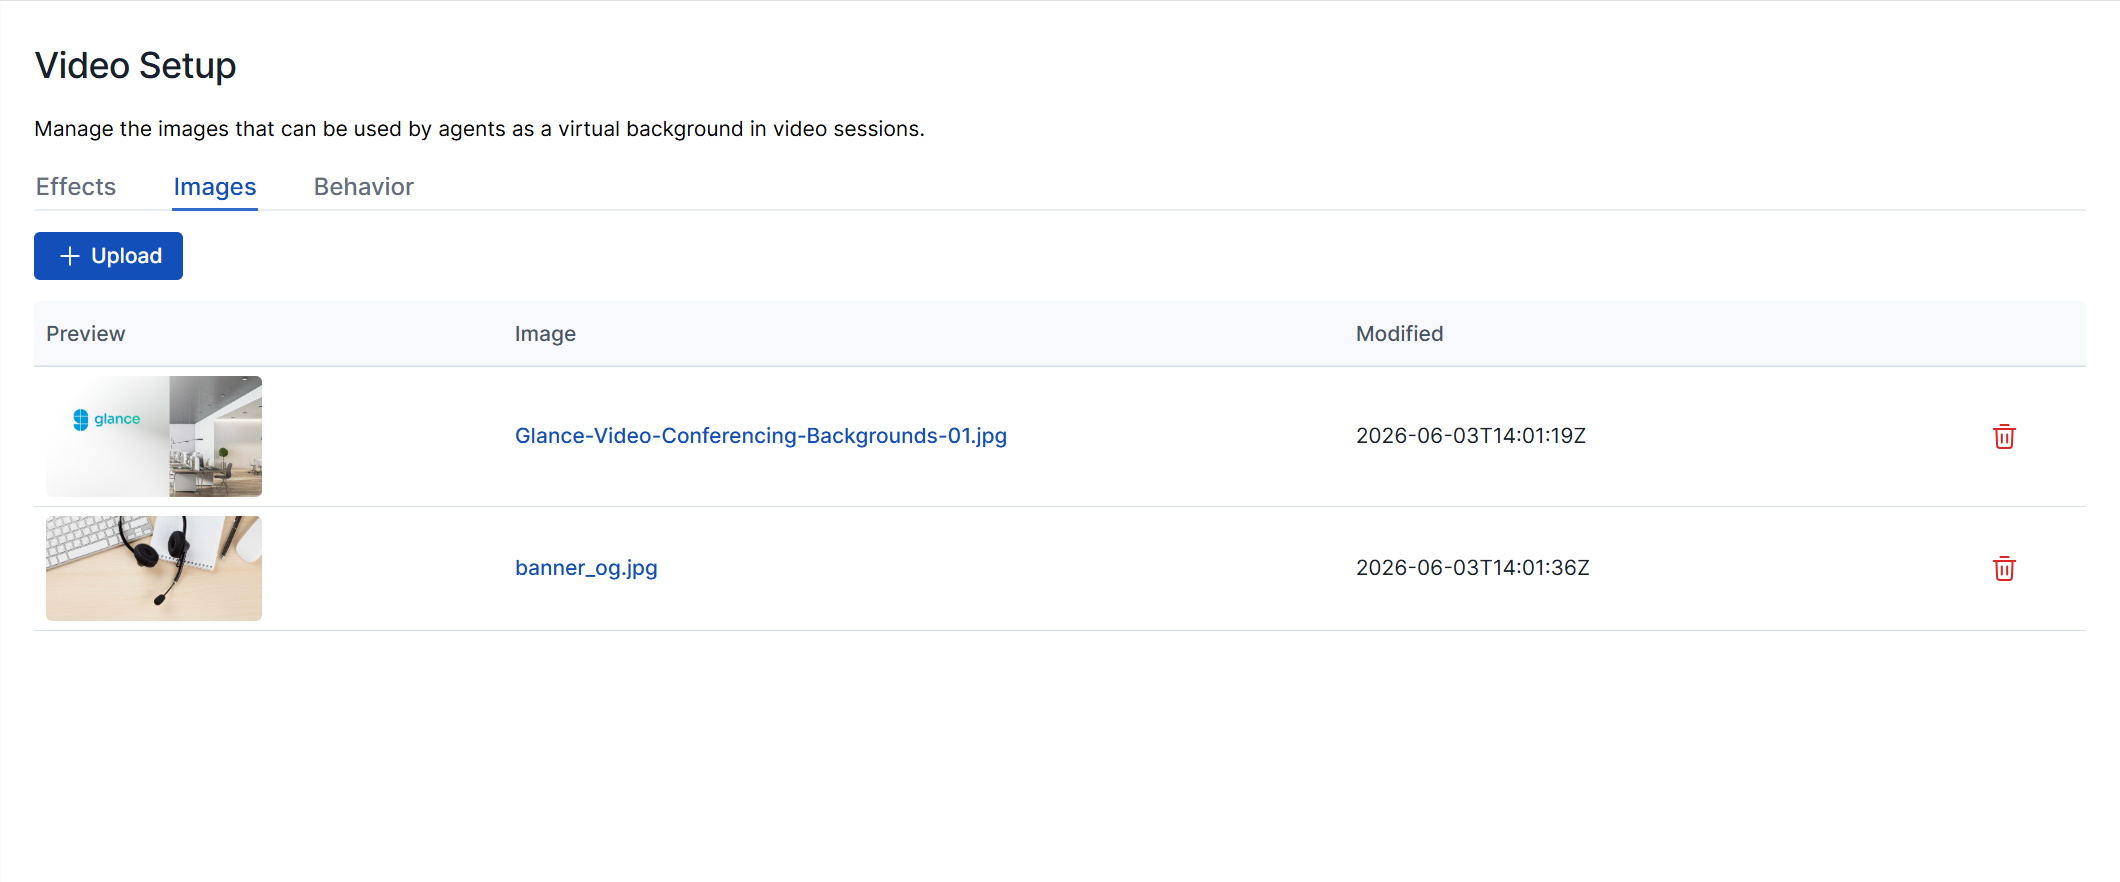 Click the **Upload** button to upload a file to use for the background replacement.
* Glance recommends using an image that is 1280 x 720 pixels.
* **Minimum Supported File Size:** 640 x 360
* **Maximum Supported File Size:** 1280 x 720
* **Supported File Types:** JPEG, PNG
* There is a total file size limit of 1 MB.
Click the **Upload** button to upload a file to use for the background replacement.
* Glance recommends using an image that is 1280 x 720 pixels.
* **Minimum Supported File Size:** 640 x 360
* **Maximum Supported File Size:** 1280 x 720
* **Supported File Types:** JPEG, PNG
* There is a total file size limit of 1 MB.
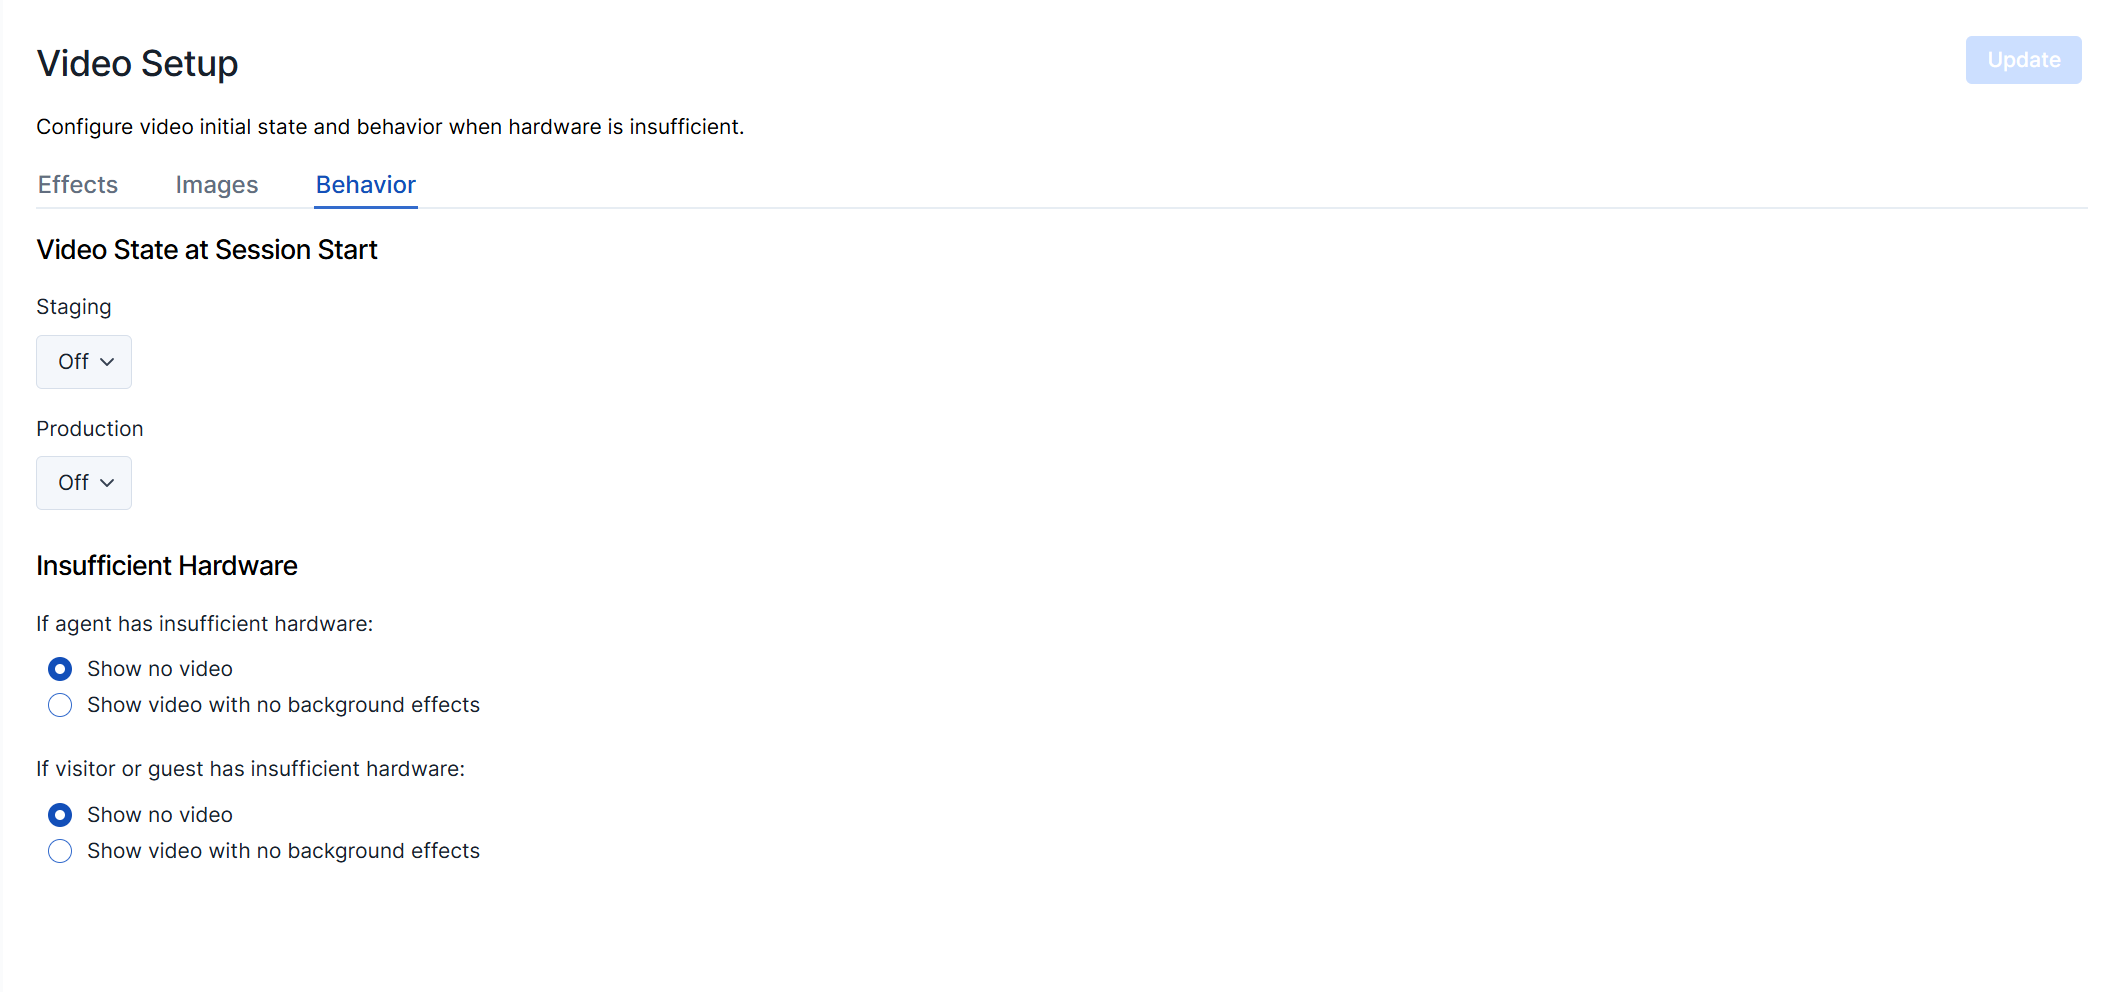 **Video State at Session Start:** Choose between *Off*, *Small*, or *Large* for the video size to begin your session within the Staging and Production environment.
**Insufficient Hardware:** Choose the fallback experience you want if there is insufficient hardware for agents or visitors/guests to use background effects:
* Show no video
* Show video with no background effect
=================================================================
FILE: /users/portal/webscreenshare
=================================================================
Glance provides the ability for agents to escalate from a Cobrowse session to a Screen Sharing session, without downloading any software. During a Cobrowse session, the agent can click the **Screen Share** button to have the option of sharing their screen or granting the visitor permission to share. The agent or the visitor can share their entire screen, a window, or a browser tab.
## Prerequisites
* The Glance Group account must be set to use Cobrowse version 5.3 or above.
* The setting **Agent Screen Share** must be enabled in the **Permissions** tab within **Web Screen Share**. As an administrator, you can choose if agents can share tabs, windows, or their entire desktop.
**Video State at Session Start:** Choose between *Off*, *Small*, or *Large* for the video size to begin your session within the Staging and Production environment.
**Insufficient Hardware:** Choose the fallback experience you want if there is insufficient hardware for agents or visitors/guests to use background effects:
* Show no video
* Show video with no background effect
=================================================================
FILE: /users/portal/webscreenshare
=================================================================
Glance provides the ability for agents to escalate from a Cobrowse session to a Screen Sharing session, without downloading any software. During a Cobrowse session, the agent can click the **Screen Share** button to have the option of sharing their screen or granting the visitor permission to share. The agent or the visitor can share their entire screen, a window, or a browser tab.
## Prerequisites
* The Glance Group account must be set to use Cobrowse version 5.3 or above.
* The setting **Agent Screen Share** must be enabled in the **Permissions** tab within **Web Screen Share**. As an administrator, you can choose if agents can share tabs, windows, or their entire desktop.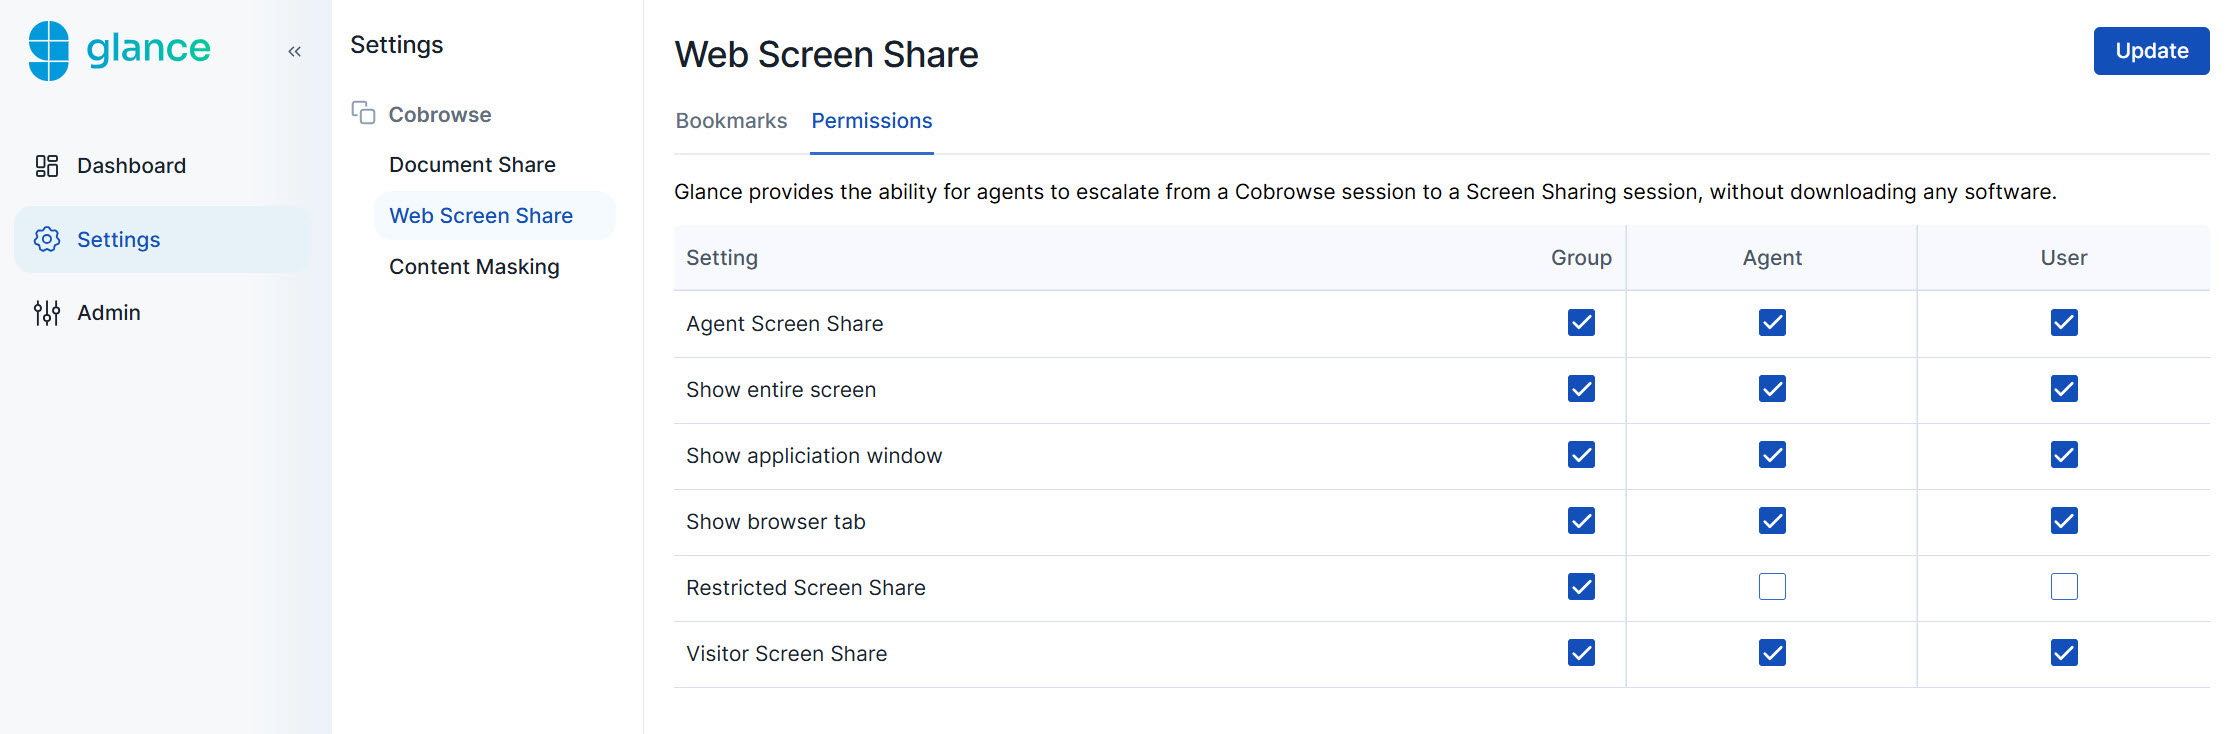 * **Agent Screen Share** - Allows the agent to share their screen.
* **Show entire screen** - Allows the agent to share their whole screen.
* **Show application window** - Allows the agent to share an application window.
* **Show browser tab** - Allows the agent to share a browser tab.
* **Visitor Screen Share** - Allows the visitor to share their screen.
2. The agent can choose to share their entire screen, a window, or a browser tab.
3. The agent clicks **Share** to share the content.
4. The visitor can view the agent's content.
## Multiple Participants Sharing Their Screen
If a session involves multiple agents, and a second agent shows their screen, the initial agent will get a message stating **Another agent is sharing their screen. You are no longer sharing your screen.**
## Screen Share Bookmarks
**Requires CB 5.3 or higher**
Glance also provides the ability to configure bookmark links of easy-to-share websites agents can share. Once enabled, these websites display in the **Screen Share** menu of the Agent Viewer for the agent to easily select.
* **Agent Screen Share** - Allows the agent to share their screen.
* **Show entire screen** - Allows the agent to share their whole screen.
* **Show application window** - Allows the agent to share an application window.
* **Show browser tab** - Allows the agent to share a browser tab.
* **Visitor Screen Share** - Allows the visitor to share their screen.
2. The agent can choose to share their entire screen, a window, or a browser tab.
3. The agent clicks **Share** to share the content.
4. The visitor can view the agent's content.
## Multiple Participants Sharing Their Screen
If a session involves multiple agents, and a second agent shows their screen, the initial agent will get a message stating **Another agent is sharing their screen. You are no longer sharing your screen.**
## Screen Share Bookmarks
**Requires CB 5.3 or higher**
Glance also provides the ability to configure bookmark links of easy-to-share websites agents can share. Once enabled, these websites display in the **Screen Share** menu of the Agent Viewer for the agent to easily select.
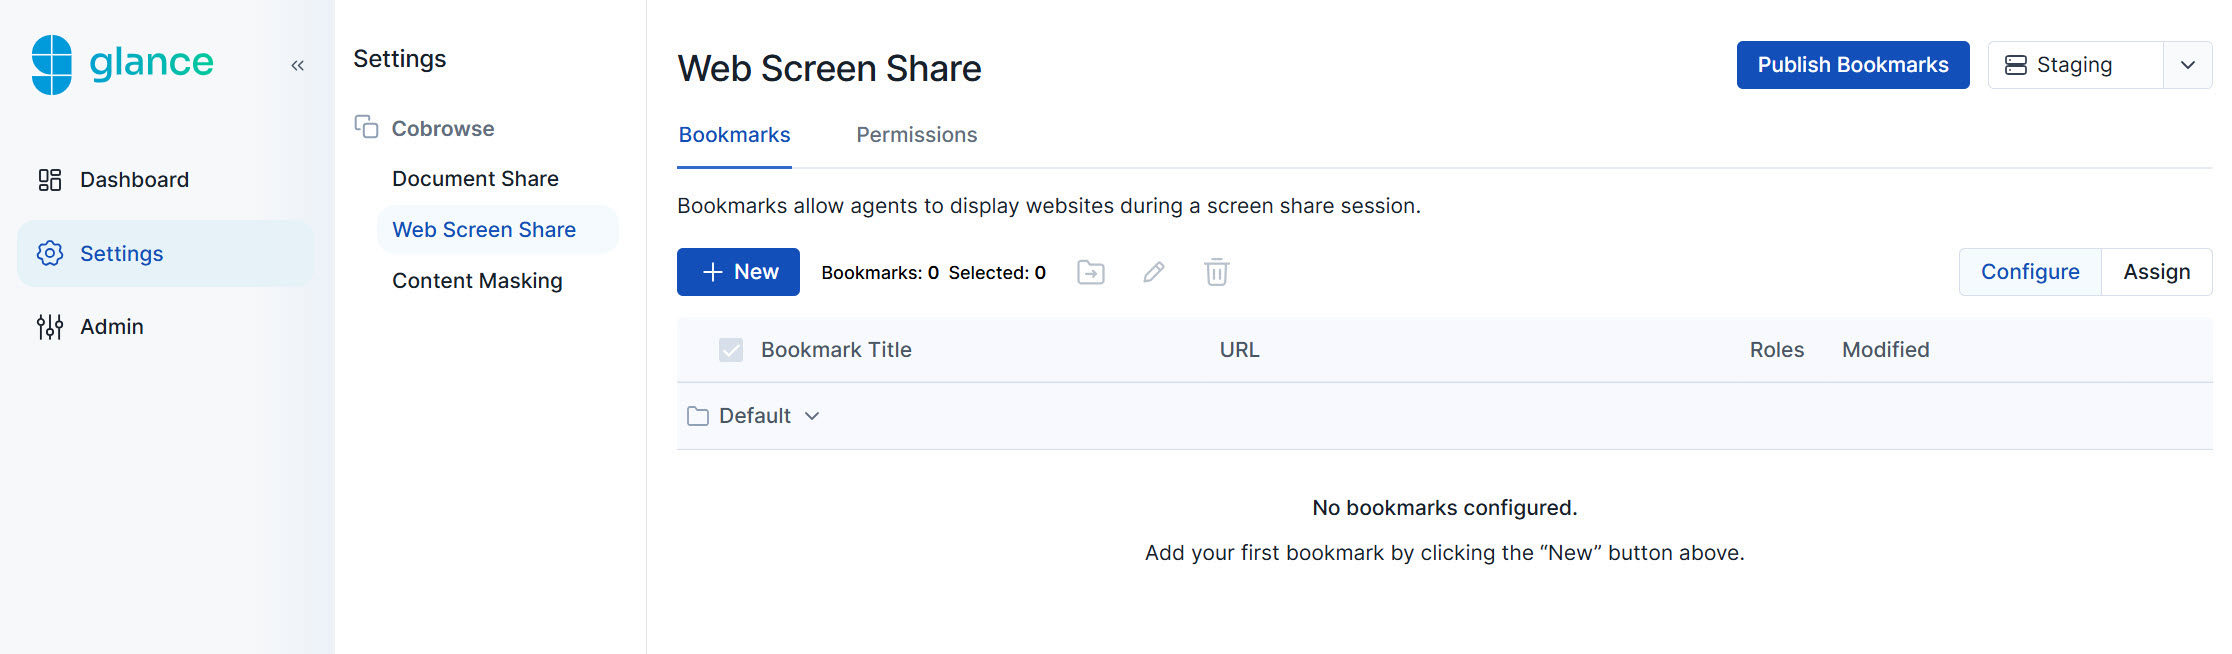 To add a bookmark:
1. Click the **New** button and select **Bookmark**.
* **Title** - Enter the title for the bookmark link in the Agent Viewer.
* **URL** - Enter the URL of the bookmark site.
* **Folder** - Select which folder you want this bookmark stored in (Optional).
2. To add an additional bookmark, click the **Add another** button.
3. Click **Create**.
4. After you test your changes in staging, click **Publish Bookmarks**.
To add a folder:
1. Click the **New** button and select **Folder**.
2. Input the **Folder title** and click **Create**.
3. After you test your changes in staging, click **Publish Folder**.
To add a bookmark:
1. Click the **New** button and select **Bookmark**.
* **Title** - Enter the title for the bookmark link in the Agent Viewer.
* **URL** - Enter the URL of the bookmark site.
* **Folder** - Select which folder you want this bookmark stored in (Optional).
2. To add an additional bookmark, click the **Add another** button.
3. Click **Create**.
4. After you test your changes in staging, click **Publish Bookmarks**.
To add a folder:
1. Click the **New** button and select **Folder**.
2. Input the **Folder title** and click **Create**.
3. After you test your changes in staging, click **Publish Folder**.
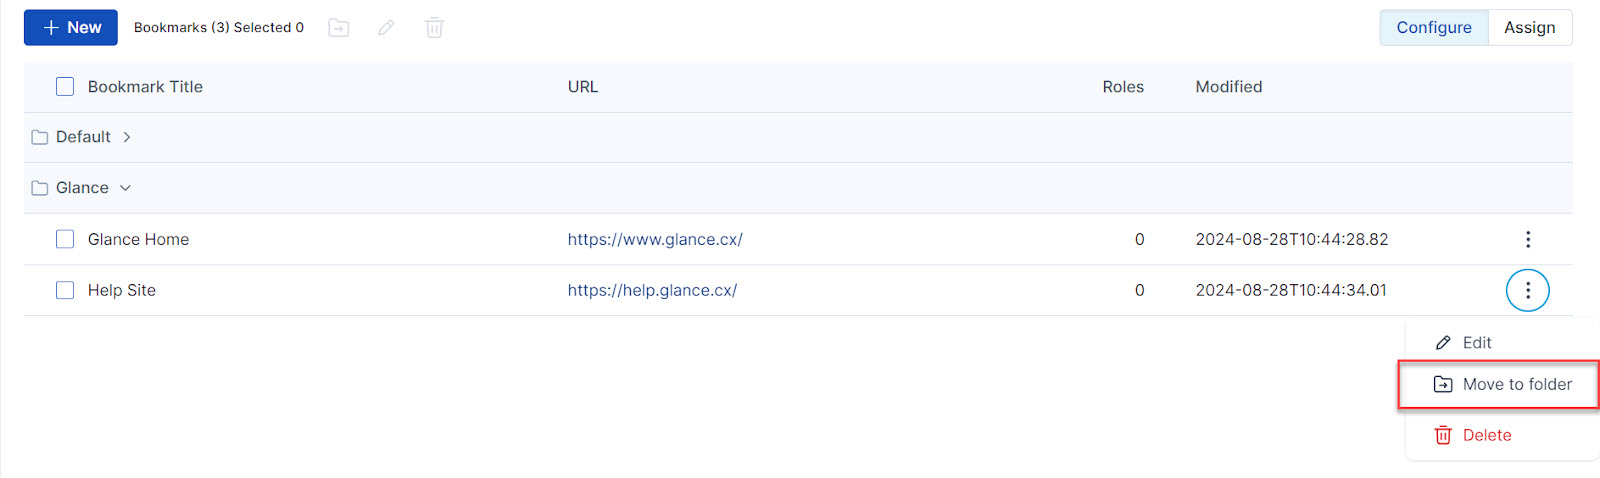 3. Select the new folder from the drop-down menu and click **Update**.
#### Assigning Bookmarks
Bookmarks can be assigned to specific roles within your group, ensuring that only authorized agents have the ability to utilize them.
1. Click the **Assign** tab.
3. Select the new folder from the drop-down menu and click **Update**.
#### Assigning Bookmarks
Bookmarks can be assigned to specific roles within your group, ensuring that only authorized agents have the ability to utilize them.
1. Click the **Assign** tab. 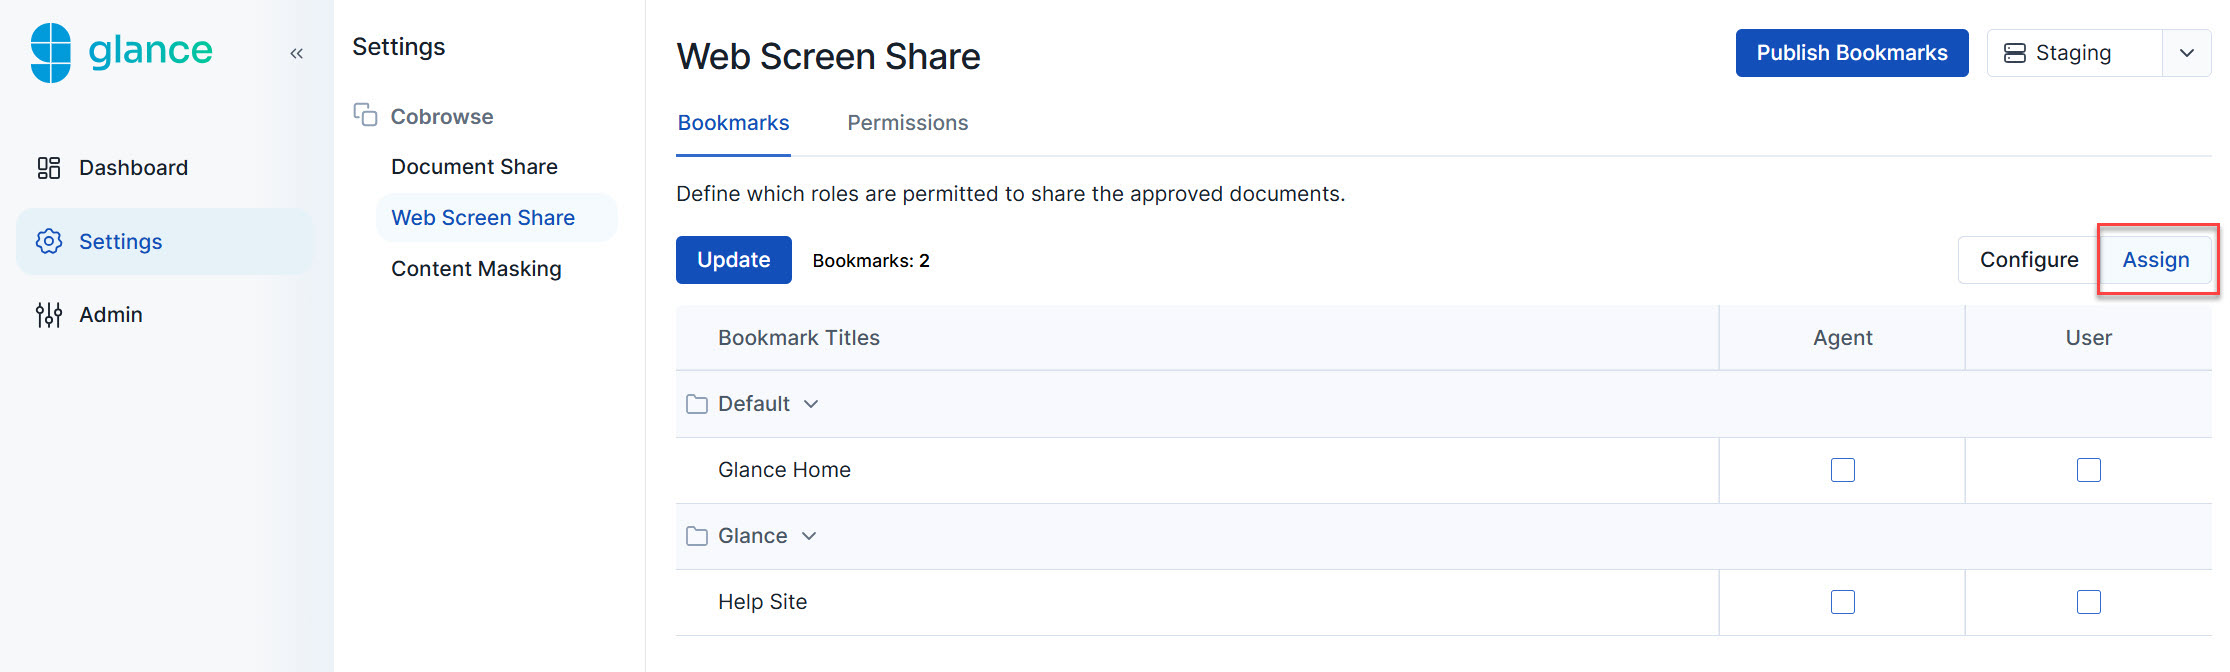 2. Click the checkbox underneath each role that needs to utilize the bookmark.
3. Click **Update**.
### Using Screen Share Bookmarks
1. Once the agent and visitor are in a Cobrowse session, the agent can click the **Share Screen** icon to view the bookmark links.
2. After clicking the link, the bookmark site will open in a new window, and the agent has the opportunity to preview the content.
3. Click **Share...** > **Window** > select the bookmark window from the available windows.
4. The visitor can view the agent's window.
5. Click **Stop Sharing** to end the screen share session. The cobrowse session will continue.
## Screen Share for Visitors
**Requires CB 5.7 or higher**
The agent is able to grant the visitor permission to share their desktop, application window, or browser tab with the agent to quickly resolve any issues.
Visitors must be on a PC or Mac to share their screen. Mobile devices do not support screen sharing from their browsers.
3. The visitor will receive a **Share Your Screen** modal in which they must click **Accept**.
4. The visitor can then choose if they want to share their entire screen, a window, or a tab.
**Remediation:** You can click the Screen Share button and try to share the Window instead.
=================================================================
FILE: /users/security/compliance
=================================================================
Engineered to comply with the strictest enterprise information security and privacy requirements, Glance is the compliance-friendly enterprise visual engagement choice.
| Icon | Standard | Description |
|---|---|---|
|
2. Click the checkbox underneath each role that needs to utilize the bookmark.
3. Click **Update**.
### Using Screen Share Bookmarks
1. Once the agent and visitor are in a Cobrowse session, the agent can click the **Share Screen** icon to view the bookmark links.
2. After clicking the link, the bookmark site will open in a new window, and the agent has the opportunity to preview the content.
3. Click **Share...** > **Window** > select the bookmark window from the available windows.
4. The visitor can view the agent's window.
5. Click **Stop Sharing** to end the screen share session. The cobrowse session will continue.
## Screen Share for Visitors
**Requires CB 5.7 or higher**
The agent is able to grant the visitor permission to share their desktop, application window, or browser tab with the agent to quickly resolve any issues.
Visitors must be on a PC or Mac to share their screen. Mobile devices do not support screen sharing from their browsers.
3. The visitor will receive a **Share Your Screen** modal in which they must click **Accept**.
4. The visitor can then choose if they want to share their entire screen, a window, or a tab.
**Remediation:** You can click the Screen Share button and try to share the Window instead.
=================================================================
FILE: /users/security/compliance
=================================================================
Engineered to comply with the strictest enterprise information security and privacy requirements, Glance is the compliance-friendly enterprise visual engagement choice.
| Icon | Standard | Description |
|---|---|---|
|  | **ISO 27001** | ISO 27001 is a globally recognized standard for the establishment and certification of an information security management system (ISMS). Our entire information security program is built on the ISO 27001 framework and we are annually audited. |
|
| **ISO 27001** | ISO 27001 is a globally recognized standard for the establishment and certification of an information security management system (ISMS). Our entire information security program is built on the ISO 27001 framework and we are annually audited. |
|  | **General Data Protection Regulation** | The GDPR is Europe's regulation for data protection and privacy, but it also covers any data transferred outside the EU and EEA areas. As a result of Schrems 2, Glance utilizes Standard Contractual Clauses (SCC) for the legal and contractual movement of data.
Our Privacy Policy aligns to GDPR requirements. | |
 | **SOC 2 Type 2** | Glance undergoes a SOC 2 Type 2 examination of our security controls against the AICPA defined standards on an annual basis with a third party audit firm to ensure the security of our platform. |
|
| **SOC 2 Type 2** | Glance undergoes a SOC 2 Type 2 examination of our security controls against the AICPA defined standards on an annual basis with a third party audit firm to ensure the security of our platform. |
|  | **Cloud Security Alliance** | Glance is STAR Registry Level 1 with Cloud Security Alliance (CSA). The CSA Cloud Controls Matrix is a cybersecurity control framework for cloud computing. It is composed of 197 control objectives that are structured in 17 domains covering all key aspects of cloud technology. |
|
| **Cloud Security Alliance** | Glance is STAR Registry Level 1 with Cloud Security Alliance (CSA). The CSA Cloud Controls Matrix is a cybersecurity control framework for cloud computing. It is composed of 197 control objectives that are structured in 17 domains covering all key aspects of cloud technology. |
|  | **ISO 27701** | ISO 27701 is a globally recognized standard for the establishment and certification of a privacy information management system (PIMS) that builds on ISO 27001. Our privacy program is built on the ISO 27701 framework. |
=================================================================
FILE: /users/security/encoding_streaming
=================================================================
Glance Screen Share's client software captures and transmits screen content using pixel-based methods. Screen changes are digitally compressed using a proprietary patent-pending codec that minimizes bandwidth and latency, while preserving sharpness. The compressed data is encapsulated in a proprietary messaging format and forwarded to each session participant.
Glance ensures each participant enjoys the best possible viewing experience, regardless of session size and network condition. Glance continuously optimizes each participant's data stream to the instantaneous speed of his or her network connection. Guests with fast connections receive as many screen updates as their networks allow. Those on slower links may need more time to receive updates, but they never fall behind.
To minimize path latency, Glance provisions each session on a server that is geographically close to the host. All session data flows through that server. With a very few exceptions, Glance sessions are encrypted. Glance uses modern Transport Layer Security (TLS) to secure all connections between participants and server.
| **ISO 27701** | ISO 27701 is a globally recognized standard for the establishment and certification of a privacy information management system (PIMS) that builds on ISO 27001. Our privacy program is built on the ISO 27701 framework. |
=================================================================
FILE: /users/security/encoding_streaming
=================================================================
Glance Screen Share's client software captures and transmits screen content using pixel-based methods. Screen changes are digitally compressed using a proprietary patent-pending codec that minimizes bandwidth and latency, while preserving sharpness. The compressed data is encapsulated in a proprietary messaging format and forwarded to each session participant.
Glance ensures each participant enjoys the best possible viewing experience, regardless of session size and network condition. Glance continuously optimizes each participant's data stream to the instantaneous speed of his or her network connection. Guests with fast connections receive as many screen updates as their networks allow. Those on slower links may need more time to receive updates, but they never fall behind.
To minimize path latency, Glance provisions each session on a server that is geographically close to the host. All session data flows through that server. With a very few exceptions, Glance sessions are encrypted. Glance uses modern Transport Layer Security (TLS) to secure all connections between participants and server.
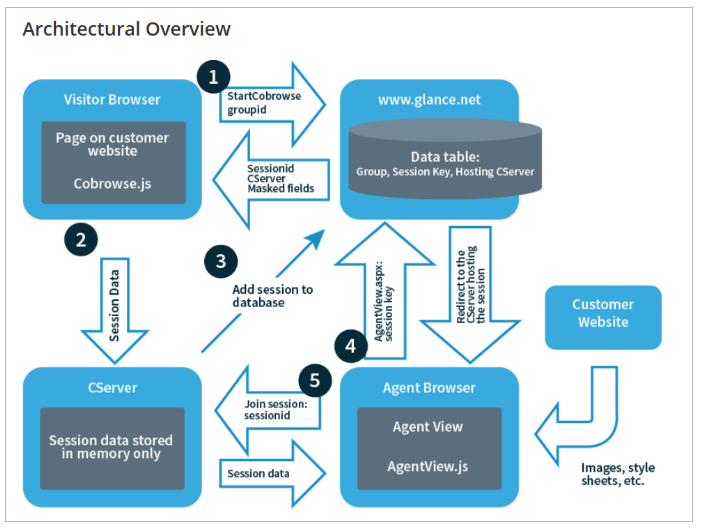 The Glance Cobrowse service relies on a script loader tag embedded into each page of a customer website. This tag references a JavaScript file hosted by Glance on their own secure content distribution network. This section refers to the visitor side JavaScript file as Cobrowse.js.
When a customer clicks a button to start a cobrowse session, the Glance cobrowse loader script handles the click by:
* Reading the glance-cobrowse script or meta tag to determine parameters such as "group" and "staging vs. production"
* Adding, based on those parameters, a `
The Glance Cobrowse service relies on a script loader tag embedded into each page of a customer website. This tag references a JavaScript file hosted by Glance on their own secure content distribution network. This section refers to the visitor side JavaScript file as Cobrowse.js.
When a customer clicks a button to start a cobrowse session, the Glance cobrowse loader script handles the click by:
* Reading the glance-cobrowse script or meta tag to determine parameters such as "group" and "staging vs. production"
* Adding, based on those parameters, a `