
Prerequisites
- All high-level prerequisites as listed in the Getting Started section.
Add the Glance Application
The following steps describe how to embed Glance controls within the Customer Service Hub workstream.
- Click the Pages tab.
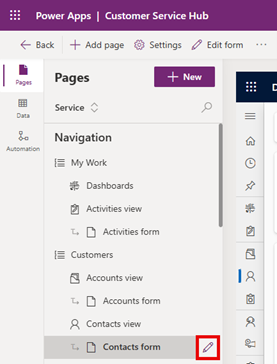
- Select the view and form to add the Glance controls (i.e., Customers -> Contacts view -> Contacts form) then click the pencil icon.
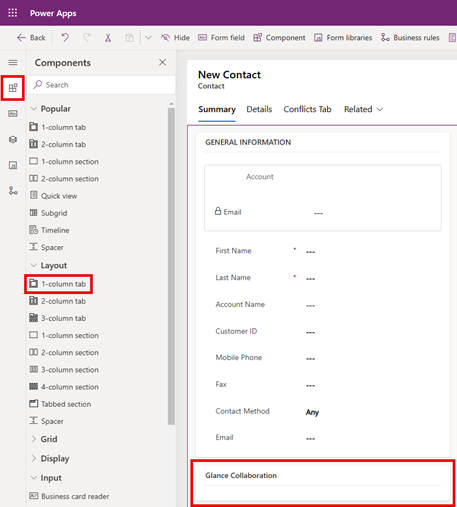
- Select the Components tab from the left menu, scroll down to the Layout section and drag 1-column tab to the form on the right.
- Rename the section to "Glance Collaboration".
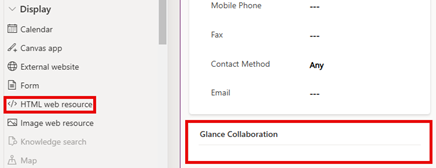
- Scroll down to the Display section and drag HTML web resource into the Glance Collaboration section.
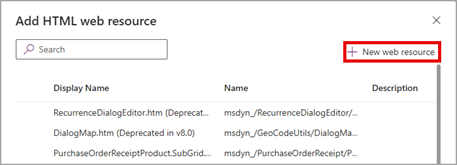
- Within Add HTML web resource click + New web resource.
- Create an HTML file containing an iframe, replacing "GLANCE URL" with the organization-specific URL provided by Glance. For example:
HTML
<!DOCTYPE html>
<html>
<head></head>
<body>
    <iframe src="GLANCE URL" style="border:none; width:100%; height:100%;" title="Glance Agent Workspace"></iframe>
</body>
</html>
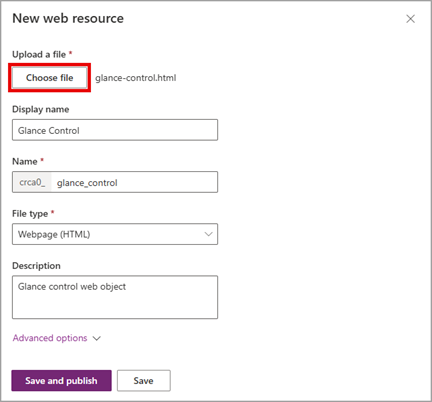
- Click Choose file and upload the HTML file created in the previous step. Complete the rest of the form and click Save.
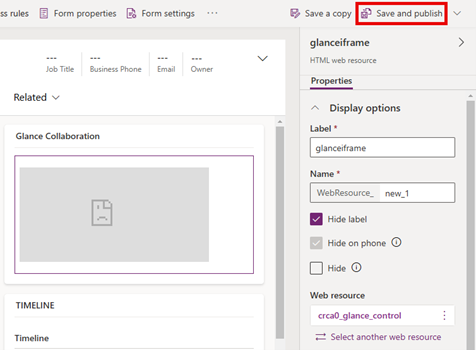
- Click Save and publish in the upper right corner. If changes to the iframe are required, use the Properties panel on the right.
Joining a Session from Microsoft Dynamics
- Navigate to the Dynamics Customer Service Hub.
- Select either Contacts or Cases from the left navigation pane.
- Click the Summary tab.
- Log in with your credentials when prompted to sign in to your Identity Provider.
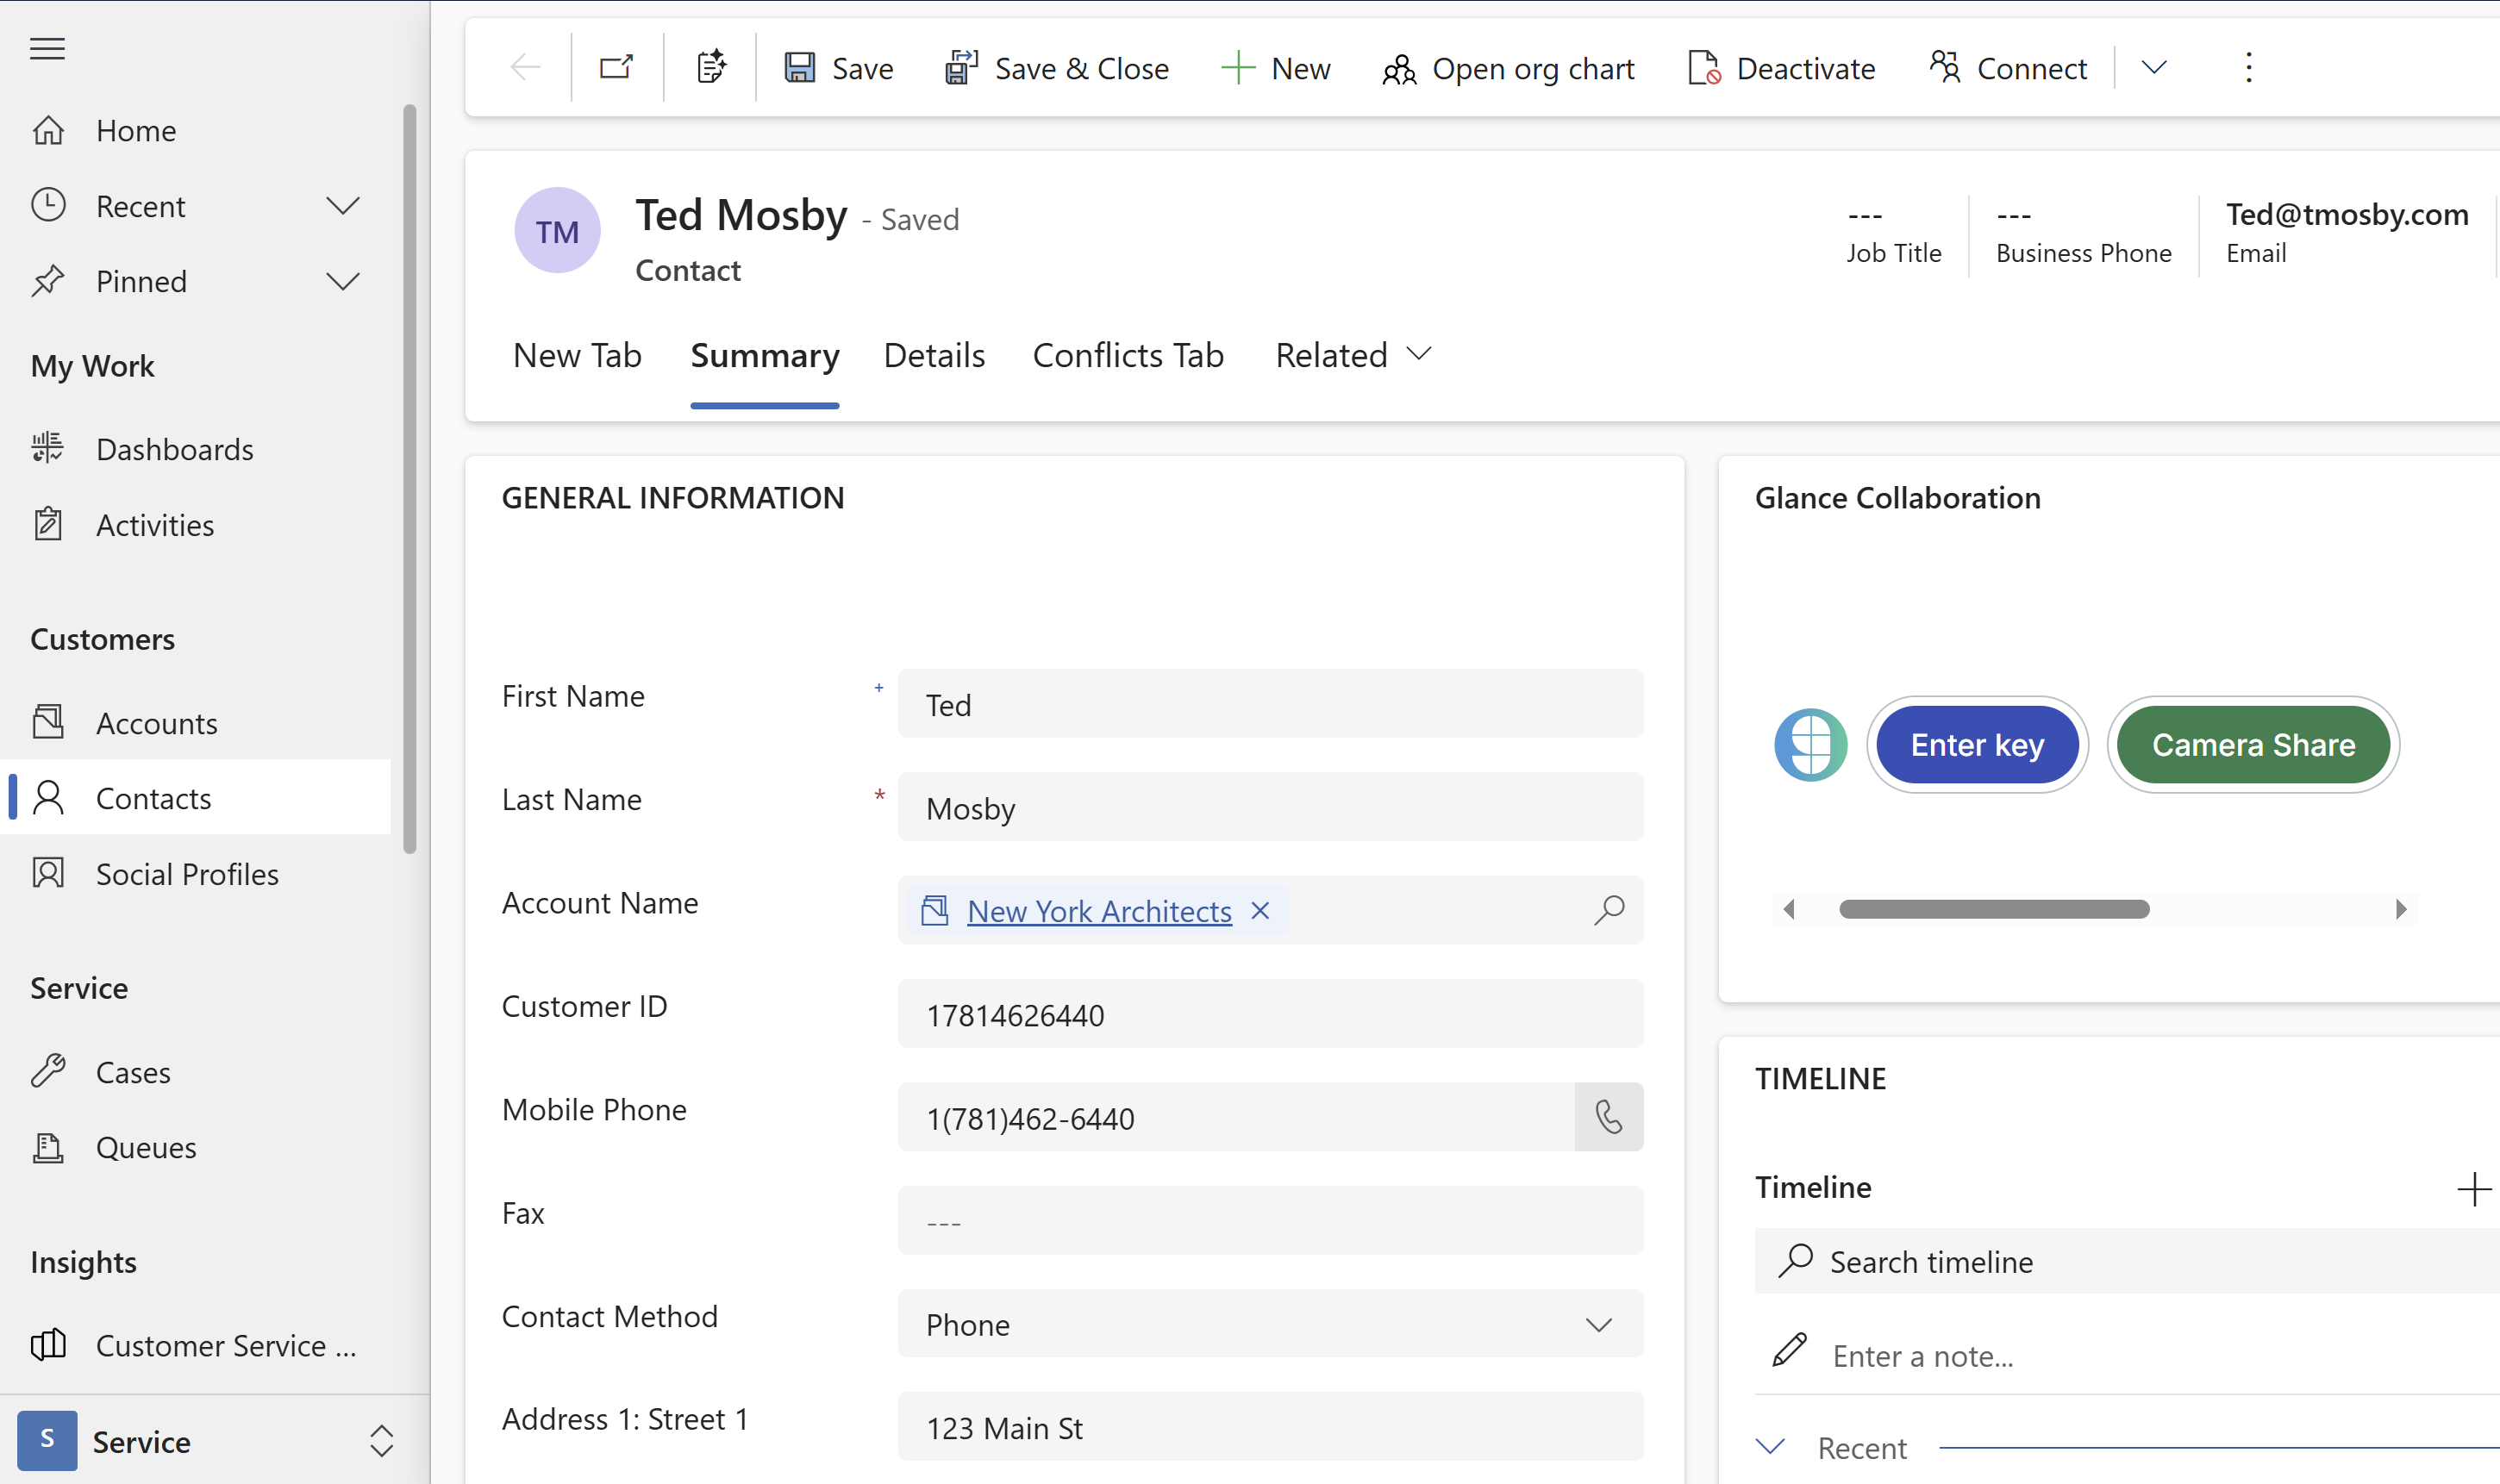
- The Glance application is now available within the Glance Collaboration section.